And, the Finish!

This is how a violin is completed:

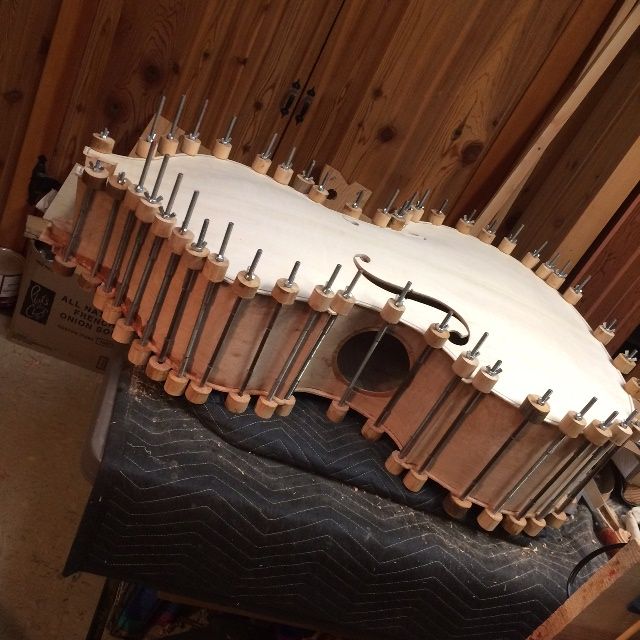
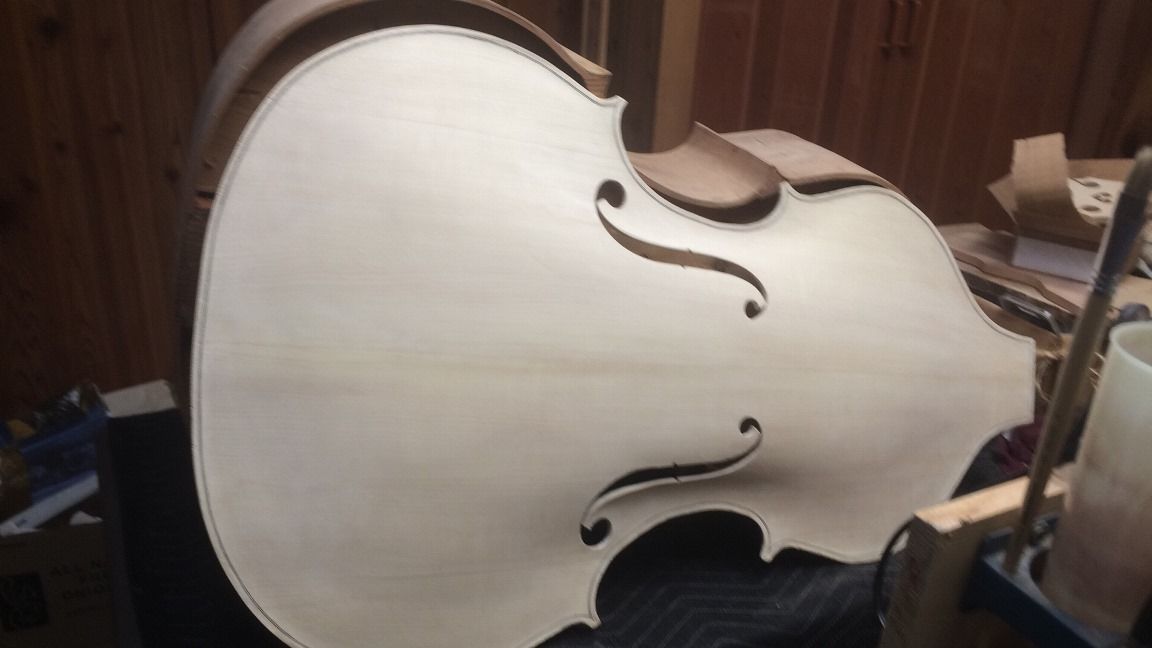
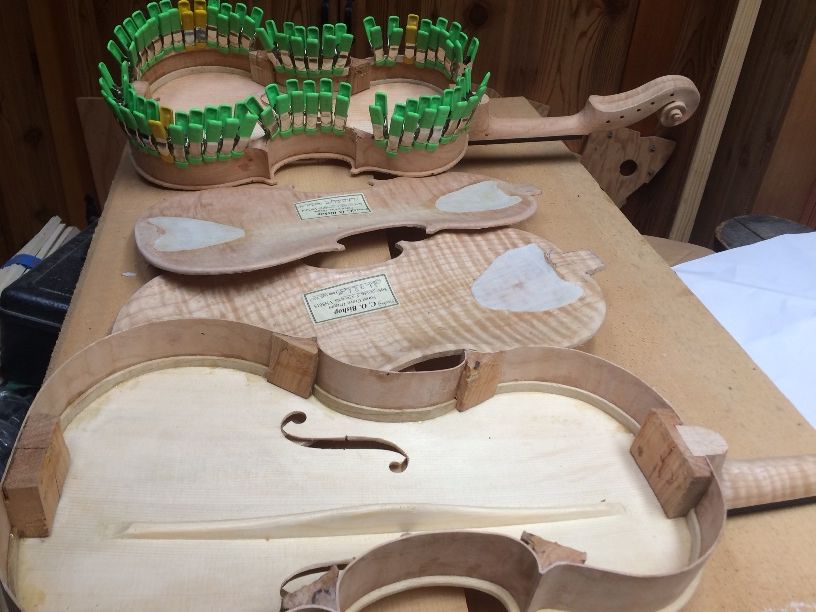
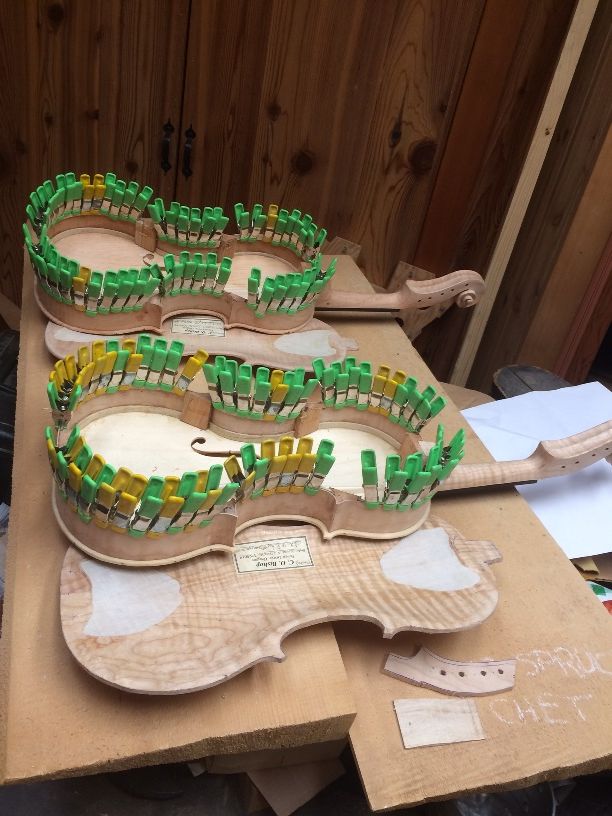
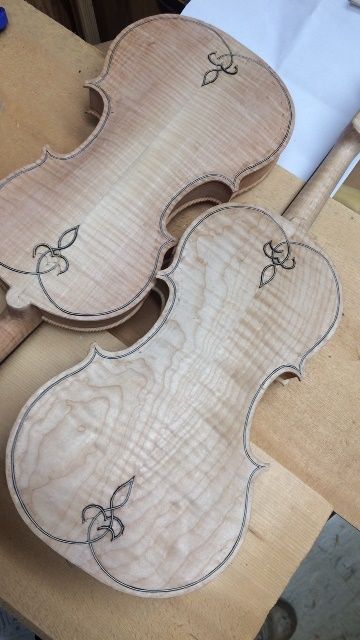
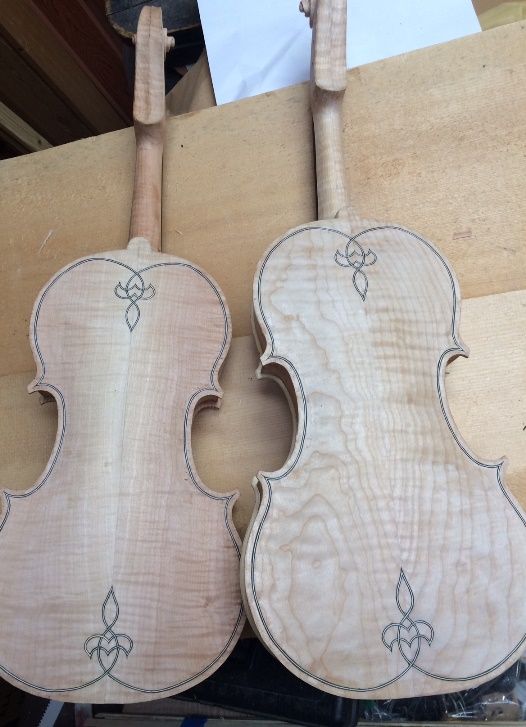
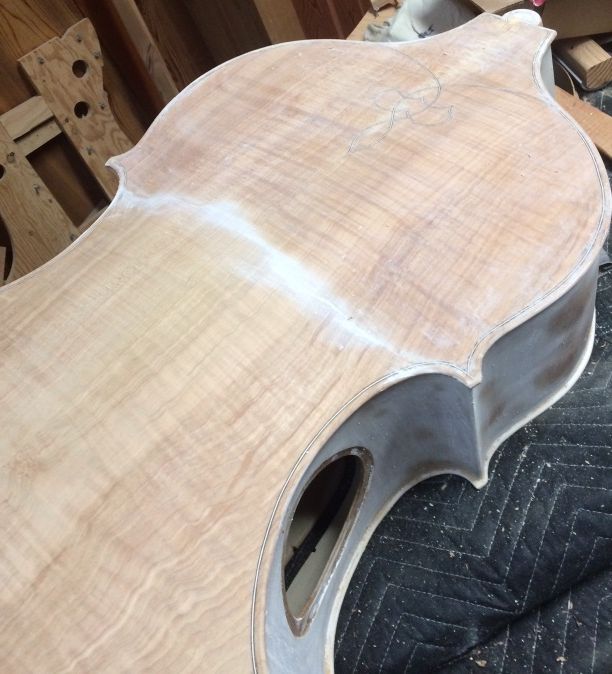
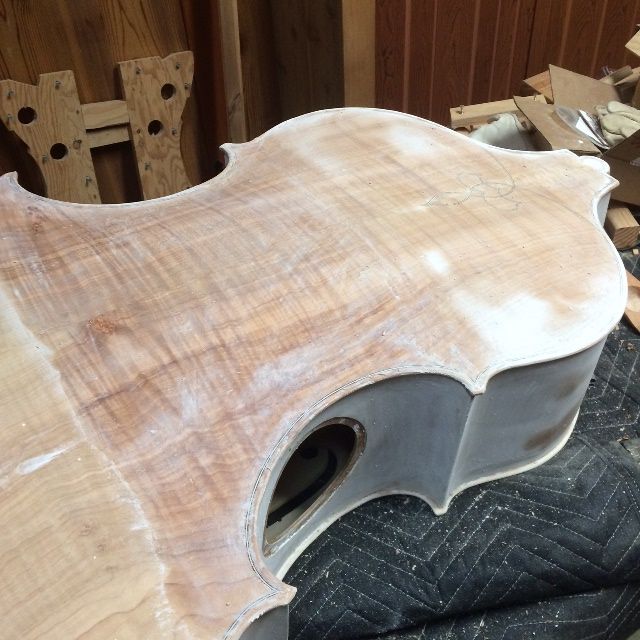
Last time I posted, I had just completed the commissioned five-string fiddle, up to and including the sealer.

Sealed five string fiddle handmade in Oregon by artisanal luthier Chet Bishop
Sealed instrument, Front View
back view of sealed five string fiddle, handmade in Oregon by artisanal luthier Chet Bishop.
Sealed instrument, Back View.

Varnish:

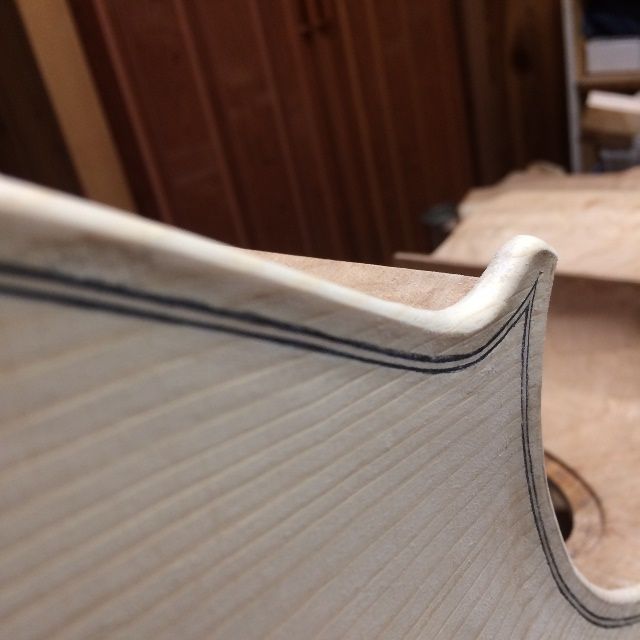
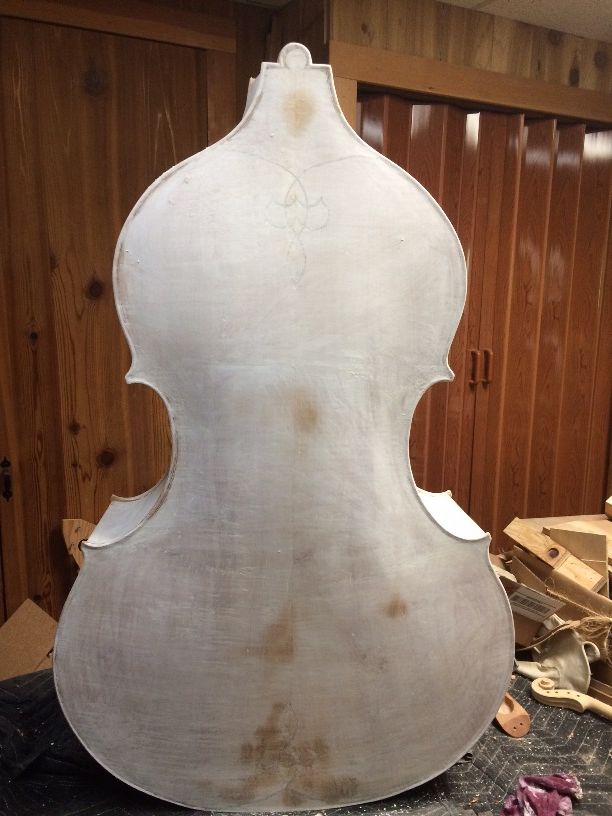
The “magic” of the sealer was that it caused the mineral ground to disappear forever. The instrument instantly went from stark chalk-white to a natural wood color. As a result, the mineral will never be visible again. I always enjoy that transformation.

The varnish, on the other hand, is a series of relatively small changes, wherein the violin achieves the color we want. Furthermore, the increasing clarity and depth of the varnish gives the impression of being able to “see into the wood.”

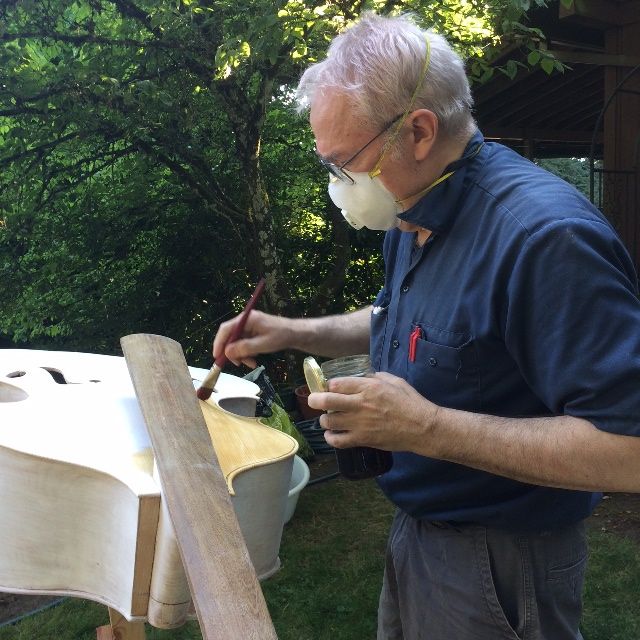
I always begin with a couple of coats of deep yellow or amber varnish, as an undercoat which will shine through the later color coats.
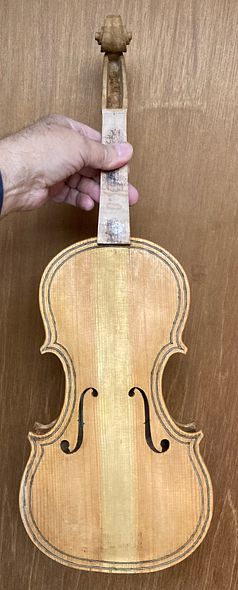
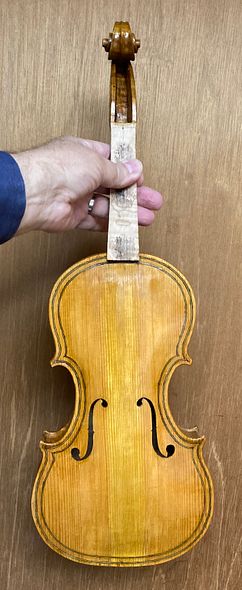
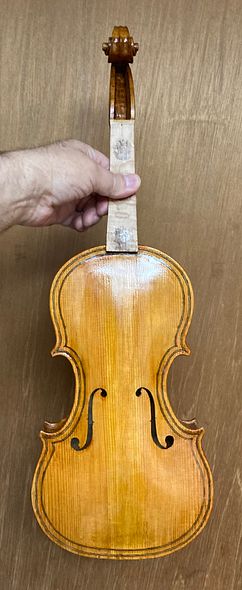
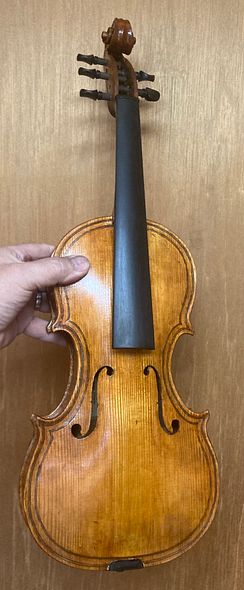
Yellow First

Here is the violin after the two coats of yellow varnish:
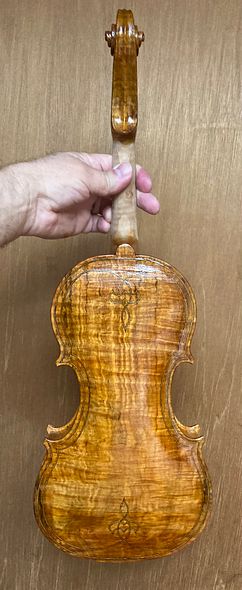
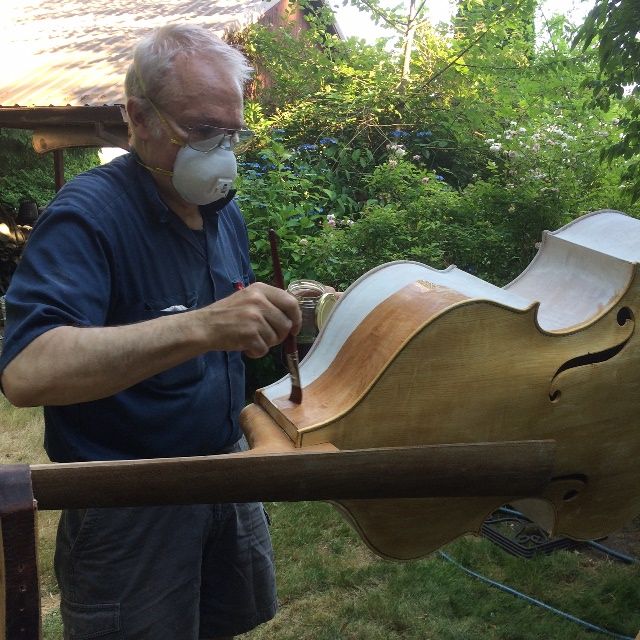
Yellow varnish base coat on a commissioned 5-string fiddle handmade in Oregon by artisanal luthier, Chet Bishop
Front View, with Yellow base coat.
Yellow base coat varnish on treble-side of commissioned 5-string fiddle, handmade in Oregon by artisanal luthier, Chet Bishop.
Yellow base coat, Treble Side View.
Yellow base coat on back side of 5-string commissioned instrument, handmade in Oregon by artisanal Luthier, Chet Bishop.
Back View with Yellow base coat.

Color Coats

Next, I bagan layering the color coats, building to the look I planned. (Each “coat,” in reality, is usually two coats, applied in quick succession. There were about eight total color coats, but I will call them “first through fourth.”)

First color coat on front of 5-string fiddle handcrafted in Oregon by artisanal Luthier Chet Bishop
First Color Coat, Front
First color coat on treble side of commissioned 5-string fiddle handcrafted in Oregon by artisanal luthier, Chet Bishop
Treble Side, with First Color Coat.
First color coat on back of commissioned 5-string fiddle handcrafted in Oregon by artisanal Luthier, Chet Bishop
First Color Coat, Back
First color coat on bass side of commissioned 5-string fiddle handcrafted in Oregon by artisanal luthier Chet Bishop.
Bass Side, with First Color Coat.

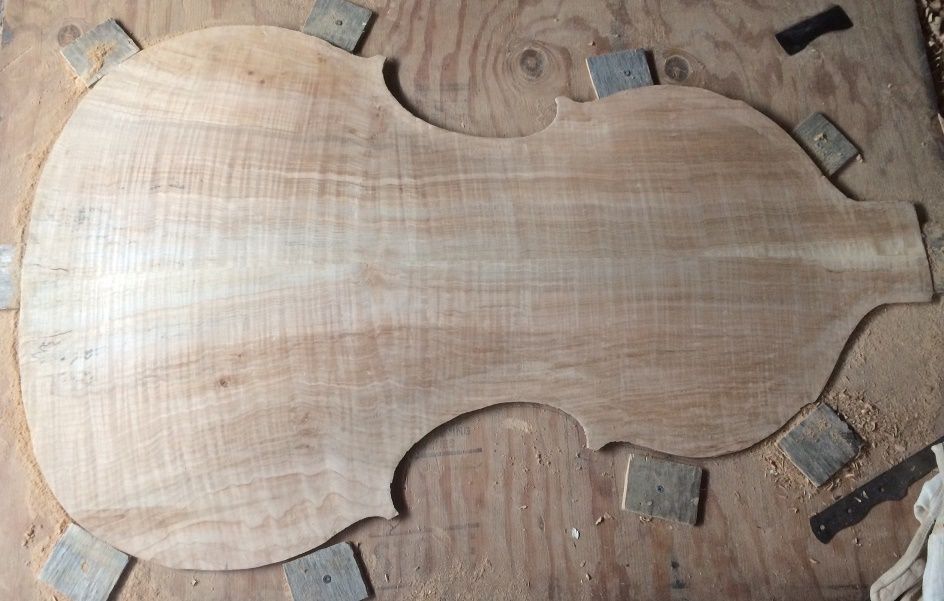
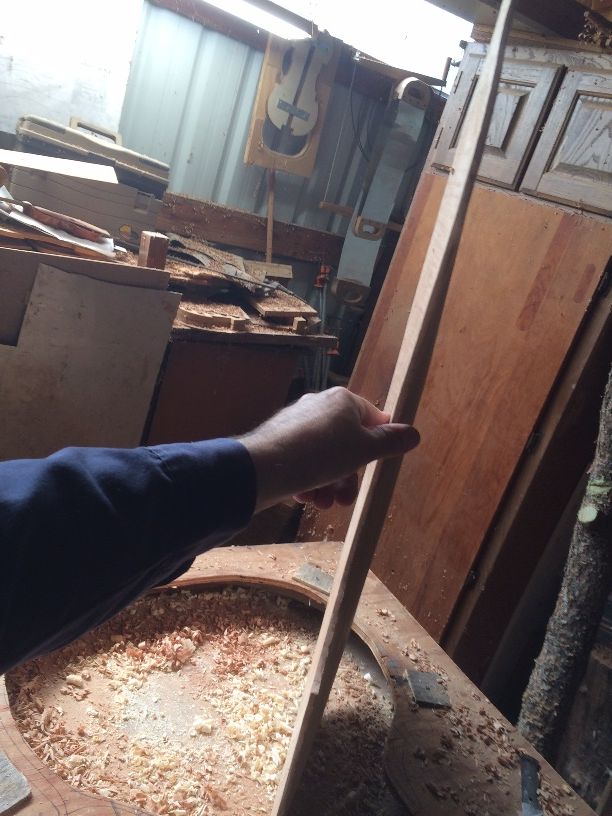
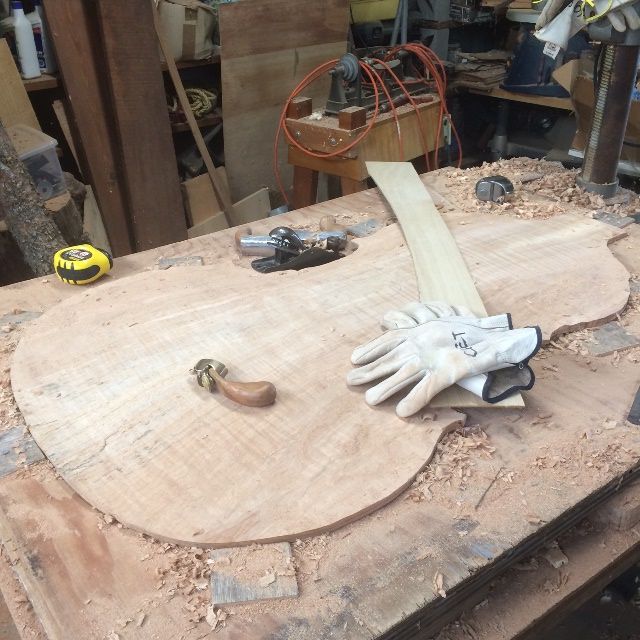
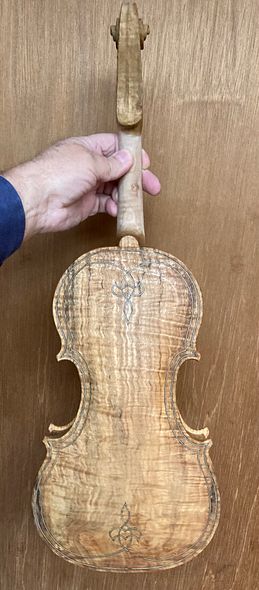
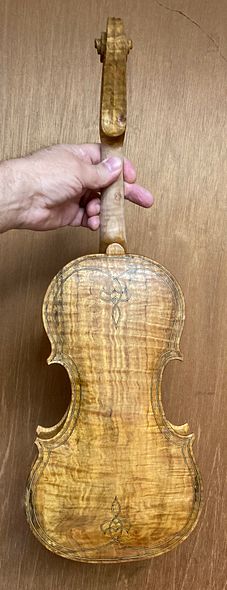
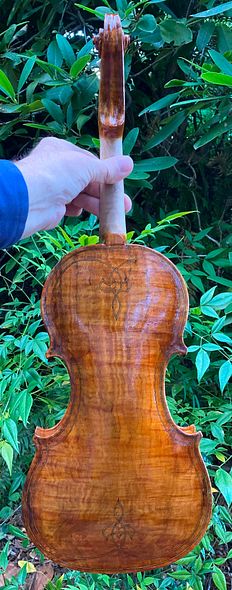
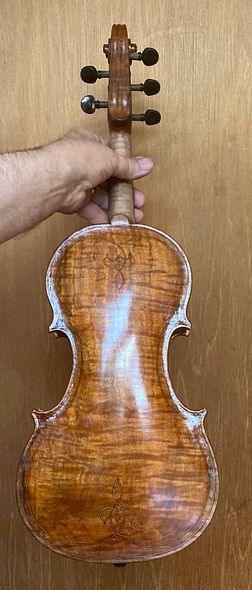
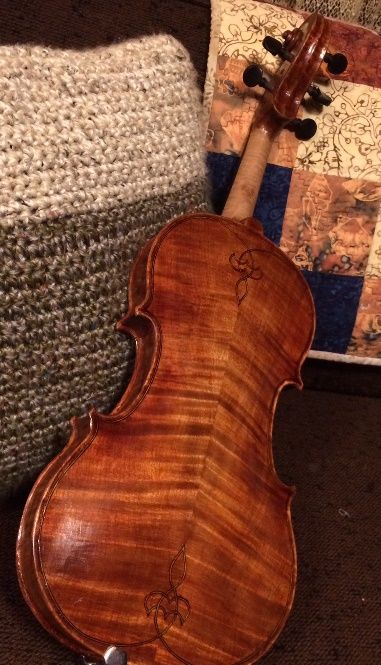
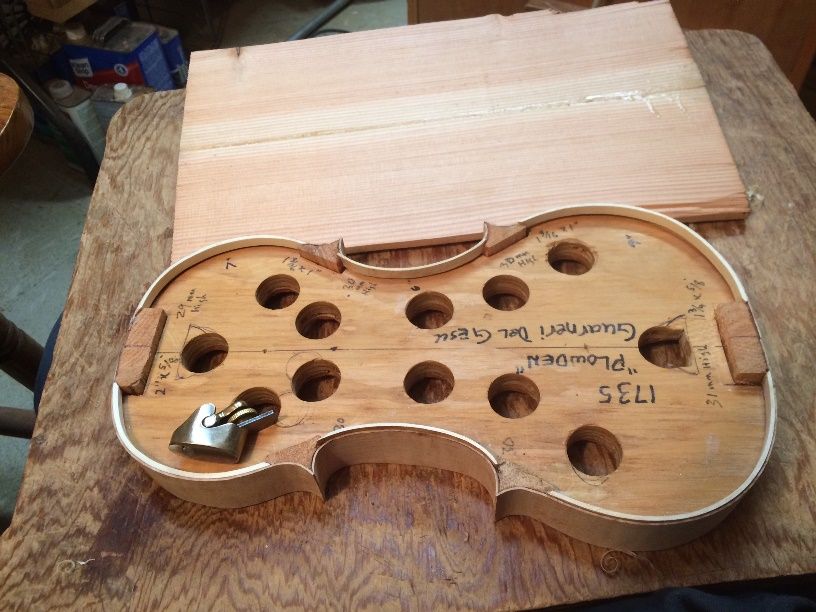
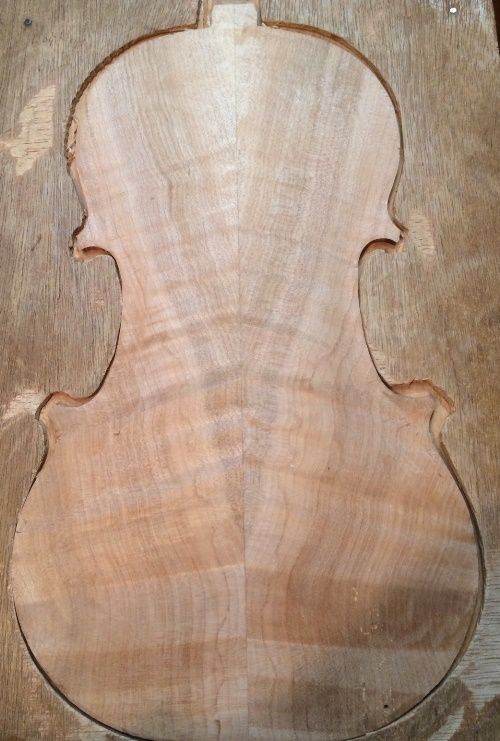
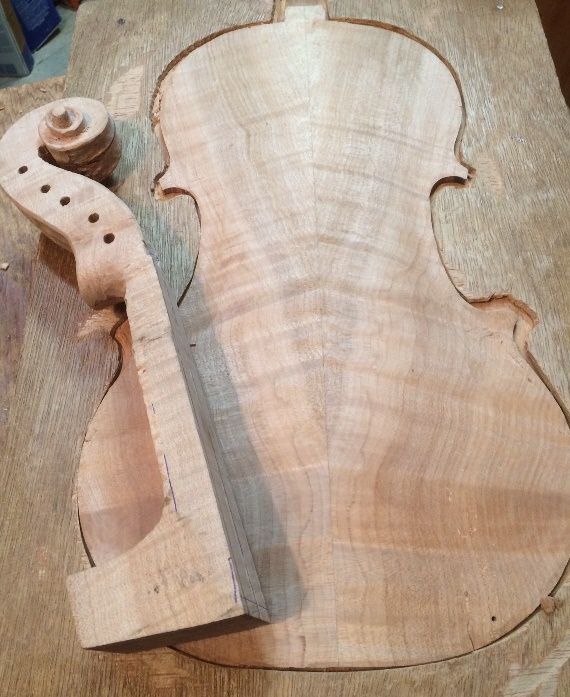
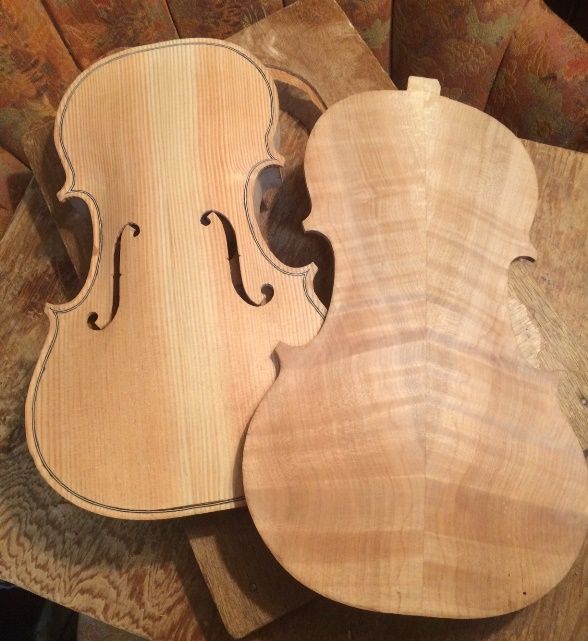
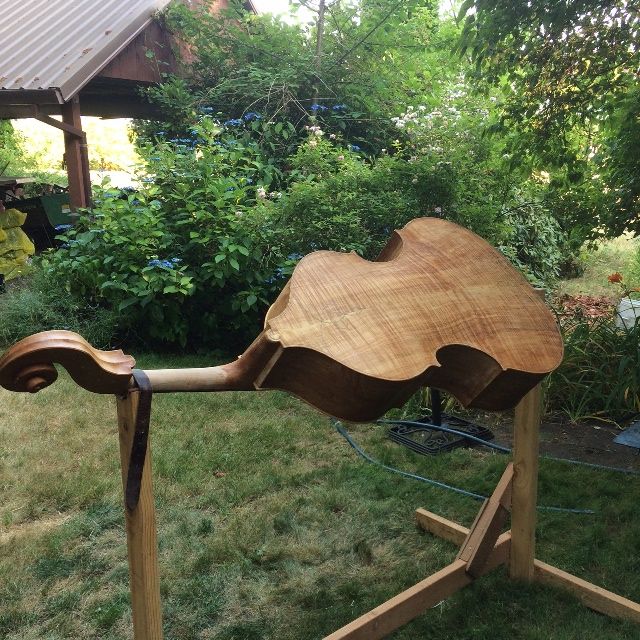
This maple is really beautiful wood. I wish I had a lot more of it, but, sadly, I only was able to salvage a little of the tree from which it originated. The “donor tree” was removed from the property where my wife and her siblings grew up. It had finally rotted and was becoming dangerous, so they removed it. But the wood is gorgeous. You can see the stump in this article….

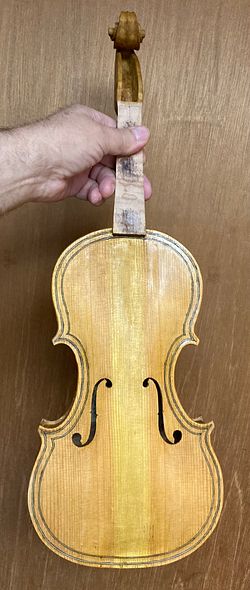
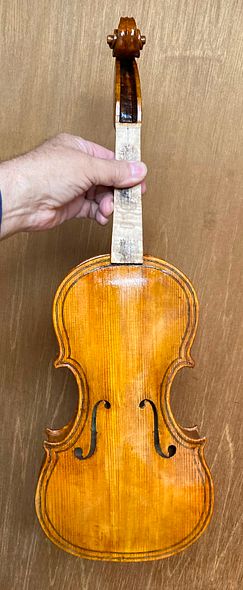
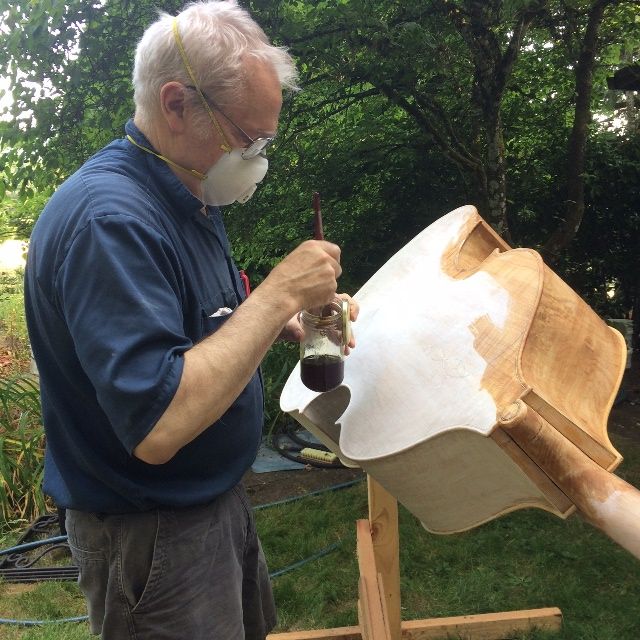
Continuing color coats

As you can see, the yellow base coat is still showing through pretty strongly. That is good, but I still wanted to move the color toward a deep reddish brown,  with the golden yellow shining through. Therefore… I needed more color coats!

Second Color Coat on 5-string fiddle handcrafted in Oregon by artisanal luthier Chet Bishop
Second Color Coat, Front
Second Color coat on back of 5-string fiddle handcrafted in Oregon by artisanal Luthier Chet Bishop
Back, with Second Color Coat.

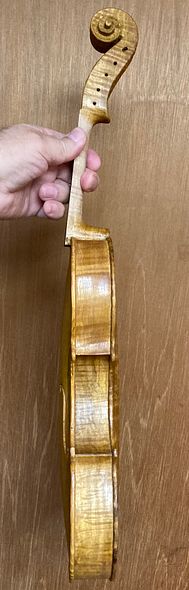
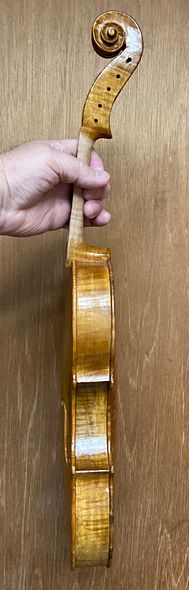
The color is headed in the right direction, but still needs to be deeper. I will add extra color in any areas that should be darker.

Third Color Coat, front side of 5-string fiddle handcrafted in Oregon by Artisanal Luthier Chet Bishop.
Third Color Coat, Front.
3rd color coat on back or 5-string fiddle handcrafted in Oregon by artisanal Luthier Chet Bishop
Oregon Big Leaf Maple Back, withThird Color Coat.

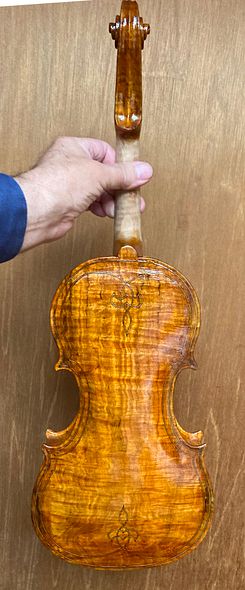
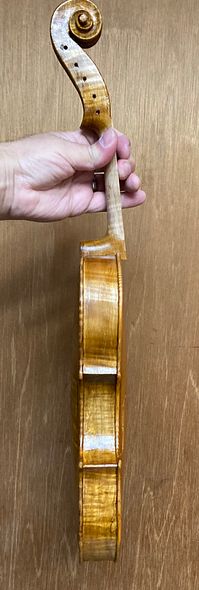
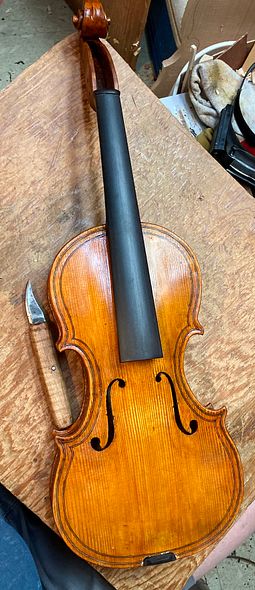
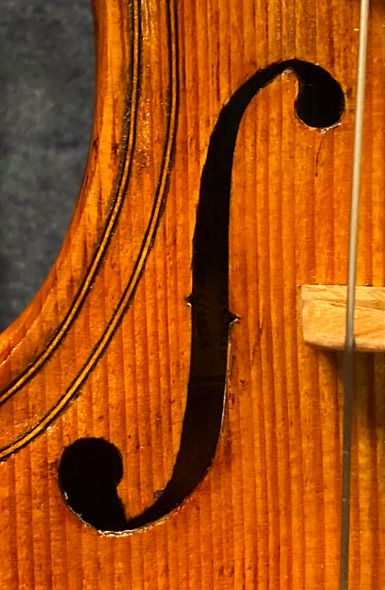
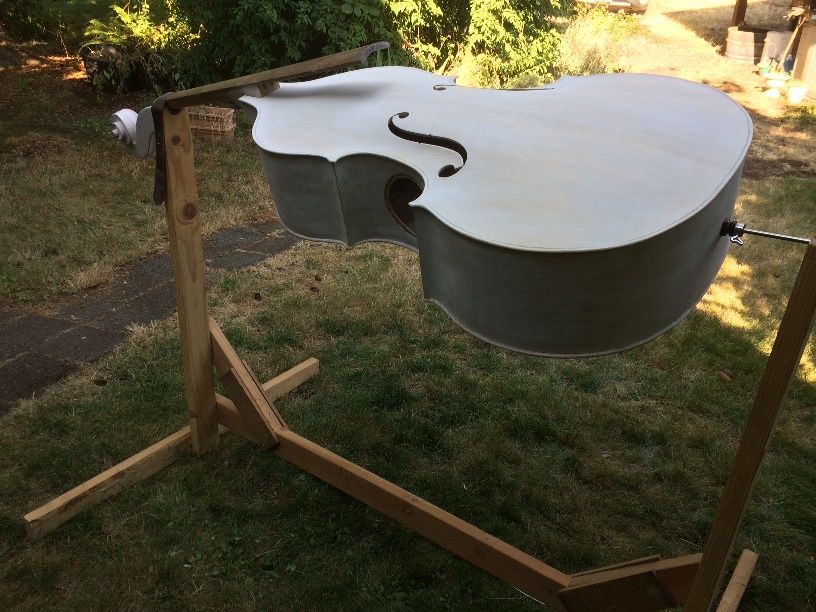
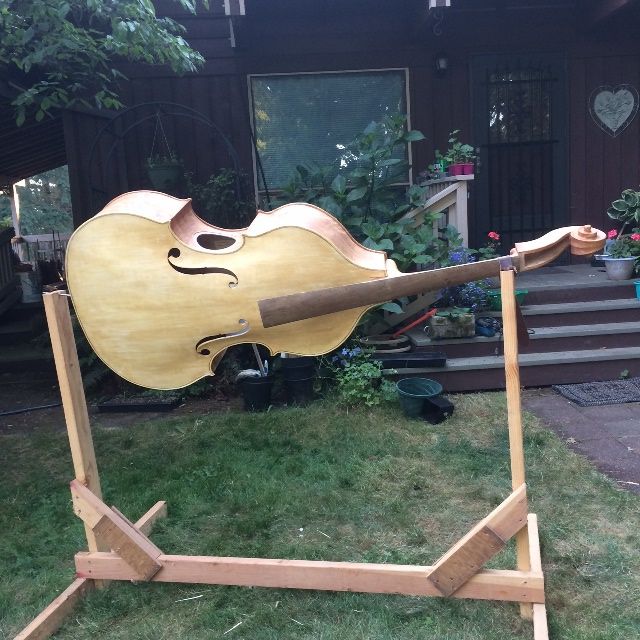
I was getting pretty close to correct, so I began taking the instrument out into natural light, to check the color there.

Fourth color coat on five string fiddle handcrafted in Oregon by artisanal Luthier Chet Bishop.
Fourth Color Coat, Front.
4th color coat treble side of 5-string fiddle handcrafted in Oregon by artisanal Luthier Chet Bishop
Treble Side with Fourth Color Coat.
4th color coat, back side of five string fiddle handcrafted in Oregon by Artisanal Luthier Chet Bishop.
Back, with Fourth Color Coat.
4th color coat bass side of commissioned 5-string fiddle handcrafted in Oregon by Artisanal Luthier Chet Bishop.
Bass side, Fourth Color Coat.

The color was pretty close to what I had hoped to produce. Therefore, I felt that I was ready to  reinstall the fingerboard, Afterward, I would hand-rub the varnish to a good polish.  Finally, I allowed it to hang in my dining room and cure a little more fully. The varnish was still quite soft, though dry to the touch.
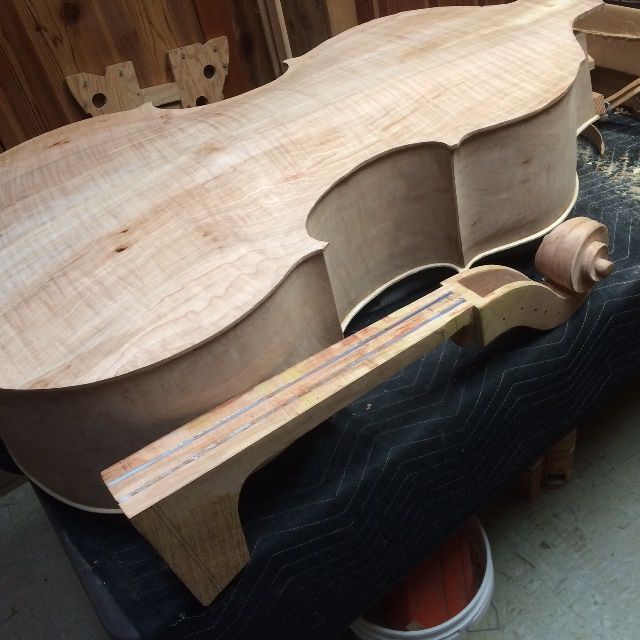
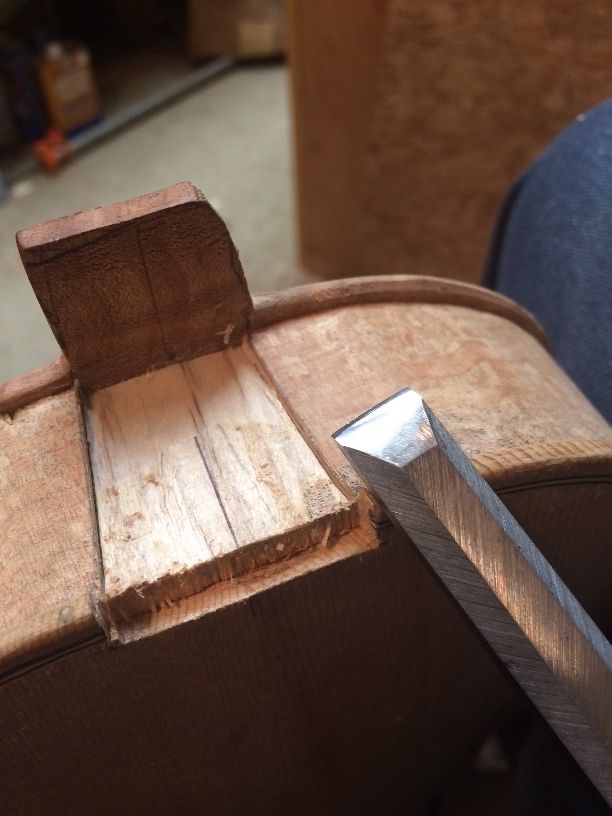
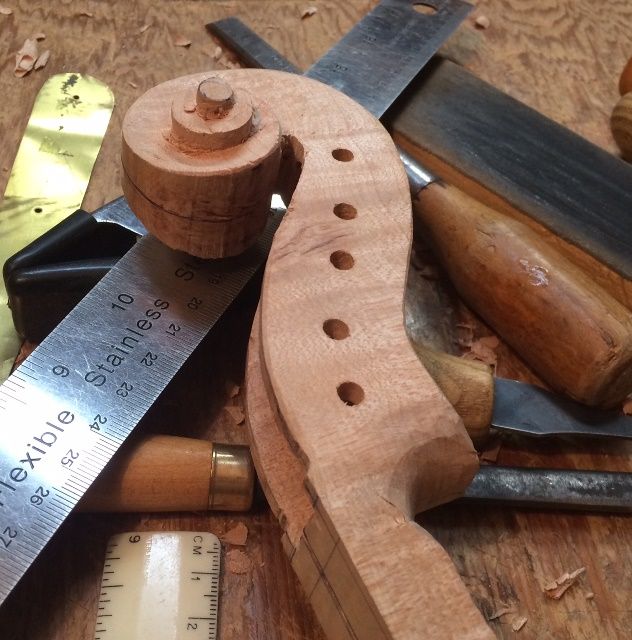
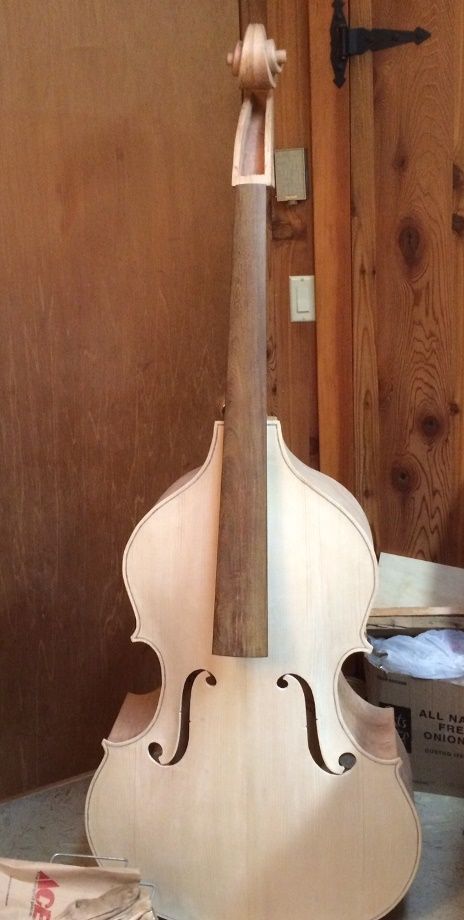
Fingerboard

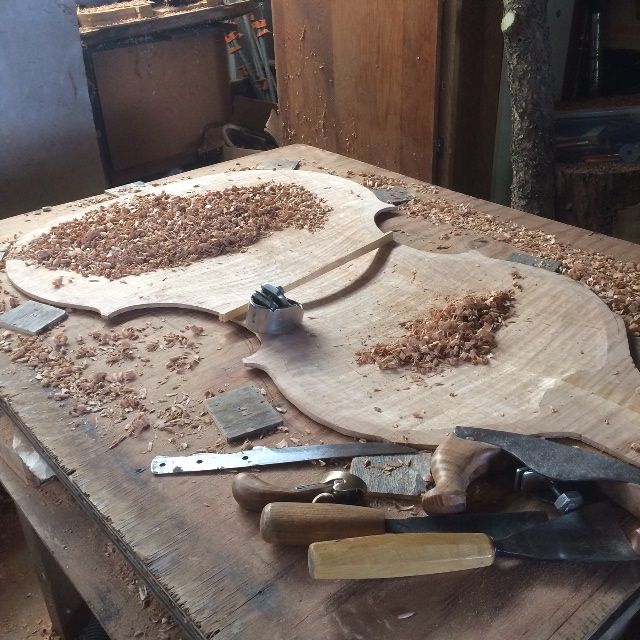
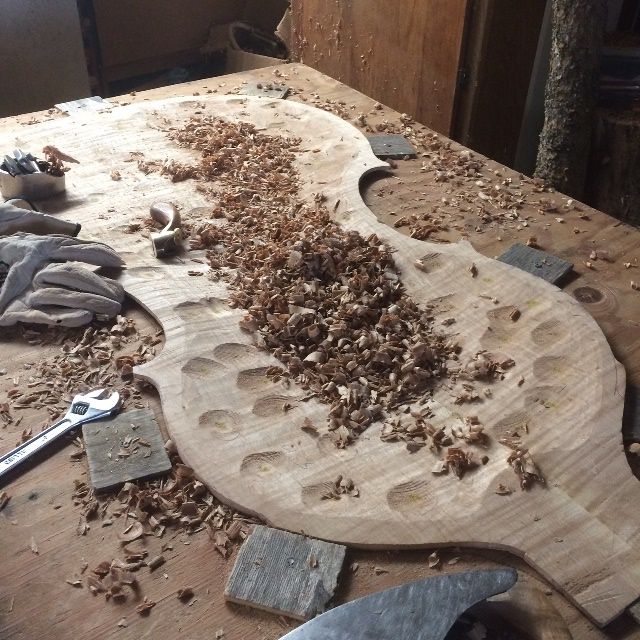
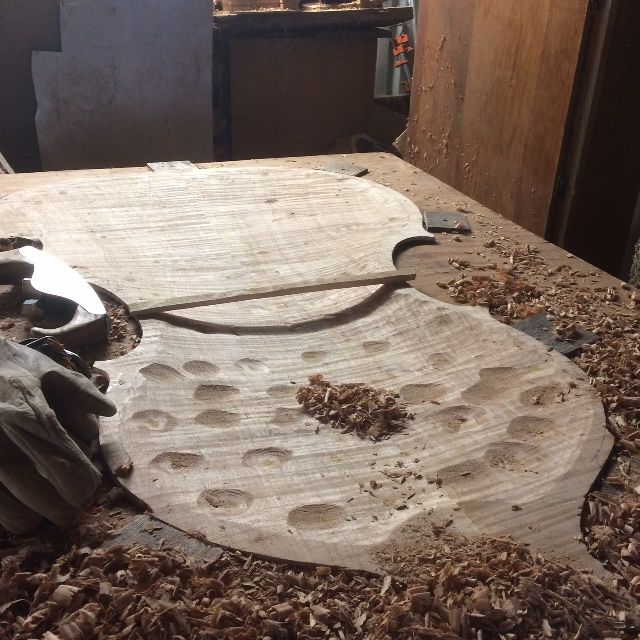
First I carved the underside of the fingerboard to remove extra mass. This affects the sound, as well as the feel of the instrument. (Extra, unnecessary mass tends to absorb vibration rather than resonate.)

Underside of fingerboard
Underside of fingerboard beginning. It was fully carved and smoothed before installation.

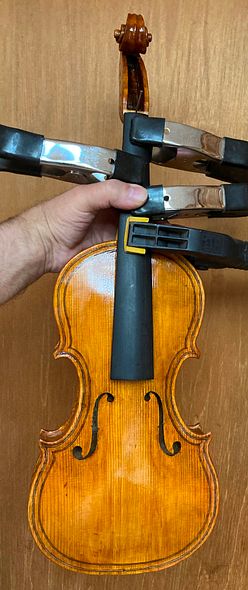
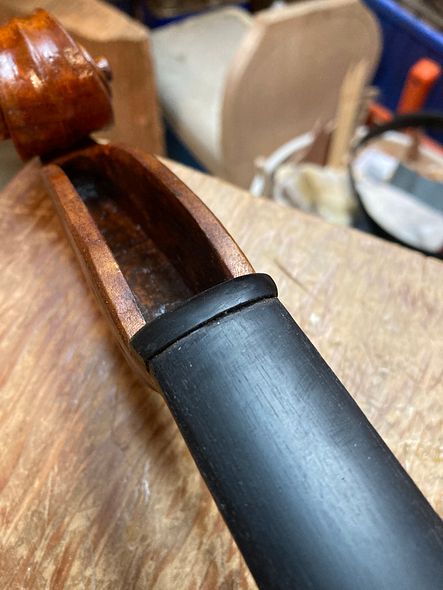
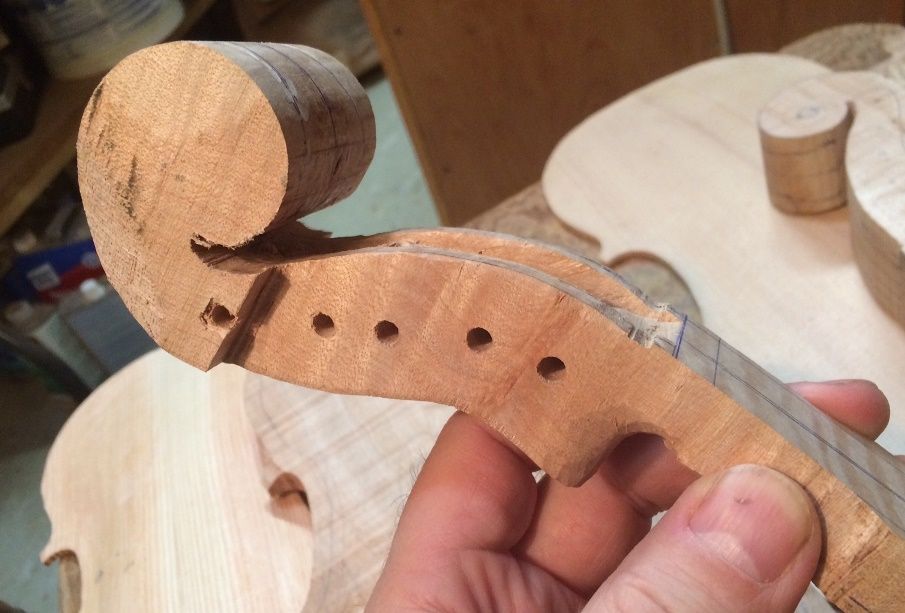
Then I carved a tiny notch, dead center on the upper end of the backside of the fingerboard, where it would contact the neck. After carving the notch in the fingerboard, I drilled a shallow 1/16″ hole in the neck, to accomodate a tiny nail.

That nail is temporarily installed, at an angle, to serve as a guide and an anchor while installing the fingerboard. (The hide glue is very slippery while it is still hot, and liquid. There is a tendency for the fingerboard to “drift” under the clamps, before the glue can gel.)

The notch in the fingerboard fits on the nail. The nail, then, serves as a temporary stop, so the fingerboard stays put. (I remove the nail after the glue has set.)
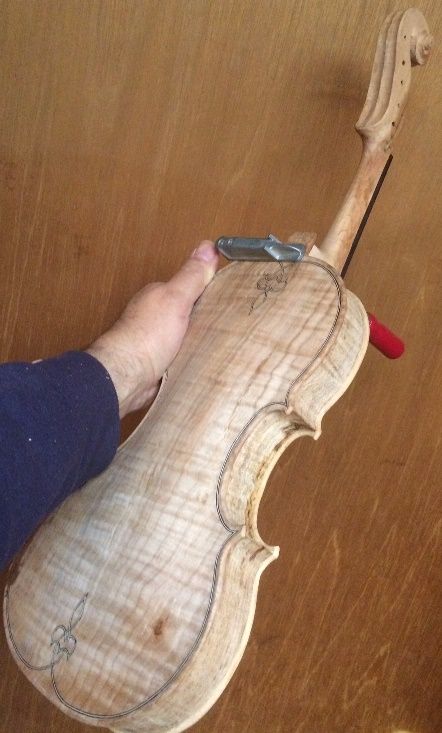
Fingerboard installed on 5-string bluegrass fiddle handcrafted in Oregon by artisanal luthier Chet Bishop.
Fingerboard installed. Notice the tiny nail used to temporarily position the fingerboard.

Beginning Set-up

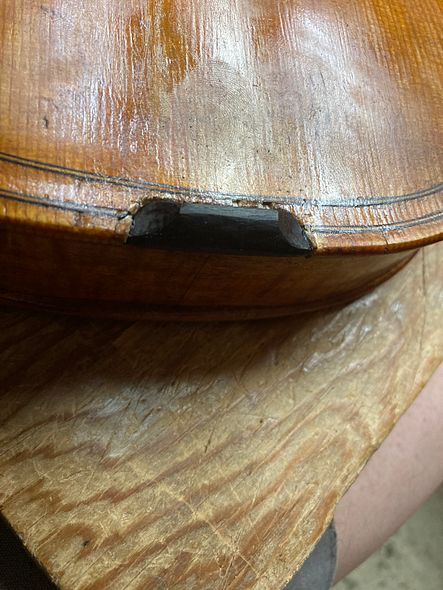
After a few more days, I began set-up. First, I installed the soundpost, saddle, nut, and end button. Next, I fit the pegs, and was ready for the bridge and the strings.

Nut installed on 5-string bluegrass fiddle handcrafted in Oregon by artisanal luthier Chet Bishop.
Nut installed: it will be filed lower before installing strings.
Saddle
Saddle installed, still requiring final smoothing and retouch.

You can see in the above photo that the varnish was still very soft. Everywhere I touched it, it also resulted in my leaving fingerprints. I had to “French-polish” the whole instrument afterward, and let it hang until the varnish was harder. Then it would be easier to handle. (But it was good to have the set-up nearing completion, too.)
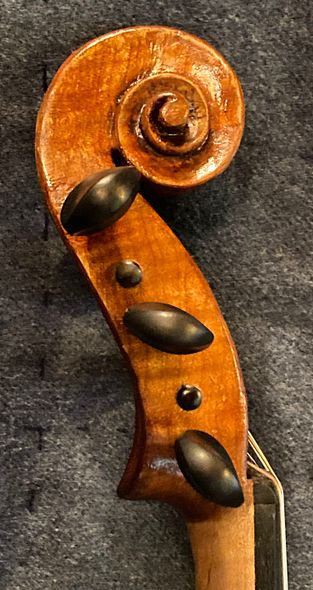
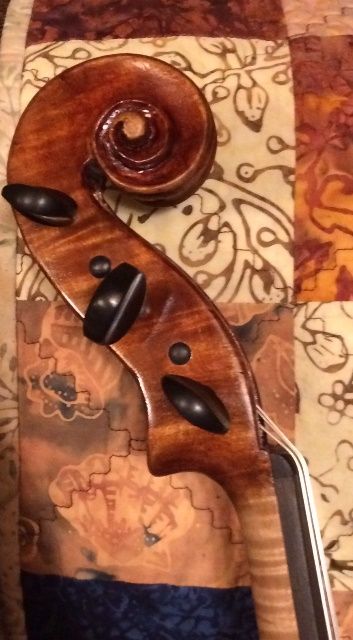
Completed five-string fiddle ready for retouching.
Completed five-string fiddle ready for varnish retouch.

Pegs

After the varnish had hardened a little more, I then installed the pegs.
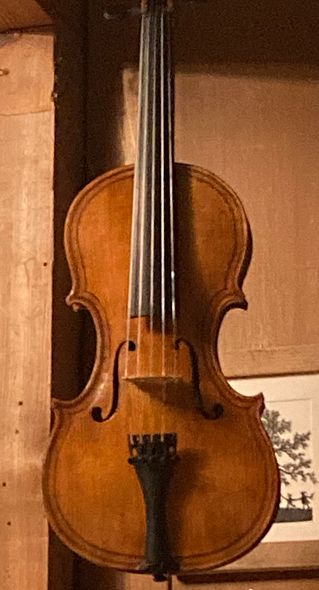
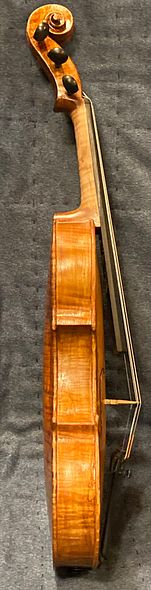
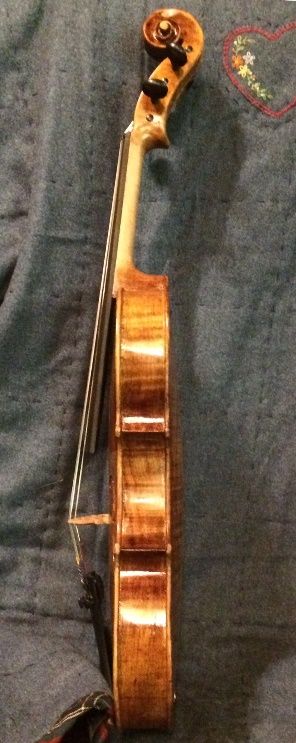
Pegs installed, front view of five string bluegrass fiddle handcrafted in Oregon by artisanal luthier Chet Bishop,
Pegs installed, Front view.
Bass side with pegs, Five string bluegrass fiddle handcrafted in Oregon by artisanal Luthier Chet Bishop.
Bass side view with Pegs.
Back side of five string bluegrass fiddle handcrafted in Oregon by artisanal luthier Chet Bishop.
Back Side View with Pegs.

Final Set-up

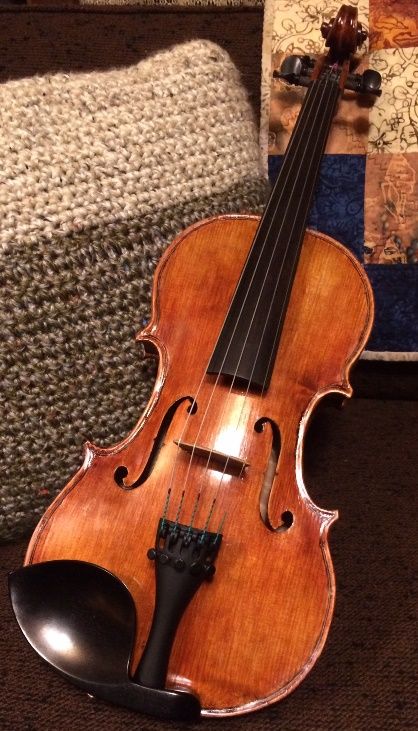
I installed the Bridge and Strings and Tailpiece, and then the fiddle was complete. I still let it hang in my dining room for a week or so, too, so that the varnish would continue to harden without damage.
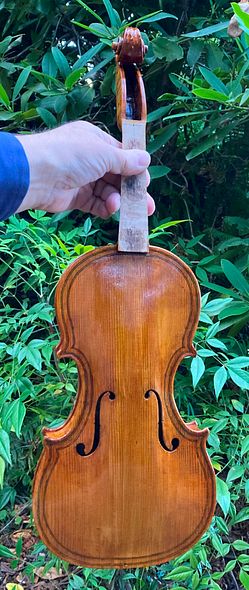
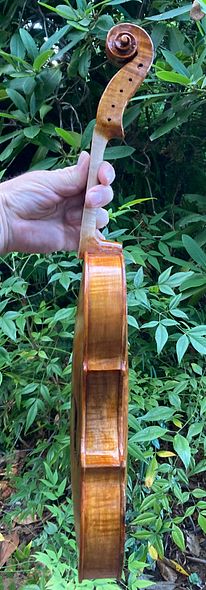
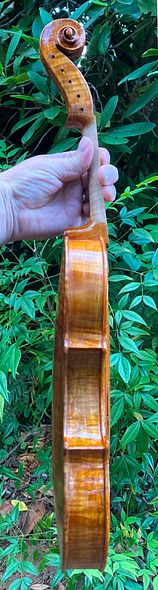
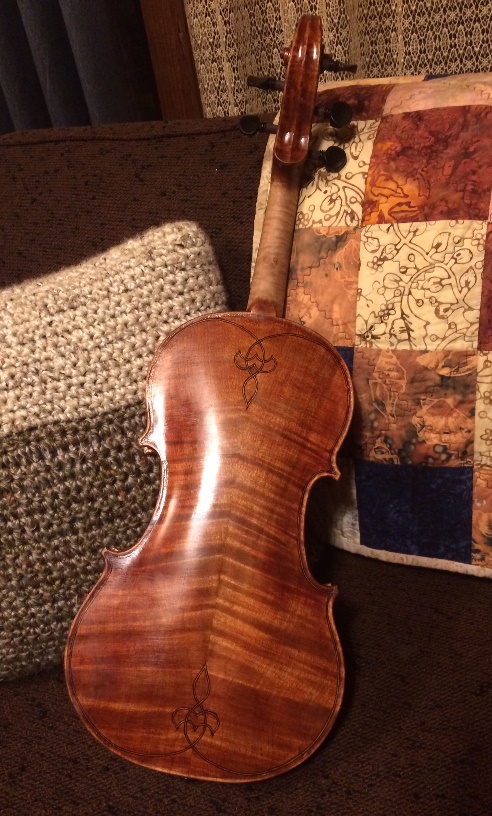
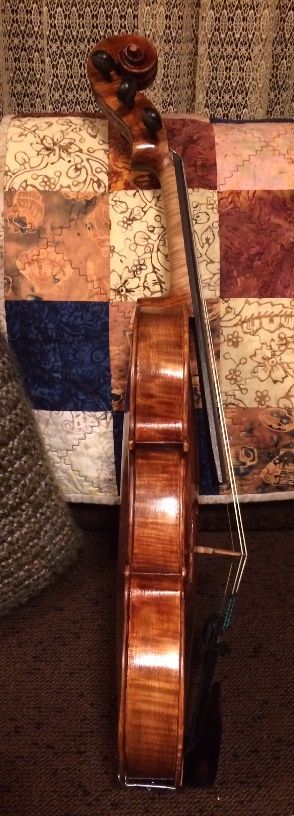
competed 5-string bluegrass fiddle handcrafted in Oregon by artisanal luthier Chet Bishop.
Hanging up to cure.

Final photos

Final front
Final look at the Front before delivery.
Close-up look at the f-hole area.
Close-up of the f-hole on the Oregon Douglas Fir Front.
Bass side final look before delivery.
Bass side: final look before delivery.
Close up of the Scroll.
back side of five string bluegrass fiddle handcrafted in Oregon by artisanal luthier Chet Bishop.
Final look at the back of the fiddle before delivery.

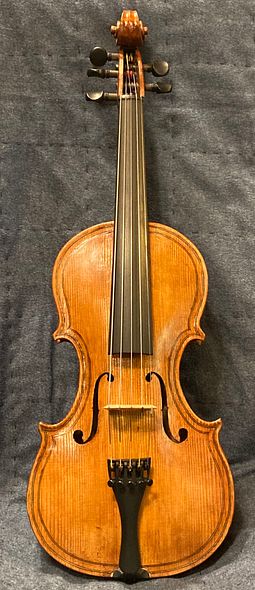
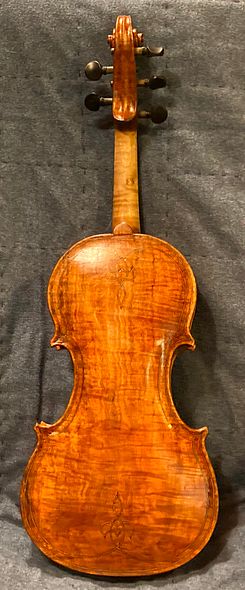
I prepared the instrument’s documents (Bill of Sale and Provenance Document) and afterward, when the varnish had cured for another two weeks, the customer took delivery at the end of July, 2023.

He was delighted, and played the instrument for a long time at my house. Further (which is a joy to me,) he has contacted me since then, expressing his continued joy in the new fiddle. That is the kind of thing that makes this work a great pleasure.


Thanks for looking.


Five-String Fiddles Nearing Completion

5-String Fiddles Nearing Completion

First, I apologize for the long hiatus. Lots of things have been going on, so I haven’t taken time to post progress reports on the two instruments I began in late July.

Initially, I had anticipated being done with both by the second week in September. Unfortunately, there have been sufficient interruptions and side-tracks that I am still not done. (Rats...)

When I last posted, I had just recently set the necks in the instruments. Initially, I progressed fairly rapidly for a bit, thereafter, but failed topost progress reports for  “Show and Tell.” Therefore…I will try to catch-up.

Linings

First, I carefully removed the molds. Then, I cleaned up the interior of the two fiddles, so they were essentially finished. Next, I bent and installed the back linings. Usually, I try to use willow for my linings. I had thought these were willow, but I am beginning to believe they may be some species of poplar.

Handmade Five string fiddles in progress, by Chet Bishop in Oregon
One set of back linings installed. Other corpus ready for back linings.


Two handmade fivestring fiddles in progress by Chet Bishop of Forest Grove, Oregon
Both fiddles with linings installed. Notice the linen reinforcements of the purfling-weave areas.

Back Plates

The next step was to install the back plates. I had already laid out and installed the back purfling weaves, but, because the rib garlands sometimes change shape a little after the molds have been removed, I avoided “locking in” the shape of the back plates until the plates were already installed. After that, I could do any final trimming of the back plate, and afterward lay out, cut and install the remaining purfling.

Purfling weaves incised
Purfling weaves incised.

Subsequently, I went ahead and installed the back plates, and trimmed them to accurately match the ribs. Then I began layout and installation of the back purfling. I bent the purfling, using heat, then began gluing the sections in place in the proper order.

purfling weave beginning
Beginning back purfling weaves. The idea is to produce an illusion of an “over-and-under weave.”


purfling in progress on two 5-string bluegrass fiddles handmade in Oregon by Chet Bishop, Luthier.
Purfling in progress.
trimming purfling weaves on 5-string bluegrass fiddles handmade in Oregon by Chet Bishop, Luthier.
Trimming the purfling weaves. They have been inlaid to a shallow depth, because the plates are thin.


scraping the purfling weaves on a 5-string bluegrass fiddle handmade in Oregon by Chet Bishop, Luthier.
Scraping the Purfling Weaves.

Final Varnish Preparations

Before I could begin varnishin, the purfling channels and all the edgework remained . Also, I turned off the artificial lighting, and used the dim light from a window to cast soft shadows across the wood, and reveal any humps and hollows I may have missed earlier. After completing all that work, I could begin the varnishing process.

five-string fiddles handmade in Oregon by Chet Bishop, Luthier.
Both fiddles ready for final varnish preparations.

I will outline the process and show pictures in my next post.

Thanks for looking.


New Five-String Fiddle Completed!

Five-String Fiddle from the Vallery Tree

The Beginning:

This instrument was actually begun last winter, but is only now coming into completed form. The back, sides and neck are all salvaged from a tree taken down years ago on my wife’s parents’ property, where she grew up. (I built a commissioned instrument from this same tree last year.) I wish I had a lot more of it, but much of the tree was lost to rot. Too bad… it is pretty wood. The Sitka spruce top came from somewhere here in the northwest, but I don’t know exactly where: all I can say is that I bought it from a local wood dealer.

Early stage Oregon five string bluegrass fiddle by Chet Bishop
Early stage… at this point there was a long way to go!


Eventually, I had the corpus (body) completed and had begun working on the neck and scroll. Additionally, arthritis was plaguing me a little, so it was slow progress.

handmade Oregon 5-string fiddle in progress
Completed corpus with partially carved scroll and neck.


hand carved five string fiddle scroll for oregon 5-string fiddle
Nearly-completed scroll joined to fingerboard, for final shaping as a unit.


completed scroll and neck assembly with fingerboard ready for installation on Oregon five-string fiddle
Completed neck assembly, ready for “neck-set.”


Then it was time to set the neck. This is one of the most exacting steps in building a violin: everything has to be correct, or it will be impossible to correctly set the instrument up for playing.

Beginning the neck mortise on an Oregon handmade 5-string fiddle by Chet Bishop
Beginning the neck-mortise into which the neck heel will be set.


Final Assembly

After the neck mortise is completed, so that the neck fits perfectly and all angles and dimensions are exactly right, I liberally coat the mortise and neck-heel with hot hide-glue, and then I quickly ram the neck into place. Then, I checked all measurements one last time and clamped it with a single clamp at the heel.

neck set completed on a handmade oregon 5-string fiddle by Chet Bishop
Successful Neck-Set! (The button and heel still need to be trimmed…)


back view neck-set handmade Oregon 5-string fiddle by Chet Bishop
Back view


After all the woodwork was completed, I varnished the instrument: The first coats are quite yellow, to provide a “golden glow” from under the color coats.

five string fiddle handmade by Chet Bishop in Oregon
First coat of (yellow) varnish. The Spruce shows the yellow strongly.


varnishing a 5-string bluegrass fiddle handmade in Oregon by Chet Bishop
Back view: the Maple was darker to begin with, so the yellow is not as obvious.

Final Set-up

Finally, the instrument was fully varnished and set-up:

Oregon handmade five-string bluegrass fiddle by Chet Bishop
Front View of the completed instrument.


Oregon Bluegrass five-string fiddle, handmade by Chet Bishop
Side View:


Oregon five-string bluegrass fiddle, handmade by Chet Bishop
Back view.  (I love that grain!)


The Verdict:

The sound on this fiddle is very strong and clear: it has a well-focused C-string and is well-balanced across all five strings. I think this is possibly my best instrument so far.


Thanks for looking!


Five String Fiddle Finally Complete

Finally Done!

This one took awhile: Lots of sidetracks and other projects to complete. But it is finally done!

Back, Neck and sides

The back, sides and neck are from the “scrap” left over from building that five-string double bass last summer. This is the “sister-instrument” to the commission I built last winter, from the same wood-source, but the other side of the bass.

This and several other of my instruments are all from a log given me by the late Terry Howell. I have made one cello, one bass and several five-string fiddles from the wood of that log, and I still have a lifetime supply, thanks to Terry’s generosity. (see that story, here)

Front Plate

The front plate, however, is a first for me: Douglas Fir! This is unusual, but not unheard of: there are a number of professional instruments by Otto Erdesz out there being played whose front plates were made of Douglas fir. Will I always use it? Nope! But this turned out very well indeed! I am more confortable using spruce, and probably will continue to mostly use spruce, but it was quite an eye-opening experience to try the Douglas Fir.

The sound is very big, with a very clear, deep C-String, and perfect balance across all five strings. This fiddle will “cut through the mix” in a band, but can also play pianissimo when needed.

Overall, I am very well satisfied with the final result on this fiddle. I am confident that a buyer will find it a thrill to play.

Front view of handmade five-string bluegrasss fiddle.
Front is made of Oregon Douglas Fir: this is unusual, but not a first. Otto Erdesz used to use Douglas fir for front plates.


Side view of handmade 5-string bluegrass fiddle, made of Oregon Big Leaf Maple and Oregon Fouglas Fir.
Sides and neck are made from Oregon Big Leaf Maple. I have the entire log they came from.


Back view of Oregon handmade five-string fiddle, or Oregon Big Leaf Maple.
Back plate is also that same Big Leaf Maple.


Scroll of handmade 5-string bluegrass fiddle by Chet Bishop.
The Scroll, too, came from that same log.


Thanks for looking!


Five-String Progress

Handmade 5-String Fiddle coming along!

Oregon Douglas Fir Top Plate

Otto Erdesz, 1917-2000 often made top plates for violas and violins out of Douglas Fir. Professional players bought and played his instruments. They are still playing them today, although many classical players insist that European spruce is the only “proper wood” for an instrument soundboard.

Frankly, I usually agree: all my experience with Douglas Fir has seemed to indicate that it would not be a very good choice. (I believed this, even though I have played one of his instruments, and it was excellent.) So, I simply didn’t try it, until this instrument.

Game-Changer!

Earlier this winter, a friend gave me a load of clean, dry Douglas Fir firewood. I use wood heat, and we had all been told it would be a bad winter (it wasn’t.) So I felt truly grateful for the gift. Later, as I split some of it, I noticed that, unlike most Douglas Fir, it had no twist at all, and it split easily and cleanly. I picked up a chunk and tapped it, and it gave a very clear, bell-like ring. (Hah! That spells “time to try some Douglas Fir!”)

So, I searched through the pile, and found one of the few pieces long enough to use. Then I carefully split it into useable billets. Next, I sawed along the center-line to book-match a plate.

Douglas Fir billet with Rib Garland
Douglas Fir billet with Guarneri Rib Garland

I frequently use a pattern modeled after the 1735 “Plowden” Guarneri del Gesu. And…I like it, so I installed blocks in the mold, bent the ribs, and got going!

I had one more piece of “scrap” of Oregon Big Leaf Maple. Happily, I had saved it, too, from the 5-string Double bass I built last year. Understandably, I was looking forward to making a fiddle out of it. I had already made one 5-string fiddle from scrap from the other side of the bass-back, (which I sold to a bluegrass fiddle player in Ohio.)  It had turned out very well, so I was anxious to get the “sister” instrument made.

Back Plate Arching Nearly Complete:

Back arching nearly complete.
Back arching nearly complete


And, the Neck

I obtained the neck billet from a tree on my wife’s parent’s place. Every time I looked at it, I found the wood very attractive, so I got started on it, as well:

neck billet in progress
Neck billet in progress.


First. I began to carve the scroll and pegbox. I find that this task requires a lot of saw-cuts, to outline the actual curl of the scroll, and then to remove the waste wood. Alternately, I can use either a saw or a gouge, but I find that the saw saves a lot of effort. Here, I use the saw.

beginning the scroll cuts
Beginning the scroll cuts


Continuing the scroll cuts.


Then, I used various gouges and chisels to complete the scroll and the inside of the pegbox.

Scroll and pegbox nearing completion.


I prepare and attach the fingerboard after the scroll and pegbox are very close to complete. Then I can carve and shape the two as a unit. That hasn’t happened, yet, so the handle portion of the neck is still rough and untouched.

Scroll ready for fingerboard; Arching complete on back plate.
Scroll ready for fingerboard; Arching complete on back plate: ready for Graduations.


Completing the Front Plate

Meanwhile, I completed the carving of the front plate. Then, I laid out and cut the f-holes and began the purfling. Cutting the purfling slots by hand on Douglas Fir is quite difficult, because the winter reeds are exceedingly hard, compared to the softer summer reeds. The knife just “pops” over them so that it feels as though it is running over corrugated roofing.

As a result, I took much longer to purfle this plate than I usually do for a spruce plate. (Ah, well! Perhaps that is one reason so few luthiers are willing to use it!)  But, I still have high hopes for the power and tone of the resulting instrument. This plate has exceptionally strong and clear tap-tones.

Purfling the front plate.

Garland leveled and Front Plate installed!

(Unfortunately, I neglected to get photos of the bass-bar process. I made it also of Douglas Fir, from the same billet. I hope to show it after I remove the mold…sorry.)

Front plate installed and waiting for glue to dry.


Well…I’m tired. I nearly completed the graduations for the back plate, but today was a long day. So, I will simply have to finish them tomorrow. However, the progress stands here, for tonight:

Completed front plate on garland, with nearly completed back plate.


Tomorrow! (yeah, tomorrow!)

I hope to get the back plate completed tomorrow, except for the purfling, which will have to wait until after I install the plate. Then, I will prepare the fingerboard and get it glued onto the neck, and I will feel as though I am “On the Home-stretch!” (But it won’t really be true: there still will be a great deal of work left to do, before it is anywhere close to completed.)


Thanks for looking!


2021: Two New Five-String Fiddles on the Way

Two New Handmade Five String Fiddles Begun

One Guarneri-Style, One Oliver

The last two commissions were a five-string on the original Oliver Pattern and a five-string on the slightly-wider Guarneri pattern. Both sounded great, and both customers are very happy. So, that left me wondering which one to do next. The obvious answer: Both!


Five String fiddles Guarneri and Oliver, side by side.


I’m trying a new neck and scroll design on the Guarneri model. I hope it works well, because I really like the graceful look.

The instrument on the left (modeled after the 1735 “Plowden” Guarneri, with modifications to acommodate five strings) is  left-over Oregon Big Leaf maple from building a five-string double bass, during the summer of last year (same as the Andy Pastor commission fiddle.)

Heavily Flamed Maple for the back plate.


The scroll (also Oregon Big Leaf Maple) is from a tree on the property where my wife grew up, and so are the ribs.  The back is from a tree on the next ridge of hills west: about ten miles by road, probably three miles in direct line-of-flight. (Same one from which the recent double bass was taken, as well as several other instruments I have made. The late Terry Howell, of Howell Tree Farm, gave me the entire log, so I have a good supply.)

Heavily flamed maple neck in progress.

Experiment:

I have also decided to try an experiment: This will be the first time I have attempted a 5-string bluegrass fiddle with a belly of Douglas Fir, as opposed to Spruce. Otto Erdesz was famous for using it successfully in many of his instruments, so, when a friend gave me some very straight, split Douglas Fir, I decided to make the attempt, on the Guarneri model. It is quite dense compared to spruce, but it rings like a bell, when I tap it with my finger, so, I think it will be good.

Bookmatched Douglas fir top plate with Guarneri-model garland.


Douglas Fir Top Plate arching complete.


The back, as well as the ribs and the scroll on the right-hand instrument above (the Oliver-model) are all from the tree on my Mother- and Father-in-law’s property. The belly, as usual, is Sitka Spruce.

Spruce belly, Oregon Big Leaf Maple back and scroll.


So, that is where things stand, today:

All the parts for the two new 5-string fiddles.

Slow Start due to Repairs and other Responsibilities

This has been a slow start: 2021 saw me needing to repair my ancient bandsaw, and, even more depressing, my drill press had succumbed to the misguided attention of a marauding mouse. (The little wretch had crawled up through the ventilation holes of the electric motor and chewed off all the insulation from about 4″ of wire!)

Saw:

The bandsaw required disassembly and drilling out a worn, threaded hole, and retapping for a helicoil. The machine will probably outlast me, now.

Drill Press:

The drill press motor had to be taken apart and a new wire soldered in place. (A friend did that one for me. I really lack confidence when it comes to electric motor repair.) Fortunately, the damage was limited to just that one wire. (Maybe the plastic insulation gave the mouse a belly-ache.)

Back in business:

At any rate, I now have both machines running again, and I was able to saw out the profiles for the remaining plates as well as drilling the pilot holes in each scroll.

I should be able to get more done, now. (Gotta prune the apple-trees, too… Spring is on the way!)


Thanks for looking.

Beginning the Varnishing Sequence

Final Varnish Preparation

Wet down the wood,to raise the grain and accentuate “problem” areas

I wetted the whole bass down with coffee, mainly to raise the grain a bit, but partly to add a little color to the white wood of the Sitka spruce belly. The Oregon Big Leaf Maple is already pretty colorful.

Back plate of five-string double bass, wetted with coffee.
Back plate, wetted with coffee.


Then I turned the lights off in the workshop and went over the whole bass, inch by inch, with a small flashlight, held at a low angle, to make shadows wherever there was a discontinuity in the surface. As I located them, I scraped or sanded away the problems, before moving on. It took quite a while, but I was pretty happy with the outcome.

Mineral Ground

The next step is to coat the wood with a mineral ground: a suspension of extremely fine particles of gypsum in water is what I use. I brush it on, one section at a time, rub it in vigorously, to get the tiny particles into the pores of the wood; then rub off any excess, with a rag. It always looks as though I took all of it back off, until it dries.

Mineral ground in progress; sides nearly dry; back only begun.


Mineral ground continuing: Back is 2/3 complete: beginning to dry.,
Mineral ground continuing: Back is 2/3 complete, and beginning to dry.,


Mineral ground complete on back and sides of bass. Drying rapidly.


After the ground is fully dry, I sand all over with fine abrasive, to remove any dry patches of excess mineral. There will be very small discontinuities that have been filled by the mineral ground: this is desirable, and I am not trying to remove those places.

When the ground dries, the bass will be stark white, but when I apply the sealer, to lock the mineral particles in place, the mineral ground becomes completely transparent, permanently. It will never be visible again.

So, here is the bass, with the gypsum fully dry, mounted in my varnishing fixture, and ready for the sealer:

Five-string double bass ready for sealer.
Ready for sealer.

Sealer

I am currently using rosin dissolved in turpentine and alcohol as a sealer. The liquid (alcohol first, then turpentine) evaporates, leaving the rosin in the pores of the wood. When dry, this helps prevent the varnish from soaking into the wood, so as to minimize the sound-dampening effect of excessive varnish penetration.

This is the part of finishing I like best: it seems almost magical to see the stark white of the mineral ground disappear instantly and permanently as the sealer permeates the gypsum and renders it transparent, so that the beauty of the wood is revealed.

Sealing the front plate of a five-string double bass.
I begin by sealing the front plate.


Sealing the ribs of a 5-string double bass.
Then I rotate the bass in the fixture and seal the ribs.


Sealing the back plate of a five-string double bass.
Then I work on the back plate, and continue…


Front view of fully sealed 5-string double bass.
Until the whole thing is done! Here is the front view.


Back view of fully sealed 5-string double bass.
And here is the back!


After the sealer is dry, or just before it is completely dry, I rub down the surface of the wood with alcohol, to pick up any rosin that may have remained on the surface. When the sealer is fully dry, I go over the whole surface, lightly, with fine sandpaper, to pick off any bits of wood fiber that may have raised during the ground and sealer process.

Varnish plan

I always begin with a yellow varnish: I like the way it shines through the darker pigmented varnish when all the finishing is complete. In this particular case the maple was dark enough that even the yellow varnish will end up looking pretty dark. So, though I will still begin with the yellow, I will have to add a good deal of darker varnish on the front, to balance the color with that of the back. This is just a type of “Judgment call” that the maker must always consider when finishing an instrument. As I add coats of varnish, I will pay attention to which areas need darker varnish, and which could use yellow or clear varnish.


But Varnishing will be in the next post!


Thanks for looking.

Closing the Corpus

Time to close things up!

First things first:

The last time I posted, I had temporarily installed the neck, and (I thought) I had glued the neck heel root in place, as it was to be a permanent part of the corpus, glued to both the neck mortise and the back button.

So the bass looked like this:

Bass with temporary neck set.


Side view, showing neck heel break-away joint.


The heel root looked like this:

Heel root positioned and glued to mortise, using hide glue.
Heel root positioned and glued to mortise, using hide glue, with paper break-away joint.


I was so confident that everything was right, that I even sawed off the excess heel root, visible in the above photo, and planed it flush with the back of the neck block, in preparation for installing the back plate.  But!  When I broke the paper “break-away joint” (see the above photo) the heel root gently let go of the mortise and was completely loose. (Rats!)

It turns out that hide glue doesn’t stick to carbon fiber plate! Ok… so I had to start over, and this time glue it home with epoxy. I put a plastic bag around the neck heel to protect it, coated the heel root with epoxy on the bottom and two sides, and slid it all back into place, this time bolting the neck in solidly, and clamping the heel root tightly against it. It all worked this time.

Beginning the purfling of the back plate

While the epoxy was curing, I decided it would be a good idea to at least install the “purfling weave” portion of the back plate purfling, before installing the plate. I figured it would be easier while the plate was still loose. The reason I wait until the back plate is installed to do the rest of the purfling, is that the corpus often changes shape a little when the mold is removed, so I can’t guarantee that the overhang will still be the same. If I have already installed the purfling, then I am stuck: but if I have not, then I can maneuver the overhang to being as close as possible to what I wanted, and install the plate, then plane away excess all around until the overhang looks right again, and finally put in the purfling so that it looks as though everything just worked out right, to begin with.

Cutting the slot for the purfling weave on the back plate for five-string double bass .
Cutting the slots for the lower purfling weave on the back plate.


This is a weave that I came up with for my very first five-string fiddle and which I have tried to incorporate on all my subsequent five-string instruments. It is just a modified “fleur-de-lis”…nothing really special, but I like it. I use the same design, upside down, in the upper end.

Picking the waste wood from the upper purfling weave.


Upper weave slot nearly complete.


After cleaning the slots out, I used heat and water to bend the purfling strips to fit the curves of the weaves, and glued them in using hot hide glue.

Both purfling weaves completed on the five-string double bass back plate.
Both purfling weaves completed on the Oregon Big Leaf Maple back plate.


I planed the weaves flush with the plate after they were dry, using a gouge, a small finger-plane, and a scraper.  You can see the beginning of the rest of the purfling slots, how they will connect to the weaves.

Purfling weave planed flush.


Closing the corpus

I finished scraping the interior and then laid the corpus onto the back plate, positioning it carefully, adding spool clamps, and constantly checking the overhang all the way around. When everything was as close as I could get it, I removed a few clamps at the bottom block, used a thin palette knife to ladle in the hot hide-glue, and replaced the clamps, tightening them securely. I added more clamps over the glued area, then repeated the process for the next section on either side of the bottom block, and worked up around the sides that way: removing clamps, inserting glue, replacing the clamps and adding more…until it looked like this:

Closed Corpus for five-string double bass.
Closed Corpus.


I still had not put the magnets into the cover plate, because, when I added the reinforcements to the cover plate, it changed the curvature, and it no longer fits cleanly into the access port flange. (Rats, again!) So I kept wetting and clamping the cover plate in different configurations until I got it to a close fit, then I added the magnets.

magnets in cover plate
Here are the magnets in the cover plate.


Annnd… it turns out they are too weak. (Sigh…) I will have to order some bigger magnets after all.

At any rate, I was now ready to correct the overhang all around, and begin the final purfling.

Overhang corrected, beginning final purfling.


Tracing in the slots for the final purfling.


The bottom end of the back plate has the same design.


Carving the Channel

After the purfling was completed, I still needed to trim back the purfling and carve the plate channel. This involved marking the edge crest all the way around, about 2 millimeters inside the outer perimeter, and carving the channel to barely touch that line. I used a sharp gouge, in the manner of a drawknife, to carve the channel, then used a riffler file to smooth the outer curve, where it meets the crest line.

Using a gouge as a drawknife, to carve the channel.


(I actually made a very short video of how this works, but I was unable to successfully link it to this post. Sorry.)

After the channel was complete, it was time to begin final edgework:

Beginning final edgework on back plate of five-string double bass.
Beginning final edgework on back plate.


Beginning final edgework for the front plate of a 5-string double bass.
And the same for the front plate.


The goal is to make sure that the edge contour is correct all the way around, and that the plate channel fairs smoothly into the surface of the plate, without ridges or lumps. Getting the light at a low angle across the plate makes shadows which will show me where the lumps and ridges are so I can scrape them away.

Using shadows to complete edgework.


It suddenly occurred to me that my bass-varnishing fixture requires that the end-pin hole be drilled, so I drilled the endpin hole but did not ream it to the taper it will eventually have. On smaller instruments I usually varnish before drilling the endpin hole, so that there is no likelihood of causing sags or runs where the varnish brush touches the hole. But on the bass, I have to have that hole as a place to attach the support for varnishing. (I can’t hold the bass in one hand, and the brush in the other, as I can with a violin!)

End pin hole drilled for a 5-string double bass.
End pin hole drilled.


And, that is pretty much where it sits, for the moment! The bass is ready for final varnish-prep, which will involve wetting down the whole surface to raise the grain, so I can sand it smooth again, then repeating until the grain no longer responds to moisture. Then I will rub in a compound to add color to the wood itself (not a stain, which might “reverse” the grain colors) and a mineral ground to close the pores in the wood. Finally a sealer locks in the mineral ground, and I will be ready for varnish.

So there is the bass corpus, ready for final varnish prep!

Five string double bass corpus ready for varnish prep.


Thanks for looking.

Both Plates Complete: Front installed!

Back plate completed

Completing the Arching

When I last posted, the back plate was in progress, but even the arching was not completed, let alone the interior carving. Now it is all complete, the front plate has been installed, and the fingerboard, the neck and the tailpiece are underway! Things are moving along!

I did make a set of arching templates before moving on with the arching:

Set of cross-arching templates for the five-string double bass.

Those templates helped me to see the shape more clearly, and to know what changes to make, to improve.

So, here is the completed back arching, after scraping, so that you can see the flame in the Oregon Big Leaf Maple back:

Arching complete on back plate for five-string double bass .
Arching complete on back plate. Pretty wood, isn’t it?

Inside Carving

Carving the interior is always a daunting task…that is a lot of wood to move! But, one scoop at a time, it does get done!

Beginning the inside carving of the back plate for the five-string double bass.
Beginning the inside carving of the back plate.


Once I had the whole plate beginning to take shape, I carved “dots” all over the plate, checking thickness as I carved, until I had a pattern of correctly graduated “dots all over the plate. Each dot had a measurement written in the center, matching the graduation “map” I had chosen to emulate.

Then it was time to “connect the dots.”

Graduation
Graduation “dots” for back plate.


Connecting the dots for graduation of a five string double bass.
Connecting the dots.


Graduation of five string double bass back plate is nearly complete.
Graduation of the back plate is nearly complete.


It is always amazing to me how light the plates become after all that waste wood is removed. In this picture, you can see how thin the plate is, with the graduation complete.

Graduation of the back plate of the 5-string double bass is complete.
Graduation of the back plate is complete.


I took the plate inside, and stacked all the parts together so that I could see the progress:

All the main parts complete, and stacked on the garland of the five-string double bass.
All the main parts complete, and stacked on the garland.

What is next?

I needed to complete the neck, which means I needed to design, cut out, and shape the fingerboard and glue it to the neck block so that I could finish shaping them as a unit. Meanwhile, I could install the front plate, and get ready for the neck-set, once the neck was ready.

Front Plate installation

I completed a preliminary shaping of the blocks and shaped the linings, front and back. Then I carefully positioned the garland on the front plate, and temporarily clamped them together, using several spool clamps.

Garland and Front plate for the five-string double bass assembled and clamped.
Garland and Front plate assembled and clamped.


Then I removed the clamps from one area at a time, used a thin palette knife to slip hot hide glue into the joint, and re-clamped immediately, adding more clamps as needed. Then I moved to the next area and repeated that pattern. Soon I had the entire front plate glued, and secured to the garland with clamps.

Front plate and garland assembled, glued and clamped for the five-string double bass.
Front plate and garland assembled, glued and clamped.


And, when I removed the clamps in the morning, the project was beginning to look like a bass!

Front plate and garland for five string double bass.
Front plate and garland, with the clamps off.


I liked the looks so much, I stacked the parts together again, to see how it would look, all together. The back plate is just sitting there, again, not bent to fit the garland or anything. I will add purfling after installing the plate, I think, so I can be sure the overhang is correct, and that the purfling follows the finished edge.

Back plate sitting on garland assembly with front plate of five-string double bass.
Back plate sitting on garland assembly with front plate, and neck assembly.


There is still a  long way to go, but I will put more in the next post.


Thanks for looking.

Beginning the Back Plate

Back Plate Arching

Traced and cut out the Plate

When I last posted, I had flattened the back plate, using a plane, but the shape was still oversized.

Flattened back plate for five-string double bass.
Flattened back plate for 5-string double bass.

So I traced out the plate shape using a small section of plastic pipe as a guide, and a ball-point pen inside the pipe to make the mark. Then I cut out the plate using my very old Craftsman “Auto-Scroller” saber saw.

My beloved wife, Ann, bought me this saw when we had been married for less than two years, and it has served me well for the last 38 years, but this may be the final plate it will cut out. It overheated rather badly during the cut. 🙁

Back Plate for five-string double bass traced and cut to shape.
Back Plate traced and cut to shape.


Once the plate was cut out, I used my curved-sole scrub-plane to remove waste wood, and rapidly bring the plate to near the proper thickness around the edge. As the thickness gets close to the target dimension, I switch over to the Ibex Finger-plane with the toothed blade and the wooden handle, to complete the thicknessing of the plate edge. The Oregon Big Leaf Maple is much more difficult to carve than the Spruce was, both because it is harder, and because the grain is highly flamed, meaning that it changes directions every centimeter or so, resisting all efforts to smoothly plane off the wood. The toothed plane helps, but when I start getting close to the right thickness, I will have to switch over to a scraper before the tear-outs from planing are too deep to be removed.

Arching of the five-string double bass back plate underway.
Arching of the back plate is underway.


You can see the longitudinal arching template in the above photo: it is just a thin piece of plywood with an 11′-3″ radius circle section cut out of it so as to leave the correct arching height in the center. I used that to help me establish the longitudinal arching. The Ibex plane is on the plate, and the scrub-plane is almost out of sight behind a small block-plane in the background. The small block-plane is helpful for smoothing the ridges left by the scrub-plane.

I am working to the rough sketch I made before beginning, with the plan for the back arching: (I did change the plan a little. I realized that I could extend the arching a little further “north,” as I have tapered the entire garland a little, so that the bend in the upper bouts will not be so severe, and the arching may be able to follow it a little way before flattening out to avoid the compound curve. It’s worth a try, anyway, and will not hurt anything.)

Rough sketch of arching plan for the five-string double bass back plate.
Rough sketch of arching-plan for the back plate.


Arching of the back-plate for a five-string double bass still in progress.
Arching of the back-plate still in progress. Scrub-plane is more visible in this picture.


My hands and shoulders were getting too tired, so I went inside and used small finger-planes, files, and scrapers to refine the scroll. I am waiting on an order of carbon-fiber reinforcement materials to complete the neck, but other than that, I am pleased with how it is turning out.

Scroll for a five-string double bass nearing completion.
Scroll is nearing completion.


I also completed the scraping of the Sitka Spruce belly, and it is pretty much ready to be glued to the garland.

Front plate and Garland for a five-string double bass, ready to be joined.
Front plate and Garland, ready to be joined.


I pretty much wore myself out on this stretch: I’m looking like a tired old man, here. And I thought I was smiling…

The luthier with five-string double bass in progress.


Anyway…that is the current status.


Thanks for looking.