
I Began this 5-String Fiddle Sometime Last Year…
Life Happens! Projects get put on hold...
Originally, I laid out the “kits” for six new five-string fiddles, two years ago. However, I had taken on other responsibilities, so I was pretty busy. But I did manage to complete two of the fiddles a year ago. As a result of numerous interruptions, I had barely begun this particular instrument.
We had lots of interruptions: some good, (a commissioned five-string fiddle) some bad (Health issues for family members.) But, now I’m almost “on the homestretch” to complete my #17 Five-string fiddle.
Where it began
Initially, I bought some very pretty quilted Big Leaf Maple, and some Englemann Spruce, from Bruce Harvie, of Orcas Island Tonewoods. Fortunately, I got the ribs, back and neck out of the same billet of maple. It was nice that the Quilted Maple billet was large enough for that. I cut the top plate and bass bar out of the Englemann Spruce. However, I obtained the willow for the blocks and linings elsewhere.
But then, I laid the instrument aside for a year, partialy completed, while, as I said, other things (commissioned intstruments, family needs, etc,) took precedence.
Eventually, I “drifted back” to complete this instrument in June, and still there were a lot of sidetracks. (“Life is what actually occurs while we are planning something else.“) But this is the final work:
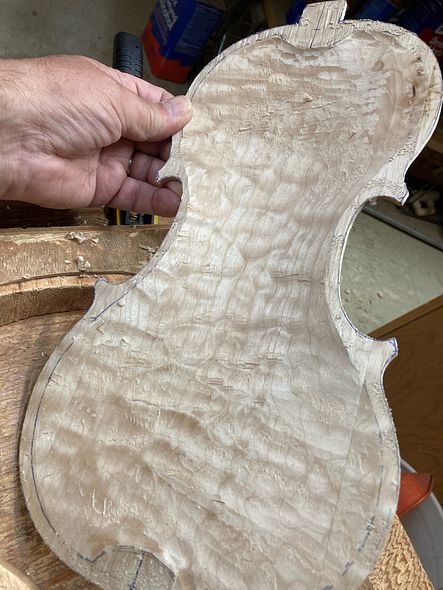
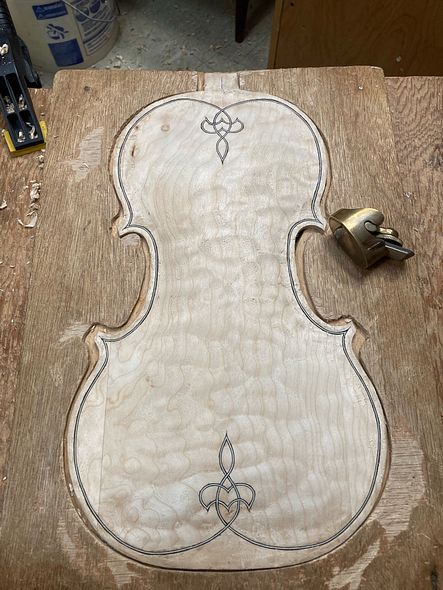
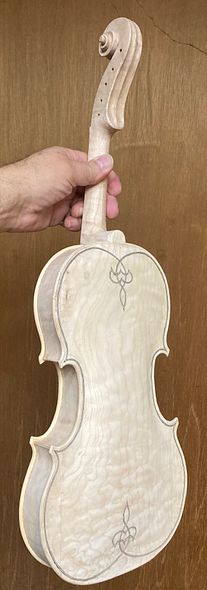
Carving the back plate
First, I completed the carving, of the back plate, inside and out. Then I installed the purfling on the back plate. (I had already completed the front plate, a year ago.)
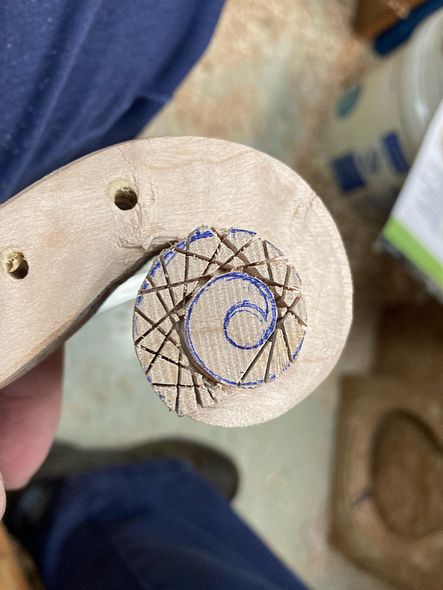
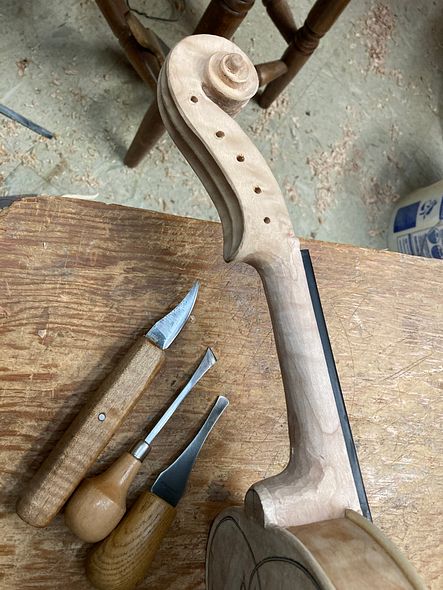
Carving the Neck
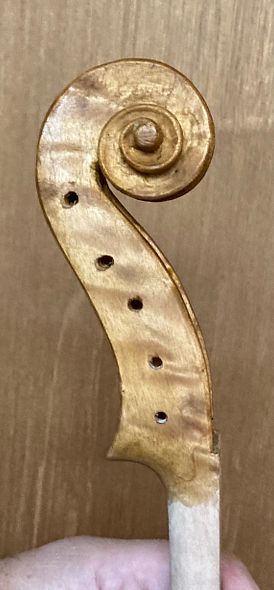
Meanwhile, I began carving the scroll and neck.

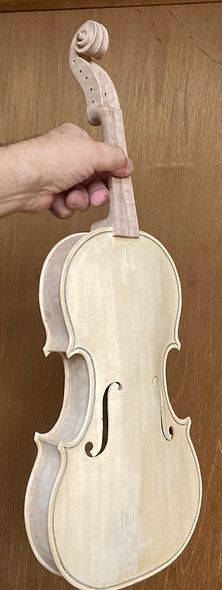
After I installed the back plate on the corpus, it was time to install the neck.
The Neck-Set
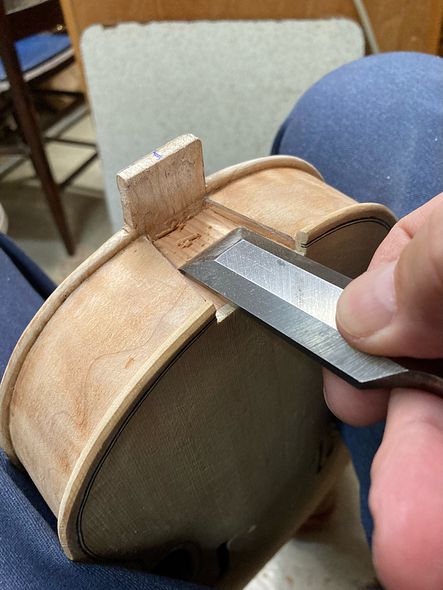
First I laid out the mortise with a straightedge and pencil. Then I carved the mortise out, using chisels and scrapers. Afterward, once the neck joint was perfectly fitted, I glued and clamped the neck into the mortise and allowed it to dry.
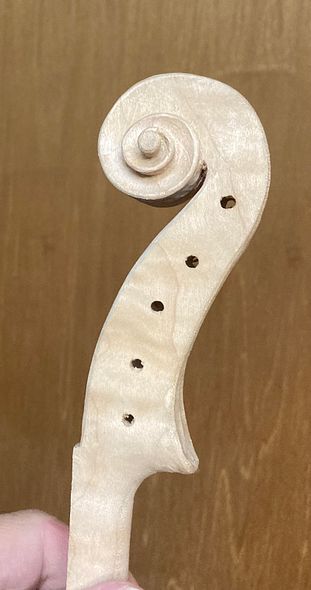
However, I still needed to finish carving the neck heel and back button, together, as one piece. In that way, all the dimensions and curves will be correct. In addition, I continued to work on the final smoothing and details on the scroll itself.
Final Shaping of Neck, Heel and Scroll


Finally, I removed the fingerboard. As a result, I could easily access all of the bare wood for the final varnish preparation and varnishing. (Originally, I had only temporarily attached the fingerboard, by means of three dots of hide glue.)
Varnish Process
In reality, the varnishing process is fairly involved.
First, I apply a mineral ground. Next, I apply a coat of sealer. Then, I begin varnishing. Furthermore, the varnish must be built up, coat by coat. To begin with, I apply two base coats of yellow. Afterward, I work through whatever colors I have chosen to achieve the final result. (Usually, it requires about eight coats of varnish.)
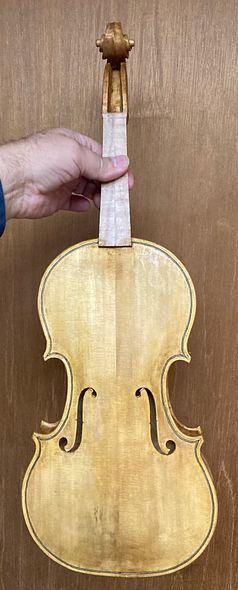
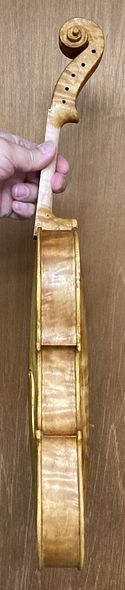
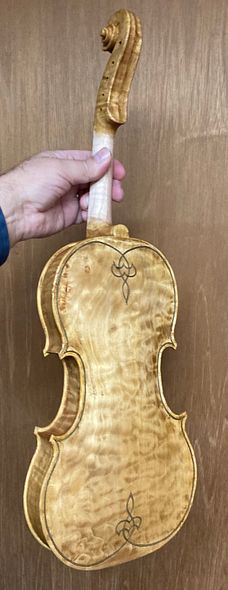
But, here are some pictures taken after the first two coats of yellow varnish:
Next time, I will describe the finishing process in more detail. And, as I near completion, I will post again, showing the set-up procedure.
Thanks for looking.