Originally, I laid out the “kits” for six new five-string fiddles, two years ago. However, I had taken on other responsibilities, so I was pretty busy. But I did manage to complete two of the fiddles a year ago. As a result of numerous interruptions, I had barely begun this particular instrument.
We had lots of interruptions: some good, (a commissioned five-string fiddle) some bad (Health issues for family members.) But, now I’m almost “on the homestretch” to complete my #17 Five-string fiddle.
Where it began
Initially, I bought some very pretty quilted Big Leaf Maple, and some Englemann Spruce, from Bruce Harvie, of Orcas Island Tonewoods. Fortunately, I got the ribs, back and neck out of the same billet of maple. It was nice that the Quilted Maple billet was large enough for that. I cut the top plate and bass bar out of the Englemann Spruce. However, I obtained the willow for the blocks and linings elsewhere.
But then, I laid the instrument aside for a year, partialy completed, while, as I said, other things (commissioned intstruments, family needs, etc,) took precedence.
Eventually, I “drifted back” to complete this instrument in June, and still there were a lot of sidetracks. (“Life is what actually occurs while we are planning something else.“) But this is the final work:
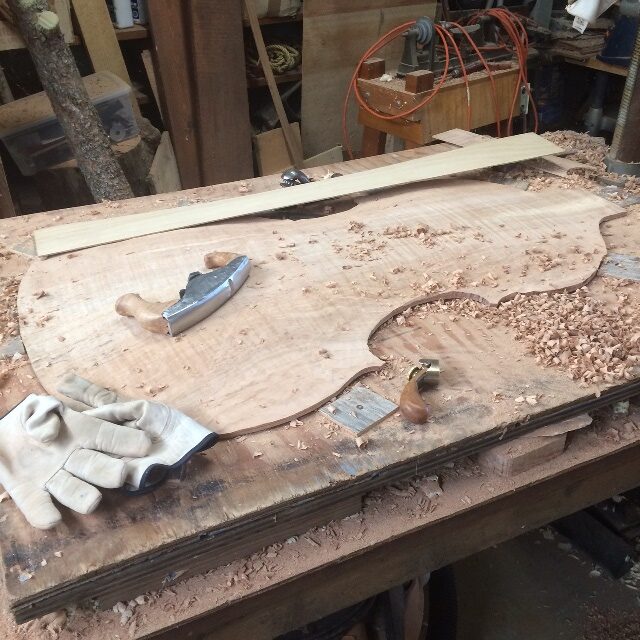
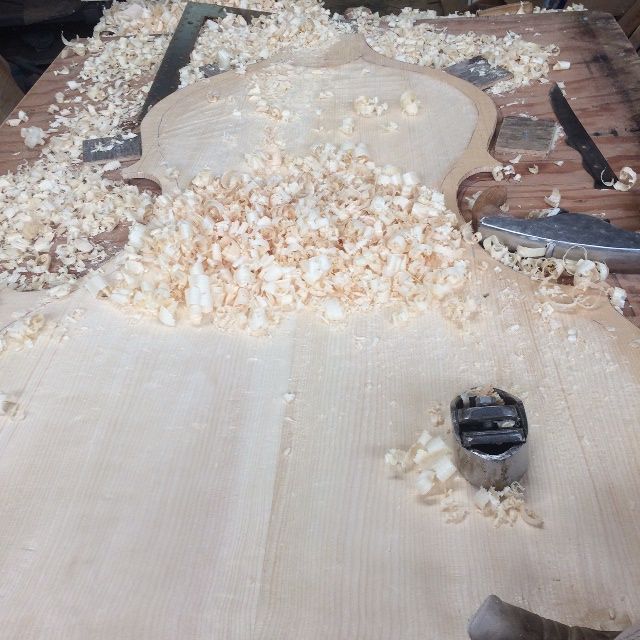
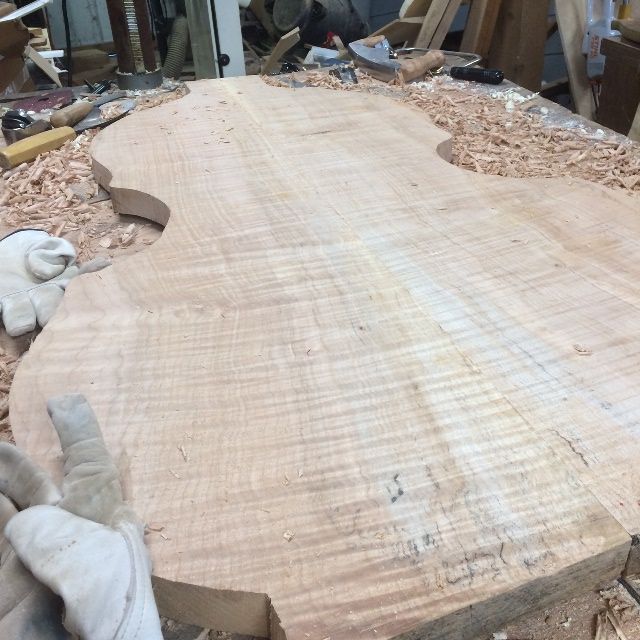
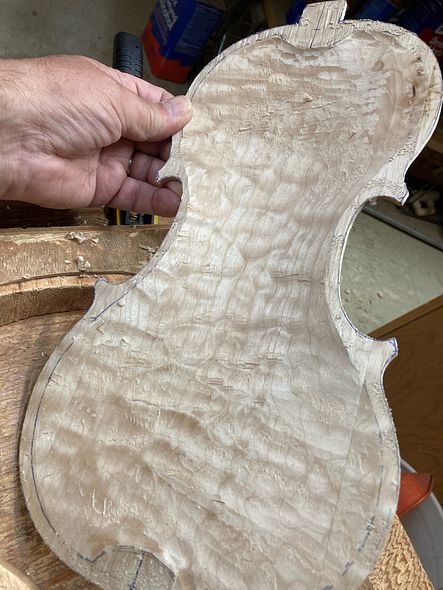
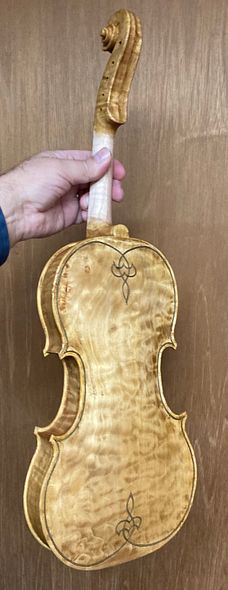
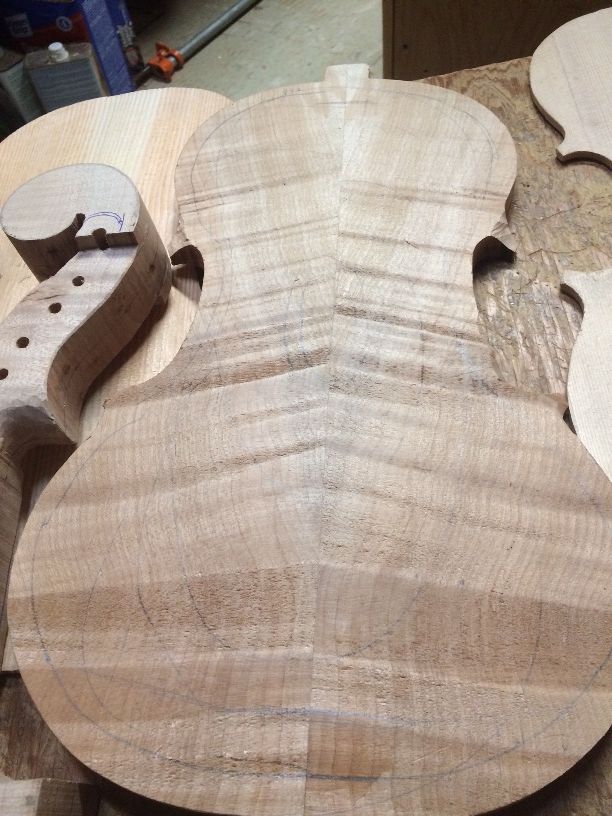
Wild quilted maple back inside carving
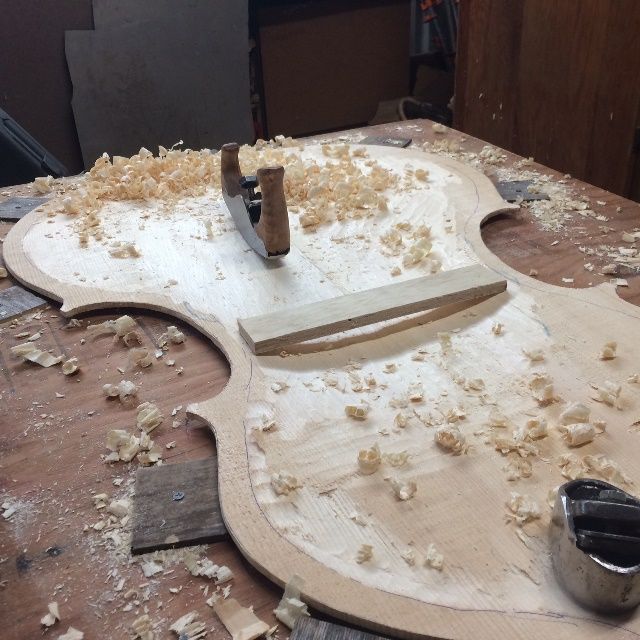
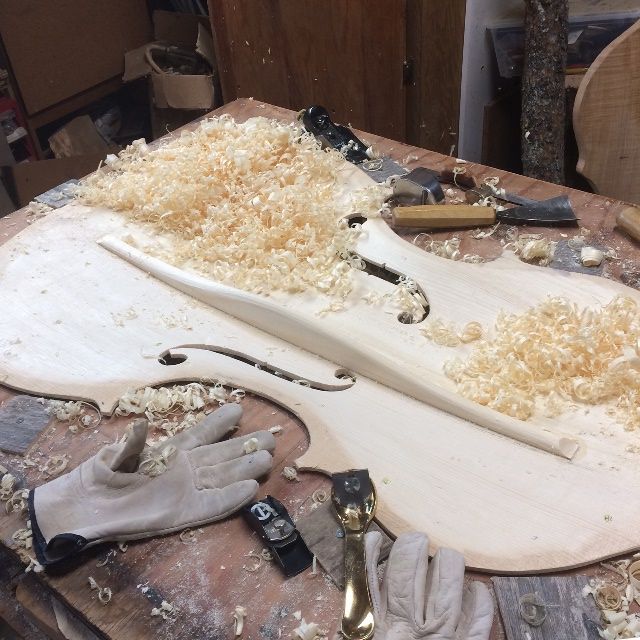
Carving the back plate
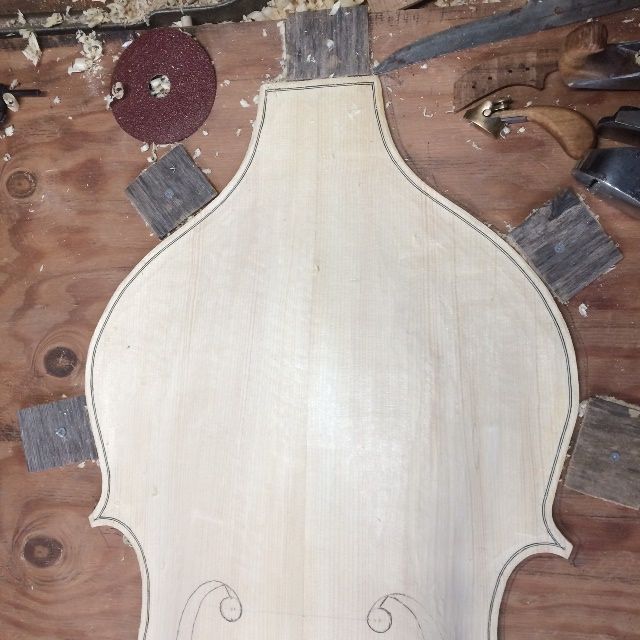
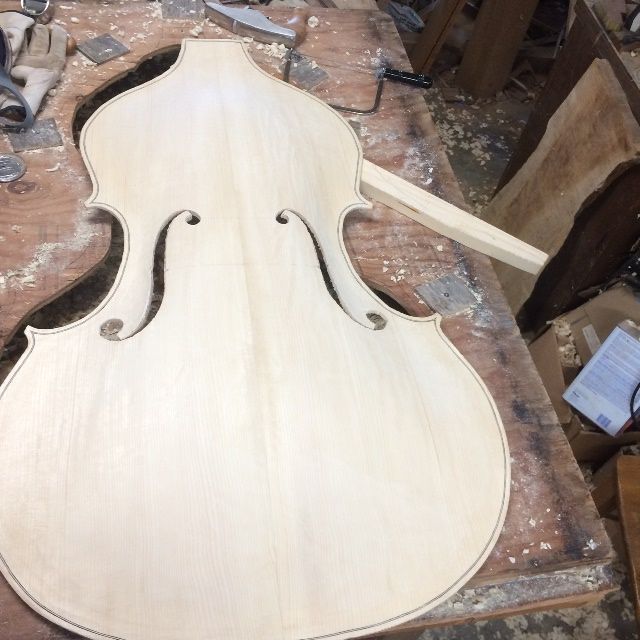
First, I completed the carving, of the back plate, inside and out. Then I installed the purfling on the back plate. (I had already completed the front plate, a year ago.)
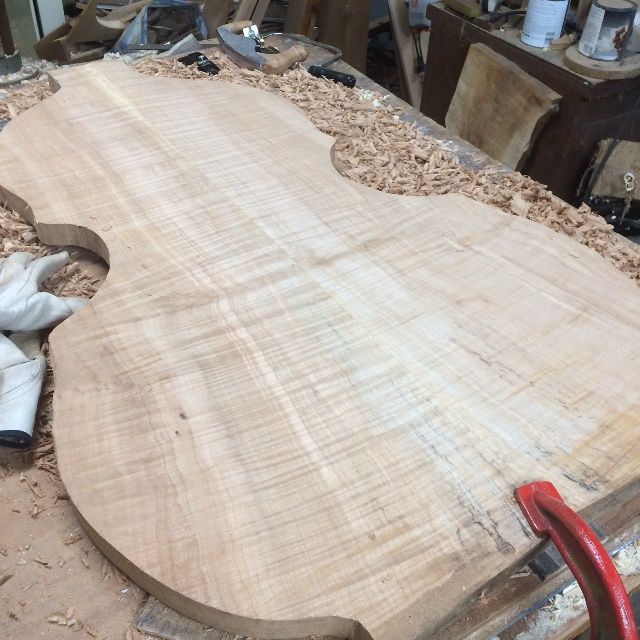
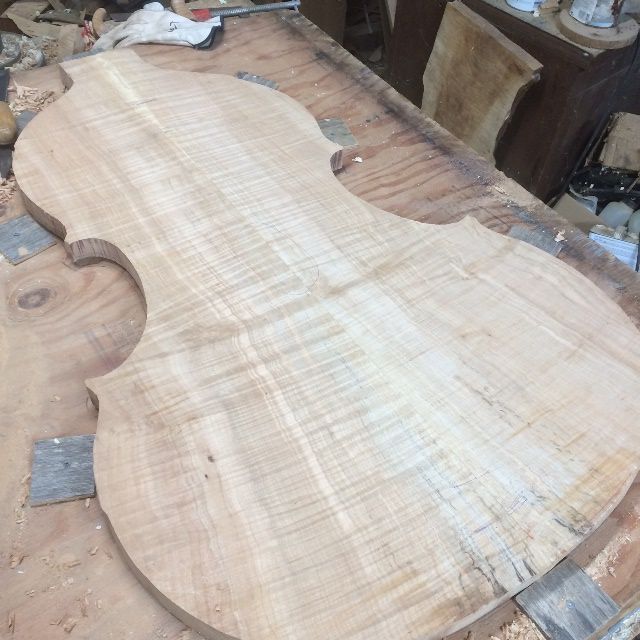
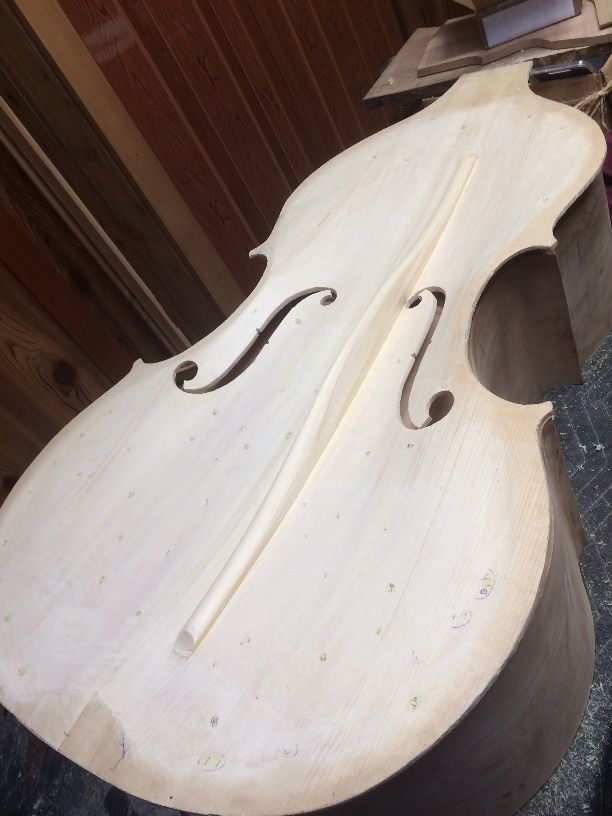
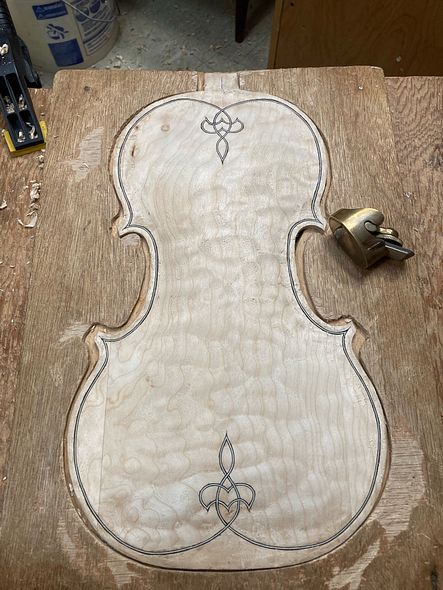
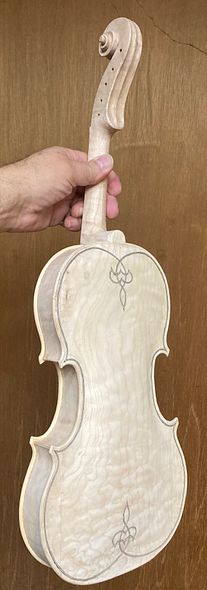
Outside of quilted maple back with purfling complete
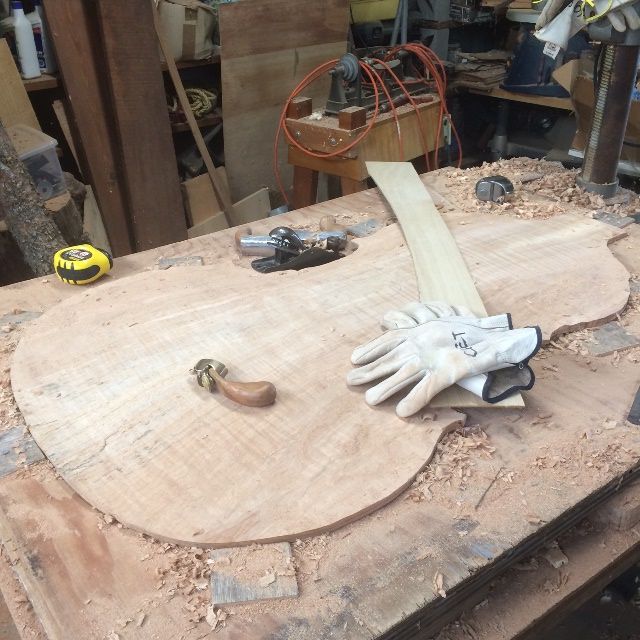
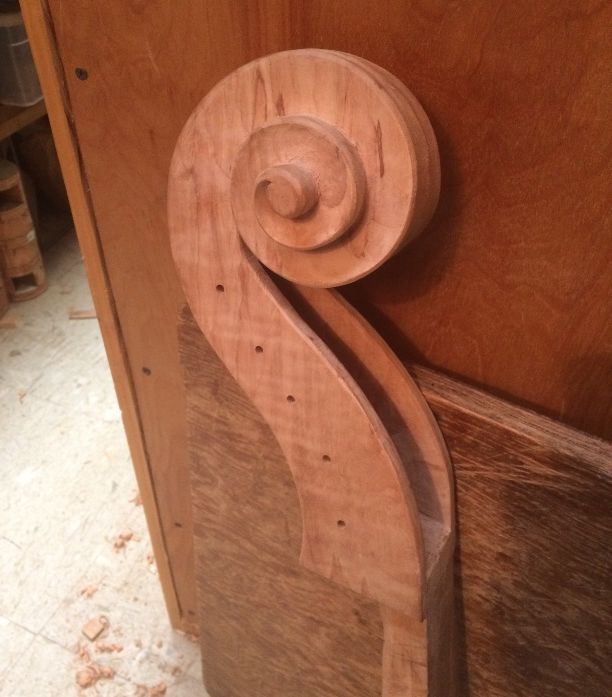
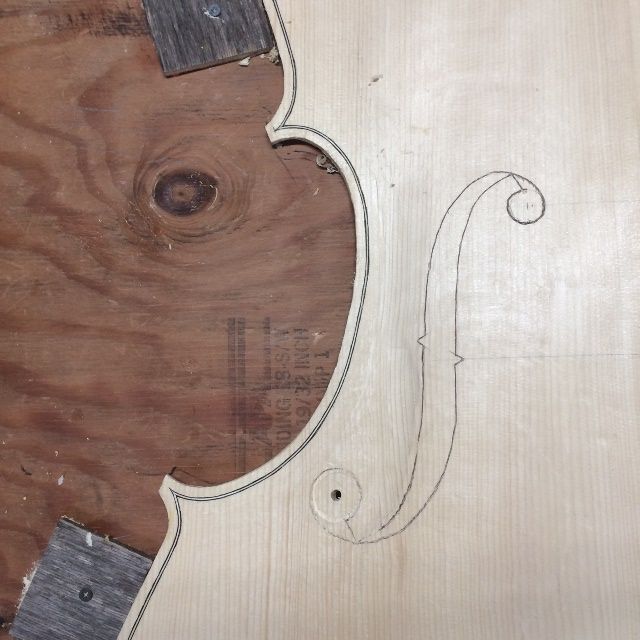
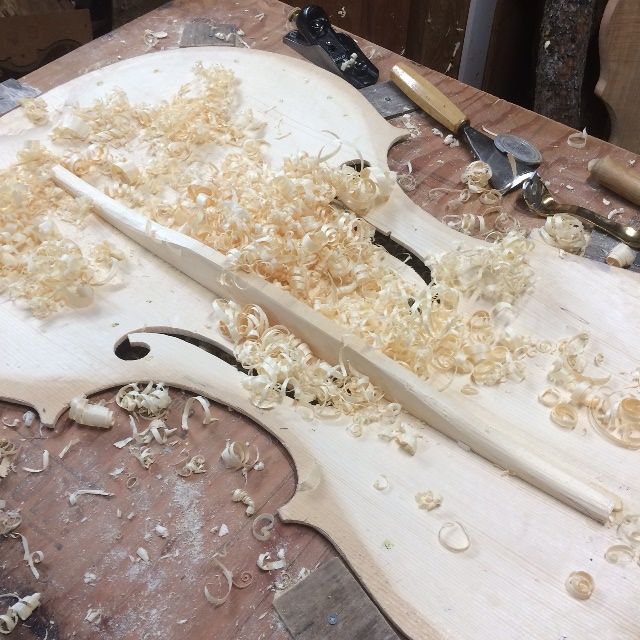
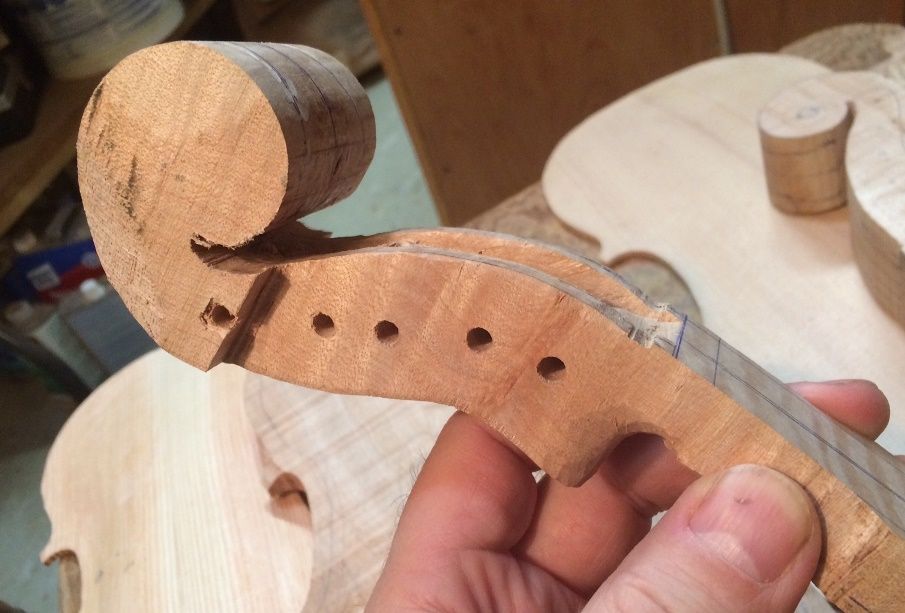
Carving the Neck
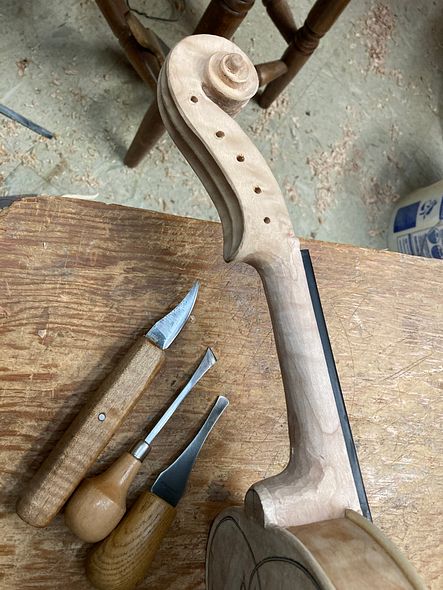
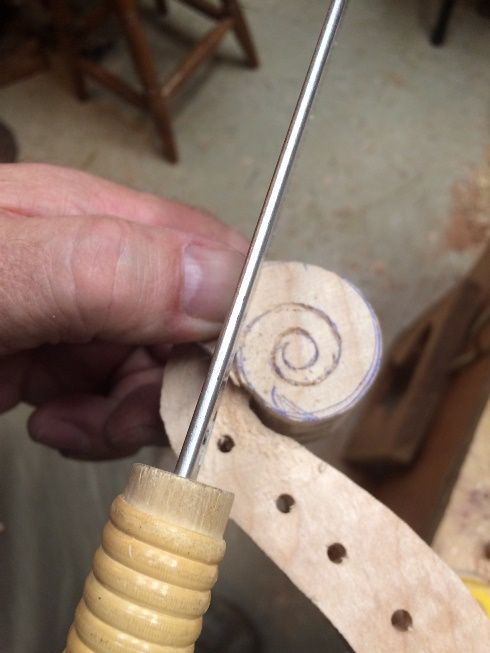
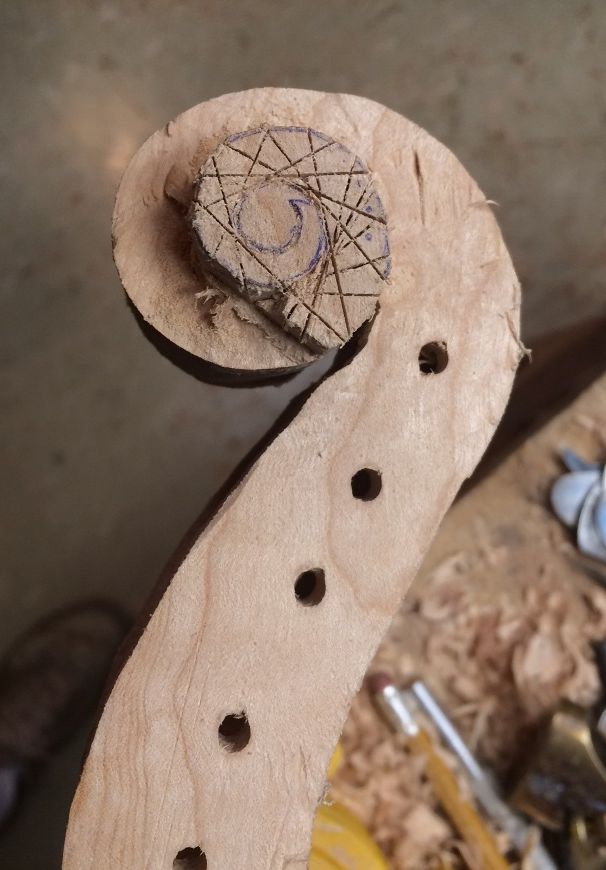
Meanwhile, I began carving the scroll and neck.
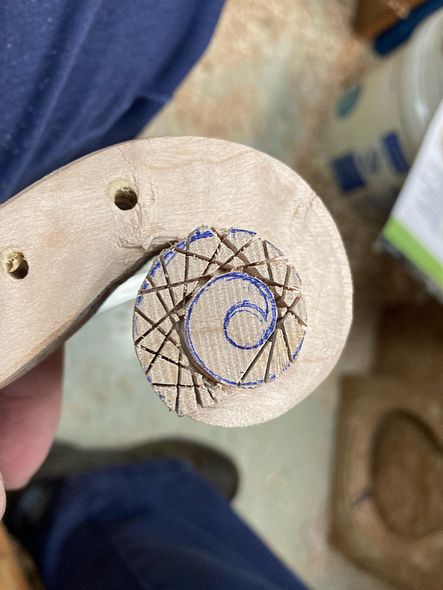
Beginning the scroll, using a saw
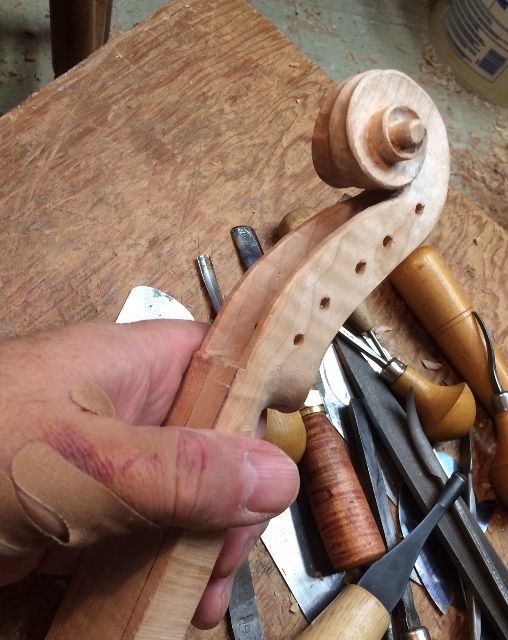
Scroll and neck ready for Fingerboard
After I installed the back plate on the corpus, it was time to install the neck.
The Neck-Set
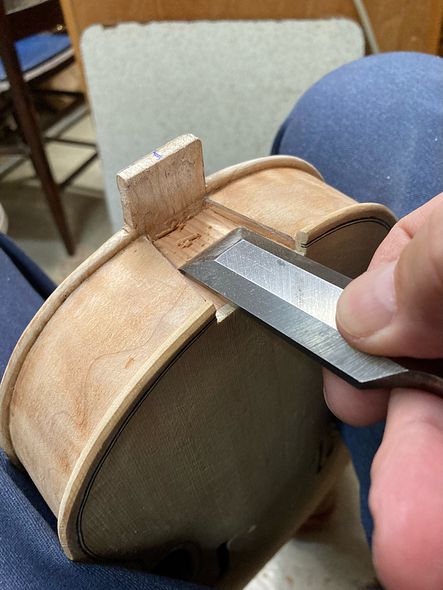
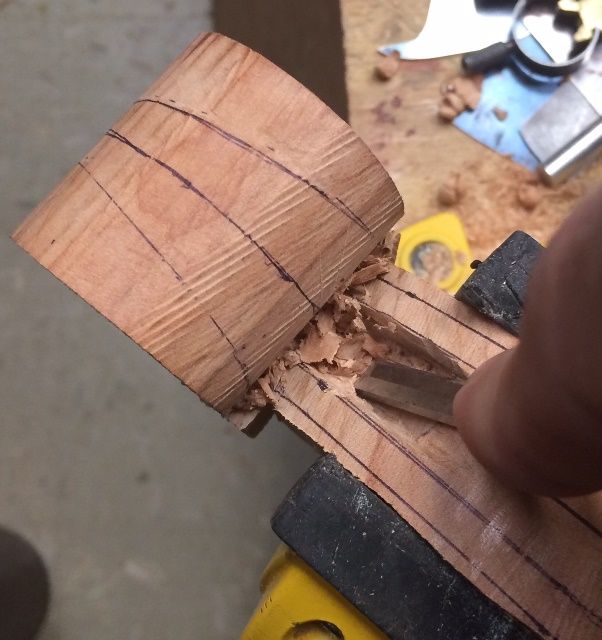
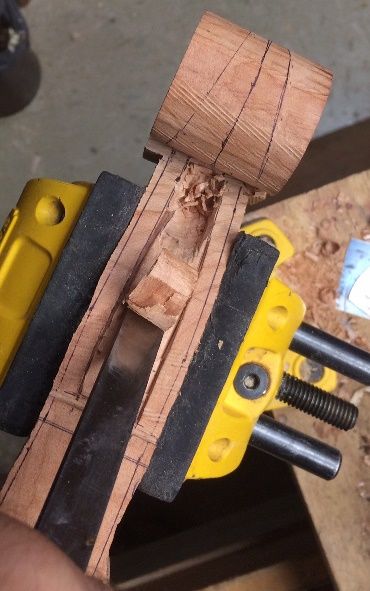
Carving the neck mortise
First I laid out the mortise with a straightedge and pencil. Then I carved the mortise out, using chisels and scrapers. Afterward, once the neck joint was perfectly fitted, I glued and clamped the neck into the mortise and allowed it to dry.
However, I still needed to finish carving the neck heel and back button, together, as one piece. In that way, all the dimensions and curves will be correct. In addition, I continued to work on the final smoothing and details on the scroll itself.
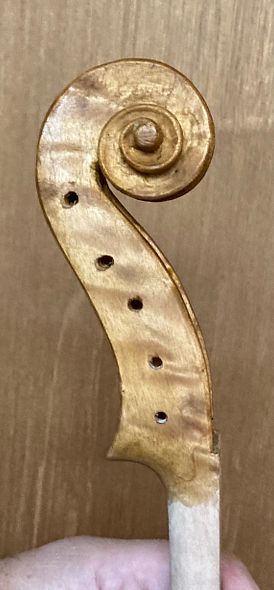
Final Shaping of Neck, Heel and Scroll
Final carving of the neck and heelBack nearly completeCarving is complete, and it is time to remove the fingerboard!
Finally, I removed the fingerboard. As a result, I could easily access all of the bare wood for the final varnish preparation and varnishing. (Originally, I had only temporarily attached the fingerboard, by means of three dots of hide glue.)
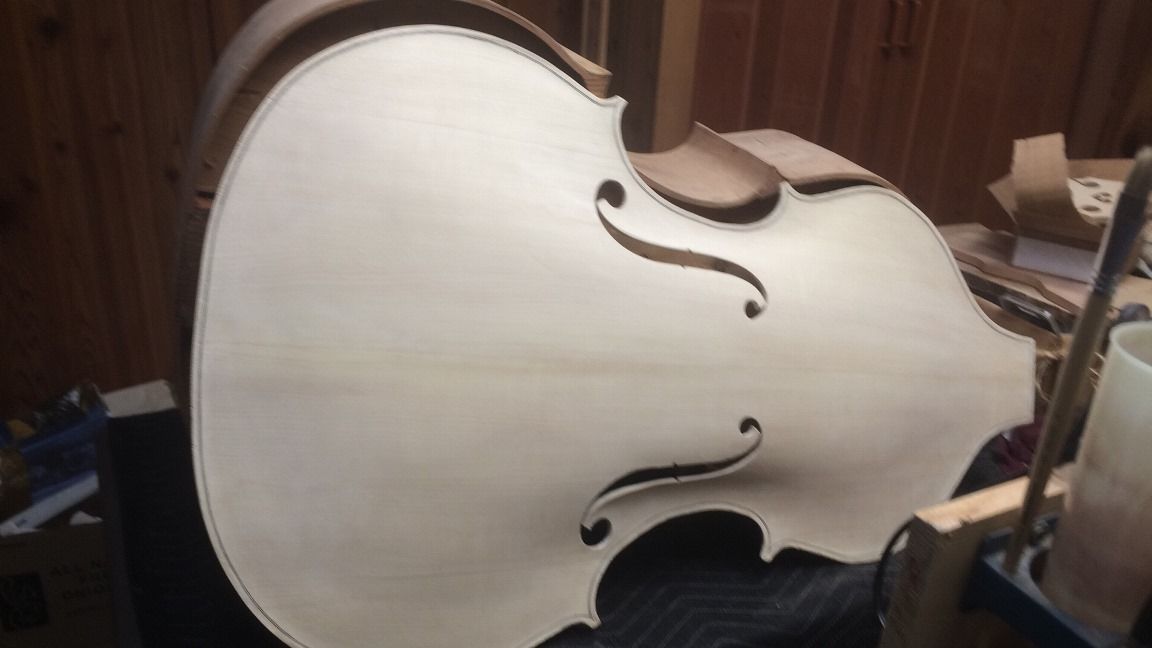
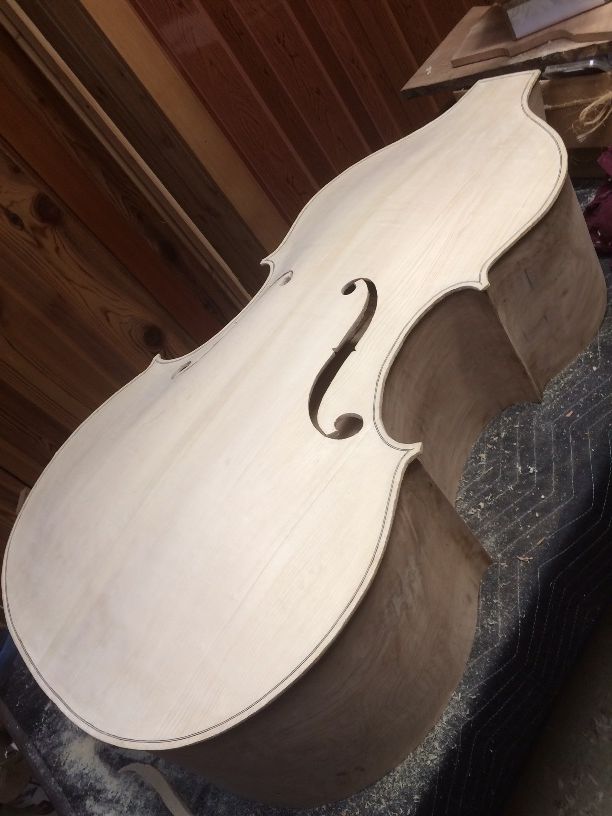
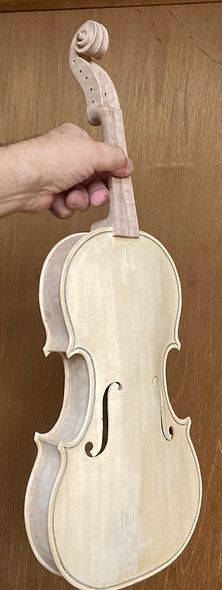
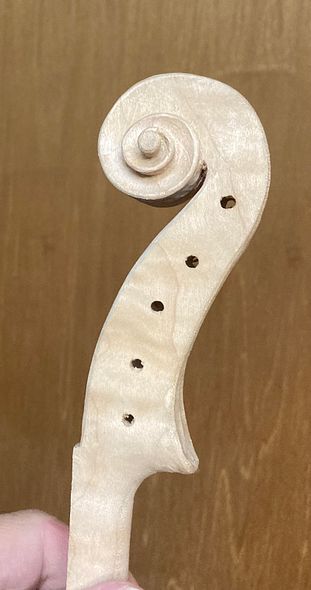
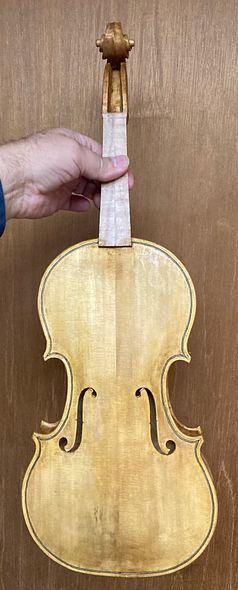
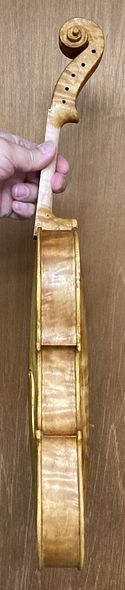
Front view, Ready for varnishBack view, Ready for VarnishScroll, ready for varnish
Varnish Process
In reality, the varnishing process is fairly involved.
First, I apply a mineral ground. Next, I apply a coat of sealer. Then, I begin varnishing. Furthermore, the varnish must be built up, coat by coat. To begin with, I apply two base coats of yellow. Afterward, I work through whatever colors I have chosen to achieve the final result. (Usually, it requires about eight coats of varnish.)
But, here are some pictures taken after the first two coats of yellow varnish:
Two coats yellow varnish, front viewSide view.: two coats yellow varnishTwo coats yellow varnish, back view.Scroll, with two coats yellow varnish
Next time, I will describe the finishing process in more detail. And, as I near completion, I will post again, showing the set-up procedure.
A customer ordered a new, custom-made Five String Fiddle, and it is on the way! He chose heavily spalted, heavily-flamed, Oregon Big Leaf Maple for the back plate, the sides, the neck and scroll. My wife’s parents gave me the wood from this maple tree.
Ann used to play under and climb on this tree as a child, and we hated to see the tree cut down. Her parents still live there, less than four miles from our house. However, they had to remove the tree because it was dying. I have salvaged wood for a few instruments from that tree and they all look and sound wonderful!
Given a choice between Spruce and Douglas Fir, the customer chose the Douglas Fir, for his front plate. This tree also grew just a few miles from my home. (A famous violin and viola maker, Otto Erdescz (1917-2000) used to make violins and violas with Douglas Fir soundboards. Professional musicians still play some of them, today. But very few luthiers use Douglas Fir. I didn’t either, until a few years ago!)
Not my usuaI Choice in times past
For many years, I refused to try such a thing. But a friend gave me a load of very straight grained Douglas Fir firewood, a few years ago. I was splitting some of the firewood, and the split-off piece hit the ground: it rang like a bell! I had never seen such straight-grained, clear Douglas Fir, with zero runout!
Unfortunately, that particular piece was too short for a fiddle. I had to search through the pile for a piece that was long enouigh for a violin plate.
Since then, I have made several such instruments, and they all sound great. (I find that the Spruce is definitely easier to work with, though, and, for classical, orchestral instruments, I still use only European maple and spruce.)
Customer Preferences:
This man showed up at my shop and he played all the five string instruments I had. (He really had not played 5-string instruments before. He laughed for joy, hearing the rich deep C-string on each one. After a short while, he declared, “OK, I’m addicted!”)
He played the full range of all of them. He finally settled on my earliest unsold 5-string (#3 on the “Chronology” page) as being exactly what he wanted.
But not to buy that instrument. No! He wanted a commissioned instrument “just like that one!” (He wanted one especially built for him! Sure! We can do that!)
And, as it turned out, that was a good thing. A week later, thenext customer who came to try out all my instruments also loved that fiddle, but she bought it that day, and drove away! So, it is gone, now!
Which Mold?
I knew which of my molds was the source of that fiddle: I have made at least four off of that specific mold. All of them have sold, now, so, for the moment, there are none available. (This instrument will “solve that problem,” for a moment, but it will disappear immediately after completion.)
The commissioning customer also wanted localwood. so that he could say, “My violin came from a tree on that hill!” So…choosing the wood was the first step.
Choosing the Wood
The model I would use had already been chosen, so that was not an issue. I also knew what the wood source would be: I still have a little of the maple my wife’s parents had given me. And, with the customer’s approval, I chose a clear piece of Douglas Fir, salvaged from the firtewood I mentioned earlier. He loved both pieces.
“Fiddle in the rough!”
Here is a closer picture of the maple:
Heavily Spalted and Heavily Flamed Maple
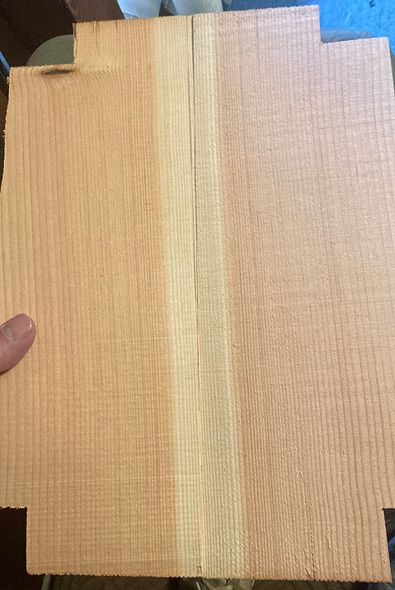
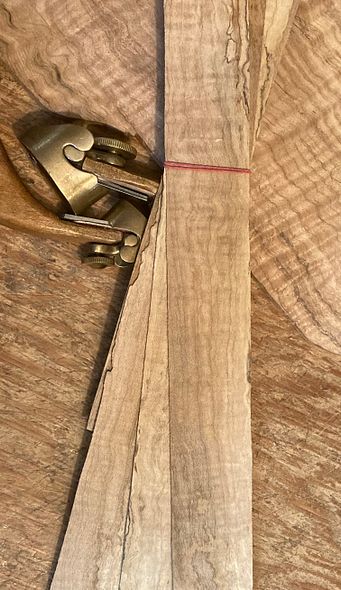
I book-matched the spruce, by cutting a single billet in two equal halves and gluing them together to make the front plate.
Douglas Fir, cut and ready to joint and glue the Center seam
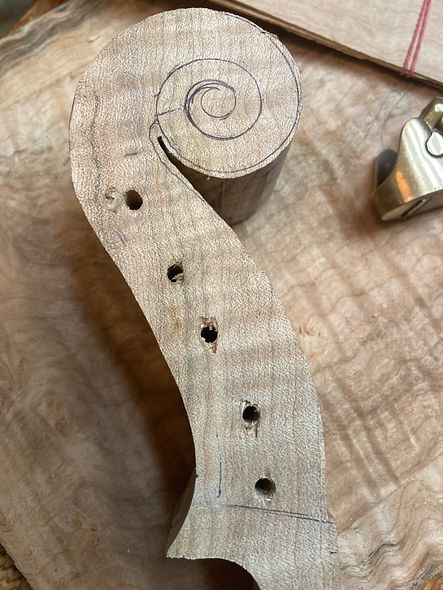
I laid out the neck outline on the billet I had chosen for the neck, and I drilled the pilot holes for the tuning pegs. Then I cut out the side profile on a bandsaw.
Scroll profile cut out, and pilot holes drilled.
Mold Preparation
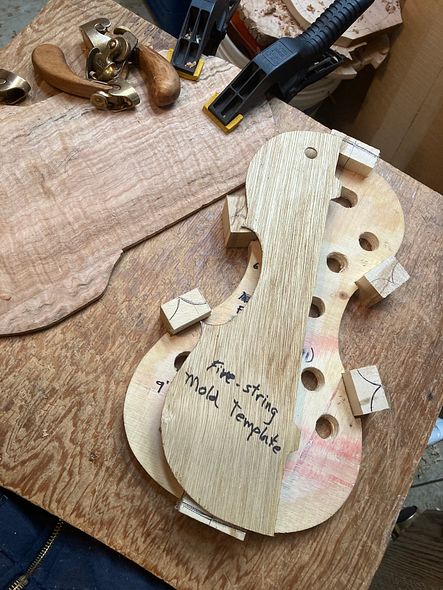
Meanwhile, I got the blocks glued into the mold. Then I traced their shapes from my template, so the whole job could begin. I also planed away the rough surfaces of the maple to ascertain that it actually would serve well as the back plate of a new five-string fiddle. And, I found that it was just a little too narrow in the lower bouts.
So, I “transplanted” a small piece of wood from the area above the upper bout on each side and grafted them in on the lower bouts. (This practice is not at all uncommon: It will be every bit as strong as the center seams on two-piece backs. And, once the double purfling is installed, the joints will be nearly invisible, under the varnish.)
Back plate in progress, blocks in the mold, and the shapes traced from the template.
Preparing the Ribs
I had chosen wood for the ribs, as well, and I sawed them to a thickness of a little over 2 mm. I thinned them, using a wooden fixture I made, clamped to my oscillating spindle-sander. The fixture allows me to gradually reduce the thickness to 1 mm.
Here are the ribs:
Rib-stock, sawn and thinned: ready to be cut to size and bent.
Installing the Ribs
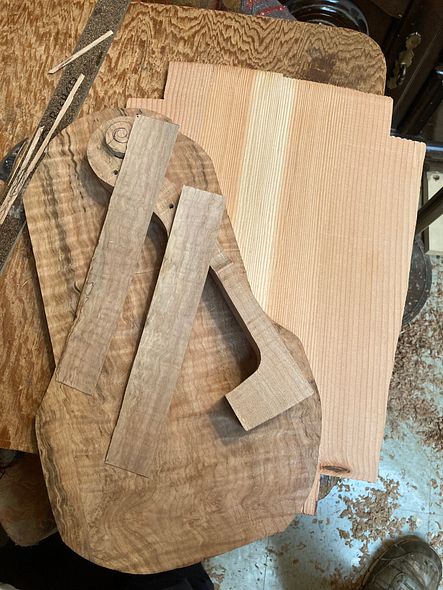
Next, I cut the ribs to the correct length and width. I carefully considered which grain from one side would “mirror” which grain on the otherside. I had already been tinkering on the neck, as you can see in this photo, but I will explain that process later. (It isn’t always possible to do everything in a precise order. While I am waiting for glue to dry on one section, for example, I may jump ahead on another piece.) You can see the bookmatched front plate, too.
Bookmatched top plate, neck and back billets in progress, and rib samples, cut to size.
I cut all six ribs, and marked them as to inside, outside, upper and lower ends, etc, as well as which side of the fiddle they would call their home…treble or bass side.
Then I bent the ribs using a hot “bending iron” (actually made of aluminum, but, in the old days, they wereiron.)
(I forgot to take photos of the shaped blocks: Sorry.)
I had cut and shaped the corner and end blocks, already, so I applied a generous coat of hot hide glue to one block at a time. then, I clamped the rib into the block surfaces, making certain that everything fit correctly before tightening the clamps.
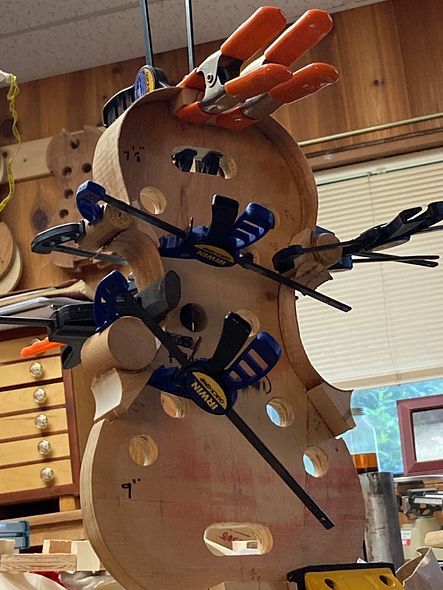
First, I installed the center bout ribs, and when the glue had dried, I used the spindle-sander to trim the ends of those ribs to match the curvature of the outer faces of the corner block, so I could install the upper and lower ribs. Here are the upper ribs, glued and clamped:
Center and Upper bout ribs installed, using hot hide glue and clamps.
The lower end of the bass-side center bout rib was not fully tight, so I reglued it and reclamped it. (left lower side of photo.)
Then, when that glue was dry, I installed the lower ribs, by turning the mold upside down in the vise, so I could see clearly. It also meant that both hands were free to adjust the rib position, and apply clamps.
All the ribs are installed, but still need to be trimmed, before installing the linings.
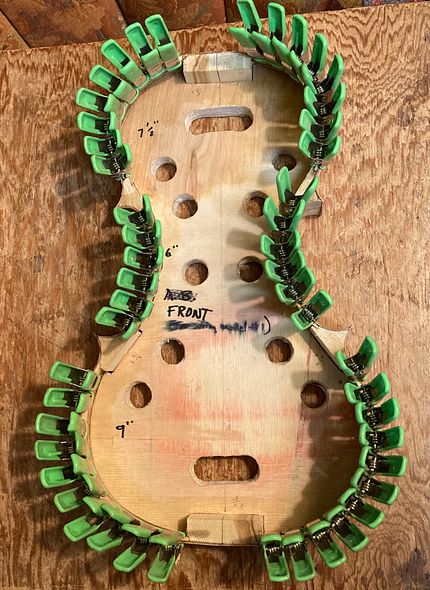
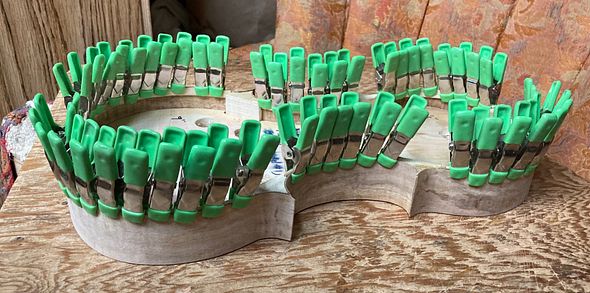
Linings bent and installed
I also did not take photos of bending and installing the linings. (Sorry.) Here are two photos of the result, still in clamps.
Front view of linings clamped in place.Side view of lining clamps and rib garland.
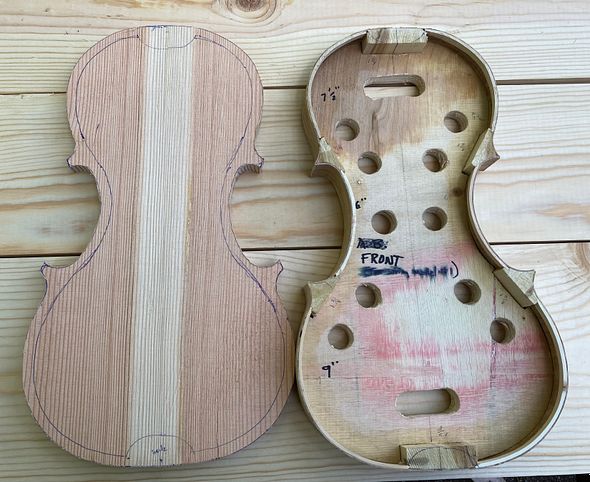
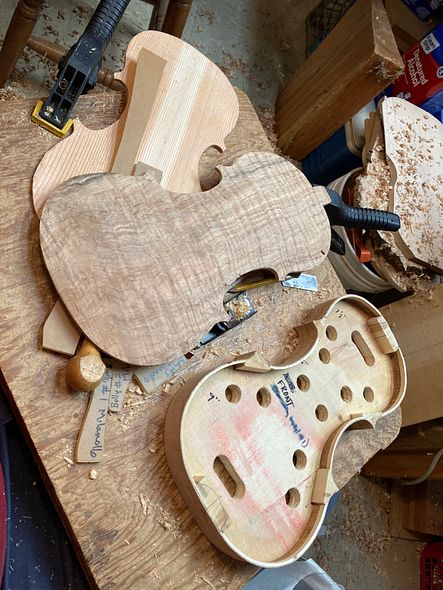
Tracing the plates
Once the linings were installed and the ribs thus strengthened, I could trace the shape of the plates, and begin cutting things out.
Garland and Front plate billet cut to shape.And, that is the progress, so far!
Thanks for looking! I will try to keep everyone posted as to progress.
A few weeks ago, I bookmatched my plates. Then I cut ribs and necks, so as to set up “kits” for six new five-string fiddles. Afterward, I started building two of them, as parallel builds.
Since I last posted, two weeks ago, I did not exactlystay on schedule, but I didn’t get too far behind.
I had already completed the first scroll and neck, and had begun working on the second neck, when, I “kinda took an unplanned detour.”
Beginning to carve the pegbox for fiddle #1.
Heavy wood removal from pegbox interior.
Beginning the saw-carving of the scroll
Saw-carving the scroll.
Scroll nearing completion
Scroll #1 essentially complete.
Then I Had a Small Mishap:
I had worked for 12 hours, Monday the 16th, and afterward, I felt pretty tired. Consequently, I had tired hands: Probably I had a tired brain, too, I suppose… anyway:
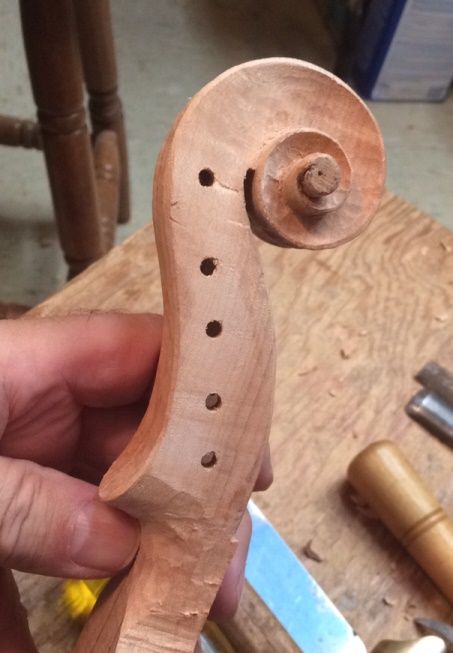
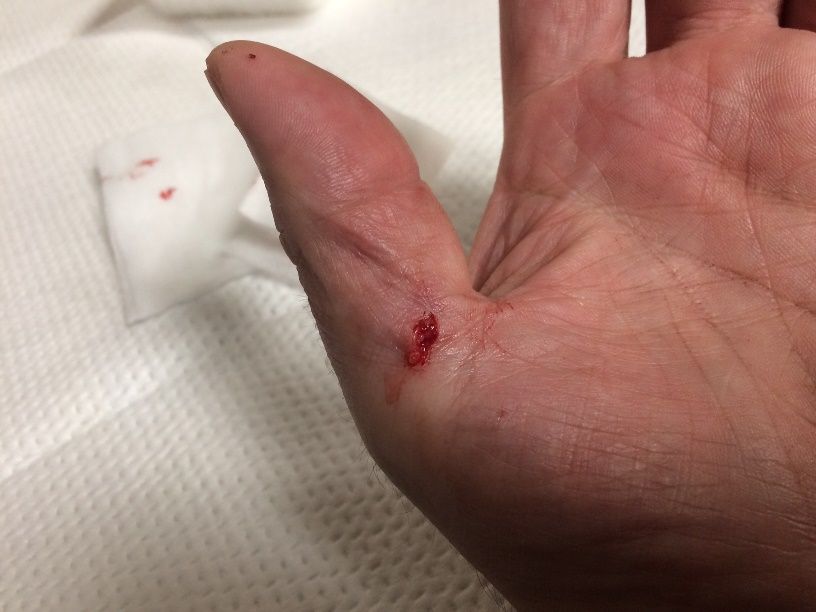
I had begun carving the second scroll. I completed the saw-carving part, and I was removing waste wood, with a small gouge, when, I slipped. annnnd, just happened to have my left hand in the path of the misdirected gouge. (sigh…)
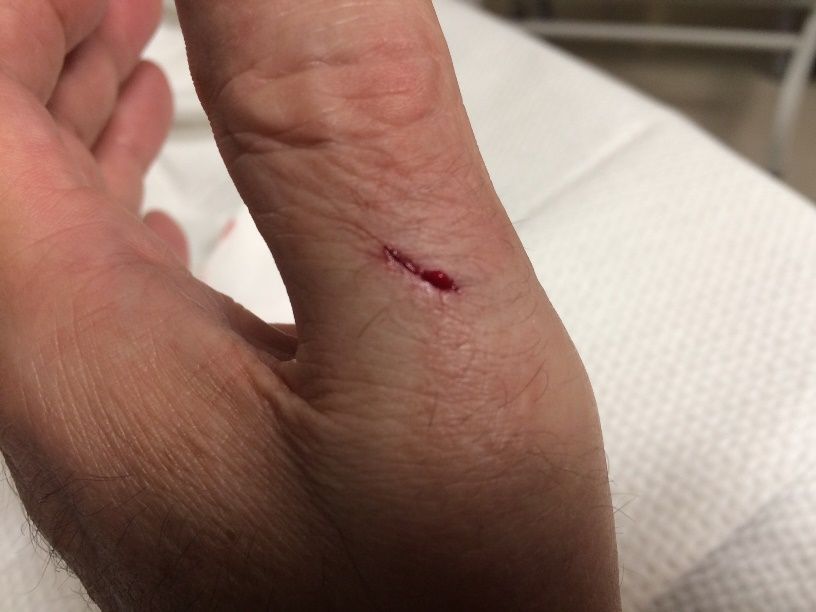
Entry wound!
Exit wound!
Both sides at once!
Urgent Care? Emergency Room?
First we tried going to an Urgent Care clinic. We arrived there, and then discovered that (a) they only work by appointment, and (b) they don’t take medicare insurance, anyway. Accordingly, I asked what my options were, and they said: “Everything else is closed! Go to the ER!” (Sigh… very expensive option!)
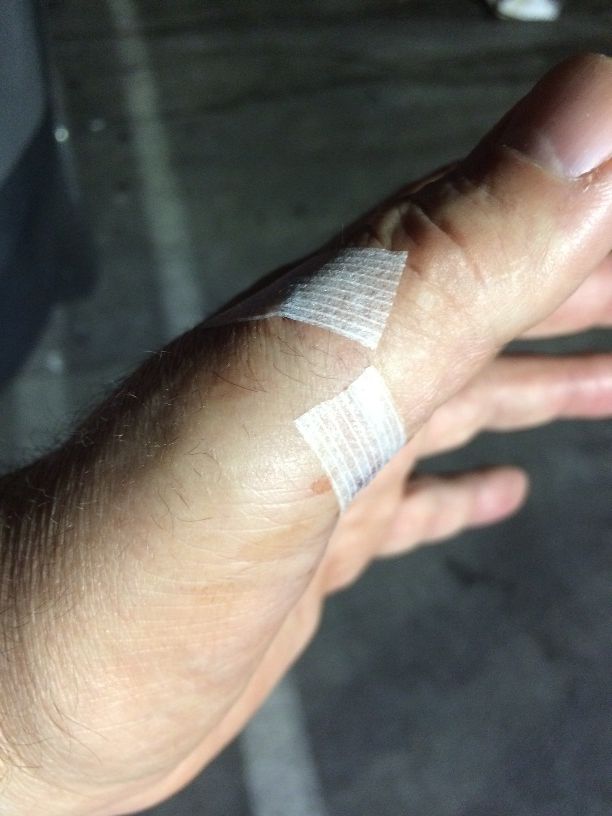
So, about 30 minute later we arrived at the Emergency Room at Saint Vincent Hospital. They were busy as usual, so we waited for about four hours. But after that, the ER people washed it out with sterile water, X-Rayed it to eliminate the possibility of torn bone or tendons, and applied two little “Steri-Strips!”
Steri-Strips from the ER.
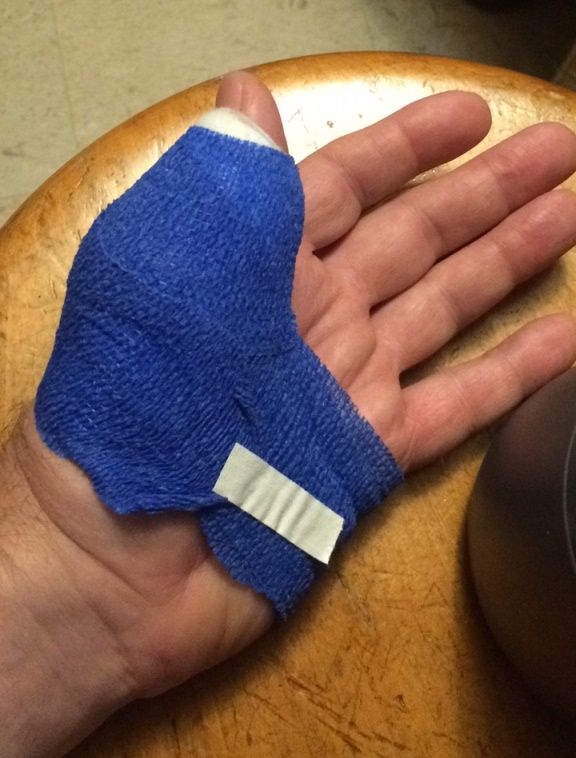
I guess that was normal, but it felt pretty “exposed,” and was very prone to bumps (which were pretty uncomfortable when they happened.) So, after we got home, Ann bandaged me up with a heavily padded dressing so that I could sleep without bumping it. That was a real help, and, as a result, I slept well.
However, I kind of puttered around, the next day…partly too tired, I suppose, as we had arrived home somewhat after 3AM, and we got to bed after 4AM. Partly, I was just not feeling real good. Anyway, I had other things that needed doing, so I didn’t work on fiddles for that day.
Bandage for protection.
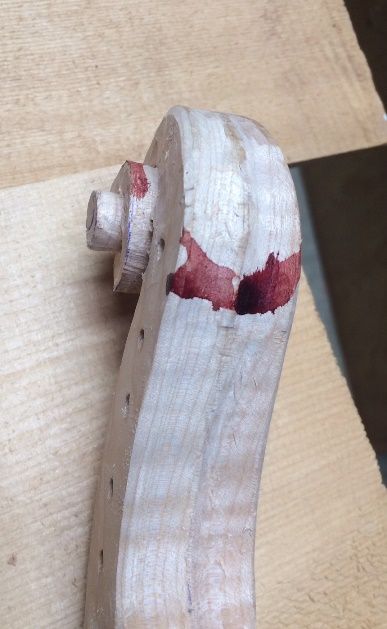
Red Violin beginning? This was the second scroll, in progress when I slipped.
Back to Work!
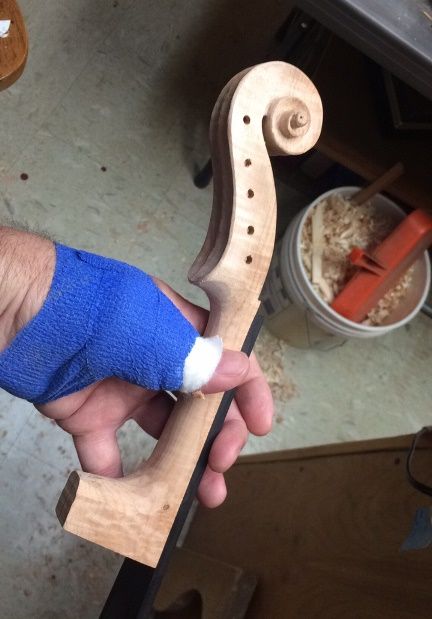
I got back to work on Wednesday. It turned out that I really needed two hands for most things, so it slowed me down rather badly, having a bulky bandage on the left paw. However, I was finally able to get the fingerboard installed on the first scroll/neck so that I could shape them as a unit.
Fingerboard installed the second day after the injury.
That was kind of encouraging, seeing some progress again.
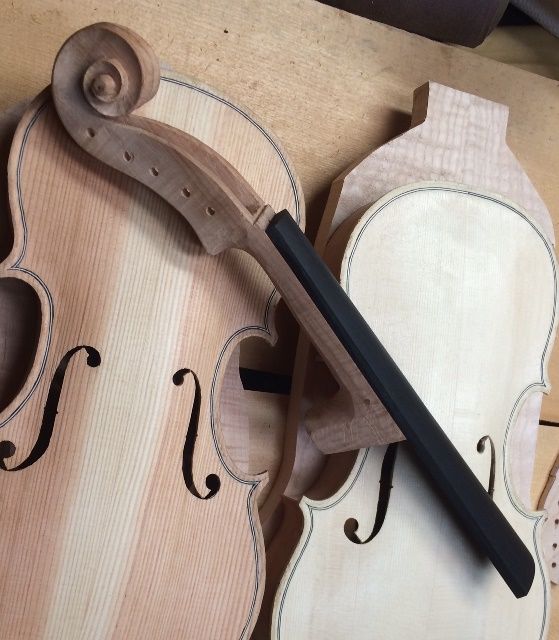
Neck #1 with the two completed front plates and garland assemblies.
I had also traced and cut out the back plate for fiddle #1. (Big Leaf Maple: Pretty stuff!)
Then I set the neck on fiddle #1:
Beginning the neck mortise. Notice the hard, heavy winter reeds in the Douglas Fir front plate.
The cut-out in the front plate for the neck mortise.
Completed neck mortise
Completed Neck-set. (Back of the neck heel will still have to be sawn off.)
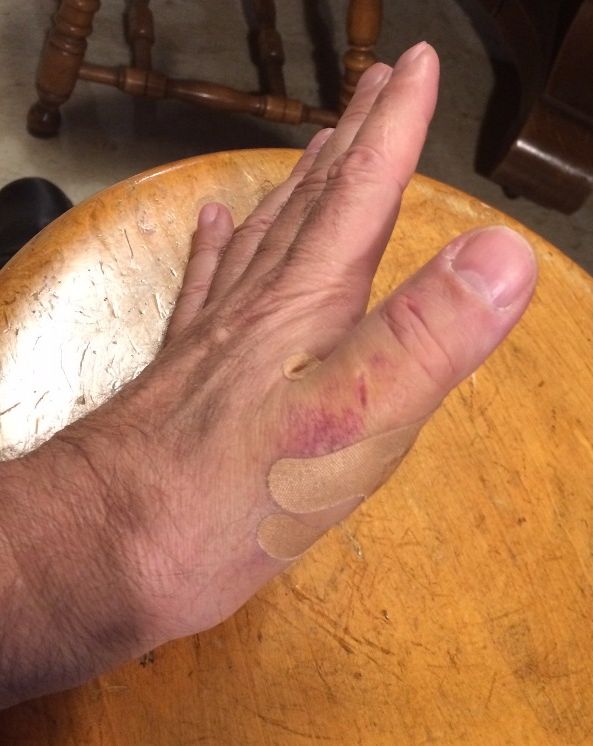
Healing up!
After that, we had appointments with various people, so I didn’t get a lot done on Thursday or Friday. By the time the weekend had rolled around, I had the biggest bandages off, and was sporting a plain finger bandage, but I had to be pretty careful. Bumps were still pretty unpleasant.
Thumb exit wound, healing well.
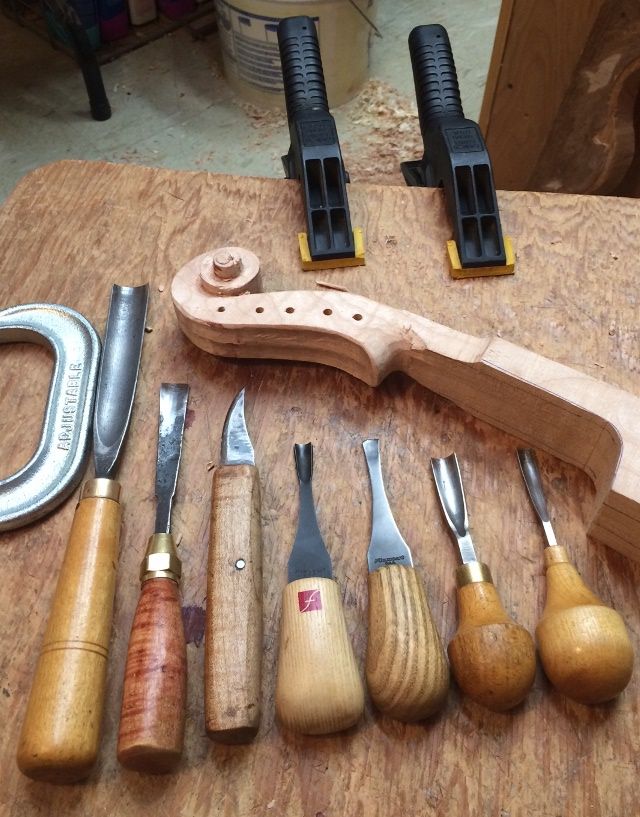
So, after having removed the bulky bandage, I went back to work on fiddle #2, carving that “Red Violin” scroll into just a plain, “five-string fiddle scroll.” It looked as though the majority of the “gore” would simply be carved away: so, no “Red Violin!” (By the way, that little gouge, third from the right, is the one that perforated my thumb.)
Beginning work on the second scroll, again.
Second scroll nearing completion.
I will post more again, soon. Sorry for the hiatus: it wasn’t intentional. 🙂
My last post showed the six “kits” I had built. The post included bookmatching the five-string fiddle plates, cutting the profiles of the Big Leaf Maple necks and scrolls, and cutting appropriate ribs to size. As a result, I ended up with six kits, including bass bar blanks all cut from the same billet of Englemann Spruce, and a big pile of linings ready to bend. ( I thought the linings were willow, but I now suspect may be poplar, instead.)
Five of these front plates ar Englemann Spruce, but one is Douglas Fir. I rarely find Douglas Fir that will work for tonewood, but a friend brought me a pickup-load of firewood, and I found some that sounds great. (As you can see, I am not a “snob” about where I get my wood. If I need special wood, I buy it, but I frequently use Oregon woods.)
(In case anyone reading this is not aware, I build all my instruments (except the fittings, as a rule) entirely from the raw materials. I make all my molds by hand, and all my templates by hand. I have even made many of my tools. So every instrument is genuinely “handmade in Oregon by Chet Bishop.”) 🙂
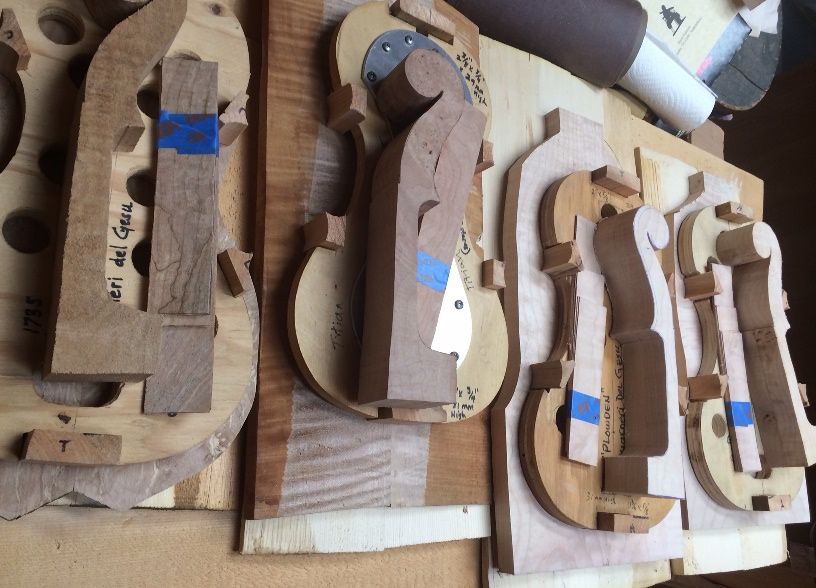
Four of the six assembled “kits.”
I set aside four of the six “kits,” just to get them out of the work area. Then I began work on the remaining two kits.
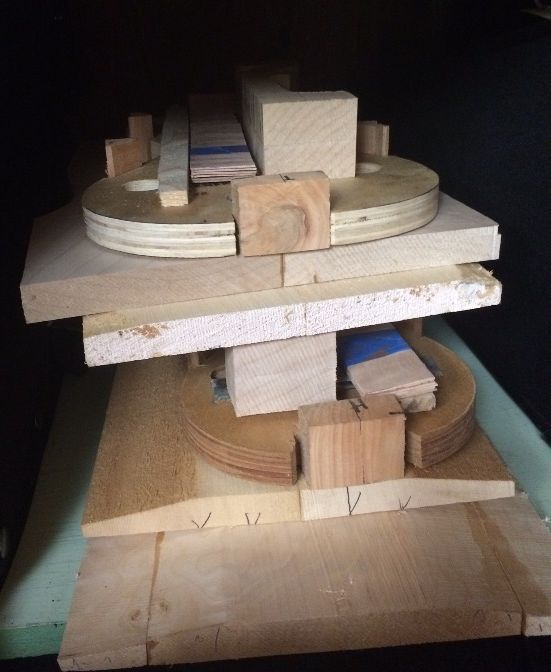
Two of the four kits in storage.
Beginning the Builds
The first step after shaping the blocks (last post) is to bend the ribs and linings. Then I can glue the ribs to the prepared blocks, using hot hide glue, and finally glue the linings to the ribs.
I rub a heavy coat of candle-wax (“paraffin” in the US) on the outer rims of my molds. This will prevent a “sneaky” drop of hide-glue from accidentally bonding the ribs to the molds instead of just to the blocks.
(A rib accidentally glued to the mold can be a disaster if I don’t realize my mistake in time. The glue is definitely stronger than the rib. It will destroy the rib, if I don’t catch it early enough to use hot water or steam to release it. But the wax coating pretty much eliminates that problem.)
I used a bending iron and a thin aluminum bending strap, to hand-shape the ribs, and then put them aside in paired sets, with the respective molds for which they are intended.
Ribs and linings bent and ready to install.
Installing the Ribs
I installed the center-bout ribs first: they can be difficult, so I’m glad they are first. But the realreason they are first, is that the upper and lower ribs will overlap the ends of the center ribs: they do not have a mitered corner, but a lapped corner, which if done correctly, is essentially invisible.
A pair of center-bout ribs installed.
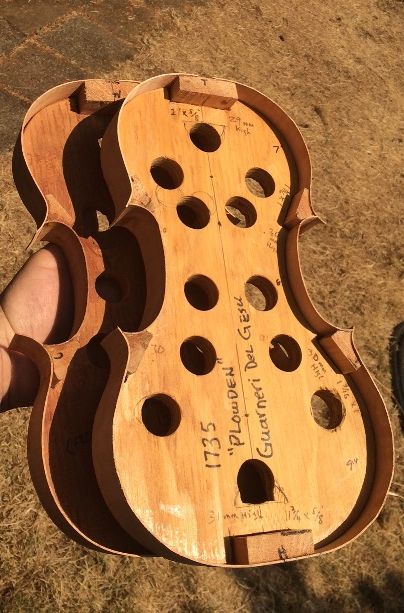
I frequently use these “French-style” molds, (flush on the back) which allow me to install the front linings and still easily remove the mold. (Italian-style molds are centered on the ribs…I use that kind, too.)
I used cylindrical clamping cauls of appropriate sizes (dowels, broom-handles…whatever) and f-clamps to quickly secure the rib ends before the hot hide glue gels. If I make a mistake, I can steam the joint loose with a teapot, and do it over, correctly.
After the center-bout ribs dry, I shape the ends of the ribs to match the curvature of the blocks. Then the upper and lower ribs can be glued to the perfectly-shaped block and rib. Finally, I begin installing the upper and lower ribs.
First upper rib installed: notice the shaped endes of the center-bout ribs.
A pair of matching upper ribs installed.
All the upper and lower ribs installed. (Looking from the back side of the mold.)
Two completed rib-sets, ready to be trimmed before adding linings. (Lots of smoke blowing in from the fires this season, making the light kind of red.)
Necks!
While waiting for glue to dry on the ribs, I laid out the necks so that I will be ready to begin carving them.
Necks laid out for carving.
Linings!
After trimming all the corners, so that they look as though the ribs come together as one, I begin installing the linings. I cut a small mortise on each side of each block, flush with the rib, so that the lining will be glued tightly to the rib, and into the block mortise. I secure them all using hot hide glue.
Next, I cut the linings to length, shaping the ends to closely fit the prepared mortises. Then, I coat about 7mm of the edge of the rib, and the entire mating surface of the lining with hot hide-glue and insert the lining into the mortises and push it to the correct level, corresponding to the ribs. Finally, moving rapidly, I secure it with small spring-clamps.
One set of linings fully installed: one to go!
All the front linings installed in both molds.
I made a good deal of progress yesterday, and had hoped to make more progress today, but there were some household repairs that needed to be addressed first; so I didn’t begin working on violins until mid-afternoon.
Tomorrow I will level the fronts of the garlands and trace the front plates… I hope. 🙂
I shipped the last three fiddles I had made, so the “cupboard” is looking pretty bare!
Unfortunately, I spent a lot of time messing around, this year, trying to build a travel case for the Travel Bass I built last summer. (I really need to complete it. The bass isn’t going anywhere without the case.) Also, the last two fiddles I had made were literally hanging around the house, and so, I wasn’t feeling pressed to build more of them right away. I found it to be a busy year in a lot of other ways, too.
Sudden Changes
Two customers came, and rather abruptly, those two most recent fiddles suddenly found homes. I only have two five-string violin-size fiddles left, both of which I had made several years ago, and they both play very well. However, the ones I am building currently are my best work, and that is what I want to put in players’ hands.
The Plan
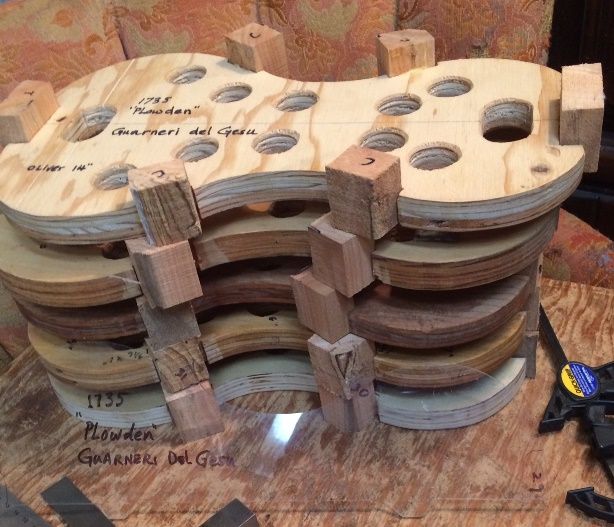
Therefore, I decided I had better “hit the Lutherie trail” in a big way. First, I selected six of my molds (five in the photo, below: the sixth shows up later.) Then, I glued the blocks in place, to begin a group of six new fiddles. Next, I plan to select and prepare materials, and match them together into “kits.” In this way, I know which top plate goes with which back plate. neck, and ribs, etc.
Afterward, I plan to begin building them in pairs, but I will always have another pair ready to begin, if things slow down at all.
Five molds with blocks and a transparent template.
The Process:
Look closely, and you soon will see the transparent plexiglass template in the photographs above and below. Because the template is clear, it is hard to see, but it gives the precise shape I want for the outline of my blocks. I use a ballpoint pen to trace the shape onto the blocks.
I use the template to trace the exact shape I want for my blocks.
Next, I use a saw to roughly cut out the shapes. Afterward, I use an oscillating spindle sander to shape them more precisely. Using an old candle, I rub parrafin wax on all the exposed edges of the molds, so that an accidental drop of glue can’t bond them to a rib. Initially, I glue the ribs only to the blocks and linings. Ultimately, I will remove the mold, before closing the body of the instrument.
Here are the blocks, shaped and ready for ribs.
Wood Choices
Then, I cut the ribs from wood that match the back and neck, as closely as possible. Usually, I try to get them all out of the same billet of wood. Over the years, I have harvested some of my wood, myself. However, A friend (the late Terry Howell) gave me a great deal of curly maple, in log form. Immediately, I had someone mill it up for me on a large portable bandsaw mill. In other cases, I have simply bought wood from tonewood dealers.
I have used a variety of woods for the back plates. These (below) are all Big Leaf Maple. But, I have used a wide variety of other woods. When I build classical orchestral instruments, I use only European Maple and Spruce.
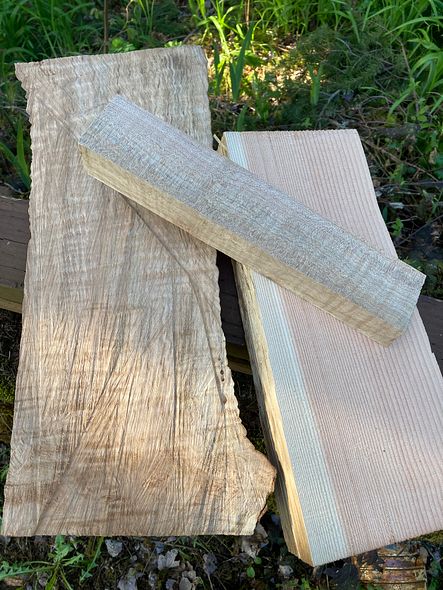
I bought the wood (in the pictures below) from Bruce Harvie, of Orcas Island Tonewood Company. That piece of Big leaf maple on the right measures 2″ thick, about 6″ wide, and 16″ long, or more. The large billet allowed me to cut the ribs, neck and two-piece back all from the same billet. I cut up the Englemann Spruce billet on the left. to provide two tops and nine bass-bars.
Englemann Spruce and Big Leaf Maple.
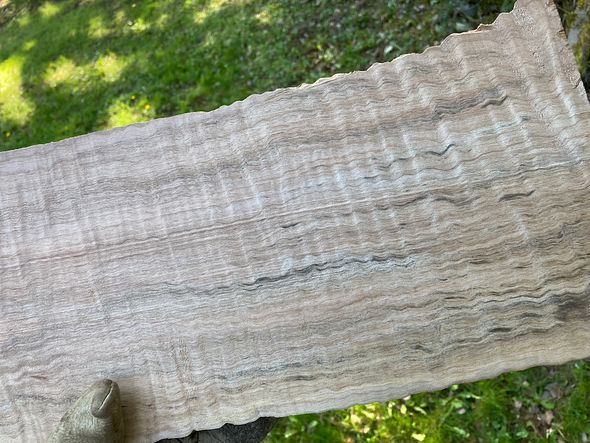
Same piece of Maple…closer view.
Processing the materials:
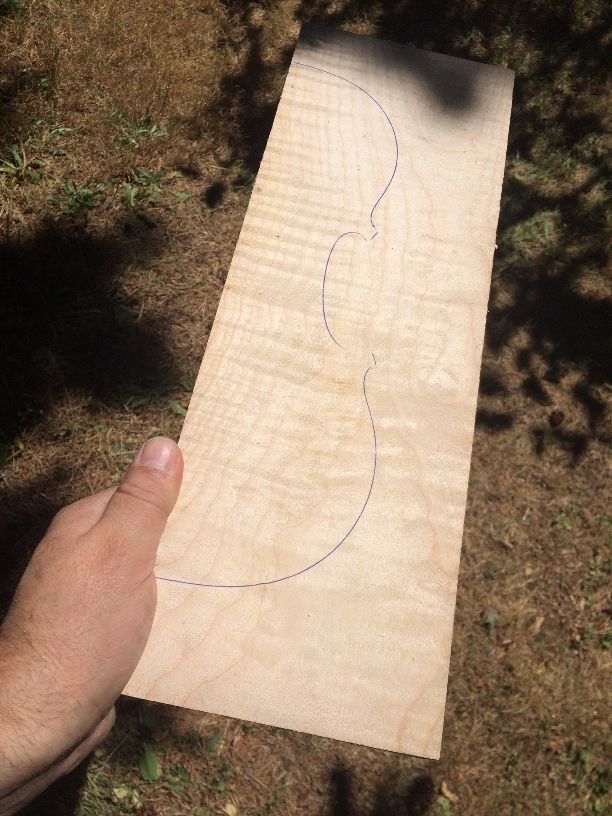
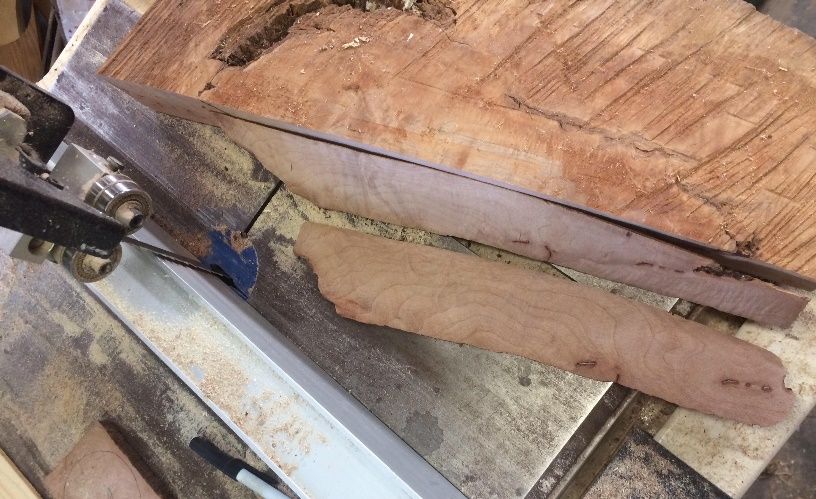
To begin with, I used a bandsaw to slice off the rib material. Then, I laid out the actual shape I needed for the back and neck. (I did not make the traced “shape” visible in the above photo. That is just the way tonewood dealers “spark the imagination” of their customers.)
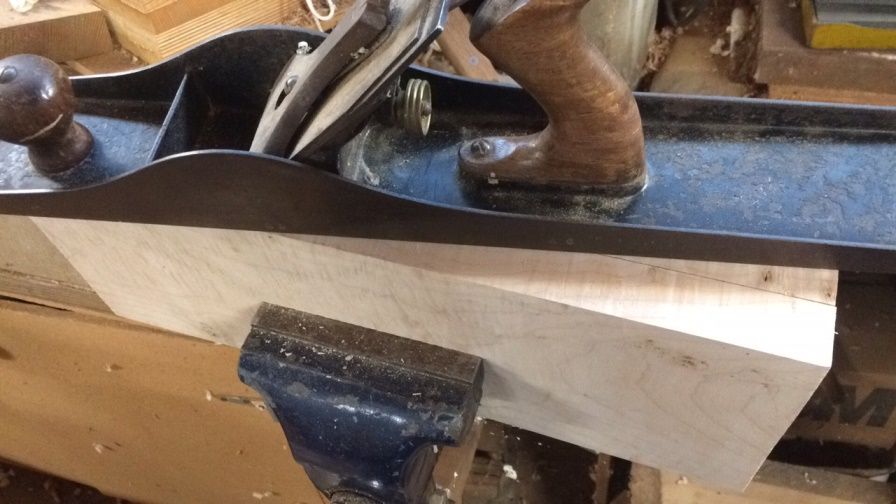
I sliced the back plate shape in half lengthwise, originally. Next I planed the two edges perfectly smooth and flat. Finally, I glued the halves together, to form the back plate.
Hand-planing the center joint.
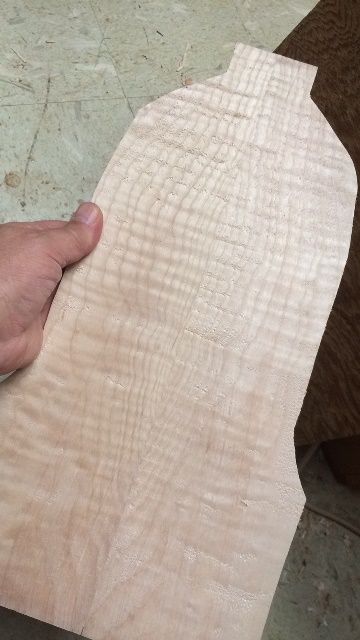
Same billet, made into a back plate blank. The rest became ribs and neck.
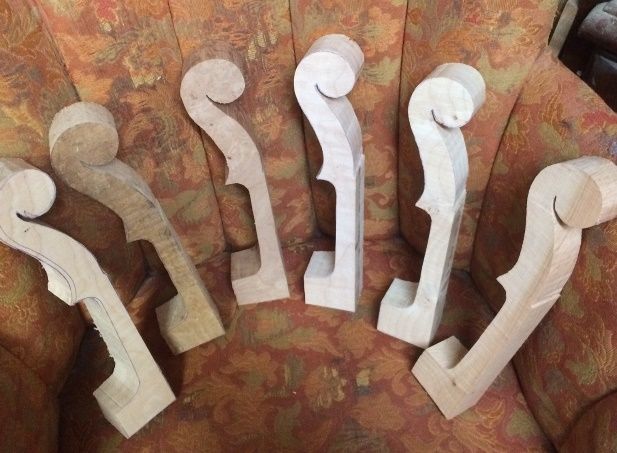
While the glue was drying on the plates, I traced out all the neck billets. I used a bandsaw to cut them out, to produce “neck blanks.”
Looks like a “bouquet of fiddle necks.” They will be matched with their respective backs and ribs.
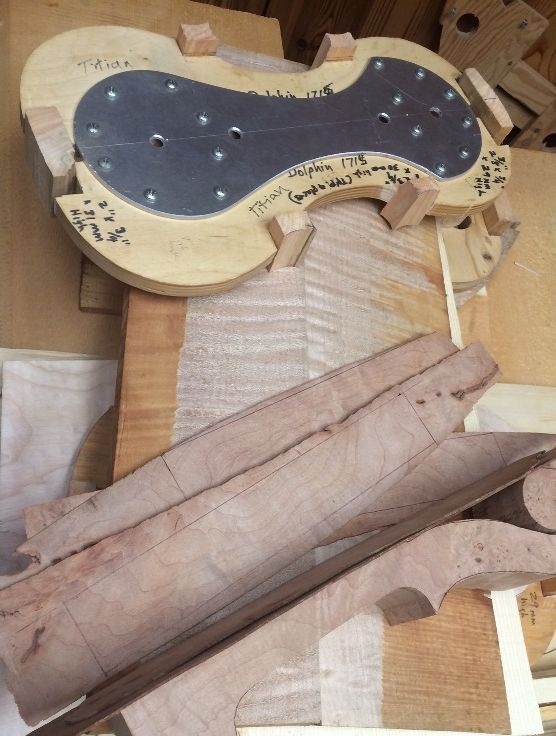
In addition to the preparation of the heavier components, I used a bandsaw to slice rib material from appropriate wood to match the wood of the backs. For example, a darker maple back required darker maple ribs. I then sanded them to 1 mm final thickness, using the oscillating spindle sander.
I was glad I had rib material that matched the color of the old wood for this fiddle. That back (below) was harvested in September, 1983.
Matching ribs and neck to back wood.
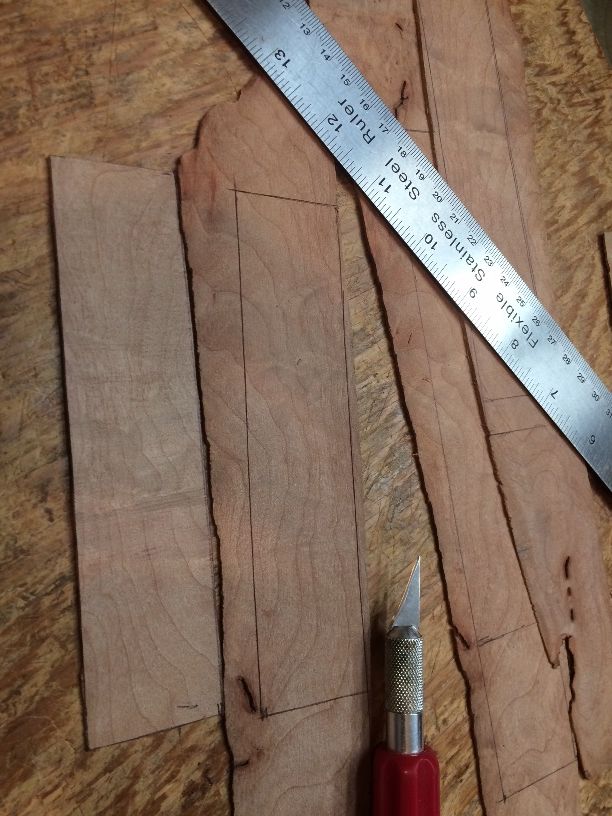
After thinning the ribs, I used a knife to cut the ribs to size.
Each set of ribs requires three pairs, in lengths for upper, center and lower bouts.
Douglas Fir
Usually, I make the top plates of my instruments from some type of spruce. (Sitka, Englemann, European or other species all work well.) But, sometimes (rarely) I use other woods: this one is Douglas Fir.
Otto Erdesz used Douglas fir for the front plates on many instruments. I have seen and played one of the violas he made of Douglas Fir. When I found some Douglas Fir with great tone qualities and very straight grain, I decided to try it, emulating his success. Thus far, I have only used Douglas Fir once, but it turned out to be an excellent fiddle, so, I am doing it again.
A Douglas Fir top plate with a Big Leaf Maple back, neck and ribs.
And, finally, I see the “kits” beginning to emerge!
These Kits will help me keep focused and encouraged about building the six new fiddles.
I will try to provide updates and to post progress reports.
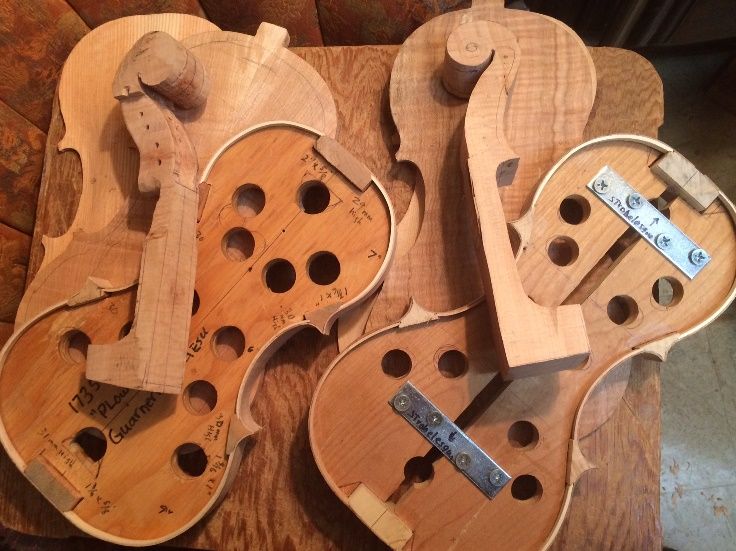
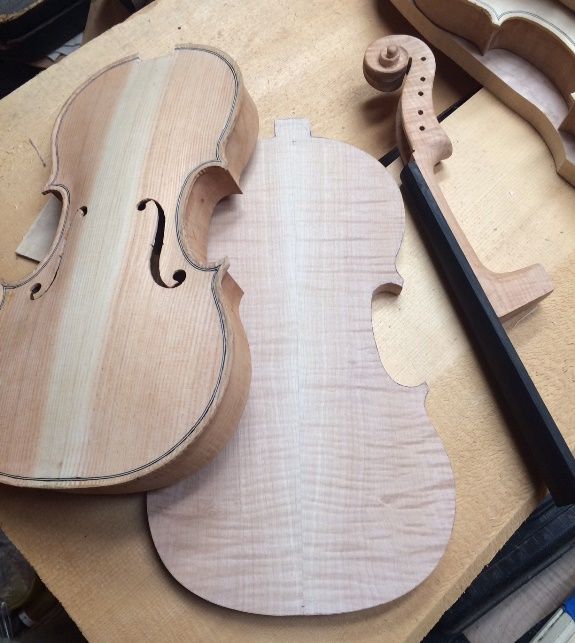
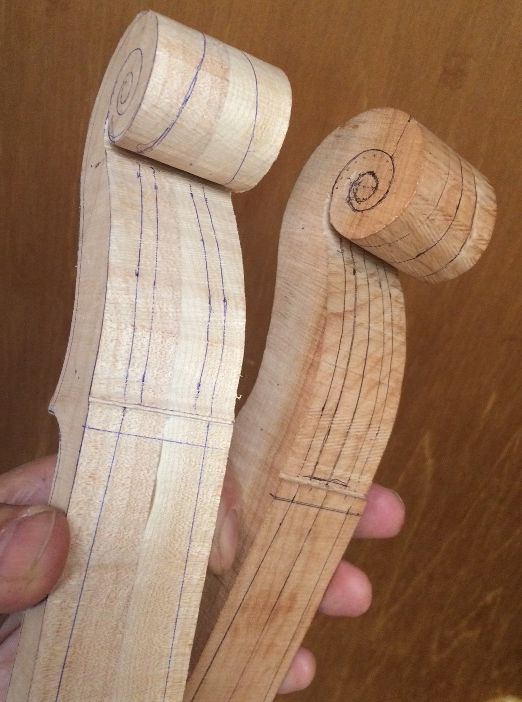
The last two commissions were a five-string on the original Oliver Pattern and a five-string on the slightly-wider Guarneri pattern. Both sounded great, and both customers are very happy. So, that left me wondering which one to do next. The obvious answer: Both!
Five String fiddles Guarneri and Oliver, side by side.
I’m trying a new neck and scroll design on the Guarneri model. I hope it works well, because I really like the graceful look.
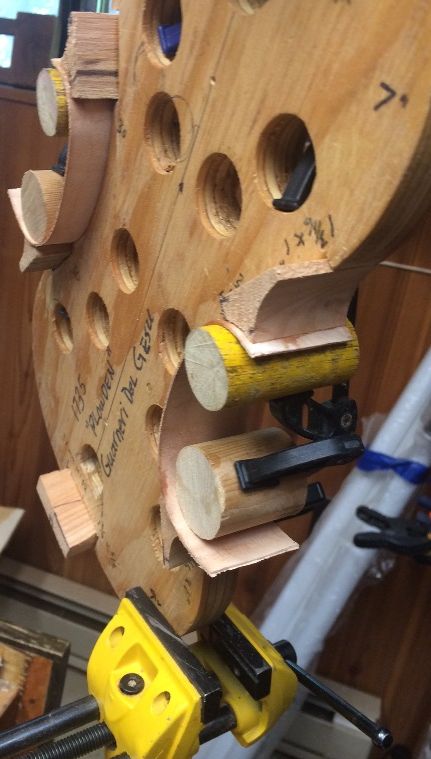
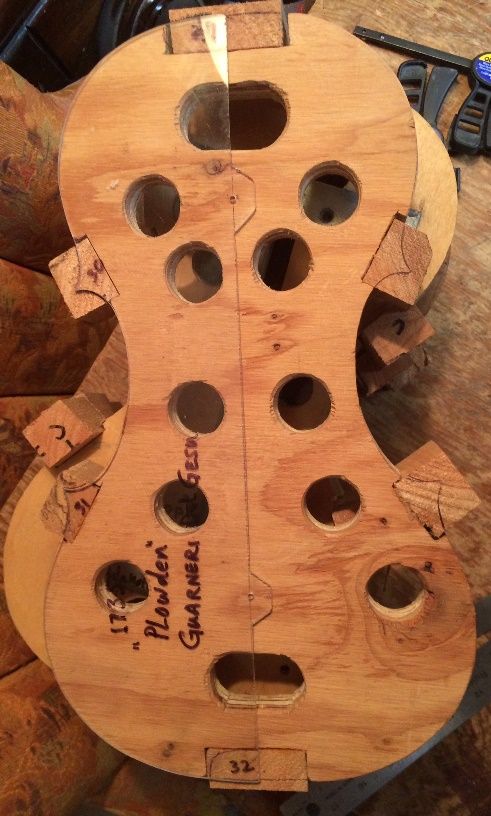
The instrument on the left (modeled after the 1735 “Plowden” Guarneri, with modifications to acommodate five strings) is left-over Oregon Big Leaf maple from building a five-string double bass, during the summer of last year (same as the Andy Pastor commission fiddle.)
Heavily Flamed Maple for the back plate.
The scroll (also Oregon Big Leaf Maple) is from a tree on the property where my wife grew up, and so are the ribs. The back is from a tree on the next ridge of hills west: about ten miles by road, probably three miles in direct line-of-flight. (Same one from which the recent double bass was taken, as well as several other instruments I have made. The late Terry Howell, of Howell Tree Farm, gave me the entire log, so I have a good supply.)
Heavily flamed maple neck in progress.
Experiment:
I have also decided to try an experiment: This will be the first time I have attempted a 5-string bluegrass fiddle with a belly of Douglas Fir, as opposed to Spruce. Otto Erdesz was famous for using it successfully in many of his instruments, so, when a friend gave me some very straight, split Douglas Fir, I decided to make the attempt, on the Guarneri model. It is quite dense compared to spruce, but it rings like a bell, when I tap it with my finger, so, I think it will be good.
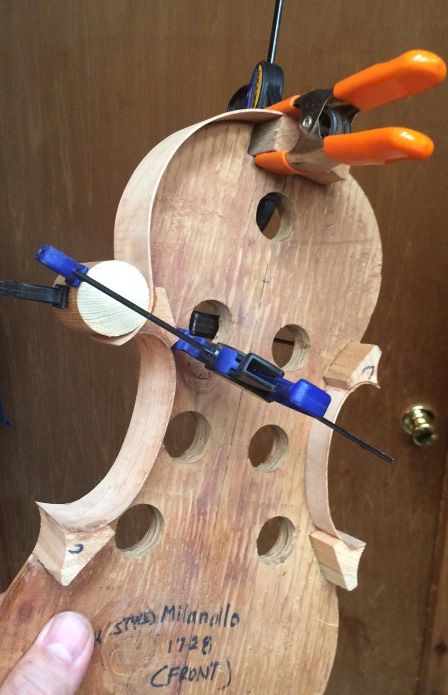
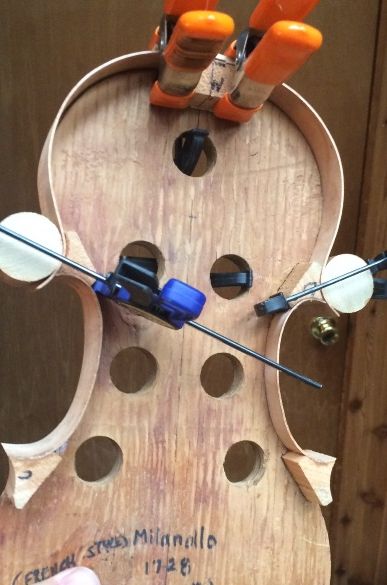
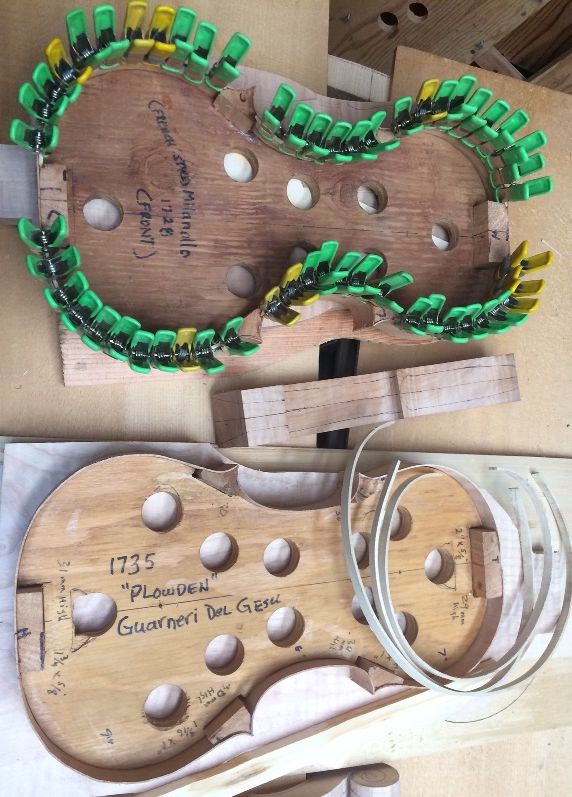
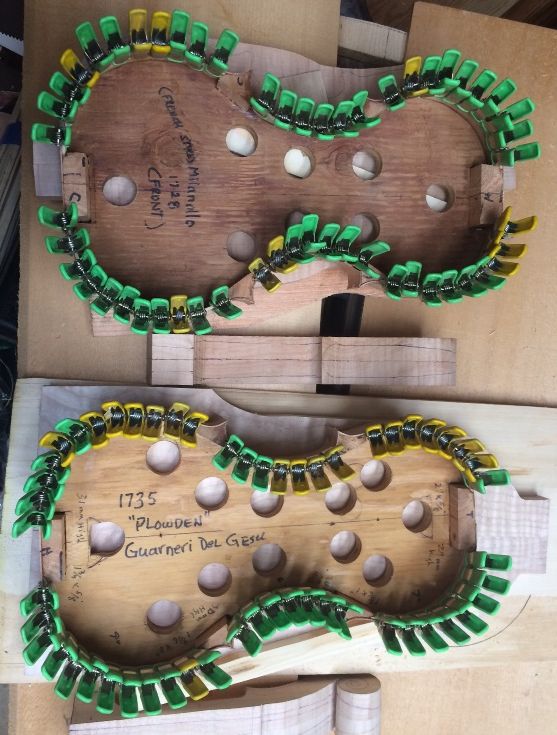
Bookmatched Douglas fir top plate with Guarneri-model garland.
Douglas Fir Top Plate arching complete.
The back, as well as the ribs and the scroll on the right-hand instrument above (the Oliver-model) are all from the tree on my Mother- and Father-in-law’s property. The belly, as usual, is Sitka Spruce.
Spruce belly, Oregon Big Leaf Maple back and scroll.
So, that is where things stand, today:
All the parts for the two new 5-string fiddles.
Slow Start due to Repairs and other Responsibilities
This has been a slow start: 2021 saw me needing to repair my ancient bandsaw, and, even more depressing, my drill press had succumbed to the misguided attention of a marauding mouse. (The little wretch had crawled up through the ventilation holes of the electric motor and chewed off all the insulation from about 4″ of wire!)
Saw:
The bandsaw required disassembly and drilling out a worn, threaded hole, and retapping for a helicoil. The machine will probably outlast me, now.
Drill Press:
The drill press motor had to be taken apart and a new wire soldered in place. (A friend did that one for me. I really lack confidence when it comes to electric motor repair.) Fortunately, the damage was limited to just that one wire. (Maybe the plastic insulation gave the mouse a belly-ache.)
Back in business:
At any rate, I now have both machines running again, and I was able to saw out the profiles for the remaining plates as well as drilling the pilot holes in each scroll.
I should be able to get more done, now. (Gotta prune the apple-trees, too… Spring is on the way!)
The neck and back are made of spalted, heavily flamed Big Leaf Maple, salvaged from the yard at the home where my wife grew up. Her mom and dad had the tree taken down a few years ago, and my son and I salvaged a little of it. The front plate is sitka spruce.
Front plate arching complete.
Back plate arching complete.
Wood for new fiddle.
It will be a few weeks…and there is another coming right behind it, but on the Guarneri mold.
When I last posted, I had flattened the back plate, using a plane, but the shape was still oversized.
Flattened back plate for 5-string double bass.
So I traced out the plate shape using a small section of plastic pipe as a guide, and a ball-point pen inside the pipe to make the mark. Then I cut out the plate using my very old Craftsman “Auto-Scroller” saber saw.
My beloved wife, Ann, bought me this saw when we had been married for less than two years, and it has served me well for the last 38 years, but this may be the final plate it will cut out. It overheated rather badly during the cut. 🙁
Back Plate traced and cut to shape.
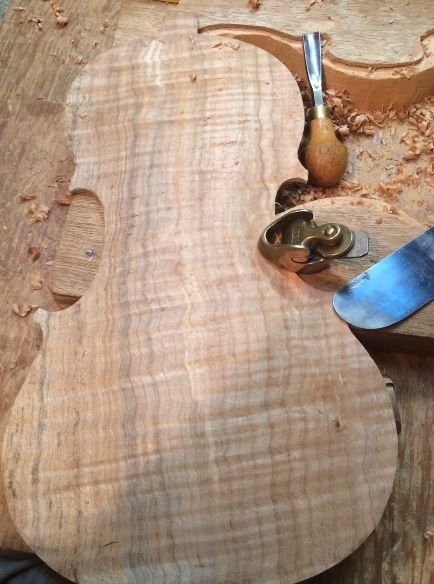
Once the plate was cut out, I used my curved-sole scrub-plane to remove waste wood, and rapidly bring the plate to near the proper thickness around the edge. As the thickness gets close to the target dimension, I switch over to the Ibex Finger-plane with the toothed blade and the wooden handle, to complete the thicknessing of the plate edge. The Oregon Big Leaf Maple is much more difficult to carve than the Spruce was, both because it is harder, and because the grain is highly flamed, meaning that it changes directions every centimeter or so, resisting all efforts to smoothly plane off the wood. The toothed plane helps, but when I start getting close to the right thickness, I will have to switch over to a scraper before the tear-outs from planing are too deep to be removed.
Arching of the back plate is underway.
You can see the longitudinal arching template in the above photo: it is just a thin piece of plywood with an 11′-3″ radius circle section cut out of it so as to leave the correct arching height in the center. I used that to help me establish the longitudinal arching. The Ibex plane is on the plate, and the scrub-plane is almost out of sight behind a small block-plane in the background. The small block-plane is helpful for smoothing the ridges left by the scrub-plane.
I am working to the rough sketch I made before beginning, with the plan for the back arching: (I did change the plan a little. I realized that I could extend the arching a little further “north,” as I have tapered the entire garland a little, so that the bend in the upper bouts will not be so severe, and the arching may be able to follow it a little way before flattening out to avoid the compound curve. It’s worth a try, anyway, and will not hurt anything.)
Rough sketch of arching-plan for the back plate.
Arching of the back-plate still in progress. Scrub-plane is more visible in this picture.
My hands and shoulders were getting too tired, so I went inside and used small finger-planes, files, and scrapers to refine the scroll. I am waiting on an order of carbon-fiber reinforcement materials to complete the neck, but other than that, I am pleased with how it is turning out.
Scroll is nearing completion.
I also completed the scraping of the Sitka Spruce belly, and it is pretty much ready to be glued to the garland.
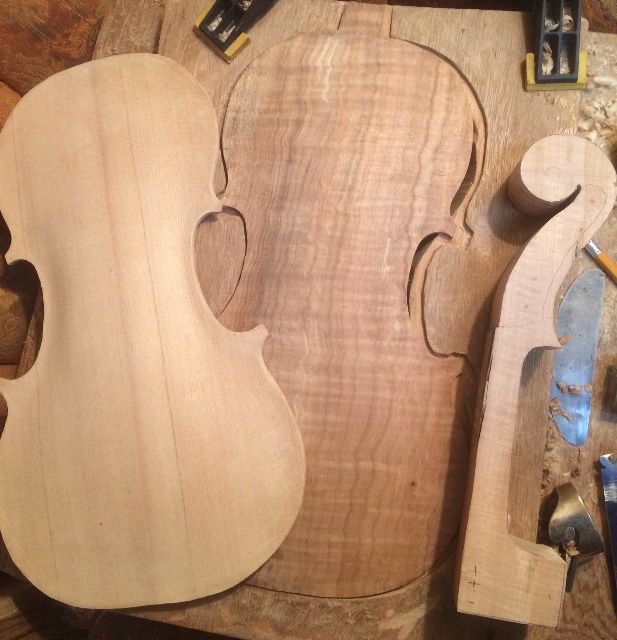
Front plate and Garland, ready to be joined.
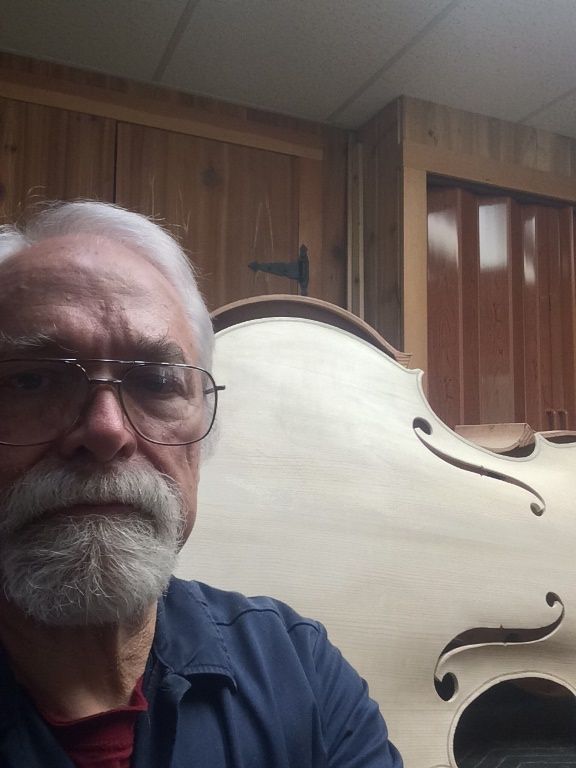
I pretty much wore myself out on this stretch: I’m looking like a tired old man, here. And I thought I was smiling…
The luthier with five-string double bass in progress.
As I said in the post regarding tools, I built the little curved-sole scrub-plane with the specific intent of using it to carve out the inside of the Sitka Spruce front plate for this Five-string Double Bass.
Rough-carving the interior, using the scrub plane.
Carving Dots
As the depth approached the correct value, I began switching over to the palm plane, there in the foreground. But as it turned out, I actually had a long way to go before I was anywhere near too thin.
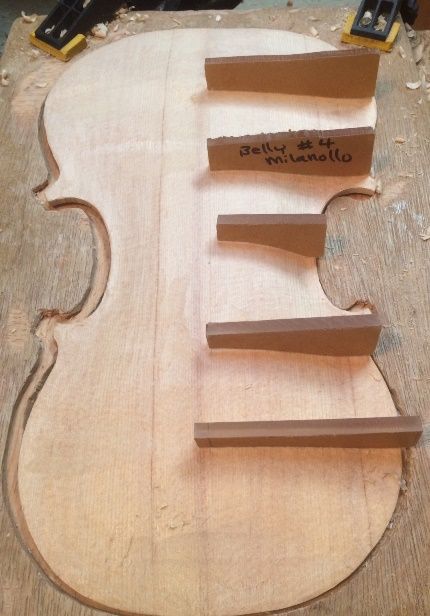
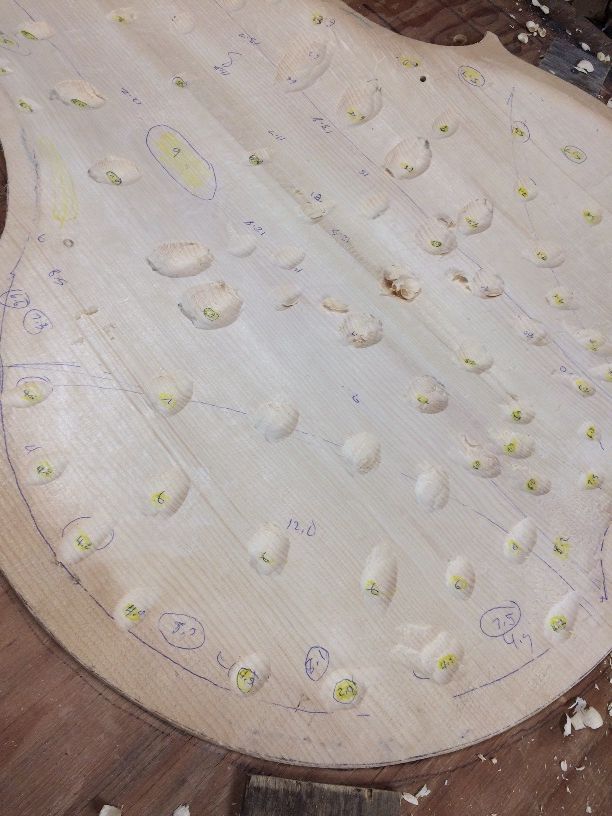
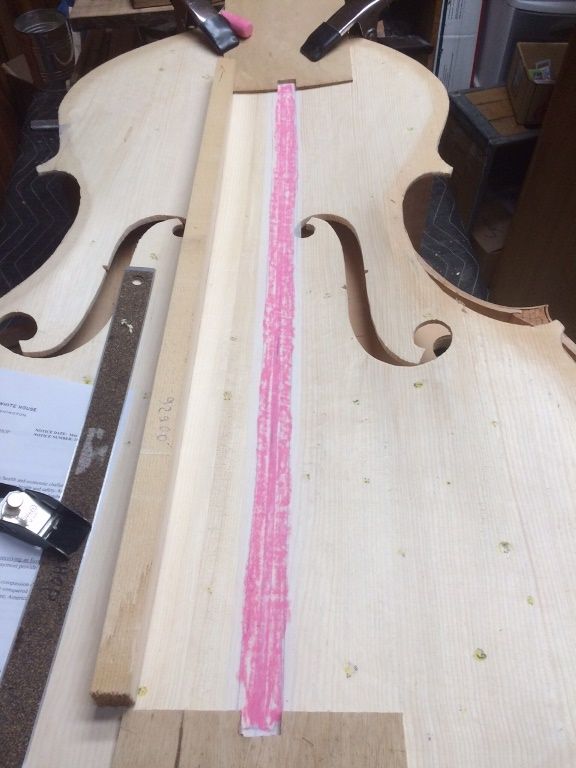
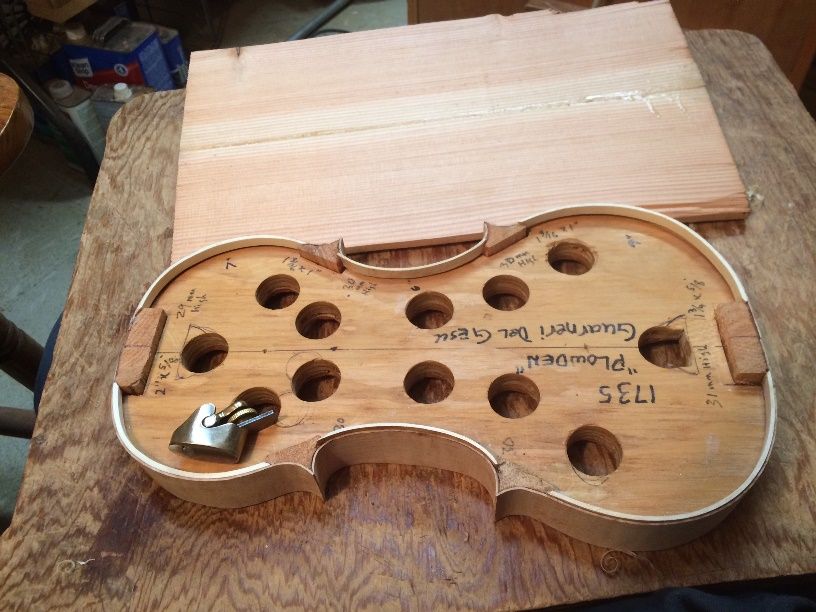
I used the bass caliper to register thicknesses all over the plate, and then began carving “dots” at each location, to the desired thickness.
Carving “dots” of correct thicknesses all over the plate.
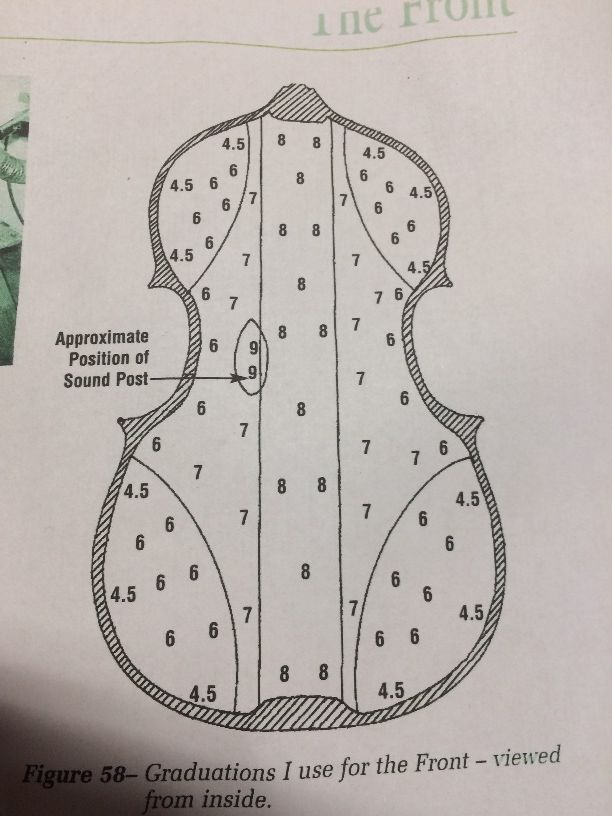
As I found (or created) spots that were at the correct thickness, I wrote in the thickness, and highlighted them in yellow, to warn myself against going any deeper. Eventually, I had mapped out the entire plate at least approximately according to this diagram from Peter Chandler’s book “So you want to build a Double Bass”:
Graduation map from Peter Chandler.
He had derived these measurements from a fine old master bass by Domenico Busan, which conveniently happened to be disassembled for repairs and restoration. He said that he had subsequently used these values on all his basses, and it always worked well. (Sounds good to me!)
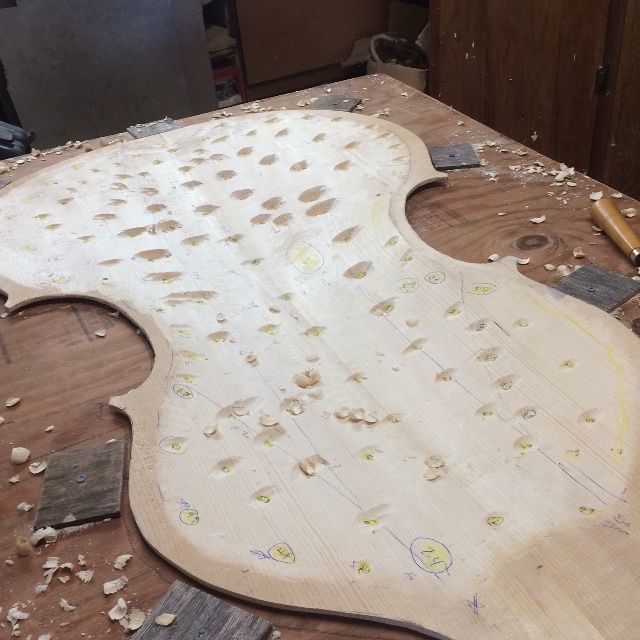
I kept carving until I had “dots” all over the plate.
Thicknessing Dots completed.
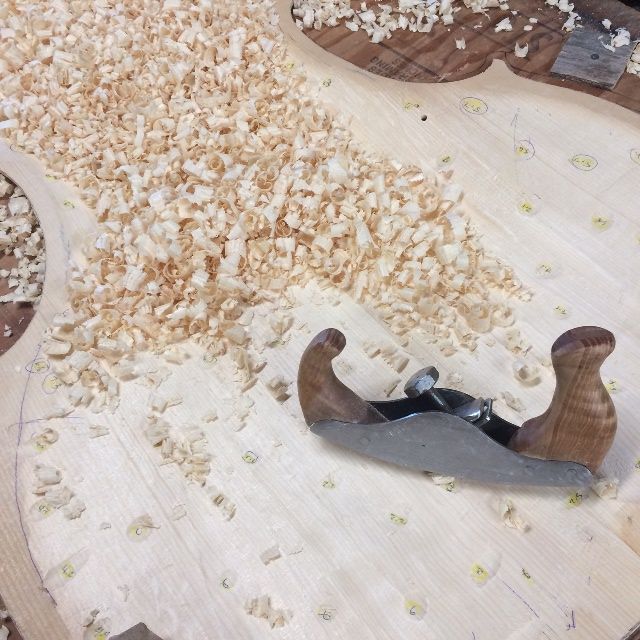
Connecting the Dots
Then I began “Connecting the Dots”:
Connecting the dots.
As I planed away the excess wood, the “dots” got smaller and smaller, and, in some areas disappeared. By that point I had switched over to the palm plane which is less aggressive and makes a smoother surface.
Planing with the Palm Plane.
But eventually, it was pretty much all done, and time to cut out the f-holes. However, I decided to install the purfling first, and then cut out the f-holes.
Purfling installed:
I did not take pictures while this step was in progress: I just got going and pressed on until the job was finished, then took a few pictures. Sorry. I don’t always think about pictures.
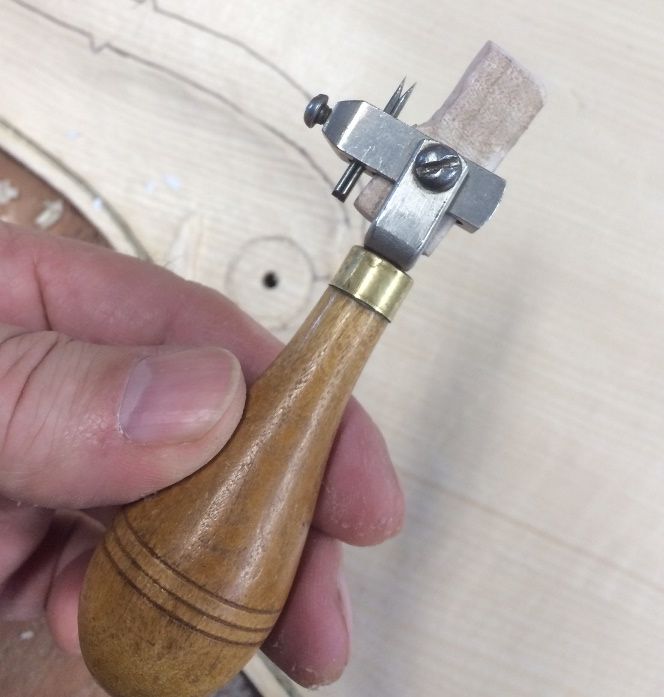
I used this old purfling marker to trace my lines, then a thin-bladed knife to slice along the lines to make a slot…then picked out the waste wood and inlaid the purfling.
Old purfling tool: missing part replaced with maple.
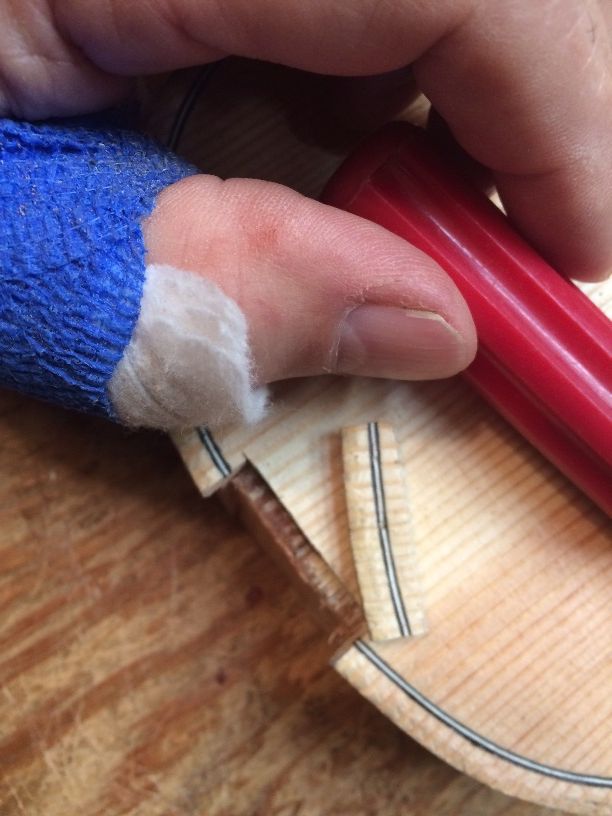
Upper bouts with purfling installed.
Bass F-hole incised and center-bout with purfling.
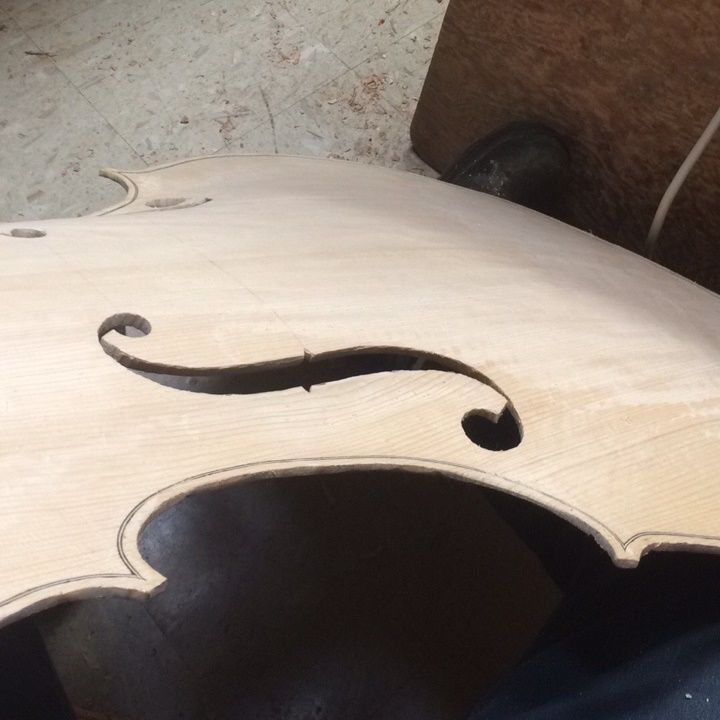
Cutting the F-holes
I used a coping saw to cut out the f-holes. It was slow and laborious but it worked, and there was little chance of any catastrophic errors. The result was two f-holes cut within a millimeter of the line and no errors. It is starting to look like a double bass!
F-holes cut out.
Rough-cut f-hole ready for refinement.
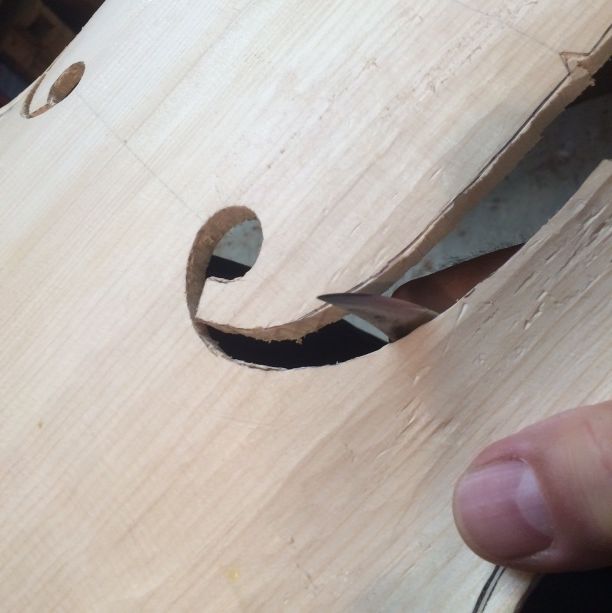
Using a knife to refine the f-holes. ( I will finish them with a file.)
Bass-bar fitting
Fitting fixtures for fitting the Sitka Spruce bass-bar.
I use a very thin paper gauze tape for chalk-fitting bass-bars.
This is the tape I use, along with sidewalk chalk.
Paper tape with chalk applied.
The trick is to press the bar into the chalked tape, and “wiggle it” slightly, to pick up chalk on the high spots. then plane off just the chalked places and do it again, until all of the bass-bar comes up with chalk on it. That achieves a perfect fit. When the tape is finally removed, it takes all the chalk with it.
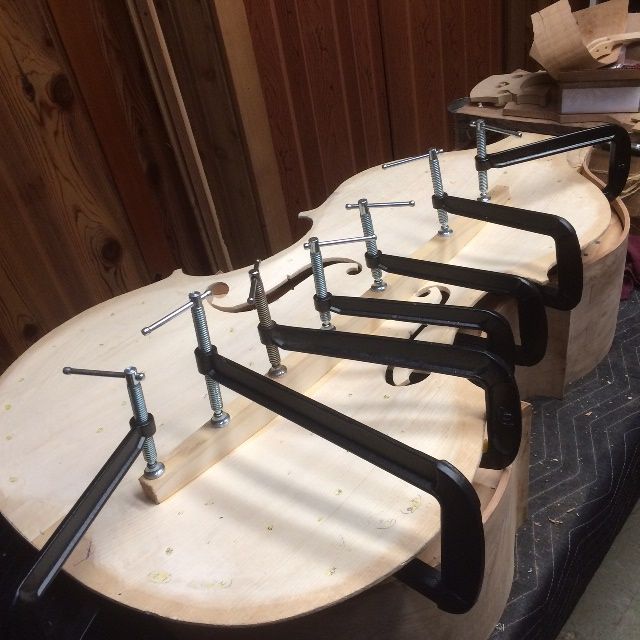
Then I warm the wood using a heat gun, apply a liberal coating of hot hide glue to both surfaces and clamp the bar in place. I leave it overnight to dry, just to make certain it will not pop back off (I have had it happen.)
Bass bar fitted, glued and clamped.
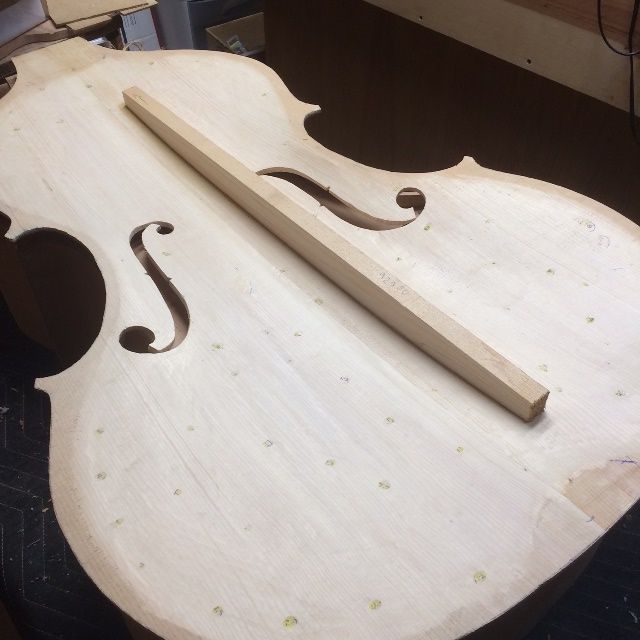
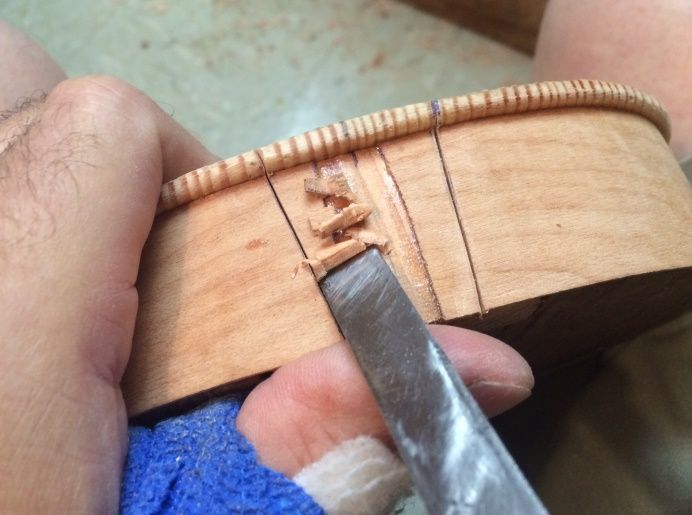
Installed bass-bar, ready to carve to shape.
The properly-installed bass-bar still has to be carved to the appropriate shape. I use planes to accomplish the carving.
Beginning to carve the bass-bar.
Bass bar nearly complete.
Bass bar complete
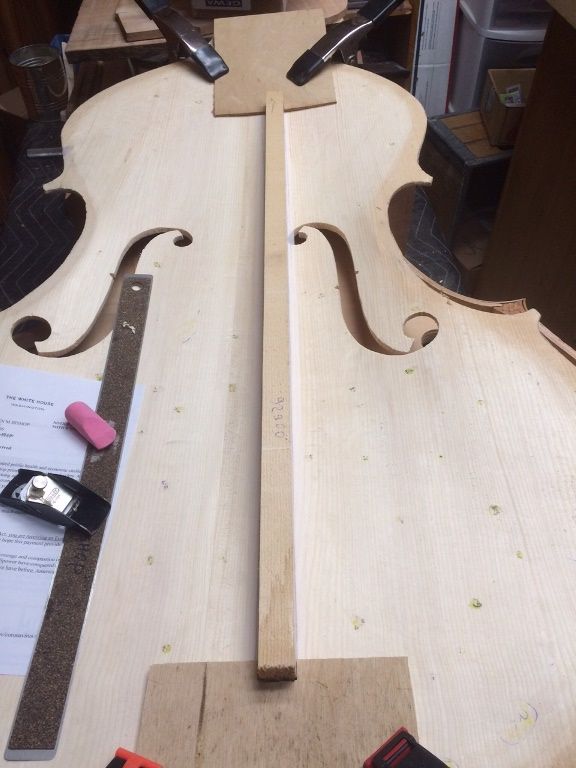
Interior of completed Front plate sitting on the garland.
Completed front plate resting on the garland. (Starting to look like a double bass!)
Back Plate Vision
There is still a good deal to be done, before I can install the Front plate, so I am stopping there for the time being.
But I really wanted to get a foretaste of what the Big Leaf maple of the back is going to look like; so I planed the inside and outside of the back plate flat, just to have a look at it:
Back plate inside surface.
Back plate outside surface.
It is pretty stuff! I am really looking forward to seeing it completed.
An elderly couple of friends gave me a large pile of highly flamed “fiddleback” maple, hoping I could build fiddles of the wood. This was Big Leaf Maple wood that the woman’s father had salvaged specifically because of the beautiful grain, perhaps fifty years ago, while making wood to heat his home.
Unfortunately, the wood turned out to be riddled with worm damage so that most of it is unusable. I felt bad about it, because she had hoped, all through the years, to have a box or something made of the wood, and now it seemed to be lost.
I had just repaired my bandsaw, though, while in the process of building the five-string double bass, and was busy cutting up billets of violin-wood to see what I really had that would be useable. I salvaged a few pieces of their maple wood that (maybe) could make a violin, and enough thin slices that I thought I would try a box for her.
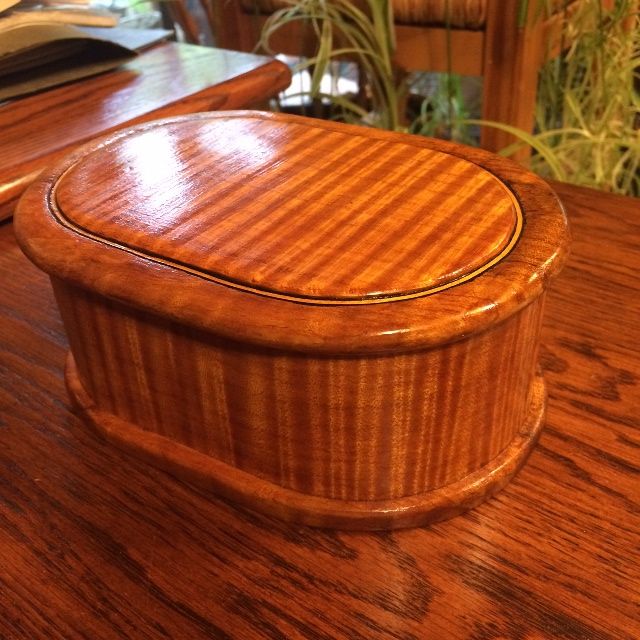
When most people think of a box, they are thinking of a rectangular enclosure of some sort: but, I’m a violin maker! So…I bent the wood into an oval, and went from there:
There was not enough solid wood to do very much, so the heavier sections are from a different tree; one cut from the yard of my wife’s family home.
Gift box showing bent body, inlaid top, solid base and lid.
I inlaid the fiddleback maple section about 3 mm thick, into the lid which was also flamed maple, but not as spectacular. I trimmed it with purfling left over from the building of the five-string double bass.
The sides were only a little over a millimeter thick and bent around a hot iron made for that purpose. But they would be too fragile, if that was all that was there, and there would also be no secure way to fasten them to the base. So there is a 4 mm raised section glued to the base and the sides wrap around that “plug.” I added a 5 mm thick ring around the top, the same size as the bottom plug, in order to reinforce the upper edge.
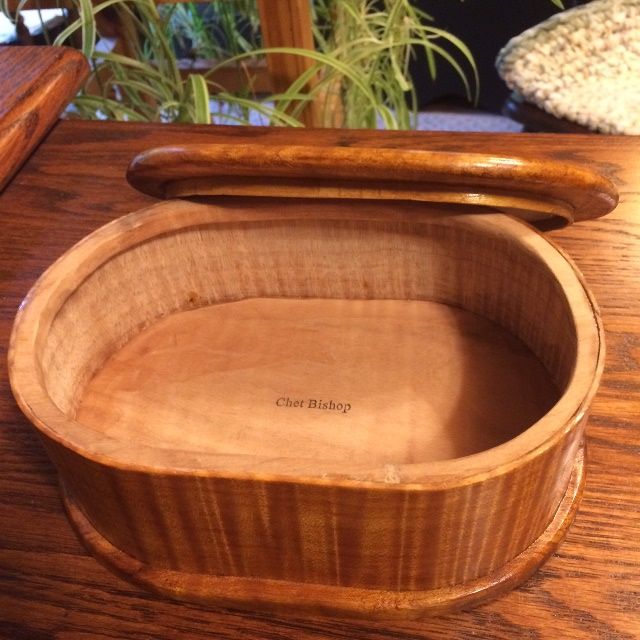
Then I inlaid a 7 mm wide by 2 mm thick band of bent willow wood into the lid, positioned so that it fits cleanly inside the upper ring. As it happens, the lid fits perfectly in one direction, but if you turn it 180 degrees, it is very loose. So I stamped my name in the base and the lid: when you open the lid, if both are readable or if both are upside down, then the lid will fit.
Interior of bentwood box.
I varnished the bentwood box pretty much the same as I do my violins, and delivered it the following Saturday.
Both the husband and wife seemed quite pleased, so I am happy too.


_rib_installed.jpg?width=590&height=590&fit=bounds)


.JPG)

.jpg)