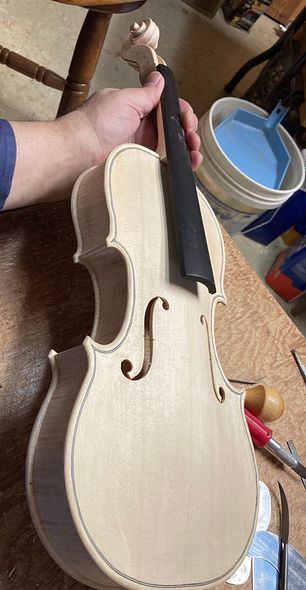
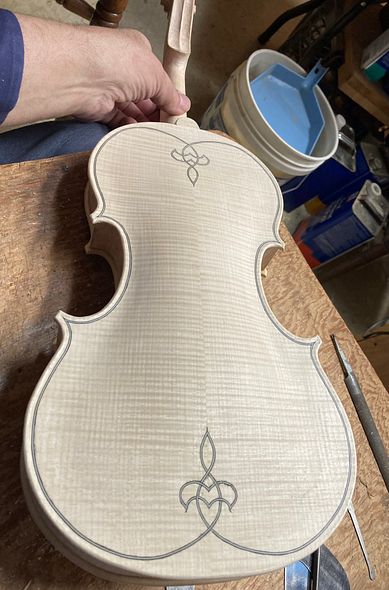
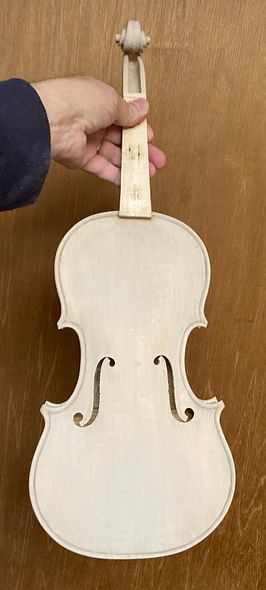
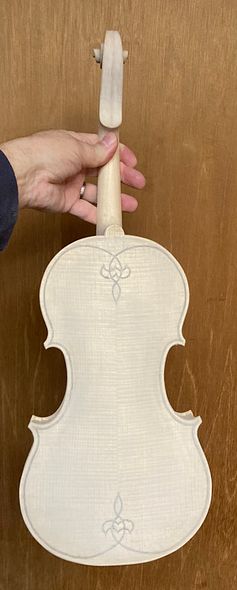
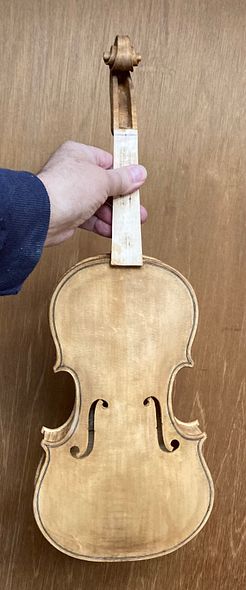
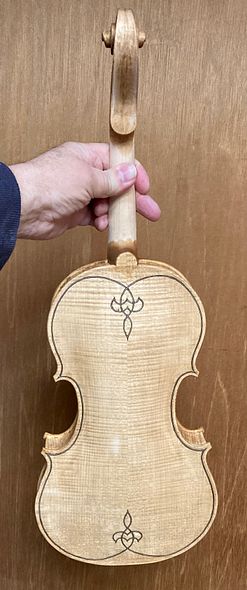
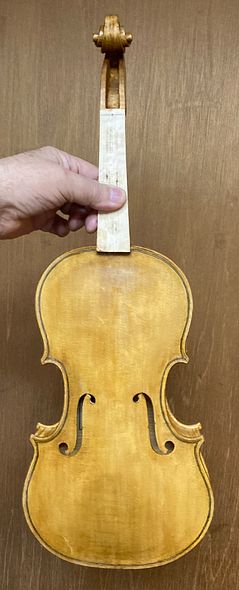
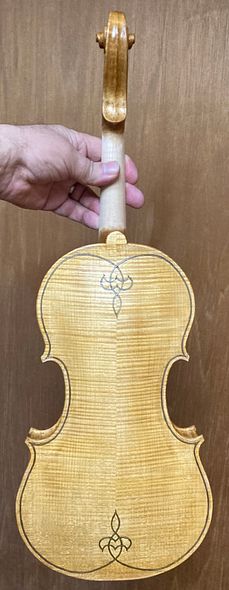
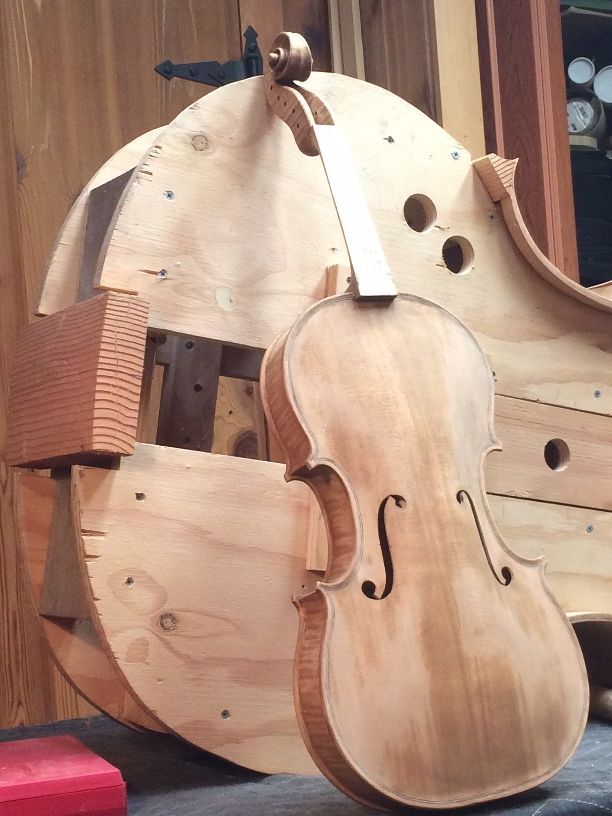
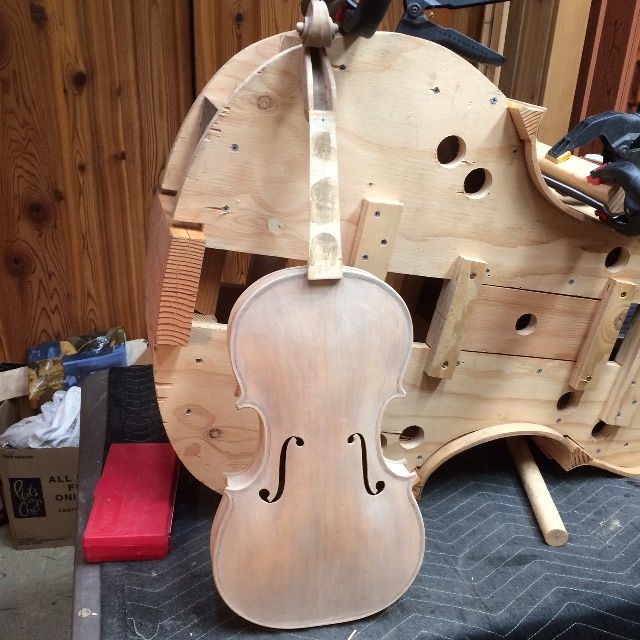
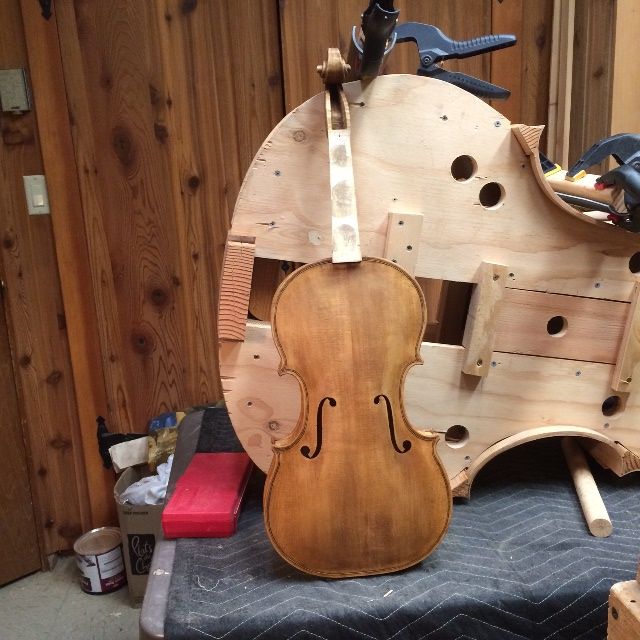
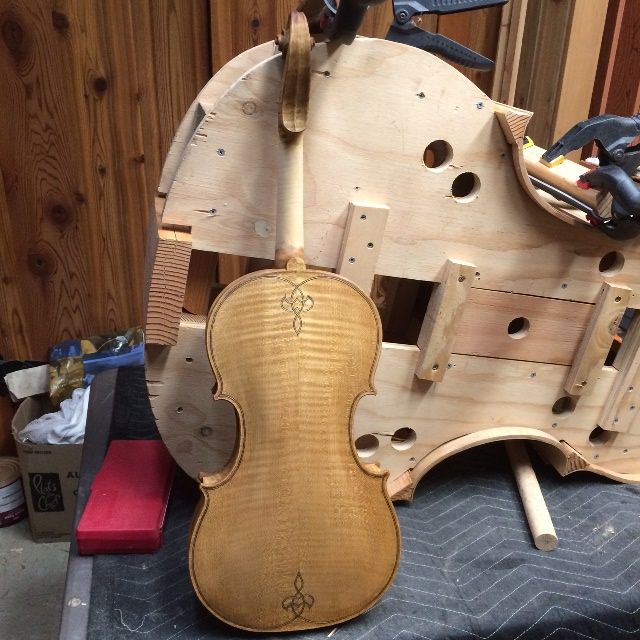
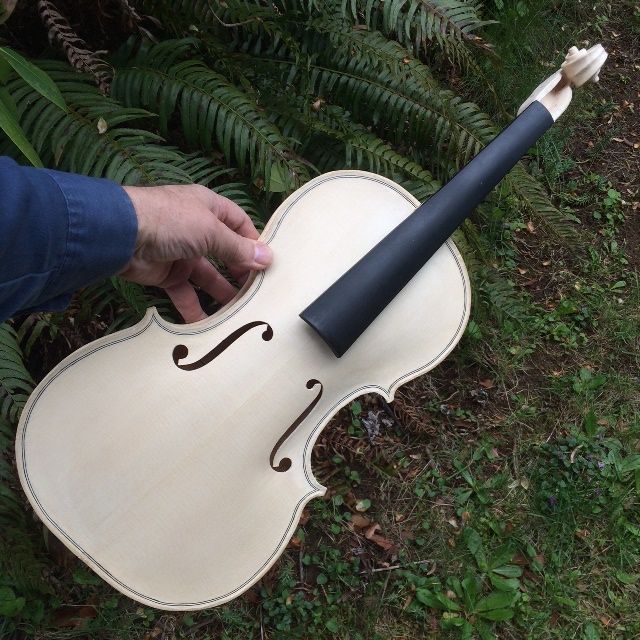
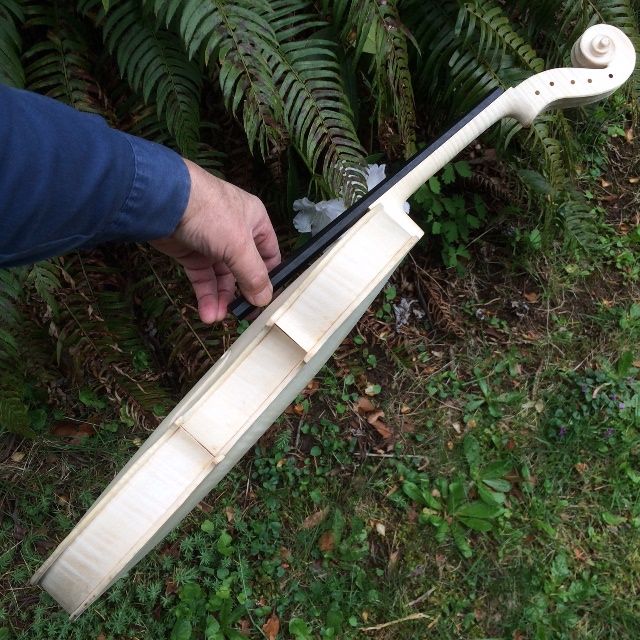
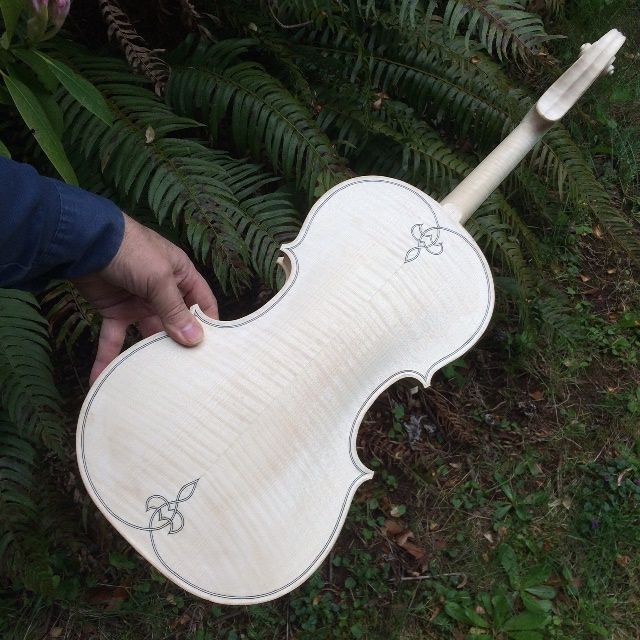
New Commissioned Five String Fiddle On the Way!

New Commission!

Unusual  Woods

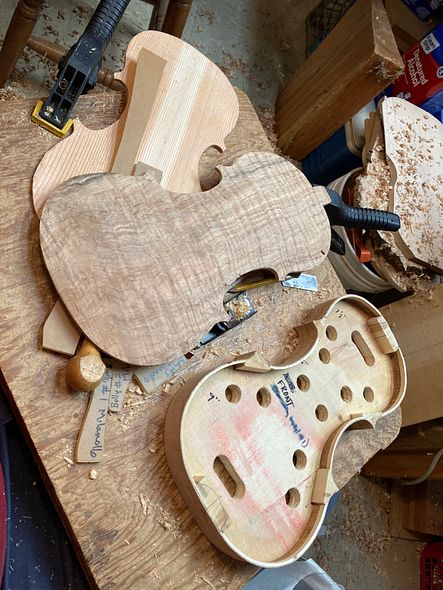
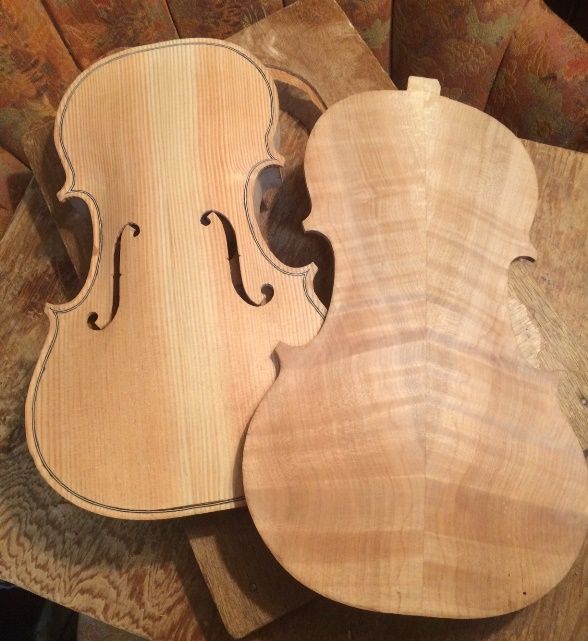
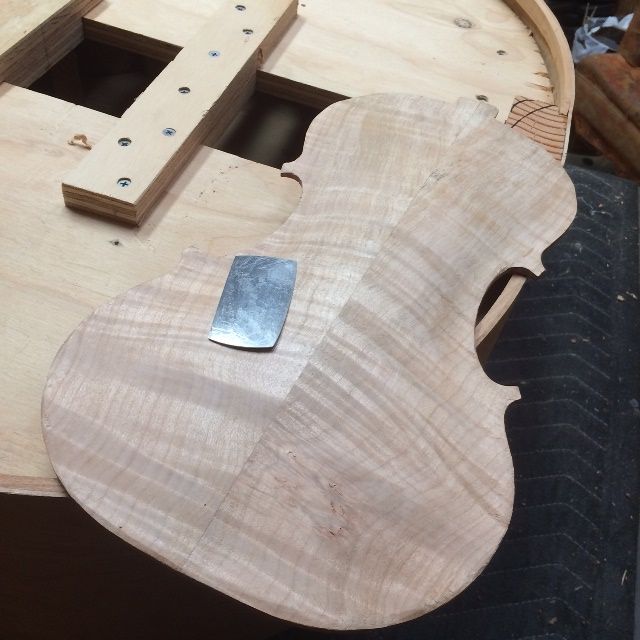
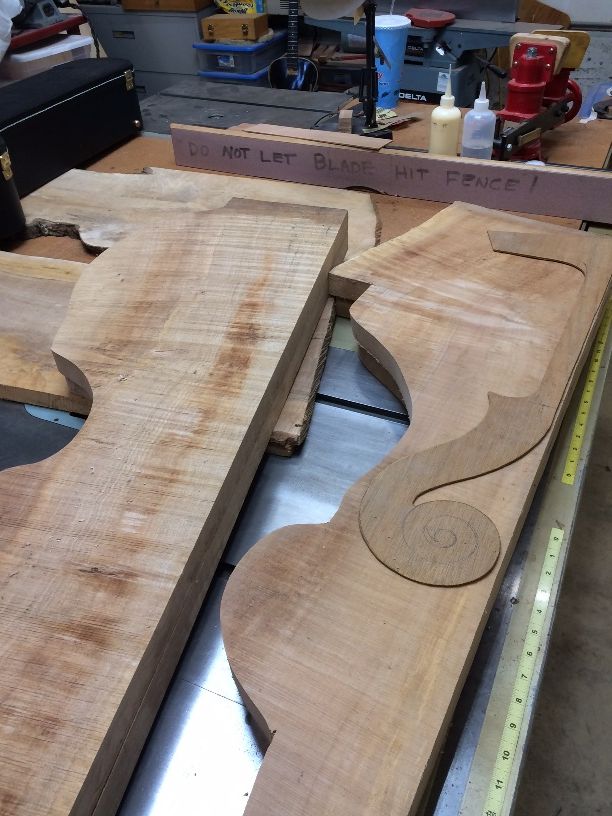
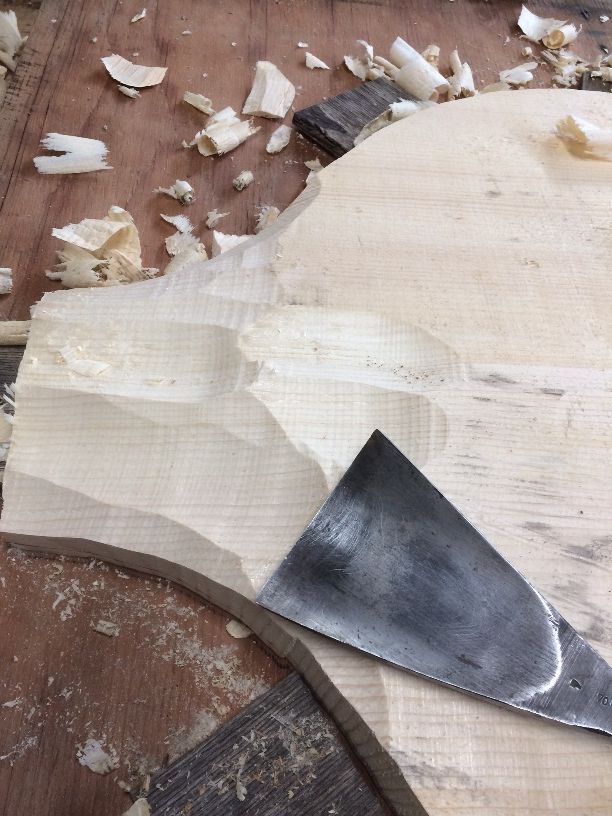
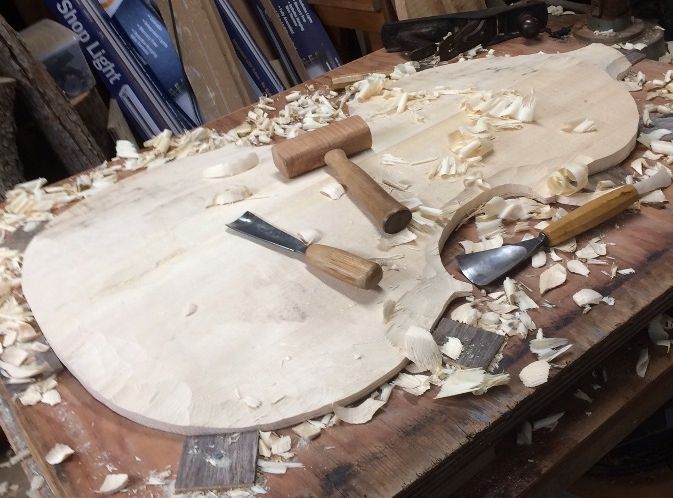
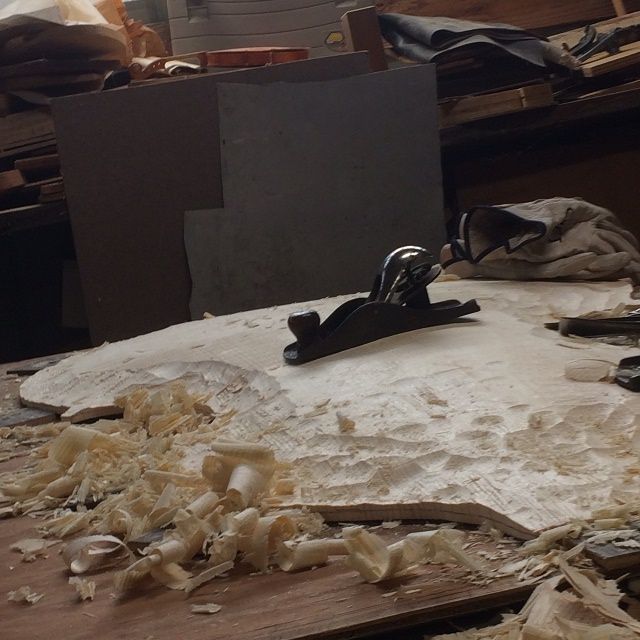
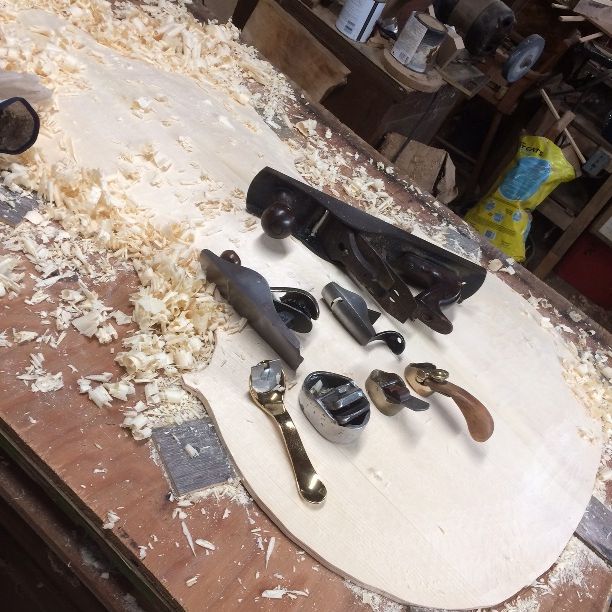
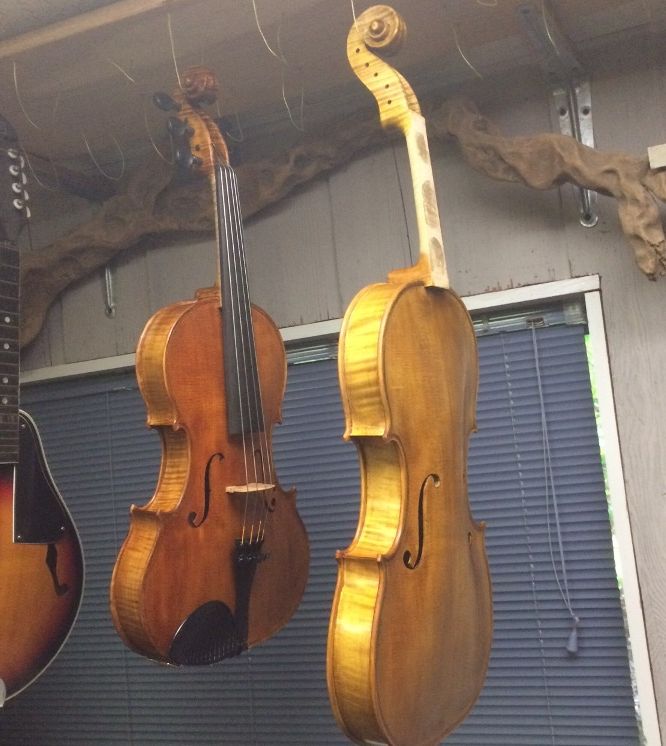
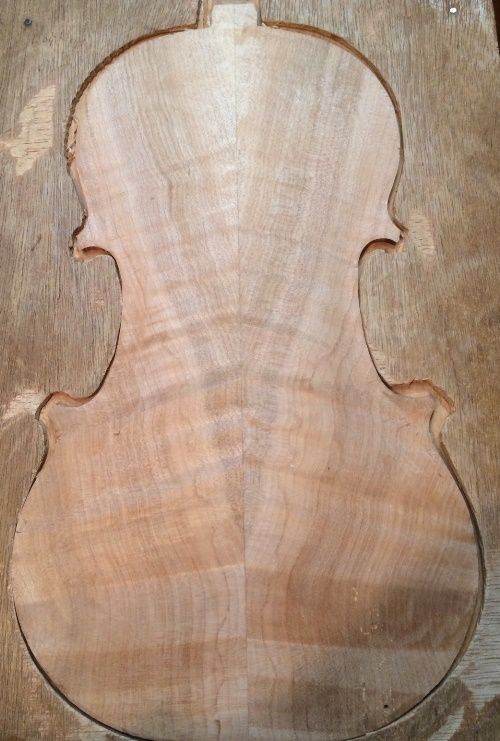
A customer ordered a new, custom-made Five String Fiddle, and it is on the way!  He chose heavily spalted, heavily-flamed, Oregon Big Leaf Maple for the back plate, the sides, the neck and scroll. My wife’s parents gave me the wood from this maple tree.

Ann used to play under and climb on this tree as a child, and we hated to see the tree cut down. Her parents still live there, less than four miles from our house. However, they had to remove the tree because it was dying. I have salvaged wood for a few instruments from that tree and they all look and sound wonderful!

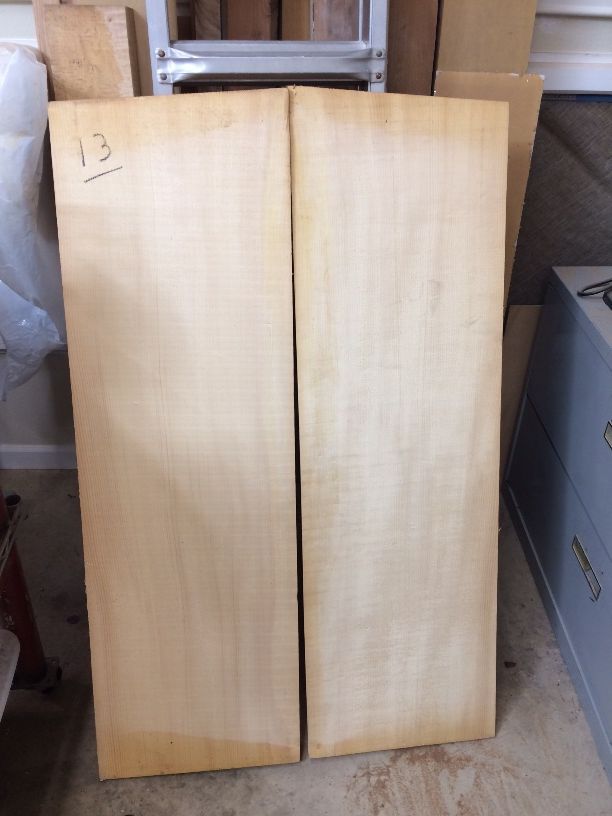
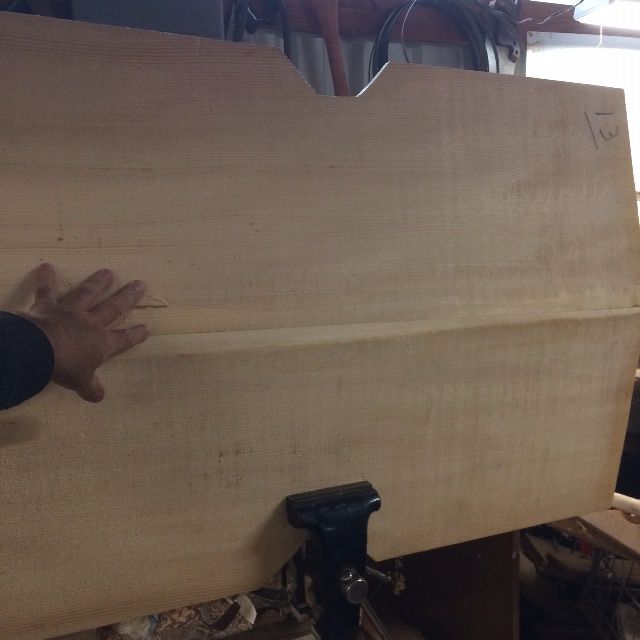
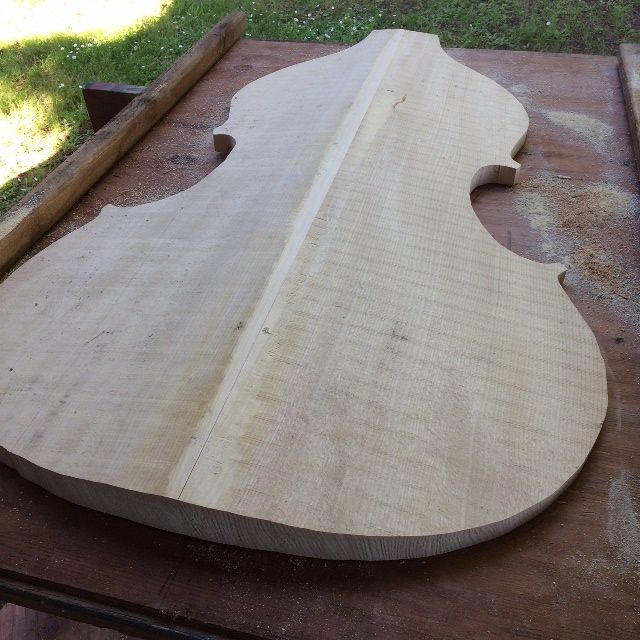
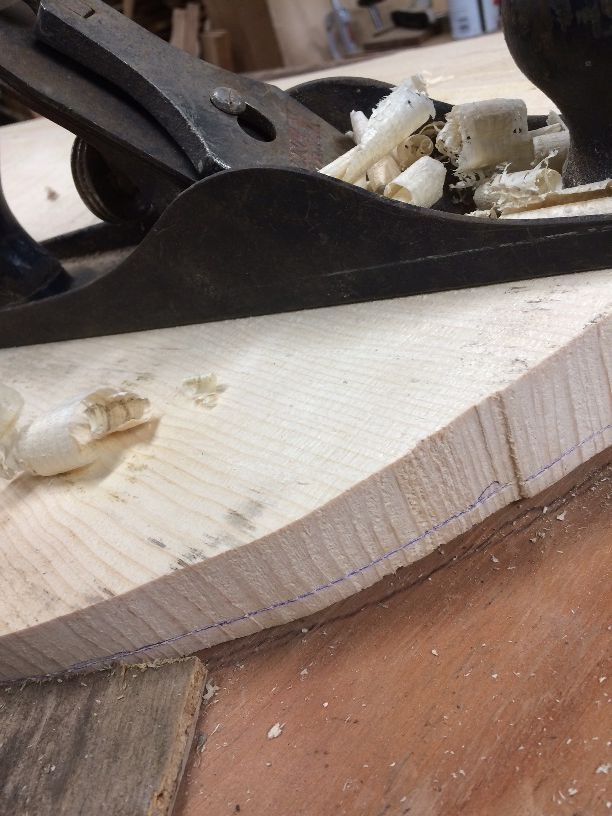
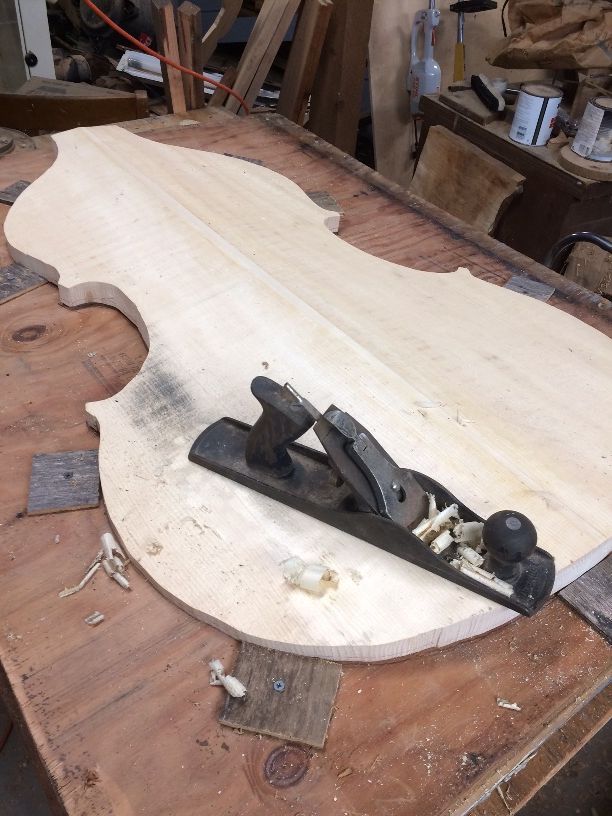
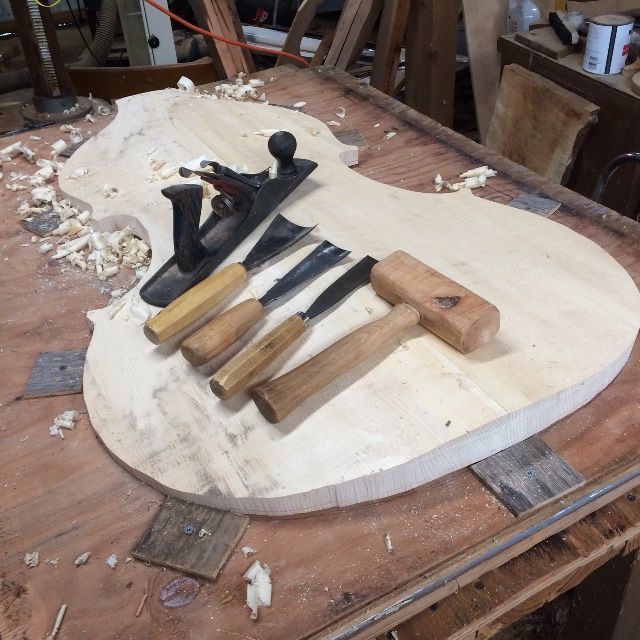
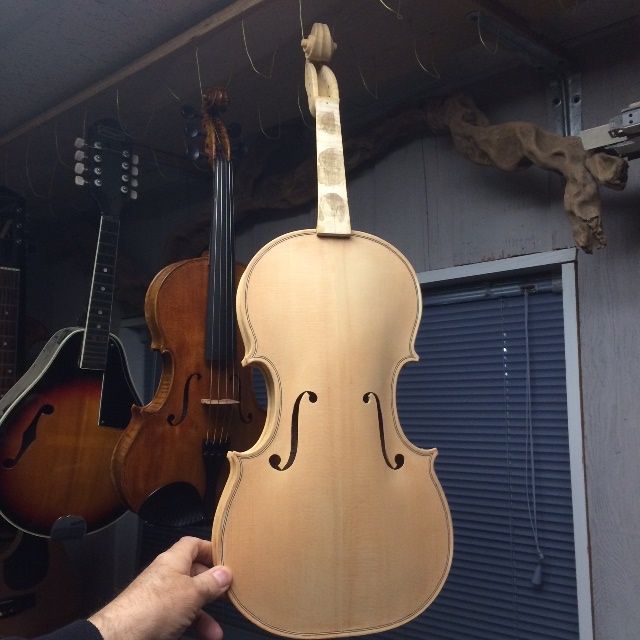
Given a choice between Spruce and Douglas Fir, the customer chose the Douglas Fir, for his front plate. This tree also grew just a few miles from my home. (A famous violin and viola maker, Otto Erdescz  (1917-2000) used to make violins and violas with Douglas Fir soundboards. Professional musicians still play some of them, today. But very few luthiers use Douglas Fir. I didn’t either, until a few years ago!)

Not my usuaI Choice in times past

For many years, I refused to try such a thing. But a friend gave me a load of very straight grained Douglas Fir firewood, a few years ago.   I was splitting some of the firewood,  and the split-off piece hit the ground: it rang like a bell! I had never seen such straight-grained, clear Douglas Fir, with zero runout!

Unfortunately, that particular piece was too short for a fiddle. I had to search through the pile for a piece that was long enouigh for a violin plate.

Since then, I have made several such instruments, and they all sound great. (I find that the Spruce is definitely easier to work with, though, and, for classical, orchestral instruments, I still use only European maple and spruce.)

Customer Preferences:

This man showed up at my shop and he played all the five string instruments I had. (He really had not played 5-string instruments before. He laughed for joy, hearing the rich deep C-string on each one.  After a short while, he declared, “OK, I’m addicted!”)

He played the full range of all of them. He finally settled on my earliest unsold 5-string (#3 on the “Chronology” page) as being exactly what he wanted.

But not to buy that instrument. No! He wanted a commissioned instrument “just like that one!” (He wanted one especially built for him! Sure! We can do that!)

And, as it turned out, that was a good thing.  A week later, the next customer who came to try out all my instruments  also loved that fiddle, but she bought it that day, and drove away! So, it is gone, now!

Which Mold?

I knew which of my molds was the source of that fiddle: I have made at least four off of that specific mold. All of them have sold, now, so, for the moment, there are none available. (This instrument will “solve that problem,” for a moment, but it will disappear immediately after completion.)

The commissioning customer also wanted local wood. so that he could say, “My violin came from a tree on that hill!” So…choosing the wood was the first step.

Choosing the Wood

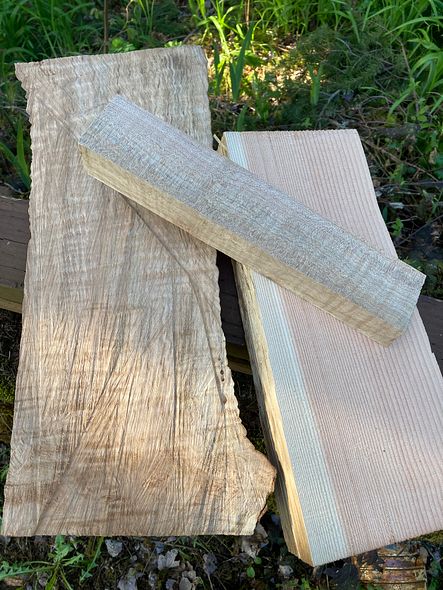
The model I would use had already been chosen, so that was not an issue. I also knew what the wood source would be: I still have a little of the maple my wife’s parents had given me. And, with the customer’s approval, I chose a clear piece of Douglas Fir, salvaged from the firtewood I mentioned earlier. He loved both pieces.

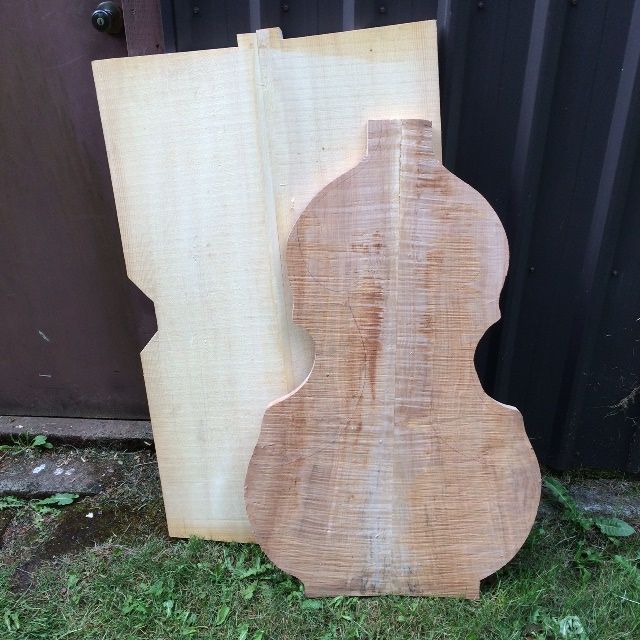
Maple and spruce for five string bluegrass fiddle handmade in Oregon by Chet Bishop, Luthier
“Fiddle in the rough!”

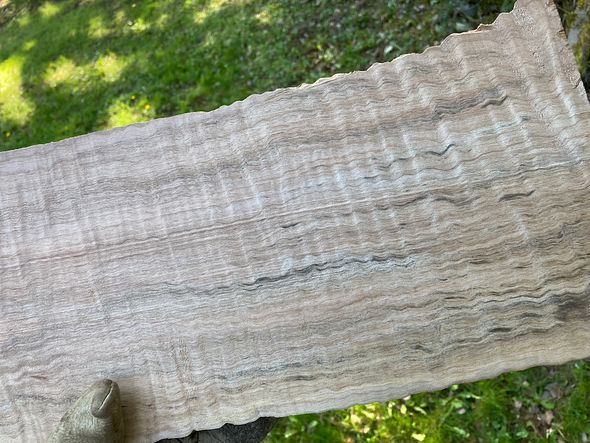
Here is a closer picture of the maple:

Heavily Spalted and Heavily Flamed Maple for five string bluegrass fiddle handmade in Oregon by Chet Bishop, luthier.
Heavily Spalted and Heavily Flamed Maple

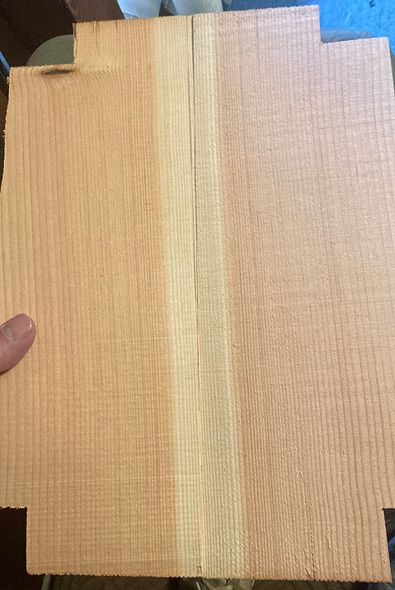
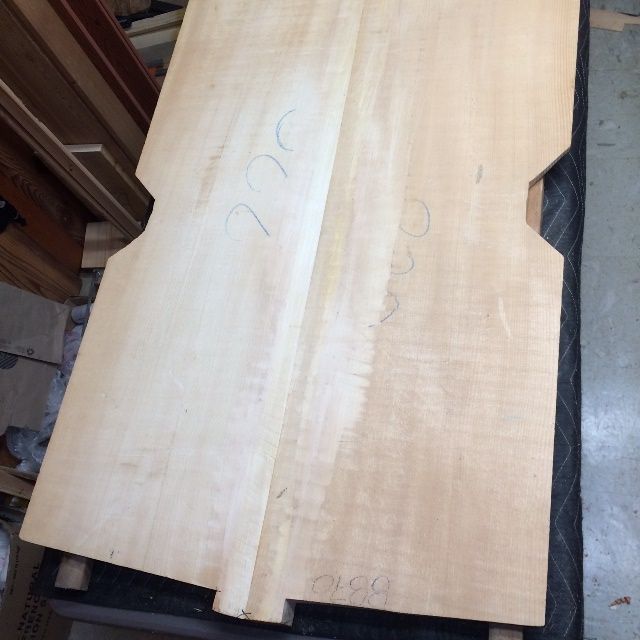
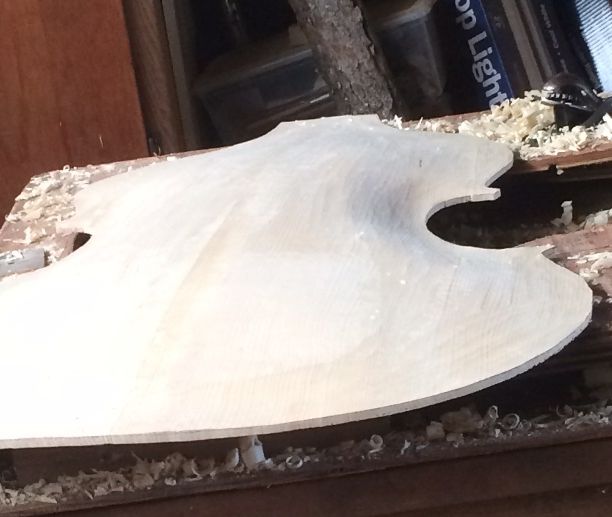
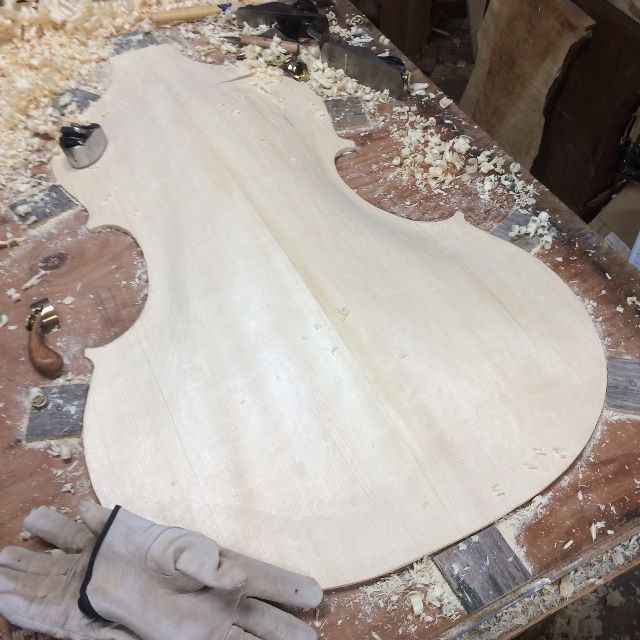
I book-matched the spruce, by cutting a single billet in two equal halves and gluing them together to make the front plate.

Douglas Fir for five String bluegrass fiddle, handmade in Oregon by Chet Bishop, Luthier.
Douglas Fir, cut and ready to joint and glue the Center seam

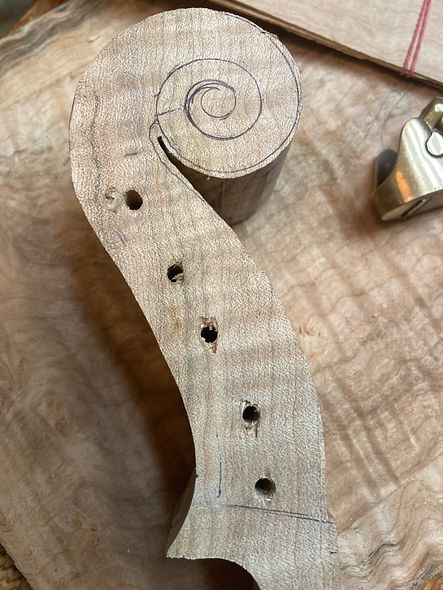
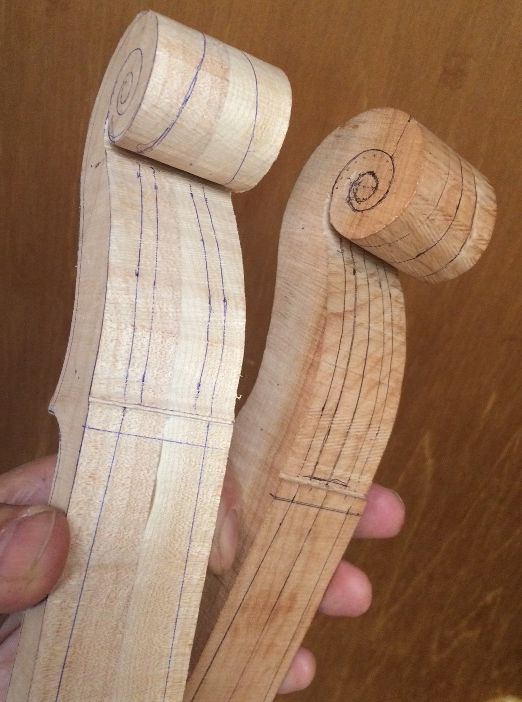
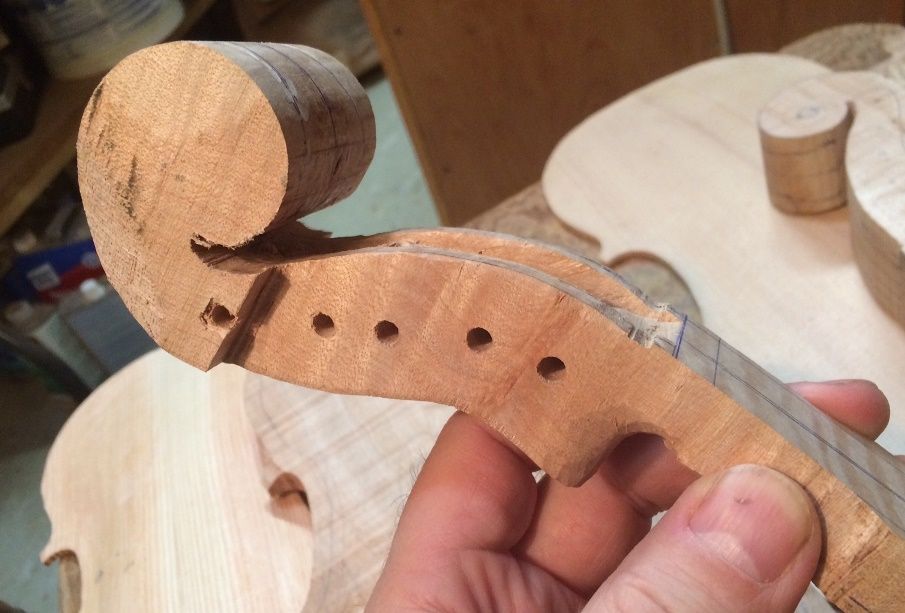
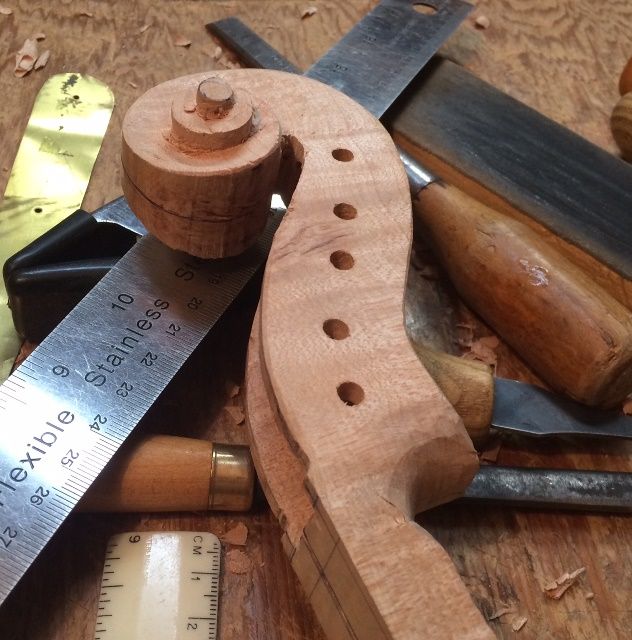
I laid out the neck outline on the billet I had chosen for the neck, and I drilled the pilot holes for the tuning pegs. Then I cut out the side profile on a bandsaw.

scroll billet for new five string bluegrass fiddle, handmade in Oregon by Chet Bishop, Luthier.
Scroll profile cut out, and pilot holes drilled.

Mold Preparation

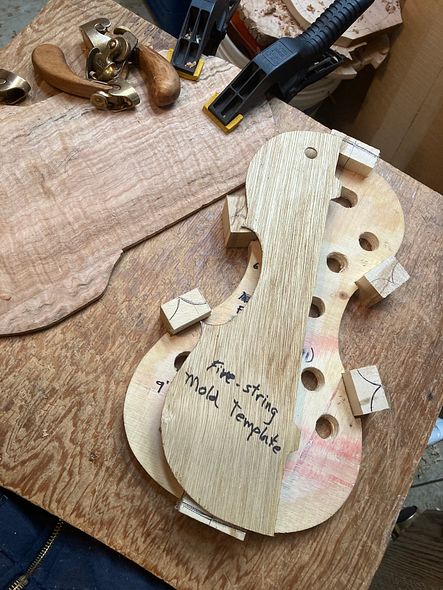
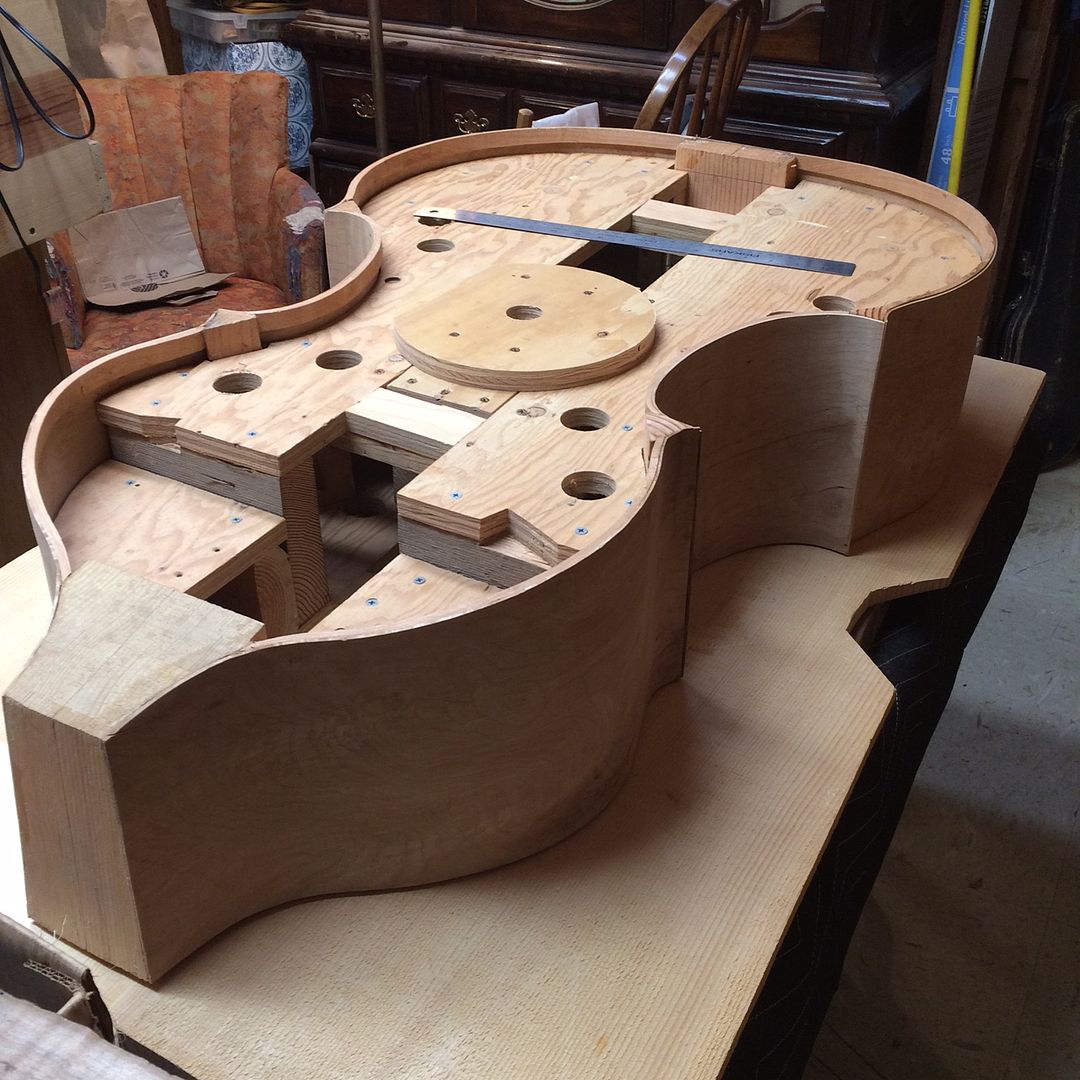
Meanwhile, I got the blocks glued into the mold. Then I  traced their shapes from my template, so the whole job could begin. I also  planed away the rough surfaces of the maple to ascertain that it actually would serve well as the back plate of a new five-string fiddle. And, I found that it was just a little too narrow in the lower bouts.

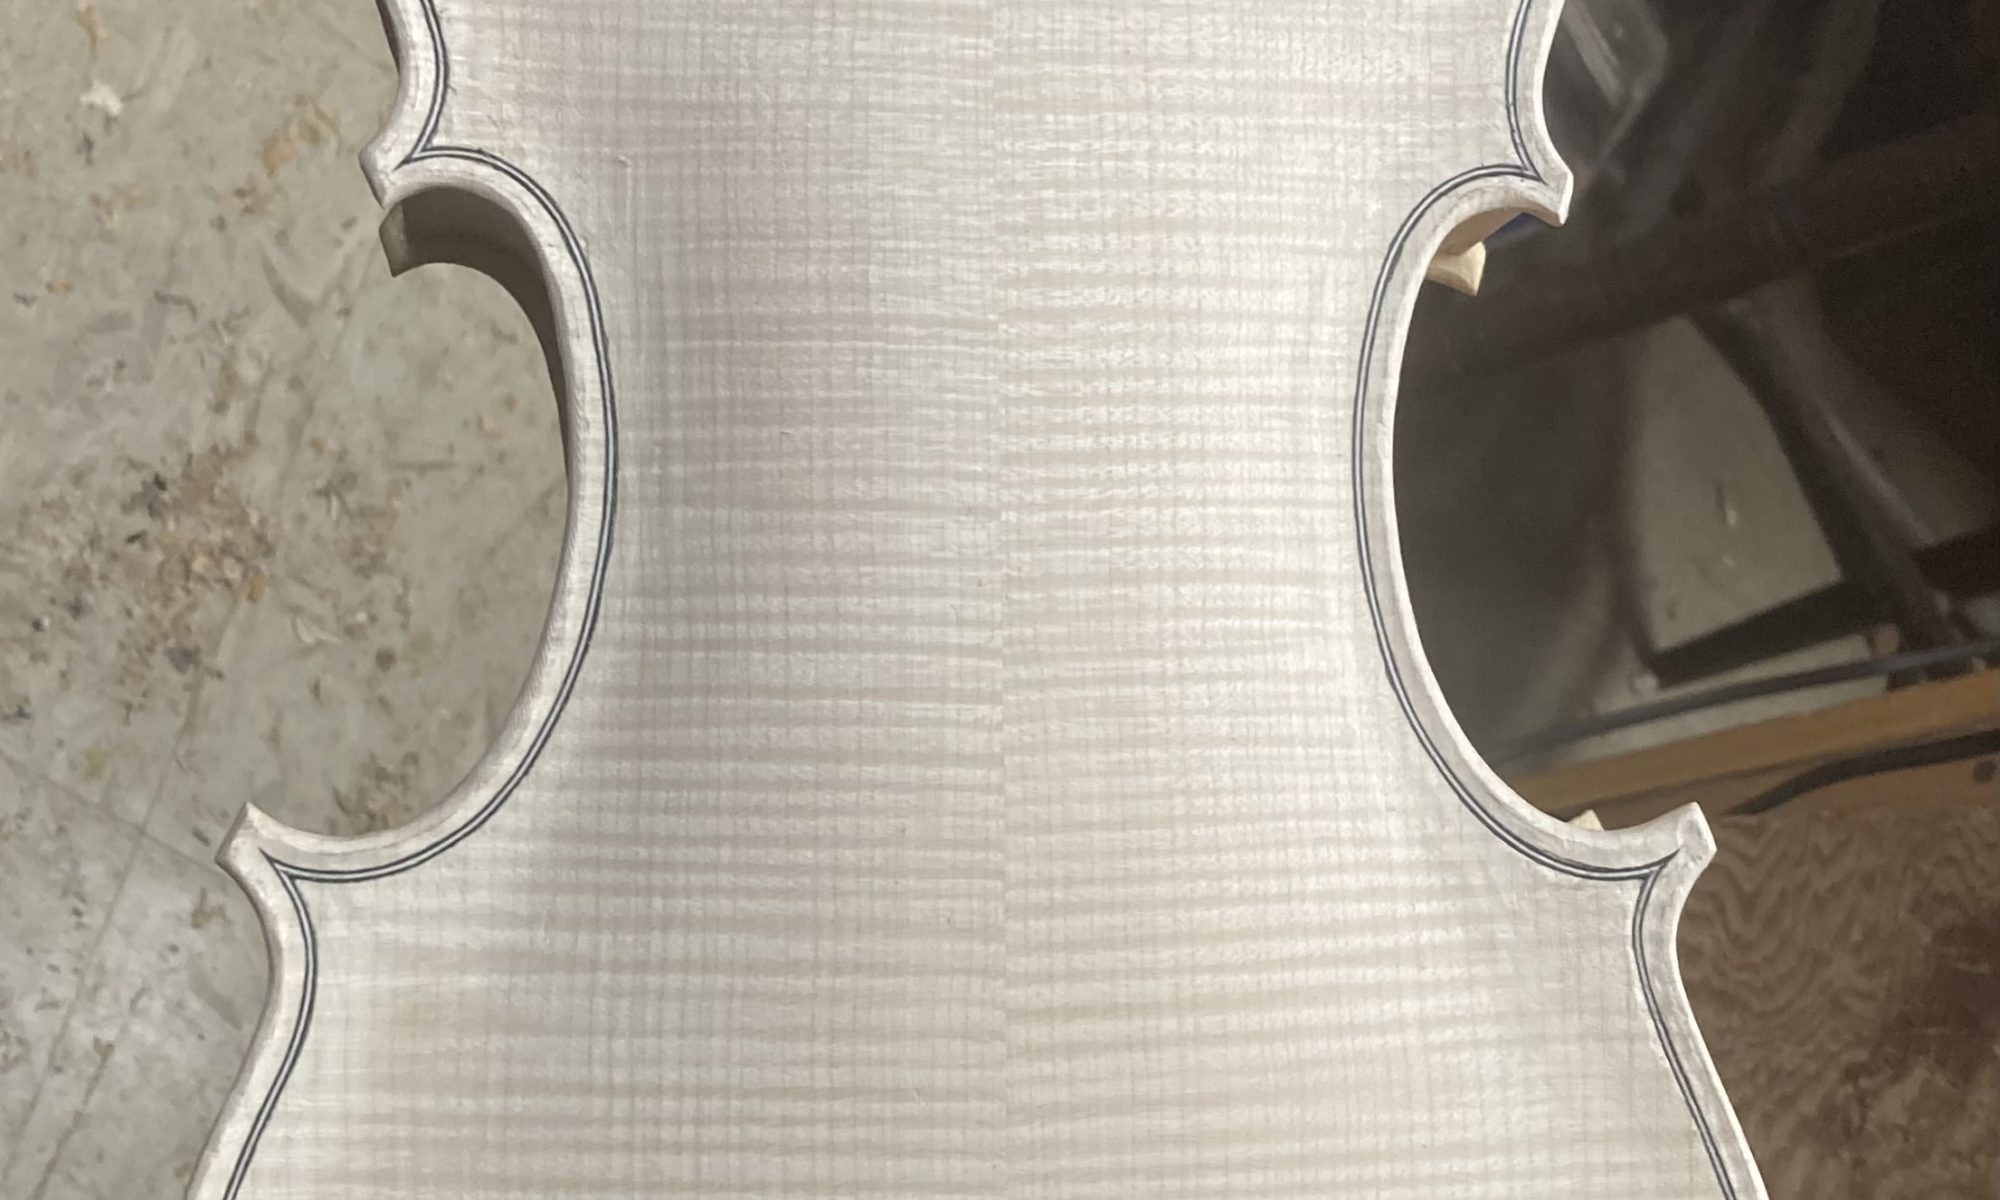
So, I “transplanted” a small piece of wood from the area above the upper bout on each side and grafted them in on the lower bouts. (This practice is not at all uncommon: It will be every bit as strong as the center seams on two-piece backs. And, once the double purfling is installed, the joints will be nearly invisible, under the varnish.)

wood for new five-string bluegrass fiddle, handmade in Oregon by Chet Bishop, Luthier.
Back plate in progress, blocks in the mold, and the shapes traced from the template.

Preparing the Ribs

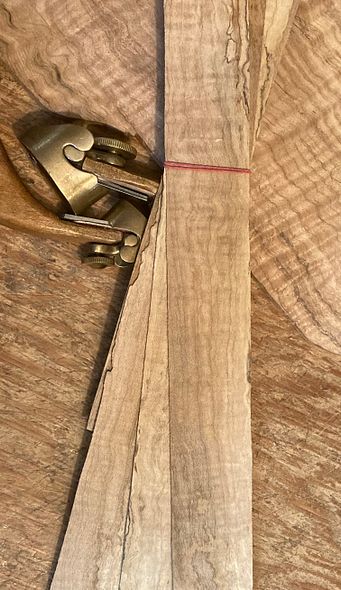
I had chosen wood for the ribs, as well, and I sawed them to a thickness of a little over 2 mm. I thinned them, using a wooden fixture I made, clamped to my oscillating spindle-sander. The fixture allows me to  gradually reduce the thickness to 1 mm.

Here are the ribs:

Ribs for new five string bluegrass fiddle, handmade in Oregon by Chet Bishop, Luthier.
Rib-stock, sawn and thinned: ready to be cut to size and bent.

Installing the Ribs

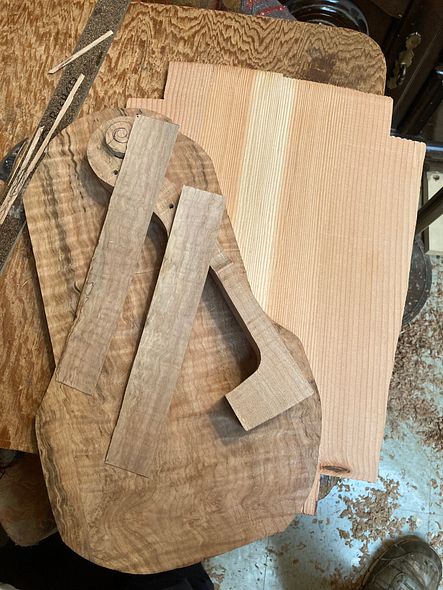
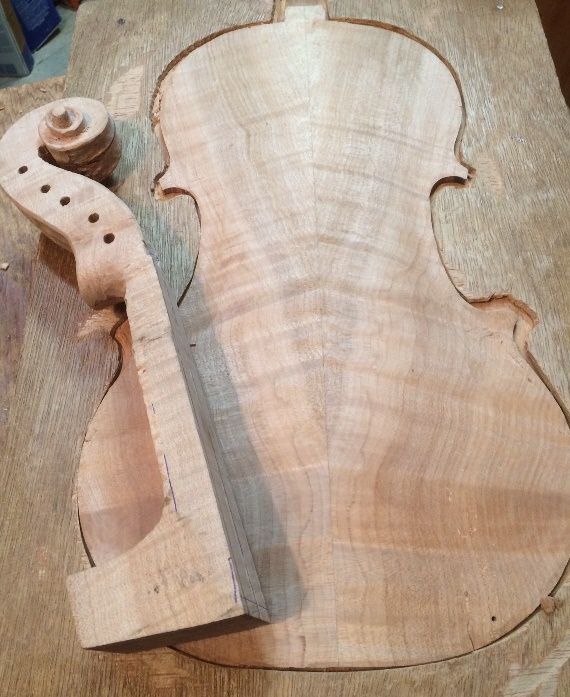
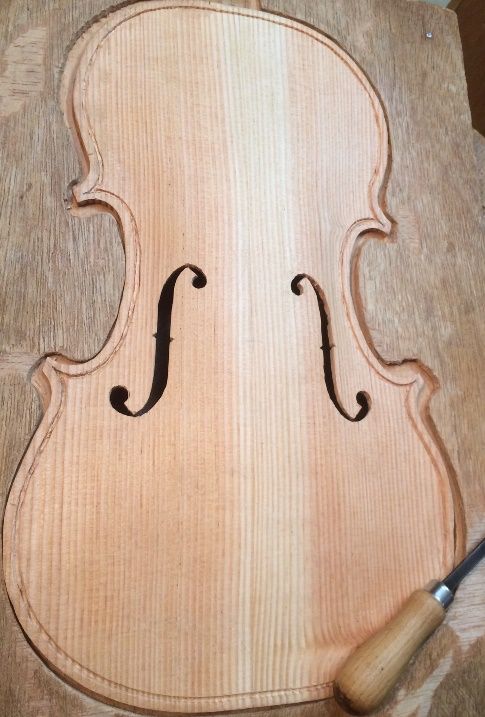
Next, I cut the ribs to the correct length and width. I carefully considered which grain from one side would “mirror” which grain on the other side. I had already been tinkering on the neck, as you can see in this photo, but I will explain that process later.  (It isn’t always possible to do everything in a precise order. While I am waiting for  glue to dry on one section, for example, I may jump ahead on another piece.) You can see the bookmatched front plate, too.

Wood for new five string bluegrass fiddle handmade in Oregon by Chet Bishop, Luthier.
Bookmatched top plate, neck and back billets in progress, and rib samples, cut to size.

I cut all six ribs, and marked them as to inside, outside, upper and lower ends, etc, as well as which side of the fiddle they would call their home…treble or bass side.

Then I bent the ribs using a hot “bending iron” (actually made of aluminum, but, in the old days, they were iron.)

(I forgot to take photos of the shaped blocks: Sorry.)

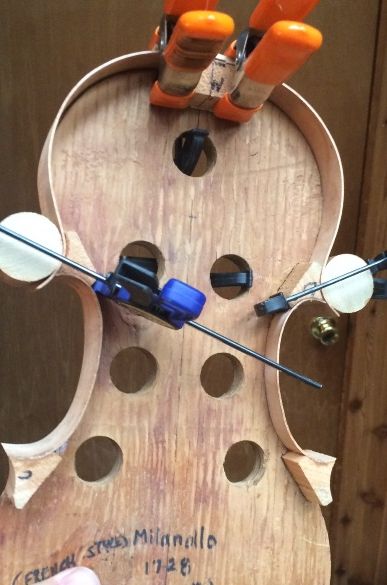
I had cut and shaped the corner and end blocks, already, so I applied a generous coat of hot hide glue to one block at a time. then, I clamped the rib into the block surfaces, making certain that everything fit correctly before tightening the clamps.

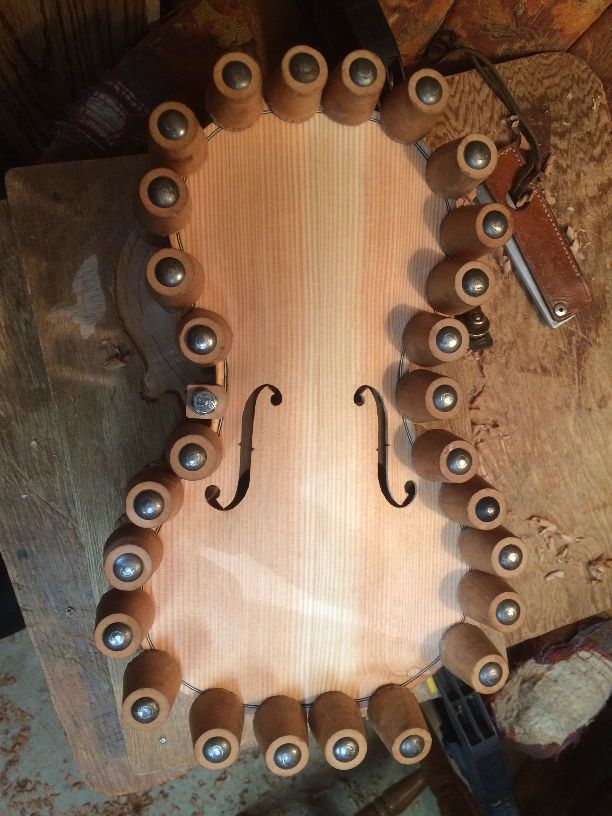
First, I installed the center bout ribs, and when the glue had dried, I used the spindle-sander to trim the ends of those ribs to match the curvature of the outer faces of the corner block, so I could install the upper and lower ribs. Here are the upper ribs, glued and clamped:

ribs installed for a new 5-string bluegrass fiddle handmade in Oregon by Chet Bishop, Luthier.
Center and Upper bout ribs installed, using hot hide glue and clamps.

The lower end of the bass-side center bout rib was not fully tight, so I reglued it and reclamped it. (left lower side of photo.)

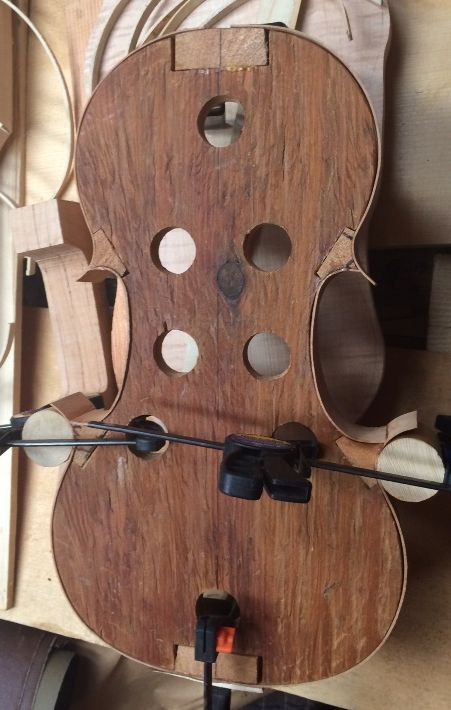
Then, when that glue was dry, I installed the lower ribs, by turning the mold upside down in the vise, so I could see clearly. It also meant that both hands were free to adjust the rib position, and apply clamps.

All ribs installed on new 5-string bluegrass fiddle handmade in Oregon by Chet Bishop, Luthier.
All the ribs are installed, but still need to be trimmed, before installing the linings.

Linings bent and installed

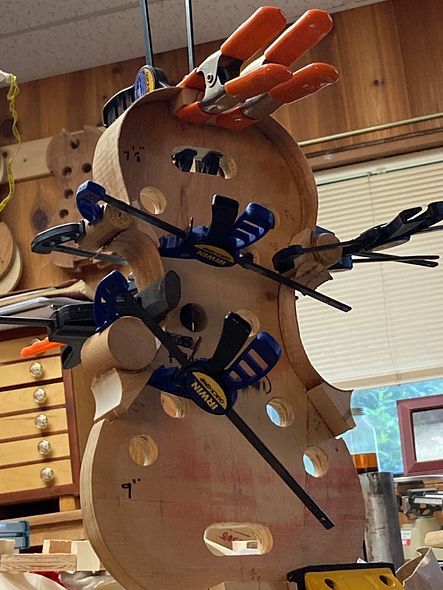
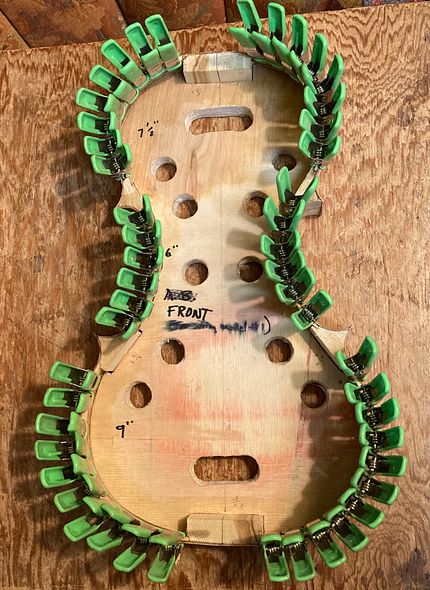
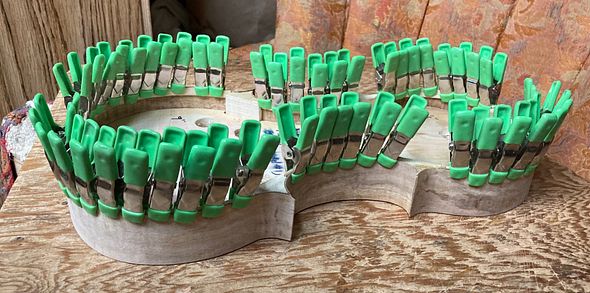
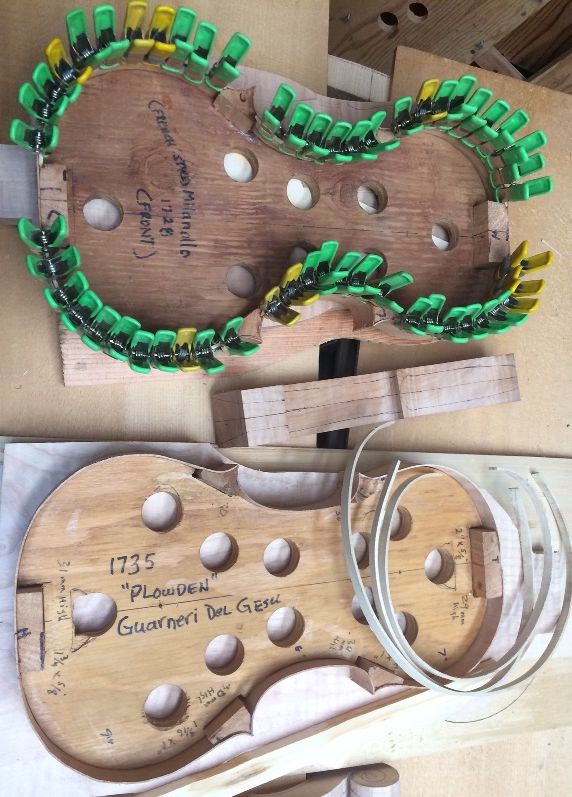
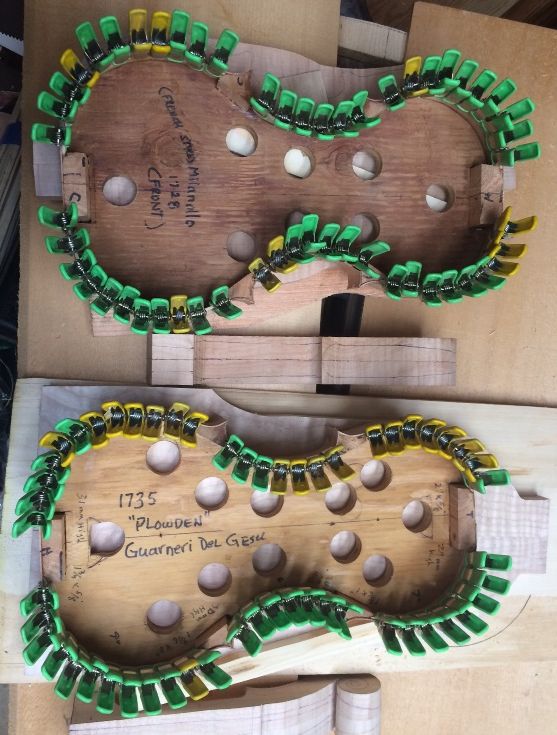
I also did not take photos of bending and installing the linings. (Sorry.) Here are two photos of the result, still in clamps.

Linings installed in new 5-string Bluegrass fiddle, handmade in Oregon by Chet Bishop. Luthier.
Front view of linings clamped in place.
Garland with linings installed, for 5-string bluegrass fiddle handmade in Oregon by Chet Bishop, Luthier.
Side view of lining clamps and rib garland.

Tracing the plates

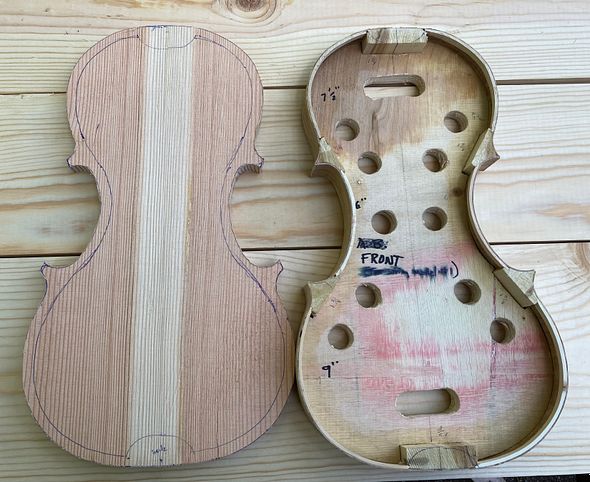
Once the linings were installed and the ribs thus strengthened, I could trace the shape of the plates, and begin cutting things out.

Completed garland and billet for front plate for 5-string bluegrass fiddle, handmade in Oregon by Chet Bishop, Luthier.
Garland and Front plate billet cut to shape.
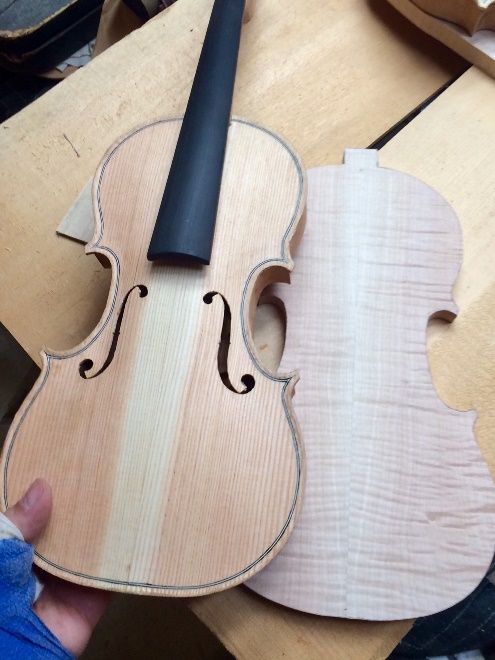
New 5-string bluegrass fiddel in progress, handmade in Oregon by Chet Bishop Luthier.
And, that is the progress, so far!

Thanks for looking! I will try to keep everyone posted as to progress.

Looking Better! Further Progress on Fiddles, as of 8/24/21

Slower Progress:

(I actually got a fair amount done, though…)

A few weeks ago, I bookmatched my plates. Then I cut ribs and necks, so as to set up “kits” for six new five-string fiddles. Afterward, I started building two of them, as parallel builds.

Since I last posted, two weeks ago, I did not exactly stay on schedule, but I didn’t get too far behind.

Scroll Carving

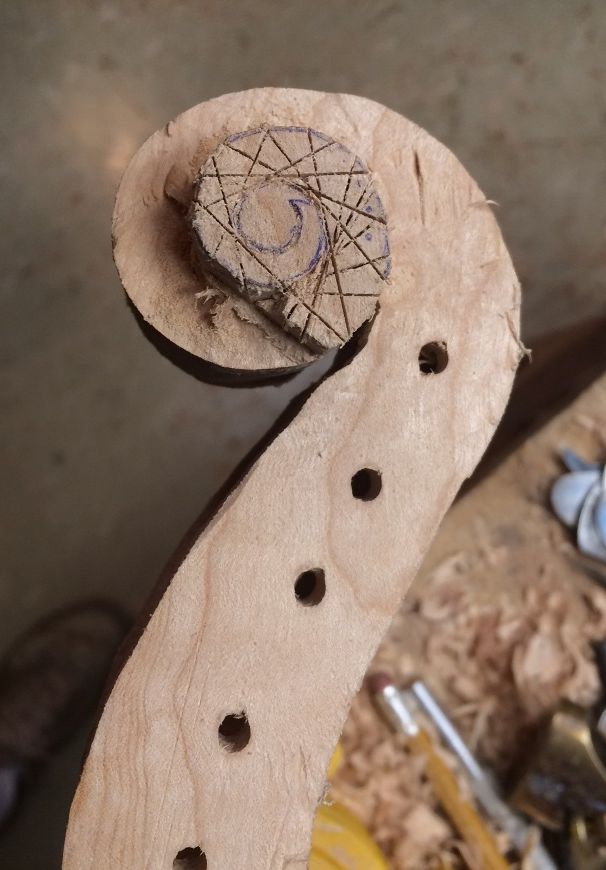
I had already completed the first scroll and neck, and had begun working on the second neck, when, I “kinda took an unplanned detour.”

scroll carving for five string fiddle handmade in Oregon by Chet Bishop Luthier.
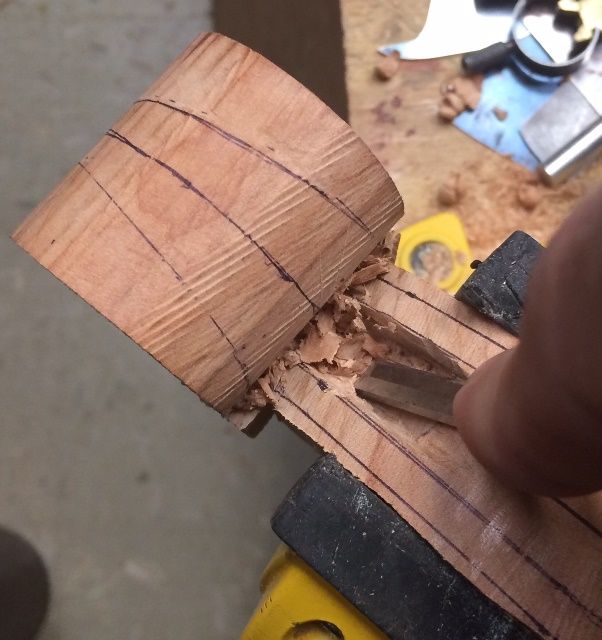
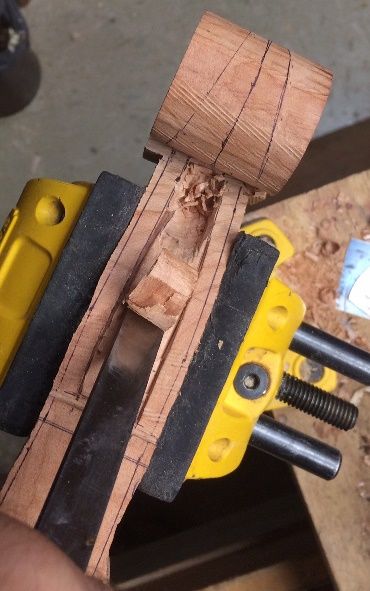
Beginning to carve the pegbox for fiddle #1.


carving pegbox for five string bluegrass fiddle handmade in Oregon my Chet Bishop, luthier.
Heavy wood removal from pegbox interior.


sawing out scroll on 5-string bluegrass fiddle handmade in Oregon by Chet Bishop, luthier.
Beginning the saw-carving of the scroll


Saw-carving the scroll for a 5-string bluegrass fiddle, handmade in Oregon by Chet Bishop. luthier.
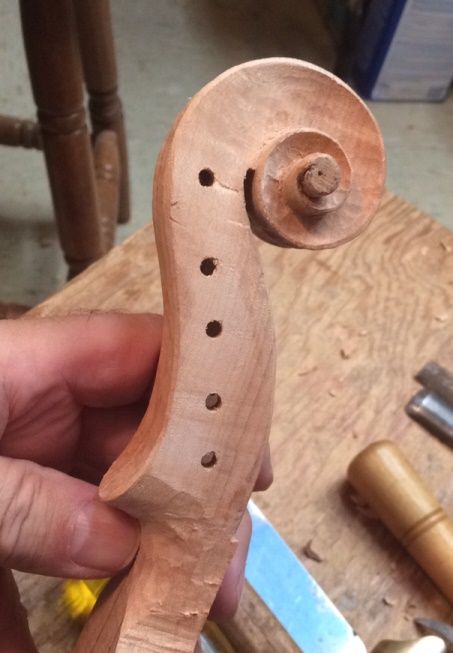
Saw-carving the scroll.


scroll for 5-string bluegrass fiddle, handmade in Oregon by Chet Bishop, luthier.
Scroll nearing completion


scroll for 5-string bluegrass fiddle handmade in Oregon, by Chet Bishop, luthier.
Scroll #1 essentially complete.


Then I Had a Small Mishap:

I had worked for 12 hours, Monday the 16th, and afterward, I felt pretty tired. Consequently, I had tired hands: Probably I had a tired brain, too, I suppose… anyway:

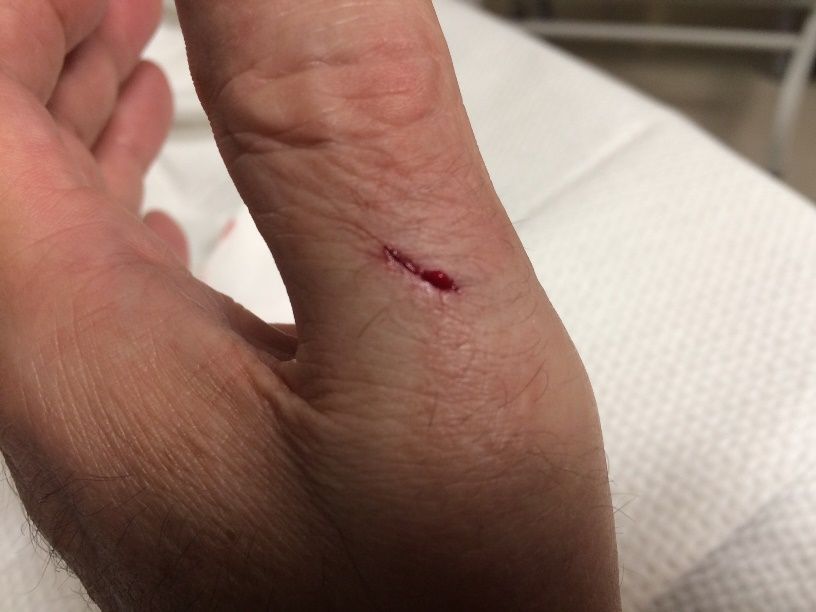
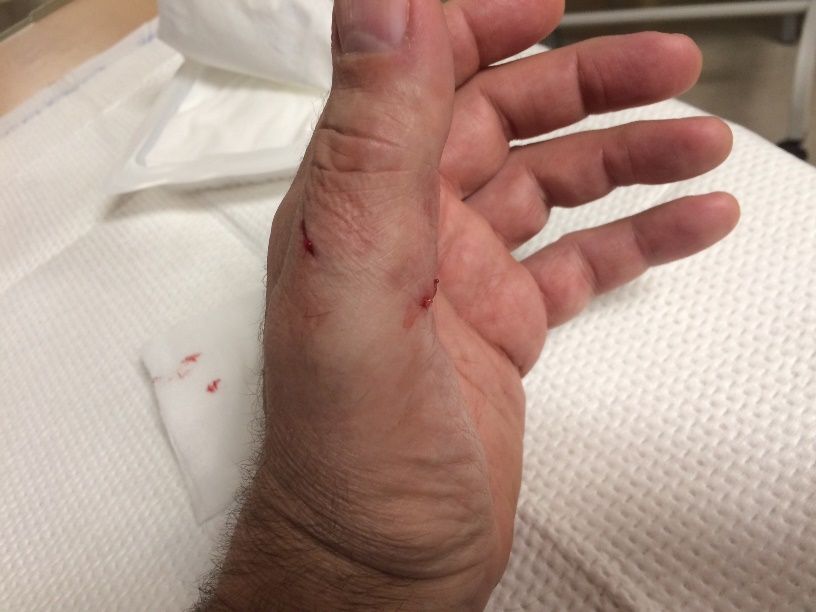
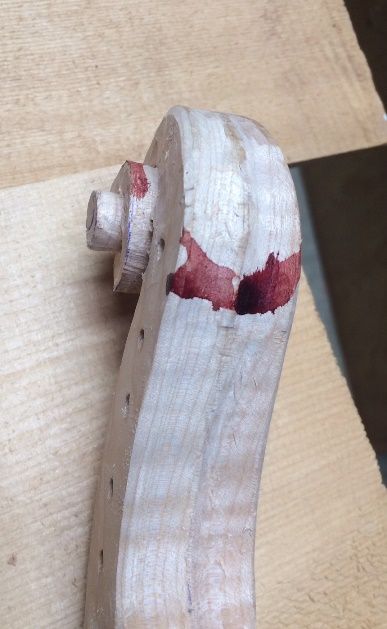
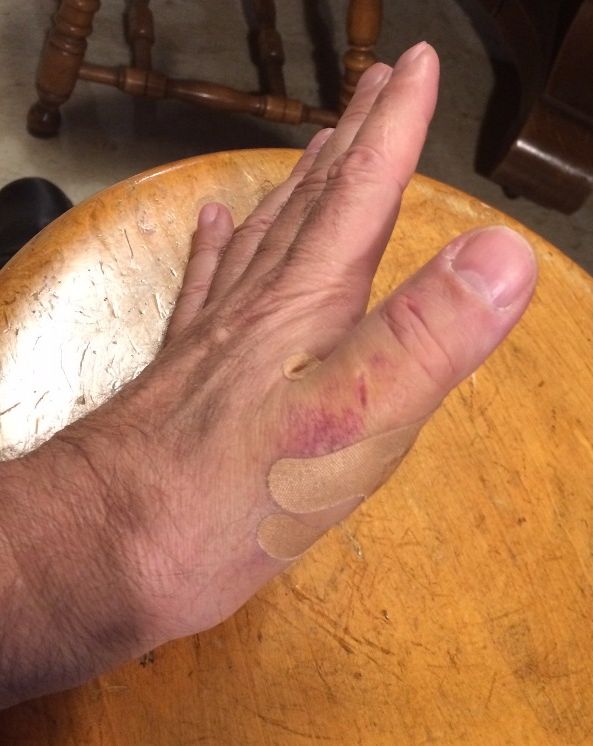
I had begun carving the second scroll. I completed the saw-carving part, and I was removing waste wood, with a small gouge, when, I slipped. annnnd, just happened to have my left hand in the path of the misdirected gouge. (sigh…)

Entry wound!


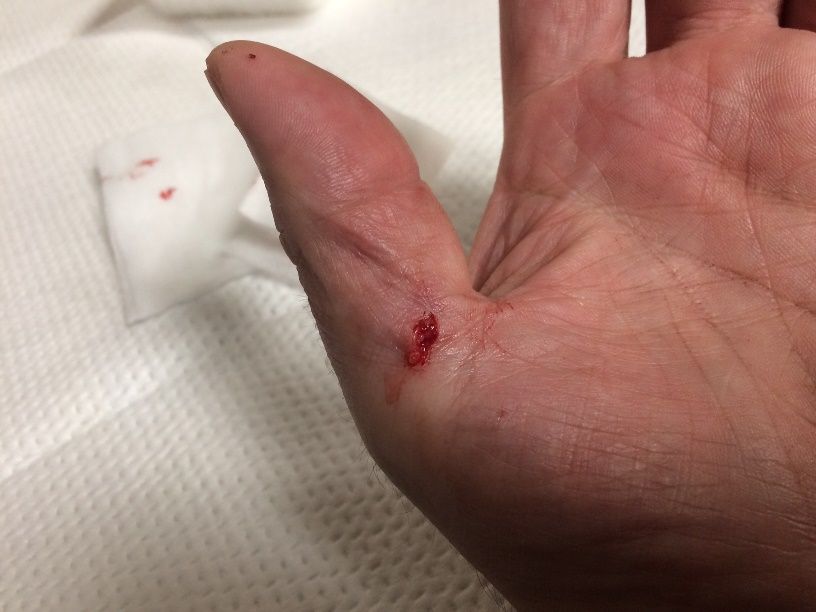
Exit wound!


Both sides at once!


Urgent Care? Emergency Room?

First we tried going to an Urgent Care clinic. We arrived there, and then discovered that (a) they only work by appointment, and (b) they don’t take medicare insurance, anyway. Accordingly,  I asked what my options were, and they said: “Everything else is closed! Go to the ER!” (Sigh… very expensive option!)

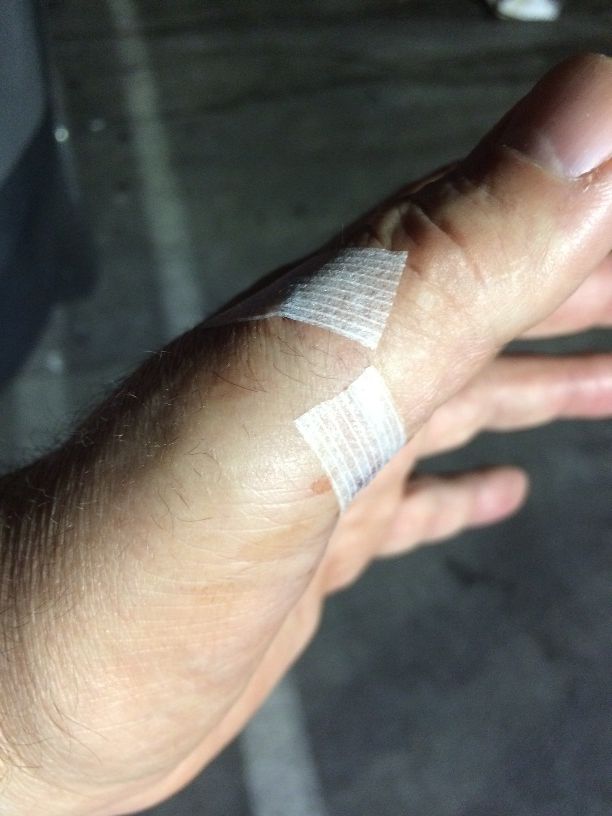
So, about 30 minute later we arrived at the Emergency Room at Saint Vincent Hospital. They were busy as usual, so we waited for about four hours. But after that, the ER people washed it out with sterile water, X-Rayed it to eliminate the possibility of torn bone or tendons, and applied two little “Steri-Strips!”

Steri-Strips from the ER.


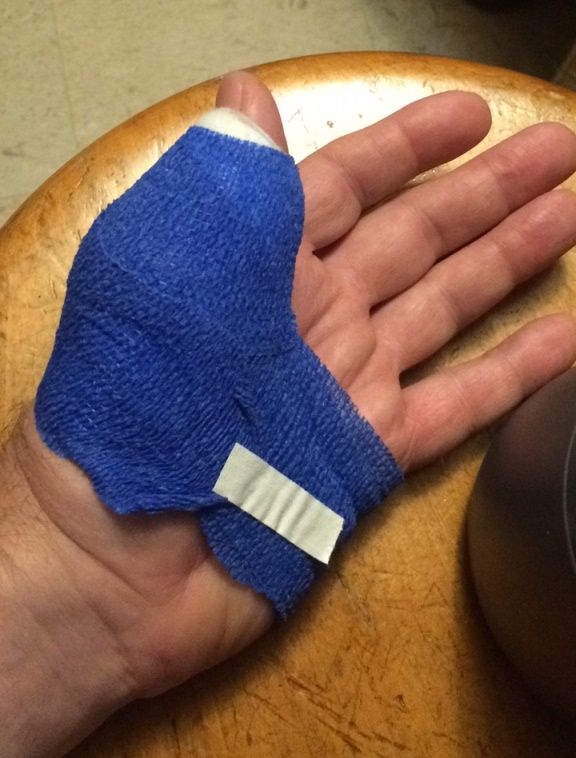
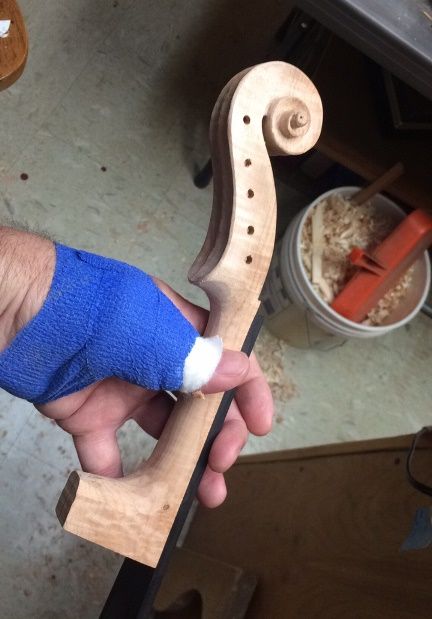
I guess that was normal,  but it felt pretty “exposed,” and was very prone to bumps (which were pretty uncomfortable when they happened.) So, after we got home, Ann bandaged me up with a heavily padded dressing so that I could sleep without bumping it. That was a real help, and, as a result, I slept well.

However, I kind of puttered around, the next day…partly too tired, I suppose, as we had arrived home somewhat after 3AM, and we got to bed after 4AM. Partly, I was just not feeling real good. Anyway, I had other things that needed doing, so I didn’t work on fiddles for that day.

Bandage for protection.


Red Violin beginning? This was the second scroll, in progress when I slipped.

Back to Work!

I got back to work on Wednesday. It turned out that I really needed two hands for most things, so it slowed me down rather badly, having a bulky bandage on the left paw. However, I was finally able to get the fingerboard installed on the first scroll/neck so that I could shape them as a unit.

Fingerboard installed for 5-string bluegrass fiddle handmade in Oregon by Chet Bishop, luthier
Fingerboard installed the second day after the injury.


That was kind of encouraging, seeing some progress again.

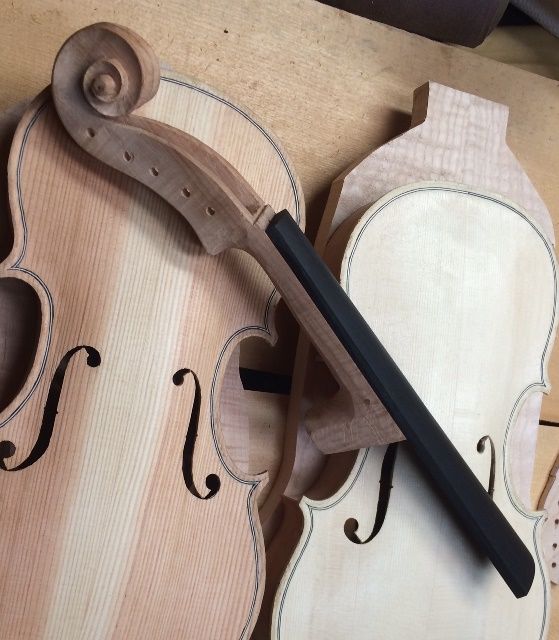
neck and fingerboard with five-string fiddles by Chet Bishop, Luthier.
Neck #1 with the two completed front plates and garland assemblies.


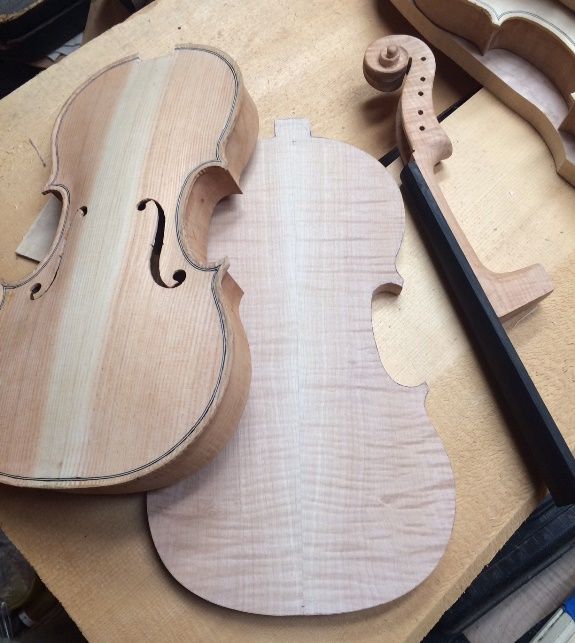
back plate and neck assembly with dive string fiddles by Chet Bishop, Luthier.
I had also traced and cut out the back plate for fiddle #1.  (Big Leaf Maple: Pretty stuff!)


Then I set the neck on fiddle #1:

cutting neck mortise in 5-string bluegrass fiddle handmade in Oregon by Chet Bishop, Luthier
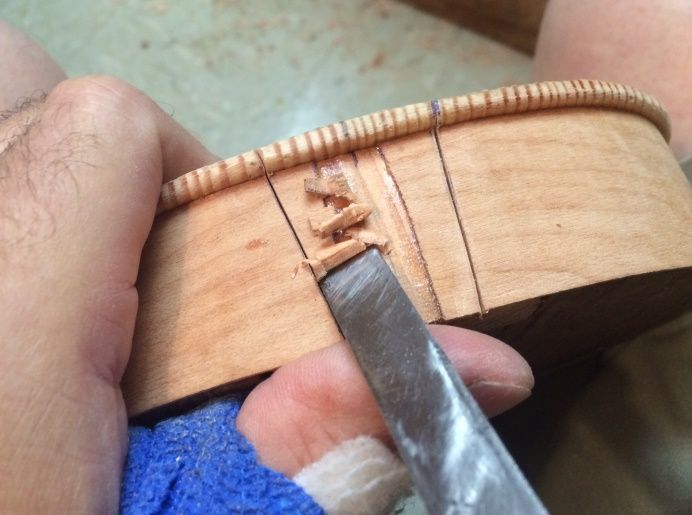
Beginning the neck mortise. Notice the hard, heavy winter reeds in the Douglas Fir front plate.


cutting the neck mortise on a 5-string bluegrass fiddle handmade in Oregon by Chet Bishop. Luthier.
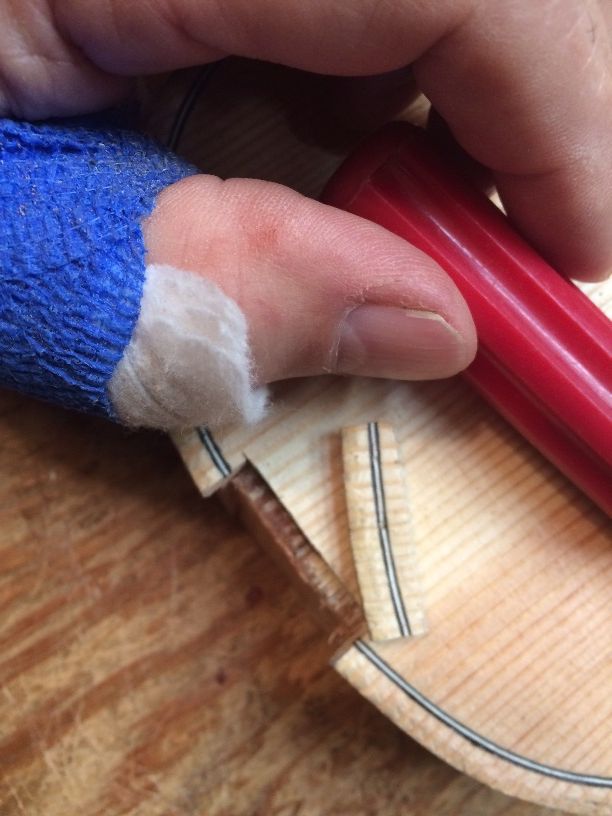
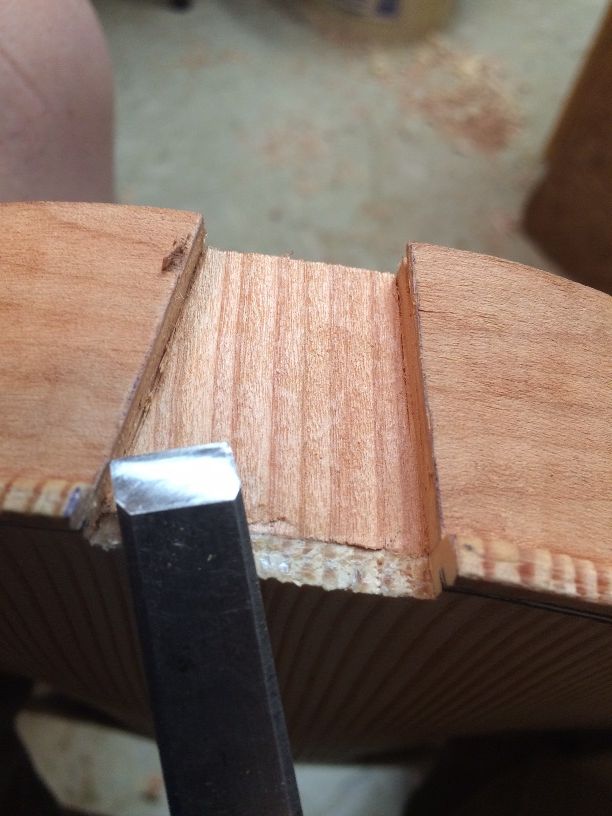
The cut-out in the front plate for the neck mortise.


completed neck mortise in 5-string bluegrass fiddle handmade in Oregon by Chet Bishop, Luthier.
Completed neck mortise


neck set completed in 5-string bluegrass fiddle, handmade in Oregon by Chet Bishop, Luthier.
Completed Neck-set. (Back of the neck heel will still have to be sawn off.)


Healing up!

After that, we had appointments with various people, so I didn’t get a lot done on Thursday or Friday. By the time the weekend had rolled around, I had the biggest bandages off, and was sporting a plain finger bandage, but I had to be pretty careful.  Bumps were still pretty unpleasant.

Thumb exit wound, healing well.


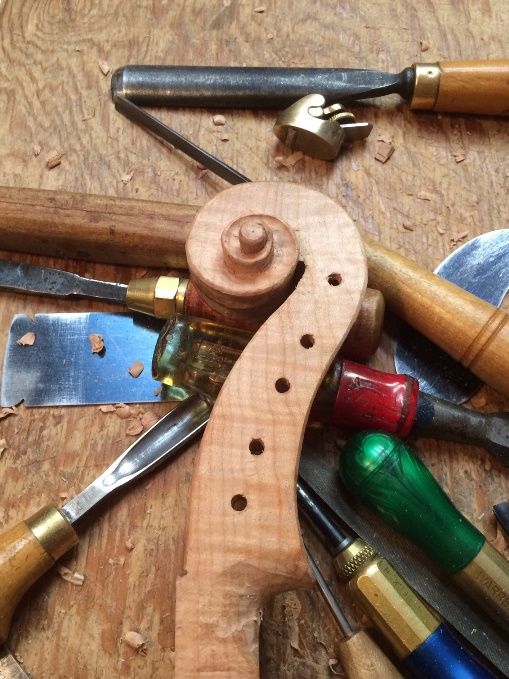
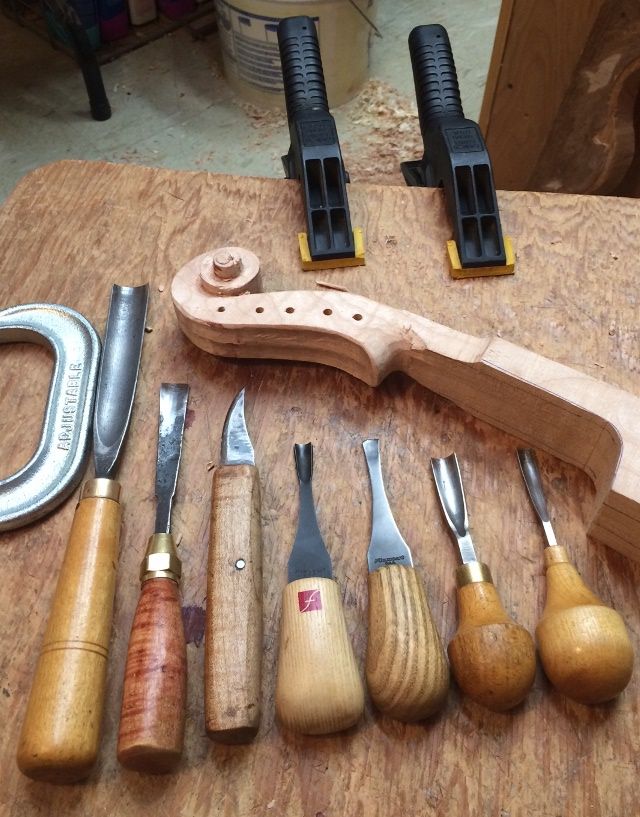
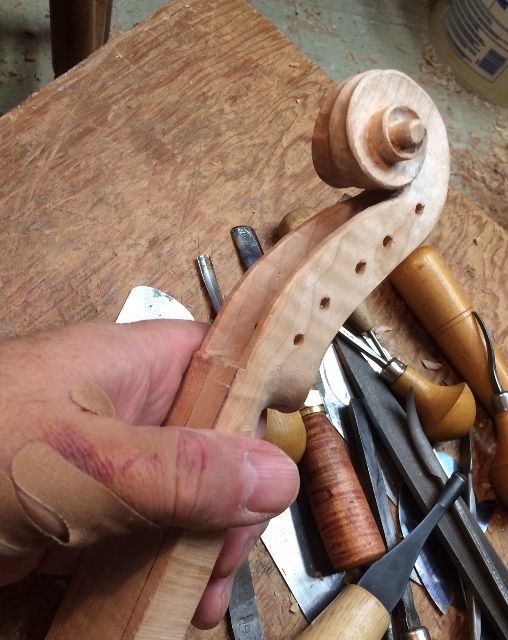
So, after having removed the bulky bandage, I went back to work on fiddle #2, carving that “Red Violin” scroll into just a plain, “five-string fiddle scroll.” It looked as though the majority of the “gore” would simply be carved away: so, no “Red Violin!” (By the way, that little gouge, third from the right, is the one that perforated my thumb.)

scroll for 5-string bluegrass fiddle handmade in Oregon by Chet Bishop, luthier.
Beginning work on the second scroll, again.


scroll nearing completion for a 5-string bluegrass fiddle handmade in Oregon by Chet Bishop. Luthier.
Second scroll nearing completion.

I will post more again, soon. Sorry for the hiatus: it wasn’t intentional. 🙂


Thanks for looking.


Progress report: fiddles for Fall of 2021

Progress Report 8/3/21

Foundational Work For 5-string Fiddles

My last post showed the six “kits” I had built. The post included bookmatching the five-string fiddle plates, cutting the profiles of the Big Leaf Maple necks and scrolls, and cutting appropriate ribs to size. As a result, I ended up with six kits, including bass bar blanks all cut from the same billet of Englemann Spruce, and a big pile of linings ready to bend. ( I thought the linings were willow, but I now suspect may be poplar, instead.)

Five of these front plates ar Englemann Spruce, but one is Douglas Fir. I rarely find Douglas Fir that will work for tonewood, but a friend brought me a pickup-load of firewood,  and I found some that sounds great. (As you can see, I am not a “snob” about where I get my wood. If I need special wood, I buy it, but I frequently use Oregon woods.)

(In case anyone reading this is not aware, I build all my instruments (except the fittings, as a rule) entirely from the raw materials. I make all my molds by hand, and all my templates by hand. I have even made many of my tools. So every instrument is genuinely “handmade in Oregon by Chet Bishop.”) 🙂

materials laid out for 5-string fiddles to be made in Oregon by Chet Bishop
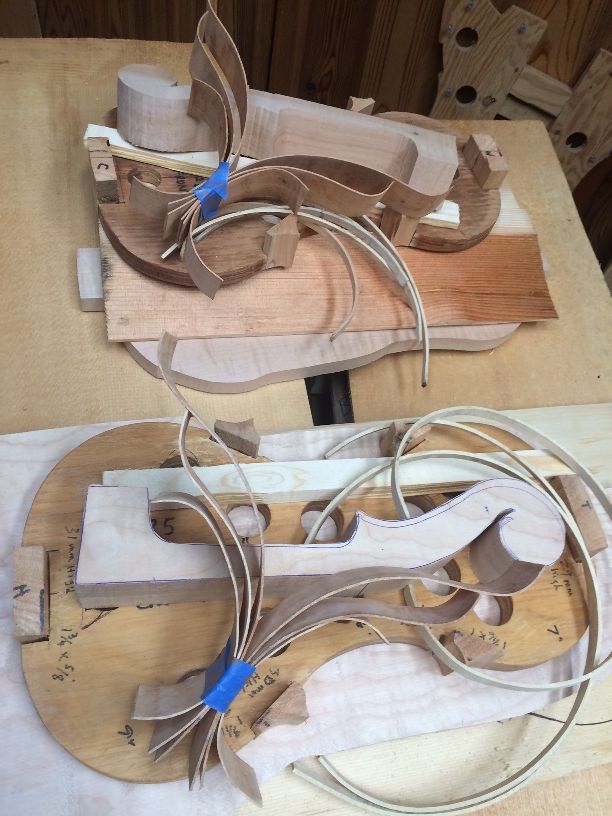
Four of the six assembled “kits.”


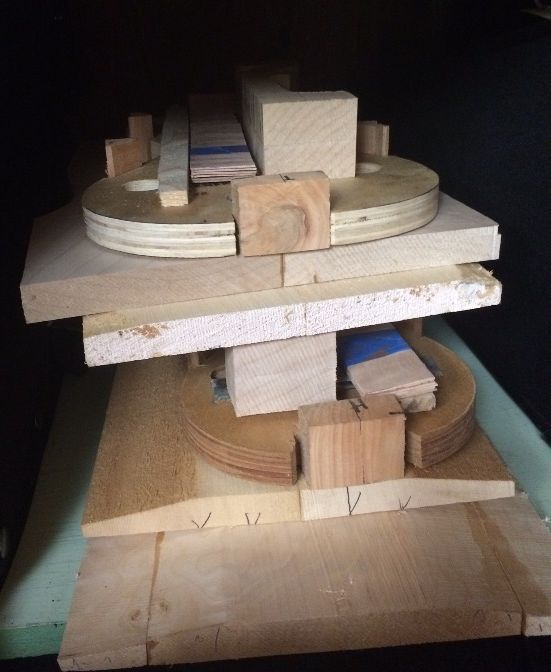
I set aside four of the six “kits,” just to get them out of the work area. Then I began work on the remaining two kits.

Fiddles in pieces, waiting to become 5-string fiddles handmade in Oregon by Chet Bishop
Two of the four kits in storage.


Beginning the Builds

The first step after shaping the blocks (last post) is to bend the ribs and linings. Then I can glue the ribs to the prepared blocks, using hot hide glue, and finally glue the linings to the ribs.

I rub a heavy coat of candle-wax (“paraffin” in the US) on the outer rims of my molds. This will prevent a “sneaky” drop of hide-glue from accidentally bonding the ribs to the molds instead of just to the blocks.

(A rib accidentally glued to the mold can be a disaster if I don’t realize my mistake in time. The glue is definitely stronger than the rib. It will destroy the rib, if I don’t catch it early enough to use hot water or steam to release it. But the wax coating pretty much eliminates that problem.)

I used a bending iron and a thin aluminum bending strap, to hand-shape the ribs, and then put them aside in paired sets, with the respective molds for which they are intended.

ribs and linings bent for handmade 5-string fiddle by Chet Bishop in Oregon
Ribs and linings bent and ready to install.

Installing the Ribs

I installed the center-bout ribs first: they can be difficult, so I’m glad they are first. But the real reason they are first, is that the upper and lower ribs will overlap the ends of the center ribs: they do not have a mitered corner, but a lapped corner, which if done correctly, is essentially invisible.

installing ribs on 5-string bluegrass fiddle handmade in Oregon by Chet Bishopribs
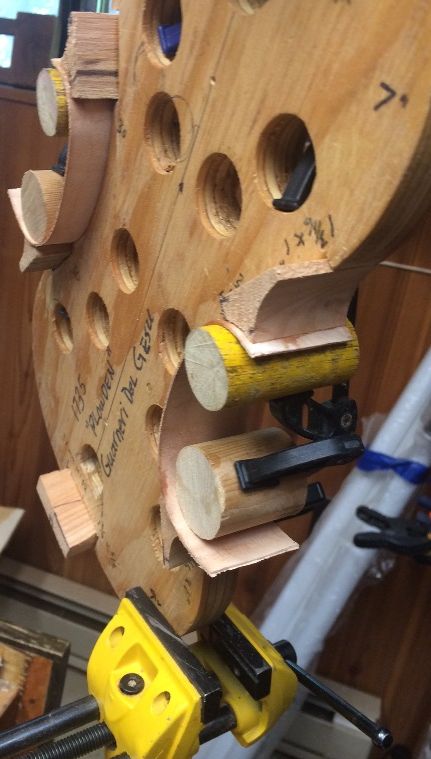
A pair of center-bout ribs installed.

I frequently use these “French-style” molds, (flush on the back) which allow me to install the front linings and still easily remove the mold. (Italian-style molds are centered on the ribs…I use that kind, too.)

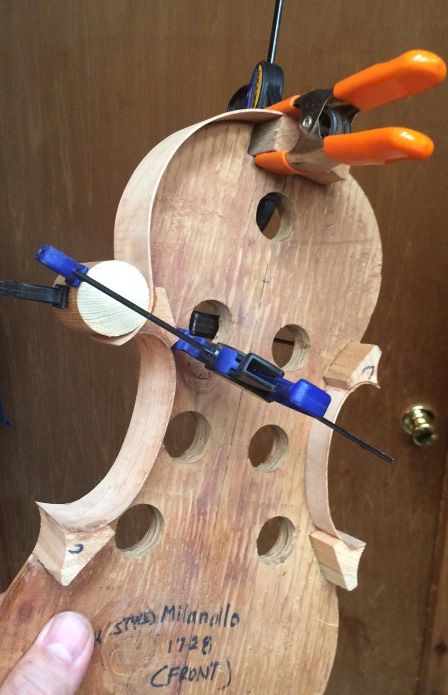
I used cylindrical clamping cauls of appropriate sizes (dowels, broom-handles…whatever) and f-clamps to quickly secure the rib ends before the hot hide glue gels. If I make a mistake, I can steam the joint loose with a teapot, and do it over, correctly.

After the center-bout ribs dry, I shape the ends of the ribs to match the curvature of the blocks.  Then the upper and lower ribs can be glued to the perfectly-shaped block and rib. Finally, I begin installing the upper and lower ribs.

installing ribs on 5-string fiddle handmade by Chet Bishop in Oregon
First upper rib installed: notice the shaped endes of the center-bout ribs.


Installing ribs in 5-string fiddle handmade in Oregon by Chet Bishop
A pair of matching upper ribs installed.


installed ribs on five-string fiddle handmade in Oregon by Chet Bishop
All the upper and lower ribs installed. (Looking from the back side of the mold.)


ribs installed on two five-string fiddles, handmade in Oregon by Chet Bishop, Luthier.
Two completed rib-sets, ready to be trimmed before adding linings. (Lots of smoke blowing in from the fires this season, making the light kind of red.)

Necks!

While waiting for glue to dry on the ribs, I laid out the necks so that I will be ready to begin carving them.

Necks for five-string fiddles handmade in Oregon by Chet Bishop, Luthier.
Necks laid out for carving.

Linings!

After trimming all the corners, so that they look as though the ribs come together as one, I begin installing the linings. I cut a small mortise on each side of each block, flush with the rib, so that the lining will be glued tightly to the rib, and into the block mortise. I secure them all using hot hide glue.

Next, I cut the linings to length, shaping the ends to closely fit the prepared mortises. Then, I coat about 7mm of the edge of the rib, and the entire mating surface of the lining with hot hide-glue and insert the lining into the mortises and push it to the correct level, corresponding to the ribs. Finally, moving rapidly, I secure it with small spring-clamps.

installing linings in five-string fiddles being handmade in Oregon by Chet Bishop
One set of linings fully installed: one to go!


Linings installed in five-string fiddles handmade in Oregon by Chet Bishop
All the front linings installed in both molds.


I made a good deal of progress yesterday, and had hoped to make more progress today, but there were some household repairs that needed to be addressed first; so I didn’t begin working on violins until mid-afternoon.

Tomorrow I will level the fronts of the garlands and trace the front plates… I hope.  🙂


Thanks for looking!

Five-String Progress

Handmade 5-String Fiddle coming along!

Oregon Douglas Fir Top Plate

Otto Erdesz, 1917-2000 often made top plates for violas and violins out of Douglas Fir. Professional players bought and played his instruments. They are still playing them today, although many classical players insist that European spruce is the only “proper wood” for an instrument soundboard.

Frankly, I usually agree: all my experience with Douglas Fir has seemed to indicate that it would not be a very good choice. (I believed this, even though I have played one of his instruments, and it was excellent.) So, I simply didn’t try it, until this instrument.

Game-Changer!

Earlier this winter, a friend gave me a load of clean, dry Douglas Fir firewood. I use wood heat, and we had all been told it would be a bad winter (it wasn’t.) So I felt truly grateful for the gift. Later, as I split some of it, I noticed that, unlike most Douglas Fir, it had no twist at all, and it split easily and cleanly. I picked up a chunk and tapped it, and it gave a very clear, bell-like ring. (Hah! That spells “time to try some Douglas Fir!”)

So, I searched through the pile, and found one of the few pieces long enough to use. Then I carefully split it into useable billets. Next, I sawed along the center-line to book-match a plate.

Douglas Fir billet with Rib Garland
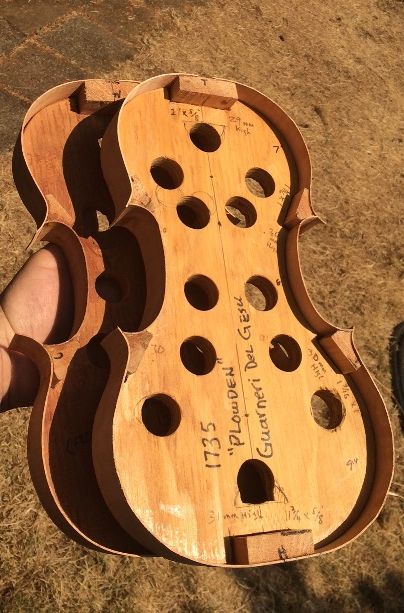
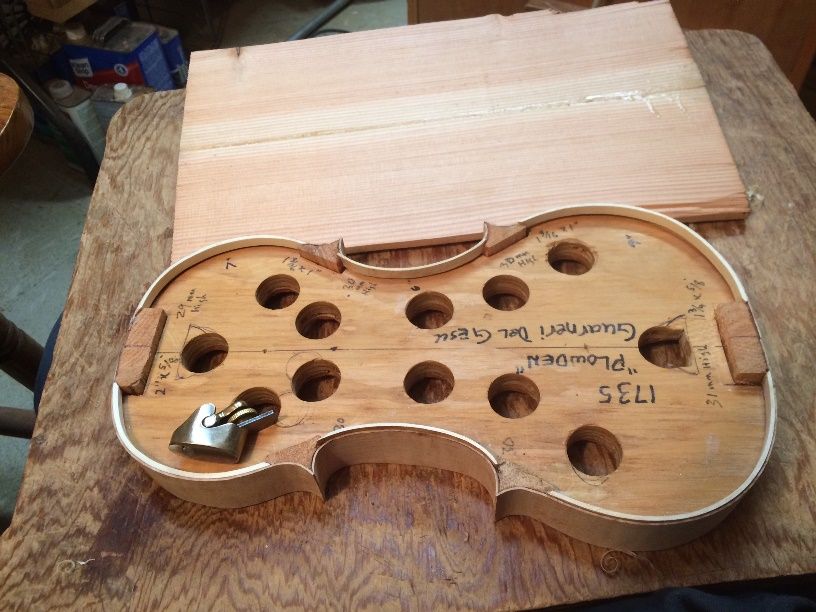
Douglas Fir billet with Guarneri Rib Garland

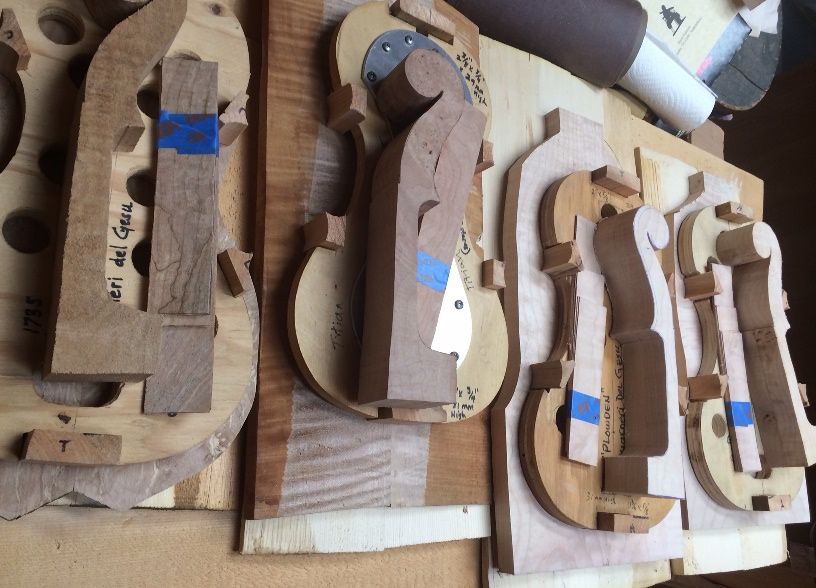
I frequently use a pattern modeled after the 1735 “Plowden” Guarneri del Gesu. And…I like it, so I installed blocks in the mold, bent the ribs, and got going!

I had one more piece of “scrap” of Oregon Big Leaf Maple. Happily, I had saved it, too, from the 5-string Double bass I built last year. Understandably, I was looking forward to making a fiddle out of it. I had already made one 5-string fiddle from scrap from the other side of the bass-back, (which I sold to a bluegrass fiddle player in Ohio.)  It had turned out very well, so I was anxious to get the “sister” instrument made.

Back Plate Arching Nearly Complete:

Back arching nearly complete.
Back arching nearly complete


And, the Neck

I obtained the neck billet from a tree on my wife’s parent’s place. Every time I looked at it, I found the wood very attractive, so I got started on it, as well:

neck billet in progress
Neck billet in progress.


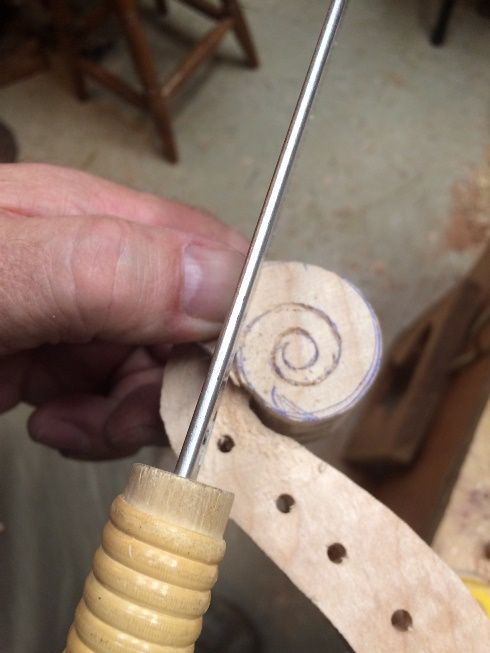
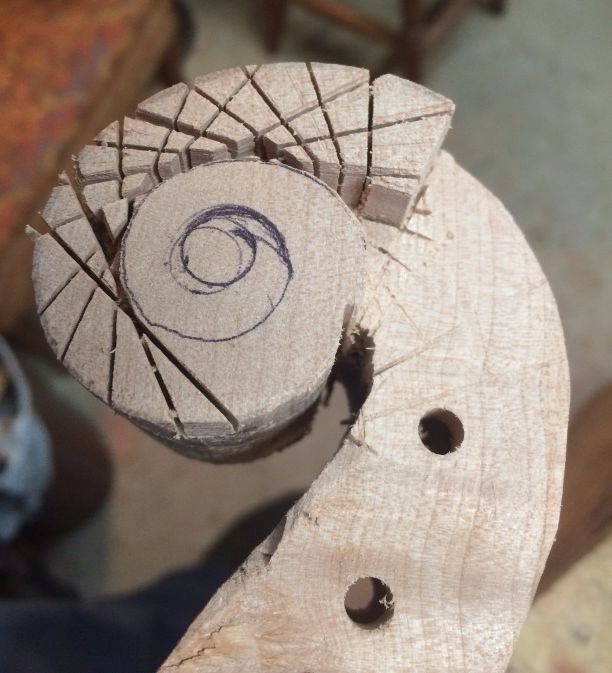
First. I began to carve the scroll and pegbox. I find that this task requires a lot of saw-cuts, to outline the actual curl of the scroll, and then to remove the waste wood. Alternately, I can use either a saw or a gouge, but I find that the saw saves a lot of effort. Here, I use the saw.

beginning the scroll cuts
Beginning the scroll cuts


Continuing the scroll cuts.


Then, I used various gouges and chisels to complete the scroll and the inside of the pegbox.

Scroll and pegbox nearing completion.


I prepare and attach the fingerboard after the scroll and pegbox are very close to complete. Then I can carve and shape the two as a unit. That hasn’t happened, yet, so the handle portion of the neck is still rough and untouched.

Scroll ready for fingerboard; Arching complete on back plate.
Scroll ready for fingerboard; Arching complete on back plate: ready for Graduations.


Completing the Front Plate

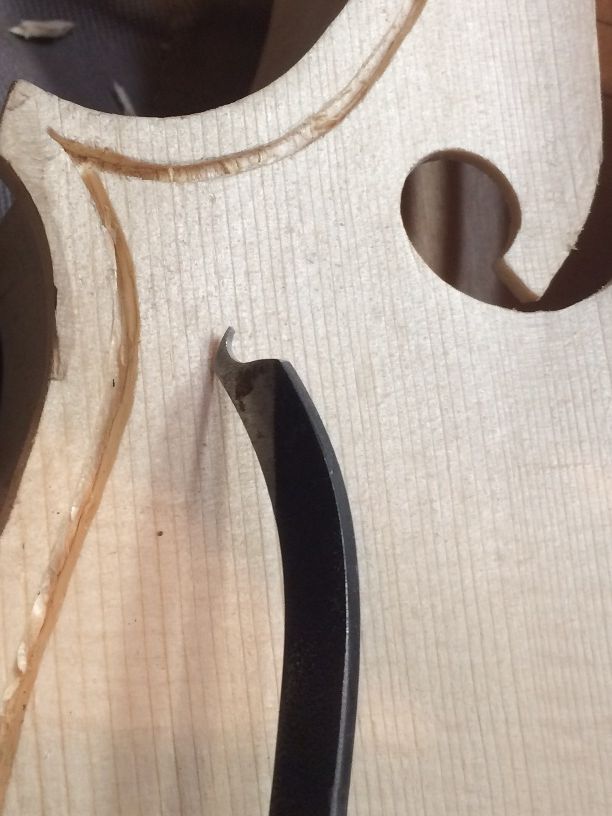
Meanwhile, I completed the carving of the front plate. Then, I laid out and cut the f-holes and began the purfling. Cutting the purfling slots by hand on Douglas Fir is quite difficult, because the winter reeds are exceedingly hard, compared to the softer summer reeds. The knife just “pops” over them so that it feels as though it is running over corrugated roofing.

As a result, I took much longer to purfle this plate than I usually do for a spruce plate. (Ah, well! Perhaps that is one reason so few luthiers are willing to use it!)  But, I still have high hopes for the power and tone of the resulting instrument. This plate has exceptionally strong and clear tap-tones.

Purfling the front plate.

Garland leveled and Front Plate installed!

(Unfortunately, I neglected to get photos of the bass-bar process. I made it also of Douglas Fir, from the same billet. I hope to show it after I remove the mold…sorry.)

Front plate installed and waiting for glue to dry.


Well…I’m tired. I nearly completed the graduations for the back plate, but today was a long day. So, I will simply have to finish them tomorrow. However, the progress stands here, for tonight:

Completed front plate on garland, with nearly completed back plate.


Tomorrow! (yeah, tomorrow!)

I hope to get the back plate completed tomorrow, except for the purfling, which will have to wait until after I install the plate. Then, I will prepare the fingerboard and get it glued onto the neck, and I will feel as though I am “On the Home-stretch!” (But it won’t really be true: there still will be a great deal of work left to do, before it is anywhere close to completed.)


Thanks for looking!


First Complaint!

Nice Problem to have!

Addictive Fiddle!

I got a text message from Andy Pastor, stating his only complaint so far, regarding the new five-string fiddle he bought last week:

He isn’t getting enough sleep!

He finds that fiddle to be utterly addictive, and has been staying up ’til midnight playing the thing, even when he knows he has to get up and go to work in the morning! 🙂

Great problem to have!

Here is Andy, playing his new fiddle:

Playing the new 5-string Fiddle
Happy Fiddler!


And here are two sound clips (actually recorded in his bathroom where there are high, vaulted ceilings, producing a bit of an echo-effect…which he likes. )

🙂

First one is “St. Ann’s Reel” Second is “Arkansas Traveler.”

https://mail.google.com/mail/u/0?ui=2&ik=a7311bb001&attid=0.1.1&permmsgid=msg-f:1686643027999616458&th=176828e5d2ce6dca&view=att&disp=safe


Thanks for looking!

5-string fiddle from bass back

5-string Fiddle Back from Bass Back Scrap!

I don’t like wasting tonewood!

So, when I saw that there were two sections of “scrap” left over, near where the neck end of the five-string double bass back was cut out, I realized that a 5-string fiddle back could fit into each of those two pieces.

So, I salvaged the wood, and not only got two backs, but also the neck blanks for two 5-string fiddles.

Five-string fiddle back cut from the scrap left from a 5-string double bass back.

Five-string fiddle back cut from the scrap left from a 5-string double bass back.

Arching the Plate

Five string fiddle begun, with back and neck from scrap from a 5-string double bass back.


I really like the look of the Oregon Big Leaf Maple back wood. I enjoyed arching the plate.

Five-string fiddle back arching nearly complete.
Five-string fiddle back arching nearly complete. It is sitting on the five-string double bass garland whose back provided the scrap for the fiddle-back.

Purfling the Plate

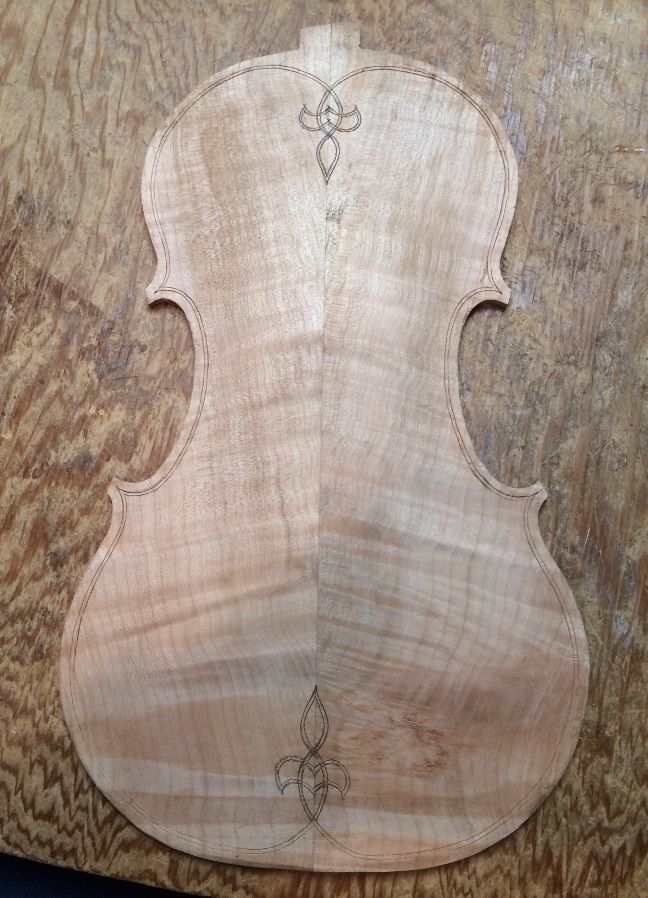
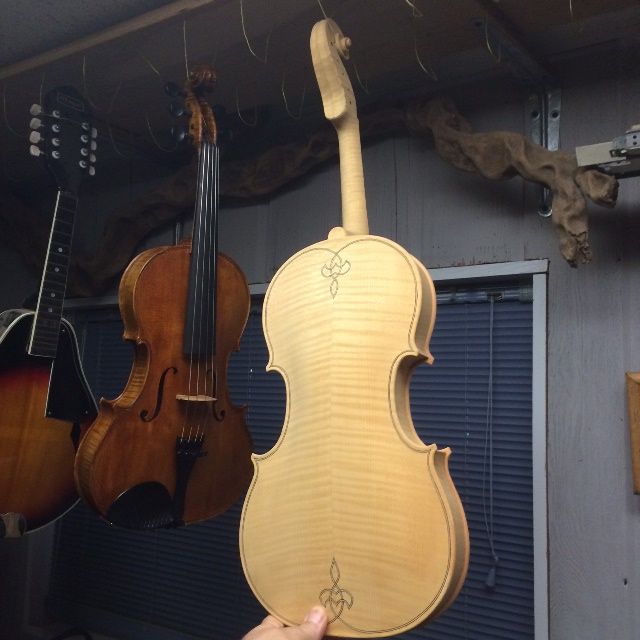
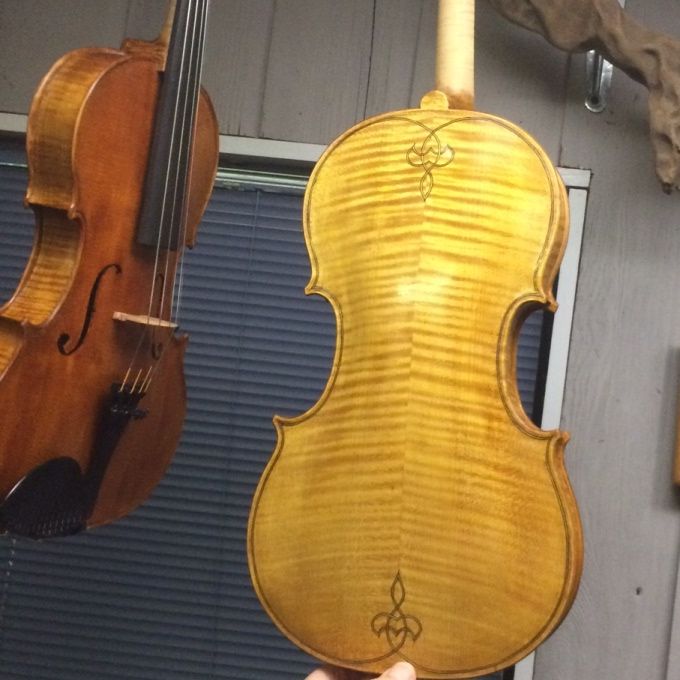
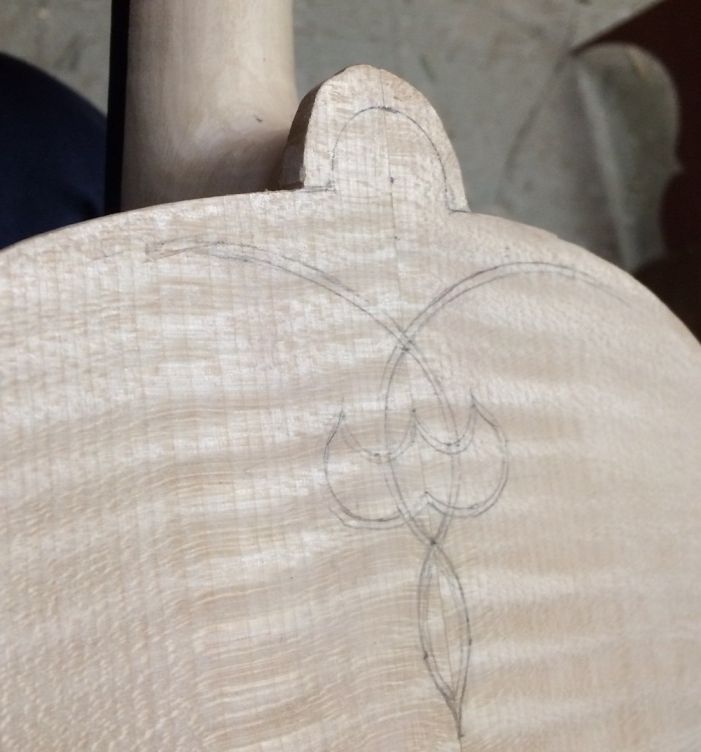
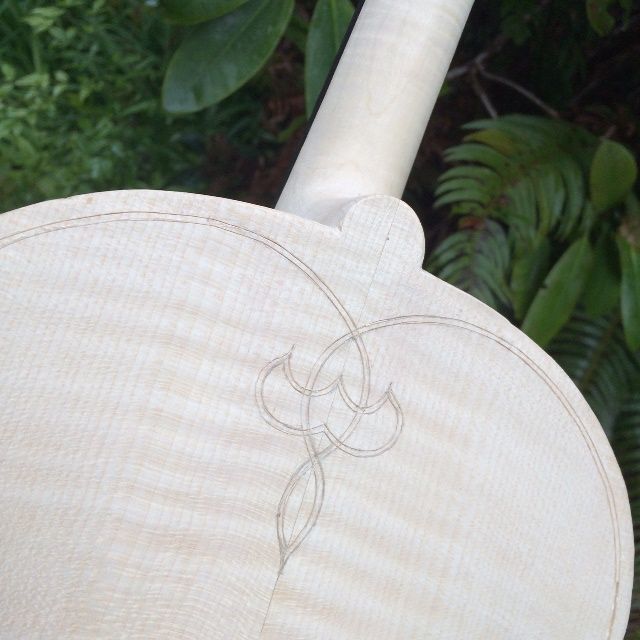
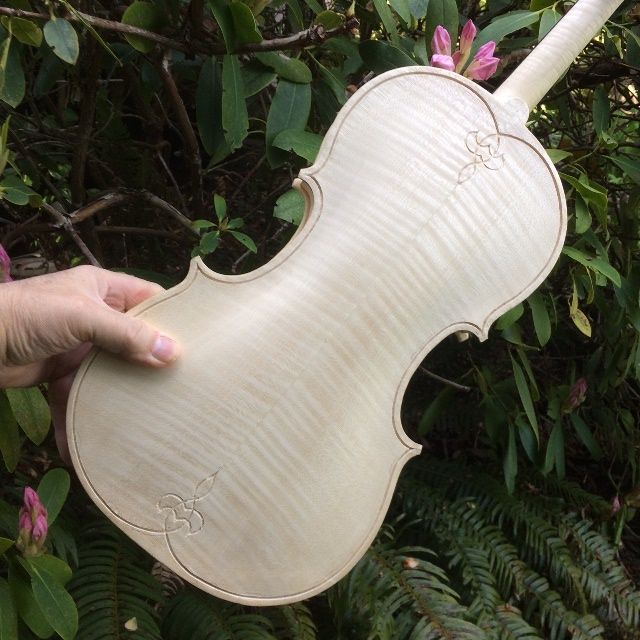
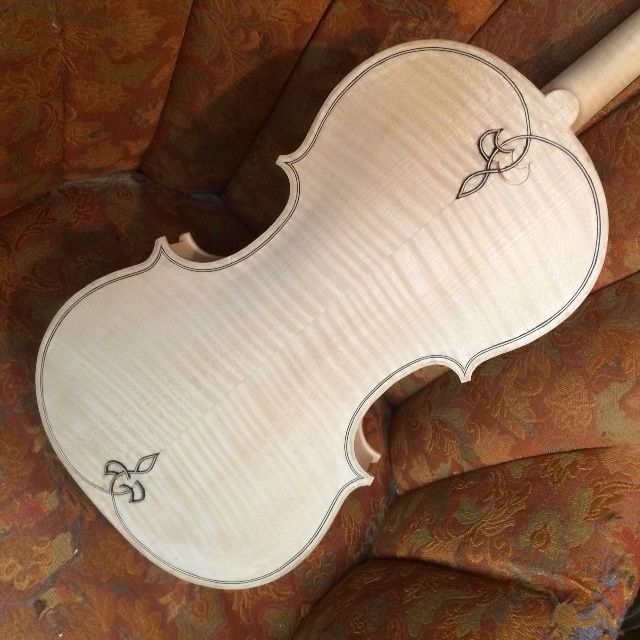
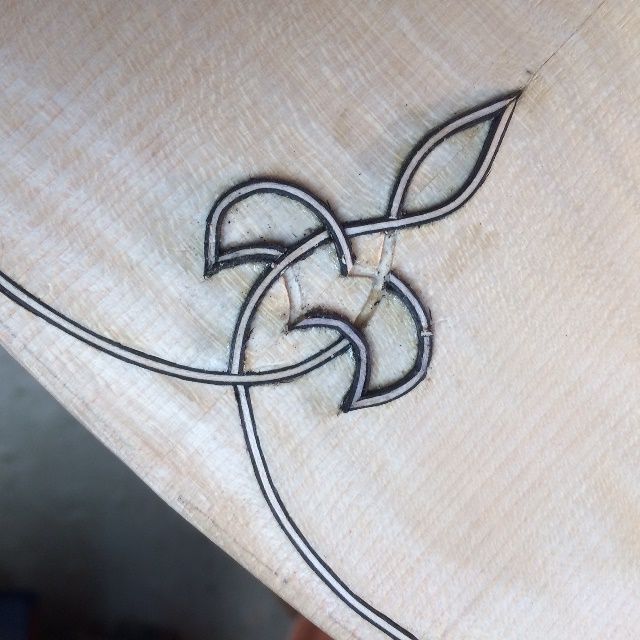
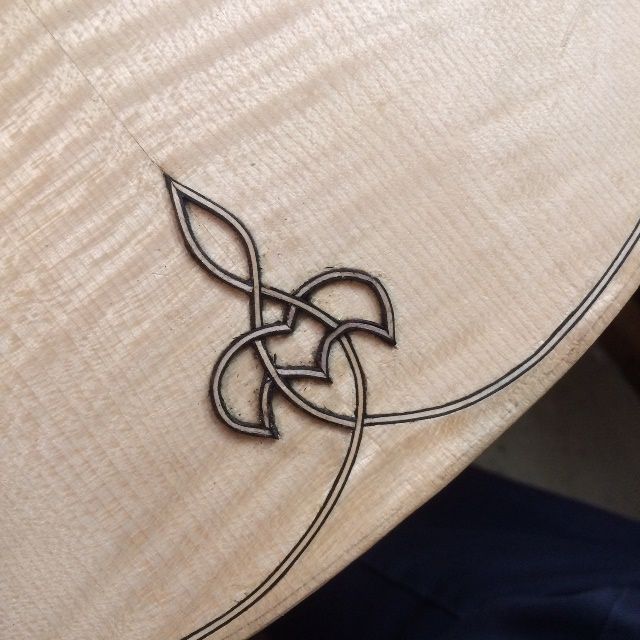
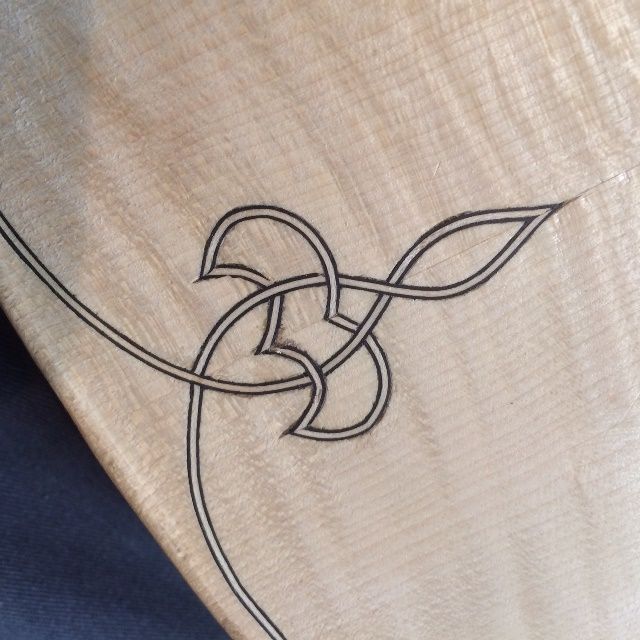
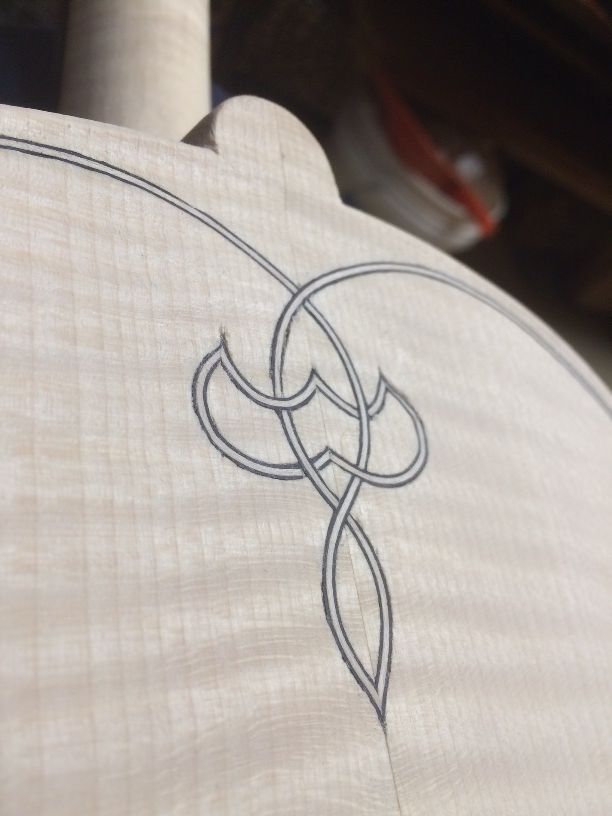
On all my five-string instruments I usually include a purfling weave. It is a modified fleur-de-lis I designed for my first five-string fiddle and have continued to use on subsequent work.

Five-string fiddle back with purfling slots incised and ready to complete.

In this photo, the slots for the purfling have been incised, but not cut deeply, so the next step is to slice deeply enough that the waste wood can be removed from between the cuts, and the purfling strips inlaid in the resulting slot.

I will include the purfling process in subsequent posts.


Thanks for looking.

Beginning the Plates

Beginning the Plates

Bookmatching the Plates

When I last posted, I had the garland pretty much complete, and the materials were prepared for the neck and the front and back plates.  I had cut the back plate roughly to shape, in order to use as much of the “fall-off” material from the back plates, as possible, from which to make the neck.

I went ahead with the neck and scroll, just because I find it encouraging to have some of the “pretty” work done, as it makes me feel that I am making progress. You can see the neck progress, here.

But at some point, one has to go ahead with the task of bookmatching the plates and getting them ready to carve.

Sitka Spruce front plate halves for the five-string double bass.
Rough shape of five-string double bass back plate, and template for the neck.
Rough shape of the five-string double bass back plate, with the template for the neck. The neck was cut out of the scrap from the back.


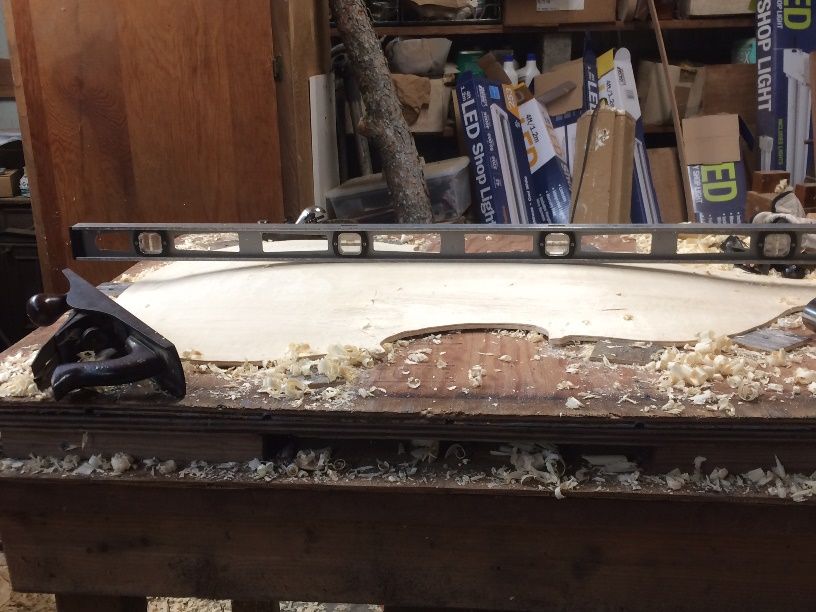
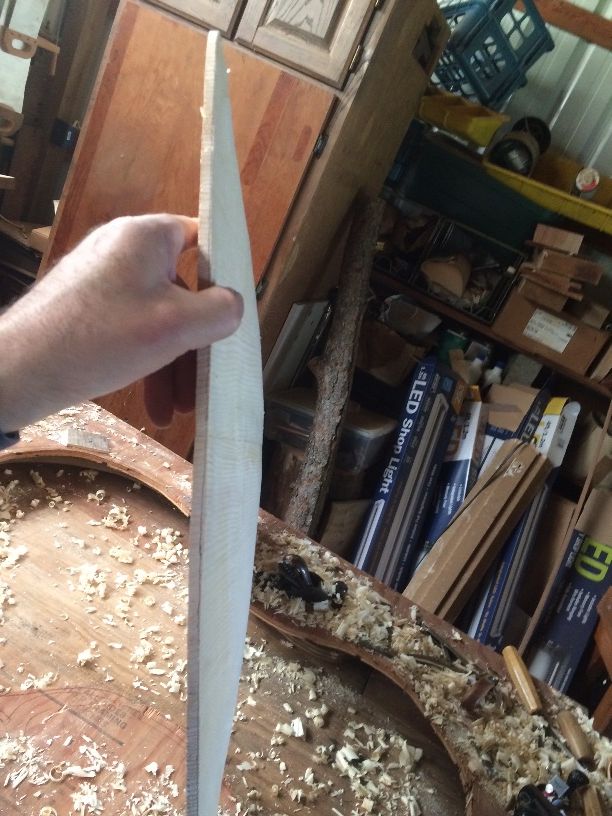
So, for the front and back plates, the next thing on the agenda was to plane the center-joints absolutely flat and straight and then glue them together. It took two tries on each of them, as it turned out that while they were technically “straight”, and if I put a try-square at any given point, they seemed to be square…in reality, there was a longitudinal twist to the surface I had planed, and the fit was not acceptable. (sigh…) No big deal… I just had to saw the joint back apart, and try again.

Finally, I got everything lined up correctly; then I glued and clamped the plate halves together, and produced the plate banks, ready to trace the actual shapes.

Sitka spruce front plate for five-string double bass, bookmatched and ready to glue.
Sitka spruce front plate for five-string double bass, bookmatched, and ready to glue.


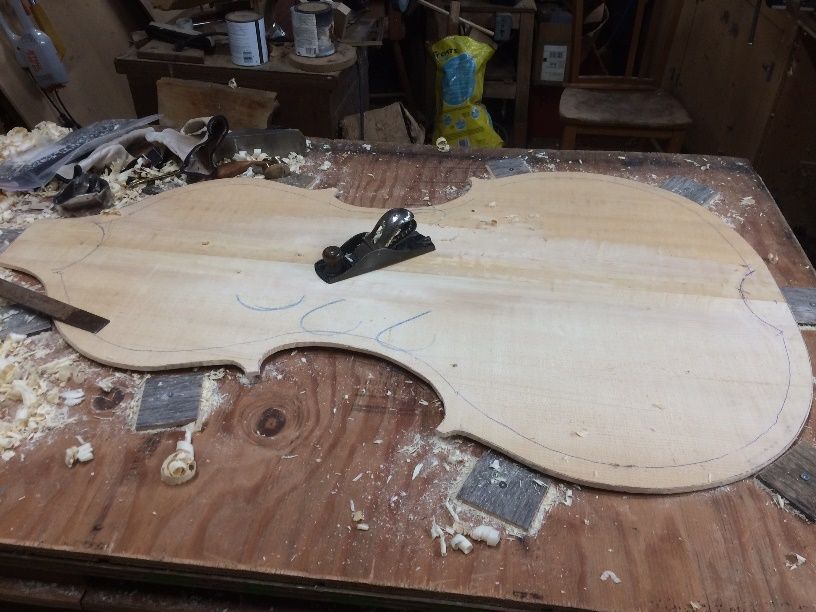
Front and back plates for five-string double bass, bookmatched and ready to trace shapes.
Front and back plates, bookmatched, and ready to trace shapes.

Tracing the plates

Sitka spruce front plate for five-string double bass, ready to trace the shape.
Sitka spruce front plate, ready to trace the shape.


Ready to trace the shape of the front plate of the five-string double bass.
Ready to trace the shape of the garland onto the front plate.


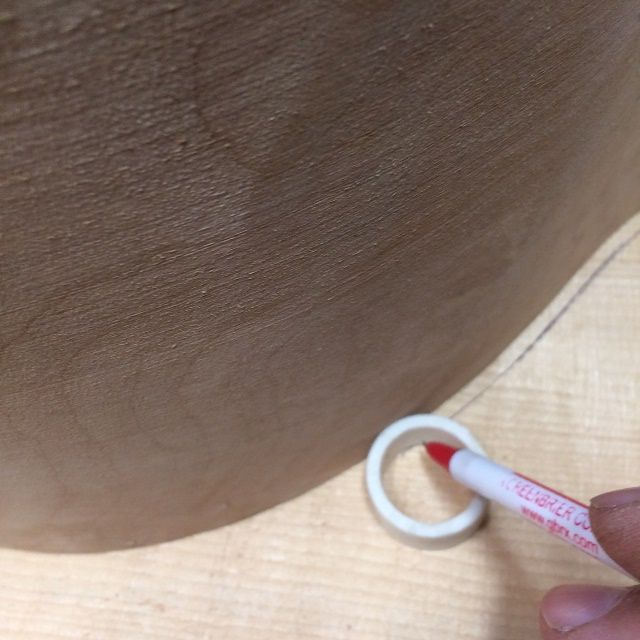
Using a pipe spacer to trace the shape of the five-string double bass front plate.
Using a pipe spacer to trace the shape of the garland onto the Front plate.


Tracing the plate out with a pipe spacer like that enables me to establish a very even overhang of about 4.5 mm. The problem is, it also makes round corners, which I did not want. So I had to correct, the corners, using a long straightedge to “point” the corners toward the center of the plate at the far end, and then use circle templates to extend the curvature of the plate edge above and below the corner to meet the straight lines. (Incidentally, the reason I have stopped using a washer for a spacer, is that any washer small enough to have the right distance from outside to inside also is so thin that if there is the smallest change in the fit between the plate and the garland, the washer will slide under the garland, changing the overhang distance to zero. The thin slice of PVC pipe never does that.)

Cutting out the Front Plate

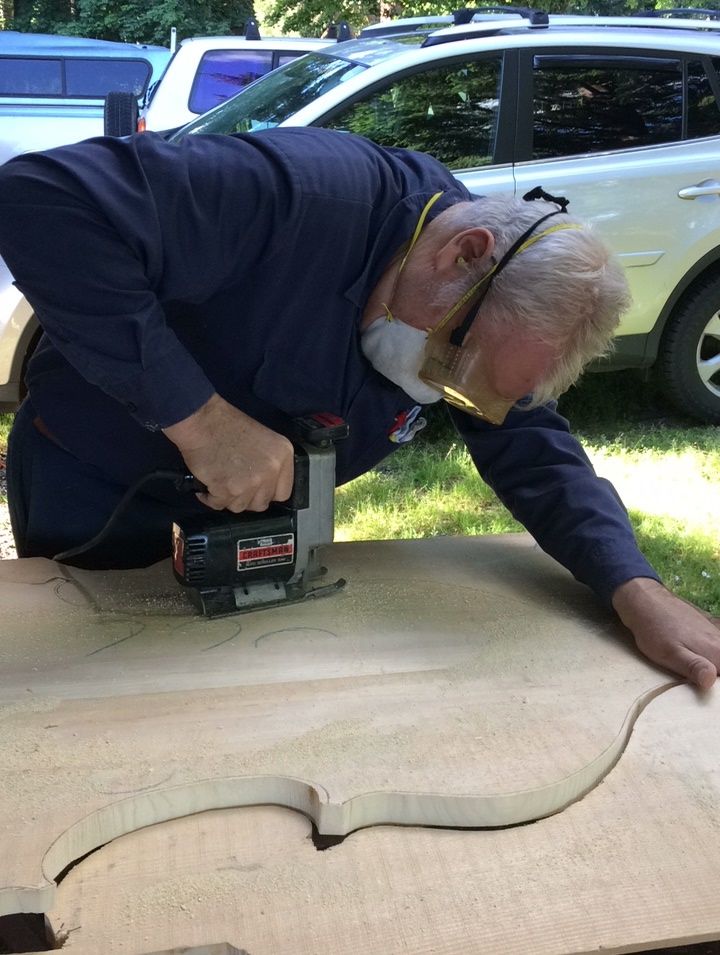
I used an old Craftsman “Auto-scroller” saber-saw (Hand-held jigsaw) to cut out the perimeter of the front plate. Ann, my beloved wife, bought me that saw 36 years ago, when we had been married for only about three years. That little saw has a lot of miles on it!

Cutting out the completed shape of the front plate for the five-string double bass.
Cutting out the completed shape of the front plate. I am not attempting to cut exactly to the lines. I will correct to the lines, after the arching has been completed.


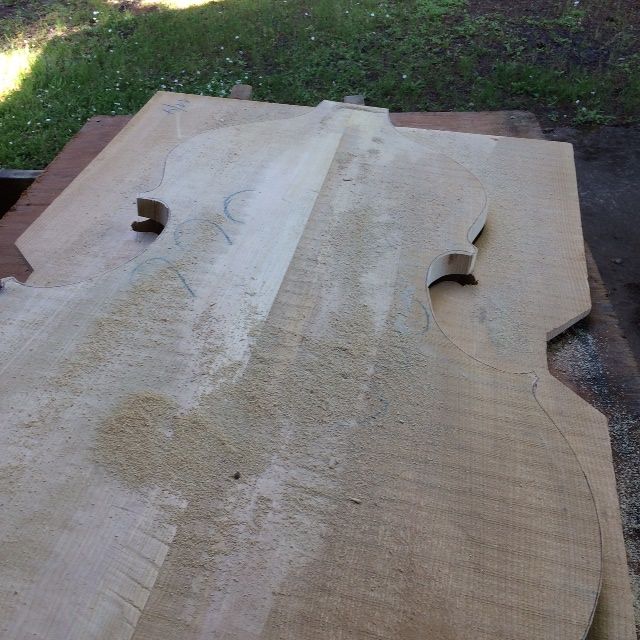
Cutting is complete: the front plate for the five-string double bass is ready for arching.
Inside view: the cutting is complete: the front plate is ready for arching.


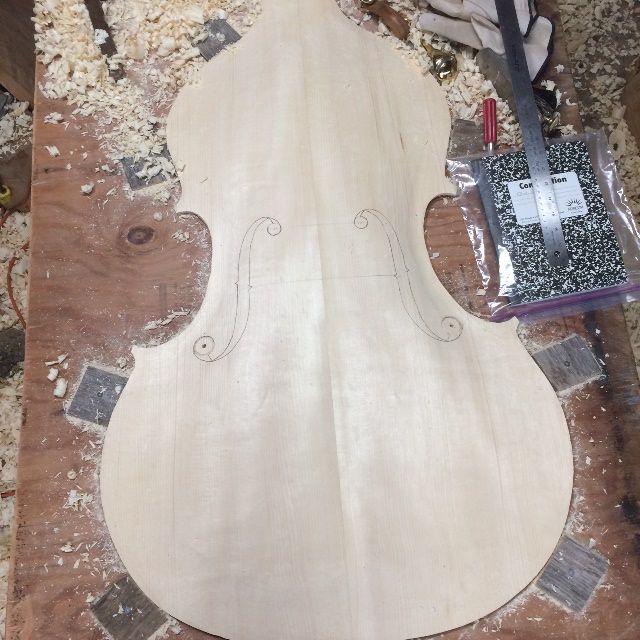
Outside view of the front plate for the 5-string double bass.
Outside view of the front plate.

Arching is Next:

Before I could begin arching, I needed to mark the intended plate thickness: I used a marking tool to scribe a line all the way around the plate at 6 mm. Before the plate is done, this will be reduced to 5 mm in most areas. I used a ballpoint pen to highlight the groove so that I could more easily see it when I am working, and not accidentally go past it.

Edge-thickness scribed into front plate for the 5-string double bass.
Edge-thickness scribed into front plate.


Then I secured the plate in a cradle especially made to fit this design, and secured it in place by affixing small squares of 1/4″ plywood around the perimeter so that the plate will not shift laterally, while I am working on it. The reason the little stop-blocks are so thin is that I do not want them to be in the way when I am planing the edges.

Front plate for the 5-string double bass secured in a work cradle.
Front plate secured in a work cradle.


Tools for arching the five-string double bass.
Tools for arching: cradle, gouges and planes.


Sculpting the front plate arch for a five-string double bass.
Sculpting the front plate arch.


five string double bass arching in progress.
Front plate arching in progress!


Planing the arching surface smooth on a 5-string double bass.
Planing the arching surface smooth.


Planes used to shape the 5-string double bass.
Some of the planes used to shape the bass.


Shadow line defining the longitudinal arching shape of the 5-string double bass.
Shadow line defining the longitudinal arching shape.


Transverse arching shape of the 5-string double bass.
Transverse arching shape.


Arching for the 5-string double bass nearing completion.
Arching nearing completion.


Arching and outline completed for the 5-string double bass.
Arching and outline completed.


Time to lay out the F-holes!

F-holes laid out for 5-string double bass.
F-holes laid out, incised, and inked.

When I build the smaller instruments, I inside the f-hole perimeters quite deeply, knowing that, without exception, I end up needing to correct the arching, using the f-hole side-profile as a guide. I want the “stem” portion of the f-holes to be essentially parallel to the plane of the garland-plate joint when viewed from the side. On the violins and violas I have built, I have universally found that, in spite of my best intentions, I have left too much “puffiness” in the area of the lower wings of the f-holes and I need to plane away more wood. If I have incised them deeply enough, I don’t lose the marks when I remove the wood.

I was quite pleased to find that, on this instrument, the side profile was exactly what I had hoped for, as soon as I laid it out.  So I incised them, but not very deeply, and then inked them with a ball-point pen, so that I could easily see them while perfecting the arching later, using a scraper.

So– the next step will be to complete the “graduation” of the plate– carving away the majority of the wood thickness from the inside of the plate, so that the plate is the correct thickness all over…ranging from 9mm at the center, all the way down to 5mm in the flanks.

Ready to carve the front plate graduations of the five-string double bass.
Ready to carve the front plate graduations.

But…I will leave that post for another day.

Thanks for looking.


16-1/2″ 5-string Viola Varnish Sequence

Varnishing Process for the 16-1/2″ five-string Viola:

All Smoothing and Varnish-prep is done:

When I last posted, the final woodwork had been completed. I had twice wetted down the wood, to raise the grain, and scraped and sanded away the rough raised grain. The wood was stable enough to commence the tanning process.

After the wood is smooth, there will be:

    1. a tanning treatment,
    2. a mineral ground treatment,
    3. a sealer, to lock the mineral ground in place, and
    4. finally, the varnish itself in a series of 6-12 coats, depending on color.

Tanning the Wood

People who live in very sunny regions (New Mexico, for instance) need no light booth: they simply hang their instrument out in the sun for a few hours and it takes on a deep yellow-tan color. I live in Oregon. Western Oregon, between Portland and the coast. We are more likely to achieve a patina of bird-droppings than a sun-tan, if we hang instruments outdoors. (Sigh…)

So, a number of years ago, I bought an old cabinet, about seven feet tall, lined it with aluminum foil as a reflector, wired it with a strong UV source (two 48″ fluorescent UV tubes in a shop-light fixture), and I hang my instruments in it overnight. To heighten the effect, I brush on a coat of very diluted Sodium nitrite and let it dry before I expose it to the UV. This works pretty well, and I have pretty much adopted it as a normal pre-varnish treatment.

Tanned front of 16-1/2" 5-string viola
Tanned front side of the 16-1/2″ five-string Viola.


16-1/2" Five String Viola tanned back side.
Tanned back side of the same instrument.

Mineral Ground:

Years ago, an excellent luthier in Europe posted a detailed explanation of why and how he employs a mineral ground in his instruments, to improve projection. I tried it (because, “if it is good enough for Roger Hargraves…”) and immediately started getting better reviews on the sound of my instruments.

So…obviously, that became part of my process, as well. I use gypsum powder, suspended in coffee (gotta wake up the tone!) so as to achieve a little deeper color in the same move. I rub it in vigorously, trying to get the particles of gypsum to actually penetrate the pores of the wood, then rub off the excess with a rag, before it is fully dry.  When it is dry, it obscures the grain, and turns a chalky white color.

Mineral ground drying on 16-1/2" Five-String Viola.
Mineral ground drying on 16-1/2″ 5-string Viola. (5-string bass beginning in background.)


Mineral Ground is dry on the 16-1/2" Five-String Viola.
Mineral Ground is dry. I will sand off any excess mineral, and then apply the sealer.


Sealer

16-1/2" Five-String Viola with Sealer coat, front view.
Sealer coat, front view.


16-1/2" Five-String Viola with Sealer coat, back view.
Sealer coat, back view.


The sealer, in this case, is simply rosin, dissolved in turpentine and alcohol. The mixture soaks into the wood, causing the mineral ground to become transparent, then the solvents evaporate, leaving the rosin in the wood. The mineral ground will never again be visible.

Varnish Beginning

When the sealer is dry, I sand lightly, using 320 grit, to remove any lumps I may not have seen, and then I am ready to begin varnishing. I always begin with two base-coats of very yellow/gold varnish, so that the gold color will shine through the darker color coats.

16-1/2" Five-String Viola with Two coats of yellow varnish, side and front view.
Two coats of yellow varnish, side and front view.


16-1/2" Five-String Viola with Two coats of yellow varnish, back view.
Two coats of yellow varnish, back view.

I like the way the European Maple and Spruce are shining through the varnish. I think they will sound great, too. Tapping on the corpus, it sounds as though it will have a big, deep voice.

I will follow the completion of the varnish process in a later post.


Thanks for looking.


Final woodwork on 5-string 16-1/2″ Viola

Last “woodwork” tasks on the 16-1/2″ five-string Viola:

Last time, we finished up with the neck set, and the corpus closed, but all the edgework (and final shaping of the neck heel, etc.) left to be done.

Closed corpus of the 16-1/2" five-string Viola: purfling weave sketched, heel/button need carving.
Closed corpus, purfling weave sketched, heel/button need carving.


Carving the heel/button combination

The neck heel and the back button, together, make up the majority of the strength of the neck-joint. I once had a cello come in for repair, fully up to tension, but “something was loose.” Yeah, the ONLY glue still holding in the neck-joint was the glue between the neck heel and back button! I removed the neck, cleaned out the old glue, and re-glued the entire joint: but I never forgot that the heel/button connection alone had held the entire load of the string tension! So I make certain that this joint is perfect, and the two are carved as one piece after gluing.

There is also a specific measurement from the center of the neck-heel curve to the top edge of each side of the front plate where it joins the back: in violas, I shoot for exactly 27mm.

Heel and button carved on the 16-1/2" five-string Viola: ready to begin purfling.
Heel and button carved: ready to begin purfling. I have laid out the purfling and incised it.


Purfling

I used to struggle with cutting the purfling slot (I still do, but for different reasons) because I was trying to cut the full depth in a single pass, or maybe two. One of my teachers corrected me, saying that the first pass around, with the knife, is just to “darken the lines” left by the marker. Then it is relatively easy for the blade to follow the groove for subsequent fast passes, each making the slice a little deeper. Finally, I use a special tool to pick out the waste wood from between the lines.
Purfling pick with front plate of 16-1/2" five-string Viola.
Purfling-pick with front plate.

One problem I faced with the back plate that I had not noticed so much, on the front plate, even though it had the same issue: This purfling is a little wider than what I usually use, so, in spite of the fact that I marked out the correct width, my pick tools (all of them) are made for the narrower purfling, and they do not readily make the slot the correct width. That meant a lot of going back and widening things just a little bit (0.5 mm, usually.) The European spruce of the front plate is soft, and quite forgiving. The harder European maple back plate does not give at all, so if the slot is too narrow, the strip is not going in, at all.
Another issue is that the purfling weave is on top of a fairly thin portion of the back plate, so I could not cut my slots as deeply as I wanted to. Thus, there was very little wood-support for the purfling, and the pieces were difficult to fit, whereas, around the perimeter, I could cut a slot for the full depth of the purfling strips and achieve full support. Ah, well…that’s life. But there were some joints I am not so happy with.

Anyway, this is how the purfling went:

I cut the center bout slots, first, along with the corners of the 16-1/2" five-string Viola.
I cut the center bout slots, first, along with the corners.


The goal is to complete the whole slot before inserting any purfling on the 16-1/2" five-string Viola.
The goal is to complete the whole slot before inserting any purfling. (Notice the shallow purfling-weave slots.)


Installing the purfling

As I did on the front plate, I installed the center-bout strips first, dry, and then the rest of the perimeter. I glued the perimeter in completely, before beginning the purfling weaves, themselves.

In the case of the purfling weaves, since the slots were so shallow, I glued each piece as I installed it, then worked on the other end of the instrument while the glue from that piece set up and began to hold.

Outer perimeter complete...working on the purfling weaves for the 16-1/2" five-string Viola.
Outer perimeter complete…working on the weaves.


Purfling weave nearly done on the 16-1/2" five-string Viola. Notice that some joints are not as clean as others.
Purfling weave is nearly complete. Notice that some joints are not as clean as others.


Completed purfling weave on the 16-1/2" five-string Viola: still needs to be planed flush.
Completed purfling weave: still needs to be planed flush.


Completed purfling weave on the 16-1/2" five-string Viola...warts and all.
Completed purfling weave…”warts and all.” I may elect to go back and improve things a little. (Probably not.)
The other weave on the 16-1/2" five-string Viola turned out a little better.
The other weave turned out a little better.

The Channel

Once the purfling is all in place, and planed flush, it is time to carve the “channel.” This is a slight “ditch” that runs all the way around the perimeter: the bottom of the “ditch” is usually at the purfling, while the outer edge of the ditch ends exactly at a line called the “crest,” which is about 40% of the distance in, from the outer edge of the plate to the outer edge of the purfling. The inner edge of the “ditch”  will be planed and scraped back to “fair” into the surface of the arching, without any lumps or hollows.

Notice the pencil-line marking the crest of the edge on the 16-1/2" five-string Viola.
Notice the pencil-line “crest”, between the purfling and the plate-edge.


Edgework

Finally, after all the surface of the plate is correct, I plane, scrape and sand the edges themselves, so that the outer curve of the plate edge perfectly meets the inner curve of the channel, all the way around the plate.

In this case, I did not take the picture until after I had completed the next step, which was to wet the whole structure down with water, in order to deliberately raise the grain, so that any imperfections, or compressed areas, will rise up and be seen…and subsequently, be scraped and sanded flush again. All this to say, please understand the “rough” surface of all the wood.

Edgework of the 16-1/2" five-string Viola complete, but still rough with raised grain.
Edgework complete, but still rough with raised grain.


So…that means the whole instrument is now complete, minus the varnish prep-work, and the actual varnish and set-up!

16-1/2" five-string Viola Front ready for varnish.
Front ready for varnish.


16-1/2" five-string Viola Side ready for varnish.
Side ready for varnish.


16-1/2" five-string Viola Back ready for varnish.
Back ready for varnish.


Varnish Sequence

I will post the varnish sequence as it occurs, but, for now, know that the sequence will include at least two “wet-it-down, let-it-dry, and scrape/sand-it-smooth” iterations. The idea is to produce a surface that will no longer respond to moisture by raising the grain. This is particularly important on the handle portion of the neck, where the moisture from players’ hands will certainly be in contact with the wood, every time the instrument is played. But, under the varnish, the slightest discontinuity will become glaringly obvious, so that is important as well.

After the wood is smooth, there will be:

    1. a tanning treatment,
    2. a mineral ground treatment,
    3. a sealer, to lock the mineral ground in place, and
    4. finally, the varnish itself in a series of 6-12 coats, depending on color.


Enough for today.


Thanks for looking.


More Progress on the 16-1/2″ Five-String Viola

Progress on the 16-1/2″ five-string Viola

Beginning the plates

When I last posted, I had traced the shape of the garland onto the plates and was ready to cut out the plates. I decided to wait on the back plate, but the front plate was ready to go,  so I cut it out, using my band saw, and smoothed the edges, using the spindle sander and files. (I have built precisely one instrument without power tools of any sort: One of my early teachers required it, so I complied, but it convinced me that, at my age, I need to save my joints for the things that I have to do by hand, rather than beating them to death just on principle. Besides, I am convinced that if the old masters had possessed power tools, they would have used them without question. They were very practical people.)

So, with the front plate cut to shape, I first marked the edge at a thickness of 4.5 mm. I used a wheel-style marking gauge, with a sharp disc, to mark the thickness and scribe it into the edge of the plate, all the way around. Then I began cutting away waste wood to achieve the desired arching shape. I checked a poster (Published by The Strad) of the “Conte Vitale” 1676 viola by Andrea Guarneri . It is one of the most frequently copied violas in the world, as it is a large viola that works very well, and copies of it frequently work very well, too. I am modifying the pattern a little for superior playability, but I have made this model before, so it is not “guesswork.”

I forgot to take pictures, initially, but here are a couple, belatedly:

Remaining scribe-line for edge-thickness on the 16-1/2" five-string Viola.
Remaining scribe-line for edge-thickness. I plane down to the line all around, eventually.


Line beginning to disappear on the edge of the 16-1/2" five-string Viola.
Line beginning to disappear.


Arching complete on the front plate of the 16-1/2" five-string Viola.
Arching complete.


Arching complete and f-holes laid out for the 16-1/2" five-string Viola.
Arching complete and f-holes laid out.

F-hole Layout and Incision

Once the arching was complete, right down to scraping, I laid out the f-holes, and incised them deeply into the European Spruce of the front plate. Incising the f-hole outline allows me to turn the plate and sight over the edge of the plate at the profile. I want the main stem of the f-hole to be essentially parallel with the plane of the ribs, when seen from the side. I use this as a final correction for the arching, and without exception, it has required me to correct the shape of the arching before moving on.

F-holes laid out and incised deeply on the front plate of the 16-1/2" five-string Viola.
F-holes laid out and incised deeply.

Graduation

Once the arching is truly completed, and I am satisfied with the f-holes, I begin graduating the inside of the plate. This means that I am carving the inside of the plate to “match the outside,” in that it will be an appropriate thickness all over. I usually want the center area between the f-holes one thickness, the band running up the center to each end slightly thinner, and the wing areas outside that area quite a bit thinner. There is no “set” thickness, and each luthier has to make choices in order to achieve what he or she wants from an instrument. Getting what you hope for depends on those choices you make, and the choices were (hopefully) made intelligently,  based on the type and density of the chosen wood, the shape of the arching, and so forth. Getting the arching and graduations right is a lot of carving on a large instrument, but it pays off in quality of sound.

beginning to carve the interior of the front plate of the 16-1/2" five-string Viola.
Beginning to carve the interior for thickness graduation.


Carving away the waste wood from the interior of the 16-1/2" five-string Viola.
Carving away all this waste wood produces a lot of shavings. Fortunately, we heat our home with wood, and the shavings are great for starting the morning fire. 🙂


Carving thickness "dots" for the front plate of the 16-1/2" five-string Viola.
Once I am getting close, I carve “dots,” calibrated to specified thicknesses.


Connecting the thickness "dots" on the front plate of the 16-1/2" five-string Viola, by planing.
“Connecting the dots,” using a finger plane.


Frequently I can see the traces of the incised f-holes from the inside by the time I am finished with the graduation of the front plate. And, believe it or not, I  always can easily see light through the spruce plate, in the thinner areas, if I hold it up to a lamp.

Cutting out the F-holes

I use a special tool to cut the upper and lower eyes of the two f-holes, then use a small knife to finish cutting them out.

f-hole cutter, boring the "eyes" of the f-holes on the 16-1/2" five-string Viola.
I use an f-hole cutter to open the upper and lower “eyes” of the f-holes.


Ready to cut out the stems of the f-holes on the 16-1/2" five-string Viola.
Ready to cut out the stems of the f-holes. (Earlier instrument…I forgot to take pictures…)


Bass Bar

Once the f-holes are cut out and refined, the next thing is the bass bar. This is the only brace attached to the inside of a violin, viola or cello: it supports the bass foot of the bridge, and provides for clarity and strength to the bass notes. An instrument with a weak bass bar will not sound good.

Bass bar fitted, glued and clamped, in the 16-1/2" five-string Viola front plate.
Bass bar fitted, glued and clamped.


With no point of reference, it is hard to realize the size of that plate: so here is a standard violin-sized plate for comparison: A 16-1/2″ viola is pretty big.

Size comparison with violin plate and bassbar: 16-1/2" five-string Viola compared to a violin.
Size comparison with violin plate and bass bar.


Bass bar glued into the 16-1/2" five-string Viola, and ready for trimming to shape.
Bass bar glued, and ready for trimming to shape.


Proposed shape of completed bass bar in the 16-1/2" five-string Viola.
Proposed shape of the completed bass bar.


I cut the bass bar to the desired shape, using gouges, planes and scrapers.

Completed bass bar in the 16-1/2" five-string Viola.
Completed bass bar.


Another size comparison between the 16-1/2" five-string Viola and a violin.
Another size comparison. Same violin plate.


Inner Edgework

I know it will be difficult to accomplish the inner edgework after the plate is installed, so I always do that first. I also trim and shape the linings, so that they taper smoothly into the ribs.

Installing the Front Plate

I dry-clamped the plate to the Garland, and then, using a thin palette knife, slipped hot hide glue (on the thin side, for easy removal if needed) into the unclamped areas and immediately applied padded spool clamps to tightly hold the plate until the glue could dry. Then I removed the first few clamps and inserted glue there, and reclamped. My wife thinks the instrument looks as though it is wearing hair-curlers at this point. 🙂

Front plate of the 16-1/2" five-string Viola installed, glued and clamped to the garland.
Front plate installed, glued and clamped.


And that is where the instrument rests for tonight.


Thanks for looking.