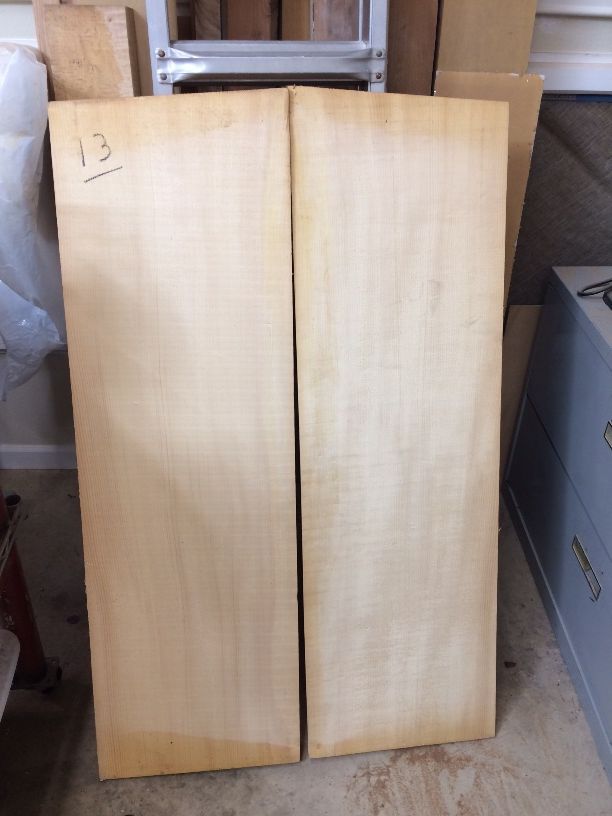
An elderly couple of friends gave me a large pile of highly flamed “fiddleback” maple, hoping I could build fiddles of the wood. This was Big Leaf Maple wood that the woman’s father had salvaged specifically because of the beautiful grain, perhaps fifty years ago, while making wood to heat his home.
Unfortunately, the wood turned out to be riddled with worm damage so that most of it is unusable. I felt bad about it, because she had hoped, all through the years, to have a box or something made of the wood, and now it seemed to be lost.
I had just repaired my bandsaw, though, while in the process of building the five-string double bass, and was busy cutting up billets of violin-wood to see what I really had that would be useable. I salvaged a few pieces of their maple wood that (maybe) could make a violin, and enough thin slices that I thought I would try a box for her.
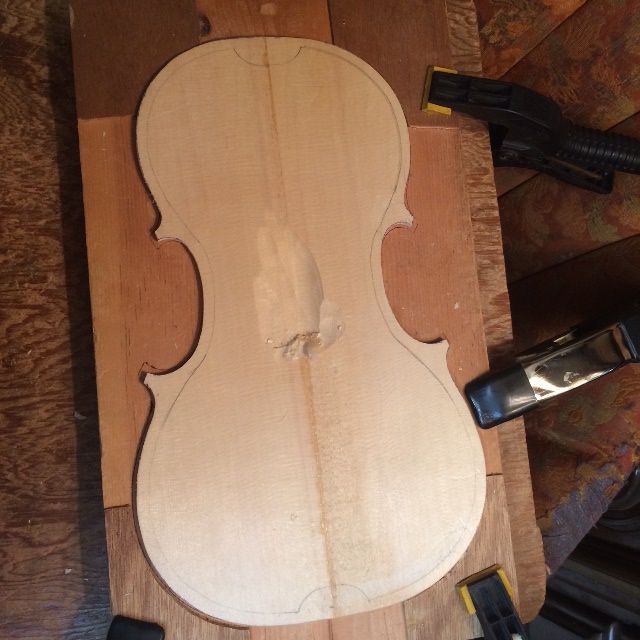
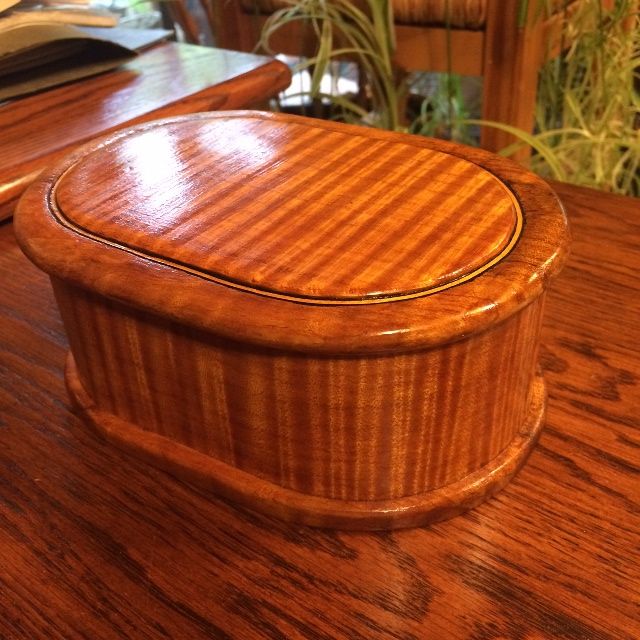
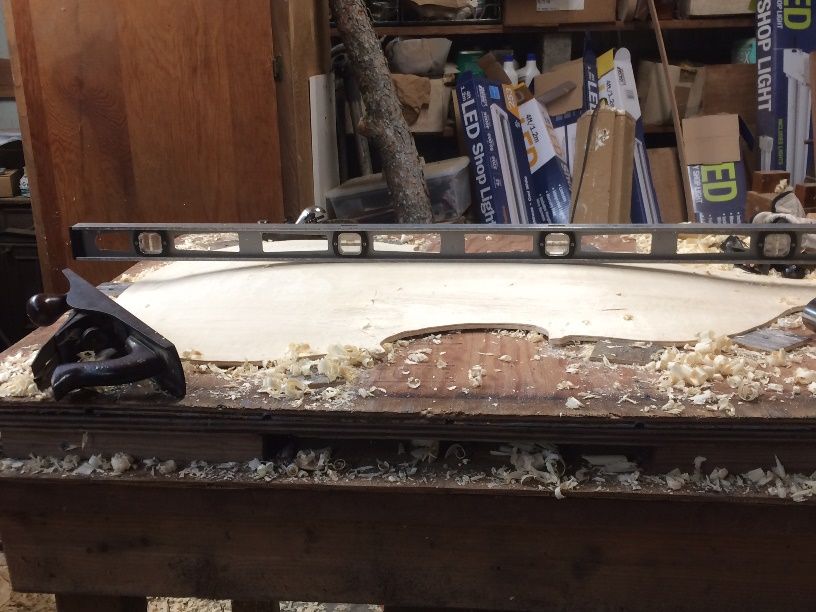
When most people think of a box, they are thinking of a rectangular enclosure of some sort: but, I’m a violin maker! So…I bent the wood into an oval, and went from there:
There was not enough solid wood to do very much, so the heavier sections are from a different tree; one cut from the yard of my wife’s family home.
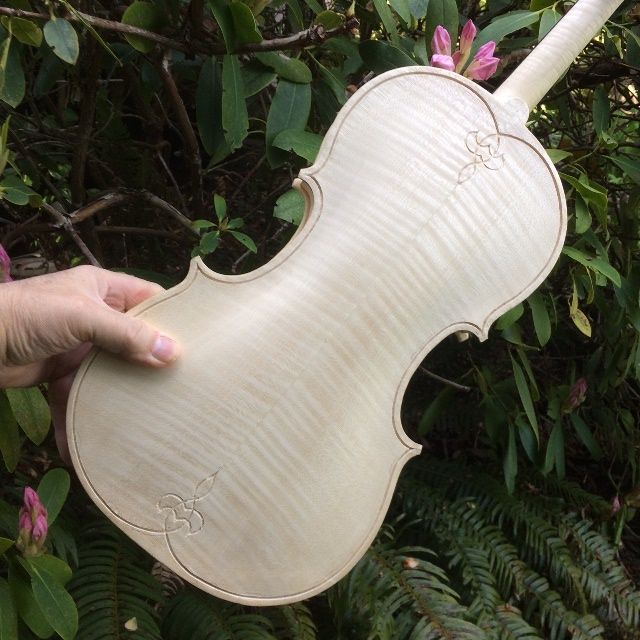
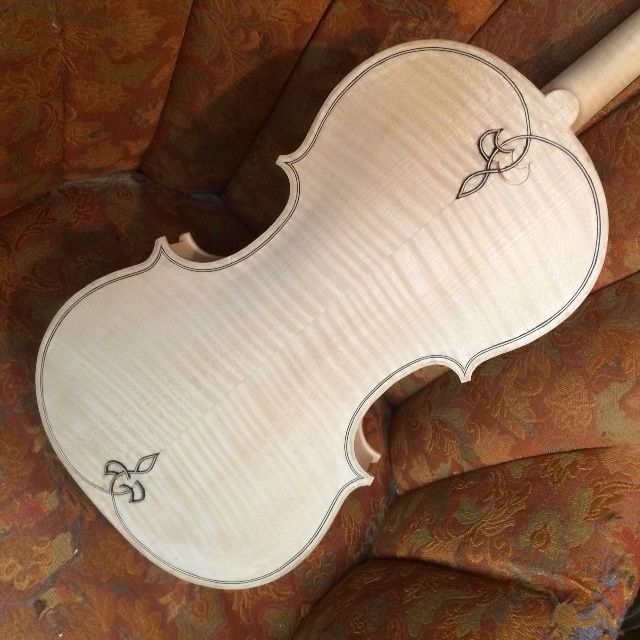
Gift box showing bent body, inlaid top, solid base and lid.
I inlaid the fiddleback maple section about 3 mm thick, into the lid which was also flamed maple, but not as spectacular. I trimmed it with purfling left over from the building of the five-string double bass.
The sides were only a little over a millimeter thick and bent around a hot iron made for that purpose. But they would be too fragile, if that was all that was there, and there would also be no secure way to fasten them to the base. So there is a 4 mm raised section glued to the base and the sides wrap around that “plug.” I added a 5 mm thick ring around the top, the same size as the bottom plug, in order to reinforce the upper edge.
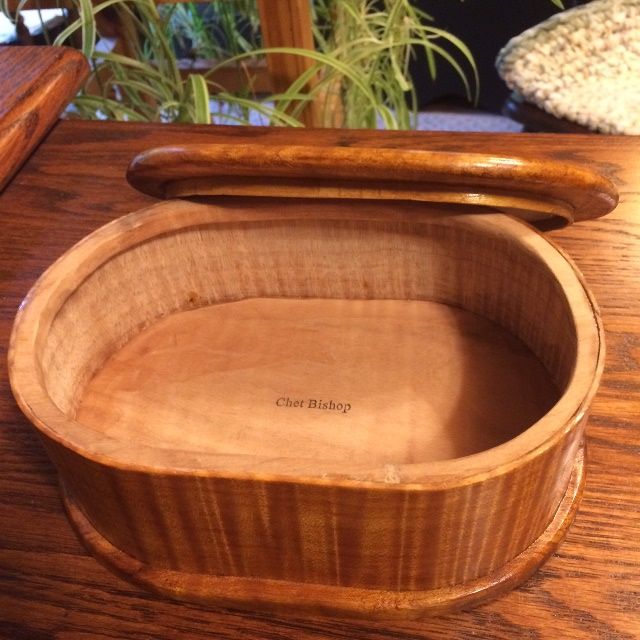
Then I inlaid a 7 mm wide by 2 mm thick band of bent willow wood into the lid, positioned so that it fits cleanly inside the upper ring. As it happens, the lid fits perfectly in one direction, but if you turn it 180 degrees, it is very loose. So I stamped my name in the base and the lid: when you open the lid, if both are readable or if both are upside down, then the lid will fit.
Interior of bentwood box.
I varnished the bentwood box pretty much the same as I do my violins, and delivered it the following Saturday.
Both the husband and wife seemed quite pleased, so I am happy too.
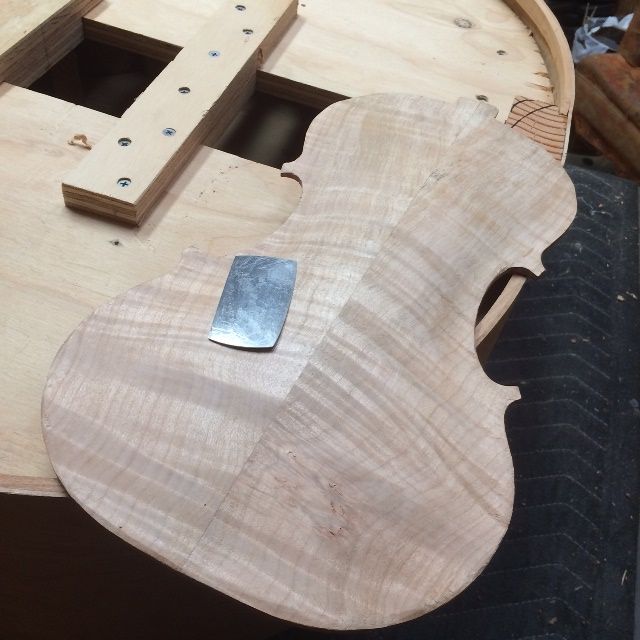
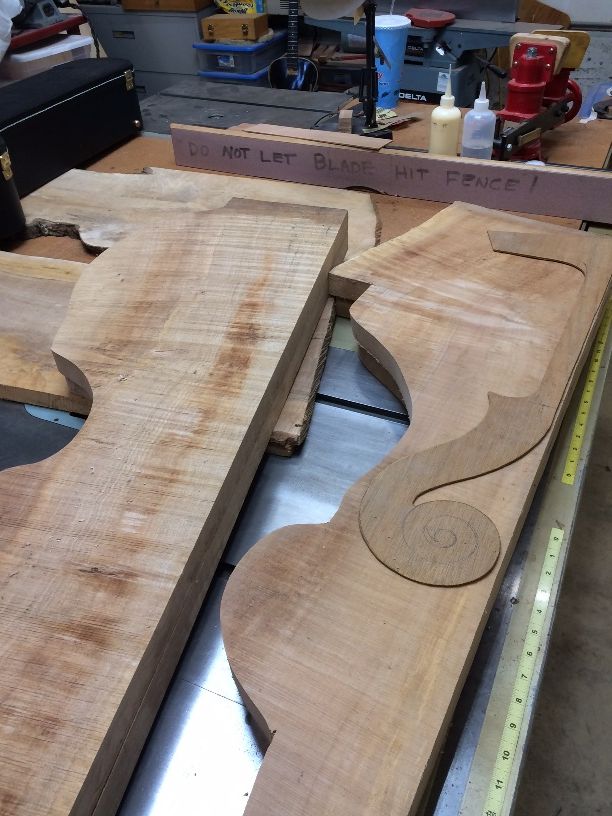
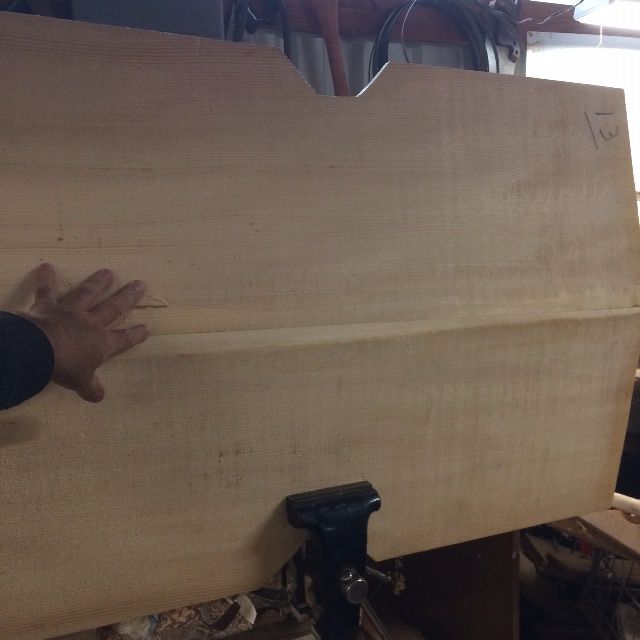
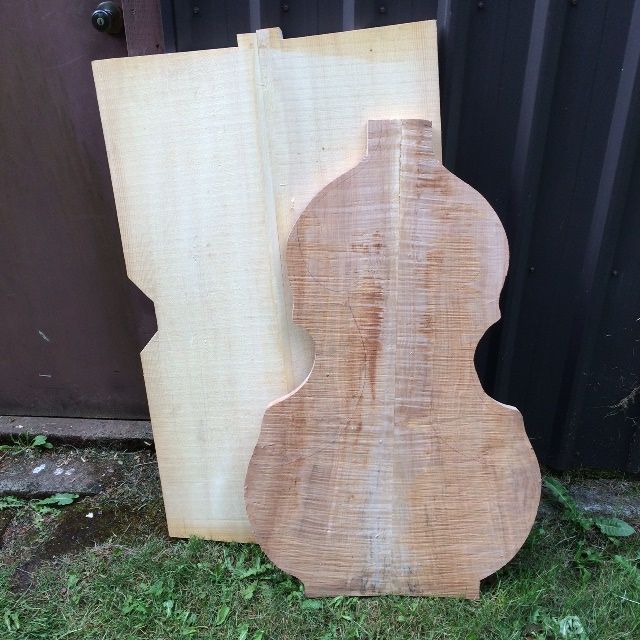
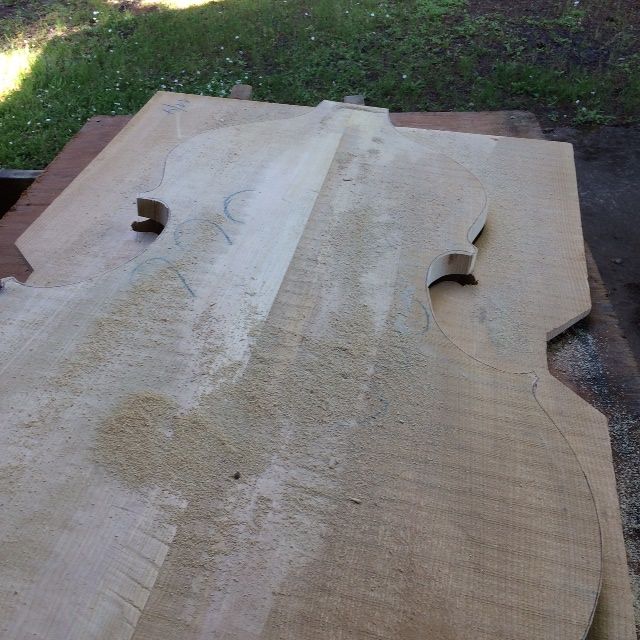
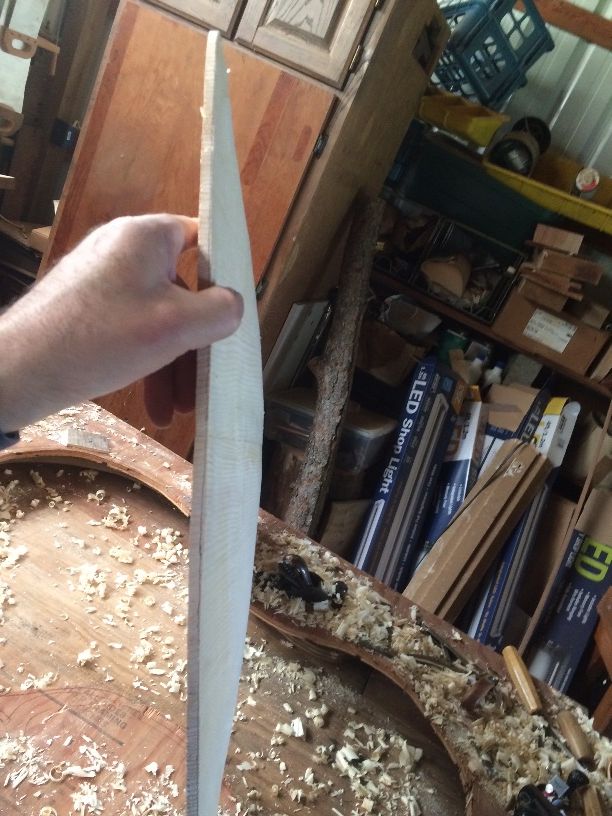
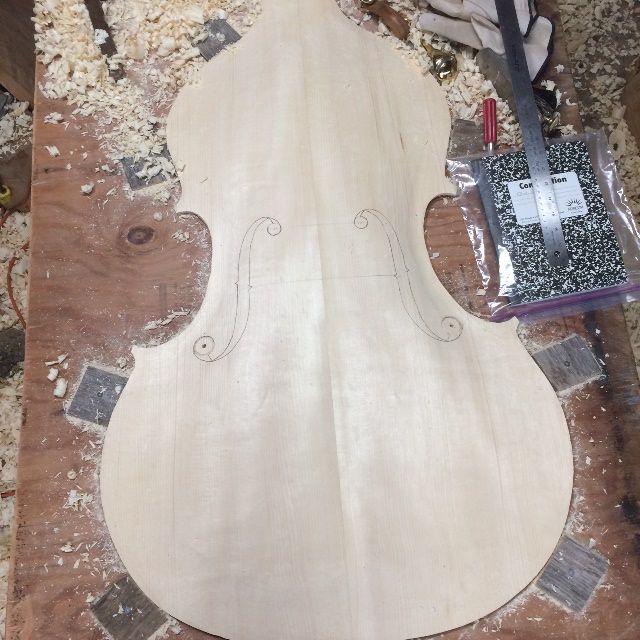
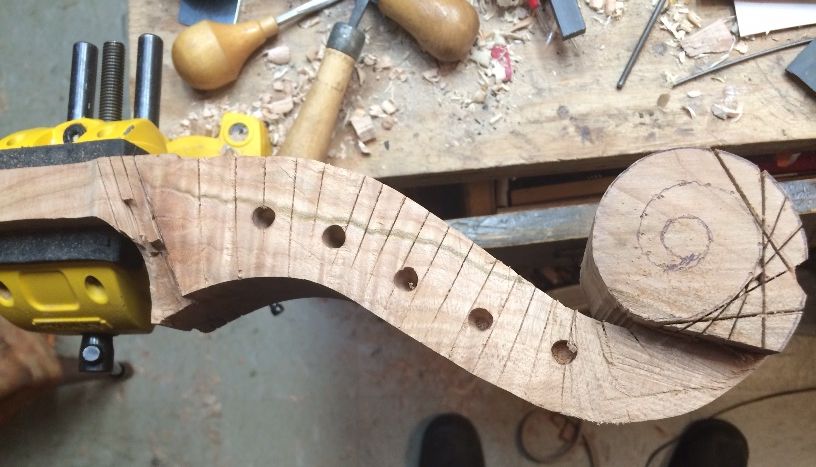
So, when I saw that there were two sections of “scrap” left over, near where the neck end of the five-string double bass back was cut out, I realized that a 5-string fiddle back could fit into each of those two pieces.
So, I salvaged the wood, and not only got two backs, but also the neck blanks for two 5-string fiddles.
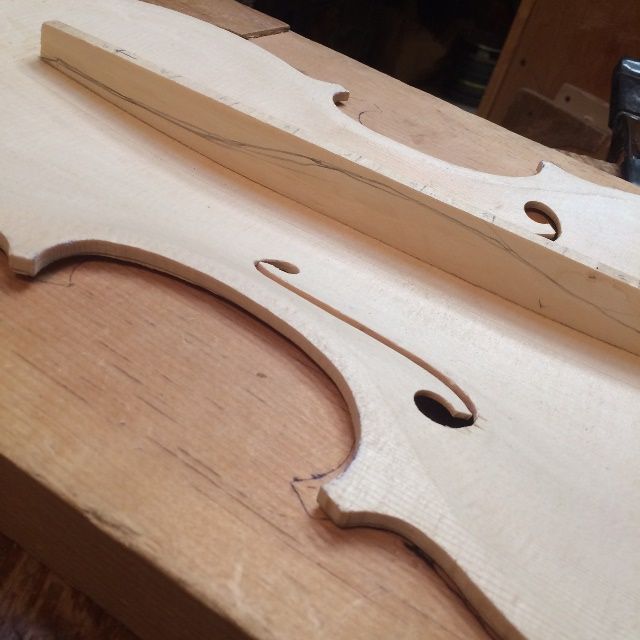
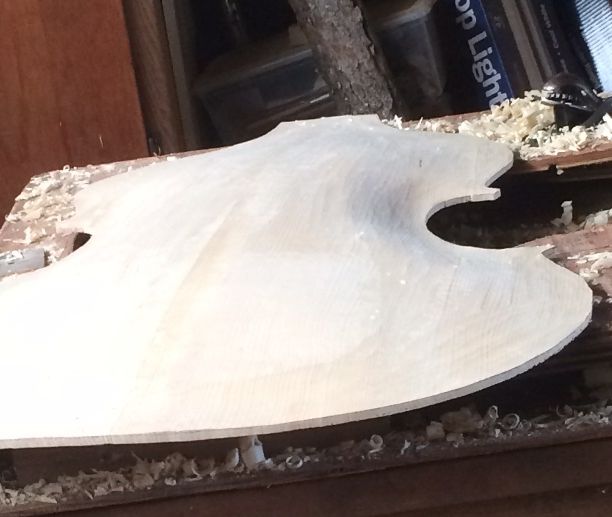
Five-string fiddle back cut from the scrap left from a 5-string double bass back.
Arching the Plate
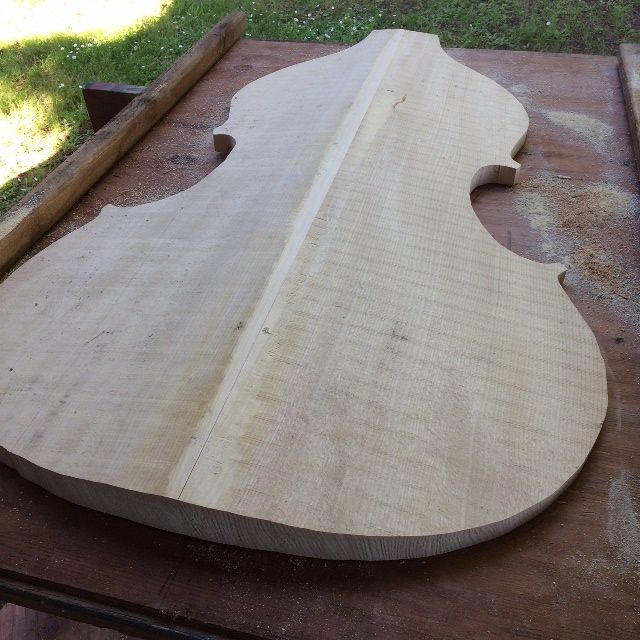
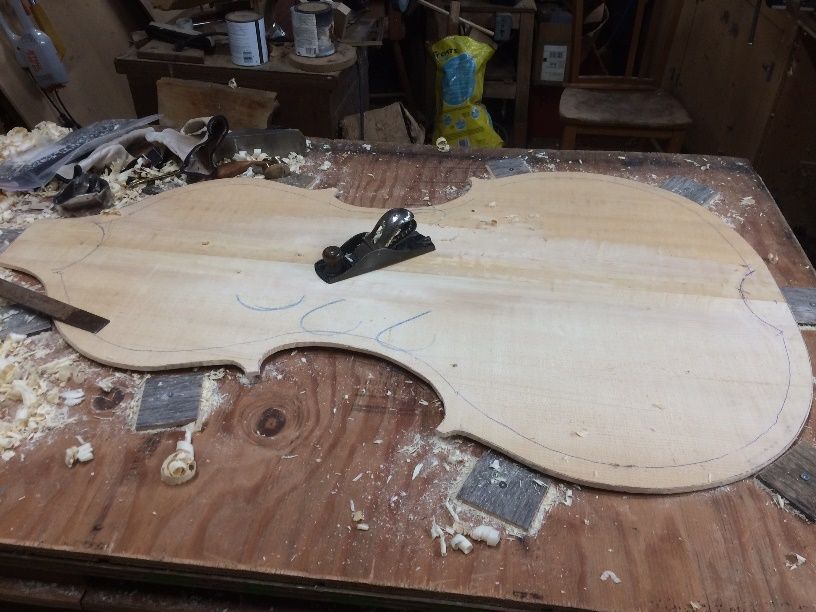
Five string fiddle begun, with back and neck from scrap from a 5-string double bass back.
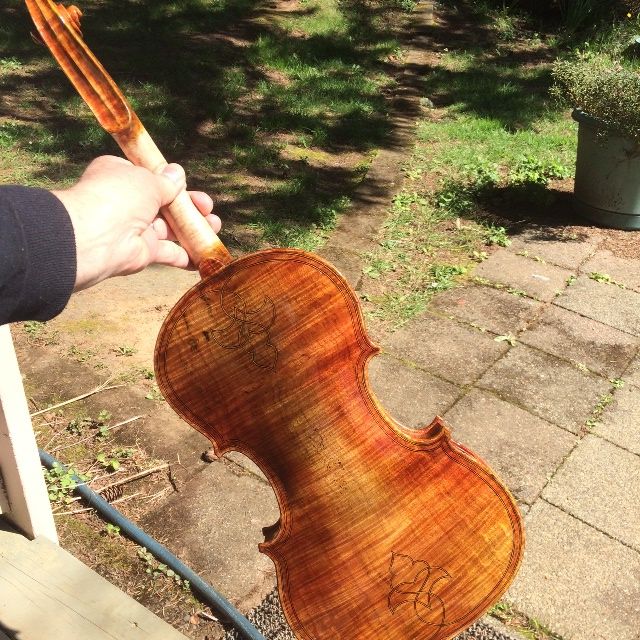
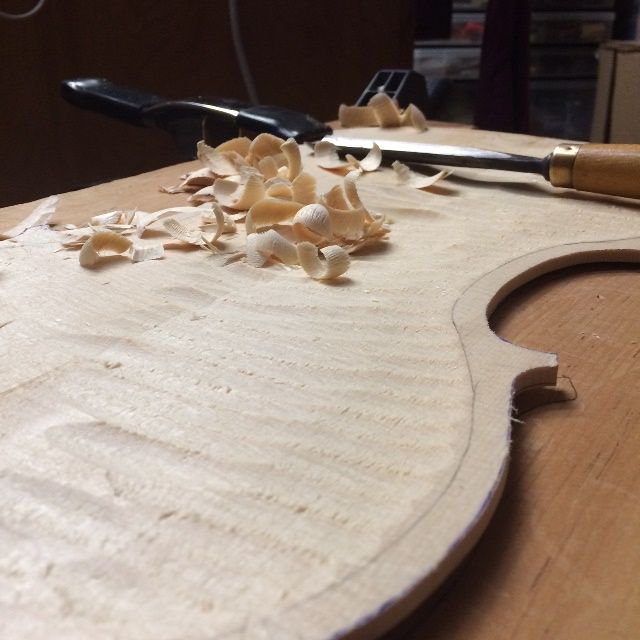
I really like the look of the Oregon Big Leaf Maple back wood. I enjoyed arching the plate.
Five-string fiddle back arching nearly complete. It is sitting on the five-string double bass garland whose back provided the scrap for the fiddle-back.
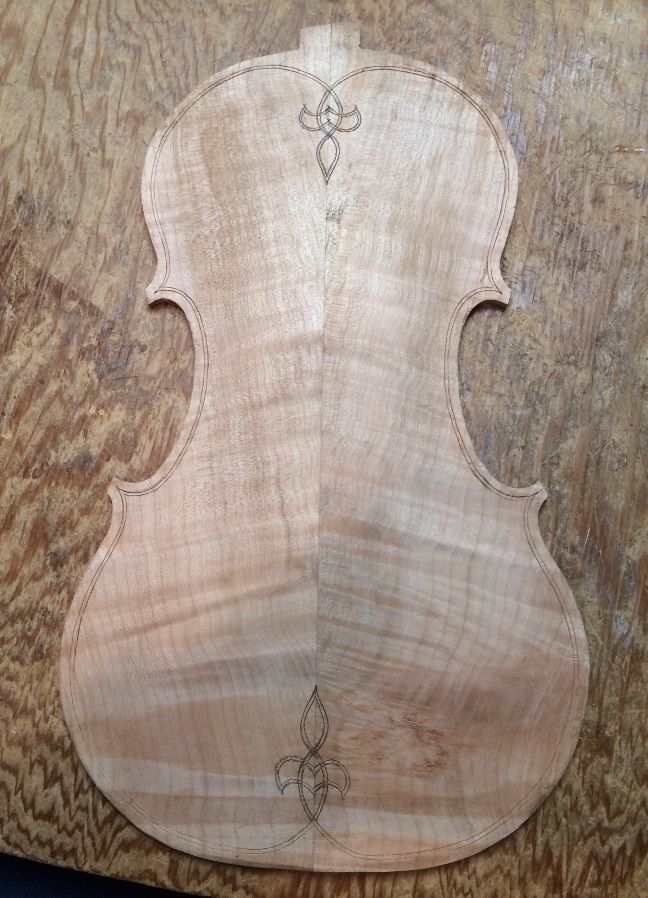
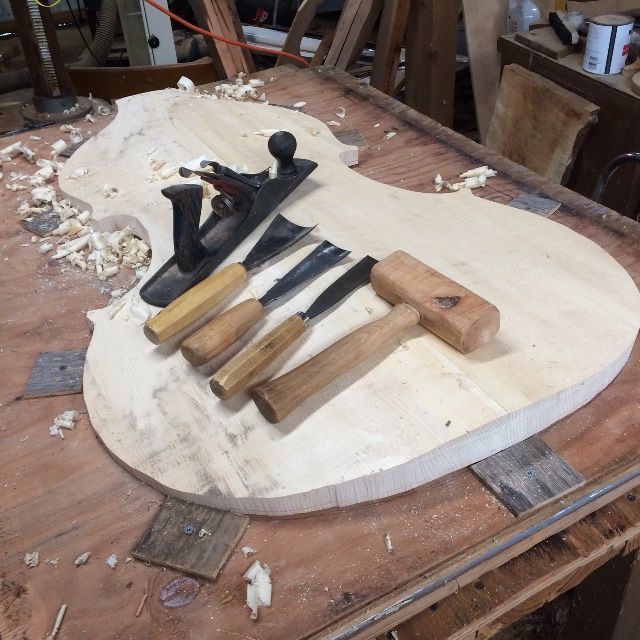
Purfling the Plate
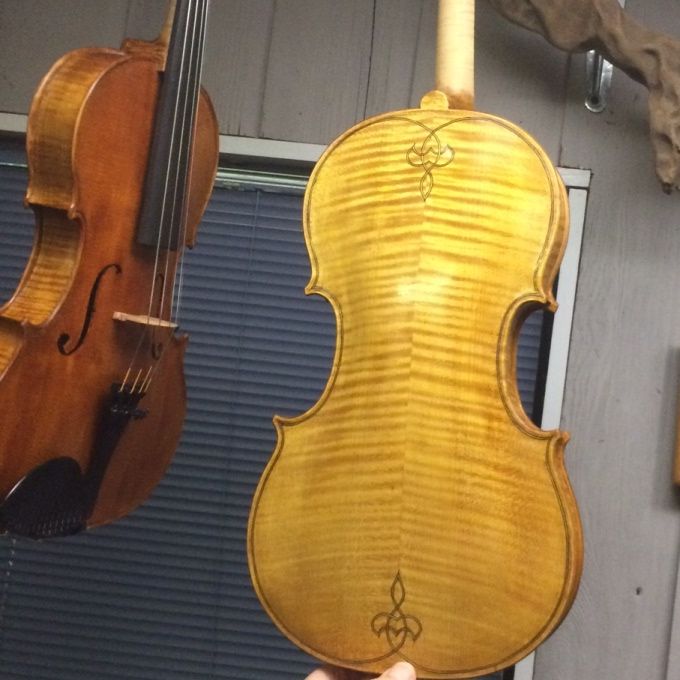
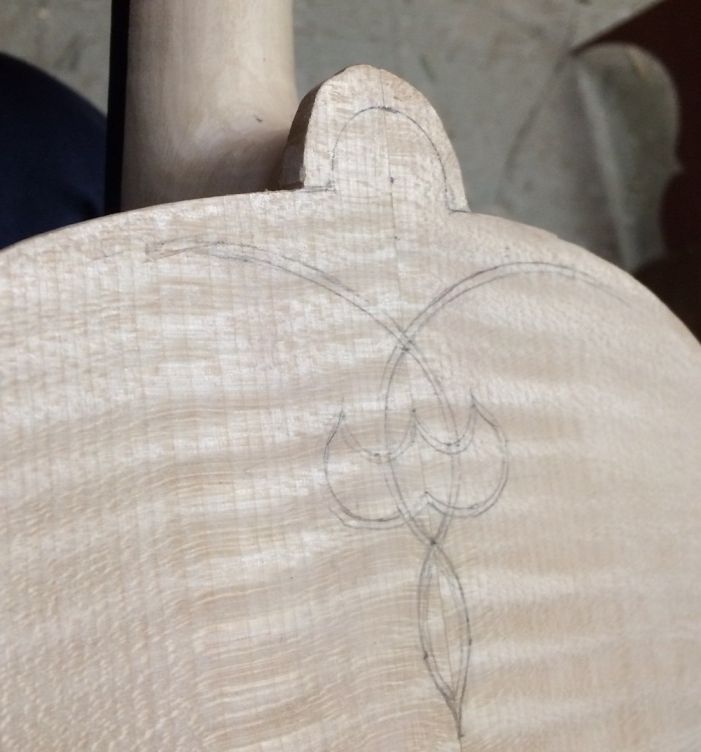
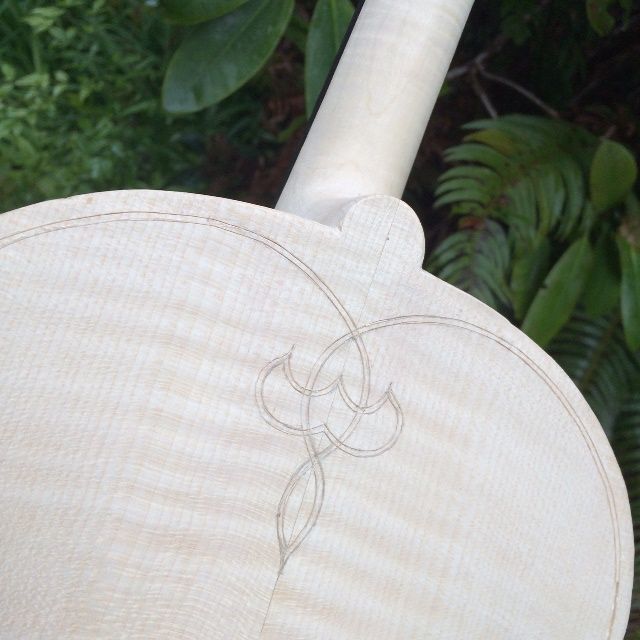
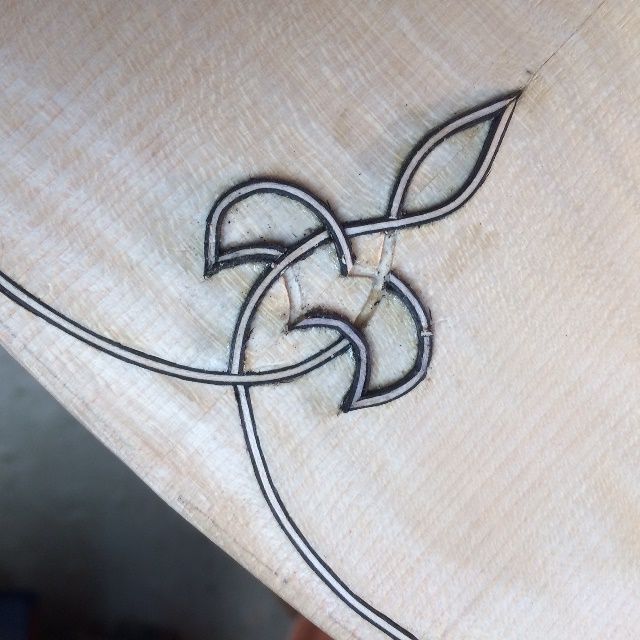
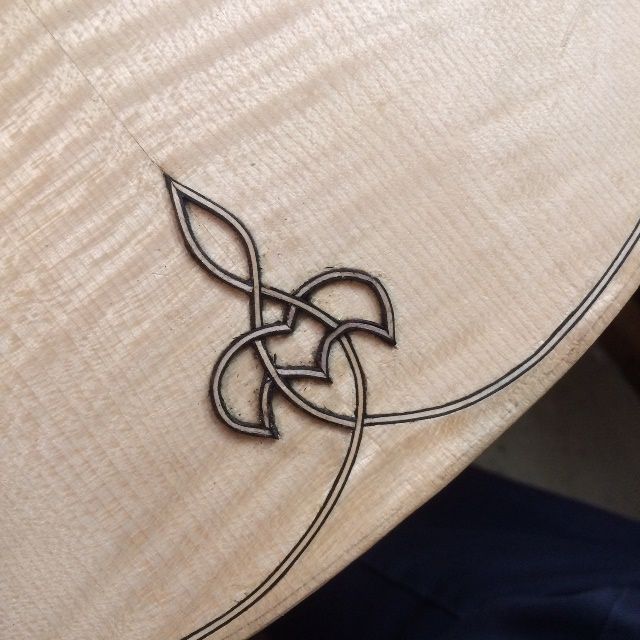
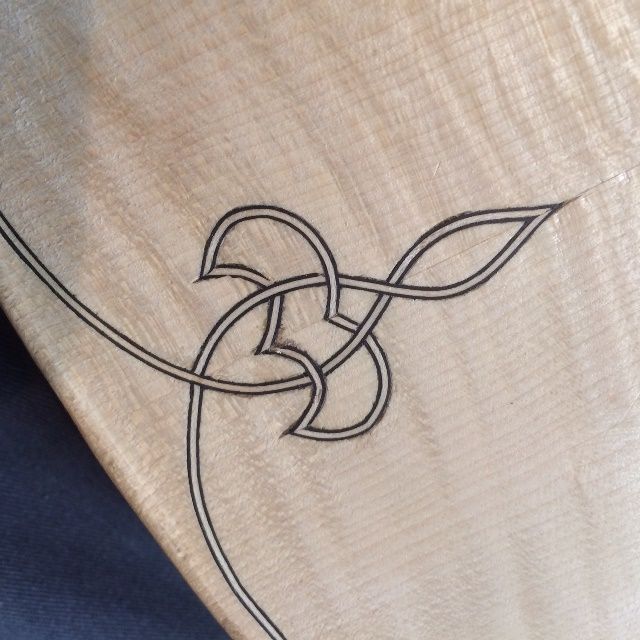
On all my five-string instruments I usually include a purfling weave. It is a modified fleur-de-lis I designed for my first five-string fiddle and have continued to use on subsequent work.
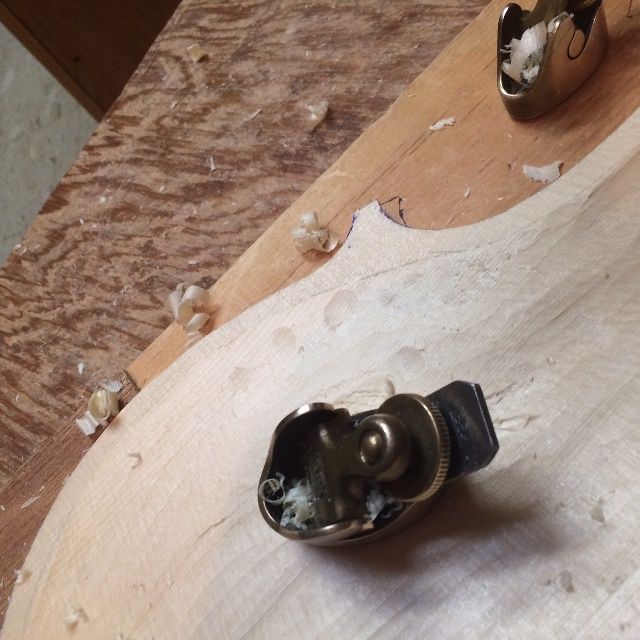
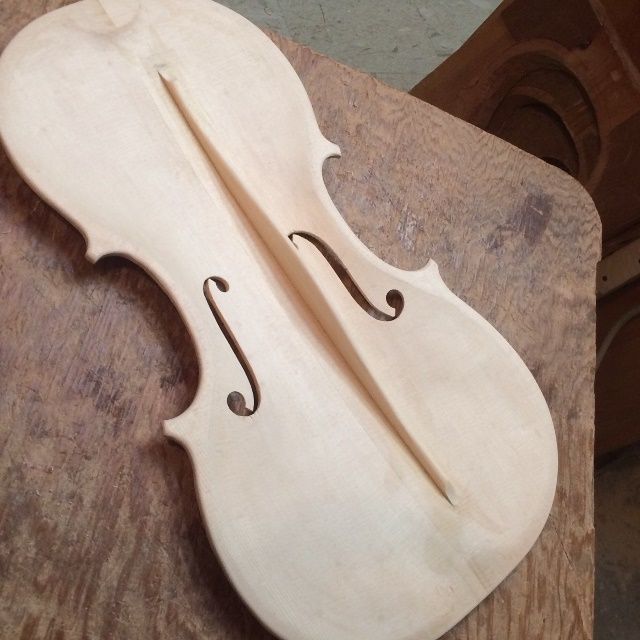
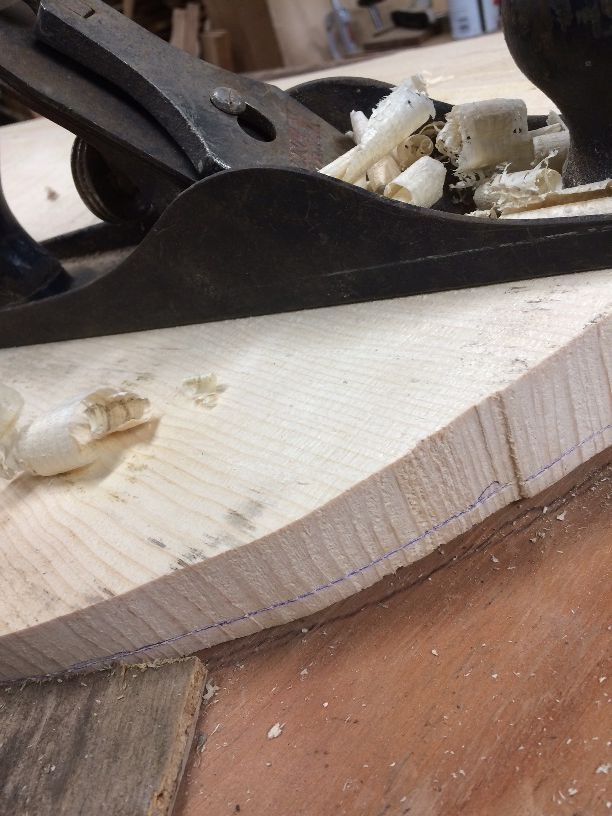
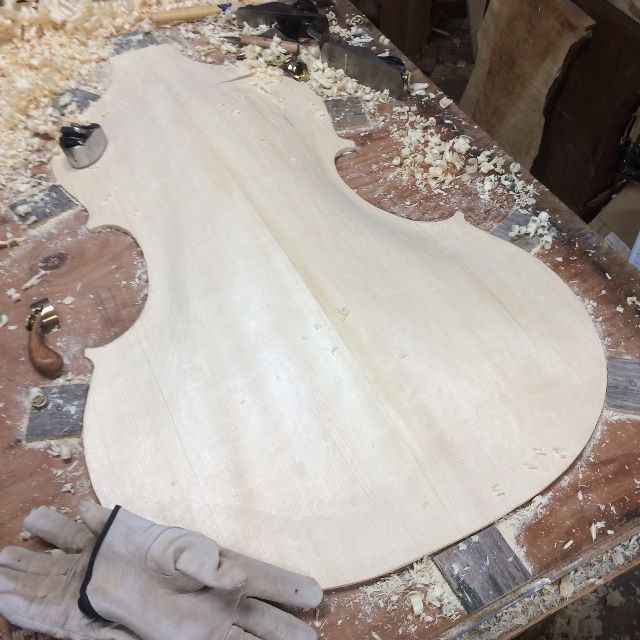
Five-string fiddle back with purfling slots incised and ready to complete.
In this photo, the slots for the purfling have been incised, but not cut deeply, so the next step is to slice deeply enough that the waste wood can be removed from between the cuts, and the purfling strips inlaid in the resulting slot.
I will include the purfling process in subsequent posts.
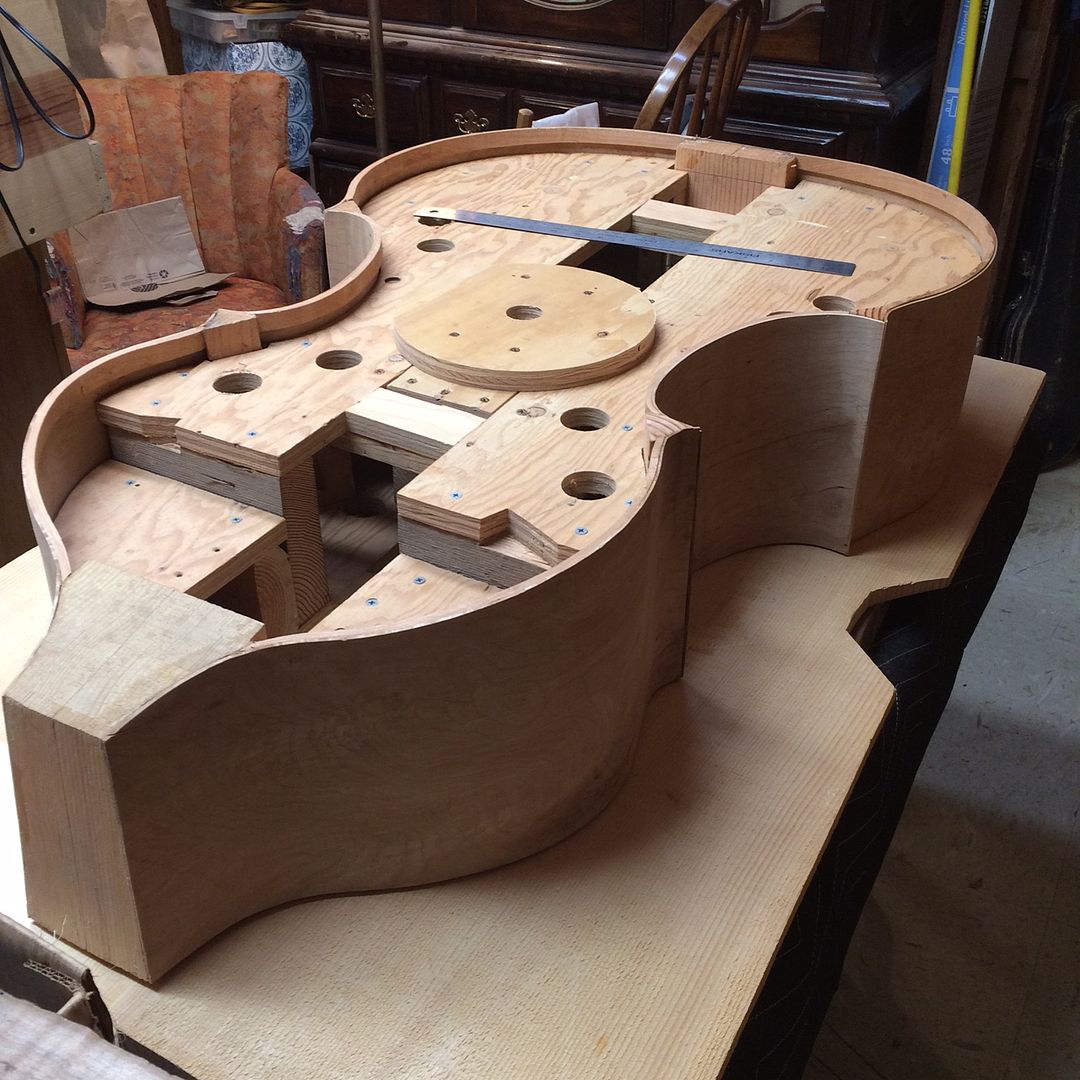
When I last posted, I had the garland pretty much complete, and the materials were prepared for the neck and the front and back plates. I had cut the back plate roughly to shape, in order to use as much of the “fall-off” material from the back plates, as possible, from which to make the neck.
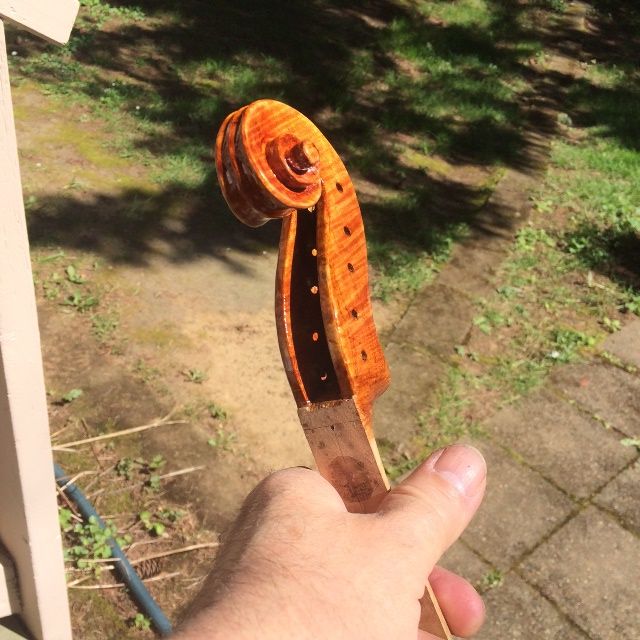
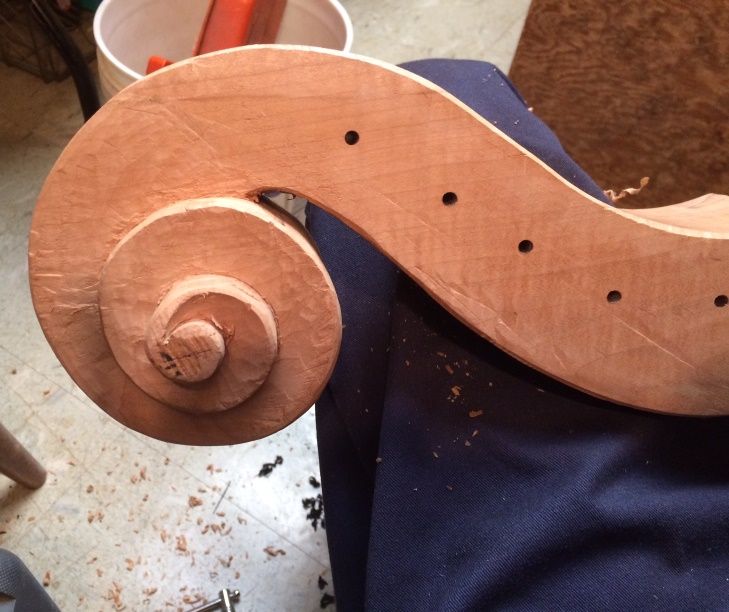
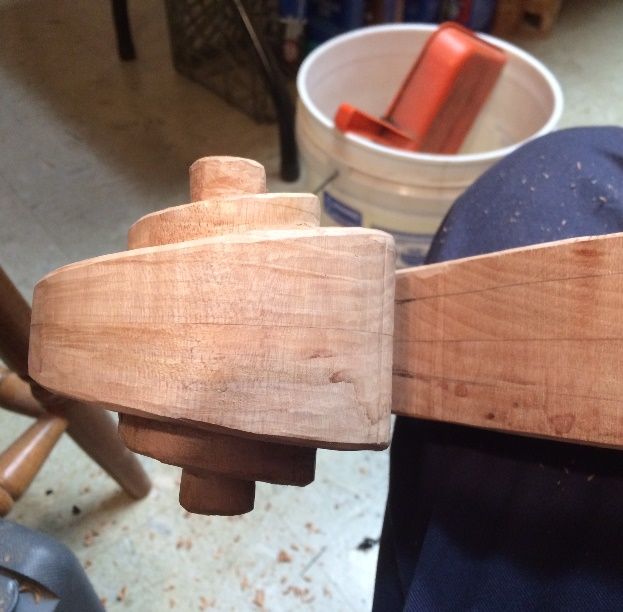
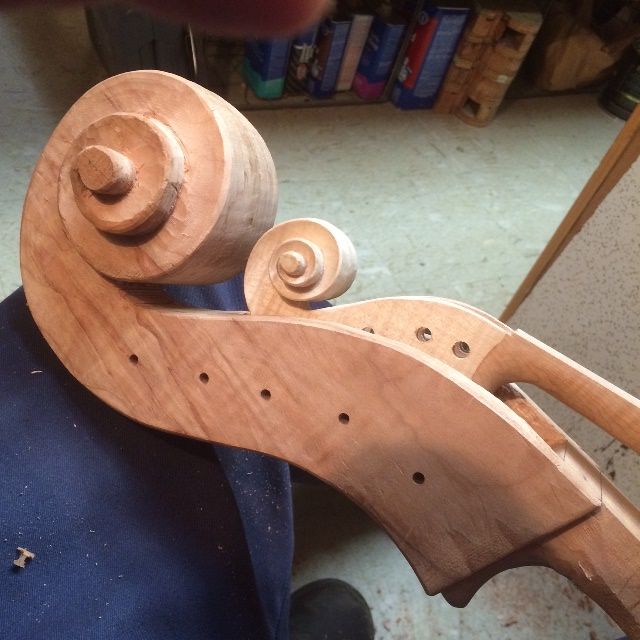
I went ahead with the neck and scroll, just because I find it encouraging to have some of the “pretty” work done, as it makes me feel that I am making progress. You can see the neck progress, here.
But at some point, one has to go ahead with the task of bookmatching the plates and getting them ready to carve.
Sitka Spruce front plate halves for the five-string double bass.Rough shape of the five-string double bass back plate, with the template for the neck. The neck was cut out of the scrap from the back.
So, for the front and back plates, the next thing on the agenda was to plane the center-joints absolutely flat and straight and then glue them together. It took two tries on each of them, as it turned out that while they were technically “straight”, and if I put a try-square at any given point, they seemed to be square…in reality, there was a longitudinal twist to the surface I had planed, and the fit was not acceptable. (sigh…) No big deal… I just had to saw the joint back apart, and try again.
Finally, I got everything lined up correctly; then I glued and clamped the plate halves together, and produced the plate banks, ready to trace the actual shapes.
Sitka spruce front plate for five-string double bass, bookmatched, and ready to glue.
Front and back plates, bookmatched, and ready to trace shapes.
Tracing the plates
Sitka spruce front plate, ready to trace the shape.
Ready to trace the shape of the garland onto the front plate.
Using a pipe spacer to trace the shape of the garland onto the Front plate.
Tracing the plate out with a pipe spacer like that enables me to establish a very even overhang of about 4.5 mm. The problem is, it also makes round corners, which I did not want. So I had to correct, the corners, using a long straightedge to “point” the corners toward the center of the plate at the far end, and then use circle templates to extend the curvature of the plate edge above and below the corner to meet the straight lines. (Incidentally, the reason I have stopped using a washer for a spacer, is that any washer small enough to have the right distance from outside to inside also is so thin that if there is the smallest change in the fit between the plate and the garland, the washer will slide under the garland, changing the overhang distance to zero. The thin slice of PVC pipe never does that.)
Cutting out the Front Plate
I used an old Craftsman “Auto-scroller” saber-saw (Hand-held jigsaw) to cut out the perimeter of the front plate. Ann, my beloved wife, bought me that saw 36 years ago, when we had been married for only about three years. That little saw has a lot of miles on it!
Cutting out the completed shape of the front plate. I am not attempting to cut exactly to the lines. I will correct to the lines, after the arching has been completed.
Inside view: the cutting is complete: the front plate is ready for arching.
Outside view of the front plate.
Arching is Next:
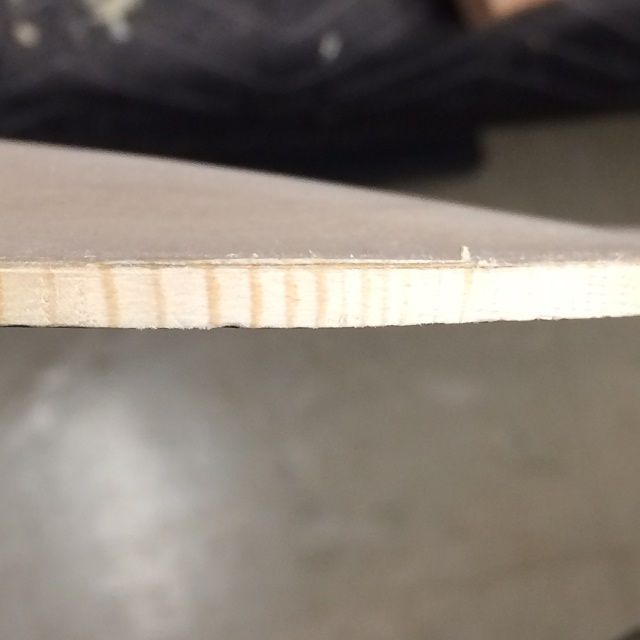
Before I could begin arching, I needed to mark the intended plate thickness: I used a marking tool to scribe a line all the way around the plate at 6 mm. Before the plate is done, this will be reduced to 5 mm in most areas. I used a ballpoint pen to highlight the groove so that I could more easily see it when I am working, and not accidentally go past it.
Edge-thickness scribed into front plate.
Then I secured the plate in a cradle especially made to fit this design, and secured it in place by affixing small squares of 1/4″ plywood around the perimeter so that the plate will not shift laterally, while I am working on it. The reason the little stop-blocks are so thin is that I do not want them to be in the way when I am planing the edges.
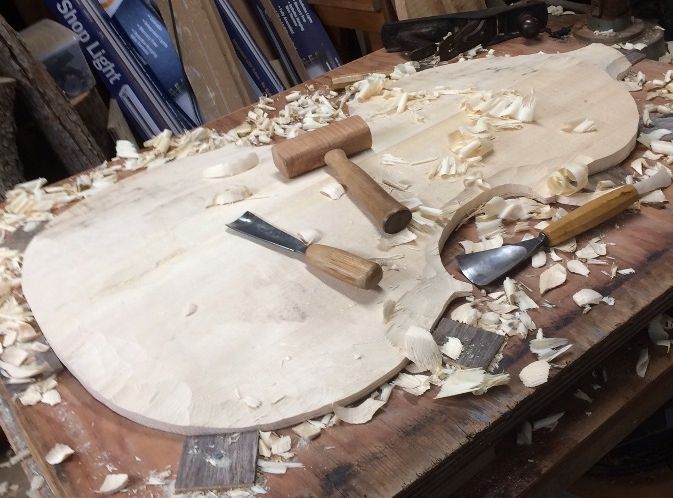
Front plate secured in a work cradle.
Tools for arching: cradle, gouges and planes.
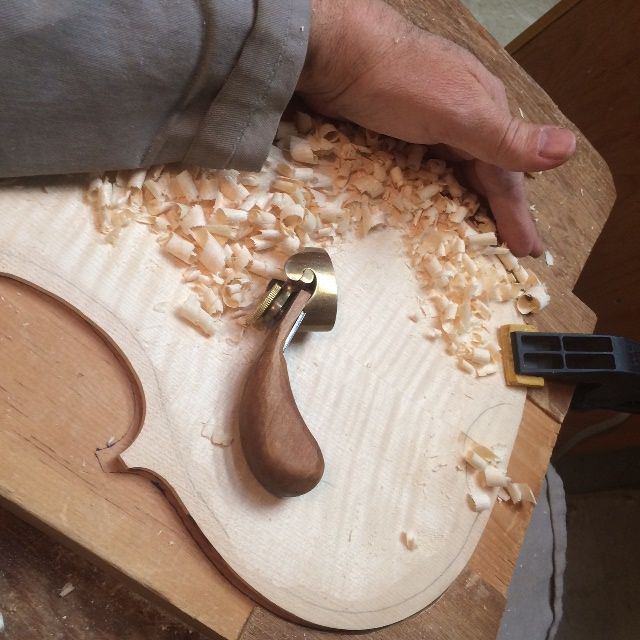
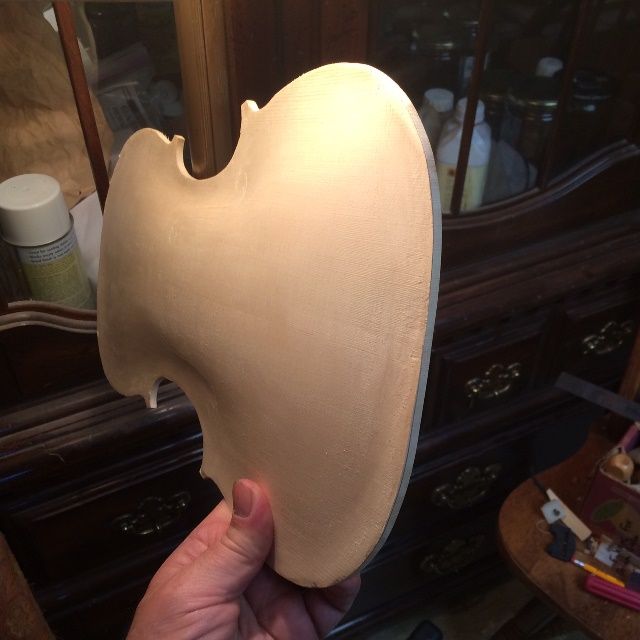
Sculpting the front plate arch.
Front plate arching in progress!
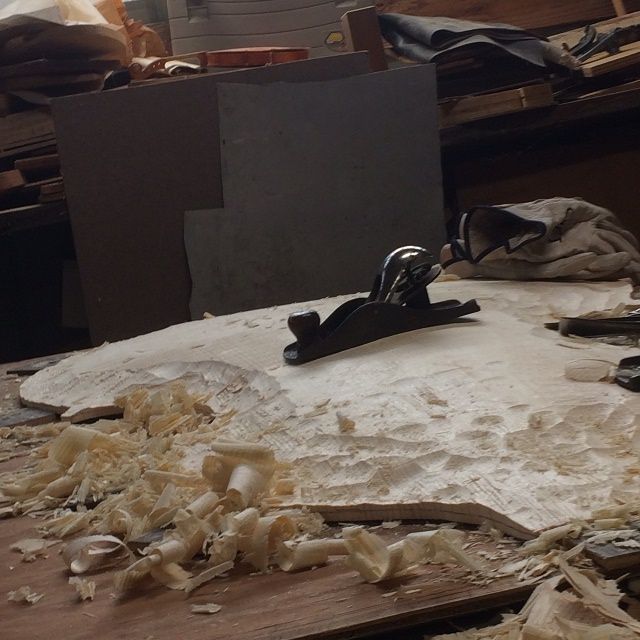
Planing the arching surface smooth.
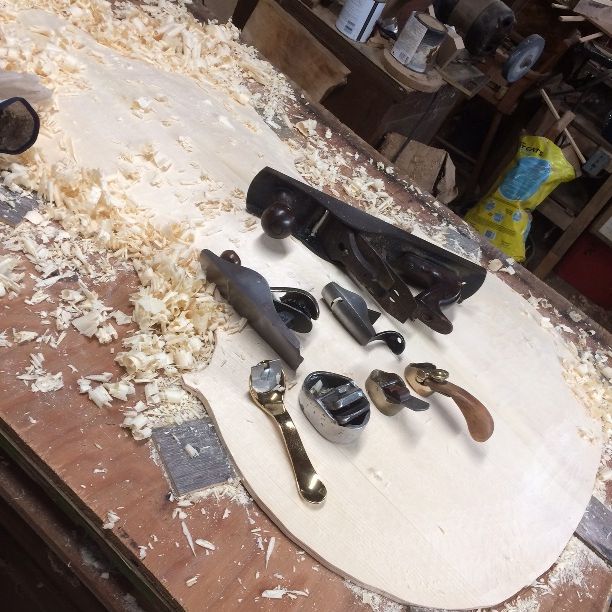
Some of the planes used to shape the bass.
Shadow line defining the longitudinal arching shape.
Transverse arching shape.
Arching nearing completion.
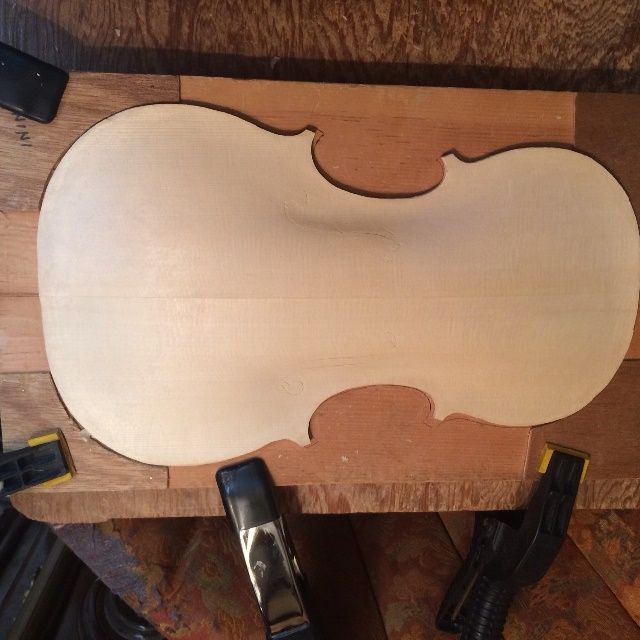
Arching and outline completed.
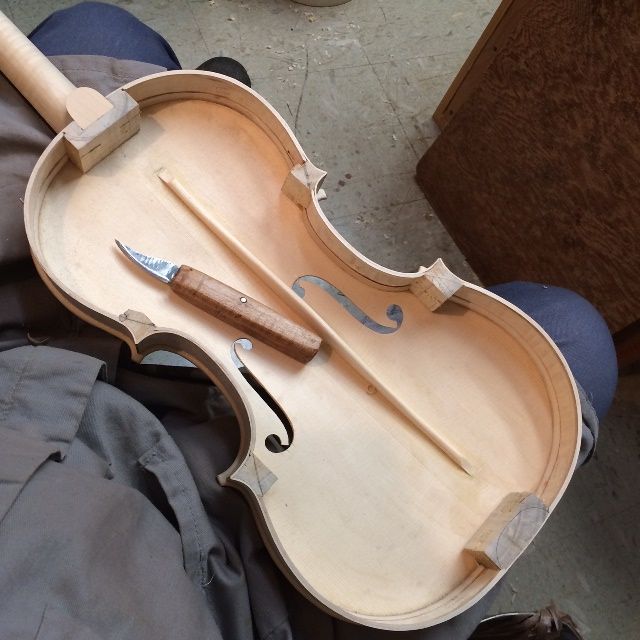
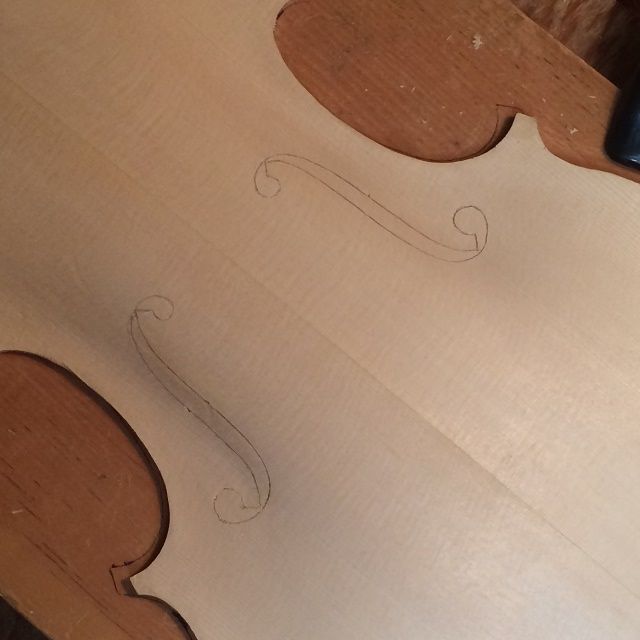
Time to lay out the F-holes!
F-holes laid out, incised, and inked.
When I build the smaller instruments, I inside the f-hole perimeters quite deeply, knowing that, without exception, I end up needing to correct the arching, using the f-hole side-profile as a guide. I want the “stem” portion of the f-holes to be essentially parallel to the plane of the garland-plate joint when viewed from the side. On the violins and violas I have built, I have universally found that, in spite of my best intentions, I have left too much “puffiness” in the area of the lower wings of the f-holes and I need to plane away more wood. If I have incised them deeply enough, I don’t lose the marks when I remove the wood.
I was quite pleased to find that, on this instrument, the side profile was exactly what I had hoped for, as soon as I laid it out. So I incised them, but not very deeply, and then inked them with a ball-point pen, so that I could easily see them while perfecting the arching later, using a scraper.
So– the next step will be to complete the “graduation” of the plate– carving away the majority of the wood thickness from the inside of the plate, so that the plate is the correct thickness all over…ranging from 9mm at the center, all the way down to 5mm in the flanks.
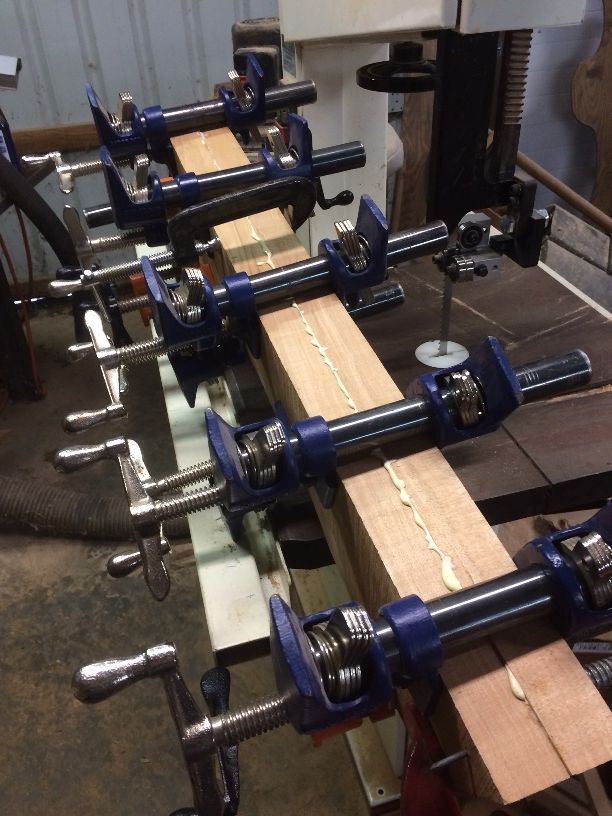
All of the Big Leaf maple portions of this bass are made from a log I was given, years ago, by the late Terry Howell. The fellow I hired to mill it up said he did not know how to do quarter-sawing or flitch-sawing, so I settled for plane-sawing, which means that all I have is slabs. That is OK, because I like using slab-sawn wood, especially for backs; but it also meant I had no pieces thick enough for a neck on a bass. So…I chose to glue-laminate the neck billet, and produce a piece thick enough to use.
Contrary to my usual rule of “nothing but hot hide-glue,” I chose to use Titebond on this, reasoning that it is not supposed to ever come apart. One of the reasons we usually stick with hot hide glue is that it is always reversible. Titebond is not.) My son Brian lent me about a dozen clamps to make the job easier. He makes exquisite guitars, and learned early the value of having lots of clamps available.
Neck billet bookmatched, glued and clamped.
The resulting billet was still about 3/4″ too narrow to accommodate the “ears” of the scroll, so I added a layer on each side, carefully chosen from nearby grain, so they would match (hopefully), and not be too obtrusive.
Extra wood glued on for “ears.”
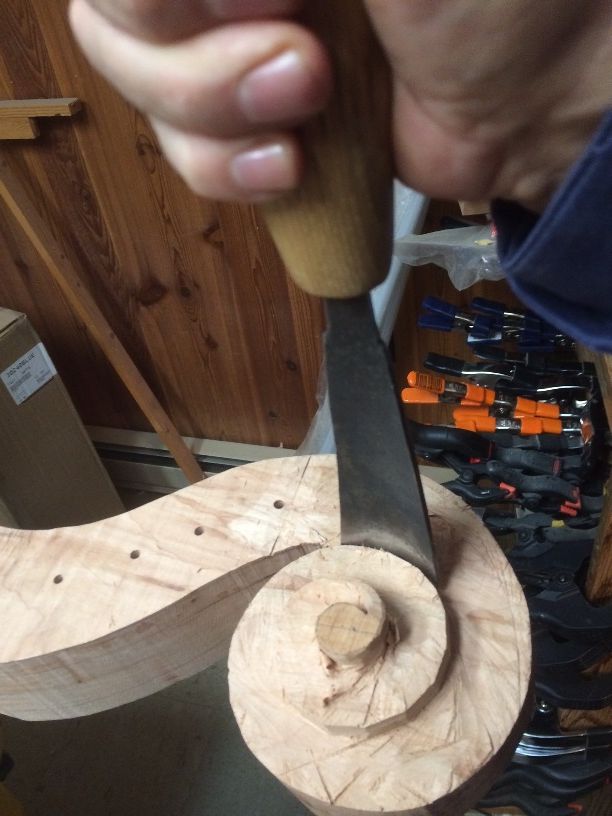
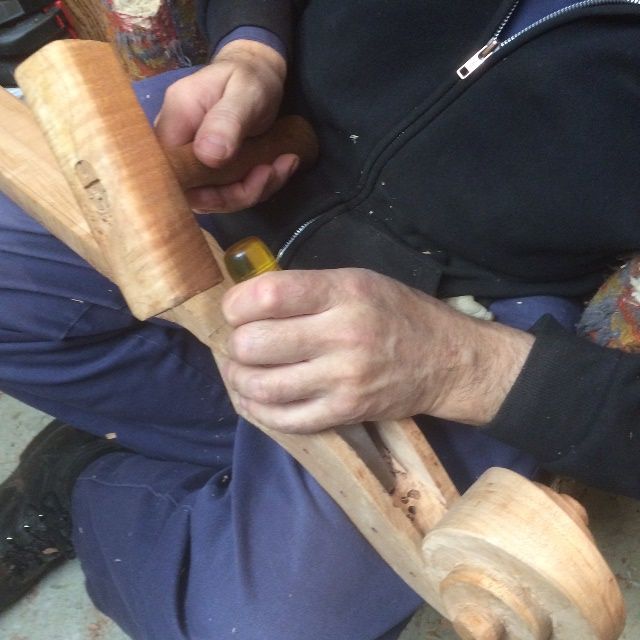
Carving the scroll
Finally, I drew in the planned shape of the entire scroll and pegbox, and proceeded to cut away as much waste-wood as possible, using a saw.
I forgot to photograph the initial carving portion, so this is from a five-string cello I made earlier. The same process is followed.
Saw-work on a viola scroll…I forgot to photograph this step on this bass.
Removing waste wood using gouges. (Again, this is a viola scroll; but the same principle applies.)
All saw-work is done on the scroll…time to remove wood using gouges and planes.
Removing waste wood using a gouge.
Removing waste wood using a palm-plane.
Waste wood has mostly been removed. Time to begin the pegbox and volute.
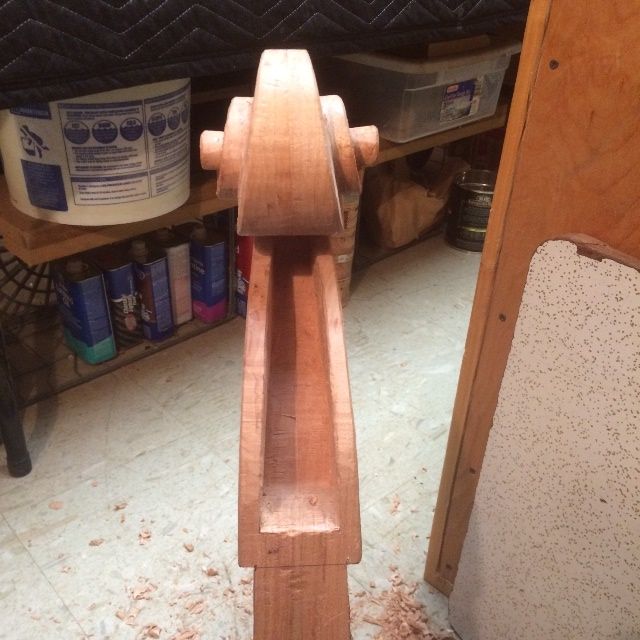
Carving the Pegbox
Pegbox has been drawn and is ready to carve.
Beginning the interior of the pegbox.
Pegbox carving is complete.
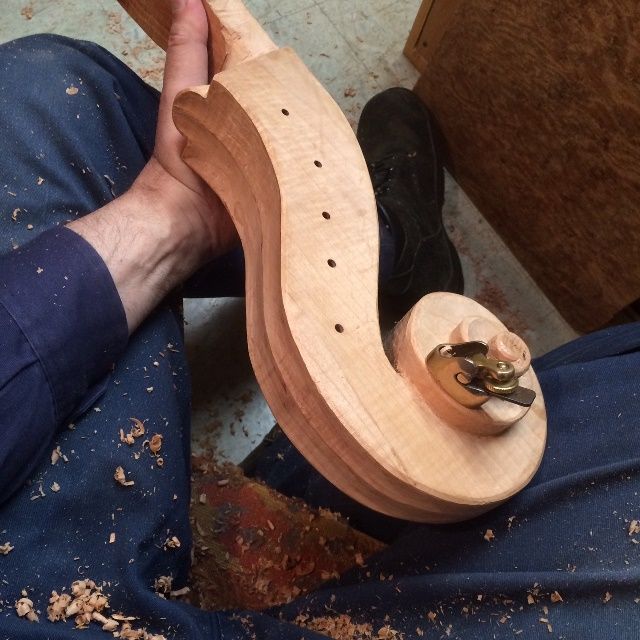
Carving the Volute
Beginning the volute for the 5-string double bass scroll.
Bass Scrolls are BIG!
That large viola scroll fits easily…loosely…inside the bass pegbox. Reminds me of a mother monkey cuddling her baby. The bass scroll is simply huge, compared to any other instrument I build. (No, I will never build an octobass.)
As you can see, there is a lot that goes into carving a scroll…and this thing is really big! So, though I’m not done, I will go ahead and post this, and share the rest as it gets done. (The turns of the scroll will be more deeply undercut, and all surfaces more refined.)
This is not really a new project, but rather one that was “tabled,” for lack of better term…work was suspended until a better set of circumstances emerged.
I built the mold for this bass in 2015, began bending ribs in 2017, with a woefully inadequate bending iron, and a great deal of frustration.
A commission came in, so I set aside the bass, to work on the cello, and never came back to it…so it sat in the corner of my workshop silently sneering at me every time I looked that way.
But! Since I was laid off from my job, where I had worked for 33-1/3 years, in January, I am catching up with some projects and able to face others with new eyes.
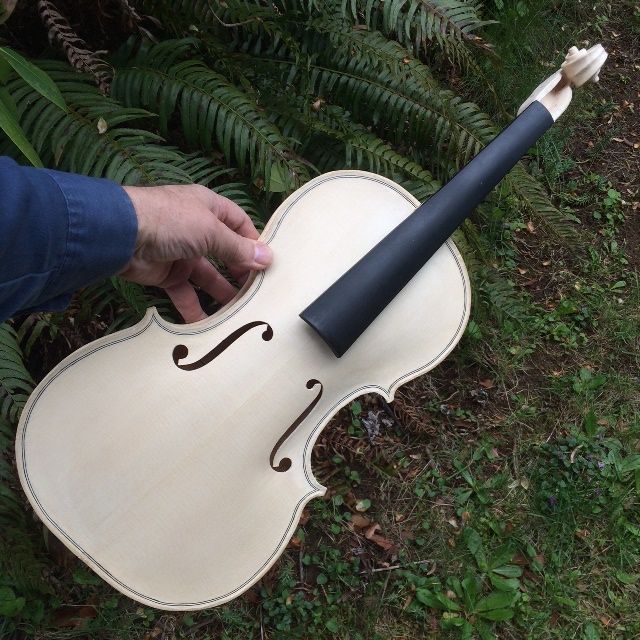
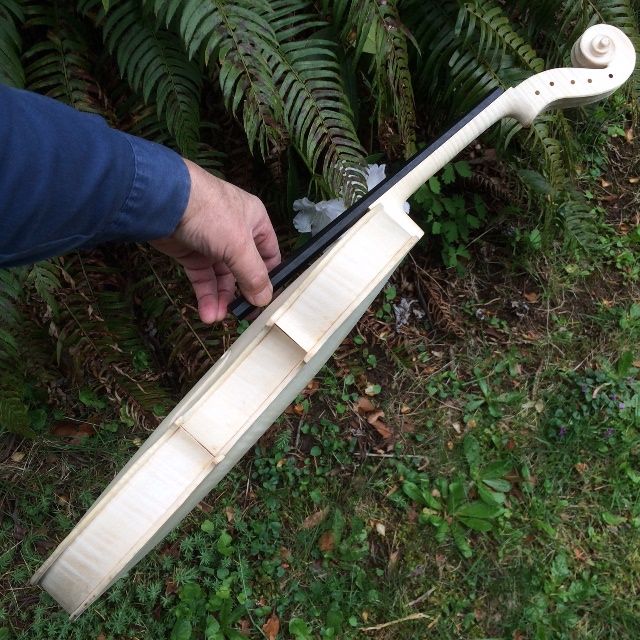
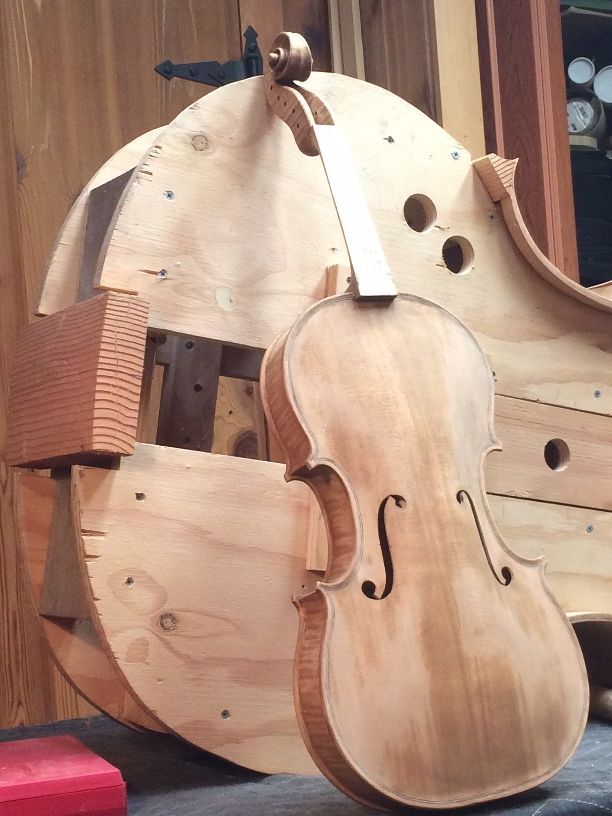
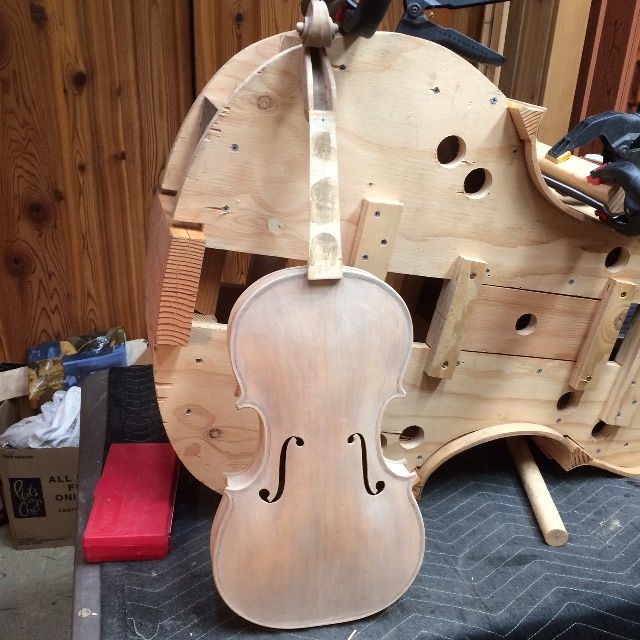
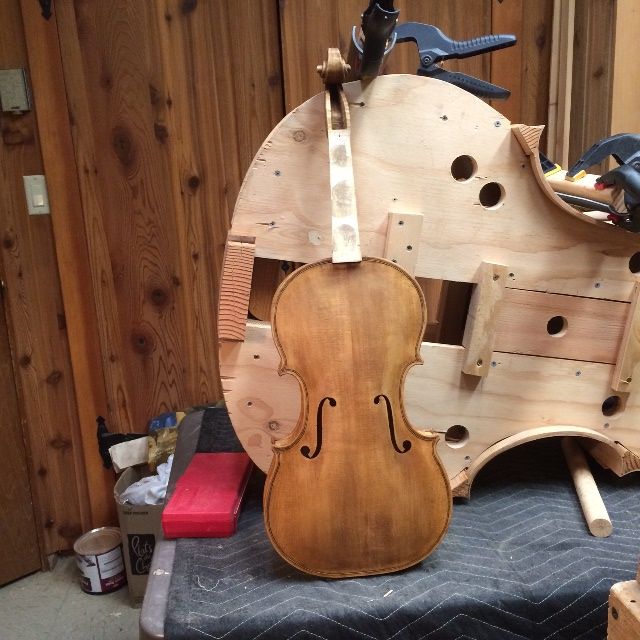
Here is the five-string 16-1/2″ viola I am just finishing up, balanced on top of the bass mold:
Large viola with double bass mold.
Once I had the bass mold up on my bench again, it was easier to confront the problems, rather than avoiding them.
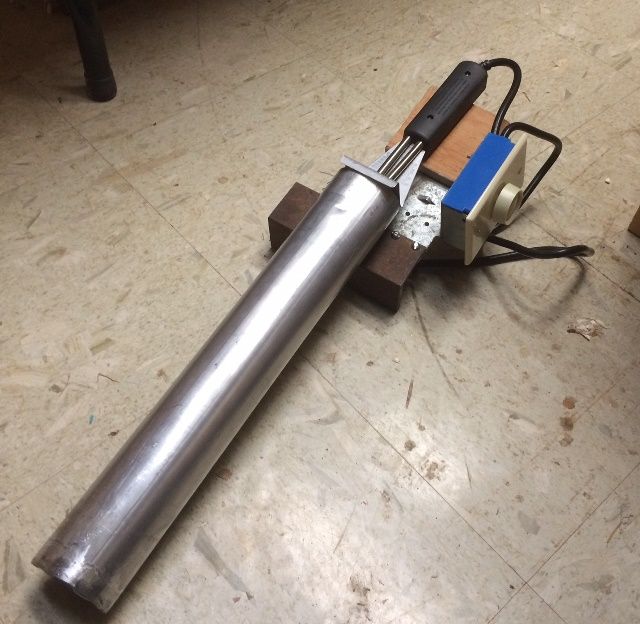
The New Bending Iron
The first thing I needed was a new bending iron. A fellow I met online, John Koehler, a fellow bass maker, told me how he built his bending iron. So I followed his lead, and built a new bending iron:
My homemade bending iron.
It is a section of exhaust tube, welded to a piece of angle iron, so that I could clamp the apparatus in a vise. Heat is supplied by a 550-W electric charcoal briquette lighter, controlled by a 600-W dimmer switch. It took a little trial and error to get it set up correctly and to calibrate it, but it turned out to work very well! (What a relief!)
Bending the ribs
Bending the remaining two Big Leaf Maple ribs was nearly effortless, and took about ten minutes, tops, not counting waiting for the tube to heat up.
Lower ribs bent to approximate the mold shape.
Installing the ribs and linings
Then I glued the ribs into the fir blocks on the mold with hot hide glue, one at a time, and affixed the willow linings in the same manner before moving to the next rib.
Treble rib with linings installed.
Once one rib was completely secure, trimmed and lined, I rolled the bass mold over and repeated the operation on the other side.
Bass side rib with linings installed.
I planed the linings flush with the ribs and blocks, and the garland was essentially complete. It will require careful leveling before fitting the plates, but not much other than that.
Completed rib garland.
In the coming weeks, I will complete the center-joins of front and back plates, then complete the carving of the plates and the neck and scroll, and start putting this bass together!
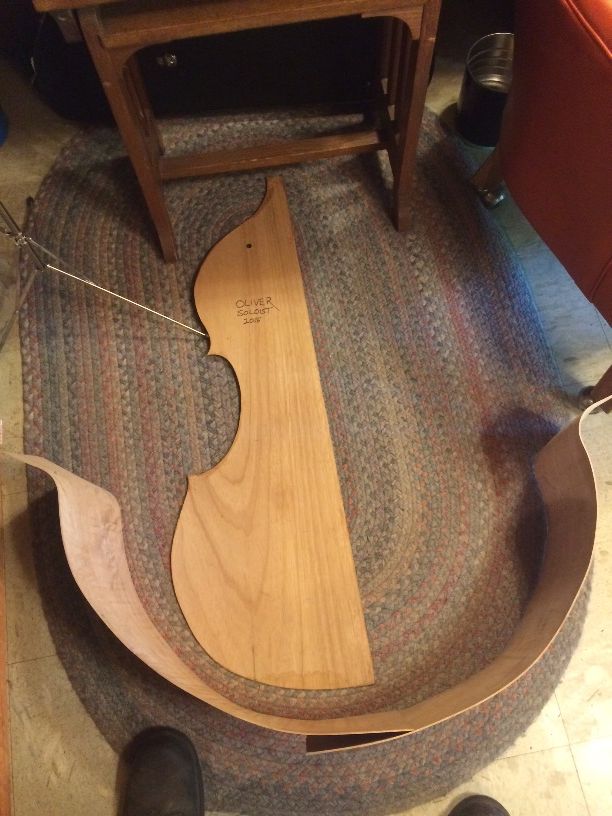
Just as a teaser, this is the wood for the front, back and neck:
Sitka Spruce billet for the front plate.
Big Leaf Maple for the back plate and neck.
(Notice that there is a fair chunk left over where the neck pattern does not use all the wood it is on: watch that space! )
Varnishing Process for the 16-1/2″ five-string Viola:
All Smoothing and Varnish-prep is done:
When I last posted, the final woodwork had been completed. I had twice wetted down the wood, to raise the grain, and scraped and sanded away the rough raised grain. The wood was stable enough to commence the tanning process.
After the wood is smooth, there will be:
a tanning treatment,
a mineral ground treatment,
a sealer, to lock the mineral ground in place, and
finally, the varnish itself in a series of 6-12 coats, depending on color.
Tanning the Wood
People who live in very sunny regions (New Mexico, for instance) need no light booth: they simply hang their instrument out in the sun for a few hours and it takes on a deep yellow-tan color. I live in Oregon. Western Oregon, between Portland and the coast. We are more likely to achieve a patina of bird-droppings than a sun-tan, if we hang instruments outdoors. (Sigh…)
So, a number of years ago, I bought an old cabinet, about seven feet tall, lined it with aluminum foil as a reflector, wired it with a strong UV source (two 48″ fluorescent UV tubes in a shop-light fixture), and I hang my instruments in it overnight. To heighten the effect, I brush on a coat of very diluted Sodium nitrite and let it dry before I expose it to the UV. This works pretty well, and I have pretty much adopted it as a normal pre-varnish treatment.
Tanned front side of the 16-1/2″ five-string Viola.
Tanned back side of the same instrument.
Mineral Ground:
Years ago, an excellent luthier in Europe posted a detailed explanation of why and how he employs a mineral ground in his instruments, to improve projection. I tried it (because, “if it is good enough for Roger Hargraves…”) and immediately started getting better reviews on the sound of my instruments.
So…obviously, that became part of my process, as well. I use gypsum powder, suspended in coffee (gotta wake up the tone!) so as to achieve a little deeper color in the same move. I rub it in vigorously, trying to get the particles of gypsum to actually penetrate the pores of the wood, then rub off the excess with a rag, before it is fully dry. When it is dry, it obscures the grain, and turns a chalky white color.
Mineral ground drying on 16-1/2″ 5-string Viola. (5-string bass beginning in background.)
Mineral Ground is dry. I will sand off any excess mineral, and then apply the sealer.
Sealer
Sealer coat, front view.
Sealer coat, back view.
The sealer, in this case, is simply rosin, dissolved in turpentine and alcohol. The mixture soaks into the wood, causing the mineral ground to become transparent, then the solvents evaporate, leaving the rosin in the wood. The mineral ground will never again be visible.
Varnish Beginning
When the sealer is dry, I sand lightly, using 320 grit, to remove any lumps I may not have seen, and then I am ready to begin varnishing. I always begin with two base-coats of very yellow/gold varnish, so that the gold color will shine through the darker color coats.
Two coats of yellow varnish, side and front view.
Two coats of yellow varnish, back view.
I like the way the European Maple and Spruce are shining through the varnish. I think they will sound great, too. Tapping on the corpus, it sounds as though it will have a big, deep voice.
I will follow the completion of the varnish process in a later post.
Last “woodwork” tasks on the 16-1/2″ five-string Viola:
Last time, we finished up with the neck set, and the corpus closed, but all the edgework (and final shaping of the neck heel, etc.) left to be done.
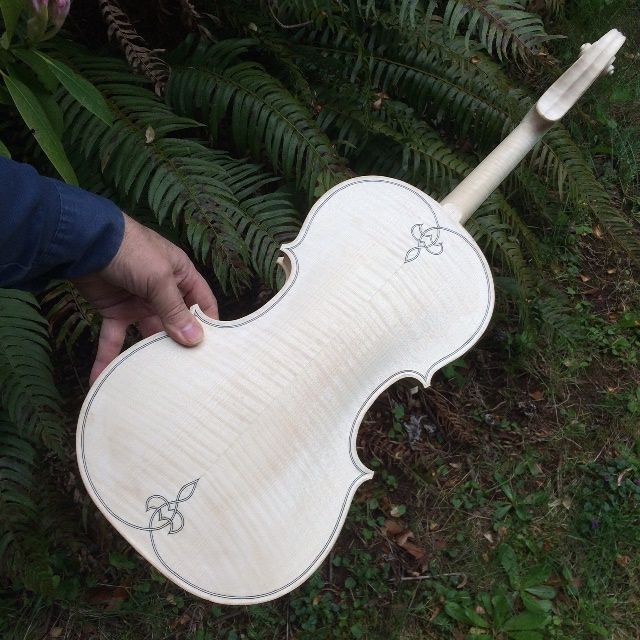
Closed corpus, purfling weave sketched, heel/button need carving.
Carving the heel/button combination
The neck heel and the back button, together, make up the majority of the strength of the neck-joint. I once had a cello come in for repair, fully up to tension, but “something was loose.” Yeah, the ONLY glue still holding in the neck-joint was the glue between the neck heel and back button! I removed the neck, cleaned out the old glue, and re-glued the entire joint: but I never forgot that the heel/button connection alone had held the entire load of the string tension! So I make certain that this joint is perfect, and the two are carved as one piece after gluing.
There is also a specific measurement from the center of the neck-heel curve to the top edge of each side of the front plate where it joins the back: in violas, I shoot for exactly 27mm.
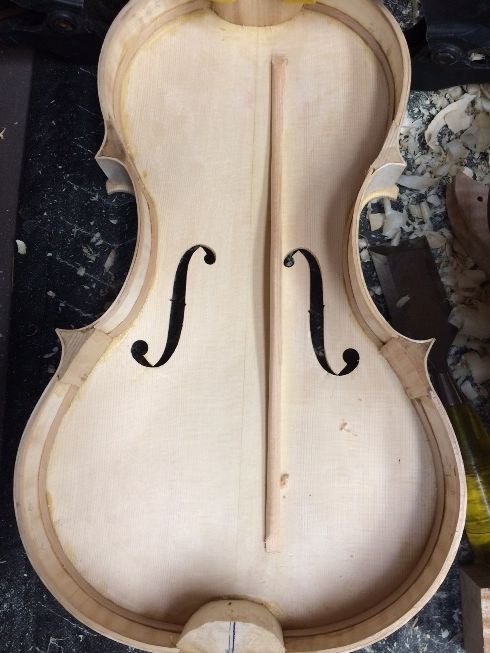
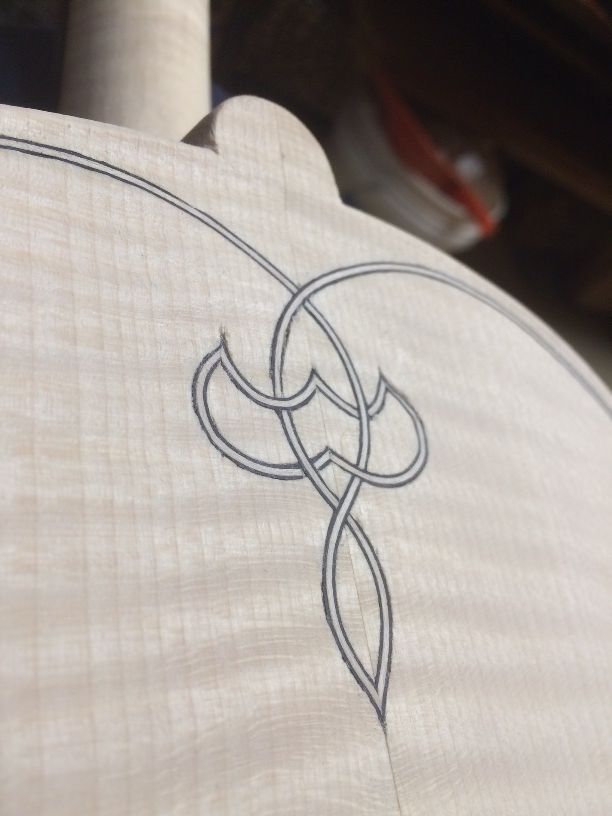
Heel and button carved: ready to begin purfling. I have laid out the purfling and incised it.
Purfling
I used to struggle with cutting the purfling slot (I still do, but for different reasons) because I was trying to cut the full depth in a single pass, or maybe two. One of my teachers corrected me, saying that the first pass around, with the knife, is just to “darken the lines” left by the marker. Then it is relatively easy for the blade to follow the groove for subsequent fast passes, each making the slice a little deeper. Finally, I use a special tool to pick out the waste wood from between the lines.
Purfling-pick with front plate.
One problem I faced with the back plate that I had not noticed so much, on the front plate, even though it had the same issue: This purfling is a little wider than what I usually use, so, in spite of the fact that I marked out the correct width, my pick tools (all of them) are made for the narrower purfling, and they do not readily make the slot the correct width. That meant a lot of going back and widening things just a little bit (0.5 mm, usually.) The European spruce of the front plate is soft, and quite forgiving. The harder European maple back plate does not give at all, so if the slot is too narrow, the strip is not going in, at all.
Another issue is that the purfling weave is on top of a fairly thin portion of the back plate, so I could not cut my slots as deeply as I wanted to. Thus, there was very little wood-support for the purfling, and the pieces were difficult to fit, whereas, around the perimeter, I could cut a slot for the full depth of the purfling strips and achieve full support. Ah, well…that’s life. But there were some joints I am not so happy with.
Anyway, this is how the purfling went:
I cut the center bout slots, first, along with the corners.
The goal is to complete the whole slot before inserting any purfling. (Notice the shallow purfling-weave slots.)
Installing the purfling
As I did on the front plate, I installed the center-bout strips first, dry, and then the rest of the perimeter. I glued the perimeter in completely, before beginning the purfling weaves, themselves.
In the case of the purfling weaves, since the slots were so shallow, I glued each piece as I installed it, then worked on the other end of the instrument while the glue from that piece set up and began to hold.
Outer perimeter complete…working on the weaves.
Purfling weave is nearly complete. Notice that some joints are not as clean as others.
Completed purfling weave: still needs to be planed flush.
Completed purfling weave…”warts and all.” I may elect to go back and improve things a little. (Probably not.)The other weave turned out a little better.
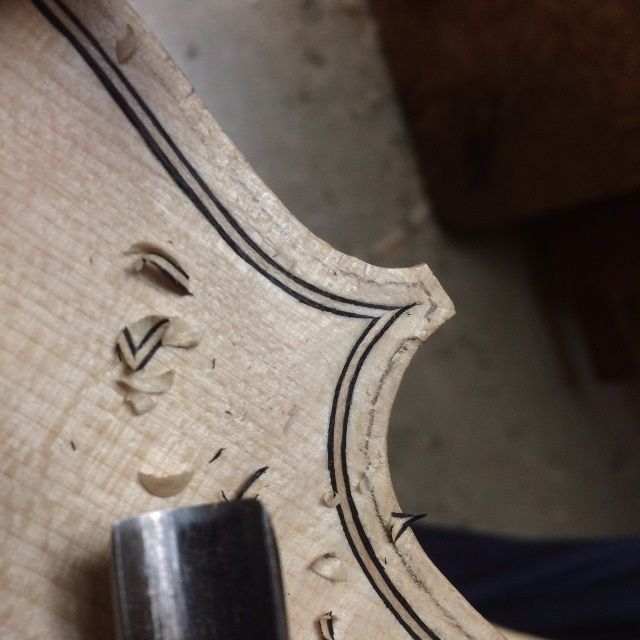
The Channel
Once the purfling is all in place, and planed flush, it is time to carve the “channel.” This is a slight “ditch” that runs all the way around the perimeter: the bottom of the “ditch” is usually at the purfling, while the outer edge of the ditch ends exactly at a line called the “crest,” which is about 40% of the distance in, from the outer edge of the plate to the outer edge of the purfling. The inner edge of the “ditch” will be planed and scraped back to “fair” into the surface of the arching, without any lumps or hollows.
Notice the pencil-line “crest”, between the purfling and the plate-edge.
Edgework
Finally, after all the surface of the plate is correct, I plane, scrape and sand the edges themselves, so that the outer curve of the plate edge perfectly meets the inner curve of the channel, all the way around the plate.
In this case, I did not take the picture until after I had completed the next step, which was to wet the whole structure down with water, in order to deliberately raise the grain, so that any imperfections, or compressed areas, will rise up and be seen…and subsequently, be scraped and sanded flush again. All this to say, please understand the “rough” surface of all the wood.
Edgework complete, but still rough with raised grain.
So…that means the whole instrument is now complete, minus the varnish prep-work, and the actual varnish and set-up!
Front ready for varnish.
Side ready for varnish.
Back ready for varnish.
Varnish Sequence
I will post the varnish sequence as it occurs, but, for now, know that the sequence will include at least two “wet-it-down, let-it-dry, and scrape/sand-it-smooth” iterations. The idea is to produce a surface that will no longer respond to moisture by raising the grain. This is particularly important on the handle portion of the neck, where the moisture from players’ hands will certainly be in contact with the wood, every time the instrument is played. But, under the varnish, the slightest discontinuity will become glaringly obvious, so that is important as well.
After the wood is smooth, there will be:
a tanning treatment,
a mineral ground treatment,
a sealer, to lock the mineral ground in place, and
finally, the varnish itself in a series of 6-12 coats, depending on color.
Almost done with the Wood Work parts on the 16-1/2″ five-string Viola!
Completing Arching of the back plate.
When I last posted, I was nearly done arching the back plate, and nearly done shaping the neck:
Arching nearly complete; Neck nearly complete.
Setting the neck
I forgot to take photos during this process: sorry. I get wrapped up in the work and forget all about taking photos.
Setting a neck follows this course of action:
Prepare the neck heel– angles and dimensions all correct. Heel absolutely flat, all mating surfaces absolutely smooth.
Lay out and cut out the mortise in the neck block on the corpus. I try to give myself some room for adjustment. It is always a mistake to try to cut exactly to the layout lines in the first attempt.
Check all measurements with every single change:
how does the centerline of the neck fit, relative to the centerline of the corpus?
how does the transverse level of the neck match the level of the corpus?
how does the pitch (front-to-back) angle compare to what is correct?
how does the distance between the nut line and the top edge of the front plate compare with the correct distance?
how does the height of the lower edge of the fingerboard above the edge of the front plate match the correct height?
When the final fit is perfect, checking ALL measurements, remove the neck and slather in the hot hide glue, and immediately ram the neck into place one last time, making a fast re-check of all measurements, to make sure nothing moved out of place.
Let it dry!
Neck set complete!
You will notice that I set my neck before closing the corpus. I find it easier and faster, and it allows me to achieve a perfect fit against the back button.
Graduating the Back Plate
The next step was to carve out the interior of the back plate, to achieve ideal thicknesses all over. This is called “Graduating the plate” or, simply “Graduation.”
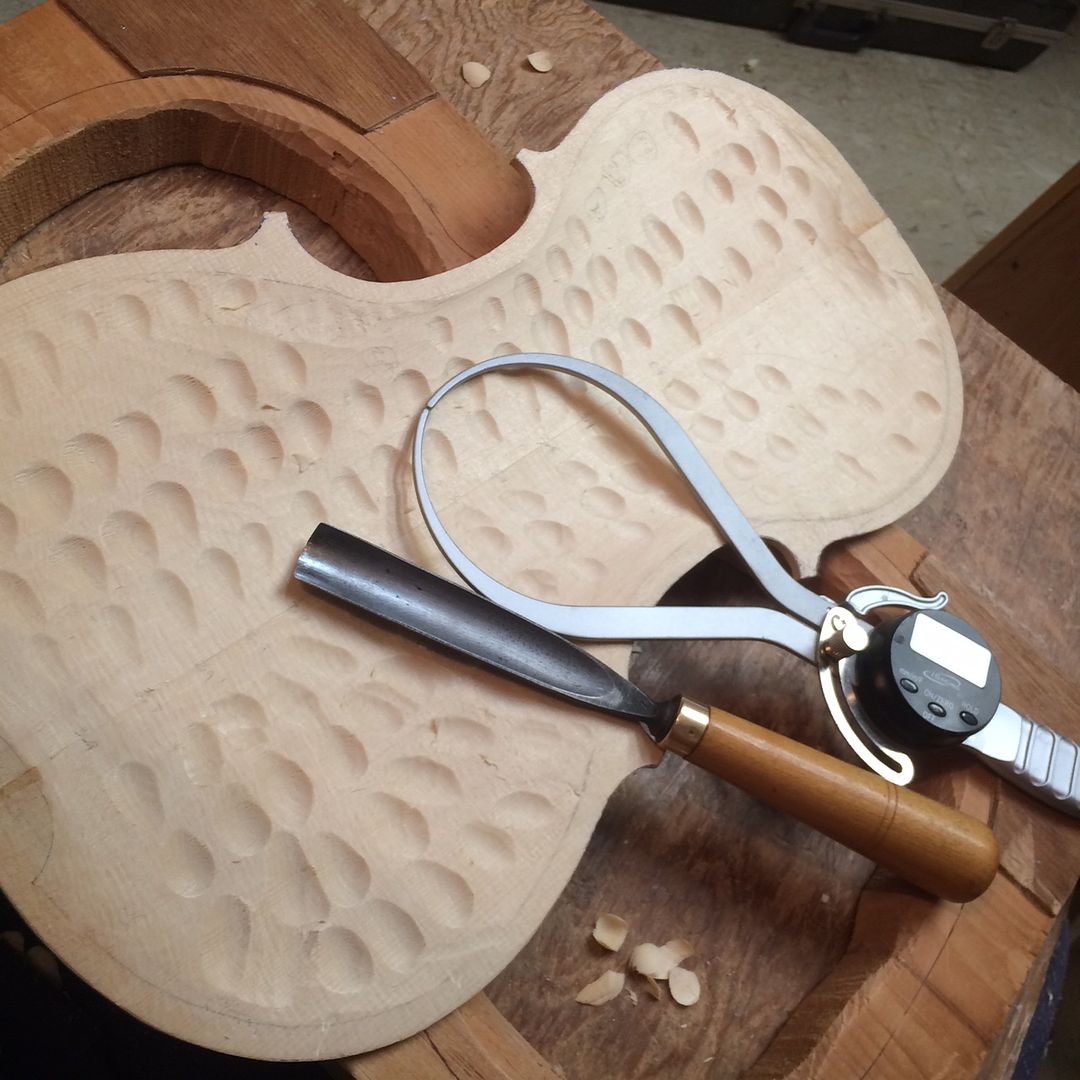
Beginning graduation of the back plate.
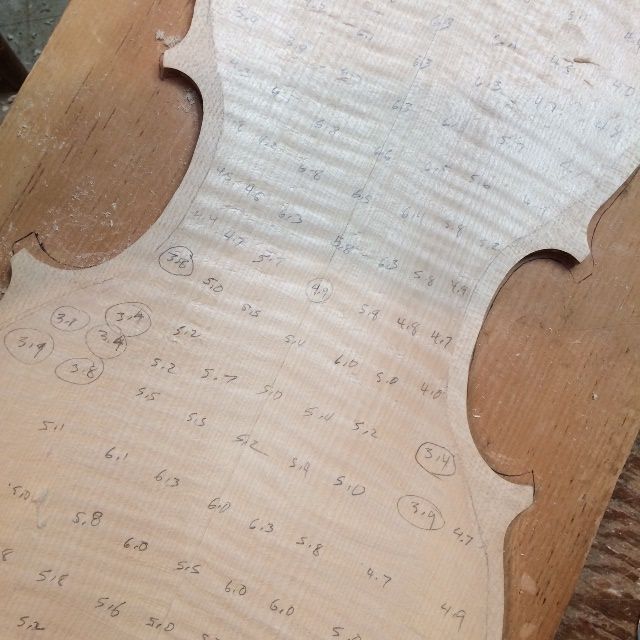
Calibration of “dots’ begun: circled dots are already correct. Others need carving out.
After I established the current thicknesses for all the above locations, I carved each dot to the thickness I actually desired, leaving a series of pits all over. The following photo was actually of the front plate, but it is the same idea:
Dots (front plate) completed and ready to be connected, using a plane.
After connecting the dots, the graduation is very nearly complete. I scraped, and checked thicknesses, and scraped some more, until it looked like this:
The shadow line shows the curve of completed graduation.
Preparing to close the Corpus
With the back plate graduation complete, I was ready to attach the plate to the corpus, except that:
the corpus was still attached to the mold, and
the blocks and linings had yet to be shaped.
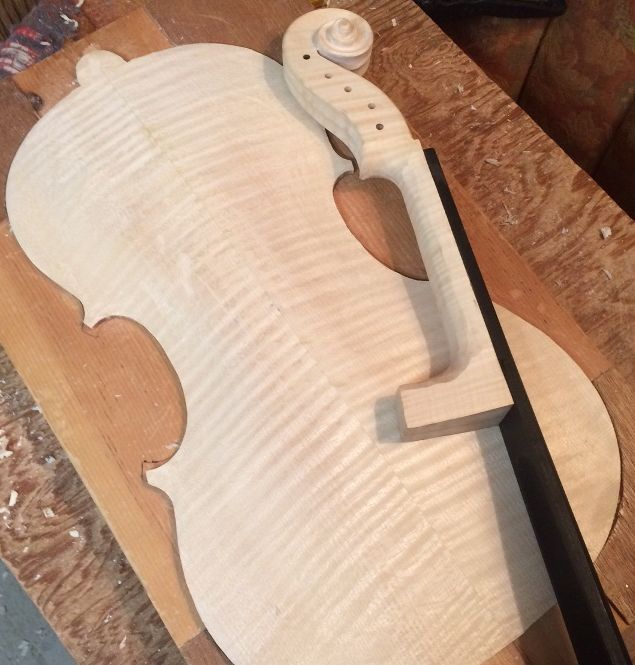
So I sketched in the planned shapes of the six blocks, trimmed the neck-heel flush, removed the mold, and then set about shaping the inside of the blocks and linings.
I used a knife and a chisel and a gouge to shape all of them, finishing with a scraper. The very first step was to sketch in the block shapes.
Sketching in the block shapes.
Then I cut the neck-heel off, flush with the neck block. I used a flush-cut saw for this step. It works well, but you have to watch carefully to make sure it is not wandering off the line.
Neck-heel cut off flush with the neck block.
Removing the Mold
Then I leveled the back of the garland, using a sanding board, and I was pretty much ready to remove the mold. I popped the glue-lines loose from where the blocks were attached to the mold and lifted the mold out. It is a collapsible mold, so I removed the bolts and took the mold out in three pieces. That left me with a completed corpus, and a neck already set, but no mold. At this point the structure is extremely fragile: I have to be verycareful until the back plate is glued on, making the structure rigid and strong again.
Mold is out! Preparing to shape the blocks.
No mold means no support! Be very careful!
The next photo is from an earlier instrument, because I forgot to take a picture of the shaped blocks in this instrument:
The general shape of the finished blocks (earlier instrument.)
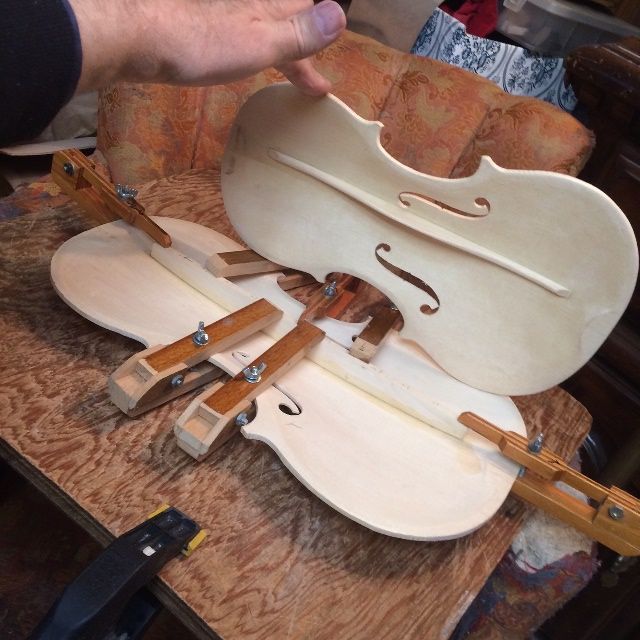
Closing the Corpus
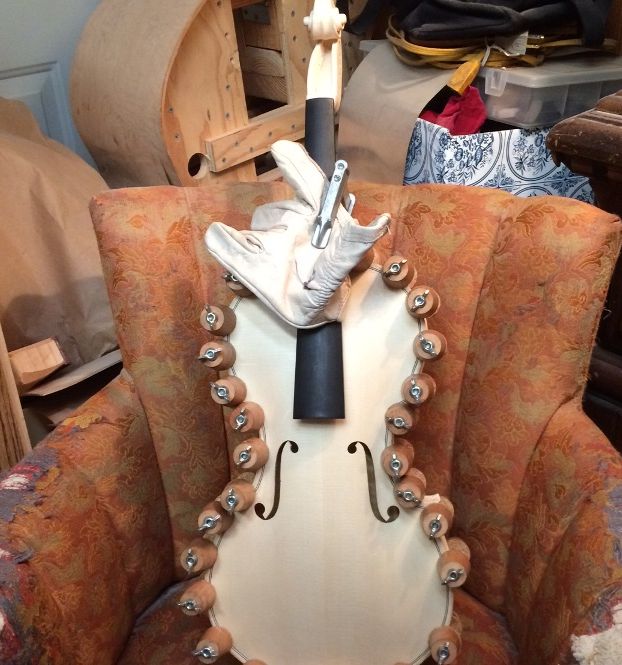
Then I installed the label, and dry-clamped the back plate to the corpus, using spool-clamps, checking carefully to see that my position was correct, and that the overhang was equal all the way around.
I then removed a few clamps at a time, and slipped hot hide glue into the joint, using a thin palette knife, and quickly replaced the clamps. When I had spool-clamps all around the perimeter, I added one last clamp, a padded C-clamp, to ensure that the joint between the neck heel and the back button was fully closed and tight. I used a glove to pad the neck, and clamped it securely.
Closed Corpus, with bass in the background. (Gotta get going on that double bass again!)
The next thing will be to trim the neck heel and back button together, as they are the key to the strength of the joint, and must hereafter function as one.
Neck-heel and back button awaiting final shaping. Planned purfling-weave sketched in.
But I will leave those steps for a later post…this one is already too long. (sorry…)
I would love to just say, “There! All Done!” but the fact is, I will always be able to see little things I wish I could change, and perhaps could not see until it was pretty much too late. That’s OK…it’s part of being a maker. I just have to know when it is time to say, “That’s as far as I am going!” and call it good.
Varnish
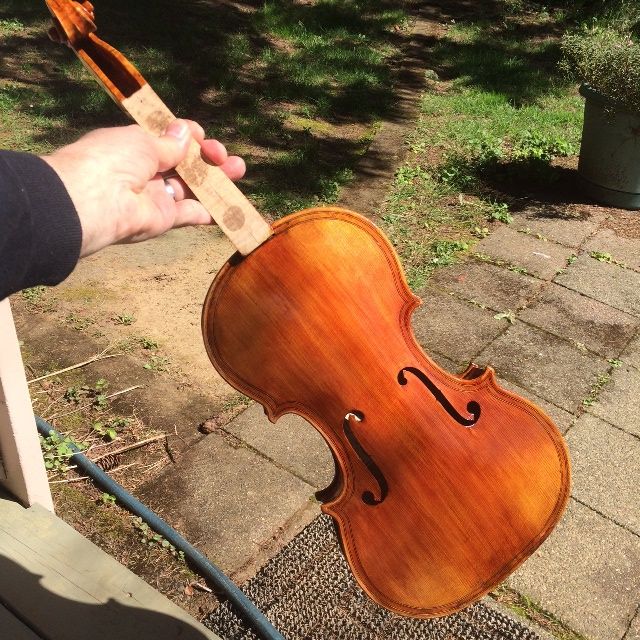
Last time, I shared how one of those decisions was how dark to make the varnish. I came to that decision about two coats past the last time I posted, so I allowed the varnish to harden for about a week, and then gave it a final once-over, and began the set-up procedures. Here is how it looked before I began set-up:
Final varnish front view.
Final Varnish, Back View.
Final varnish, Scroll.
The varnish took several days to harden enough to work on set-up, and even when I thought it was ready, it still easily took fingerprints. 🙁 I guess I should have known. Anyhow, it means there will be some rubbing out to be done after set-up is complete, and the varnish is even harder.
Set-up
I did not take many photos during set-up. Set-up includes:
Re-installing the Fingerboard,
Installing the nut,
Installing the saddle,
Installing pegs,
Fitting the soundpost,
Fitting the bridge,
Installing the end-button,
Installing and adjusting the tailpiece and strings,
Installing the chinrest, and
Playing while adjusting for sound (balance, tone, etc.)
So, I had a fairly frustrating day, wherein it seemed nothing went right on the first try. It took me twice as long as it should have, but I got it done. I only took a few photos:
Fingerboard installed: Beginning to ream peg holes.
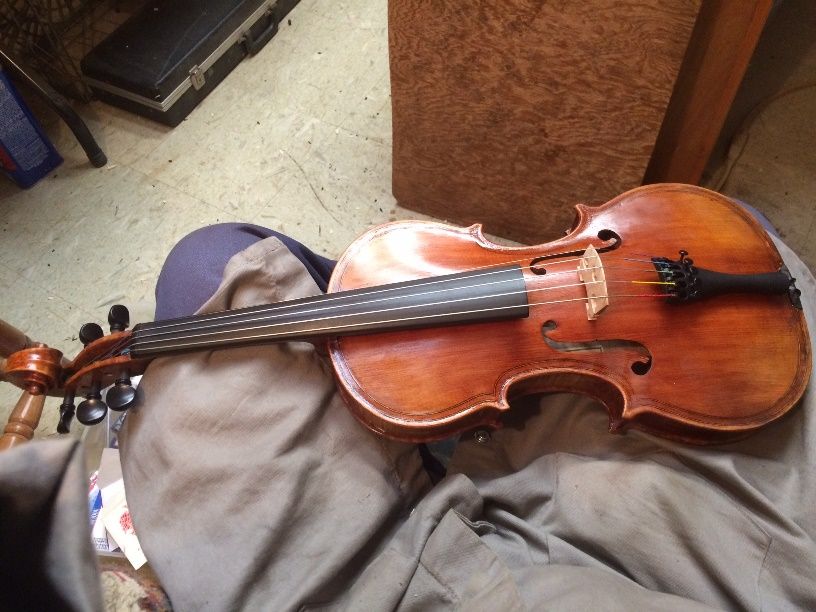
Pegs, nut, saddle, end-button and soundpost installed. Still working on the bridge.
Almost done with set-up: chinrest and final adjustments remaining.
Sound
The 5-string 15″ viola had good sound from the first moment, but, as usual, it required some sound-post adjustment to achieve balance across all five strings. A sharp-eyed viewer also may notice all the mismatched strings; Jargar C, heavy Dominant G, D and A, and a regular Dominant E. I was unable to find the string sets I had bought recently (found them later), so, for the moment I simply used what I had, and adjusted accordingly. And, surprisingly, it sounded quite good.
It has a huge voice compared to my violin-size five-string fiddles, and except for the C, thebalance is very good. I adjusted the soundpost to bring the C-string into line, and it is much better, now. I am anxious to try an actual “set” of strings on it, to see what I can achieve in terms of balance and over-all tone.
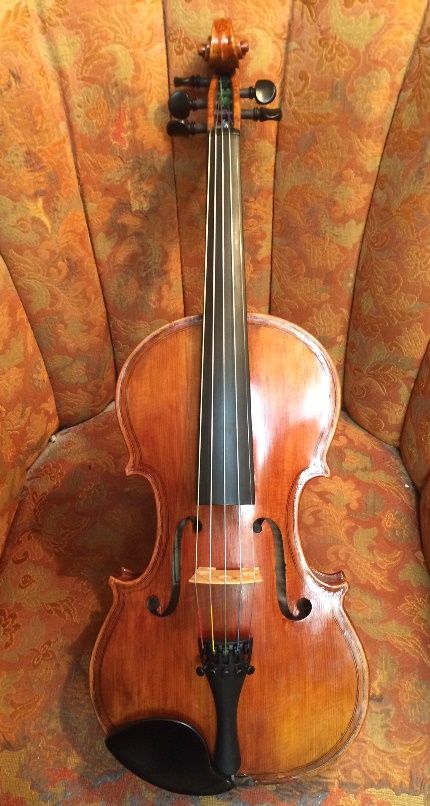
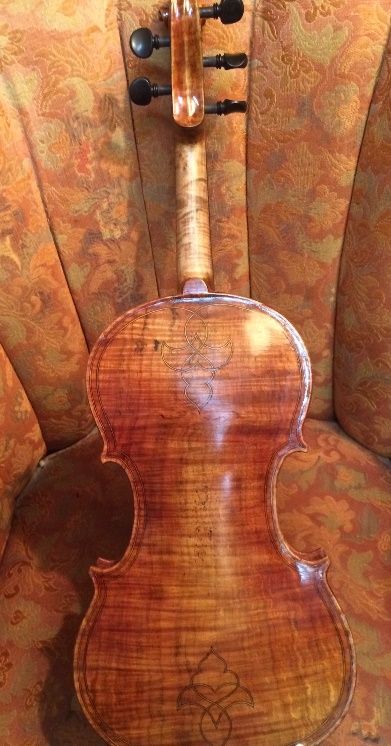
Anyway, here is what it looked like immediately after full set-up:
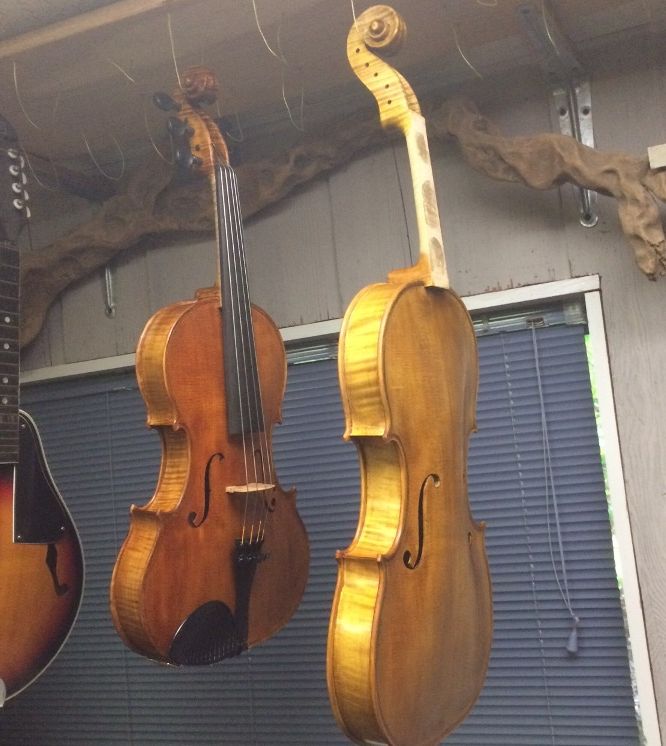
Front view of completed 15″ 5-string viola.
Back view of completed 15″ 5-string Viola.
It still will need a final rub-down, but for now, I am playing it and just letting it finish hardening.
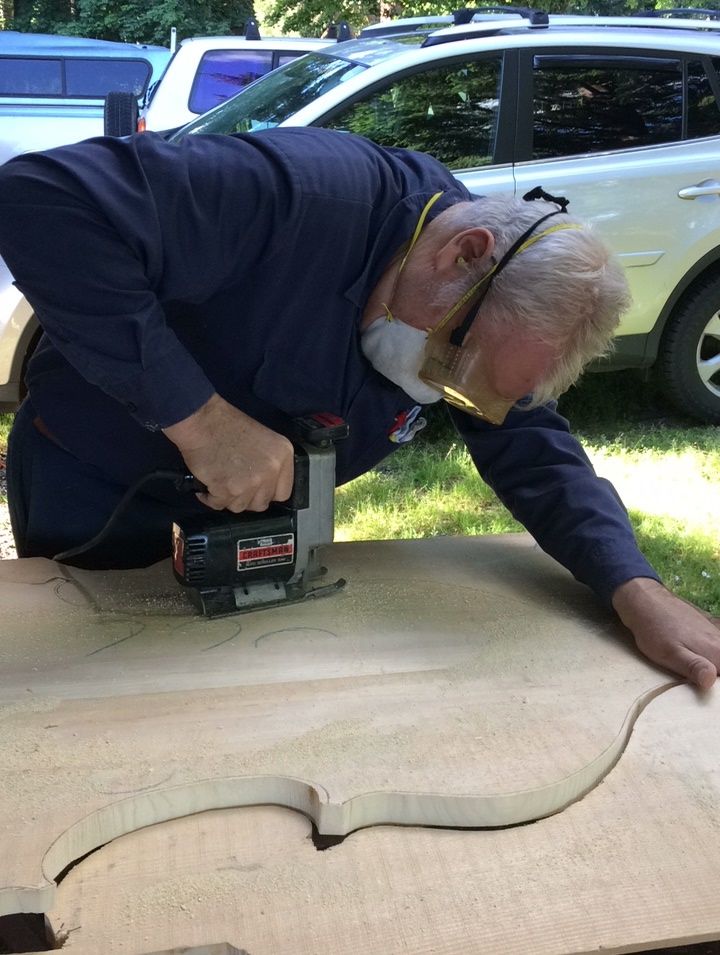
When I last posted, I had traced the shape of the garland onto the plates and was ready to cut out the plates. I decided to wait on the back plate, but the front plate was ready to go, so I cut it out, using my band saw, and smoothed the edges, using the spindle sander and files. (I have built precisely one instrument without power tools of any sort: One of my early teachers required it, so I complied, but it convinced me that, at my age, I need to save my joints for the things that I have to do by hand, rather than beating them to death just on principle. Besides, I am convinced that if the old masters had possessed power tools, they would have used them without question. They were very practical people.)
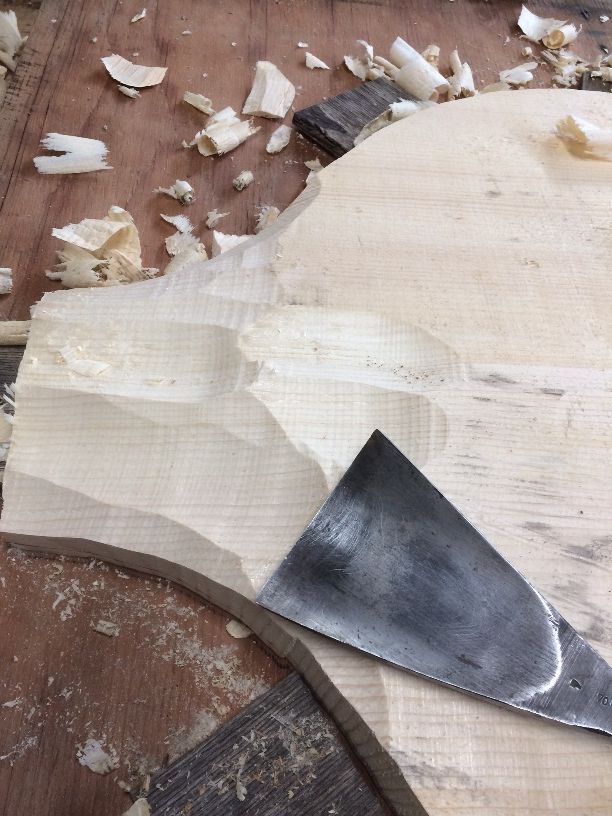
So, with the front plate cut to shape, I first marked the edge at a thickness of 4.5 mm. I used a wheel-style marking gauge, with a sharp disc, to mark the thickness and scribe it into the edge of the plate, all the way around. Then I began cutting away waste wood to achieve the desired arching shape. I checked a poster (Published by The Strad) of the “Conte Vitale” 1676 viola by Andrea Guarneri . It is one of the most frequently copied violas in the world, as it is a large viola that works very well, and copies of it frequently work very well, too. I am modifying the pattern a little for superior playability, but I have made this model before, so it is not “guesswork.”
I forgot to take pictures, initially, but here are a couple, belatedly:
Remaining scribe-line for edge-thickness. I plane down to the line all around, eventually.
Line beginning to disappear.
Arching complete.
Arching complete and f-holes laid out.
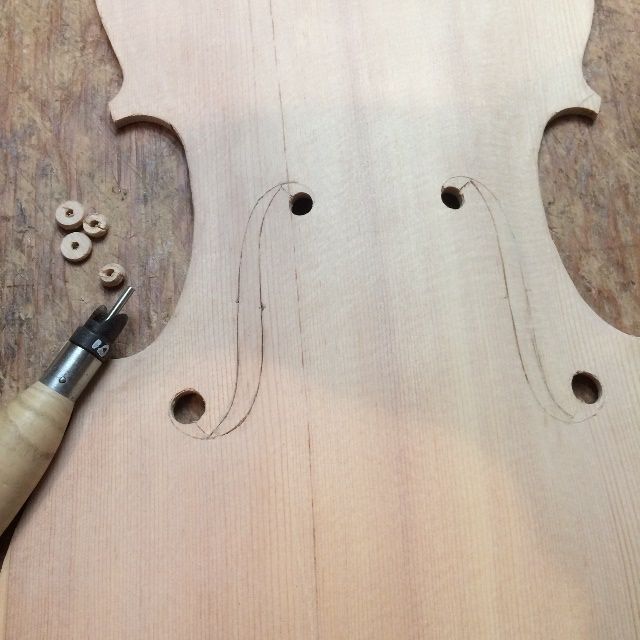
F-hole Layout and Incision
Once the arching was complete, right down to scraping, I laid out the f-holes, and incised them deeply into the European Spruce of the front plate. Incising the f-hole outline allows me to turn the plate and sight over the edge of the plate at the profile. I want the main stem of the f-hole to be essentially parallel with the plane of the ribs, when seen from the side. I use this as a final correction for the arching, and without exception, it has required me to correct the shape of the arching before moving on.
F-holes laid out and incised deeply.
Graduation
Once the arching is truly completed, and I am satisfied with the f-holes, I begin graduating the inside of the plate. This means that I am carving the inside of the plate to “match the outside,” in that it will be an appropriate thickness all over. I usually want the center area between the f-holes one thickness, the band running up the center to each end slightly thinner, and the wing areas outside that area quite a bit thinner. There is no “set” thickness, and each luthier has to make choices in order to achieve what he or she wants from an instrument. Getting what you hope for depends on those choices you make, and the choices were (hopefully) made intelligently, based on the type and density of the chosen wood, the shape of the arching, and so forth. Getting the arching and graduations right is a lot of carving on a large instrument, but it pays off in quality of sound.
Beginning to carve the interior for thickness graduation.
Carving away all this waste wood produces a lot of shavings. Fortunately, we heat our home with wood, and the shavings are great for starting the morning fire. 🙂
Once I am getting close, I carve “dots,” calibrated to specified thicknesses.
“Connecting the dots,” using a finger plane.
Frequently I can see the traces of the incised f-holes from the inside by the time I am finished with the graduation of the front plate. And, believe it or not, I always can easily see light through the spruce plate, in the thinner areas, if I hold it up to a lamp.
Cutting out the F-holes
I use a special tool to cut the upper and lower eyes of the two f-holes, then use a small knife to finish cutting them out.
I use an f-hole cutter to open the upper and lower “eyes” of the f-holes.
Ready to cut out the stems of the f-holes. (Earlier instrument…I forgot to take pictures…)
Bass Bar
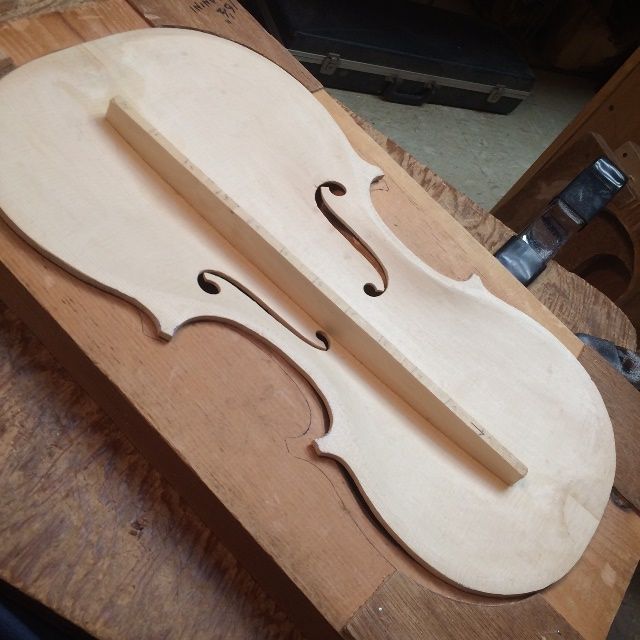
Once the f-holes are cut out and refined, the next thing is the bass bar. This is the only brace attached to the inside of a violin, viola or cello: it supports the bass foot of the bridge, and provides for clarity and strength to the bass notes. An instrument with a weak bass bar will not sound good.
Bass bar fitted, glued and clamped.
With no point of reference, it is hard to realize the size of that plate: so here is a standard violin-sized plate for comparison: A 16-1/2″ viola is pretty big.
Size comparison with violin plate and bass bar.
Bass bar glued, and ready for trimming to shape.
Proposed shape of the completed bass bar.
I cut the bass bar to the desired shape, using gouges, planes and scrapers.
Completed bass bar.
Another size comparison. Same violin plate.
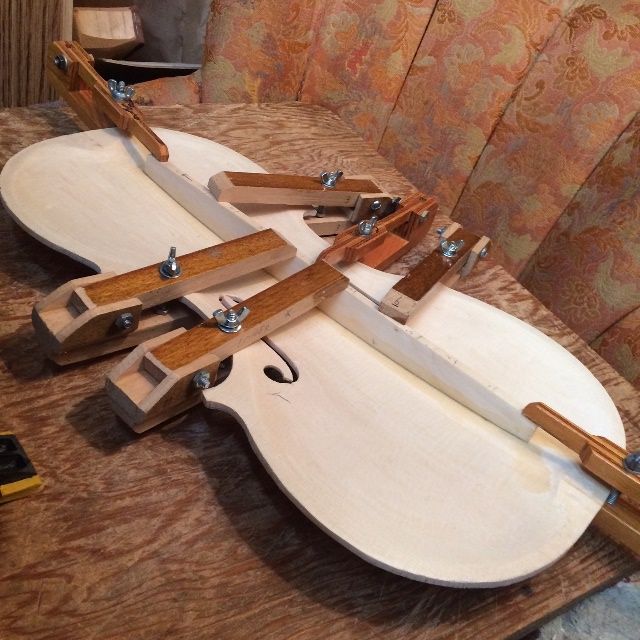
Inner Edgework
I know it will be difficult to accomplish the inner edgework after the plate is installed, so I always do that first. I also trim and shape the linings, so that they taper smoothly into the ribs.
Installing the Front Plate
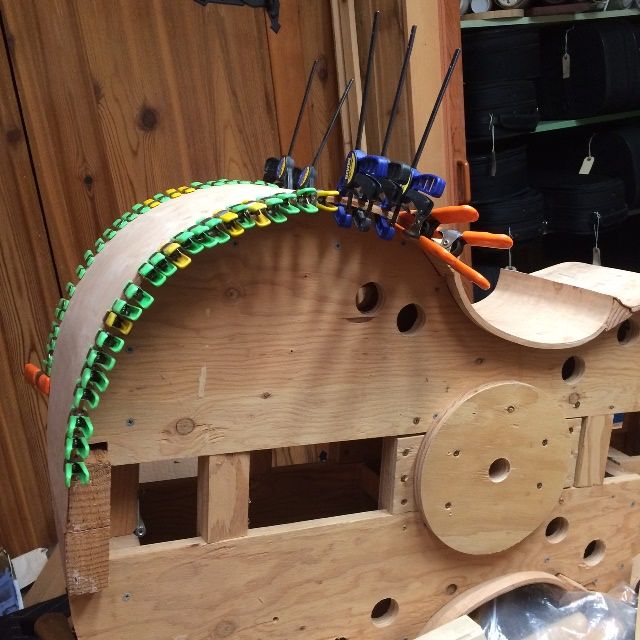
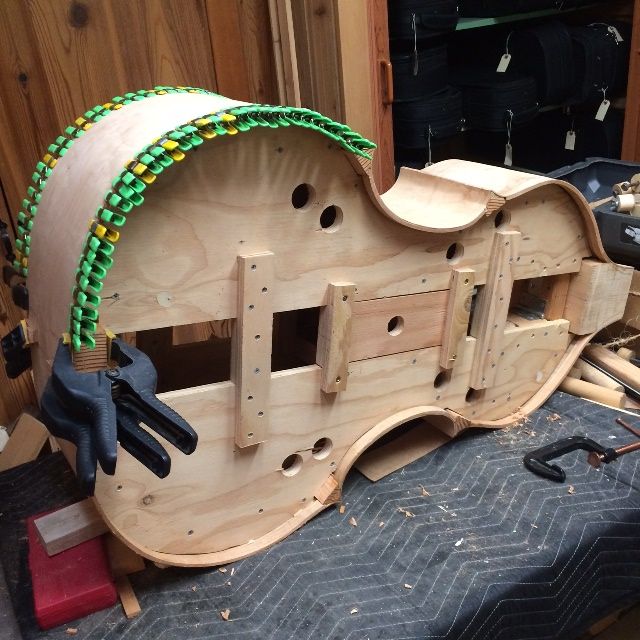
I dry-clamped the plate to the Garland, and then, using a thin palette knife, slipped hot hide glue (on the thin side, for easy removal if needed) into the unclamped areas and immediately applied padded spool clamps totightly hold the plate until the glue could dry. Then I removed the first few clamps and inserted glue there, and reclamped. My wife thinks the instrument looks as though it is wearing hair-curlers at this point. 🙂
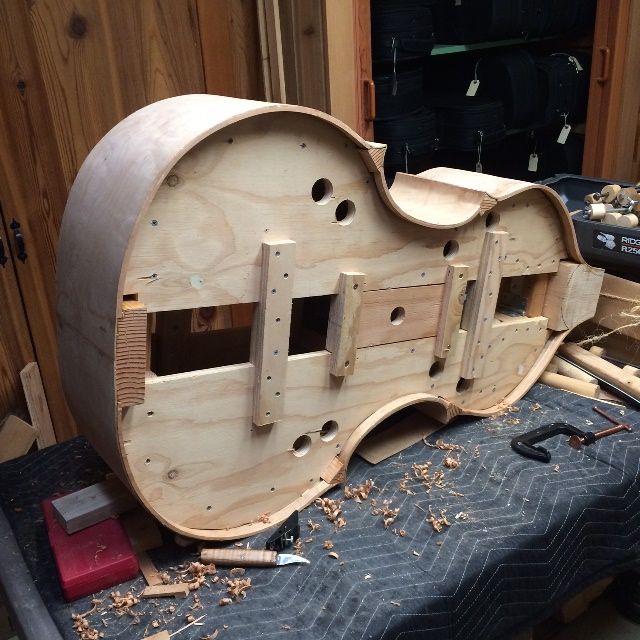
Front plate installed, glued and clamped.
And that is where the instrument rests for tonight.


.JPG)
.JPG)

.JPG)
_2.JPG)


.JPG)
.JPG)