
Making advances on the 16-1/2″ 5-String Viola.
Status as of my last post:
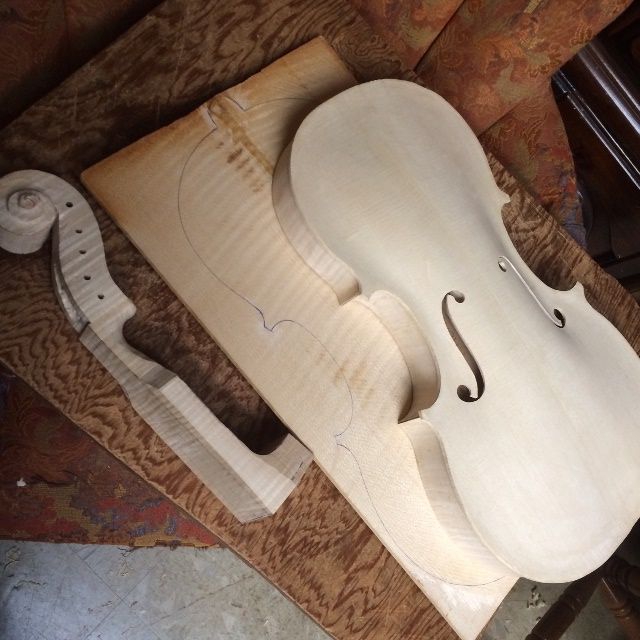
I had installed the European Spruce front plate on the garland, and showed the partially assembled corpus in spool-clamps. So, here is the partially completed corpus, out of the clamps and stacked with the rest of the parts:
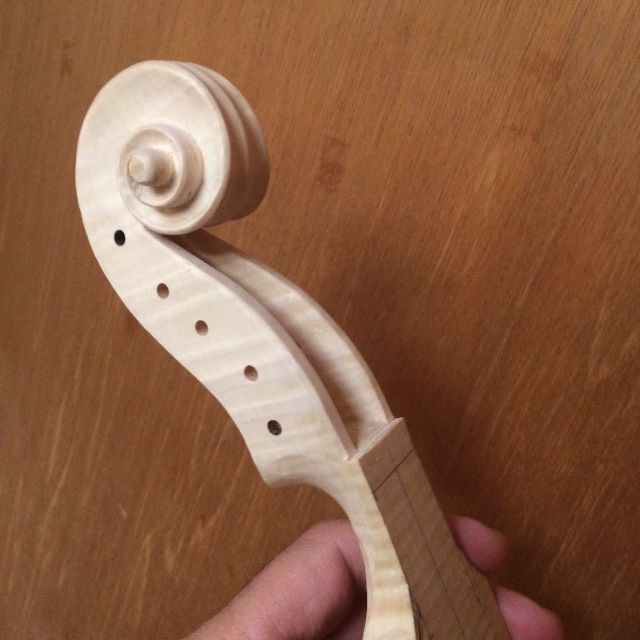
Scroll Work
So, I took a break from working on the plates, and worked on the scroll. It is made of highly flamed European Maple.
I completed the carving of the turns of the volute, and cleared it up until it was nearly complete, including the chamfers around the edges. I used an assortment of small gouges to carve the undercuts, and completed the work using scrapers.
Back Plate Beginning
Then I decided I had better get the European Maple back plate caught up to everything else, so I cut out the traced shape on my small bandsaw, and cleaned and smoothed the perimeter on the oscillating spindle-sander. I began the outside arching, using a toothed-blade finger-plane, and then switching to a smooth-blade finger plane, stopping only because I was getting tired.
I will still have a great deal of careful shaping and scraping before the back arching is truly complete. But before I stopped for the evening, I temporarily glued and clamped the ebony fingerboard to the neck, knowing that I will remove it after setting the neck and before varnishing. So, here is where the instrument sits tonight:
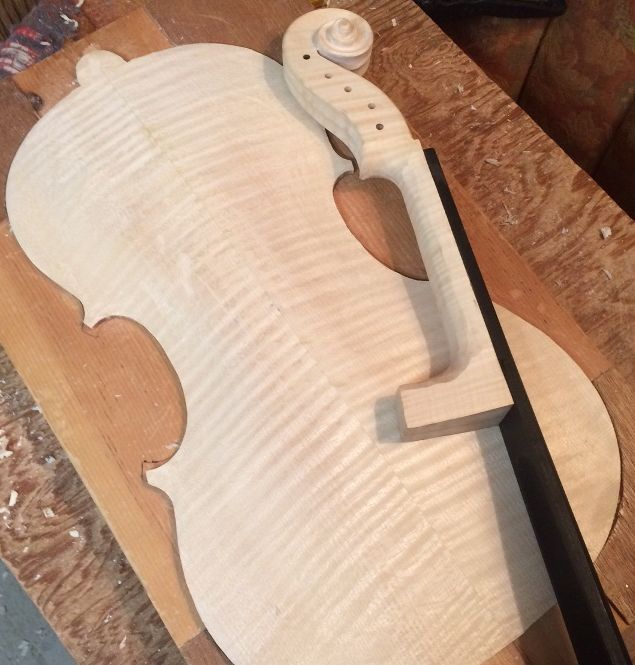
You will notice that I also began shaping the “handle” portion of the neck. I shape it along with the fingerboard, dressing the fingerboard to get the curvature perfect, and shaping the “handle” part of the neck for optimum playability and feel.
But, when the arching is complete, I can sweep straight on into graduation, because, of course, the back plate has no f-holes, let alone a bass bar. (I do have to remember to install the label before I close the corpus. I don’t enjoy trying to install a label with tweezers, through an f-hole.)
Next Steps
The next things on my agenda will be to complete the arching, complete the graduation, and get going on purfling the front plate.
Many makers install the purfling before they begin graduation, but I always had a problem with the overhang being uneven when I did that, so I switched to purfling after the plate is installed on the garland, and the overhang has been satisfactorily established.
I also usually set the neck before removing the mold, so that, when I go to install the back plate, the neck heel is already perfectly flush with the back of the garland, and the back plate fits flush and tight, all the way around. Everyone has their preferences and idiosyncrasies, I guess.
My expectation is that I should have the neck installed by the end of the week…and maybe the back plate, too. But there are always other demands on my time, so it may be next week before either of those is complete.
Thanks for looking.