Final woodwork on 5-string 16-1/2″ Viola

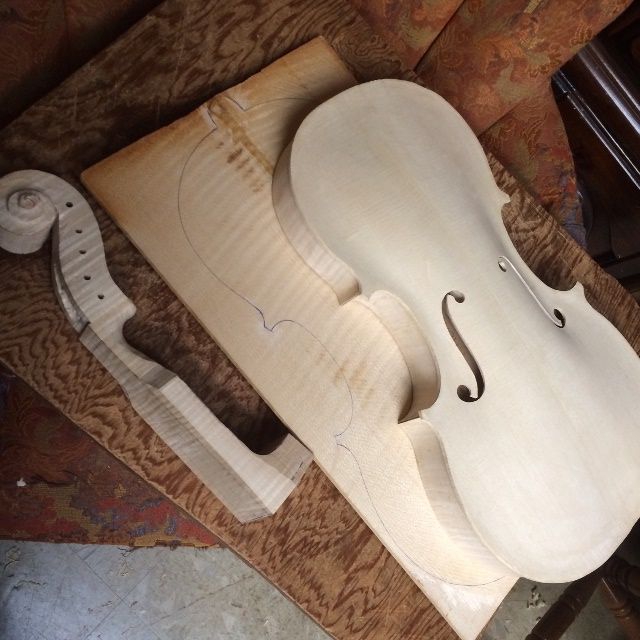
Last “woodwork” tasks on the 16-1/2″ five-string Viola:

Last time, we finished up with the neck set, and the corpus closed, but all the edgework (and final shaping of the neck heel, etc.) left to be done.

Closed corpus of the 16-1/2" five-string Viola: purfling weave sketched, heel/button need carving.
Closed corpus, purfling weave sketched, heel/button need carving.


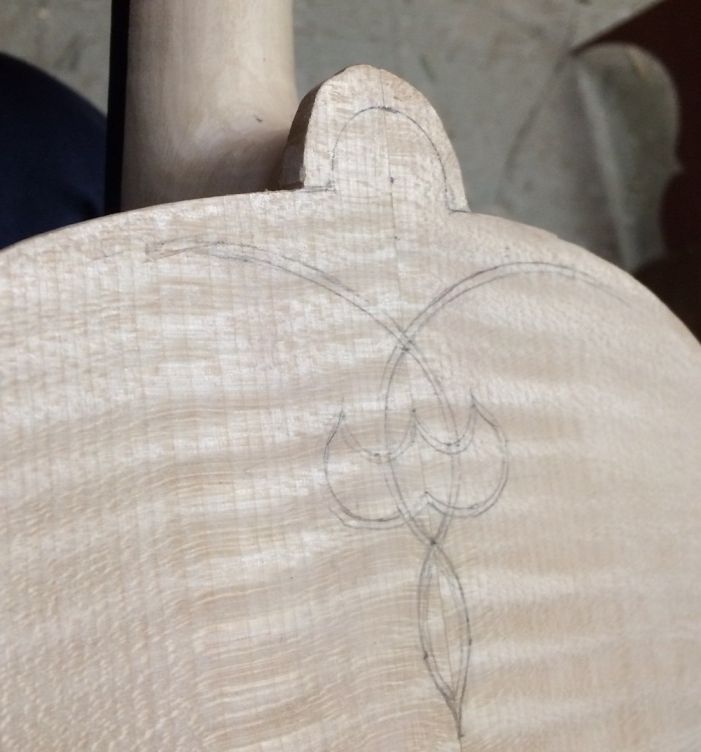
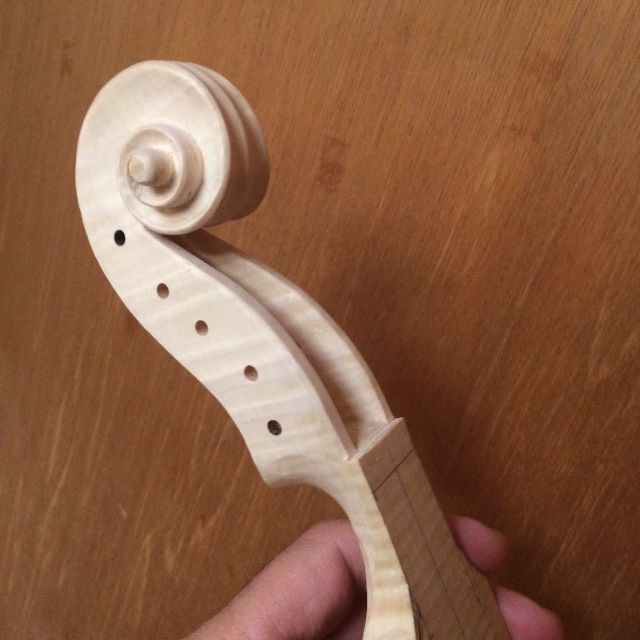
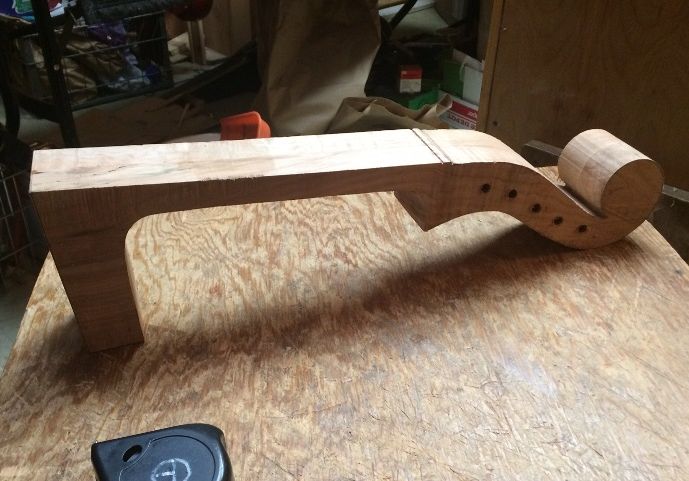
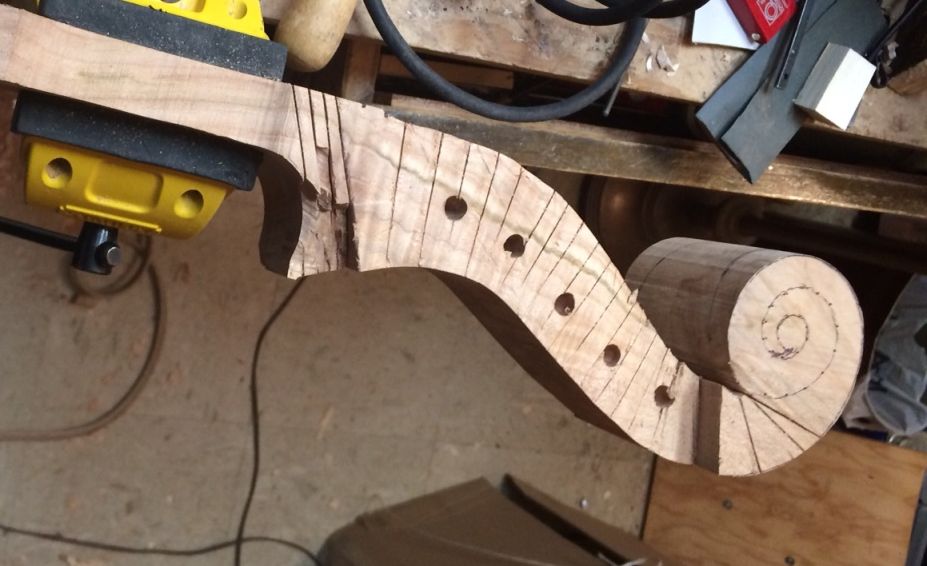
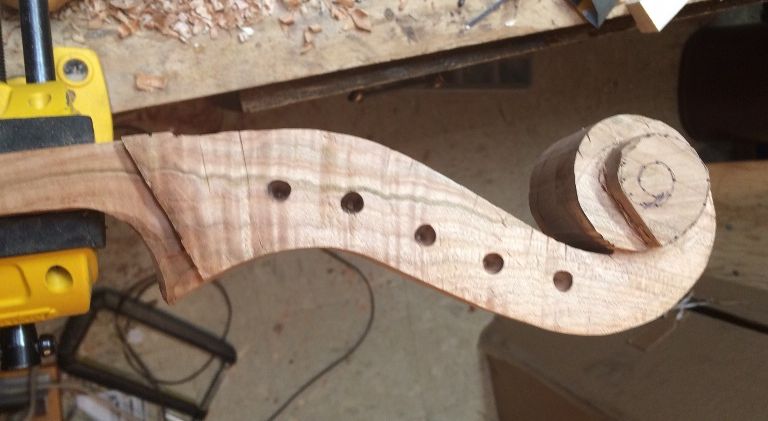
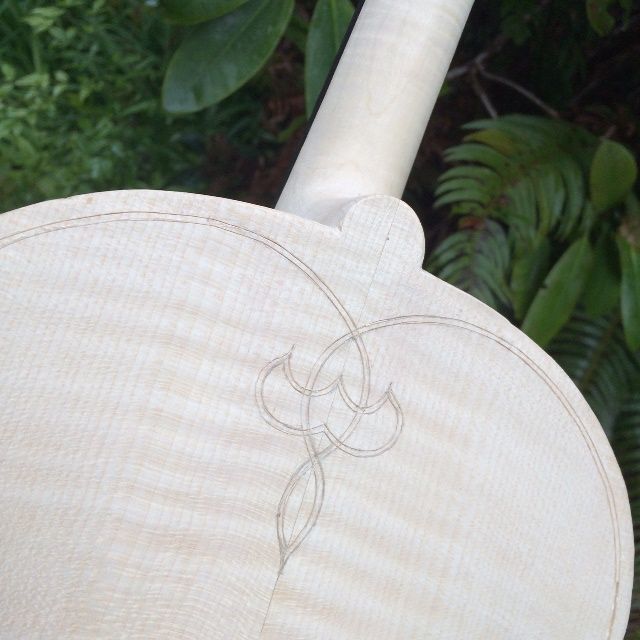
Carving the heel/button combination

The neck heel and the back button, together, make up the majority of the strength of the neck-joint. I once had a cello come in for repair, fully up to tension, but “something was loose.” Yeah, the ONLY glue still holding in the neck-joint was the glue between the neck heel and back button! I removed the neck, cleaned out the old glue, and re-glued the entire joint: but I never forgot that the heel/button connection alone had held the entire load of the string tension! So I make certain that this joint is perfect, and the two are carved as one piece after gluing.

There is also a specific measurement from the center of the neck-heel curve to the top edge of each side of the front plate where it joins the back: in violas, I shoot for exactly 27mm.
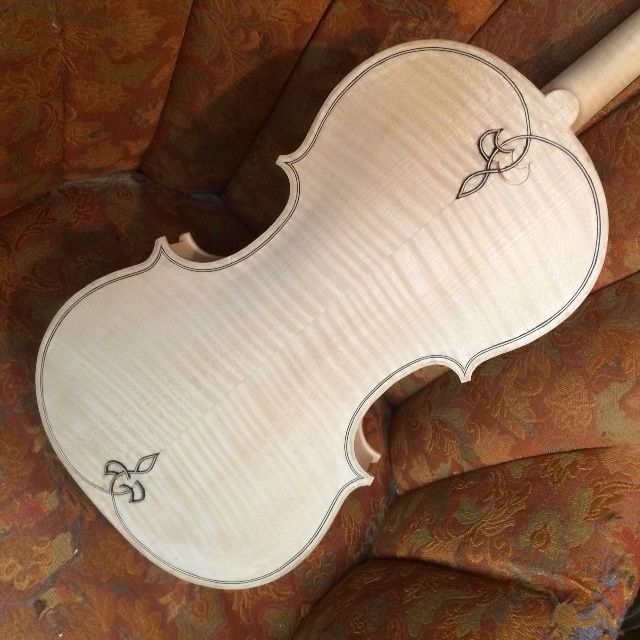
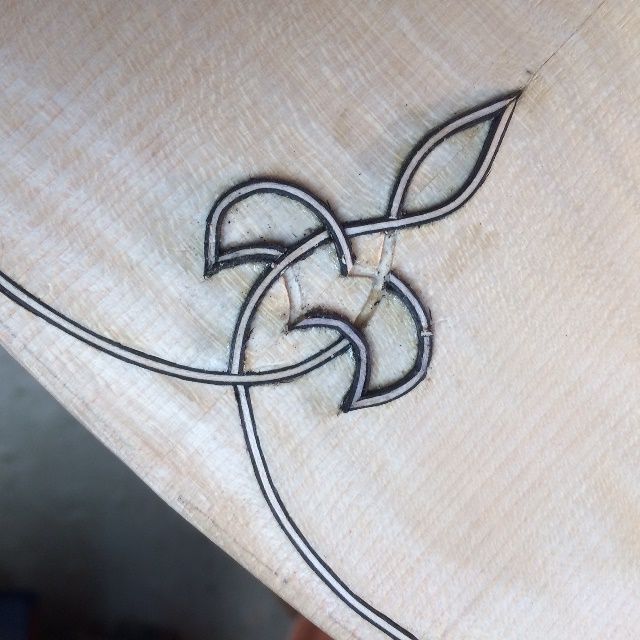
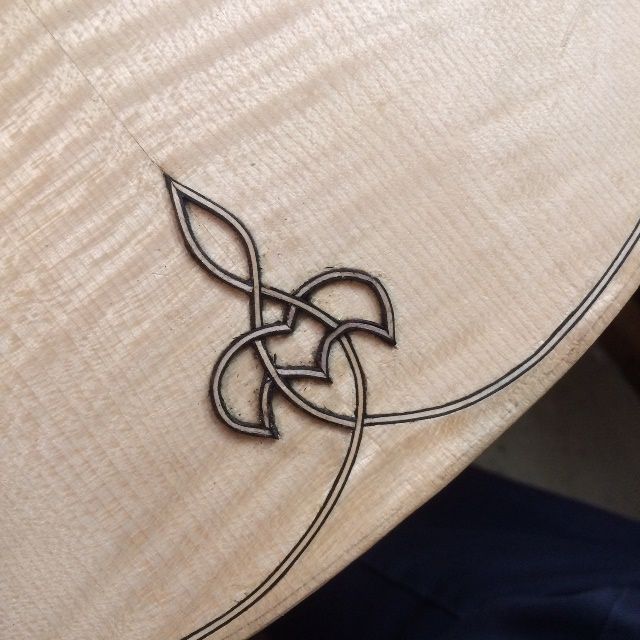
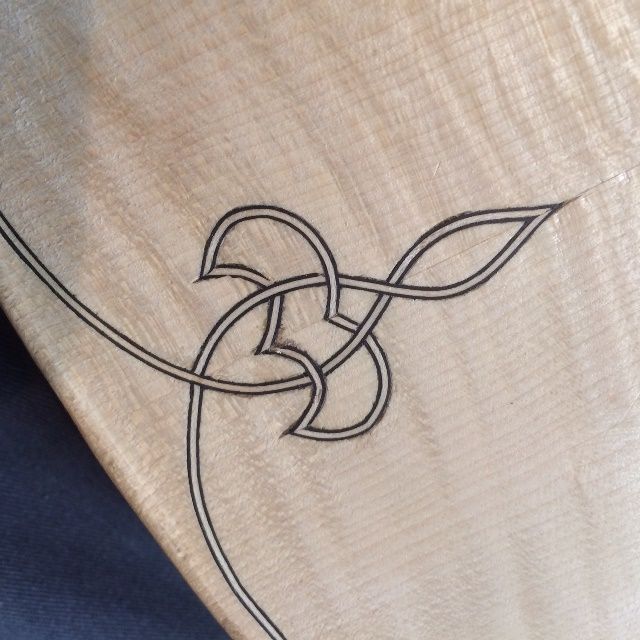
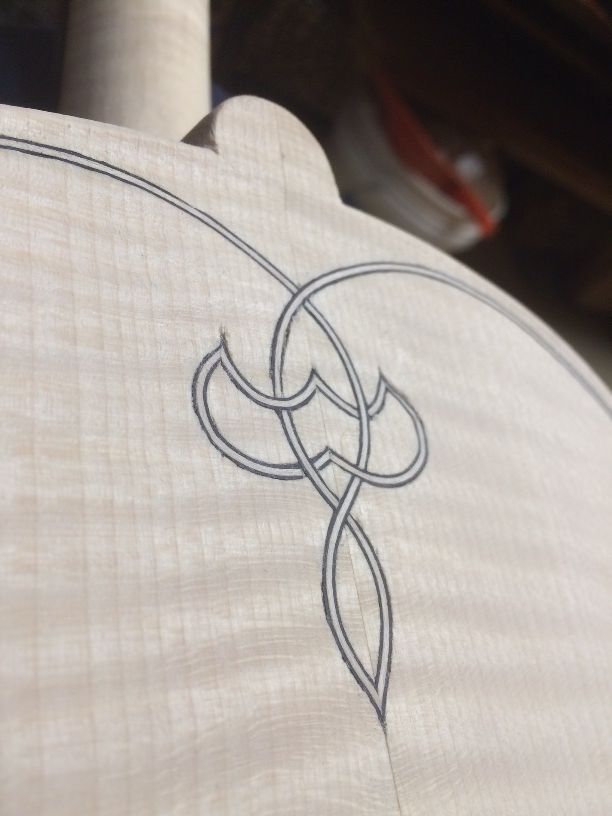
Heel and button carved on the 16-1/2" five-string Viola: ready to begin purfling.
Heel and button carved: ready to begin purfling. I have laid out the purfling and incised it.


Purfling

I used to struggle with cutting the purfling slot (I still do, but for different reasons) because I was trying to cut the full depth in a single pass, or maybe two. One of my teachers corrected me, saying that the first pass around, with the knife, is just to “darken the lines” left by the marker. Then it is relatively easy for the blade to follow the groove for subsequent fast passes, each making the slice a little deeper. Finally, I use a special tool to pick out the waste wood from between the lines.

Purfling pick with front plate of 16-1/2" five-string Viola.
Purfling-pick with front plate.

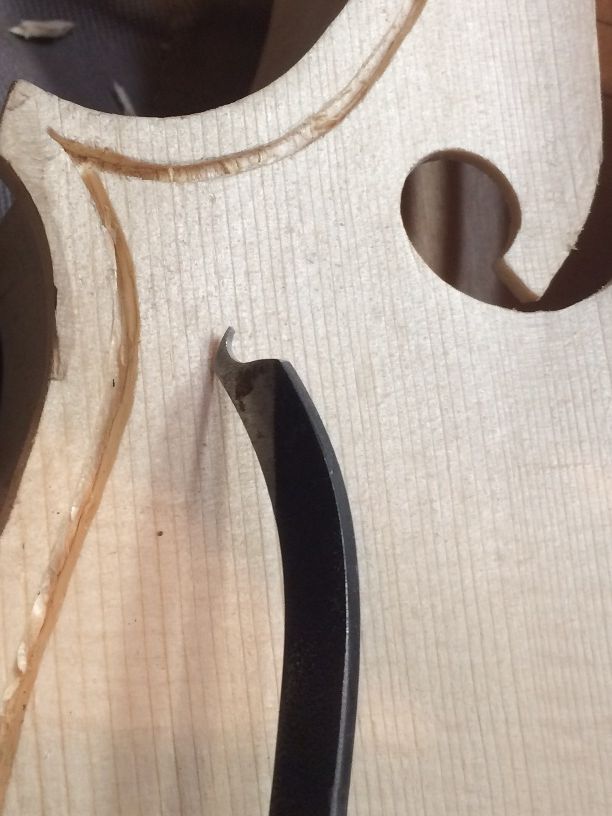
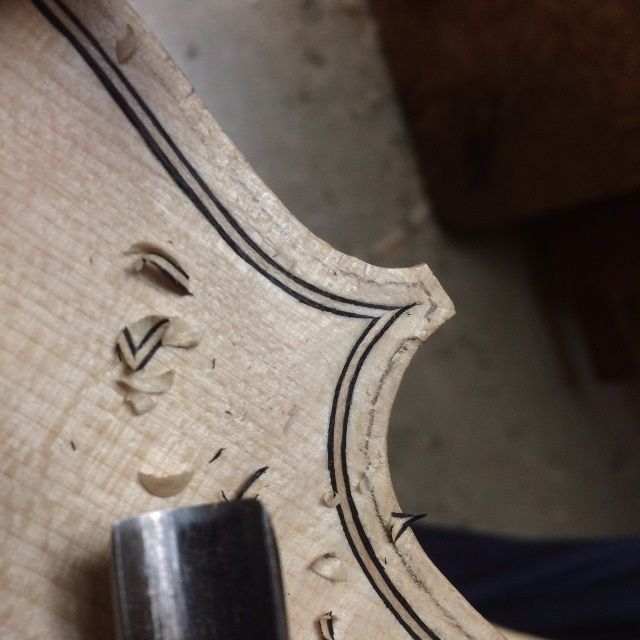
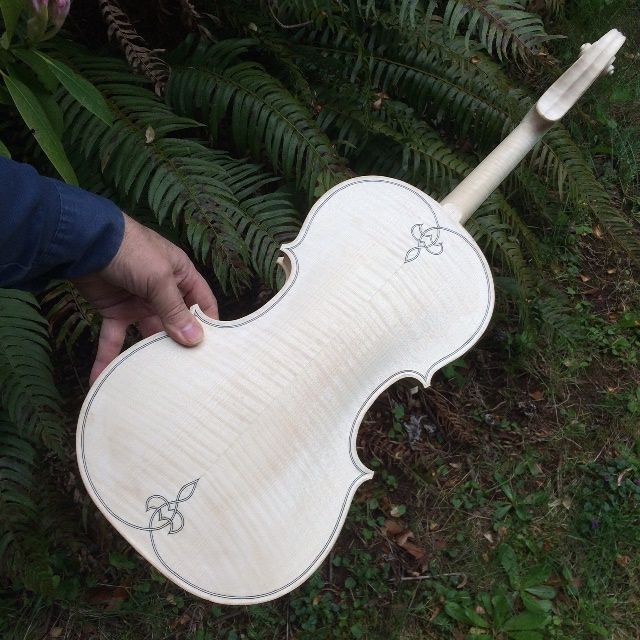
One problem I faced with the back plate that I had not noticed so much, on the front plate, even though it had the same issue: This purfling is a little wider than what I usually use, so, in spite of the fact that I marked out the correct width, my pick tools (all of them) are made for the narrower purfling, and they do not readily make the slot the correct width. That meant a lot of going back and widening things just a little bit (0.5 mm, usually.) The European spruce of the front plate is soft, and quite forgiving. The harder European maple back plate does not give at all, so if the slot is too narrow, the strip is not going in, at all.

Another issue is that the purfling weave is on top of a fairly thin portion of the back plate, so I could not cut my slots as deeply as I wanted to. Thus, there was very little wood-support for the purfling, and the pieces were difficult to fit, whereas, around the perimeter, I could cut a slot for the full depth of the purfling strips and achieve full support. Ah, well…that’s life. But there were some joints I am not so happy with.

Anyway, this is how the purfling went:

I cut the center bout slots, first, along with the corners of the 16-1/2" five-string Viola.
I cut the center bout slots, first, along with the corners.


The goal is to complete the whole slot before inserting any purfling on the 16-1/2" five-string Viola.
The goal is to complete the whole slot before inserting any purfling. (Notice the shallow purfling-weave slots.)


Installing the purfling

As I did on the front plate, I installed the center-bout strips first, dry, and then the rest of the perimeter. I glued the perimeter in completely, before beginning the purfling weaves, themselves.

In the case of the purfling weaves, since the slots were so shallow, I glued each piece as I installed it, then worked on the other end of the instrument while the glue from that piece set up and began to hold.

Outer perimeter complete...working on the purfling weaves for the 16-1/2" five-string Viola.
Outer perimeter complete…working on the weaves.


Purfling weave nearly done on the 16-1/2" five-string Viola. Notice that some joints are not as clean as others.
Purfling weave is nearly complete. Notice that some joints are not as clean as others.


Completed purfling weave on the 16-1/2" five-string Viola: still needs to be planed flush.
Completed purfling weave: still needs to be planed flush.


Completed purfling weave on the 16-1/2" five-string Viola...warts and all.
Completed purfling weave…”warts and all.” I may elect to go back and improve things a little. (Probably not.)
The other weave on the 16-1/2" five-string Viola turned out a little better.
The other weave turned out a little better.

The Channel

Once the purfling is all in place, and planed flush, it is time to carve the “channel.” This is a slight “ditch” that runs all the way around the perimeter: the bottom of the “ditch” is usually at the purfling, while the outer edge of the ditch ends exactly at a line called the “crest,” which is about 40% of the distance in, from the outer edge of the plate to the outer edge of the purfling. The inner edge of the “ditch”  will be planed and scraped back to “fair” into the surface of the arching, without any lumps or hollows.
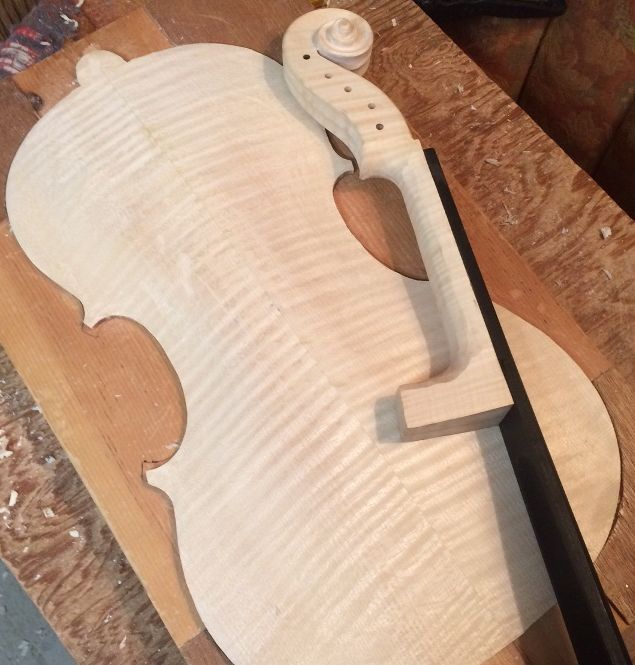
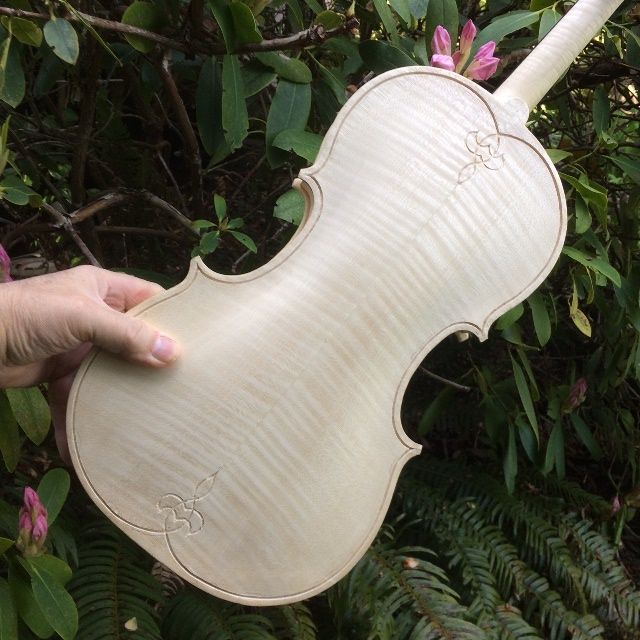
Notice the pencil-line marking the crest of the edge on the 16-1/2" five-string Viola.
Notice the pencil-line “crest”, between the purfling and the plate-edge.


Edgework

Finally, after all the surface of the plate is correct, I plane, scrape and sand the edges themselves, so that the outer curve of the plate edge perfectly meets the inner curve of the channel, all the way around the plate.

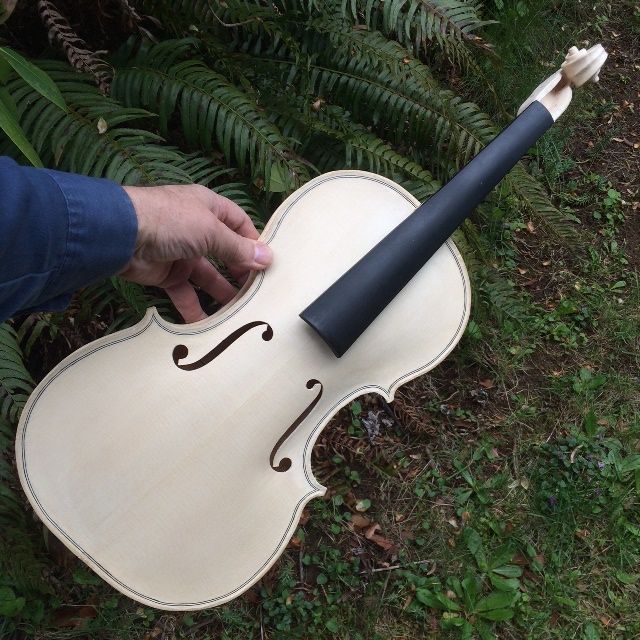
In this case, I did not take the picture until after I had completed the next step, which was to wet the whole structure down with water, in order to deliberately raise the grain, so that any imperfections, or compressed areas, will rise up and be seen…and subsequently, be scraped and sanded flush again. All this to say, please understand the “rough” surface of all the wood.

Edgework of the 16-1/2" five-string Viola complete, but still rough with raised grain.
Edgework complete, but still rough with raised grain.


So…that means the whole instrument is now complete, minus the varnish prep-work, and the actual varnish and set-up!
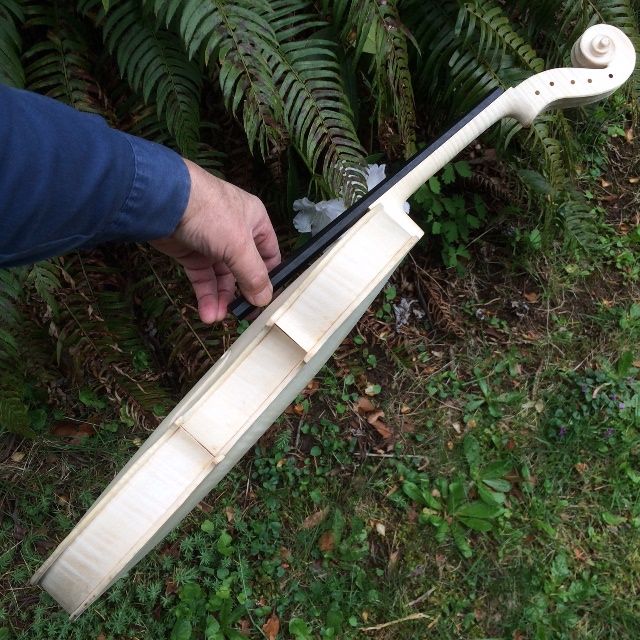
16-1/2" five-string Viola Front ready for varnish.
Front ready for varnish.


16-1/2" five-string Viola Side ready for varnish.
Side ready for varnish.


16-1/2" five-string Viola Back ready for varnish.
Back ready for varnish.


Varnish Sequence

I will post the varnish sequence as it occurs, but, for now, know that the sequence will include at least two “wet-it-down, let-it-dry, and scrape/sand-it-smooth” iterations. The idea is to produce a surface that will no longer respond to moisture by raising the grain. This is particularly important on the handle portion of the neck, where the moisture from players’ hands will certainly be in contact with the wood, every time the instrument is played. But, under the varnish, the slightest discontinuity will become glaringly obvious, so that is important as well.

After the wood is smooth, there will be:

    1. a tanning treatment,
    2. a mineral ground treatment,
    3. a sealer, to lock the mineral ground in place, and
    4. finally, the varnish itself in a series of 6-12 coats, depending on color.


Enough for today.


Thanks for looking.


Progress moving forward!

Making advances on the 16-1/2″ 5-String Viola.

Status as of my last post:

I had installed the European Spruce front plate on the garland, and showed the partially assembled corpus in spool-clamps. So, here is the partially completed corpus, out of the clamps and stacked with the rest of the parts:

16-1/2" five-string Viola garland with top plate installed, back plate traced, and scroll begun.
Garland with top plate installed, back plate traced, and scroll begun.


Scroll Work

So, I took a break from working on the plates, and worked on the scroll. It is made of highly flamed European Maple.

I completed the carving of the turns of the volute, and cleared it up until it was nearly complete, including the chamfers around the edges. I used an assortment of small gouges to carve the undercuts, and completed the work using scrapers.

16-1/2" five-string Viola scroll and pegbox essentially complete.
Scroll and pegbox essentially complete. Ready to temporarily attach the fingerboard.


Back Plate Beginning

Then I decided I had better get the European Maple back plate caught up to everything else, so I cut out the traced shape on my small bandsaw, and cleaned and smoothed the perimeter on the oscillating spindle-sander.  I began the outside arching, using a toothed-blade finger-plane, and then switching to a smooth-blade finger plane, stopping only because I was getting tired.

I will still have a great deal of careful shaping and scraping before the back arching is truly complete. But before I stopped for the evening, I temporarily glued and clamped the ebony fingerboard to the neck, knowing that I will remove it after setting the neck and before varnishing.  So, here is where the instrument sits tonight:

16-1/2" five-string Viola back arching nearly complete, neck and fingerboard joined.
Back arching nearly complete, neck and fingerboard joined.


You will notice that I also began shaping the “handle” portion of the neck. I shape it along with the fingerboard, dressing the fingerboard to get the curvature perfect, and shaping the “handle” part of the neck for optimum playability and feel.

But, when the arching is complete, I can sweep straight on into graduation, because, of course, the back plate has no f-holes, let alone a bass bar.  (I do have to remember to install the label before I close the corpus. I don’t enjoy trying to install a label with tweezers, through an f-hole.)

Next Steps

The next things on my agenda will be to complete the arching, complete the graduation, and get going on purfling the front plate.

Many makers install the purfling before they begin graduation, but I always had a problem with the overhang being uneven when I did that, so I switched to purfling after the plate is installed on the garland, and the overhang has been satisfactorily established.

I also usually set the neck before removing the mold, so that, when I go to install the back plate, the neck heel is already perfectly flush with the back of the garland, and the back plate fits flush and tight, all the way around. Everyone has their preferences and idiosyncrasies, I guess.

My expectation is that I should have the neck installed by the end of the week…and maybe the back plate, too. But there are always other demands on my time, so it may be next week before either of those is complete.

Thanks for looking.


Wintergrass 2020 Exhibit

Guitars and 5-string fiddles at Wintergrass 2020

For most people, the Wintergrass Bluegrass Festival is an opportunity to hear dozens of dynamic players and bands. For a maker, like myself, it was an opportunity to present my instruments to a variety of players. for examination and “test-drives.”

My son (Brian Bishop, of Bishop Guitars) and I, had only heard of Wintergrass a month earlier, from a wood vendor and Mandolin-player, Bruce Harvie of Orcas Island Tonewoods.  We attempted to contact Wintergrass, to ask whether any exhibitors’ booths remained available, and ultimately, Bruce Adolph, one of the main organizers, contacted me to say that one exhibitor had backed out at the last minute, so, if we wanted it, that table was available. (Yes, we wanted it!)

As it turned out, we were squeezed between two other outfits, both with huge, prominent signs, so there was occasionally a little confusion, as folks assumed we were part of one or the other of our neighbors’ companies, and never even saw our lovely sign.

One little table fro two makers of guitars and five-string fiddles.
One little table fro two makers. But we got a lot of positive attention.

People frequently thought we were either with Thompson Guitars or with Peghead Nation. We had to point out the sign (It got a little crooked in the photo below.) Notice, too, that Brian and I had traded ends of the table. Why?

Because the big outfit two booths over to our right evidently persuaded the maintenance people to change the lighting, during the night, which robbed both Thompson Guitars and us of light. So Brian and I just swapped ends, so that Brian’s guitars would glow in the light, and my violins would be a little more subdued. It was an improvement for both of us, and we were fine, but Thompson was really robbed, with no such remedy. Sad. Not a good way to treat your neighbors.

Our little table. Room for two guitars , two five-string fiddles, and one violin.
Our little table. Room for two guitars and three fiddles. Brian (in the red shirt) had a third guitar, which we handed to interested players.


We were the only actual makers in the Dealers’ Hall where our table was located…the rest were big instrument factories, mostly: Taylor, Eastman, Yamaha, etc. Our instruments were each individually handmade by a single luthier. Brian’s parlor guitars and OM guitars were very well received, as were my 5-string bluegrass fiddles and my 4-string fiddle.

Dealers' Hall, before the show opened: our guitars and five-string fiddles were apparently the only handmade instruments in the hall.
Dealers’ Hall, before the show opened. (We were just past the second post on the left.)


We got a fair amount of attention, though we were small and obscure, as players came by the table. Some had come there to perform in the show, and just decided to check out the makers. Others were there to enjoy the show, but, as players, they wanted to try out the instruments. It was very enjoyable.

Joe Craven, a well-known entertainer, and a friend of the lady who commissioned this Five-string fiddle.
Joe Craven, a well-known entertainer, and a friend of the lady who commissioned this instrument. (I was hoping he would play it, but he was exhausted from his work and chose to not try it out.)


Very good fiddler...wish I knew his name! Playing the commissioned Five-string fiddle.
I wish I knew this young player’s name! He was very friendly and a great player.

Everyone loved our handmade instruments (both the guitars and the fiddles) and some sales may eventually result. Either way, we will be back next year!

Thanks for looking.


New 5-string Commission on the Way!

New Five-String Fiddle Request!

A client contacted me through this website and asked whether I could build a 5-string fiddle of primarily Oregon woods. (Sure!)

Test-Drive of existing fiddles

We made an appointment and she came for a visit. She played eight of my hand-made instruments (all good fiddles), finally declaring a particular one to be exactly what she wanted, except that she did not care for the look of the one-piece Sitka Spruce top plate. It had very wide grain on the bass side and narrower on the treble side. (It sounds great, but the looks were bothering her.) Soooo…

Custom-made Five-string!

I went into my storage and retrieved a really wild-grained piece of Big Leaf Maple, and two billets of very straight, even-grained Spruce: one of Englemann, and another of Sitka: she chose the Englemann and loved the maple. She wanted an instrument essentially the same as that first one, but without the odd-looking belly grain. (The same model; made on the same mold (form), and sounding just like it, as well.) It will be tough to do, because the one she really likes is already five years old; it has had time to settle, be re-adjusted, and settle again. (Yes, it sounds good!)

Select Woods and a Good Start

So, we went out to one of my other buildings and hand-picked some likely-looking wood for the neck and ribs, and we were ready to do business. She presented a deposit, and I suggested that she take home the one she loved, for the time being, to keep her interest up while waiting for me to complete her personal treasure. She went home happy, and I began sorting willow for blocks, finding my proper templates, and enjoying the prospect of a new five-string fiddle build. I will post follow-ups as they occur.

Thanks for looking.

I will post this over on the Bluefiddles page, as well.

Lots of Delays and New Project

Lots of Delays and New Project

Delays:

Home repairs and equipment repairs.

We had a few break-downs this summer. The lawn tractor, a faithful beast of thirty years, suddenly quit working. Turned out to be a bad PTO clutch. I was eventually able to order new parts online, and do the work myself, but it was a discouraging project, as I am really not a mechanic, by inclination. But it works again.

Meanwhile, it also turned out that one of our toilets had been leaking under the floor, and had ruined the floor, so the whole underlayment had to come out. I replaced it with something called “wonderboard”…a concrete product, reinforced with fiberglass… nasty stuff to work with, but relatively impervious, so I was glad to go ahead with it.  mudded all the screws so they were flush, and all the seams, etc., then sanded the whole mess flat. Then linoleum, and sealer, and wallpaper. Finally got everything back in place, working, no leaking pipes, etc.,  just Wednesday of this week. Glad to be done with that.

New Project:

5-String Violoncello Piccolo

A fellow called me a while back, having seen my 5-string fiddles, and asking for a custom-made five-string cello, using all Oregon woods, if possible. (No problem…but most of the historic 5-string cellos I am aware of were piccolos…considerably smaller instruments, and quite rare. Only a few surviving models.) Nope, he wanted a full-size. Okeedoke, no problem. They even sell Cello-string sets for full-size 5-string cellos.

But he thought it over, and now is leaning toward a piccolo, just because. (They really are a special instrument!) But, now I do have a problem: I don’t have one to show him.

So, since I am short on time, I am making an experimental mock-up of the correct size, using a fractional-size hybrid cello (laminated sides and back; carved top), and replacing the normal neck with a neck and scroll specifically designed for a five-string instrument. It will not be the quality instrument he will expect in a custom-made cello, but it will give him the opportunity to experiment with the smaller size and the five strings.

I had plenty of maple on hand, but not thick enough for the neck, so I laminated two 1-1/2″ slabs, side by side, to make a thick billet, and then sawed out the blank.

Piccolo Neck Blank
Piccolo Neck Blank


I laid out the details of the scroll and neck; then used a saw to begin removing excess material. It is hot and humid, today, and I tired pretty rapidly, so I only got partway done:

Piccolo neck and scroll in progress
Piccolo neck and scroll in progress.


Piccolo Scroll with more cuts

Piccolo Scroll with more cuts.


Starting to smooth up a bit, but still a long way to go.
Starting to smooth up a bit, but there is still a long way to go.

Plan:

I hope to have the scroll and neck complete in a day or two. I then intend to make a fingerboard and nut of Ipe, a non-threatened hardwood, and install the assembly on the hybrid corpus, immediately thereafter.

At that point, it should be down to the final finish of the neck and fingerboard, and set-up of the instrument in its new life as a  five-string cello piccolo. The corpus is already in good shape, so it should not require additional attention.

I will post photos, as they become relevant.

Thanks for looking.

Five String Instruments

Five-String Fiddles

I get a fair amount of demand for five-string fiddles; in my case, that means a five-string instrument with the same footprint and scale-length as a violin, but with the added C-string, so that it carries the full range of both a violin and a viola. I have mastered this genre to the point that the low end of my five-string fiddles sound like a good, small viola, and the high end sounds like a good violin…and the neck width is just barely wider than that of a violin (25 mm) so that it plays like a violin.

Teachers like them, because they can teach the viola part or the violin part, without having to change instruments.

Wood Selection

One of the beauties of a five-string fiddle is that, because it is non-traditional, I am not under the burden of using traditional woods, so I am free to experiment, and, as it turns out, there are other woods that work quite well: I have made them of domestic woods; Big Leaf Maple/Sitka Spruce (or Englemann Spruce), but I have also used Koa/Sitka Spruce, Myrtle/Port Orford Cedar, and all these combinations worked quite well. I will soon try a five-string fiddle of Bubinga and Sitka Spruce and am open to other experiments.
I will continue to build and sell five-string fiddles either on speculation or on commission, as the demand increases.

Five-String Violas

I am beginning to hear a call for Five-String Violas as well. These have the same range of pitch as a five-string fiddle, but the physical instruments are whatever size viola is preferred by the customer. Though I have already built several sizes, until I get an increased demand, these will likely remain as custom commissions, not just built on speculation, such as how I currently produce the five-string fiddles.
The practical difference, then, between a five-string fiddle and a five-string viola, is that the (usually larger) five-string viola will usually have deeper, richer, louder tone, just because it has a larger resonating body, both of air and wood. But not everyone can comfortably play a larger instrument, so this is a matter of personal choice.

Five-String Cellos

Five-string cellos are not a new thing. The cello-piccolo and the cello da spalla have been extant for centuries, and music has been specially written for both. I hope to see a rising demand for these instruments, but, for the moment, they are a rarity. I can build both, and hope to soon have some to display here, but, for the moment, I do not. I have had customers ask about them, but usually, it was just an idea they had, and they were not prepared to place an order.

Five-String Double Basses

Five-string double basses are increasingly common, as people want the freedom to reach for lower bass notes, and not have to have a “B-Extension” added to their bass (which can also be done, of course, but it does add length to the bass scroll, and an additional source of fragility.)
I build an occasional double bass, but they are a lot of work, and they completely monopolize my small workspace when they are a work in progress; so I am more likely to default to smaller instruments. There is a special thrill, however, in building a huge instrument, seeing the beauty of the beast, and feeling the floor shake when I draw out long bass notes with the bow. I can certainly understand why players fall in love with the double bass, and especially the five-string double bass, with the lowest-of-the-low B-string at their beck and call.