I shipped it to him and it arrived just after his birthday. He has been playing it ever since.
Happy Player
The young man truly has been pleased with it: He loved the tone, loved the balance, etc. But he was reluctant to allow me to publish a video of him playing it. He wanted more time to practice.
He just had a hard time getting used to having five strings. Quite a few classically trained players have told me that this was a problem. They felt that strings just seemed to appear in the wrong places. (I can understand that: there is a string right down the middle of the fingerboard that wasn’t there before! Besides, the angle in string crossings demands more of the player: it is much flatter, requiring more precision.)
Achievable Goals
He sent me several “progress reports,” over the next few months. All of them sounded good, to me, but he was still working on “getting comfortable” with the new instrument, and did not want them made public. Until today, I did not have his blessing to share any of them.
One of his stated goals was to be able to play Bach’s Cello Suite #6 on the viola. It was originally written for a 5-string cello: A very good cellist can play it on a four-string cello. But, the best violist cannot play Suite #6 on a classical 4-string viola in the original key. The classical cello used “thumb-position” fingering to play it. “Thumb-position” is not usable on a viola.
The young man bought the 5-string viola to overcome that specific hurdle, so he is working on that piece in this video :
I especially appreciate this video. It showcases both ends of the range of the Viola, and it shows that the instrument speaks quickly and easily, in fast attacks.
He hasn’t “spoken up” online yet (and he may not) but the music tells me he is happy with the instrument.
A young man contacted me by phone, over a year ago, asking about a large, five-string viola. He was very polite and not at all aggressive or assuming, but he essentially had no money for such an instrument. The phone call was a very pleasant conversation, despite the lack of funds and I was at least able to answer all his questions.
After we disconnected, I simply assumed I would not hear from him again, and eventually forgot about it,
Second Contact
The same youmg fellow contacted me again. a year later. This time, he had been “saving his money, ” but, unfortunately, not quite enough. So we talked over the options. Eventually I offered to convert one of my earlier orchestral violas to a five-string viola at the price he could afford. He liked that idea, and eventually, after his final approval, I began the project.
An older 16-1/2″ Oliver Viola
I began with this viola– my own design. The viola played quite well, but, for some reason, no one had purchased it, so far. (It was instrument #11, viola #4 from my Bluefiddles site.)
The Plan
As I usually keep my viola necks fairly narrow, for player comfort, I needed to make a wider fingerboard and nut, to accommodate the fifth string.
Obviously, I also needed to plug three of the peg-holes and drill four new ones. They had to be positioned so that all five would fit on the pegbox, and the strings would still not rub on another peg, when tuning.
Photographs
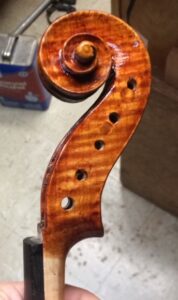
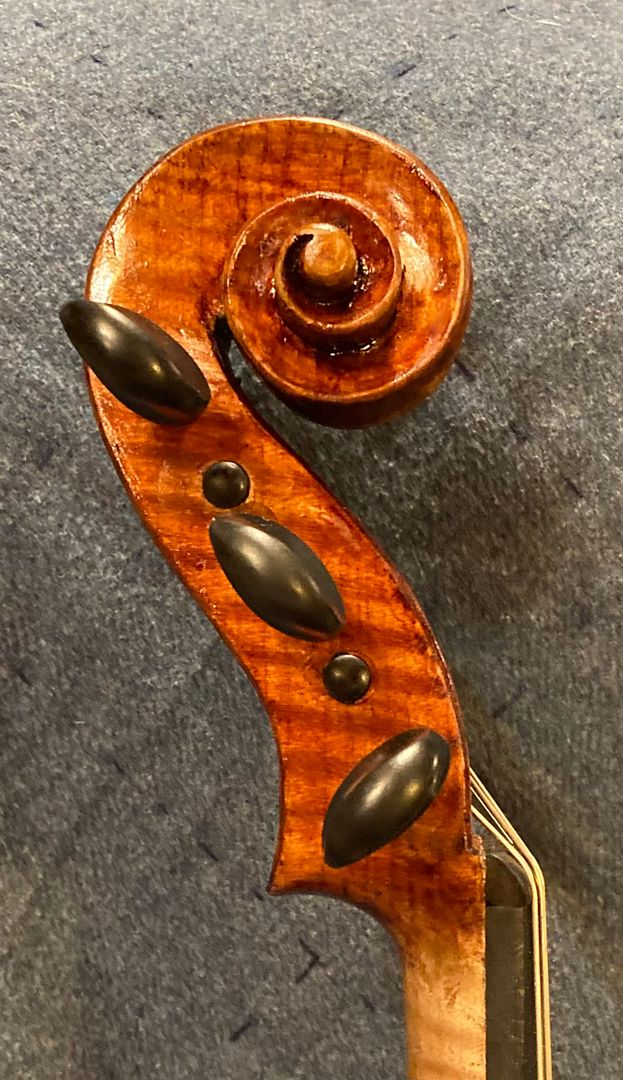
I did not take any photos of the fingerboard and nut changes, but here are a few photos of the scroll in progress. (Also, midway through the conversion, he asked whether I could darken the varnish. That really had not been part of the “deal.” But, after thinking about it, I decided that I could try to do it with minimal labor, and just count it “good customer relations.”)
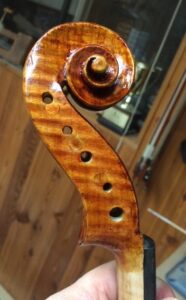
So: here are some photos of the scroll after plugging the original holes and drilling new ones. I capped all the plugs with figured maple, to avoid leaving the dark circles which usually remain after such an operation.
The different background and lighting (shifting position, trying to eliminate reflections) resulted in different apparent color…but they actually match.
Adding Color
About the time I reached this point in the conversion is when the customer requested the color change. It turned out that he liked the color of his current instrument, and hoped I could mimic that somewhat. 🙂 (Okeedoke...)
So, I began adding color; sparsely, at first, until I could see how it was building. About three very thin coats of a dark, red-brown varnish were required to offset the original golden brown, and produced the color that he wanted.
Dark front, still unfinished.
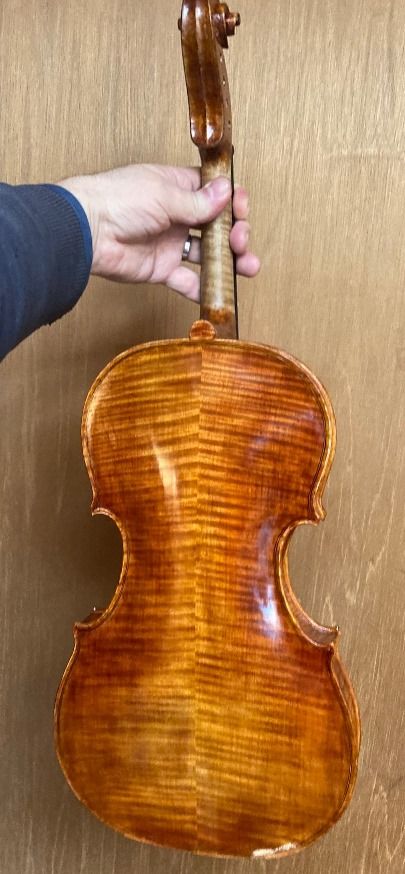
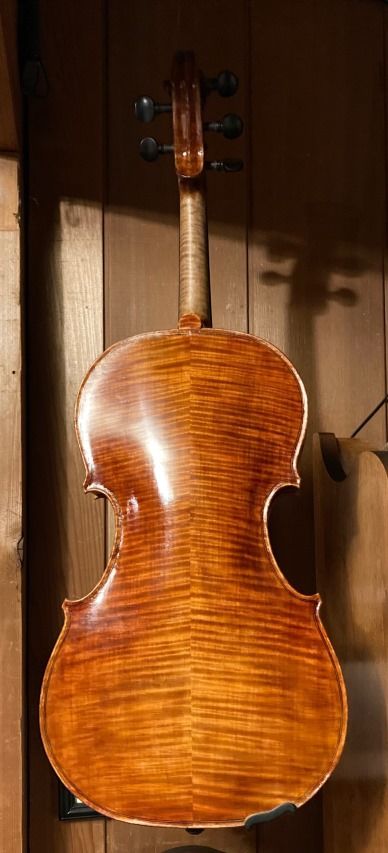
Here is the Dark back, still unfinished.
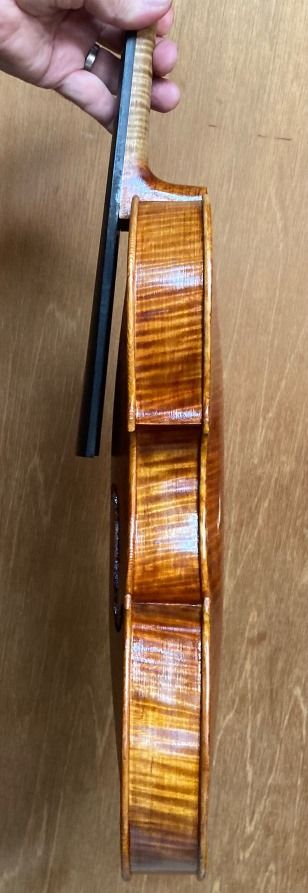
Dark treble side, still unfinished.
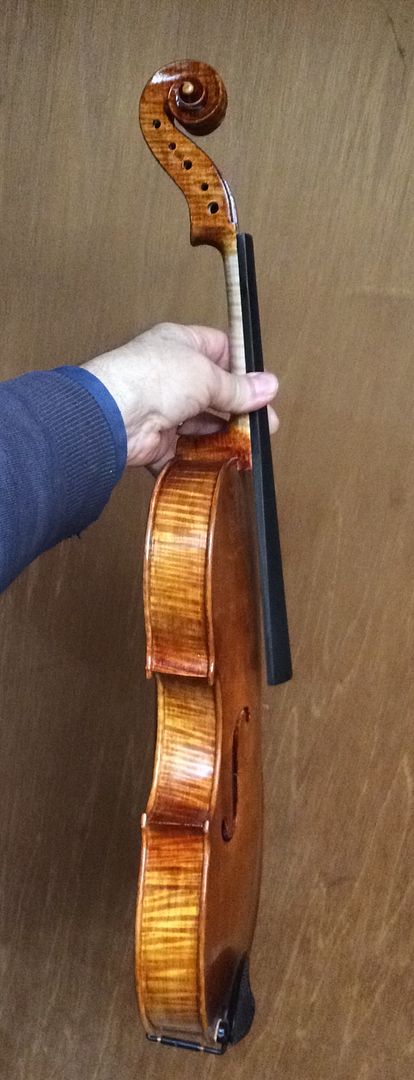
And the Dark Bass side, still unfinished.
Set-up and completion
At the point where I felt things were beginning to look correct, I added a clear coat, and allowed it to dry for a few days before setting the instrument up. But then I set it up with Evah Pirazzi strings, and it hung in my dining room, where it could dry still further, while waiting for a check to arrive. (This is where I frequently hang my instruments for final drying, as it is usually the warmest room in the house.)
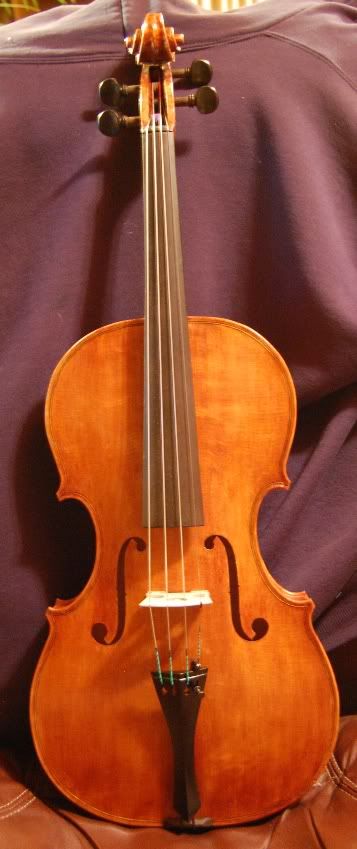
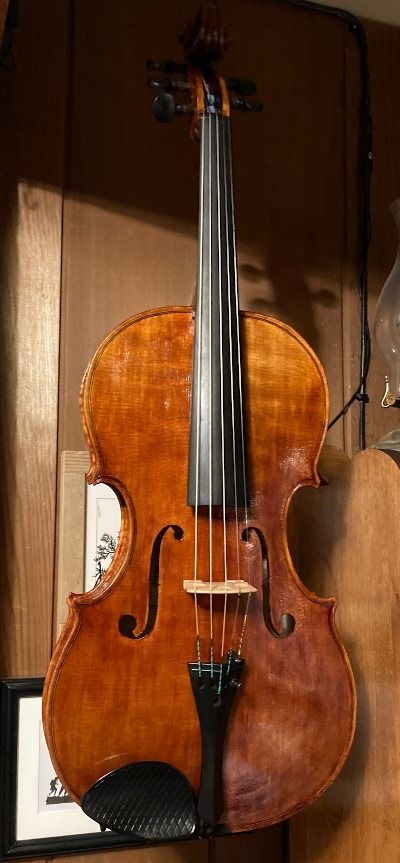
Front view, hanging in the dining room, waiting to be shipped.
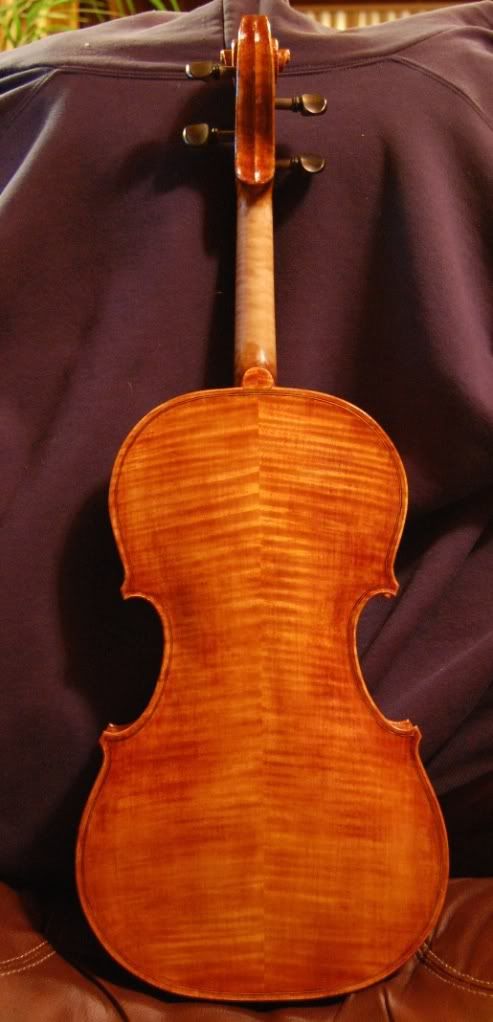
Dining room back view.
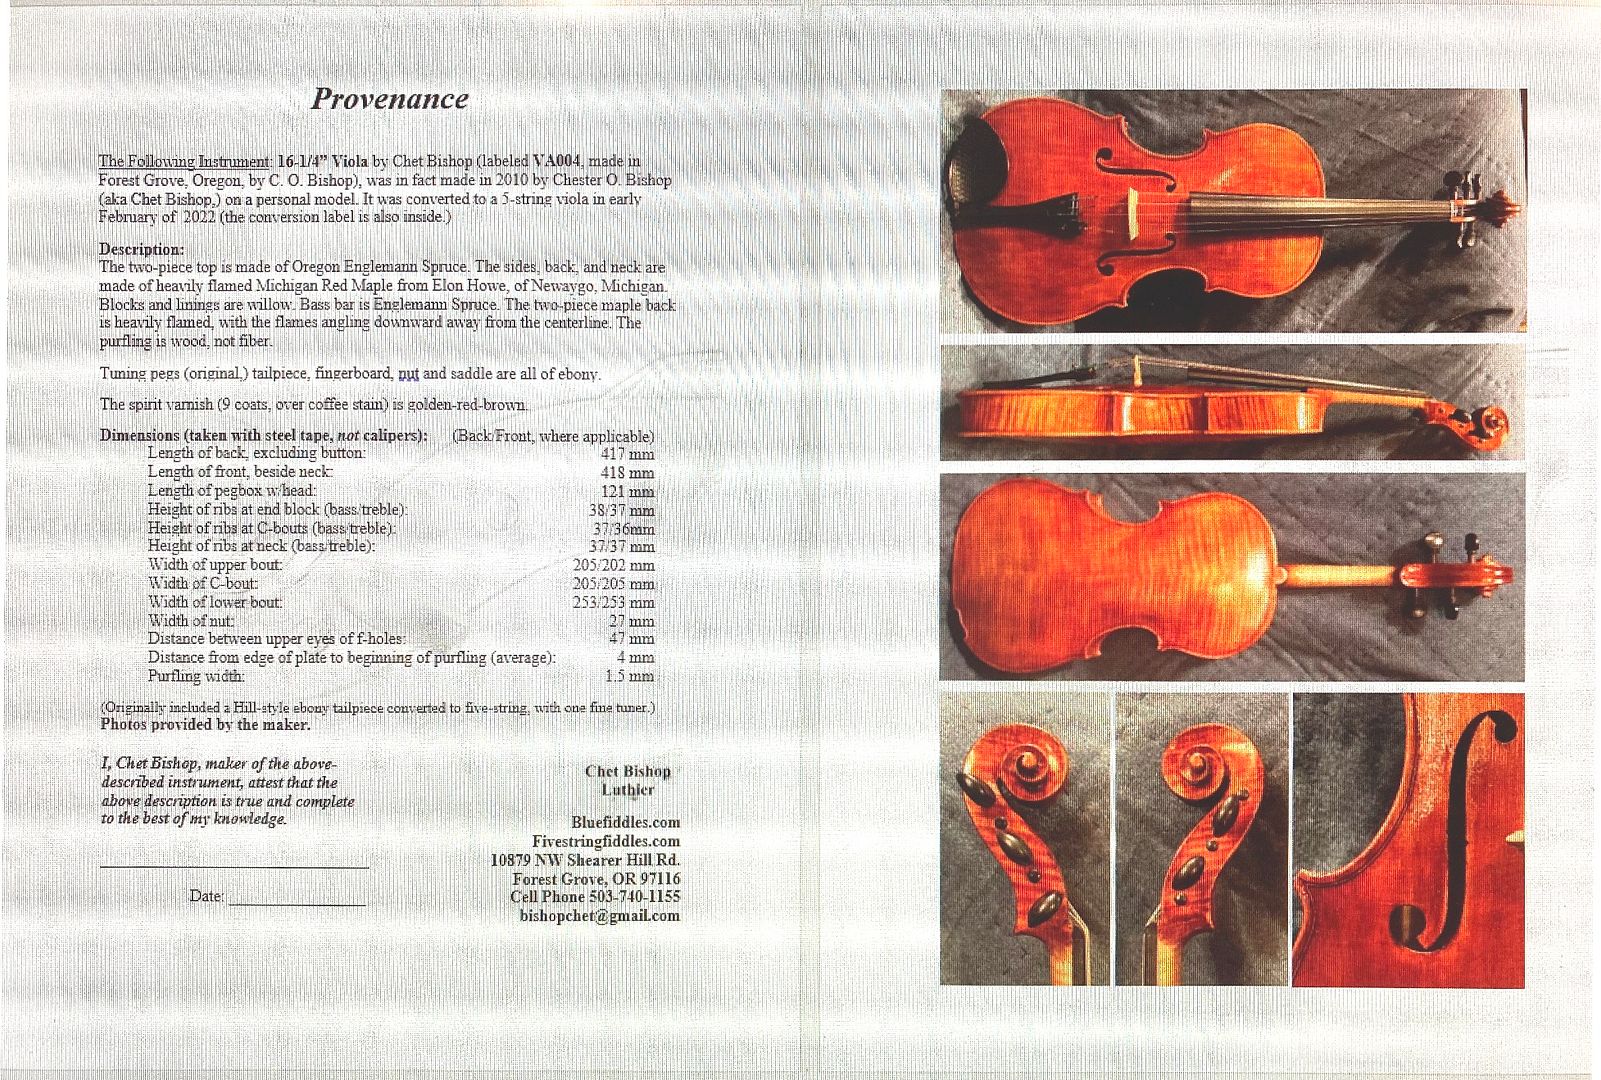
Finally, a check arrived, and I first sent a provenence document with clear photos of the instrument for identification purposes, (for insurance purposes, and, in case of theft.)
Provenance Document
I always include a provenance document for my hand-made instruments, along with the bill of sale. That way, if the instrument ever gets stolen, they have clear proof that the instrument is theirs, along with good photos by which to identify it. The front page includes a dozen accurate measurements, and the back side (Two-sided document) has all the photos.
Provenance document photo from Computer screen.
Shipping
Finally, I packed it carefully and shipped it off.
The 5-string viola arrived five days later, undamaged and still in tune. Most luthiers only ship their instruments with the strings slack and the bridge down, to minimize the chance of damage.
I don’t want to make the customer set-up the instrument, so I carefully wrap and pad the instrument inside a good case. Then I pack the case in an oversize carton, with yet more padding, and so far, the instruments have arrived safely, and usually still in tune.
Soundpost magic
I’m not confident that the customer has access to a luthier who can set up and adjust five-string instruments. The soundpost fit and position is critical to the balance across the strings. That balance is touchy on a five-string instrument, and not everyone succeeds at it.
People often tell me their 5-string fiddle sounds “dead” on the C-string. A five-minute readjustment of the soundpost brings it back into perfect balance. So…I go ahead and ship them fully set-up and ready to play.
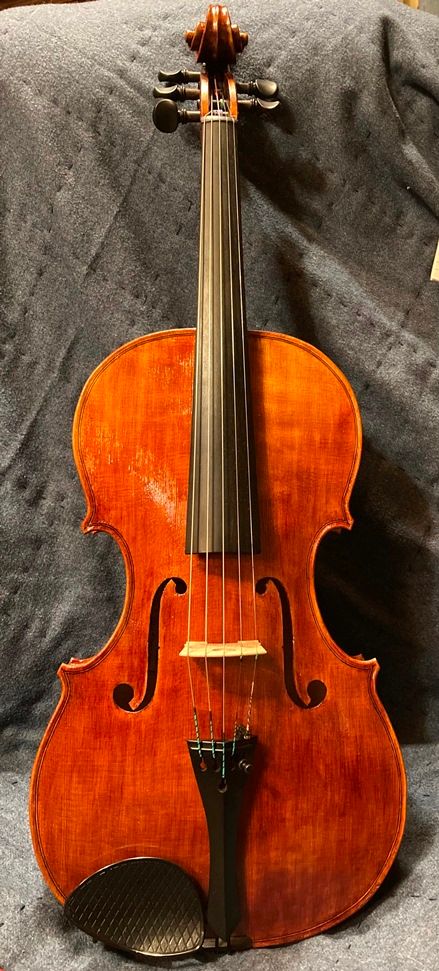
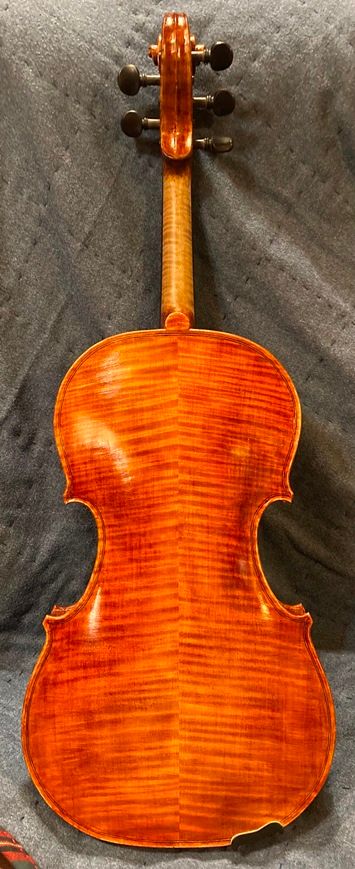
Final appearance, front view.
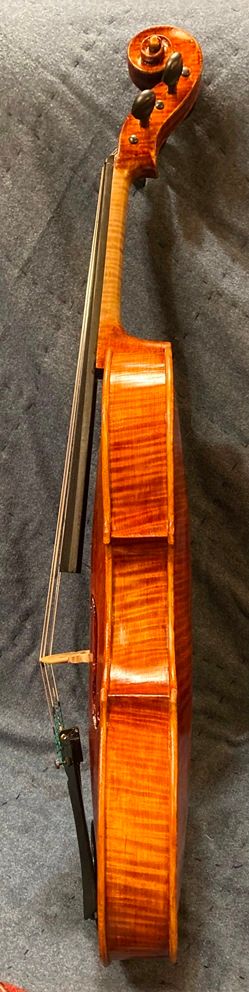
Side view, final appearance,
Final appearance, back.Final appearance Scroll
The customer loves his new Viola. He is thrilled with his new five-string, and is practicing the Bach Cello Suites on it now. He promised to send a video, once he gets accustomed to the “five-string feel,” so when the video comes, I will add it to the website.
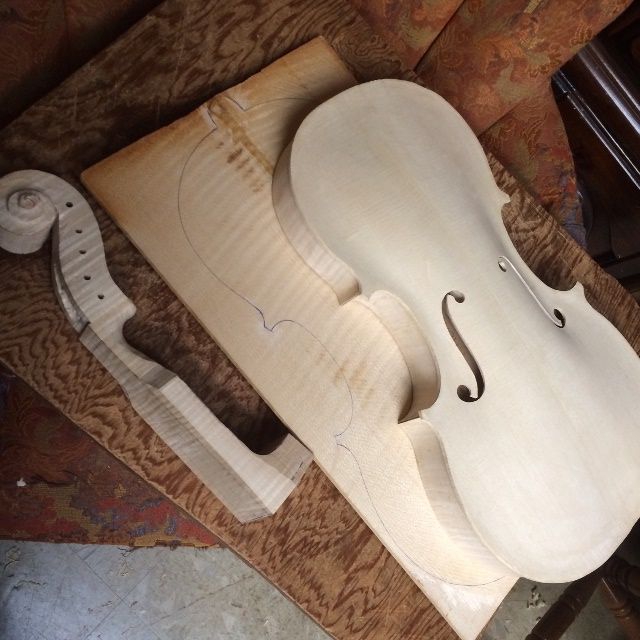
I had installed the European Spruce front plate on the garland, and showed the partially assembled corpus in spool-clamps. So, here is the partially completed corpus, out of the clamps and stacked with the rest of the parts:
Garland with top plate installed, back plate traced, and scroll begun.
Scroll Work
So, I took a break from working on the plates, and worked on the scroll. It is made of highly flamed European Maple.
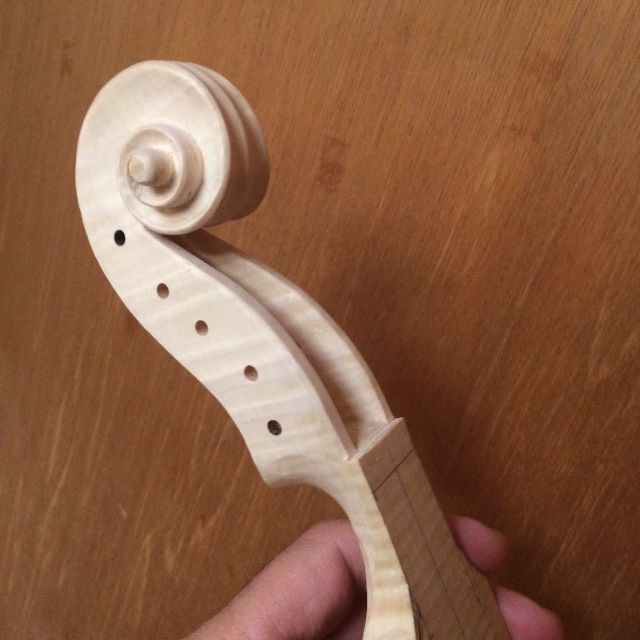
I completed the carving of the turns of the volute, and cleared it up until it was nearly complete, including the chamfers around the edges. I used an assortment of small gouges to carve the undercuts, and completed the work using scrapers.
Scroll and pegbox essentially complete. Ready to temporarily attach the fingerboard.
Back Plate Beginning
Then I decided I had better get the European Maple back plate caught up to everything else, so I cut out the traced shape on my small bandsaw, and cleaned and smoothed the perimeter on the oscillating spindle-sander. I began the outside arching, using a toothed-blade finger-plane, and then switching to a smooth-blade finger plane, stopping only because I was getting tired.
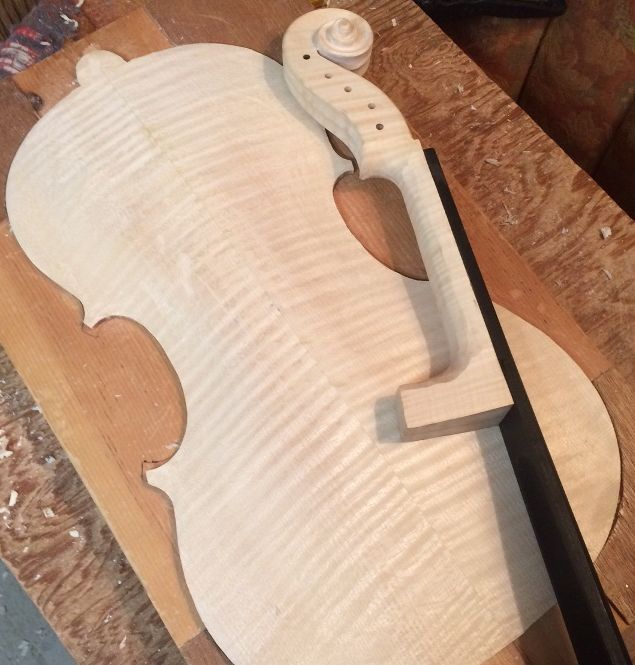
I will still have a great deal of careful shaping and scraping before the back arching is truly complete. But before I stopped for the evening, I temporarily glued and clamped the ebony fingerboard to the neck, knowing that I will remove it after setting the neck and before varnishing. So, here is where the instrument sits tonight:
Back arching nearly complete, neck and fingerboard joined.
You will notice that I also began shaping the “handle” portion of the neck. I shape it along with the fingerboard, dressing the fingerboard to get the curvature perfect, and shaping the “handle” part of the neck for optimum playability and feel.
But, when the arching is complete, I can sweep straight on into graduation, because, of course, the back plate has no f-holes, let alone a bass bar. (I do have to remember to install the label before I close the corpus. I don’t enjoy trying to install a label with tweezers, through an f-hole.)
Next Steps
The next things on my agenda will be to complete the arching, complete the graduation, and get going on purfling the front plate.
Many makers install the purfling before they begin graduation, but I always had a problem with the overhang being uneven when I did that, so I switched to purfling after the plate is installed on the garland, and the overhang has been satisfactorily established.
I also usually set the neck before removing the mold, so that, when I go to install the back plate, the neck heel is already perfectly flush with the back of the garland, and the back plate fits flush and tight, all the way around. Everyone has their preferences and idiosyncrasies, I guess.
My expectation is that I should have the neck installed by the end of the week…and maybe the back plate, too. But there are always other demands on my time, so it may be next week before either of those is complete.