New Commissioned Five String Fiddle On the Way!

New Commission!

Unusual  Woods

A customer ordered a new, custom-made Five String Fiddle, and it is on the way!  He chose heavily spalted, heavily-flamed, Oregon Big Leaf Maple for the back plate, the sides, the neck and scroll. My wife’s parents gave me the wood from this maple tree.

Ann used to play under and climb on this tree as a child, and we hated to see the tree cut down. Her parents still live there, less than four miles from our house. However, they had to remove the tree because it was dying. I have salvaged wood for a few instruments from that tree and they all look and sound wonderful!

Given a choice between Spruce and Douglas Fir, the customer chose the Douglas Fir, for his front plate. This tree also grew just a few miles from my home. (A famous violin and viola maker, Otto Erdescz  (1917-2000) used to make violins and violas with Douglas Fir soundboards. Professional musicians still play some of them, today. But very few luthiers use Douglas Fir. I didn’t either, until a few years ago!)

Not my usuaI Choice in times past

For many years, I refused to try such a thing. But a friend gave me a load of very straight grained Douglas Fir firewood, a few years ago.   I was splitting some of the firewood,  and the split-off piece hit the ground: it rang like a bell! I had never seen such straight-grained, clear Douglas Fir, with zero runout!

Unfortunately, that particular piece was too short for a fiddle. I had to search through the pile for a piece that was long enouigh for a violin plate.

Since then, I have made several such instruments, and they all sound great. (I find that the Spruce is definitely easier to work with, though, and, for classical, orchestral instruments, I still use only European maple and spruce.)

Customer Preferences:

This man showed up at my shop and he played all the five string instruments I had. (He really had not played 5-string instruments before. He laughed for joy, hearing the rich deep C-string on each one.  After a short while, he declared, “OK, I’m addicted!”)

He played the full range of all of them. He finally settled on my earliest unsold 5-string (#3 on the “Chronology” page) as being exactly what he wanted.

But not to buy that instrument. No! He wanted a commissioned instrument “just like that one!” (He wanted one especially built for him! Sure! We can do that!)

And, as it turned out, that was a good thing.  A week later, the next customer who came to try out all my instruments  also loved that fiddle, but she bought it that day, and drove away! So, it is gone, now!

Which Mold?

I knew which of my molds was the source of that fiddle: I have made at least four off of that specific mold. All of them have sold, now, so, for the moment, there are none available. (This instrument will “solve that problem,” for a moment, but it will disappear immediately after completion.)

The commissioning customer also wanted local wood. so that he could say, “My violin came from a tree on that hill!” So…choosing the wood was the first step.

Choosing the Wood

The model I would use had already been chosen, so that was not an issue. I also knew what the wood source would be: I still have a little of the maple my wife’s parents had given me. And, with the customer’s approval, I chose a clear piece of Douglas Fir, salvaged from the firtewood I mentioned earlier. He loved both pieces.

Maple and spruce for five string bluegrass fiddle handmade in Oregon by Chet Bishop, Luthier
“Fiddle in the rough!”

Here is a closer picture of the maple:

Heavily Spalted and Heavily Flamed Maple for five string bluegrass fiddle handmade in Oregon by Chet Bishop, luthier.
Heavily Spalted and Heavily Flamed Maple

I book-matched the spruce, by cutting a single billet in two equal halves and gluing them together to make the front plate.

Douglas Fir for five String bluegrass fiddle, handmade in Oregon by Chet Bishop, Luthier.
Douglas Fir, cut and ready to joint and glue the Center seam

I laid out the neck outline on the billet I had chosen for the neck, and I drilled the pilot holes for the tuning pegs. Then I cut out the side profile on a bandsaw.

scroll billet for new five string bluegrass fiddle, handmade in Oregon by Chet Bishop, Luthier.
Scroll profile cut out, and pilot holes drilled.

Mold Preparation

Meanwhile, I got the blocks glued into the mold. Then I  traced their shapes from my template, so the whole job could begin. I also  planed away the rough surfaces of the maple to ascertain that it actually would serve well as the back plate of a new five-string fiddle. And, I found that it was just a little too narrow in the lower bouts.

So, I “transplanted” a small piece of wood from the area above the upper bout on each side and grafted them in on the lower bouts. (This practice is not at all uncommon: It will be every bit as strong as the center seams on two-piece backs. And, once the double purfling is installed, the joints will be nearly invisible, under the varnish.)

wood for new five-string bluegrass fiddle, handmade in Oregon by Chet Bishop, Luthier.
Back plate in progress, blocks in the mold, and the shapes traced from the template.

Preparing the Ribs

I had chosen wood for the ribs, as well, and I sawed them to a thickness of a little over 2 mm. I thinned them, using a wooden fixture I made, clamped to my oscillating spindle-sander. The fixture allows me to  gradually reduce the thickness to 1 mm.

Here are the ribs:

Ribs for new five string bluegrass fiddle, handmade in Oregon by Chet Bishop, Luthier.
Rib-stock, sawn and thinned: ready to be cut to size and bent.

Installing the Ribs

Next, I cut the ribs to the correct length and width. I carefully considered which grain from one side would “mirror” which grain on the other side. I had already been tinkering on the neck, as you can see in this photo, but I will explain that process later.  (It isn’t always possible to do everything in a precise order. While I am waiting for  glue to dry on one section, for example, I may jump ahead on another piece.) You can see the bookmatched front plate, too.

Wood for new five string bluegrass fiddle handmade in Oregon by Chet Bishop, Luthier.
Bookmatched top plate, neck and back billets in progress, and rib samples, cut to size.

I cut all six ribs, and marked them as to inside, outside, upper and lower ends, etc, as well as which side of the fiddle they would call their home…treble or bass side.

Then I bent the ribs using a hot “bending iron” (actually made of aluminum, but, in the old days, they were iron.)

(I forgot to take photos of the shaped blocks: Sorry.)

I had cut and shaped the corner and end blocks, already, so I applied a generous coat of hot hide glue to one block at a time. then, I clamped the rib into the block surfaces, making certain that everything fit correctly before tightening the clamps.

First, I installed the center bout ribs, and when the glue had dried, I used the spindle-sander to trim the ends of those ribs to match the curvature of the outer faces of the corner block, so I could install the upper and lower ribs. Here are the upper ribs, glued and clamped:

ribs installed for a new 5-string bluegrass fiddle handmade in Oregon by Chet Bishop, Luthier.
Center and Upper bout ribs installed, using hot hide glue and clamps.

The lower end of the bass-side center bout rib was not fully tight, so I reglued it and reclamped it. (left lower side of photo.)

Then, when that glue was dry, I installed the lower ribs, by turning the mold upside down in the vise, so I could see clearly. It also meant that both hands were free to adjust the rib position, and apply clamps.

All ribs installed on new 5-string bluegrass fiddle handmade in Oregon by Chet Bishop, Luthier.
All the ribs are installed, but still need to be trimmed, before installing the linings.

Linings bent and installed

I also did not take photos of bending and installing the linings. (Sorry.) Here are two photos of the result, still in clamps.

Linings installed in new 5-string Bluegrass fiddle, handmade in Oregon by Chet Bishop. Luthier.
Front view of linings clamped in place.
Garland with linings installed, for 5-string bluegrass fiddle handmade in Oregon by Chet Bishop, Luthier.
Side view of lining clamps and rib garland.

Tracing the plates

Once the linings were installed and the ribs thus strengthened, I could trace the shape of the plates, and begin cutting things out.

Completed garland and billet for front plate for 5-string bluegrass fiddle, handmade in Oregon by Chet Bishop, Luthier.
Garland and Front plate billet cut to shape.
New 5-string bluegrass fiddel in progress, handmade in Oregon by Chet Bishop Luthier.
And, that is the progress, so far!

Thanks for looking! I will try to keep everyone posted as to progress.

Lutherie Books Now Available: More to Come, with Time.

Lutherie Books in General

This is the beginning of my “offerings” to the reading public, regarding the building of Violin-Family instruments. I currently build Violins, Violas, Cellos, and Double Basses, as well as the Five String Variants of each.

The instruments have been making customers happy wherever they go, but I have come to realize that I will only be able to build so many instruments before my body will no longer cooperate. So I am attempting to take some of the things I have learned and experienced, and make them available for others to use and enjoy. (The headings below are links to the Amazon sites where the books are available.)

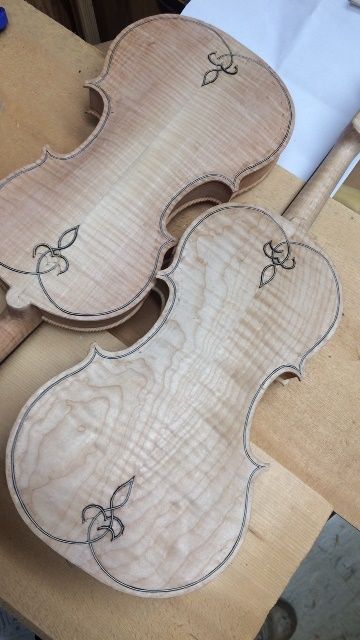
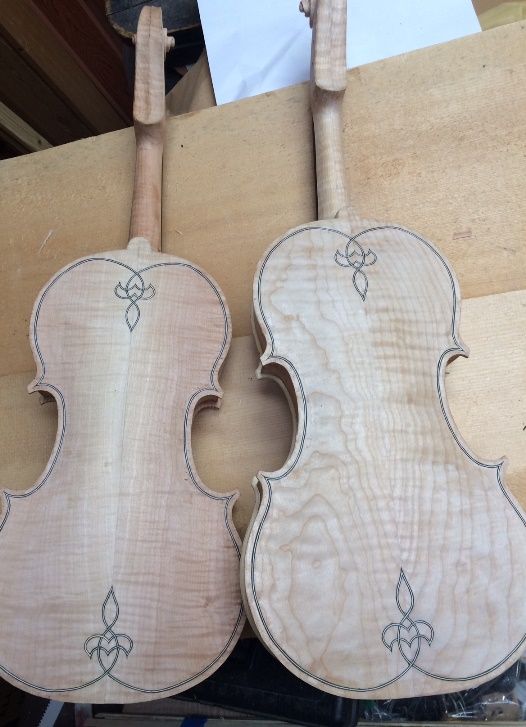
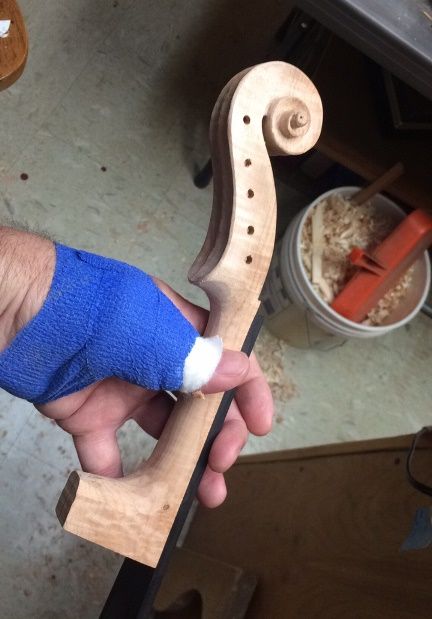
Building an Oliver Five String Fiddle

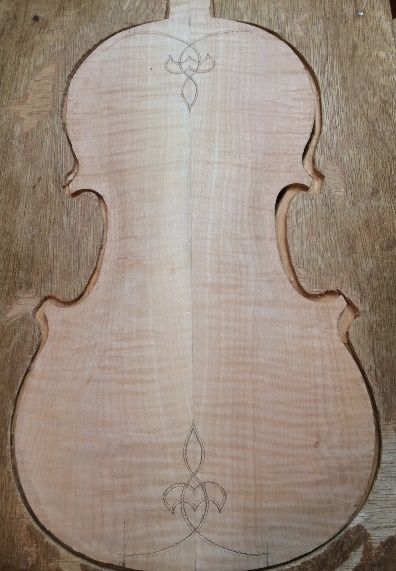
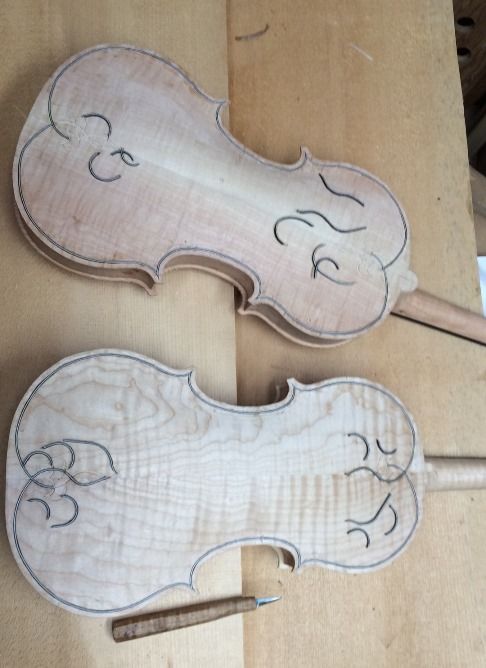
My first book on lutherie was a compilation of a series of blog posts, chronicling the building of a commissioned five-string fiddle. I offered the compliation for years as a free .pdf download, with its companion, “The Journeys of the Swan,” but it did not work well on smart-phones, or other small screens, as the text was just too small to read. So, I have revised and re-formatted the book as an electronic book, and have released it as a Kindle book.

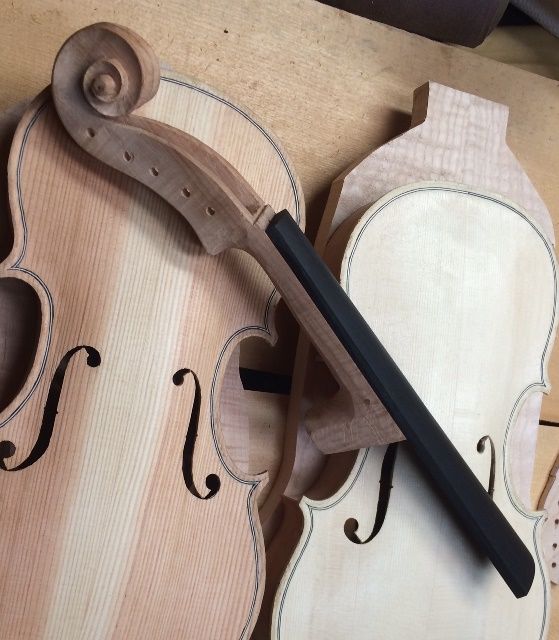
It is only 21,000 words, (which seems short, to me,) but it is profusely illustrated with color photos of the build.

I hope to offer an online series of lutherie lessons later, in keeping with this style

(Cover Photo)

The Journeys of the Swan

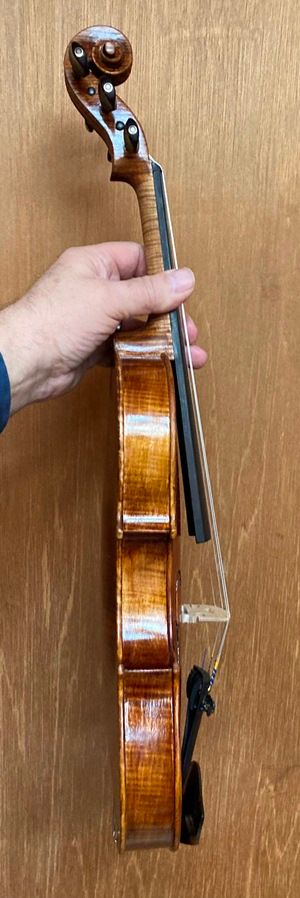
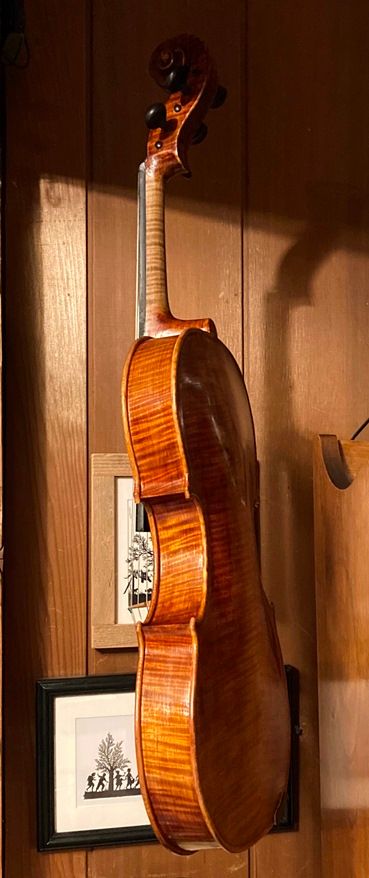
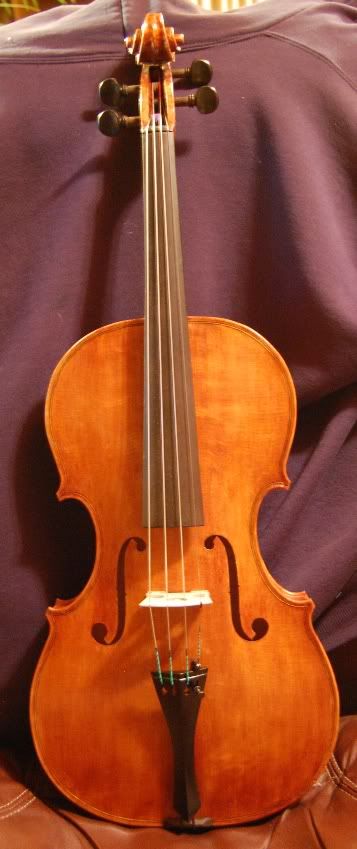
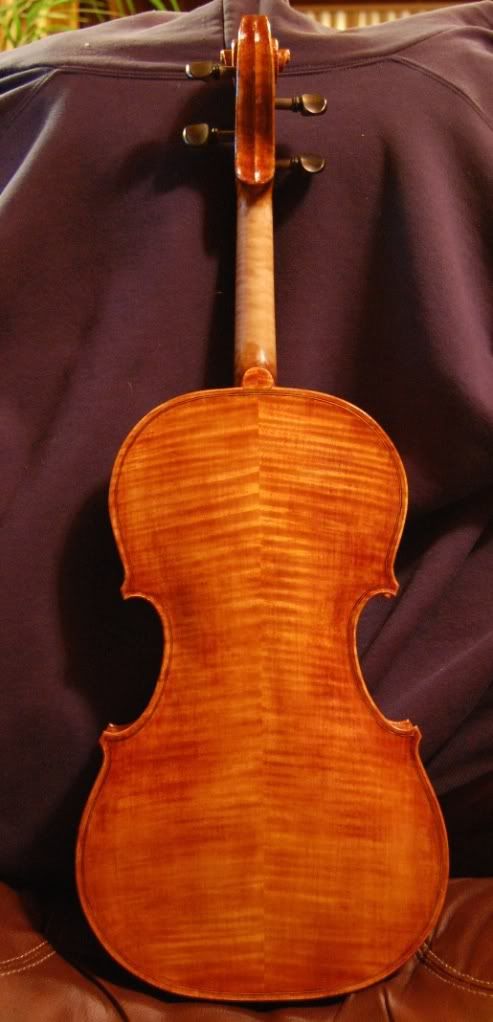
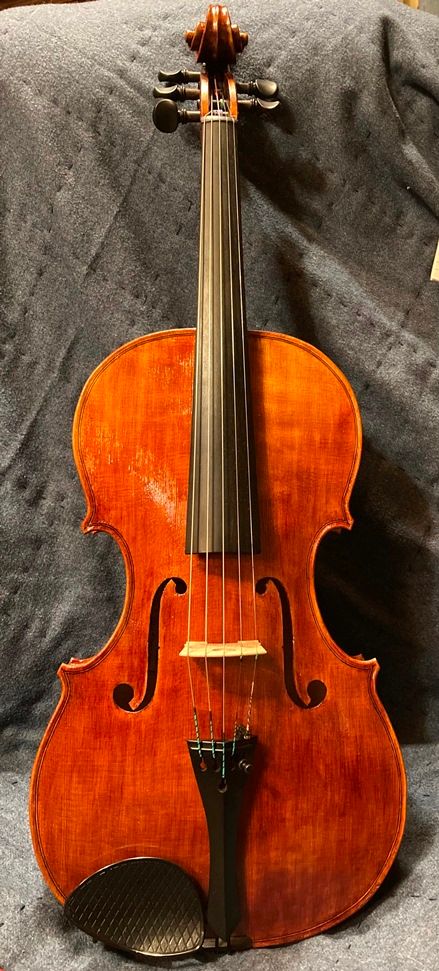
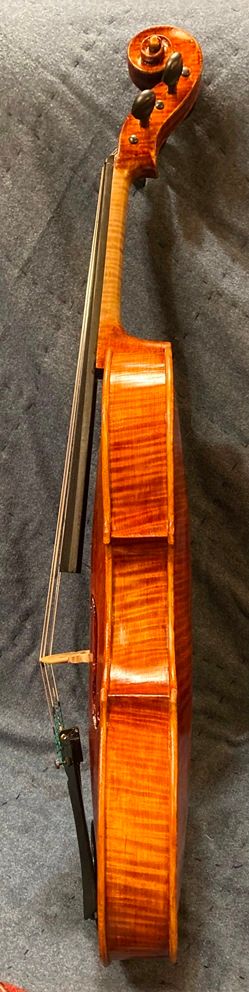
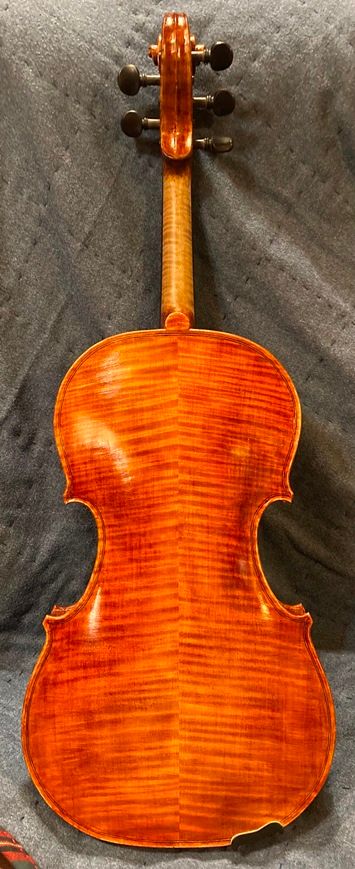
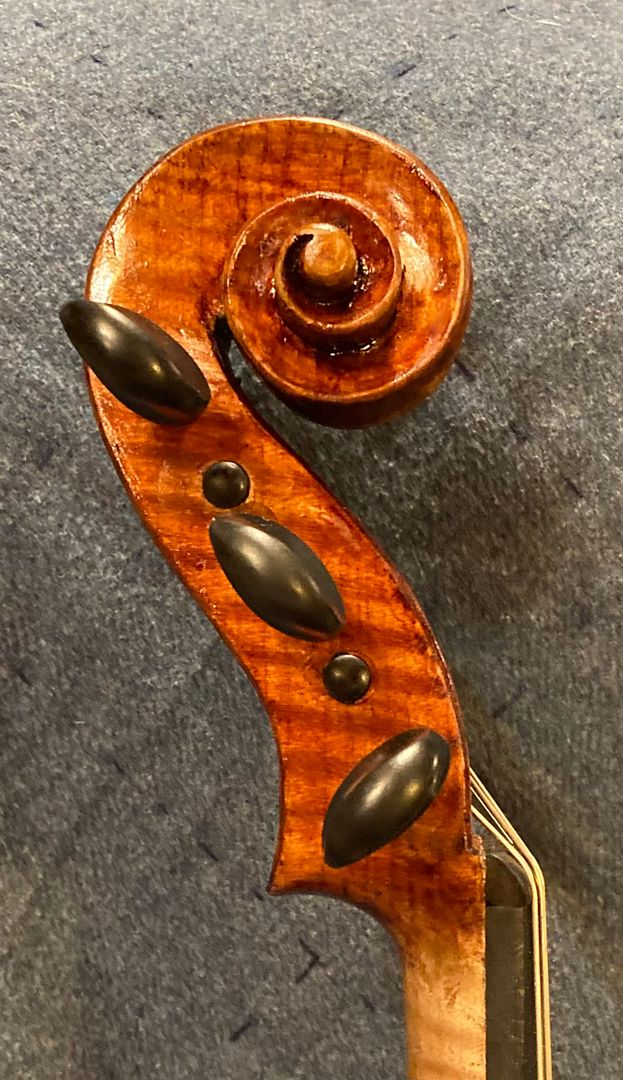
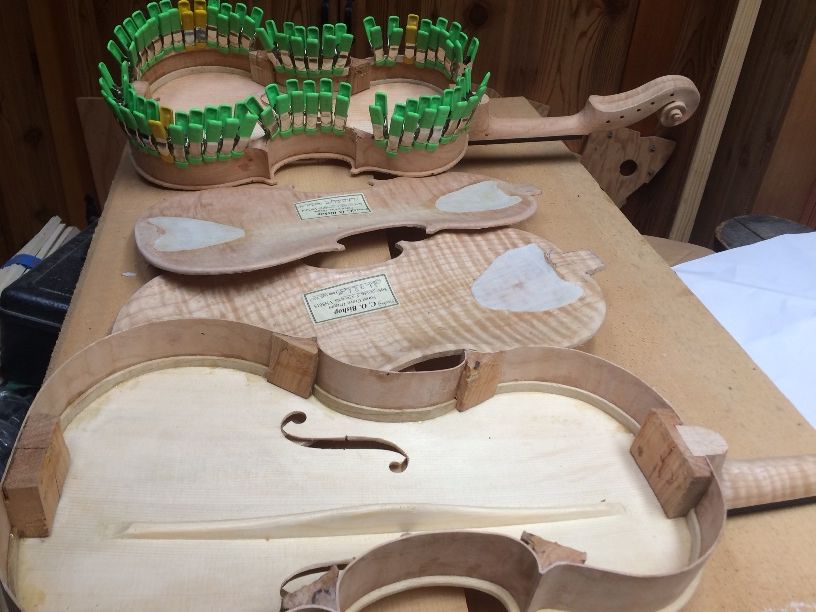
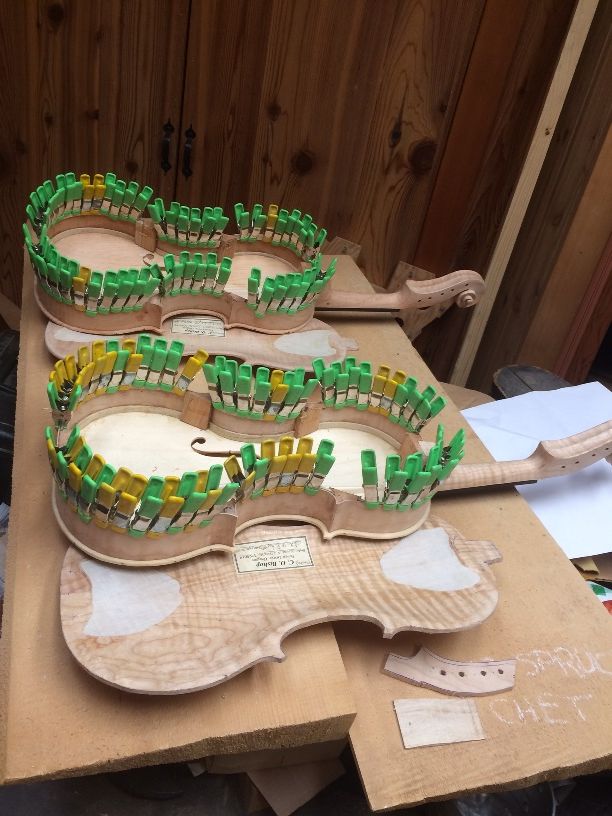
This one is a different kind of story. Kai Jensen, a NASA engineer who loved violins, began to build a cello. However,  his health failed him before he could complete his beloved project. Years later, long after his passing, his daughter brought the instrument to me to complete it for him, so that she would have her father’s cello to play.

This is the story, step-by-step, of how  we fulfilled Kai Jensen’s dream  and it blossomed into a beautiful cello. It is also the story of how his daughter inherited her father’s joy. She named the completed instrument “The Swan,” because the first music sher heard it play was Saint-Saen’s “The Swan.”
These are the Journeys of the Swan.

The Journeys of the Swan
(Cover Photo)


Booklets

This will probably become a list of articles or short books on resurrecting old fiddles. Only two for now, but more will come. These will appear on Kindle for their minimum price

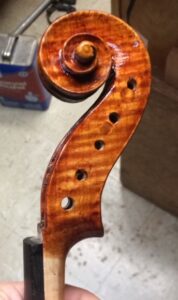
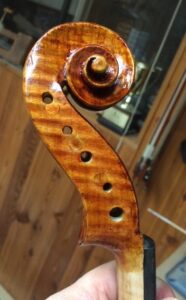
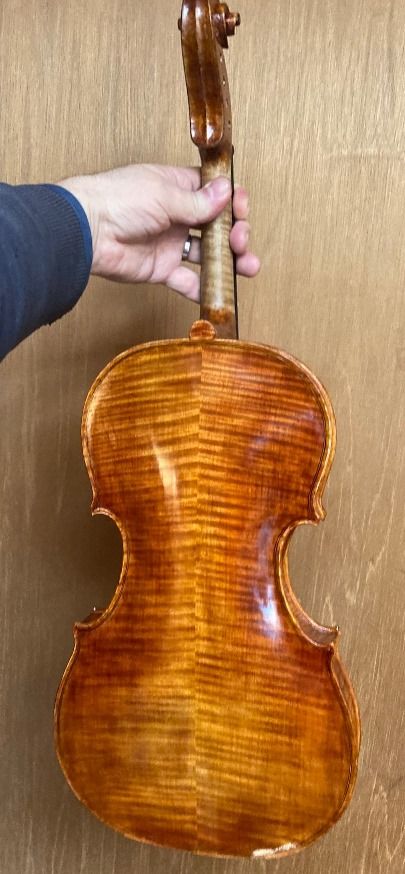
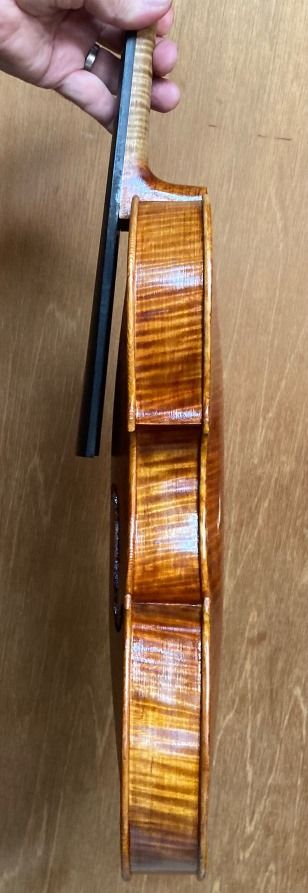
The Bread Bag Fiddle is a short work (3,800 words, 30 photos) chronicling the transformation of a “junk-store special”…a sadly neglected and abused violin, into the daily player of a gigging fiddler.

Resurrection of Another Dead Fiddle” is a little shorter, still, but it includes details of internal structural repairs, as well as replacement of missing rib wood and a full neck-set. The customer had sadly set this one aside and bought a cheap violin on which to practice, but after the repairs shown here, this violin returned to being her daily player. She has become a Happy Customer!

Video Proof! Feedback on the 5-String Viola Conversion!

I finally got some publishable feedback!

Earlier this year, I converted one of my classical 16-1/2″ violas (Instrument #18 (viola #7) on this page)  to a 5-string, for this young player. (Story here.)

I shipped it to him and it arrived just after his birthday. He has been playing it ever since.

Happy Player

The young man truly has been pleased with it: He loved the tone, loved the balance, etc. But he was reluctant to allow me to publish a video of him playing it. He wanted more time to practice.

He just had a hard time getting used to having five strings. Quite a few classically trained players have told me that this was a problem.  They felt that strings just seemed to appear in the wrong places. (I can understand that: there is a string right down the middle of the fingerboard that wasn’t there before! Besides, the angle in string crossings demands more of the player: it is much flatter, requiring more precision.)

Achievable Goals

He sent me several “progress reports,” over the next few months.  All of them sounded good, to me, but he was still working on “getting comfortable” with the new instrument, and did not want them made public. Until today, I did not have his blessing to share any of them.

One of his stated goals was to be able to play Bach’s Cello Suite #6 on the viola. It was originally written for a 5-string cello: A very good cellist can play it on a four-string cello. But, the best violist cannot play Suite #6 on a classical 4-string viola in the original key.  The classical cello used “thumb-position” fingering to play it. “Thumb-position” is not usable on a viola.

The young man bought the 5-string viola to overcome that specific hurdle, so he is working on that piece in this video :

I especially appreciate this video. It showcases both ends of the range of the Viola, and it shows that the instrument speaks quickly and easily, in fast attacks.

He hasn’t “spoken up” online yet (and he may not) but the music tells me he is happy with the instrument.

Hope you enjoy it.

A 5-String Fiddle is Headed “North to Alaska!”

A Call From an “Unknown Person”

This sort of thing has happened often enough that I ought to not be surprised: I get a call from some unfamiliar place, and I automatically suppose it to be “spam” of some sort, since I do get a lot of unsolicited calls trying to sell me something or another.

But then the caller says they are looking for a five-string fiddle, and the game changes instantly! I have to mentally “change gears,” pretty quickly. (No complaints! That is a nice surprise, when it happens.)

Call from Alaska

Ann and I were out walking,  in January, just trying to get the exercise we need. We live on the very top of a steep hill, and we were walking back up that steep hill, toward home. We had maybe a third of a mile left to go,  when my cell phone rang.

I saw that the call originated in Anchorage, Alaska!  Ironically, I do have a cousin in Anchorage, but it was unlikely to be him. I commented to Ann, “It’s probably spam…” and I answered the phone.

The woman identified herself immediately: she stated that she was looking for a five-string fiddle for her eleven-year-old son. Evidently he is an up-and-coming fiddler, and wanted a 5-string fiddle.

(Cool!) But I really don’t recomend buying a $6,000 instrument for a beginner who may change his mind in a year or less. So I cautioned her that these hand-made fiddles may not be appropriate for an 11-year-old.

I suggested that I buy a “fiddle in-the-white” (woodwork completed, but just bare wood, unfinished, and not set up) and complete that for her. In that way, I could provide  an instrument at one third the cost of handmade. She immediately agreed: that is exactly what she wanted.  I offered to call her back for more details after we arrived home and she agreed to that as well. So, we sealed the deal by telephone, and I began the work.

“Atelier Chez Les Evêques” Fiddles

Usually, this means beginning with a white instrument, checking all measurements and the resonance of the corpus, and then going ahead with varnishing. Since I am not making these instruments, but only completing someone else’s work, I do not put my label in them but rather my “house-brand” label (which only means “From the shop at the Bishops’ place.”)

But, sadly, for this example, I neglected to take any pictures until late in the varnishing process.

So, about February 1st, I sent the lady this photo of just the back, letting her know I was working on it. She had made plans to come to my area in April in regard to a different project, anyway, so I had plenty of time to make delivery.

fiddle back
Fiddle back with first coats of varnish complete.


She was quite happy with the look, so I continued without further photos until it was done.

Then I sent these:

completed front
Completed front.


completed bass side
Bass side completed (fancy pegs on this one!)


Completed back
Completed back: she loved the figured maple!


The customer was quite happy, so I hung the fiddle up in my dining room to continue drying while I waited for her to arrive in my area.

Hanging for extended dry time
Hanging for extended dry time.


Now the little fiddle is back in Alaska and being played. Everyone is pleased with it, including the young fiddler.

She sent me a video of the youngster playing “The Road to Lisdoonvarna” and he sounded pretty good! I hope he becomes a hugely successful fiddler and needs a handmade fiddle someday! 🙂


Thanks for looking!

Large Handmade Viola Converted to a BIG Five-String Viola

First Five String Conversion

Contact from a Potential Customer

A young man contacted me by phone, over a year ago, asking about a large, five-string viola. He was very polite and not at all aggressive or assuming, but  he essentially had no money for such an instrument. The phone call was a very pleasant conversation, despite the lack of funds and I was at least able to answer all his questions.

After we disconnected, I simply assumed I would not hear from him again, and eventually forgot about it,

Second Contact

The same youmg fellow contacted me again. a year later. This time, he had been “saving his money, ” but, unfortunately, not quite enough. So we talked over the options. Eventually I offered to convert one of my earlier orchestral violas to a five-string viola at the price he could afford. He liked that idea, and eventually, after his final approval, I began the project.

An older 16-1/2″ Oliver Viola

I began with this viola– my own design. The viola played quite well, but, for some reason, no one had purchased it, so far. (It was instrument #11, viola #4 from my Bluefiddles site.)

The Plan

As I usually keep my viola necks fairly narrow, for player comfort, I needed to make a wider fingerboard and nut, to accommodate the fifth string.

Obviously, I also needed to plug three of the peg-holes and drill four new ones. They had to be positioned so that all five would fit on the pegbox, and the strings would still not rub on another peg, when tuning.

Photographs

I did not take any photos of the fingerboard and nut changes, but here are a few photos of the scroll in progress. (Also, midway through the conversion, he asked whether I could darken the varnish. That really had not been part of the “deal.” But, after thinking about it, I decided that I could try to do it with minimal labor, and just count it “good customer relations.”)

So: here are some photos of the scroll after plugging the original holes and drilling new ones.  I capped all the plugs with figured maple, to avoid leaving the dark circles which usually remain after such an operation.

The different background and lighting (shifting position, trying to eliminate reflections) resulted in different apparent color…but they actually match.

Adding Color

About the time I reached this point in the conversion is when the customer requested the color change. It turned out that he liked the color of his current instrument, and hoped I could mimic that somewhat. 🙂 (Okeedoke...)

So, I began adding color; sparsely, at first, until I could see how it was building. About three very thin coats of a dark, red-brown varnish were required to offset the original golden brown, and produced the color that he wanted.

five string Viola conversion handmade in Oregon by Chet Bishop Luthier
Dark front, still unfinished.


five string viola conversion made in Oregon by Chet Bishop, Luthier
Here is the Dark back, still unfinished.


five string viola conversion made in Oregon by Chet Bishop, Luthier
Dark treble side, still unfinished.


five string viola conversion made in Oregon by Chet Bishop, Luthier
And the Dark Bass side, still unfinished.


Set-up and completion

At the point where I felt things were beginning to look correct, I added a clear coat, and allowed it to dry for a few days before setting the instrument up. But then I set it up with Evah Pirazzi strings, and it hung in my dining room, where it could dry still further, while waiting for a check to arrive. (This is where I frequently hang my instruments for final drying, as it is usually the warmest room in the house.)

five string viola conversion, handmade in Oregon by Chet Bishop, Luthier
Front view, hanging in the dining room, waiting to be shipped.


Five string viola conversion, handmade in Oregon by Chet Bishop, Luthier.
Dining room back view.

Finally, a check arrived, and I first sent a provenence document with clear photos of the instrument for identification purposes, (for insurance purposes, and, in case of theft.)

Provenance Document

I always include a provenance document for my hand-made instruments, along with the bill of sale. That way, if the instrument ever gets stolen, they have clear proof that the instrument is theirs, along with good photos by which to identify it. The front page includes a dozen accurate measurements, and the back side (Two-sided document) has all the photos.

provenance document for five string viola handmade in Oregon by Chet Bishop, Luthier.
Provenance document photo from Computer screen.

Shipping

Finally, I packed it carefully and shipped it off.

The 5-string viola arrived five days later, undamaged and still in tune. Most luthiers only ship their instruments with the strings slack and the bridge down, to minimize the chance of damage.

I don’t want to make the customer set-up the instrument, so I carefully wrap and pad the instrument inside a good case. Then I pack the case in an oversize carton, with yet more padding, and so far, the instruments have arrived safely, and  usually still in tune.

Soundpost magic

I’m not confident that the customer has access to a luthier who can set up and adjust five-string instruments. The soundpost fit and position is critical to the balance across the strings. That balance is touchy on a five-string instrument, and not everyone succeeds at it.

People often tell me their 5-string fiddle sounds “dead” on the C-string. A five-minute readjustment of the soundpost brings it back into perfect balance. So…I go ahead and ship them fully set-up and ready to play.

five string viola handmade in Oregon by Chet Bishop, Luthier.
Final appearance, front view.


five string viola handmade in Oregon by Chet Bishop, Luthier.
Side view, final appearance,


Five string viola handmade in Oregon by Chet Bishop, Luthier.
Final appearance, back.
Five-string viola handmade in Oregon by Chet Bishop, luthier.
Final appearance Scroll


The customer loves his new Viola. He is thrilled with his new five-string, and is practicing the Bach Cello Suites on it now. He promised to send a video, once he gets accustomed to the “five-string feel,” so when the video comes, I will add it to the website.


Thanks for looking.

What Advantages Does a Five-String Viola Offer?

, years ago,

What can be done on a 5-string Viola that cannot be done on a classical viola?

J. S. Bach Cello Suite #6

I recently spoke  with a pro-level violist from California. He said that you cannot play the Bach Cello Suite #6 in the original key on a four-string viola! (This presented a new idea to me.  I am not really a player, so I simply never had thought of that possibilty.) Accordingly, I looked it up online:

I offer the following quote from an article in “The Strad” Magazine. The Magazine quotes Simon Rowland-Jones’ comments in 1999. (The article appeared in July, 2021)

“The suite can only comfortably be played on a five-string instrument, although most cellists do play it on a normal four-string cello using thumb position to facilitate the higher registers. As thumb position is not possible on the viola, violists normally play this suite in the key of G.”

I knew that J. S. Bach actually wrote suite #6 for a five-string cello (possibly a violoncello piccolo.)  Experienced cellists play it, but they find it challenging on a four-string classical cello.  I just had never thought that “very difficult” for a classical cellist might spell impossible” for a classical violist!

So, a five-string viola actually provides the only answer for a violist who really wants to play all six Bach cello suites on a viola, in the original keys!

Violin/Viola Teachers love the 5-string Viola for a different reason:

Violin teachers find the 5-string viola offers a big help, too. Especially when teaching in a group setting, the five string instrument allows the teacher to demonstrate the violin part for the violin section. The teacher can immediately switch to the violists’ part, without having to change instruments. A well-balanced five-string instrument provides good sound on both ends of the spectrum.

Band Members love them, too

Players in modern bands ( Jazz, Country, Bluegrass, or anything between) enjoy being able to drop into a growly low harmony to complement whatever melody the lead singer or instrument is following. When the five-string instrument is the lead, the player will really shine, because of the extended range.

Large Violas vs. Small Violas

I do not claim that there is no difference between the sound of a large instrument and a small one. (Sorry: a well-made, well-set-up, large viola simply does provide a bigger voice.) However, a well-made, properly set-up, small 5-string viola can still demonstrate an amazingly good voice. It will speak easily on the C-string, and be very open, deep and clear. It will prove to be just as clear and strong on all five strings. But violists really like the sound of big violas!

Non-Classical, Ergonomic Options

So: what can I do for a player who, by reason of physical limitations, cannot play a large viola? David Rivinus invented a new form, years ago. He named the new instrument “Pellegrina.”

The Pellegrina I tried out offered the playing length of a 15″ viola, but it possessed the internal space of an 18″ viola! (How is that possible? Well, quite honestly, I thought it looked as though  Salvador Dali must have designed it!) Mr. Rivinus had dramatically extended the curves of both the upper bass bout and the lower treble bout, so that they “bulged diagonally.”

This feature provides the internal resonance volume of an 18″ viola. But he left the playing length from neck-heel to end-button exactly that of a 15″ viola. The player’s hand moved no further from her shoulder than it would have done with a 15″ instrument.

Commission only, for Ergonomic, non-classical forms

If a player wants such an instrument, today, I can build one. However, I will only build it as a commission. Also, I will be using my own design, not a copy of David Rivinus’s work. (Mr. Rivinus retired a few years ago, and quit building them. His personal instruments are no longer available except when a player  sells one. In fact, he still functions as a broker for those selling or buying his older creations.)

But Mr. Rivinus built the Pellegrina using sound engineering principles: His instruments (or instruments like his) offer a very good option for ergonomics.  However, some players feel so strongly the need to “Look Normal” that they will never try such an option. (That is sad, because many violists end up with injuries by playing violas which are really just too large for them. )

Five String Violas for sale:

If you are interested in a five-string viola of any kind, please contact me, and we will discuss your needs. If you need something similar to what Mr. Rivinus invented, we can talk, as well, but it would definitely be a commissioned instrument.

Additionally, if a player wants anything far out of the ordinary, it will be offered on a commission basis.


Thanks for looking.

New Venture for me: “The Bread Bag Fiddle” just went “Live!”

New Book!

First of many to come, I hope!

As some of you are aware, I have posted lots of articles on violin making and repair, over the years. I published some in book form, but in .pdf format, so that those who were interested could download them, Sadly, they were really only readable on a full compluter. It turns out that the words were too small to see on a phone, for instance.

Anyway, I put together a small (3,800 word, 30 photos) booklet on the resurrection of a fairly “dead” fiddle. This instrument literally arrived at my shop in a plastic bread-bag, with the top tied off so not parts could be lost.

A friend found the fiddle in a junk shop, and bought it to give to me. I thought I was unlikely to use it, so I tossesd the bag in a box of “possible projects,” and just forgot about it. But…it literally came to me in a bread-bag!

Hence, the name of the new booklet: “The Bread Bag Fiddle: (Resurrection of a Dead Violin).” It is not a true “tutorial:” it is more of an encouraging look at what can be done with a “junk-store-special” or a “garage-sale treasure.”

The instrument eventually found a home with a young fiddler, who was thrilled with it. I hope to meet her, someday.

New to Kindle

I am new to internet publishing, so this is more than a little intimidating. I have never attempted using the Kindle publishing software before: this is my first offering.

https://www.amazon.com/s?k=the+bread+bag+fiddle&i=digital-text&fbclid=IwAR0ruyNsAt4mJ8qlbr0sLREES-C0H9cppji7jC6Q9fAMwNOtZJaPKF6BhgU&ref=nb_sb_noss

I was fairly intimidated, as a non-tech-savvy, bona fide “Old Guy.”  I did manage, however, to “jump through all the hoops.” After much fingernail-chewing, I published the booklet through Amazon Kindle. I set the price at $2.99, originally, because, as it turns out, that is the minimum price one can set…so that is what I did.  Have a look if you are interested.

The Bread Bag Fiddle: Resurrecting a "Dead" Violin by [Chet Bishop]

Thanks for looking!

Nearing Completion of Two New Five-String Bluegrass Fiddles

5-String Fiddles Nearing Completion

First, I apologize for the long hiatus. Lots of things have been going on, so I haven’t taken time to post progress reports on the two instruments I began in late July.

Initially, I had anticipated being done with both by the second week in September. Unfortunately, there have been sufficient interruptions and side-tracks that I am still not done. (Rats...)

When I last posted, I had just recently set the necks in the instruments. Initially, I progressed fairly rapidly for a bit, thereafter, but failed topost progress reports for  “Show and Tell.” Therefore…I will try to catch-up.

Linings

First, I carefully removed the molds. Then, I cleaned up the interior of the two fiddles, so they were essentially finished. Next, I bent and installed the back linings. Usually, I try to use willow for my linings. I had thought these were willow, but I am beginning to believe they may be some species of poplar.

Handmade Five string fiddles in progress, by Chet Bishop in Oregon
One set of back linings installed. Other corpus ready for back linings.


Two handmade fivestring fiddles in progress by Chet Bishop of Forest Grove, Oregon
Both fiddles with linings installed. Notice the linen reinforcements of the purfling-weave areas.

Back Plates

The next step was to install the back plates. I had already laid out and installed the back purfling weaves, but, because the rib garlands sometimes change shape a little after the molds have been removed, I avoided “locking in” the shape of the back plates until the plates were already installed. After that, I could do any final trimming of the back plate, and afterward lay out, cut and install the remaining purfling.

Purfling weaves incised
Purfling weaves incised.

Subsequently, I went ahead and installed the back plates, and trimmed them to accurately match the ribs. Then I began layout and installation of the back purfling. I bent the purfling, using heat, then began gluing the sections in place in the proper order.

purfling weave beginning
Beginning back purfling weaves. The idea is to produce an illusion of an “over-and-under weave.”


purfling in progress on two 5-string bluegrass fiddles handmade in Oregon by Chet Bishop, Luthier.
Purfling in progress.
trimming purfling weaves on 5-string bluegrass fiddles handmade in Oregon by Chet Bishop, Luthier.
Trimming the purfling weaves. I inlaid  these to a shallow depth, because the plates are thin.


scraping the purfling weaves on a 5-string bluegrass fiddle handmade in Oregon by Chet Bishop, Luthier.
Scraping the Purfling Weaves.

Final Varnish Preparations

Before I could begin varnishin, the purfling channels and all the edgework remained . Also, I turned off the artificial lighting, and used the dim light from a window to cast soft shadows across the wood. I knew this would reveal any humps and hollows I may have missed earlier. After completing all that work, I began the varnishing process.

five-string fiddles handmade in Oregon by Chet Bishop, Luthier.
Both fiddles ready for final varnish preparations.

I will outline the process and show pictures in my next post.

Thanks for looking.


Looking Better! Further Progress on Fiddles, as of 8/24/21

Slower Progress:

(I actually got a fair amount done, though…)

A few weeks ago, I bookmatched my plates. Then I cut ribs and necks, so as to set up “kits” for six new five-string fiddles. Afterward, I started building two of them, as parallel builds.

Since I last posted, two weeks ago, I did not exactly stay on schedule, but I didn’t get too far behind.

Scroll Carving

I had already completed the first scroll and neck, and had begun working on the second neck, when, I “kinda took an unplanned detour.”

scroll carving for five string fiddle handmade in Oregon by Chet Bishop Luthier.
Beginning to carve the pegbox for fiddle #1.


carving pegbox for five string bluegrass fiddle handmade in Oregon my Chet Bishop, luthier.
Heavy wood removal from pegbox interior.


sawing out scroll on 5-string bluegrass fiddle handmade in Oregon by Chet Bishop, luthier.
Beginning the saw-carving of the scroll


Saw-carving the scroll for a 5-string bluegrass fiddle, handmade in Oregon by Chet Bishop. luthier.
Saw-carving the scroll.


scroll for 5-string bluegrass fiddle, handmade in Oregon by Chet Bishop, luthier.
Scroll nearing completion


scroll for 5-string bluegrass fiddle handmade in Oregon, by Chet Bishop, luthier.
Scroll #1 essentially complete.


Then I Had a Small Mishap:

I had worked for 12 hours, Monday the 16th, and afterward, I felt pretty tired. Consequently, I had tired hands: Probably I had a tired brain, too, I suppose… anyway:

I had begun carving the second scroll. I completed the saw-carving part, and I was removing waste wood, with a small gouge, when, I slipped. annnnd, just happened to have my left hand in the path of the misdirected gouge. (sigh…)

Entry wound!


Exit wound!


Both sides at once!


Urgent Care? Emergency Room?

First we tried going to an Urgent Care clinic. We arrived there, and then discovered that (a) they only work by appointment, and (b) they don’t take medicare insurance, anyway. Accordingly,  I asked what my options were, and they said: “Everything else is closed! Go to the ER!” (Sigh… very expensive option!)

So, about 30 minute later we arrived at the Emergency Room at Saint Vincent Hospital. They were busy as usual, so we waited for about four hours. But after that, the ER people washed it out with sterile water, X-Rayed it to eliminate the possibility of torn bone or tendons, and applied two little “Steri-Strips!”

Steri-Strips from the ER.


I guess that was normal,  but it felt pretty “exposed,” and was very prone to bumps (which were pretty uncomfortable when they happened.) So, after we got home, Ann bandaged me up with a heavily padded dressing so that I could sleep without bumping it. That was a real help, and, as a result, I slept well.

However, I kind of puttered around, the next day…partly too tired, I suppose, as we had arrived home somewhat after 3AM, and we got to bed after 4AM. Partly, I was just not feeling real good. Anyway, I had other things that needed doing, so I didn’t work on fiddles for that day.

Bandage for protection.


Red Violin beginning? This was the second scroll, in progress when I slipped.

Back to Work!

I got back to work on Wednesday. It turned out that I really needed two hands for most things, so it slowed me down rather badly, having a bulky bandage on the left paw. However, I was finally able to get the fingerboard installed on the first scroll/neck so that I could shape them as a unit.

Fingerboard installed for 5-string bluegrass fiddle handmade in Oregon by Chet Bishop, luthier
Fingerboard installed the second day after the injury.


That was kind of encouraging, seeing some progress again.

neck and fingerboard with five-string fiddles by Chet Bishop, Luthier.
Neck #1 with the two completed front plates and garland assemblies.


back plate and neck assembly with dive string fiddles by Chet Bishop, Luthier.
I had also traced and cut out the back plate for fiddle #1.  (Big Leaf Maple: Pretty stuff!)


Then I set the neck on fiddle #1:

cutting neck mortise in 5-string bluegrass fiddle handmade in Oregon by Chet Bishop, Luthier
Beginning the neck mortise. Notice the hard, heavy winter reeds in the Douglas Fir front plate.


cutting the neck mortise on a 5-string bluegrass fiddle handmade in Oregon by Chet Bishop. Luthier.
The cut-out in the front plate for the neck mortise.


completed neck mortise in 5-string bluegrass fiddle handmade in Oregon by Chet Bishop, Luthier.
Completed neck mortise


neck set completed in 5-string bluegrass fiddle, handmade in Oregon by Chet Bishop, Luthier.
Completed Neck-set. (Back of the neck heel will still have to be sawn off.)


Healing up!

After that, we had appointments with various people, so I didn’t get a lot done on Thursday or Friday. By the time the weekend had rolled around, I had the biggest bandages off, and was sporting a plain finger bandage, but I had to be pretty careful.  Bumps were still pretty unpleasant.

Thumb exit wound, healing well.


So, after having removed the bulky bandage, I went back to work on fiddle #2, carving that “Red Violin” scroll into just a plain, “five-string fiddle scroll.” It looked as though the majority of the “gore” would simply be carved away: so, no “Red Violin!” (By the way, that little gouge, third from the right, is the one that perforated my thumb.)

scroll for 5-string bluegrass fiddle handmade in Oregon by Chet Bishop, luthier.
Beginning work on the second scroll, again.


scroll nearing completion for a 5-string bluegrass fiddle handmade in Oregon by Chet Bishop. Luthier.
Second scroll nearing completion.

I will post more again, soon. Sorry for the hiatus: it wasn’t intentional. 🙂


Thanks for looking.


More Progress on the first two of Six Fiddles. (8/9/21)

Build Progress for a couple of new “5-string Bluegrass fiddles:”

Last time:

Last post showed the garlands complete, and ready to be leveled:

garlands for two five string fiddles made in Oregon by Chet Bishop
Garlands with linings installed, ready for leveling.


I began the leveling process using a file and a finger plane, until the fragile rib-edges were level with the linings.

garland for five string fiddle made in Oregon by Chet Bishop
Beginning the levelling process.


Then I completed the leveling by rubbing the garland on a sanding board.

five string fiddle in the making
Flattening the garland on a sanding board.


Tracing the plates

Once the garlands were flat, I could use them to trace the outline of the plates: I used a small washer as a tracing tool– as a spacer, to give me the overhang distance I want (3mm.)

tracing the front plate for a 5-string bluegrass fiddle handmade in Oregon by Chet Bishop
Tracing the outline of the plate, using a washer and a ballpoint pen.


five string fiddle in the making.
The washer has to be the right size to put the ink line 3mm away from the rib.


overhang for five string fiddle handmade by Chet Bishop In Oregon
Pretty close, I’d say!


Correcting the corners and cutting out the plates

I really don’t want the “round corners ” produced by the washer, but they do give me a starting point from which to correct the corners before cutting out the plates:

corner shapes for 5-string fiddles handmade in Oregon by Chet Bishop
Corrected corner shapes laid out, on Englemann Spruce, using a straightedge and a circle template.


Douglas fir front plate cut out for 5-string bluegrass fiddle handmade in Oregon by Chet Bishop
Douglas Fir Front plate cut out and ready for arching. Uncommon wood, but good!


two plates for five string fiddles handmade in Oregon by Chet Bishop
Both plates are ready for arching. I enjoy using Oregon woods when I can.


Arching the plates:

Arching the plates is a critical step, because the arching pretty much controls the tone quality. In fact, it may be the single most inportant factor in achieving good tone. I begin by scribing the edge-thickness of the plates and then I  begin removing waste wood to complete the rough arching:

Scribing the edge thickness for a 5-string fiddle handmade in Oregon by Chet Bishop
Scribing the edge thickness for the Douglas Fir front plate.


planing a front plate for a 5-string fiddle handmade in Oregon by Chet Bishop
Rough-arching the Douglas Fir plate, using planes and gouges.


I use arching templates to establish the shape of the arching, and then fair-in the parts in between the templates. (The templates for the back plate are slightly different, but all of these things matter: I have to use them correctly. And, although I can get the arching “close” without the templates, quite honestly, “close” isn’t good enough.)

arching templated for 5-string bluegrass fiddle handmade in Oregon by Chet Bishop
This top is from the previous fiddle, but I used the same templates, so here they are!

Laying out F-holes, and incising them.

After the arching shape is very close to correct, I use templates to lay out the f-hole shapes and locations, and then use a knife to incise the lines deeply, so that I can’t accidentally remove the lines through further shaping.

f-hole layout for five-string fiddles handmade in Oregon by Chet Bishop
F-holes laid out and incised on both front plates.


Then I refine the arching, using gouges, planes and scrapers, until the shape is exactly what I want.

refining the arching on a 5-string bluegrass fiddle handmade in Oregon by Chet Bishop
Refining the arching on the Englemann Spruce plate.


two plated for 5-string bluegrass fiddles handmade in Oregon by Chet Bishop
Both front plates ready to begin purfling.

Purfling:

The word “purfling” evidently comes from the old Italian “por filo” meaning edging.  It supposedly helps strengthen the edge, and it certainly helps “define” the edge, and…it looks nice. Though there are examples of old intruments without purfling, all of the better “Old Master” makers used it, and I will never make an instrument without it. (Besides…I like it.)

I position the purfling beginning at 4mm inside the outer rim of the plates, and mark the location of both sides of the slot, using a purfling marker (sometimes called a purfling cutter.) The marker won’t work for the corners, so I have to lay them out using a pencil.

Then I use a knife to incise those lines deeply enough to receive the actual purfling strips.

purfling laid out for 5-string bluegrass fiddle handmade in Oregon by Chet Bishop
Beginning purfling slot in Englemann Spruce front plate.
Douglas Fir is much more difficult to incise, because the winter growth rings are very hard.


picking waste wood from the purfling slots on a 5-string fiddle handmade in Oregon by Chet Bishop
Picking waste wood from the purfling slots.


Finally, when the slots are complete, I can begin inserting the actual purfling strips. The strips come as 32″ long three-ply veneers, and are very brittle. I have to use the bending iron to prepare them for insertion into the slots.

plate ready for purfling for a 5-string bluegrass fiddle handmade in Oregon by Chet Bishop
Purfling slot completed in Douglas Fir front plate.


inserting purfling in a 5-string bluegrass fiddle front plate, handmade in Oregon by Chet Bishop
Ready to insert purfling strips in the Englemann Spruce plate…but not without bending them first!


Purfling, inserted dry, into front plate of 5-string fiddle handmade in Oregon by Chet Bishop
Purfling, inserted dry, on the Englemann Spruce front plate. Ready for hot hide glue!


Gluing the Purfling:

After the purfling strips are correctly fitted, dry, I carefully lift them out, one by one, and slip hot hide glue into the slot beneath each strip, then quickly force the strip back into the slot, ramming it home with a special tool.

When all is complete, I allow the purfling to dry, before moving on to cutting the channel, performing the final edgework, and fairing the channels into the arching…but those are stories for another day.  🙂

Completed purfling for two 5-string bluegrass fiddles handmade in Oregon by Chet Bishop
Both plates’ purfling complete, still wet from gluing.


Thanks for looking.