
Progress Report for the 15″ Five-string viola:
When I last posted, I had completed the carving of both plates and the garland, but had not begun assembling the corpus.
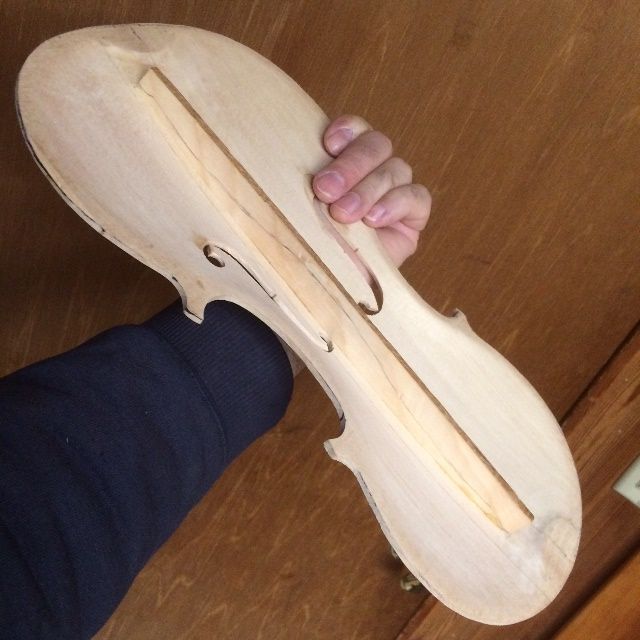
Bass-Bar
The next step was to install the bass bar. The bass bar is the only fixed, interior brace in violins, violas or cellos. Flatback basses do have some other bracing, but they are a different “branch of the family,” so to speak. All members of the violin family have a bass bar– a spruce brace, which runs “north-south” at a slight angle, nearly parallel to the centerline of the front plate of the instrument, and just inboard of the bass-side f-hole, so that it supports the bass-side foot of the bridge. In a five-string instrument, this becomes an even more critical part as the instrument has a broader range and has to have good support on the bass side, as well as the ability to sing in the higher registers.
I first carve the bass bar bottom to exactly fit the inside curve of the front plate, along the correct location, and at the correct angle, then glue and clamp it in place, using hot hide glue and special clamps, padded with cork, so as not to damage the soft spruce of the front plate.

Five-string viola corpus assembly:
Now the plates are ready to be installed. Before doing so, I used a small finger plane and half-round files to shape the edge all the way around on the inner face of each plate, hoping to avoid having to shape it after installation. (I am aware that sometimes adjustments have to be made, so I may have to do some tight-clearance work later on, in spite of this precaution. That’s OK.)
The next step was to install the back plate. This is an older-model mold, or “form,” (my first, in fact, as I mentioned in an earlier post) so it has some peculiarities, compared to my newer ones: it is a two-part mold, made to collapse, thus easing removal of the mold after installing the first plate. But in later iterations, I moved toward installing the front plate first, and installing the neck before removing the mold.
In this model, originally, I had planned to install the back plate, then remove the mold, and finally install the front plate, after which I could install the neck whenever I was ready to do so. Nowadays I personally find it easier, however, to install the neck before the back plate is in place, because I don’t have to concern myself with the back side of the heel aligning with the back plate button. (Annnd, it would have been a simple matter of planning, to still do that with this mold, if I had been thinking ahead: just label the front side of the mold as being the side without the screws (which have to be accessible) and you can install the front plate first, then remove the mold after installing the neck; no problem.) However…I wasn’t thinking ahead, and I used the mold exactly as I had originally designed it, so I have no choice, now: I am forced to install the back plate first, remove the mold and then (after shaping the blocks and linings and cleaning the interior of the corpus) install the front plate. So that is what I did. (By the way, in case you are thinking that the shape of the front and back plates are mirror-image of one another, the fact is, they virtually never are exactly mirrored, and are nearly never bilaterally symmetrical even if they were. So the front plate will not fit the back of the mold, and vice-versa.) Ah, well…hindsight, etc.
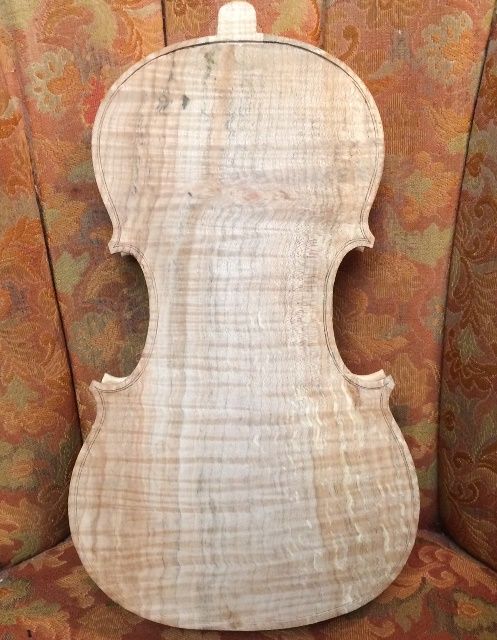
Here is the back plate, glued in place: the mold is still inside, holding everything rigid. Notice the spalting and curl in the maple back. This is a striking look, and some people love it…others do not.
After the back plate glue was dry, I removed the mold, shaped the interior blocks and linings, and cleaned up the interior of the corpus, so that it was ready for the front plate to be installed. I also installed the signed and numbered label, marking this as one of my handmade instruments.
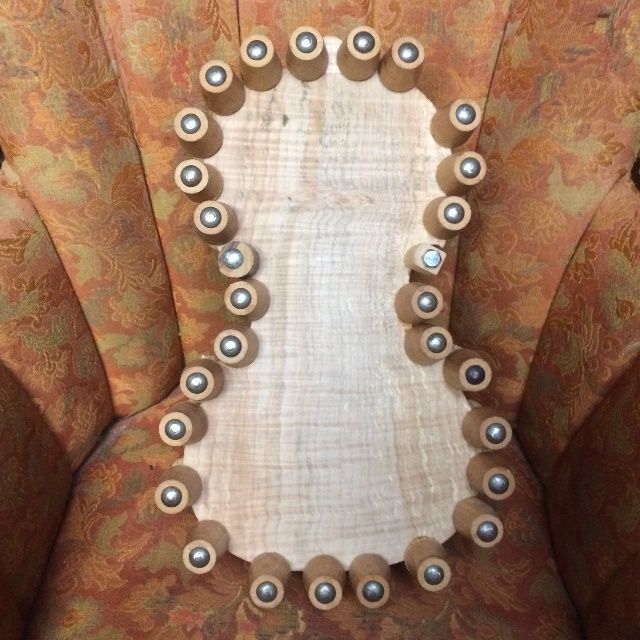
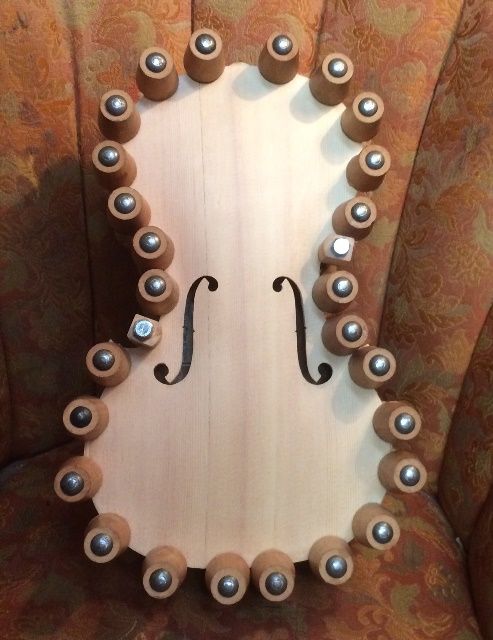
Then I clamped the front plate in place, dry, just as I had done with the back plate, removed a few clamps at a time, and used a thin palette-knife to insert hot hide glue between the plate and the blocks and linings. As soon as I had the glue in place, I quickly replaced whatever clamps I had removed, before the glue could gel.
Once the plate was glued and clamped all the way around, I went back around with a blade, and picked out any gelled, cooled hide-glue that had squeezed out of the joint, so as not to have to deal with it later, in the form of hard, jagged chunks of dry hide glue. Then I tightened the clamps a little, and brushed hot water all around the joint, so as to reconstitute any glue that had gelled too soon, and allow the joint to close even more tightly.
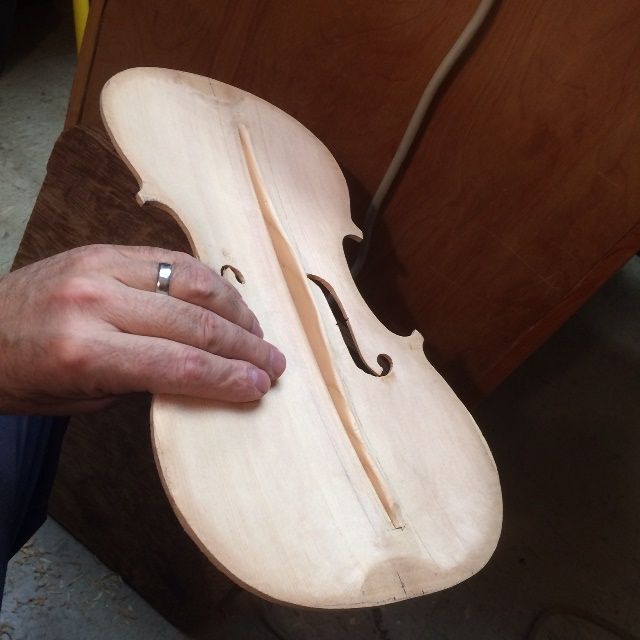
Here is the corpus, all glued together. The next step will be to adjust the overhangs as needed, and lay out the corners so as to begin purfling.
Beginning Purfling the Five-string viola:
I used to do my purfling before closing the corpus, but I frequently discovered that the rib garland had moved a little, during the removal of the mold…or in some other way, things had changed, and then my plates no longer fit the garland, and I could not change the plates, because I had already installed the purfling…which locks in the shape of the plates, irrevocably (sigh…). So, I began waiting until after the corpus is closed and whatever needed overhang adjustments have been made, and then begin purfling.
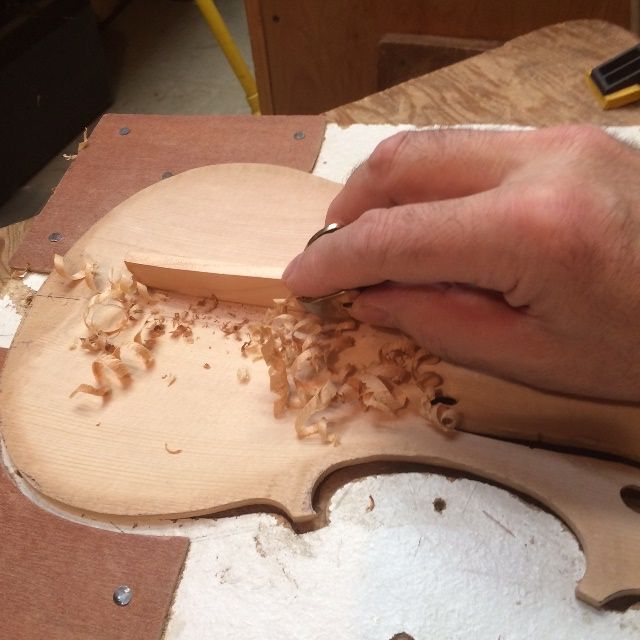
I use a two-blade purfling marker to sketch in the location of the twin, parallel cuts needed to make the purfling slot, but I have to sketch the corners in by hand, with a pencil, because the purfling marker will not correctly lay out the corners.
I went ahead and began both the front and the back plates, but got too tired to complete them last night. (Today was spent getting last-minute things done, as we have heard they are mandating that all Oregonians stay at home, due to the coronavirus scare. Went and bought flour and other groceries, filled the car with gas, and got the snow-tires removed, as that deadline is soon upon us as well.)
One thing about the maple and spruce plates: the spruce is very soft, compared to the maple, but it is tricky to carve, because of that. The winter grains (reeds, they are called) are so much harder than the summer reeds, that the blade has a definite tendency to swerve and follow the grain instead of the line you are trying to follow. The maple is much tougher to cut, because it is hard all over, but it is much easier to follow your lines without digressing.
So, here is what the little viola looks like, today:
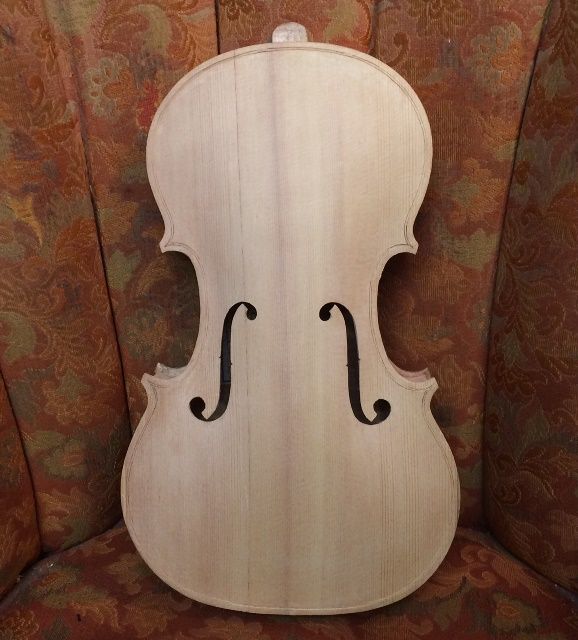
In both cases, the plan is to cut the two incisions, pick out the wood between them, and then dry-fit the purfling strips, before removing them one-by-one and gluing them in place with hot hide glue.
That will be the next post, unless I take a break and carve the scroll. Either way, it is starting to look like a fiddle!
🙂
Thanks for looking.
