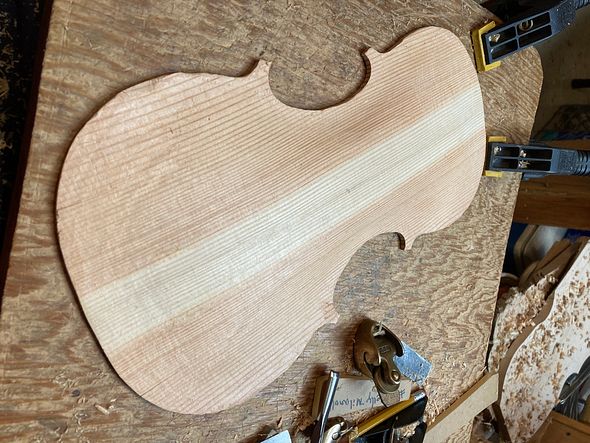
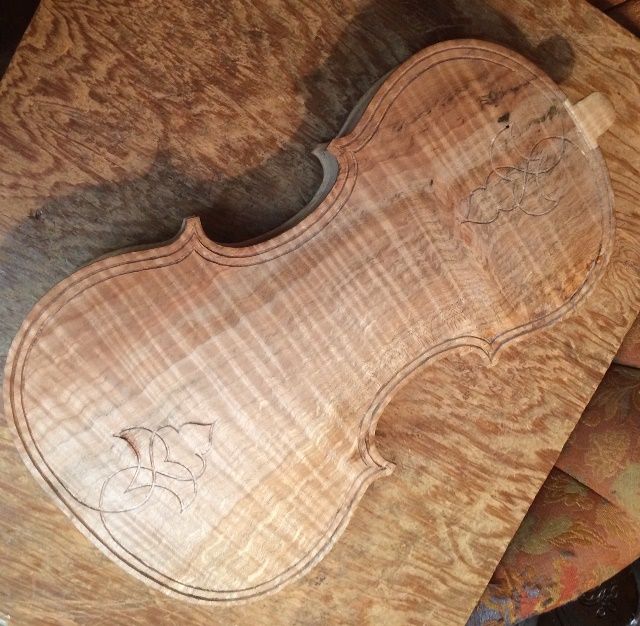
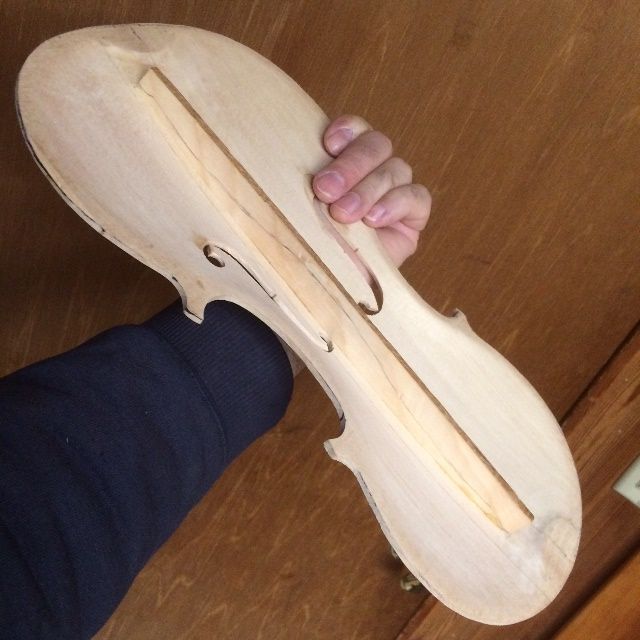
So, moving forward, the next thing was to complete the front plate,
Douglas Fir Front plate outer arching nearly completed
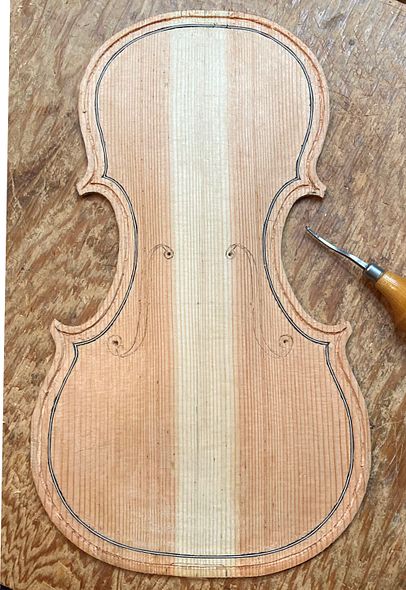
Once the arching was nearing correct values, I carved most of the interior and then began laying out f-holes and purfling lines. The Douglas Fir is extremely difficult to work with, because the winter reeds are incredibly hard, while the summer reeds are nearly as soft as spruce… so the knife tends to follow the winter reed, instead of your intended path, making it very difficult to cut a smooth line.
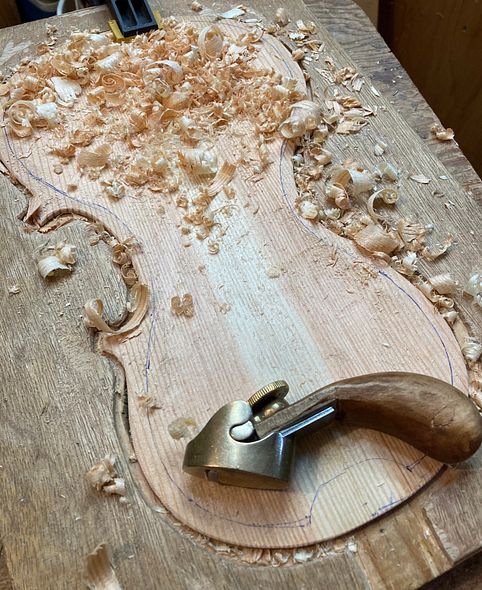
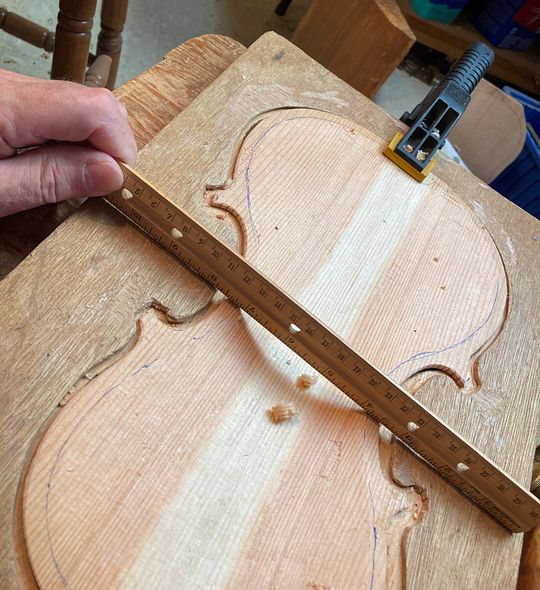
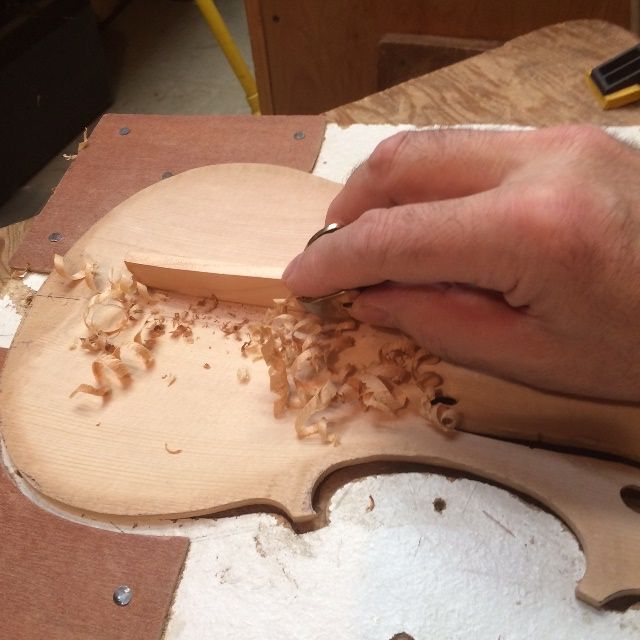
Beginning to carve the interior of the Front Plate. This part was not too hard.Checking the depth of the hollow. There is still work to do on the outside, so I have to be careful.
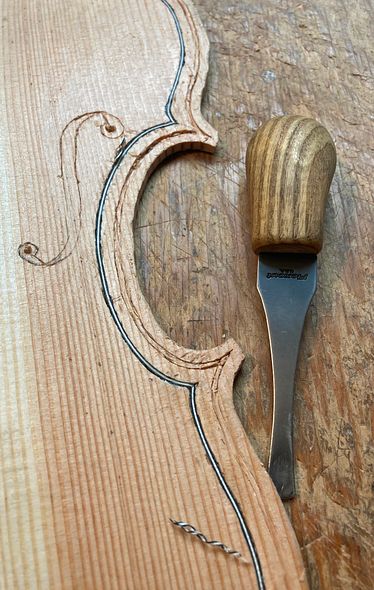
Purfling Procedure
Rough beginning for purfling and sound-holes.
It was discouraging seeing how rough my beginning looked. But, as things progressed, I was able to clean up my lines a little and they began to look more acceptable:
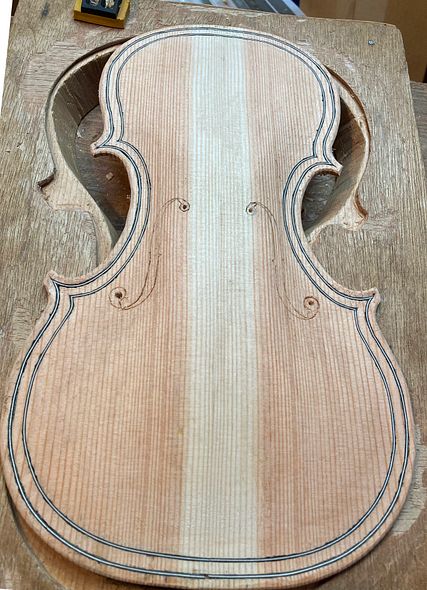
Inner line of purfling completed.
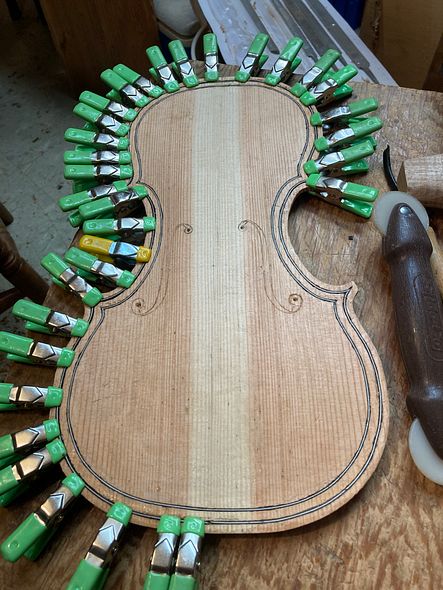
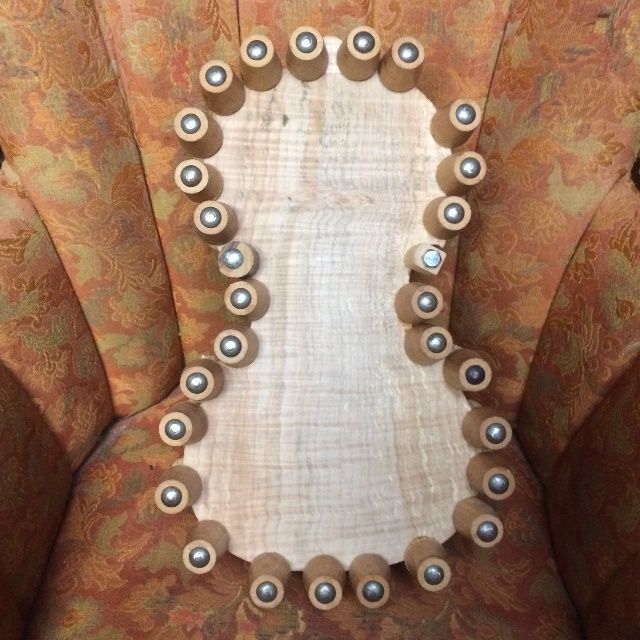
And then, The outer purfling. I was being careful to not inlay the purfling too deeply, for fear of causing problems, but that meant the purfling did not want to stay in the slots by itself, while the glue set. So I had to clamp it down until the hot hide glue gelled and set up.
Clamping purfling while glue sets.
But it looked pretty good after I planed it all flush with the Douglas Fir.
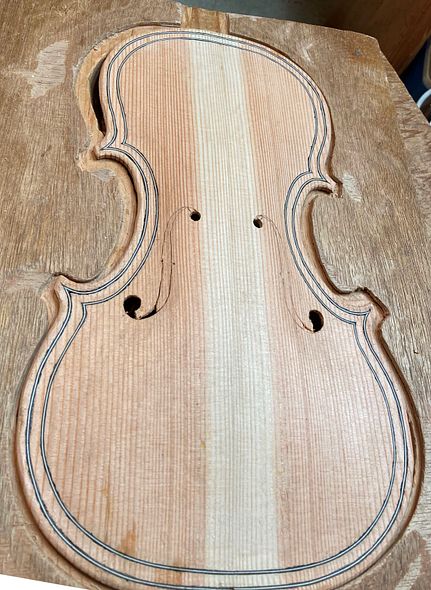
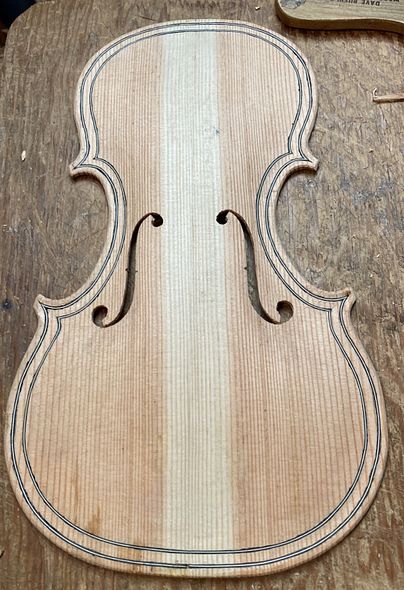
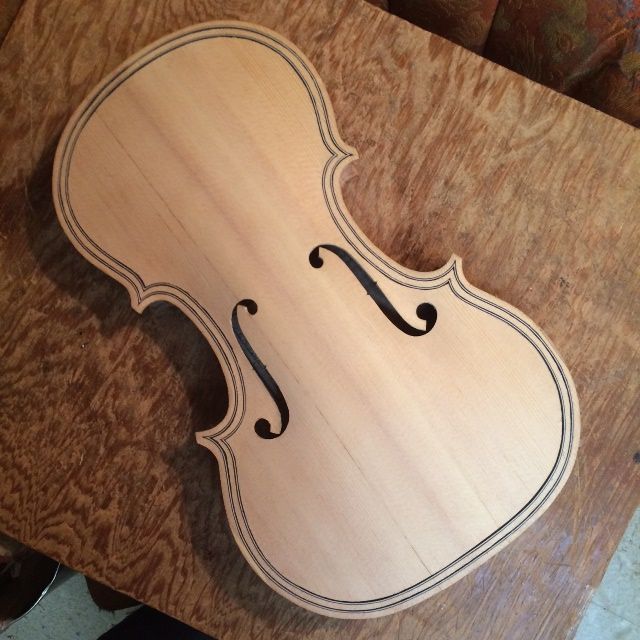
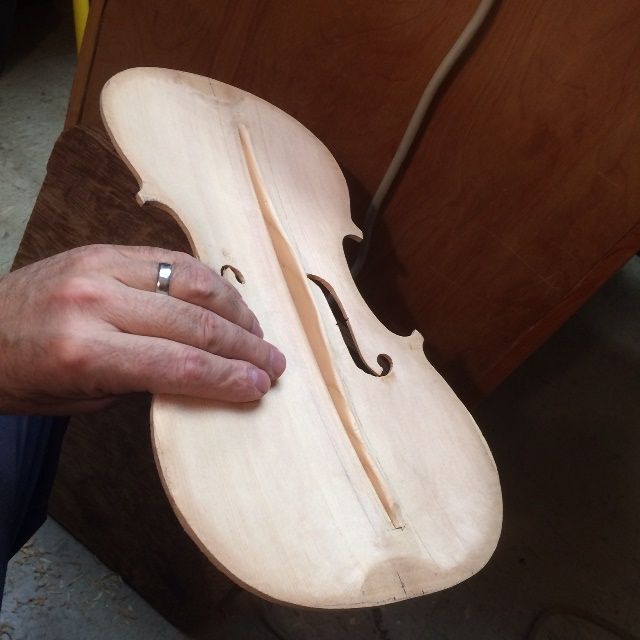
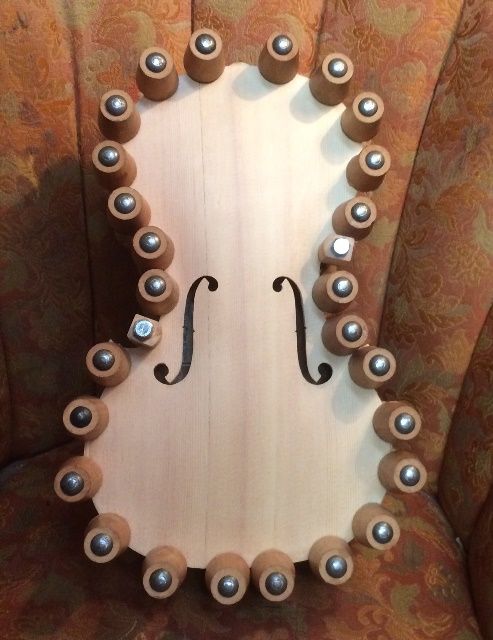
Outer line of purfling copmpleted. Notice the pilot holes for the f-holes have been drilled.
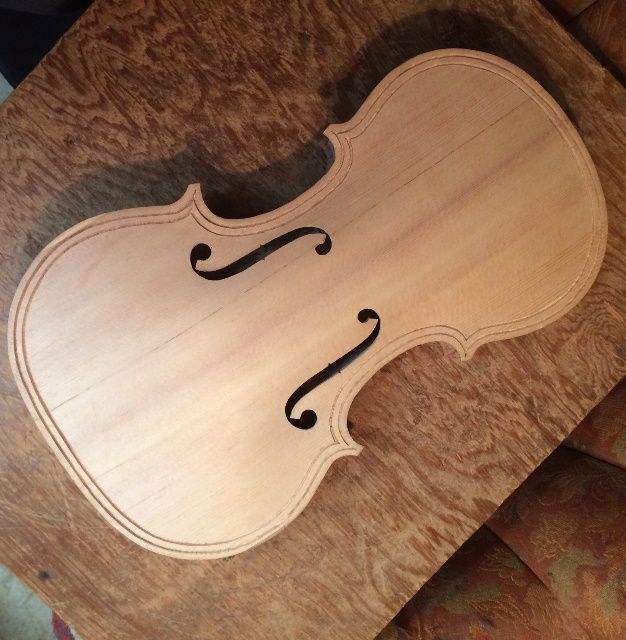
When the interior and exterior were correct, I could finish cutting out the f-holes.
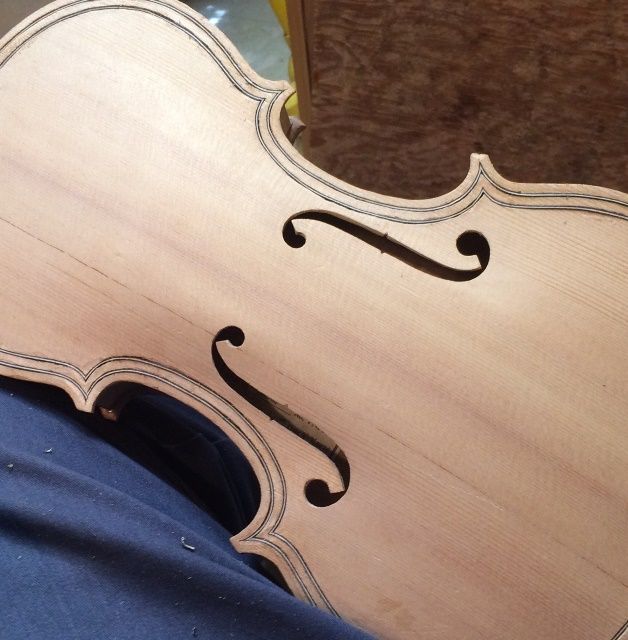
Beginning to cut out f-holes.F-holes completed but rough. as the next few days went by, I kept returning to the f-holes with small files and perfecting the shapes.
This is not really a new project, but rather one that was “tabled,” for lack of better term…work was suspended until a better set of circumstances emerged.
I built the mold for this bass in 2015, began bending ribs in 2017, with a woefully inadequate bending iron, and a great deal of frustration.
A commission came in, so I set aside the bass, to work on the cello, and never came back to it…so it sat in the corner of my workshop silently sneering at me every time I looked that way.
But! Since I was laid off from my job, where I had worked for 33-1/3 years, in January, I am catching up with some projects and able to face others with new eyes.
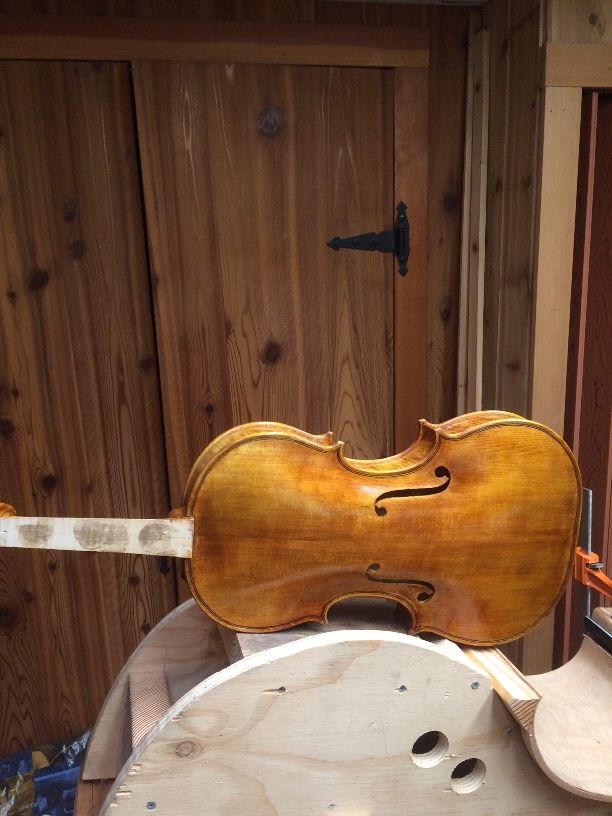
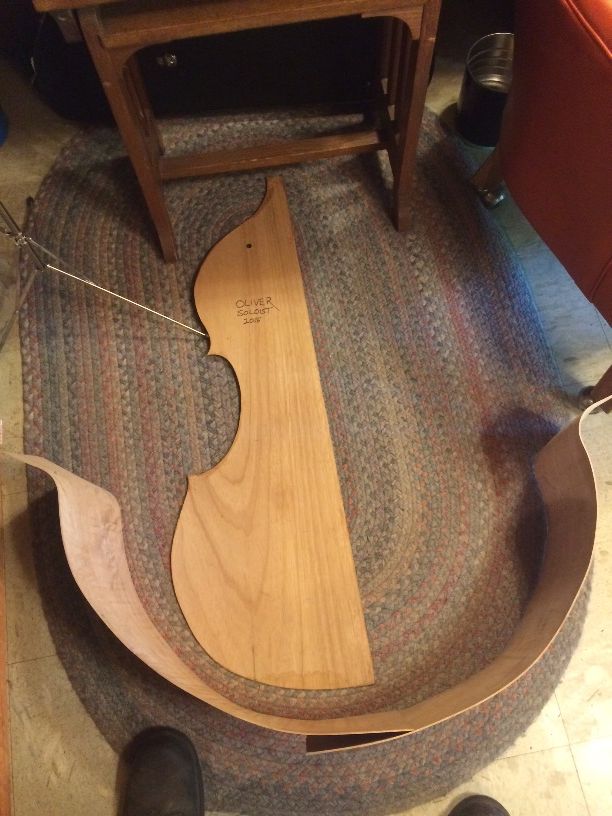
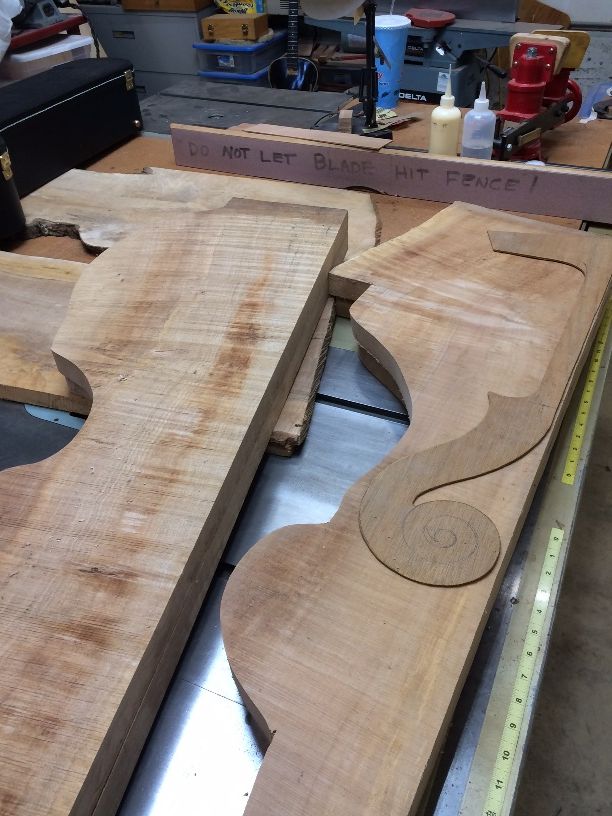
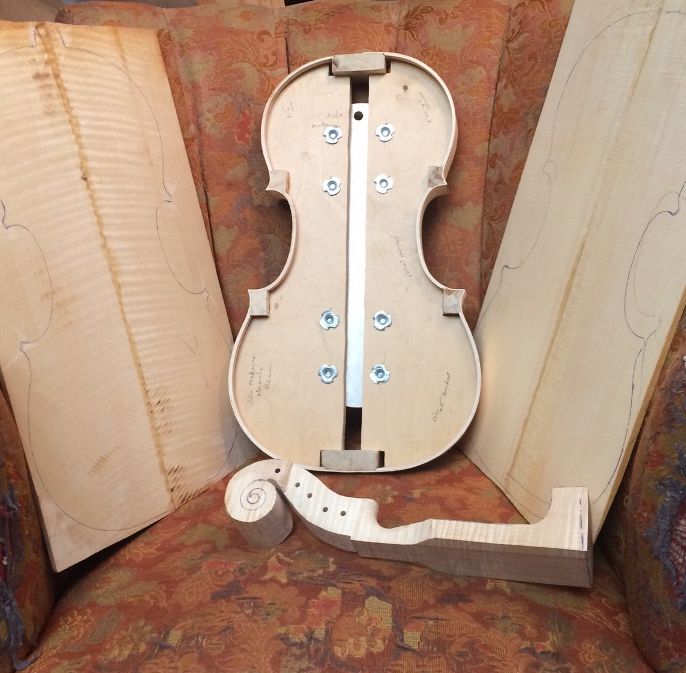
Here is the five-string 16-1/2″ viola I am just finishing up, balanced on top of the bass mold:
Large viola with double bass mold.
Once I had the bass mold up on my bench again, it was easier to confront the problems, rather than avoiding them.
The New Bending Iron
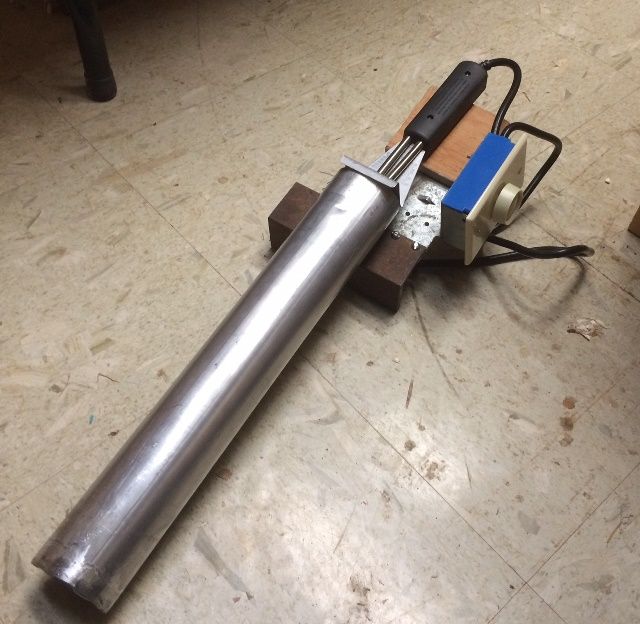
The first thing I needed was a new bending iron. A fellow I met online, John Koehler, a fellow bass maker, told me how he built his bending iron. So I followed his lead, and built a new bending iron:
My homemade bending iron.
It is a section of exhaust tube, welded to a piece of angle iron, so that I could clamp the apparatus in a vise. Heat is supplied by a 550-W electric charcoal briquette lighter, controlled by a 600-W dimmer switch. It took a little trial and error to get it set up correctly and to calibrate it, but it turned out to work very well! (What a relief!)
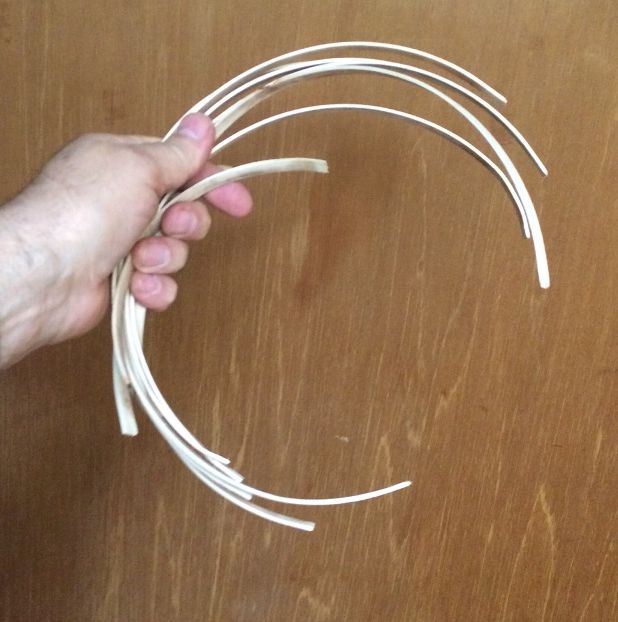
Bending the ribs
Bending the remaining two Big Leaf Maple ribs was nearly effortless, and took about ten minutes, tops, not counting waiting for the tube to heat up.
Lower ribs bent to approximate the mold shape.
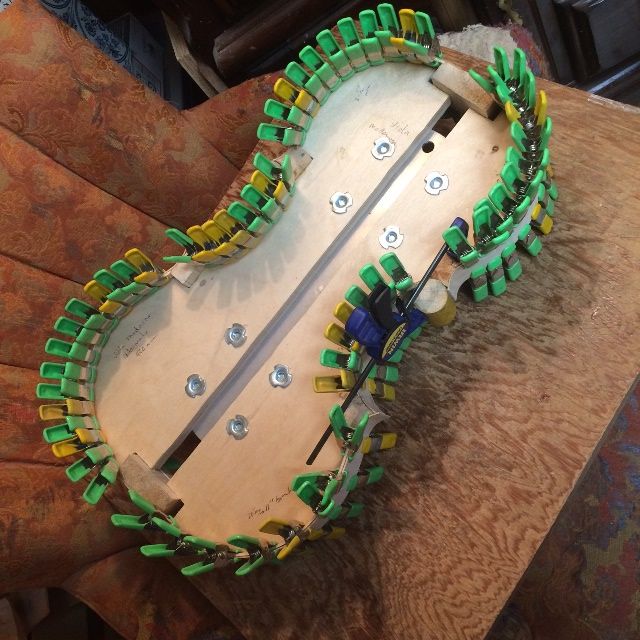
Installing the ribs and linings
Then I glued the ribs into the fir blocks on the mold with hot hide glue, one at a time, and affixed the willow linings in the same manner before moving to the next rib.
Treble rib with linings installed.
Once one rib was completely secure, trimmed and lined, I rolled the bass mold over and repeated the operation on the other side.
Bass side rib with linings installed.
I planed the linings flush with the ribs and blocks, and the garland was essentially complete. It will require careful leveling before fitting the plates, but not much other than that.
Completed rib garland.
In the coming weeks, I will complete the center-joins of front and back plates, then complete the carving of the plates and the neck and scroll, and start putting this bass together!
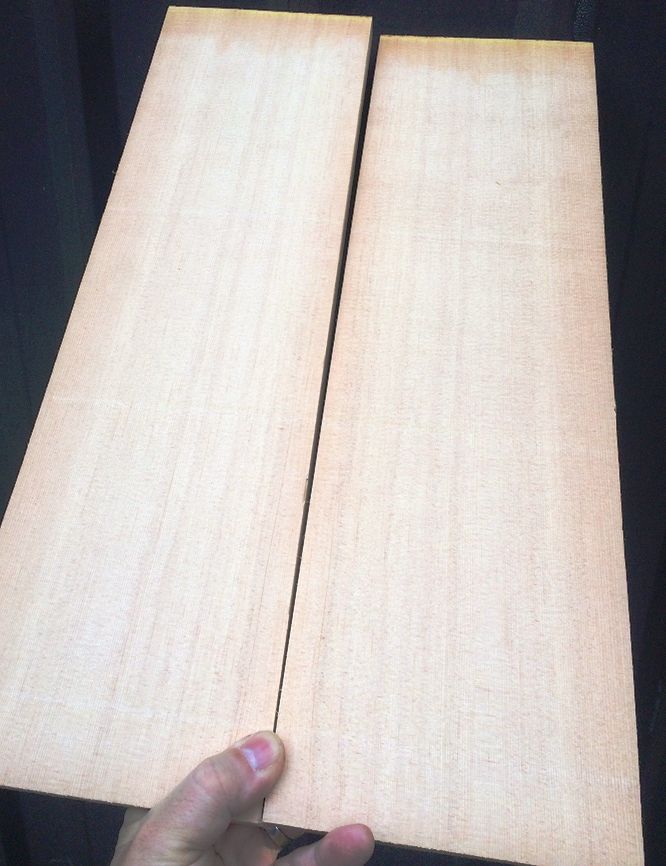
Just as a teaser, this is the wood for the front, back and neck:
Sitka Spruce billet for the front plate.
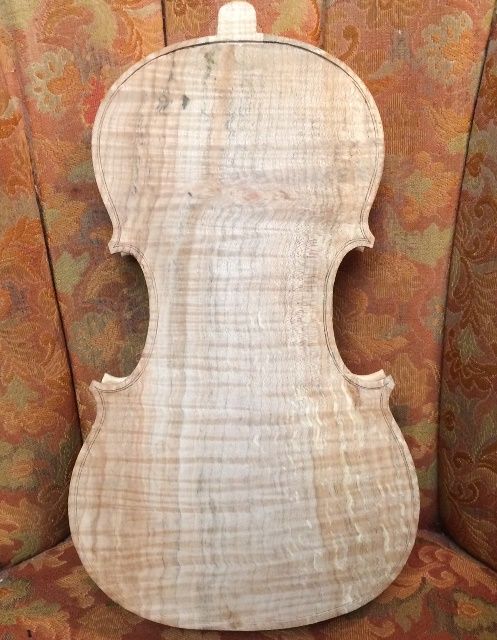
Big Leaf Maple for the back plate and neck.
(Notice that there is a fair chunk left over where the neck pattern does not use all the wood it is on: watch that space! )
This is the first large 5-string viola I have made. So far, most players have been quite firm about wanting the same scale length as a violin…and an instrument that will fit in their fiddle case. So that is what I have mostly made. But lately, there seems to have been an increased interest in five-string violas. Some were interested specifically in a smaller viola (hence the current, nearly completed 5-string 15″ Viola,) but more recently, there were two players who were really interested in a large 5-string viola. A 16-1/2″ Viola with a high E string.
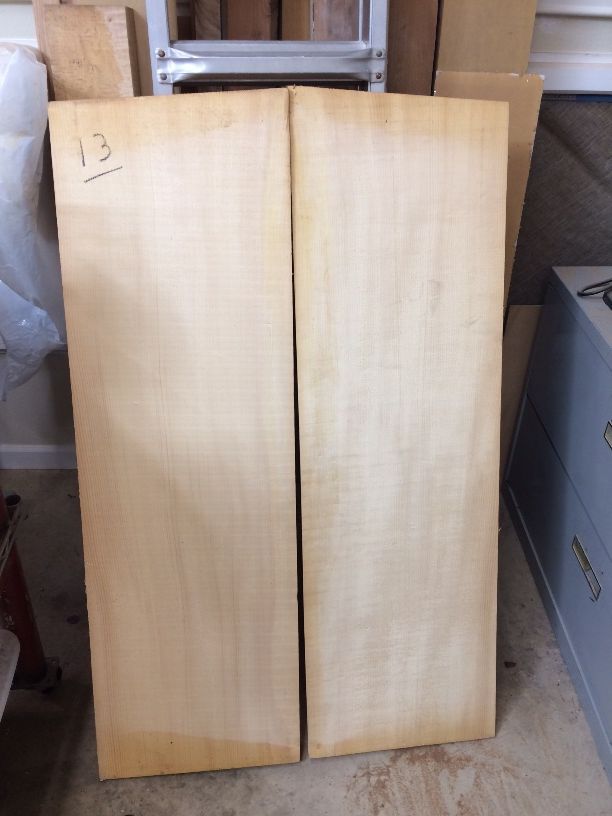
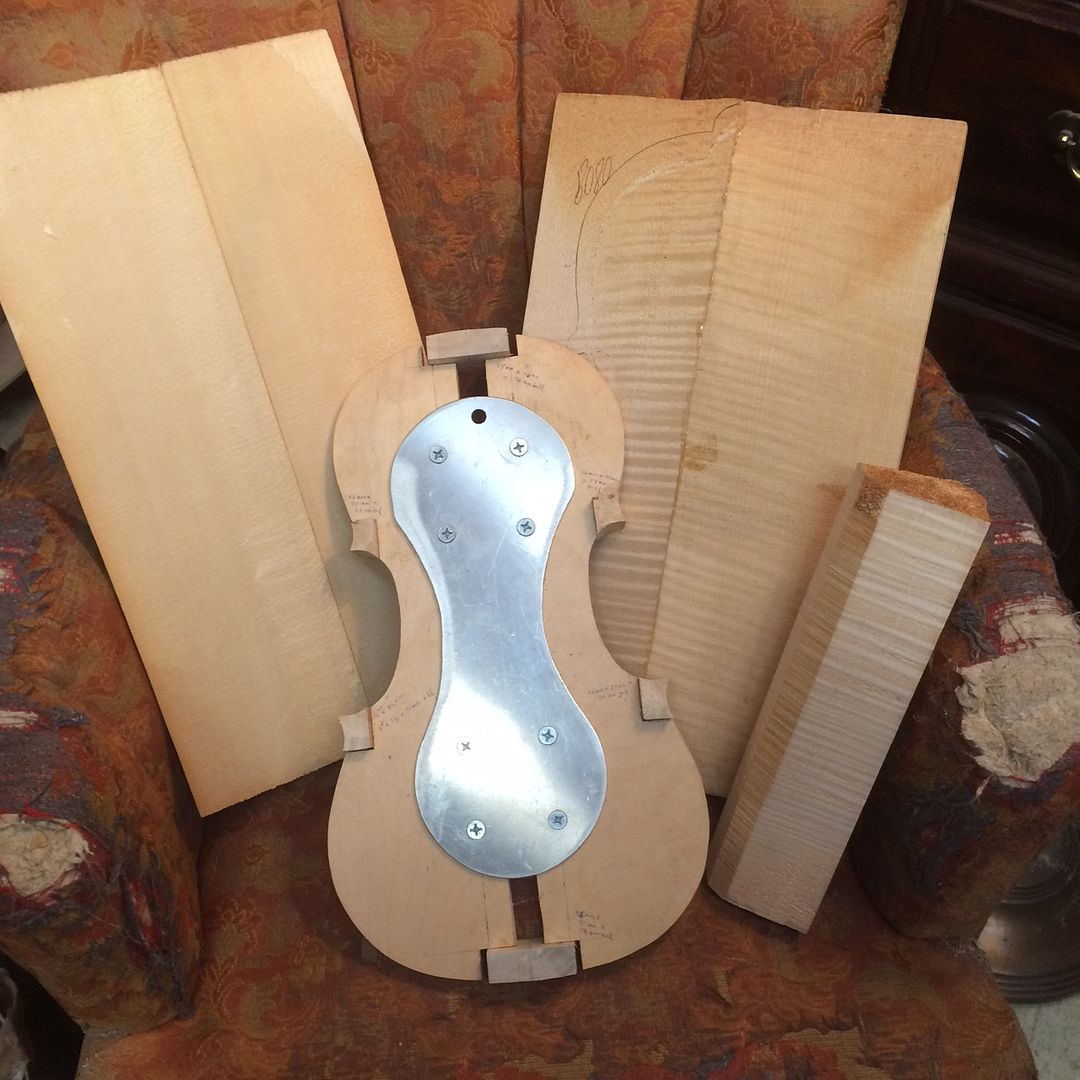
So… here we go! I already had European Maple and Spruce billets set aside from earlier “shopping trips,” and everything else that I needed to build a big viola. All I had to do was to finish the instruments already on the bench! They are now out of the way, except for completing the varnish and final set-up of the 15″ 5-string viola… so I am good to go. Here are most of the materials, with the plates already bookmatched.
Materials for new 5-string Viola.
Making, Bending and Installing Ribs
The blocks were already in the mold, and shaped. It was time to start working on ribs. I thinned the ribs to the proper thickness, using a fixture I made for my oscillating spindle sander (one of my few power-tools.) Then I bent each of them to the proper shape, using a hot bending iron.
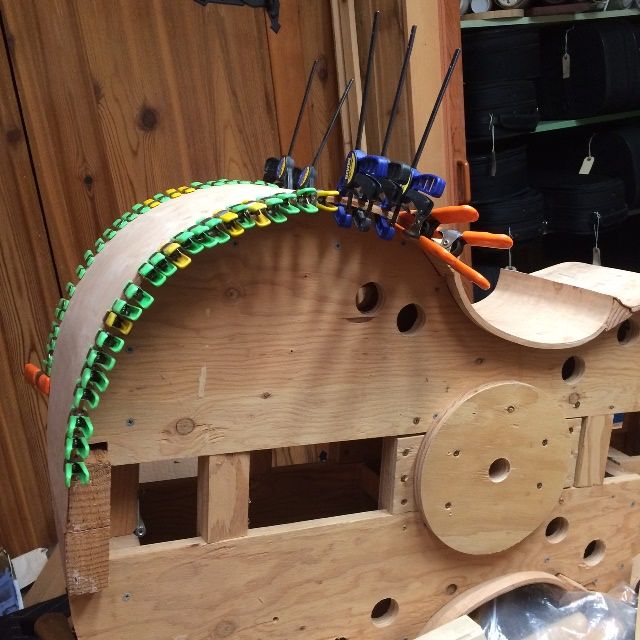
When I had all six ribs shaped, I installed the two center-bout (often called “C-bout”) ribs, and secured them with hot hide glue and clamps. You can see that clamping to a curved surface is not easy. I held the mold in a small vise, then secured each joint using hot hide glue, cylindrical wooden cauls, and f-style clamps.
Center ribs installed on 16-1/2″ five-string Viola.
When the glue holding the center-bout ribs was dry, I trimmed the ends of the ribs, using the spindle sander again, and installed the lower bout ribs. The joint at the center of the instrument, between the lower ribs, has to be pretty close to perfect, as it will always be visible and any discrepancies will be glaringly obvious under the varnish.
Center ribs trimmed to match the curvature of the blocks.
Lower ribs installed.
Finally, I installed the upper ribs. There is no joint between the upper ribs: in fact, they don’t even have to touch. The neck mortise will remove the middle section regardless of how good my joinery is, so I leave a gap there to allow for easy installation of the ribs. (Meaning, I only have to concern myself with how the ribs fit the corner blocks and that they cleanly follow the mold up to the neck block.)
Upper ribs installed.
Making, Bending and Installing Linings
While I was bending ribs, and still had the iron hot, I went ahead and cut and bent a supply of linings. The linings, like the blocks, are made of willow, because I like the way it works. The linings serve to triple the gluing surface of the edges of the ribs, where they contact the plates, as well as strengthening the rib garland.
Linings bent and ready to install.
I made a small mortise at the juncture between each rib and each block (24 of them,) and then installed the linings dry, to make certain they fit correctly. Then, one-by-one, I removed each lining, applied hot hide glue to both the rib and the lining, and quickly reinstalled the lining and secured it with a series of small spring-clamps.
Linings with hot hide glue and spring clamps.
Tracing the Shape of the Plates
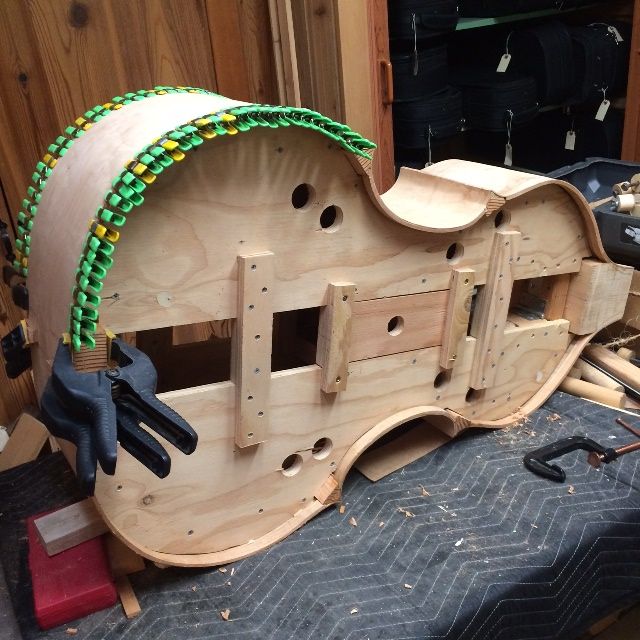
When the glue holding the linings was dry, I removed the clamps and used the spindle sander to trim the ends of the rib corners. I also leveled the front and back of the garland, so that I would be able to trace the shape of the plates. The European Maple back plate is on the left, and the European Spruce front plate is on the right. I used a small washer as a spacer, to establish the edge overhang, and a ball-point pen to trace the shapes. You can see that I have begun work on the neck, as well, which is also made of European Maple.
Completed garland, traced plate-shapes, and partially carved neck.
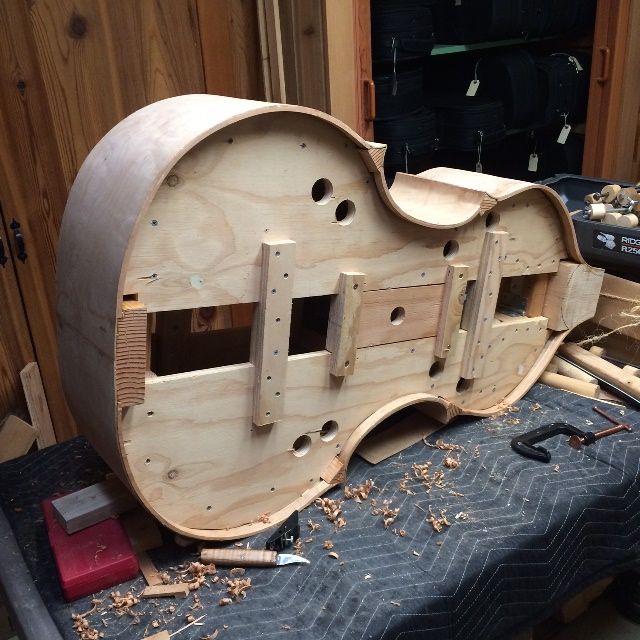
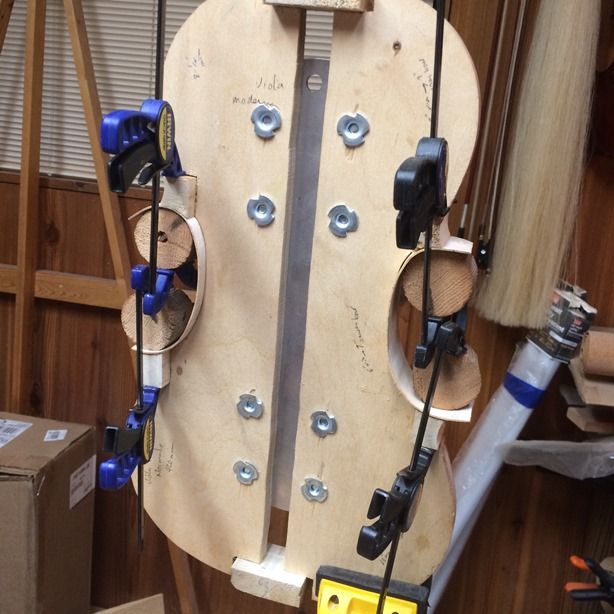
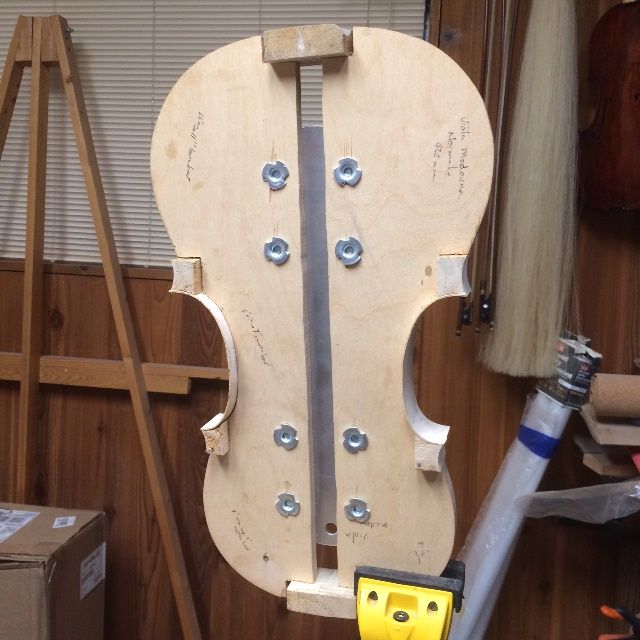
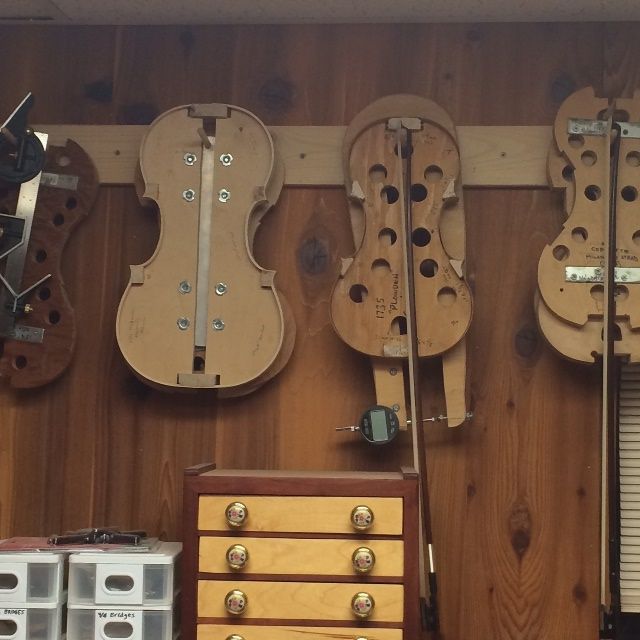
The garland is temporarily out of the focus of the work, now, so I hung it up, out of harm’s way, until I am ready to begin installing plates.
Rib garland completed and set aside for safe-keeping.
The next step is to actually cut out the plates and begin shaping them into the voice of a Viola. I will let that wait until a later post.
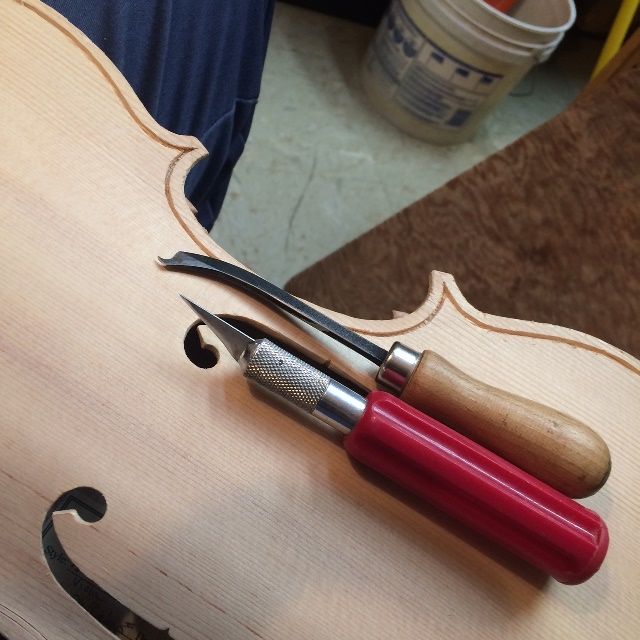
When I last posted, I had only begun cutting the outer purfling slots (I planned double purfling plus a weave for the back), so the next thing was to complete those slots.
Tools I used to cut the slots.
Front Purfling slots complete.
Back purfling slots complete, including the upper and lower weaves.
Inserting and Gluing the purfling
The next step is to insert and glue the purfling in place, using hot hide glue. First I bend the purfling, using a hot iron, then I cut the ends to match the joints where the various sections meet. I insert the pieces dry, to ascertain that they fit, then, one-by-one, I pick the pieces back out and insert hot hide glue into the underlying slot, and quickly re-insert the purfling, forcing it to the bottom of the slot.
Front purfling dry installed in the Sitka Spruce top plate.
Close-up of glued purfling, partially trimmed.
Front Purfling glued…no edgework done.
Back Purfling glued in place.
Upper Weave, in heavily spalted Big Leaf Maple back.
Lower Weave. No edgework, yet.
So that was the completion of the purfling. Edgework was next, shaping the channel through which both purfling slots will travel, as well as the outer edge and how the channel fairs into the front and back plate curvature. I used gouges, small planes and files, to get the edges to the required shape of a finished instrument.
While all this was happening, I was also getting going on the scroll, pegbox, and neck, but I will save that story for another post.
When I last posted, I had completed the carving of both plates and the garland, but had not begun assembling the corpus.
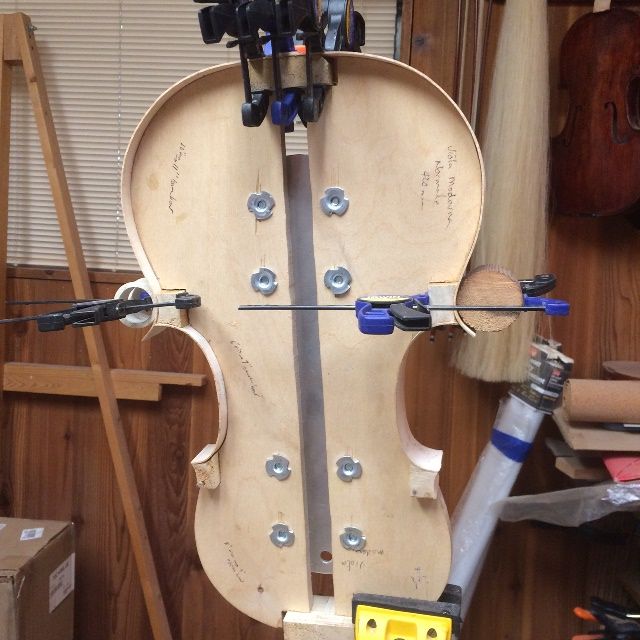
Bass-Bar
The next step was to install the bass bar. The bass bar is the only fixed, interior brace in violins, violas or cellos. Flatback basses do have some other bracing, but they are a different “branch of the family,” so to speak. All members of the violin family have a bass bar– a spruce brace, which runs “north-south” at a slight angle, nearly parallel to the centerline of the front plate of the instrument, and just inboard of the bass-side f-hole, so that it supports the bass-side foot of the bridge. In a five-string instrument, this becomes an even more critical part as the instrument has a broader range and has to have good support on the bass side, as well as the ability to sing in the higher registers.
I first carve the bass bar bottom to exactly fit the inside curve of the front plate, along the correct location, and at the correct angle, then glue and clamp it in place, using hot hide glue and special clamps, padded with cork, so as not to damage the soft spruce of the front plate.
Fitted, glued and clamped bass-bar. Still needs to be shaped.
Proposed general profile of the bass-bar.
Shaping the bass-bar, using a finger-plane.
Completed shape of finished bass-bar.
Five-string viola corpus assembly:
Now the plates are ready to be installed. Before doing so, I used a small finger plane and half-round files to shape the edge all the way around on the inner face of each plate, hoping to avoid having to shape it after installation. (I am aware that sometimes adjustments have to be made, so I may have to do some tight-clearance work later on, in spite of this precaution. That’s OK.)
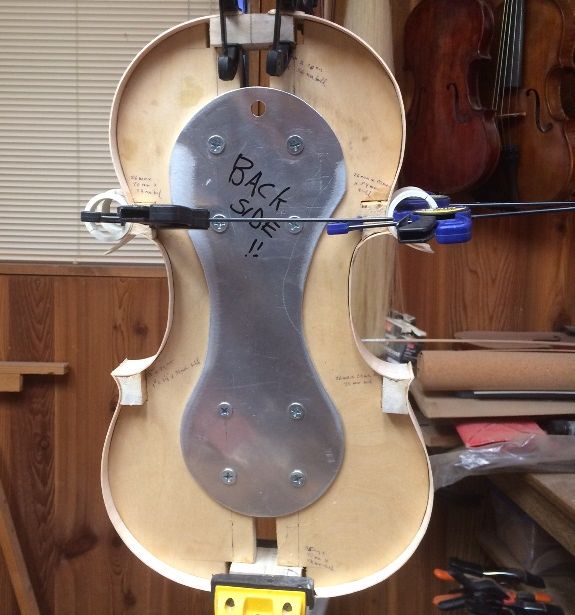
The next step was to install the back plate. This is an older-model mold, or “form,” (my first, in fact, as I mentioned in an earlier post) so it has some peculiarities, compared to my newer ones: it is a two-part mold, made to collapse, thus easing removal of the mold after installing the first plate. But in later iterations, I moved toward installing the front plate first, and installing the neck before removing the mold.
In this model, originally, I had planned to install the back plate, then remove the mold, and finally install the front plate, after which I could install the neck whenever I was ready to do so. Nowadays I personally find it easier, however, to install the neck before the back plate is in place, because I don’t have to concern myself with the back side of the heel aligning with the back plate button. (Annnd, it would have been a simple matter of planning, to still do that with this mold, if I had been thinking ahead: just label the front side of the mold as being the side without the screws (which have to be accessible) and you can install the front plate first, then remove the mold after installing the neck; no problem.) However…I wasn’t thinking ahead, and I used the mold exactly as I had originally designed it, so I have no choice, now: I am forced to install the back plate first, remove the mold and then (after shaping the blocks and linings and cleaning the interior of the corpus) install the front plate. So that is what I did. (By the way, in case you are thinking that the shape of the front and back plates are mirror-image of one another, the fact is, they virtually never are exactly mirrored, and are nearly never bilaterally symmetrical even if they were. So the front plate will not fit the back of the mold, and vice-versa.) Ah, well…hindsight, etc.
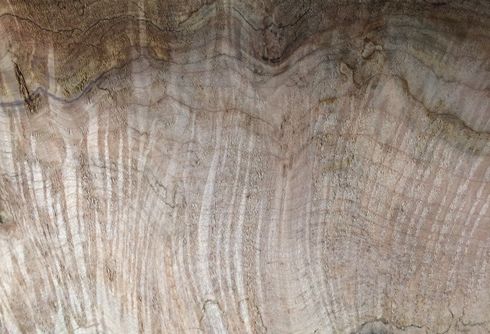
Here is the back plate, glued in place: the mold is still inside, holding everything rigid. Notice the spalting and curl in the maple back. This is a striking look, and some people love it…others do not.
Back plate glued and clamped in place on the garland.
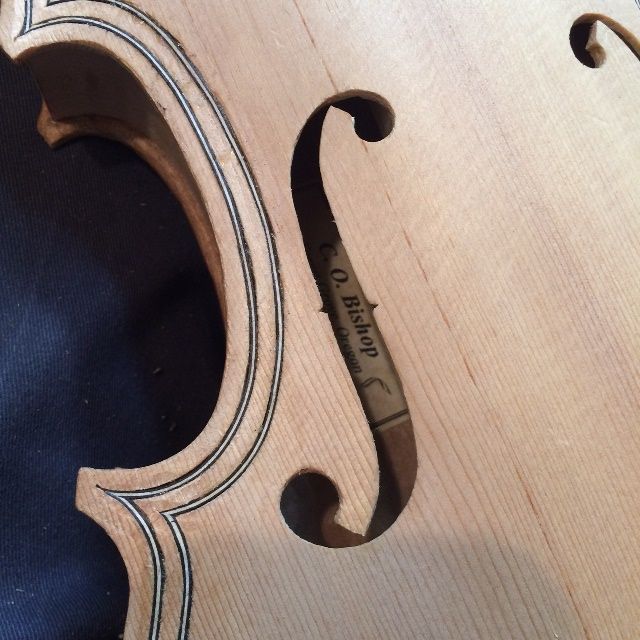
After the back plate glue was dry, I removed the mold, shaped the interior blocks and linings, and cleaned up the interior of the corpus, so that it was ready for the front plate to be installed. I also installed the signed and numbered label, marking this as one of my handmade instruments.
Then I clamped the front plate in place, dry, just as I had done with the back plate, removed a few clamps at a time, and used a thin palette-knife to insert hot hide glue between the plate and the blocks and linings. As soon as I had the glue in place, I quickly replaced whatever clamps I had removed, before the glue could gel.
Once the plate was glued and clamped all the way around, I went back around with a blade, and picked out any gelled, cooled hide-glue that had squeezed out of the joint, so as not to have to deal with it later, in the form of hard, jagged chunks of dry hide glue. Then I tightened the clamps a little, and brushed hot water all around the joint, so as to reconstitute any glue that had gelled too soon, and allow the joint to close even more tightly.
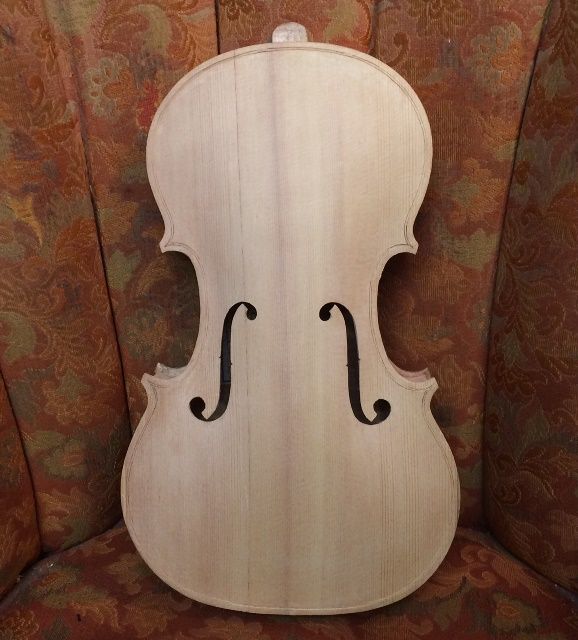
Here is the corpus, all glued together. The next step will be to adjust the overhangs as needed, and lay out the corners so as to begin purfling.
Front plate showing: Corpus assembled, glued and clamped.
Beginning Purfling the Five-string viola:
I used to do my purfling before closing the corpus, but I frequently discovered that the rib garland had moved a little, during the removal of the mold…or in some other way, things had changed, and then my plates no longer fit the garland, and I could not change the plates, because I had already installed the purfling…which locks in the shape of the plates, irrevocably (sigh…). So, I began waiting until after the corpus is closed and whatever needed overhang adjustments have been made, and then begin purfling.
I use a two-blade purfling marker to sketch in the location of the twin, parallel cuts needed to make the purfling slot, but I have to sketch the corners in by hand, with a pencil, because the purfling marker will not correctly lay out the corners.
I went ahead and began both the front and the back plates, but got too tired to complete them last night. (Today was spent getting last-minute things done, as we have heard they are mandating that all Oregonians stay at home, due to the coronavirus scare. Went and bought flour and other groceries, filled the car with gas, and got the snow-tires removed, as that deadline is soon upon us as well.)
One thing about the maple and spruce plates: the spruce is very soft, compared to the maple, but it is tricky to carve, because of that. The winter grains (reeds, they are called) are so much harder than the summer reeds, that the blade has a definite tendency to swerve and follow the grain instead of the line you are trying to follow. The maple is much tougher to cut, because it is hard all over, but it is much easier to follow your lines without digressing.
So, here is what the little viola looks like, today:
Back purfling-slot begun: the dark strip at the top is the only area where I already picked out the slot.
Front purfling-slot begun: none of the slot has been picked out.
In both cases, the plan is to cut the two incisions, pick out the wood between them, and then dry-fit the purfling strips, before removing them one-by-one and gluing them in place with hot hide glue.
That will be the next post, unless I take a break and carve the scroll. Either way, it is starting to look like a fiddle!
(Further progress on building a custom-made 5-string bluegrass fiddle.)
Neck Set
The neck was ready to set into the neck-block, late last night, but I had reached my physical limit. So, today, I prepared both the neck and the garland, by ascertaining that all angles and dimensions were correct, and then laying out the shape of the neck mortise on the neck block of the garland. This is a critical step in violin-making and always raises my blood pressure a little, as I know that, if I make a mistake, it will require serious rework to get back to a usable status.
However, this time, the job went pretty smoothly, and I was able to set the neck in a fairly short time. One thing I do a little differently than I was originally taught, is that I set the neck before installing the maple back plate. This allows me to achieve a good fit with the rib garland and neck block, and not have to worry about the fit against the back plate button. Then I saw off the stub of the neck heel, and plane and file it flush with the rib garland. After I remove the mold and add the back linings, I will level the back of the garland, and be ready to trace the back plate shape.
Neck Set Complete: still have to remove the neck-heel stub.
Here is the completed corpus (Sitka Spruce top plate and Big Leaf maple ribs still on the mold) with the wild-grain Big-leaf maple back plate billet.
Completed Corpus with Back Plate Billet.
Mold Removal
So, the next step was to remove the plywood mold. This is another stressful step because it involves literally using a hammer and chisel, to break the glue-bond between the blocks and the mold, so as to release the garland from the mold. I used to have a difficult time doing this, because occasionally a drop of hide glue had seeped between the rib and the mold, and anchored the fragile rib material to the very solid mold. The likelihood of breaking a rib at that point became nearly 100%. Eventually, however, I learned to liberally coat all the non-gluing surfaces of the mold with candle-wax (paraffin,) by vigorously rubbing a candle over all the areas I felt were likely to get a drop of glue on them.
The result today was that, when I removed the mold, it went smoothly, and I could see a place where glue had definitely intruded but it had dried with zero adhesion to the waxy mold. (What a relief!)
Mold removed, ready for back linings.
Installing the Back Linings
The linings are important for two reasons: they strengthen the fragile rib-edges, and they triple the gluing surfaces between the rib-garland and the front and back plates.
So, I cut the mortices in both sides of each of the six blocks to receive the lining strips, and then inserted the linings dry, to get a perfect fit.
Afterward, I removed each lining, one by one, coated them liberally with hot hide-glue, and re-inserted them, clamping immediately with small spring-clamps.
Back linings installed, glued and clamped.
Shaping Blocks and Linings
If you look closely you can also see, in the above photos, that I had trimmed the blocks on the front side, before removing the mold. After the glue is dry on the back linings, I will also trim the back side of the blocks, to achieve a smooth, curved surface on the interior of all the blocks. At that same time, I will taper the linings so that they are very thin on the edge toward the middle of each rib, but still 2 mm thick at the edge where they will contact the back and front plates.
After that, it will be time to level the back surface of the entire corpus (garland and neck-heel) so as to fit tightly against the back plate billet. Then I can trace the final shape of the back plate, cut it to shape, and get going on completing the back plate.
For now, I am satisfied to allow the glue to dry, and take the rest of the evening off.
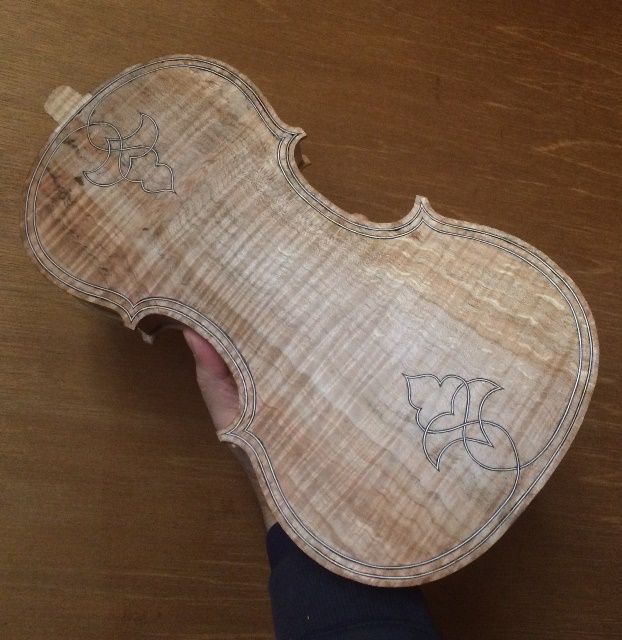
A few weeks ago I announced that a new fiddle would be beginning. Now I have a few photos to show:
The top plate is Sitka Spruce, from Bruce Harvie. The customer wanted “Oregon wood,” and the Big Leaf Maple is definitely from in my neighborhood, here in Oregon (I helped harvest it;) but the Sitka is just a species that grows here…I don’t know where it was harvested.
Wild-grain Maple for back and ribs!
Fine-grained Sitka Spruce for the top plate.
Preview of the grain in the neck billet.
Beginning the work of building a 5-string fiddle:
I book-matched the spruce, to form the basis for the front plate: a solid plate with a tight glue-line down the center.
I used the mold (or form, as many people prefer to call it) that matched the fiddle the customer liked best. Then I added willow blocks to become the corners and end-blocks, and I traced the intended shape of the blocks from the mold template onto the back-side of the blocks, where they are flush with the mold.
Blocks and mold with template.
Preliminary block-shaping complete.
Added the ribs, of the spalted maple the customer liked, and glued them to the willow blocks. Afterward, I added linings, also of willow, and let them into the blocks and glued them to the ribs and the blocks.
Spalted Maple ribs and willow linings.
Rib garland nearly complete.
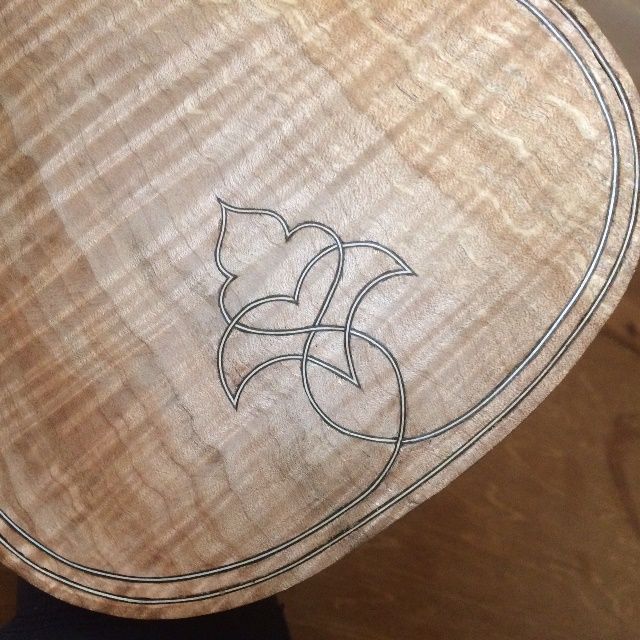
Then I traced the shape of the garland onto the top plate material, using a small washer as a spacer, and a ball-point pen as a scribe. I completed the corners using a straightedge and a series of circle templates. Finally, I marked the edge at exactly 4 mm thick, and carved the arching, using gouges and planes and scrapers.
Sitka top-plate arching complete.
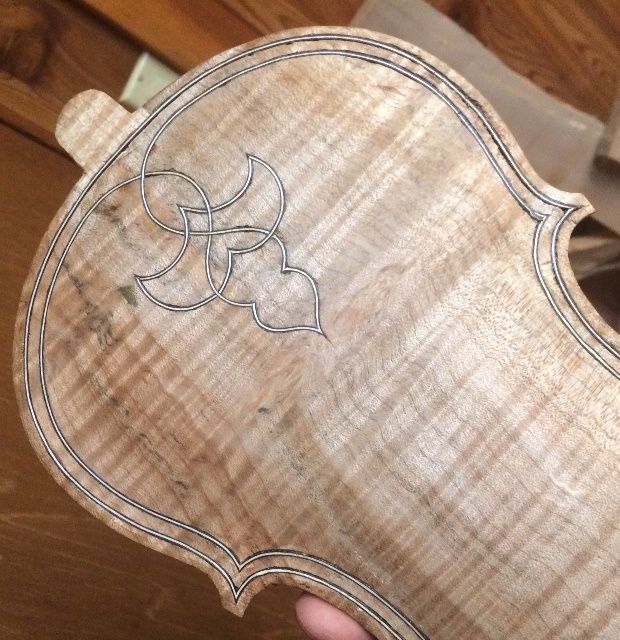
Then I marked the layout of the double purfling and the f-holes, and began incising them into the Sitka Spruce.
F-holes and purfling traced and cutting begun.
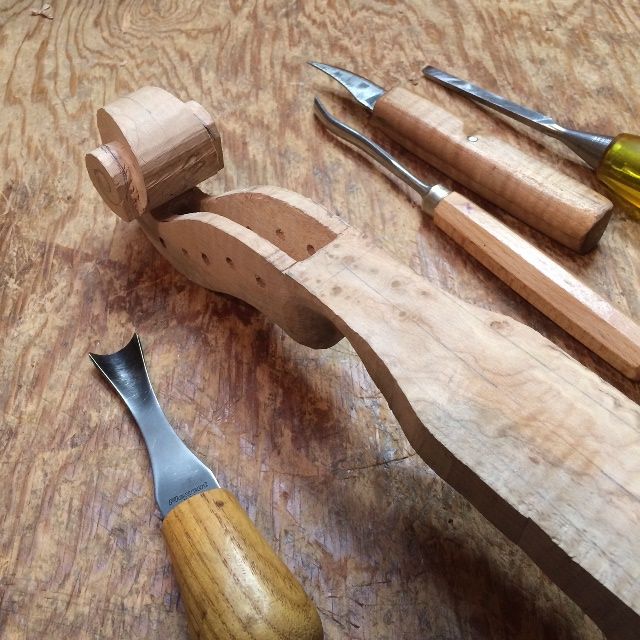
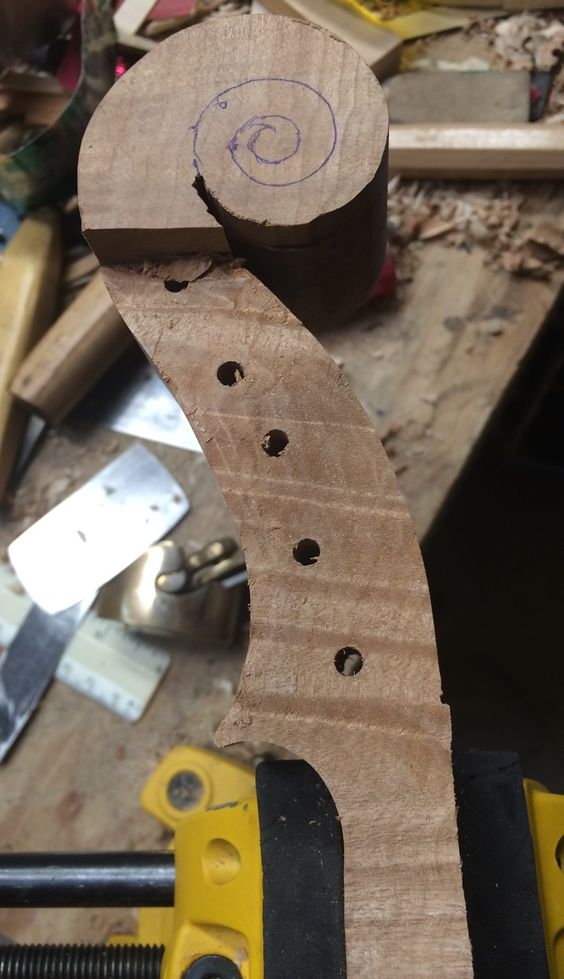
Sometime in the midst of all the above work, I laid out and began carving the scroll and pegbox. That wild grain is very tricky to carve, as it changes direction constantly.
Rough-carved scroll and pegbox.
I went ahead and completed the purfling and the f-holes, so that I could prepare the plate to be glued to the garland.
Completed top plate and neck work with garland.
I also added the bass-bar, chalk-fitting it to perfection, and gluing it in place, with hot hide glue. The bass-bar will be carved, planed and scraped to the proper shape after the glue dries.
Bass-bar glued and clamped.
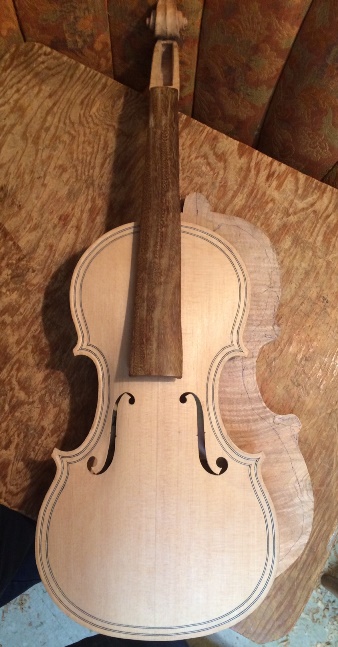
Top plate glued and clamped to the garland, fingerboard glued to the neck.
The fingerboard is Ipé, as requested by the customer. It is an extremely dense hardwood, but not threatened as Ebony is beginning to be. It finishes to a dark brown and looks good, as well as wearing well. It is extremely difficult to work, though, so it may take time to become popular with makers. The saddle and the nut will also be Ipé, but the pegs will be ebony, simply because I have never mastered the lathe-turning of tuning pegs.
Working on the fingerboard.
And that is pretty much where things stand, for now. I will try to post pictures as they become available.