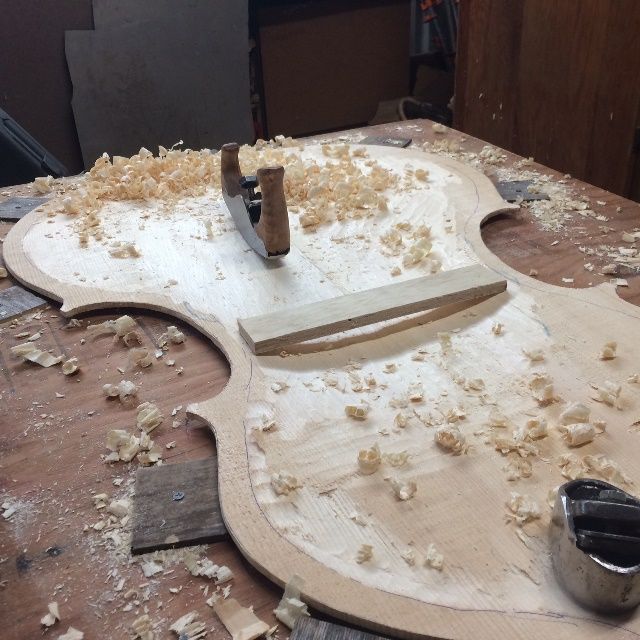
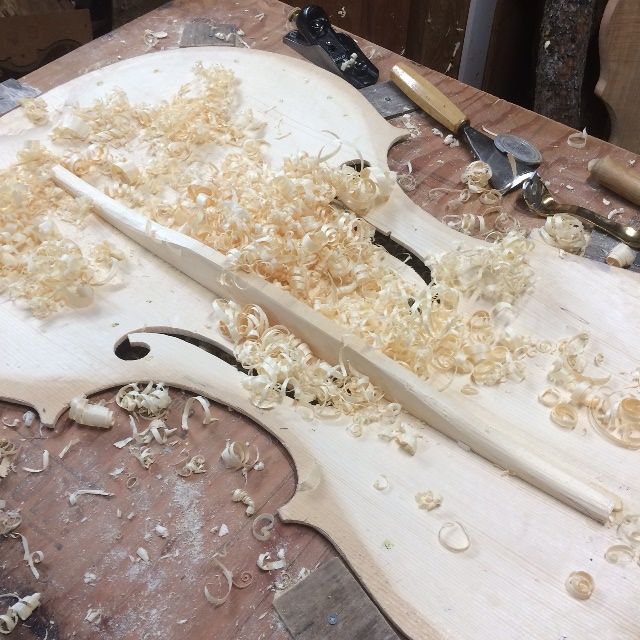
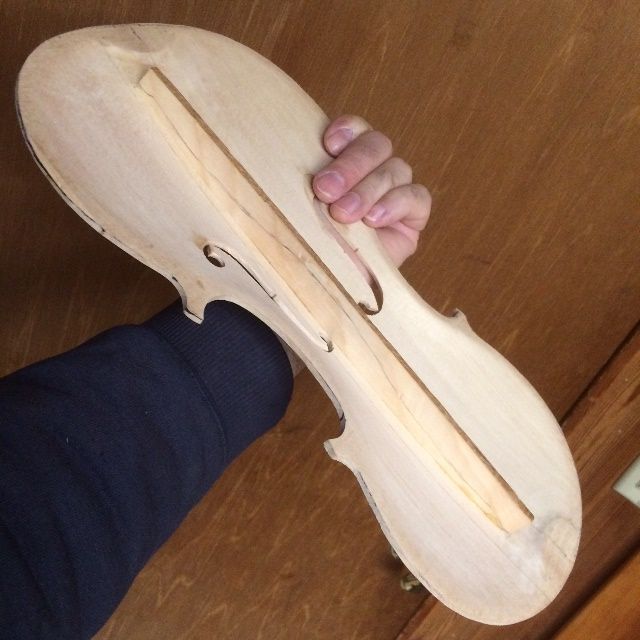
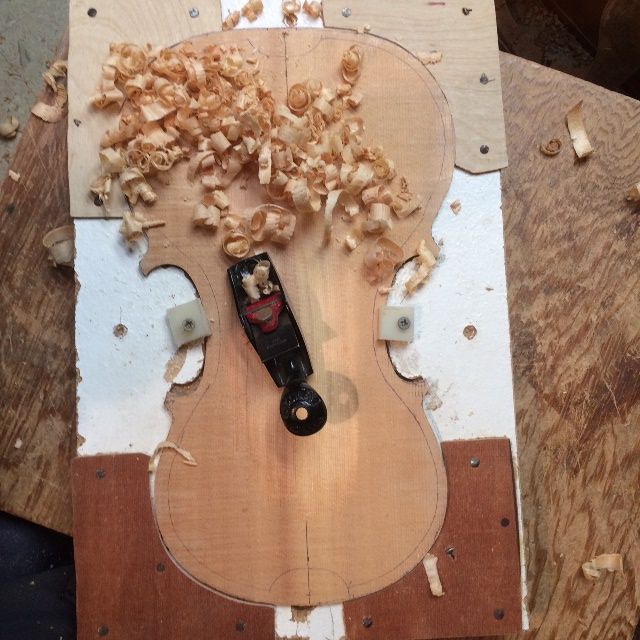
As I said in the post regarding tools, I built the little curved-sole scrub-plane with the specific intent of using it to carve out the inside of the Sitka Spruce front plate for this Five-string Double Bass.
Rough-carving the interior, using the scrub plane.
Carving Dots
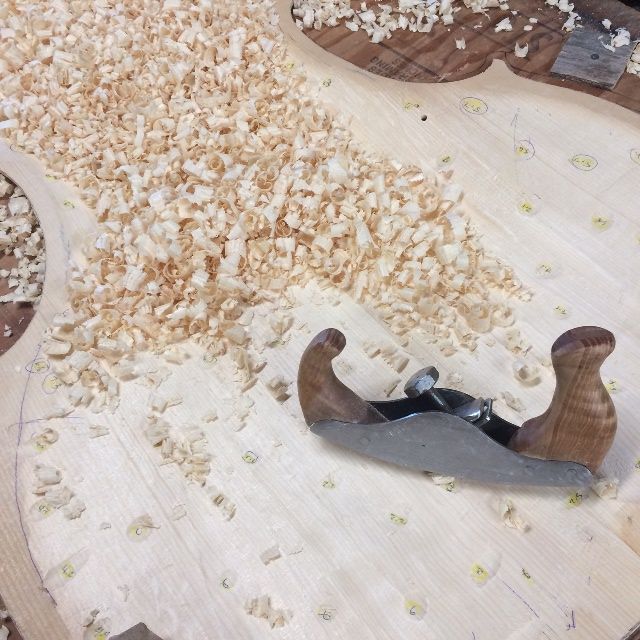
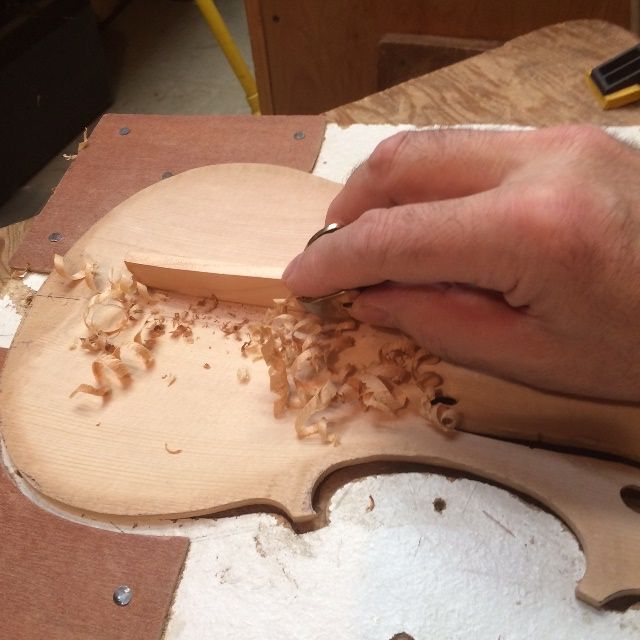
As the depth approached the correct value, I began switching over to the palm plane, there in the foreground. But as it turned out, I actually had a long way to go before I was anywhere near too thin.
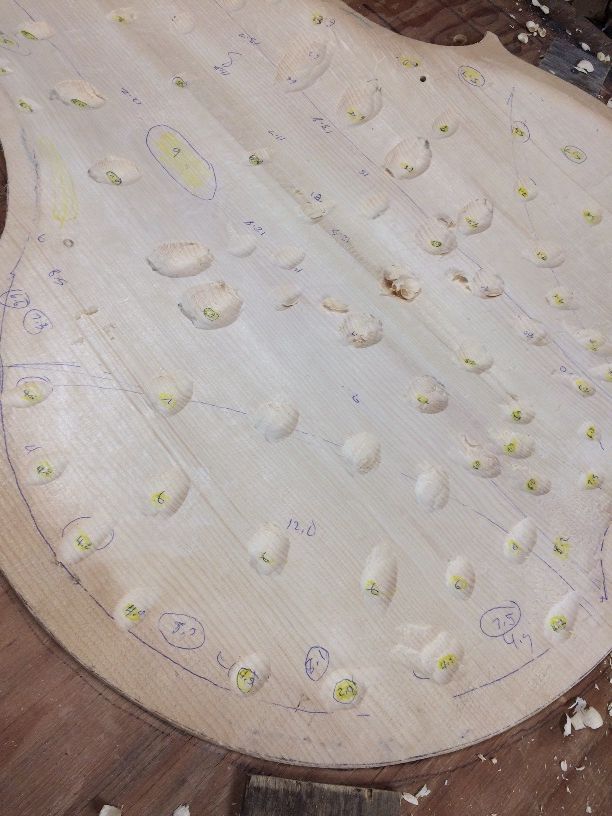
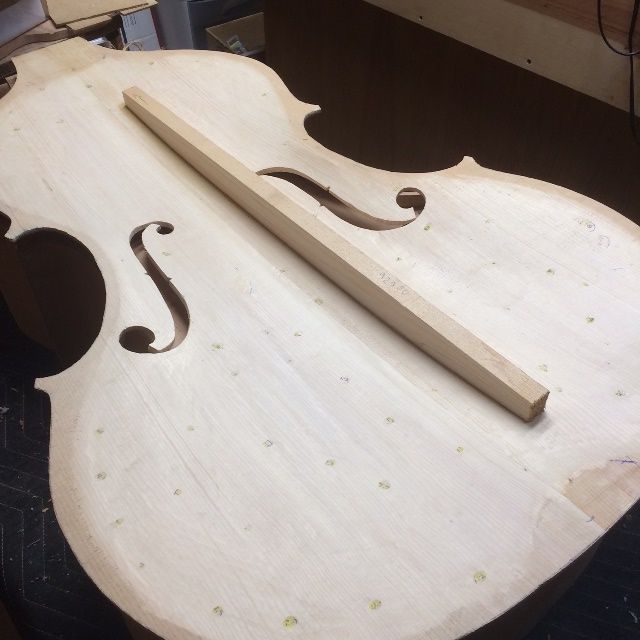
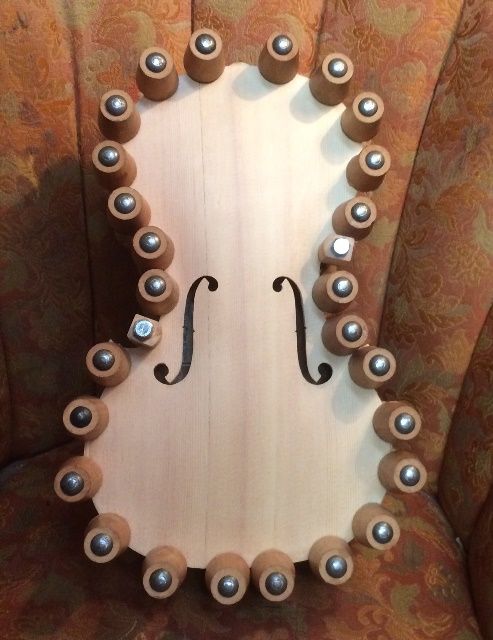
I used the bass caliper to register thicknesses all over the plate, and then began carving “dots” at each location, to the desired thickness.
Carving “dots” of correct thicknesses all over the plate.
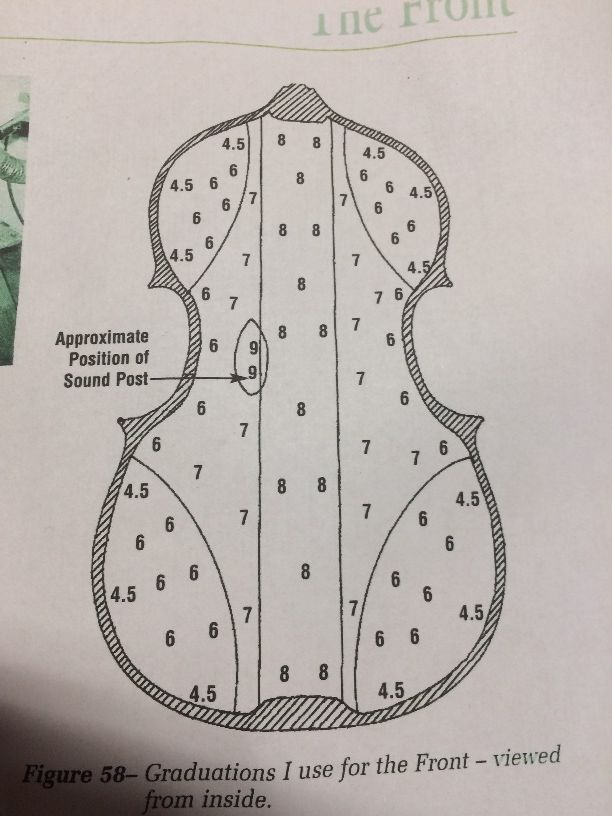
As I found (or created) spots that were at the correct thickness, I wrote in the thickness, and highlighted them in yellow, to warn myself against going any deeper. Eventually, I had mapped out the entire plate at least approximately according to this diagram from Peter Chandler’s book “So you want to build a Double Bass”:
Graduation map from Peter Chandler.
He had derived these measurements from a fine old master bass by Domenico Busan, which conveniently happened to be disassembled for repairs and restoration. He said that he had subsequently used these values on all his basses, and it always worked well. (Sounds good to me!)
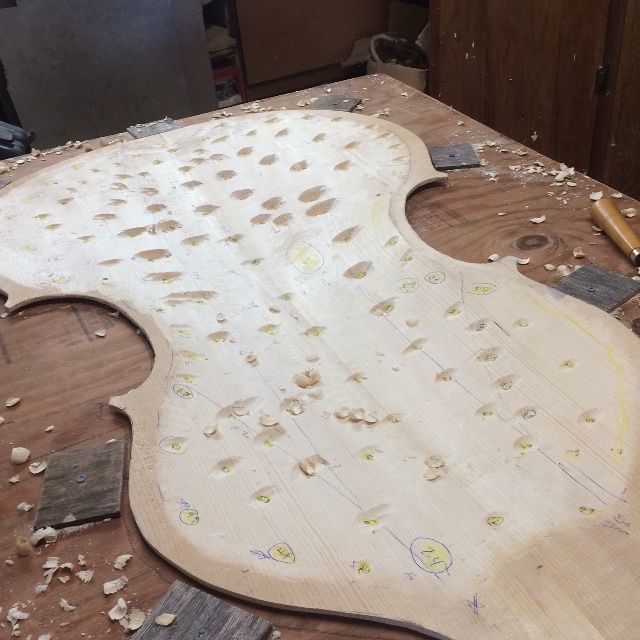
I kept carving until I had “dots” all over the plate.
Thicknessing Dots completed.
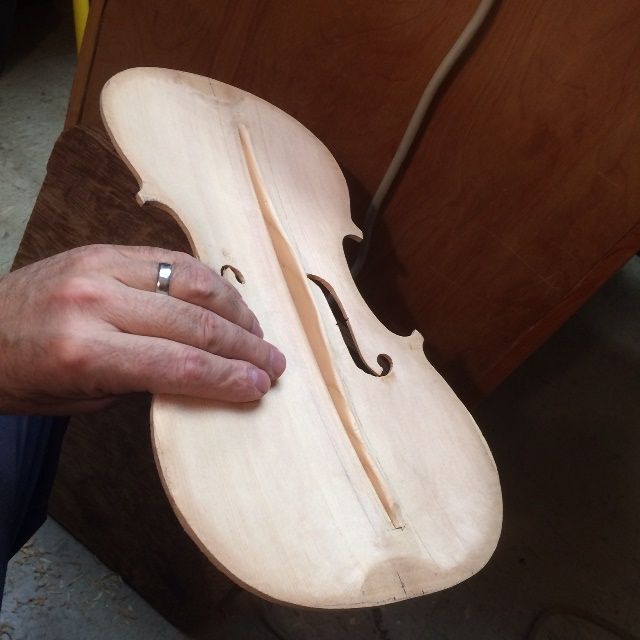
Connecting the Dots
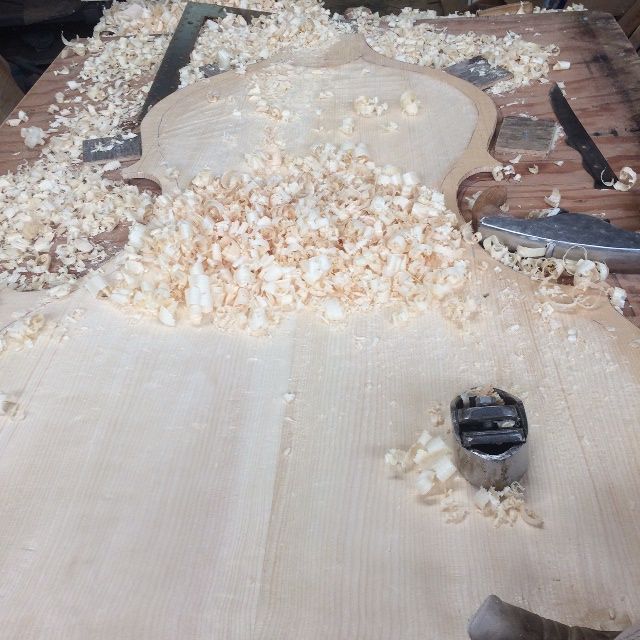
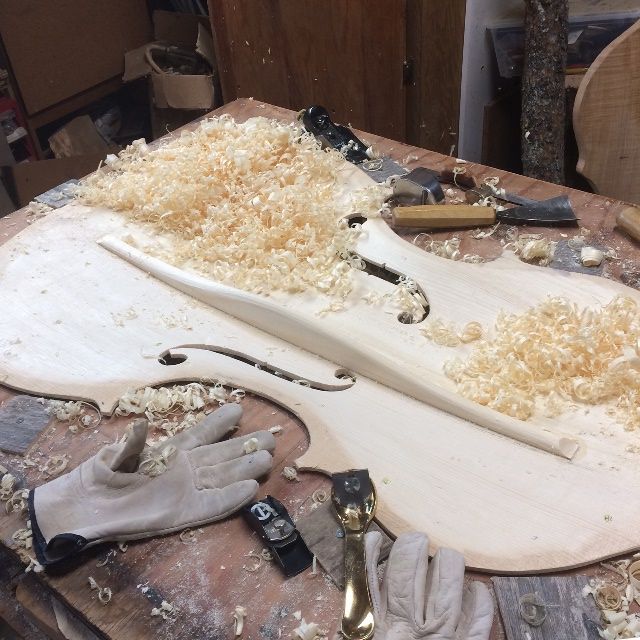
Then I began “Connecting the Dots”:
Connecting the dots.
As I planed away the excess wood, the “dots” got smaller and smaller, and, in some areas disappeared. By that point I had switched over to the palm plane which is less aggressive and makes a smoother surface.
Planing with the Palm Plane.
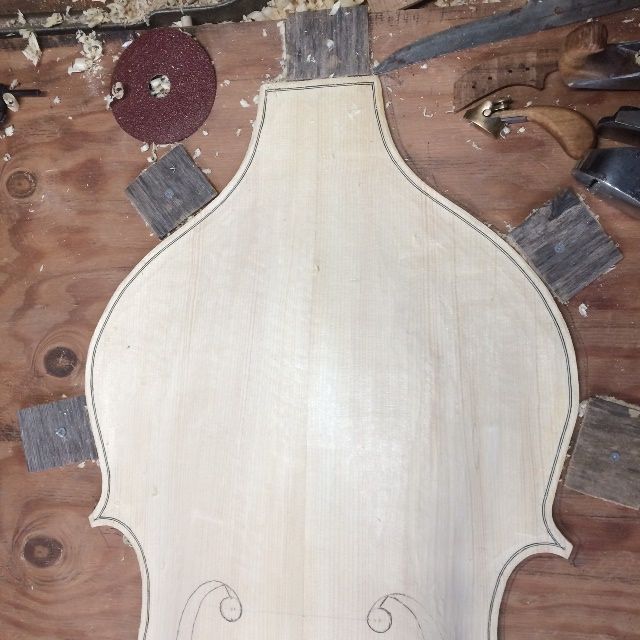
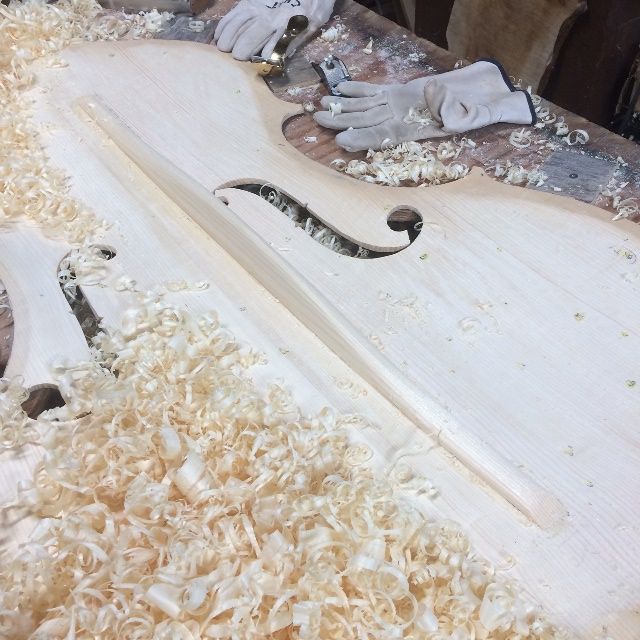
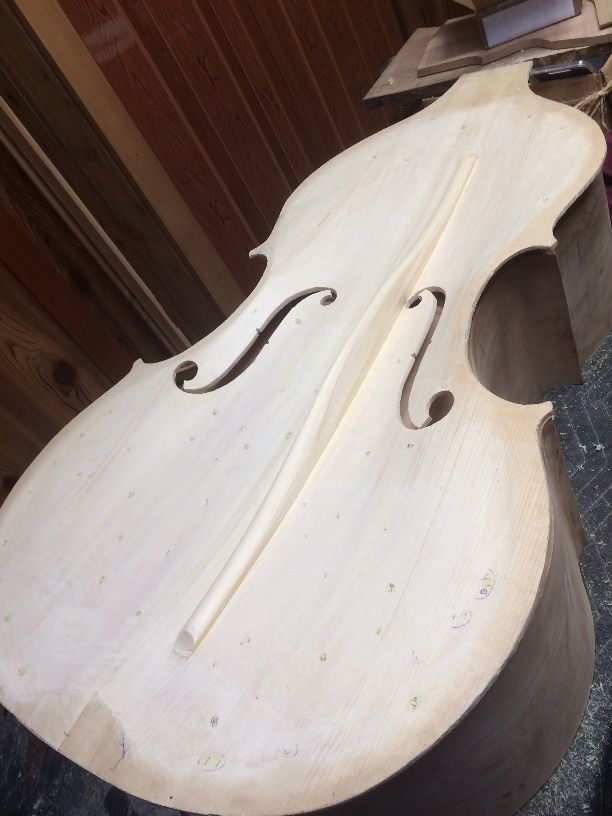
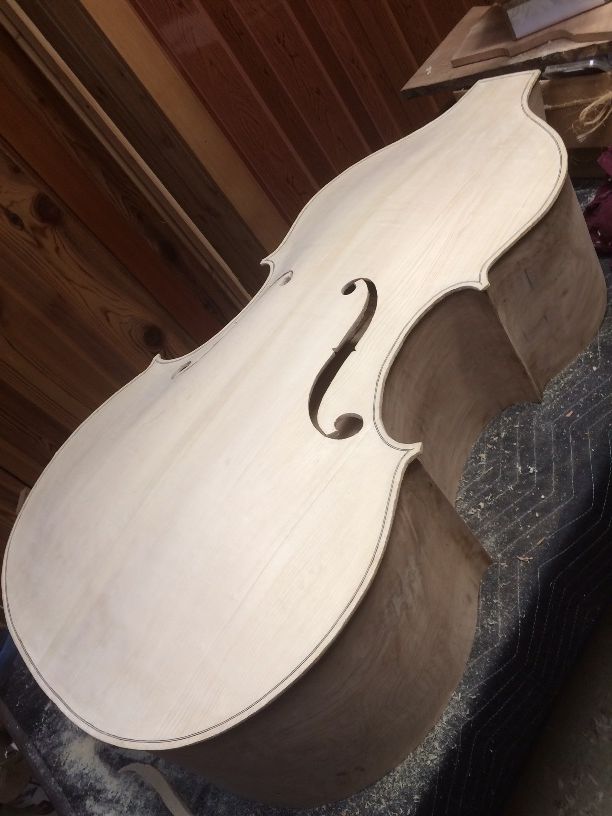
But eventually, it was pretty much all done, and time to cut out the f-holes. However, I decided to install the purfling first, and then cut out the f-holes.
Purfling installed:
I did not take pictures while this step was in progress: I just got going and pressed on until the job was finished, then took a few pictures. Sorry. I don’t always think about pictures.
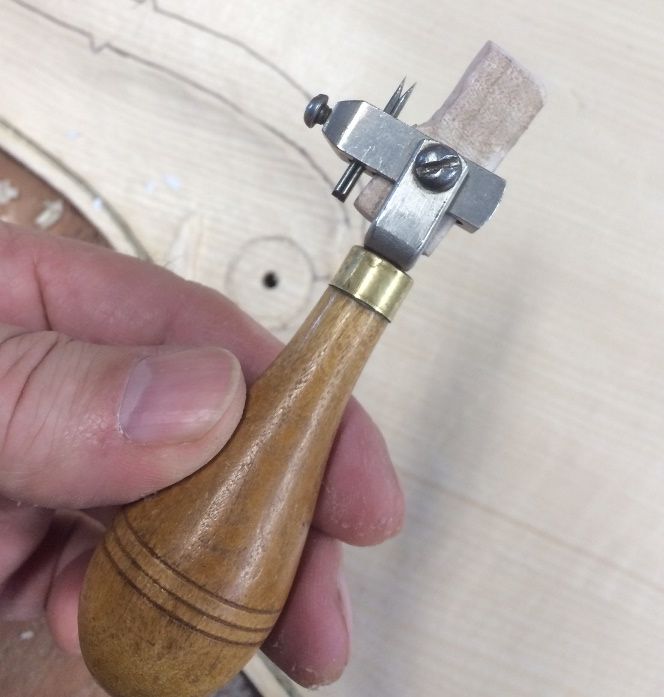
I used this old purfling marker to trace my lines, then a thin-bladed knife to slice along the lines to make a slot…then picked out the waste wood and inlaid the purfling.
Old purfling tool: missing part replaced with maple.
Upper bouts with purfling installed.
Bass F-hole incised and center-bout with purfling.
Cutting the F-holes
I used a coping saw to cut out the f-holes. It was slow and laborious but it worked, and there was little chance of any catastrophic errors. The result was two f-holes cut within a millimeter of the line and no errors. It is starting to look like a double bass!
F-holes cut out.
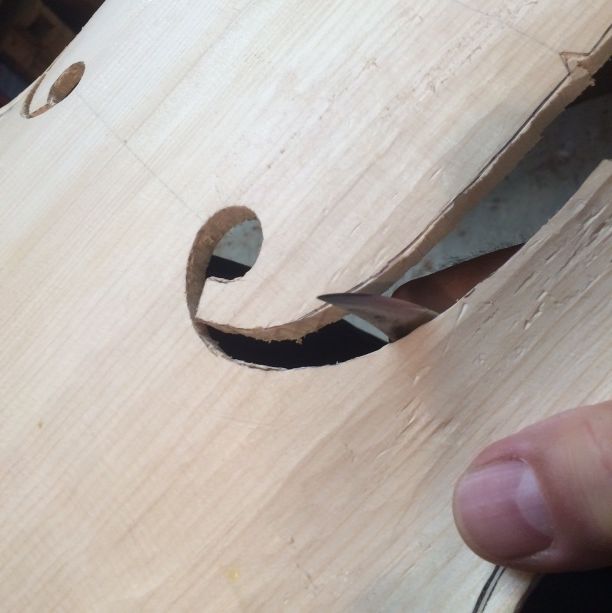
Rough-cut f-hole ready for refinement.
Using a knife to refine the f-holes. ( I will finish them with a file.)
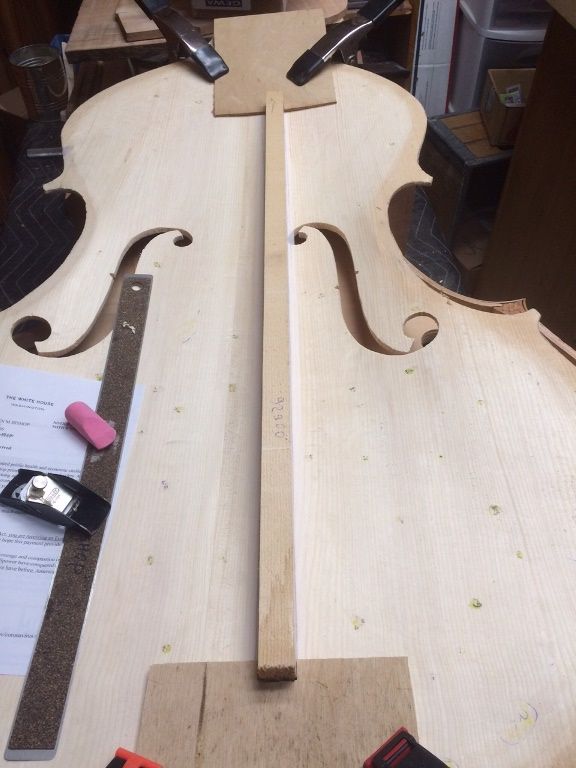
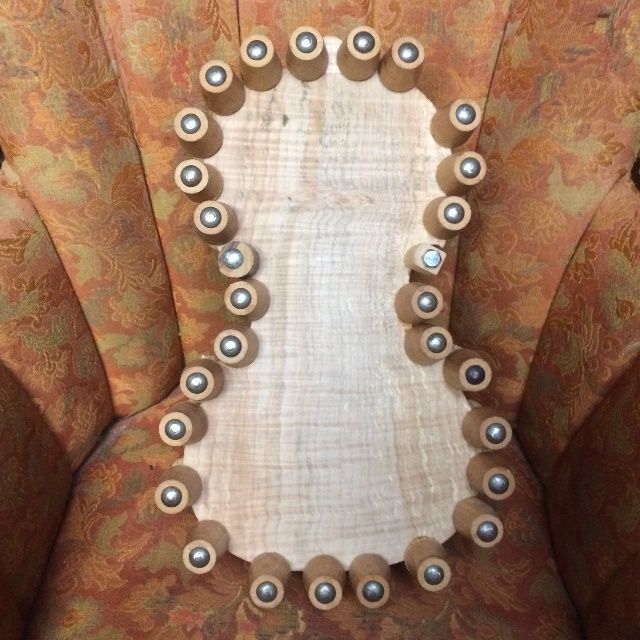
Bass-bar fitting
Fitting fixtures for fitting the Sitka Spruce bass-bar.
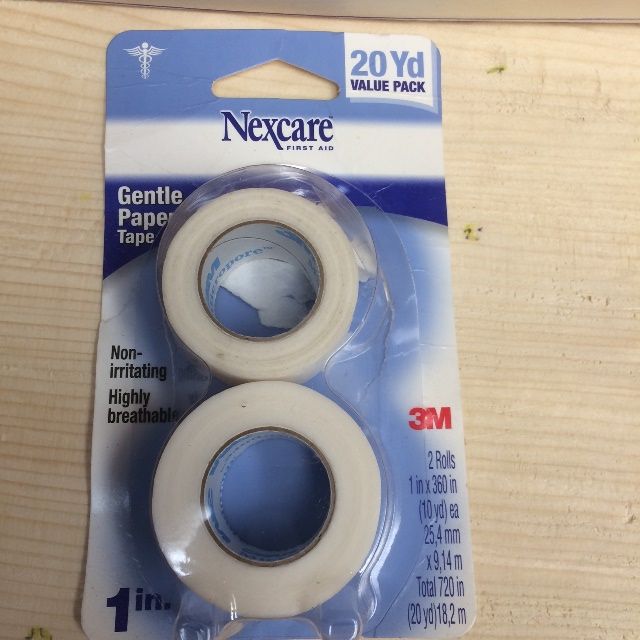
I use a very thin paper gauze tape for chalk-fitting bass-bars.
This is the tape I use, along with sidewalk chalk.
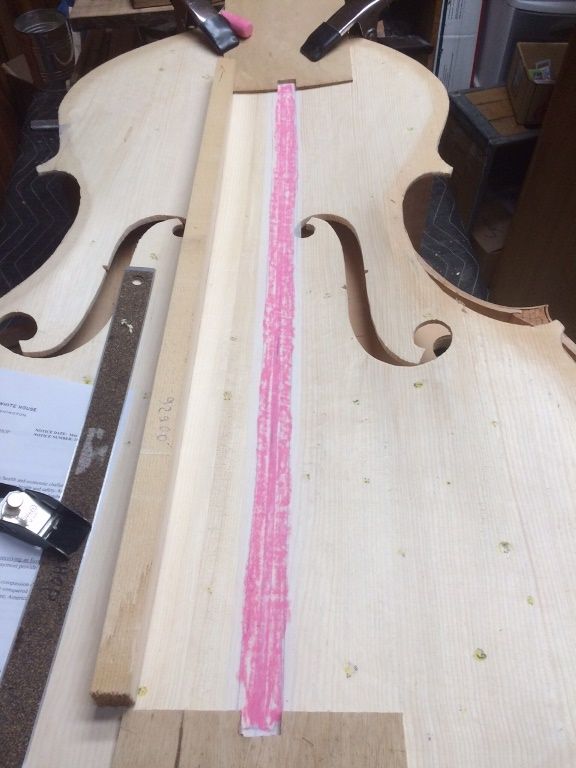
Paper tape with chalk applied.
The trick is to press the bar into the chalked tape, and “wiggle it” slightly, to pick up chalk on the high spots. then plane off just the chalked places and do it again, until all of the bass-bar comes up with chalk on it. That achieves a perfect fit. When the tape is finally removed, it takes all the chalk with it.
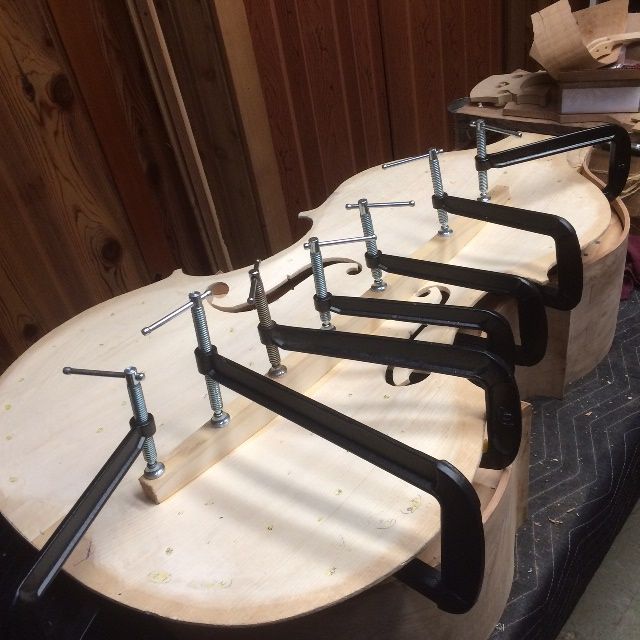
Then I warm the wood using a heat gun, apply a liberal coating of hot hide glue to both surfaces and clamp the bar in place. I leave it overnight to dry, just to make certain it will not pop back off (I have had it happen.)
Bass bar fitted, glued and clamped.
Installed bass-bar, ready to carve to shape.
The properly-installed bass-bar still has to be carved to the appropriate shape. I use planes to accomplish the carving.
Beginning to carve the bass-bar.
Bass bar nearly complete.
Bass bar complete
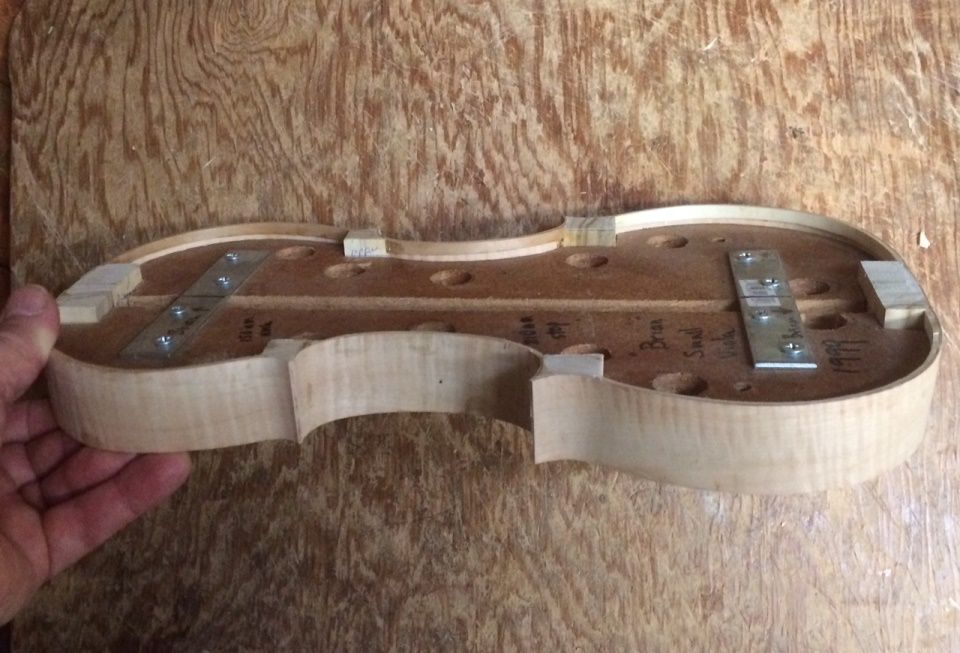
Interior of completed Front plate sitting on the garland.
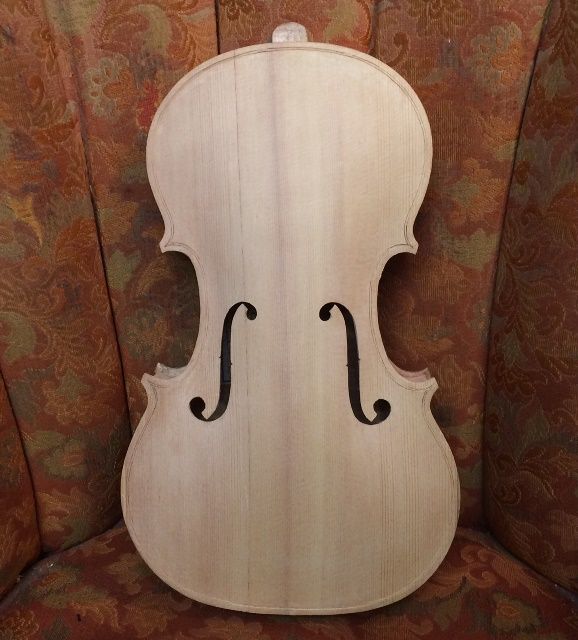
Completed front plate resting on the garland. (Starting to look like a double bass!)
Back Plate Vision
There is still a good deal to be done, before I can install the Front plate, so I am stopping there for the time being.
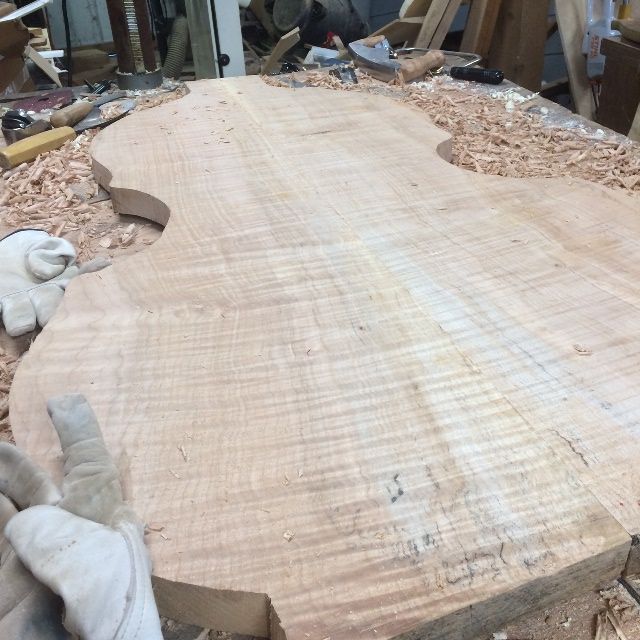
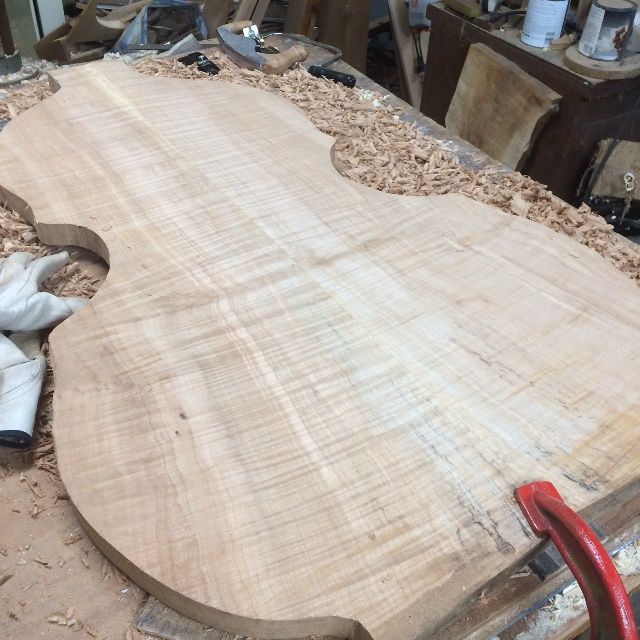
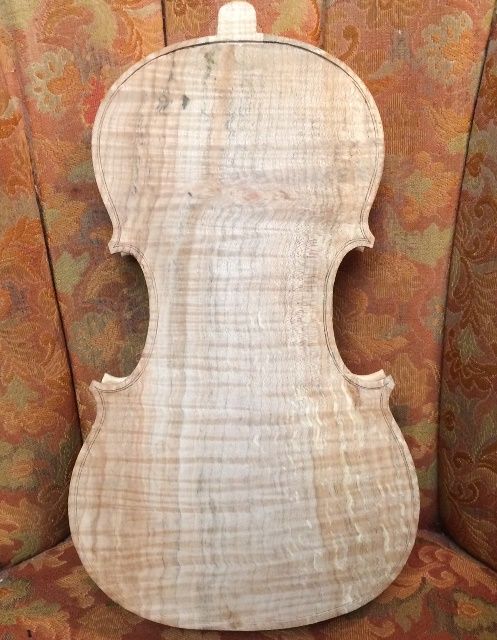
But I really wanted to get a foretaste of what the Big Leaf maple of the back is going to look like; so I planed the inside and outside of the back plate flat, just to have a look at it:
Back plate inside surface.
Back plate outside surface.
It is pretty stuff! I am really looking forward to seeing it completed.
When I last posted, I had completed the carving of both plates and the garland, but had not begun assembling the corpus.
Bass-Bar
The next step was to install the bass bar. The bass bar is the only fixed, interior brace in violins, violas or cellos. Flatback basses do have some other bracing, but they are a different “branch of the family,” so to speak. All members of the violin family have a bass bar– a spruce brace, which runs “north-south” at a slight angle, nearly parallel to the centerline of the front plate of the instrument, and just inboard of the bass-side f-hole, so that it supports the bass-side foot of the bridge. In a five-string instrument, this becomes an even more critical part as the instrument has a broader range and has to have good support on the bass side, as well as the ability to sing in the higher registers.
I first carve the bass bar bottom to exactly fit the inside curve of the front plate, along the correct location, and at the correct angle, then glue and clamp it in place, using hot hide glue and special clamps, padded with cork, so as not to damage the soft spruce of the front plate.
Fitted, glued and clamped bass-bar. Still needs to be shaped.
Proposed general profile of the bass-bar.
Shaping the bass-bar, using a finger-plane.
Completed shape of finished bass-bar.
Five-string viola corpus assembly:
Now the plates are ready to be installed. Before doing so, I used a small finger plane and half-round files to shape the edge all the way around on the inner face of each plate, hoping to avoid having to shape it after installation. (I am aware that sometimes adjustments have to be made, so I may have to do some tight-clearance work later on, in spite of this precaution. That’s OK.)
The next step was to install the back plate. This is an older-model mold, or “form,” (my first, in fact, as I mentioned in an earlier post) so it has some peculiarities, compared to my newer ones: it is a two-part mold, made to collapse, thus easing removal of the mold after installing the first plate. But in later iterations, I moved toward installing the front plate first, and installing the neck before removing the mold.
In this model, originally, I had planned to install the back plate, then remove the mold, and finally install the front plate, after which I could install the neck whenever I was ready to do so. Nowadays I personally find it easier, however, to install the neck before the back plate is in place, because I don’t have to concern myself with the back side of the heel aligning with the back plate button. (Annnd, it would have been a simple matter of planning, to still do that with this mold, if I had been thinking ahead: just label the front side of the mold as being the side without the screws (which have to be accessible) and you can install the front plate first, then remove the mold after installing the neck; no problem.) However…I wasn’t thinking ahead, and I used the mold exactly as I had originally designed it, so I have no choice, now: I am forced to install the back plate first, remove the mold and then (after shaping the blocks and linings and cleaning the interior of the corpus) install the front plate. So that is what I did. (By the way, in case you are thinking that the shape of the front and back plates are mirror-image of one another, the fact is, they virtually never are exactly mirrored, and are nearly never bilaterally symmetrical even if they were. So the front plate will not fit the back of the mold, and vice-versa.) Ah, well…hindsight, etc.
Here is the back plate, glued in place: the mold is still inside, holding everything rigid. Notice the spalting and curl in the maple back. This is a striking look, and some people love it…others do not.
Back plate glued and clamped in place on the garland.
After the back plate glue was dry, I removed the mold, shaped the interior blocks and linings, and cleaned up the interior of the corpus, so that it was ready for the front plate to be installed. I also installed the signed and numbered label, marking this as one of my handmade instruments.
Then I clamped the front plate in place, dry, just as I had done with the back plate, removed a few clamps at a time, and used a thin palette-knife to insert hot hide glue between the plate and the blocks and linings. As soon as I had the glue in place, I quickly replaced whatever clamps I had removed, before the glue could gel.
Once the plate was glued and clamped all the way around, I went back around with a blade, and picked out any gelled, cooled hide-glue that had squeezed out of the joint, so as not to have to deal with it later, in the form of hard, jagged chunks of dry hide glue. Then I tightened the clamps a little, and brushed hot water all around the joint, so as to reconstitute any glue that had gelled too soon, and allow the joint to close even more tightly.
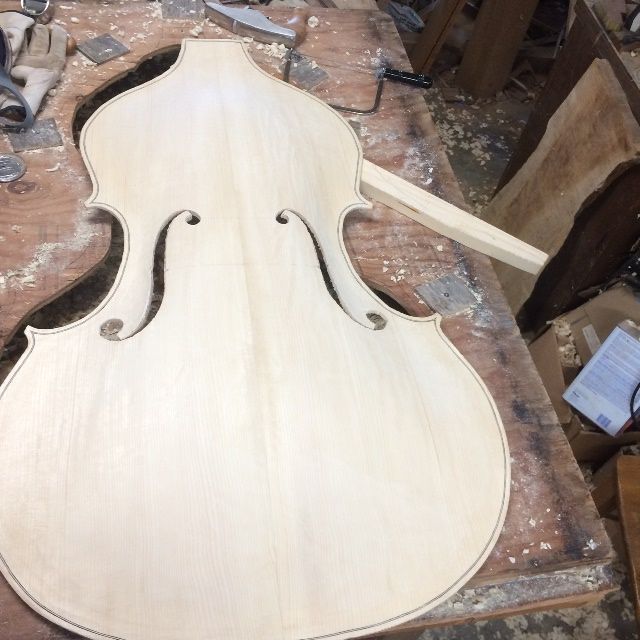
Here is the corpus, all glued together. The next step will be to adjust the overhangs as needed, and lay out the corners so as to begin purfling.
Front plate showing: Corpus assembled, glued and clamped.
Beginning Purfling the Five-string viola:
I used to do my purfling before closing the corpus, but I frequently discovered that the rib garland had moved a little, during the removal of the mold…or in some other way, things had changed, and then my plates no longer fit the garland, and I could not change the plates, because I had already installed the purfling…which locks in the shape of the plates, irrevocably (sigh…). So, I began waiting until after the corpus is closed and whatever needed overhang adjustments have been made, and then begin purfling.
I use a two-blade purfling marker to sketch in the location of the twin, parallel cuts needed to make the purfling slot, but I have to sketch the corners in by hand, with a pencil, because the purfling marker will not correctly lay out the corners.
I went ahead and began both the front and the back plates, but got too tired to complete them last night. (Today was spent getting last-minute things done, as we have heard they are mandating that all Oregonians stay at home, due to the coronavirus scare. Went and bought flour and other groceries, filled the car with gas, and got the snow-tires removed, as that deadline is soon upon us as well.)
One thing about the maple and spruce plates: the spruce is very soft, compared to the maple, but it is tricky to carve, because of that. The winter grains (reeds, they are called) are so much harder than the summer reeds, that the blade has a definite tendency to swerve and follow the grain instead of the line you are trying to follow. The maple is much tougher to cut, because it is hard all over, but it is much easier to follow your lines without digressing.
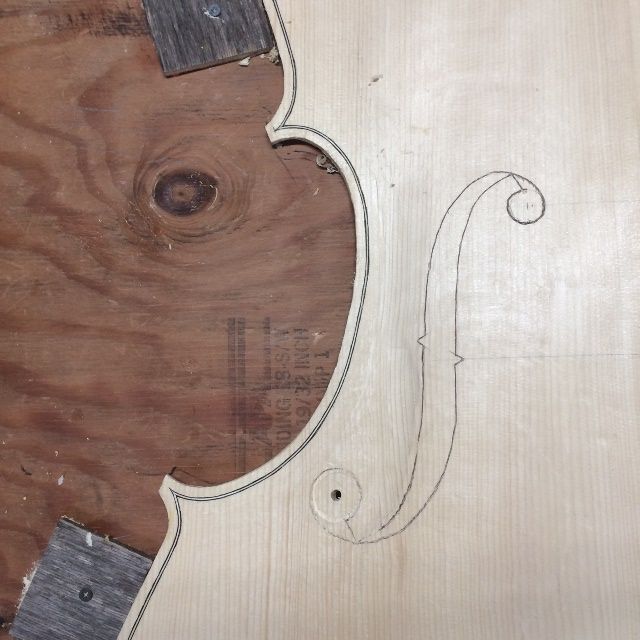
So, here is what the little viola looks like, today:
Back purfling-slot begun: the dark strip at the top is the only area where I already picked out the slot.
Front purfling-slot begun: none of the slot has been picked out.
In both cases, the plan is to cut the two incisions, pick out the wood between them, and then dry-fit the purfling strips, before removing them one-by-one and gluing them in place with hot hide glue.
That will be the next post, unless I take a break and carve the scroll. Either way, it is starting to look like a fiddle!
I have been seeing increased interest in 5-string violas, lately, so I am working to “populate” my five-string viola stock. This is the viola design I began with over 20 years ago (The mold says 1999; it was my very first instrument.) and it makes a very nice small viola. So I decided it would probably make a great 5-string viola as well.
I began the work quite some time ago, but other projects took priority, so the little viola languished on the bench. The back is curly, spalted maple from a tree that had been taken down on my wife’s parents’ place, and the belly is Sitka spruce. Both the front and back plates are one-piece in this case…something I seldom do. (One-piece front plates are uncommon. One-piece backs are quite common, and I prefer them.)
The rib-garland had been completed and the plates traced out months ago; so, after delivering the last commissioned instrument, I finally felt free to get to work again on the viola.
Completed Rib Garland. Linings and blocks still require shaping and scraping.
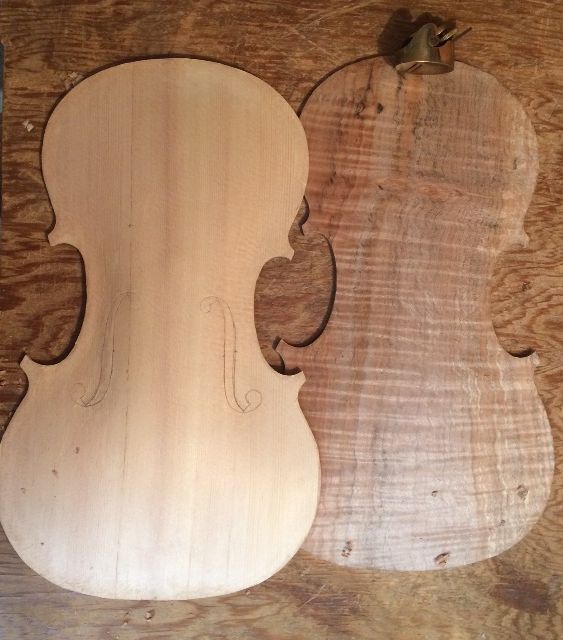
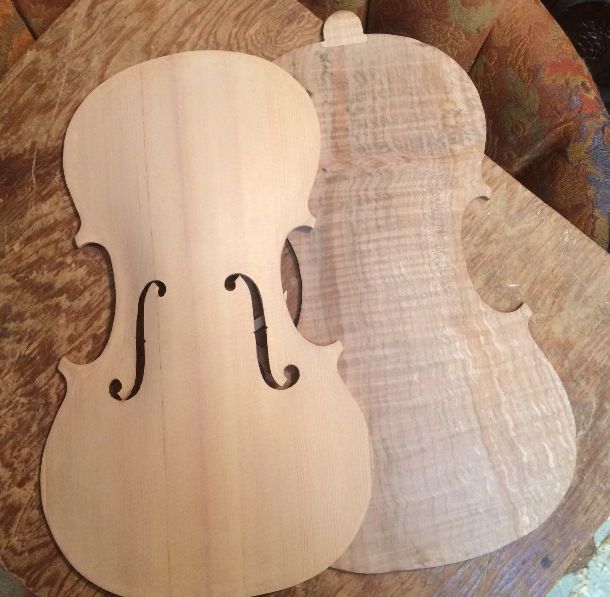
Five-string viola arching complete: ready to graduate the plates
I failed to take any photos while arching…so we are beginning with that portion complete.
Front and Back Plates, completed except f-holes, bass-bar, purfling, and edgework.
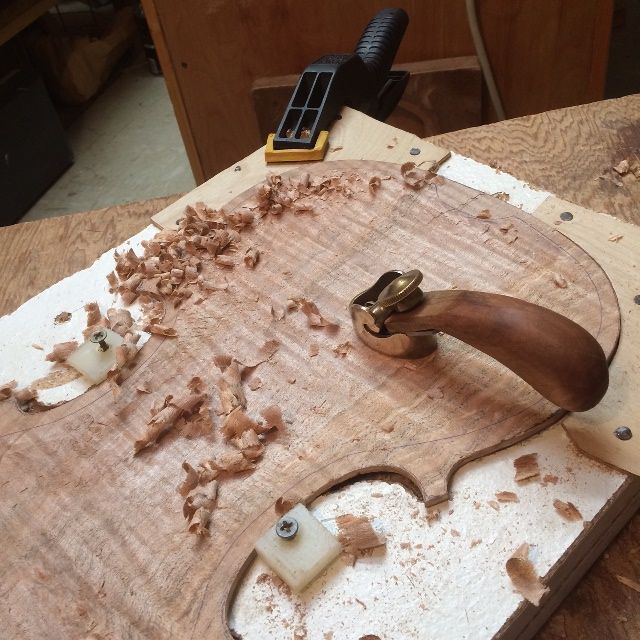
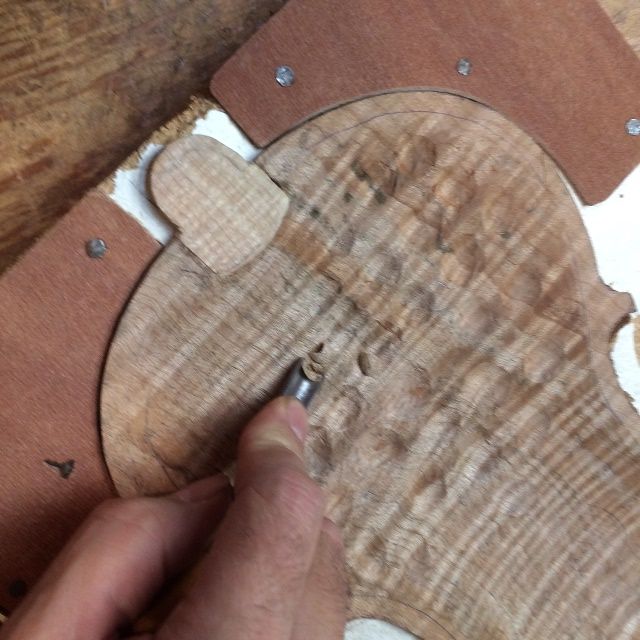
Graduation of back plate.
Carving “dots” with specific thicknesses. Notice the button graft, to replace damaged wood.
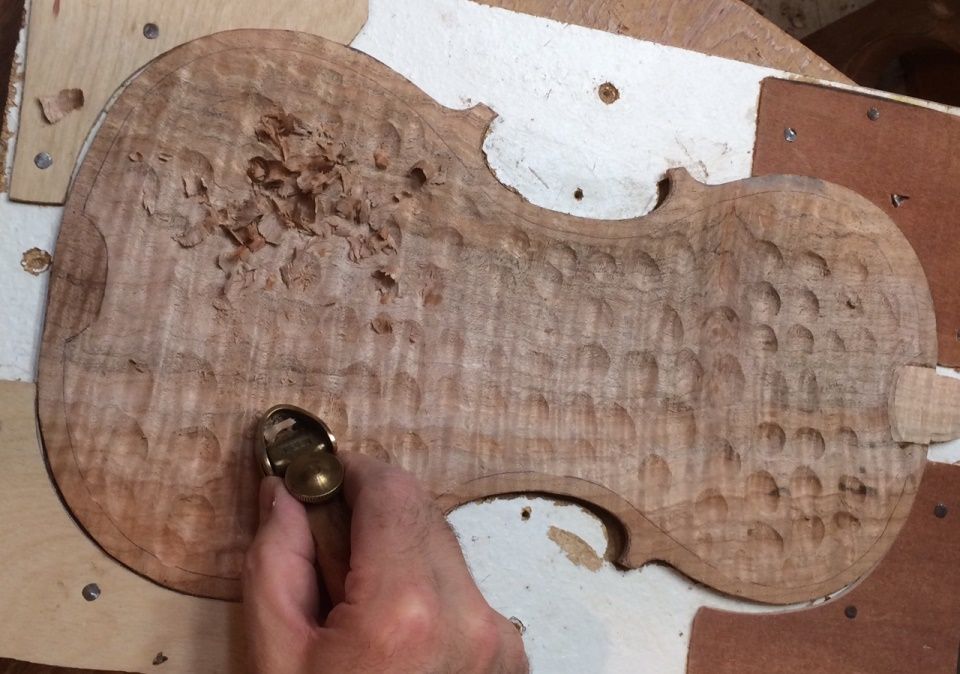
On the backs, especially, I make a practice of carving “dots” to specific thicknesses, following a plan in my mind. Once all the dots are correct, I “connect the dots” using small planes, until the entire interior is a smooth continuum, and all the correct thicknesses.
Connecting the Dots.
The Spruce is a lot easier to plane, so I tend to just measure and plane. Most people use gouges for all this work, but I like using the planes.
Graduating Front Plate, using curved-sole plane.
Cutting the f-holes on the Five-String viola
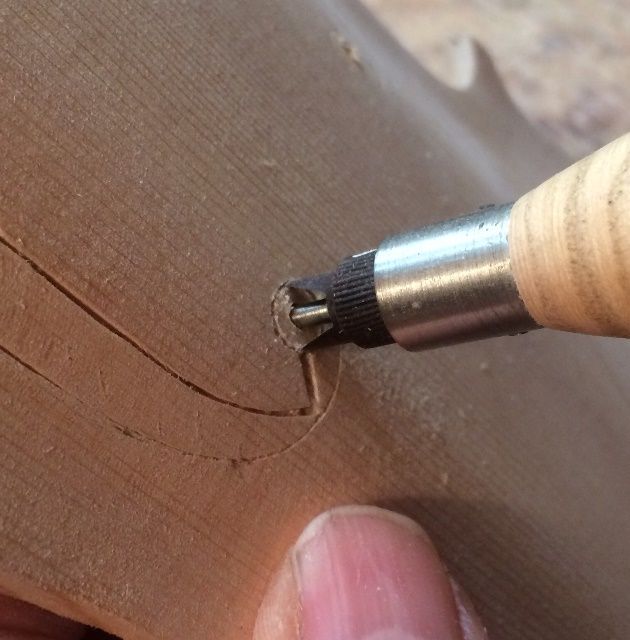
Once the plates are completed (which also involved laying out and incising the f-holes) I still have to actually cut out the f-holes. I used to do this using just a knife, but it was time-consuming, and I found it difficult to get the round parts “round.” My grown children bought this tool for me, a special tool for cutting just the upper and lower eyes of f-holes. It works beautifully!
F-hole cutter in action: this tool cuts a perfectly round hole for the eyes of the f-holes.
F-hole cutter mark.
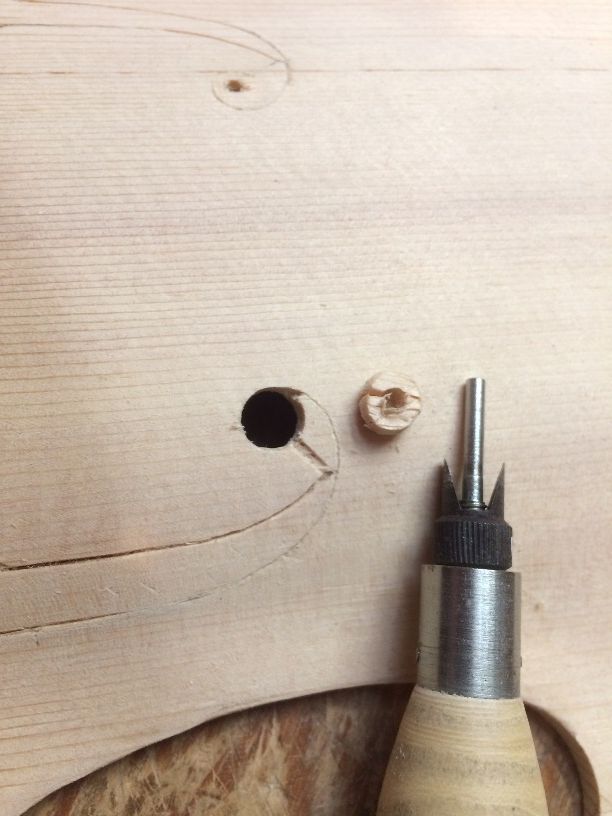
F-hole cutter with plug removed.
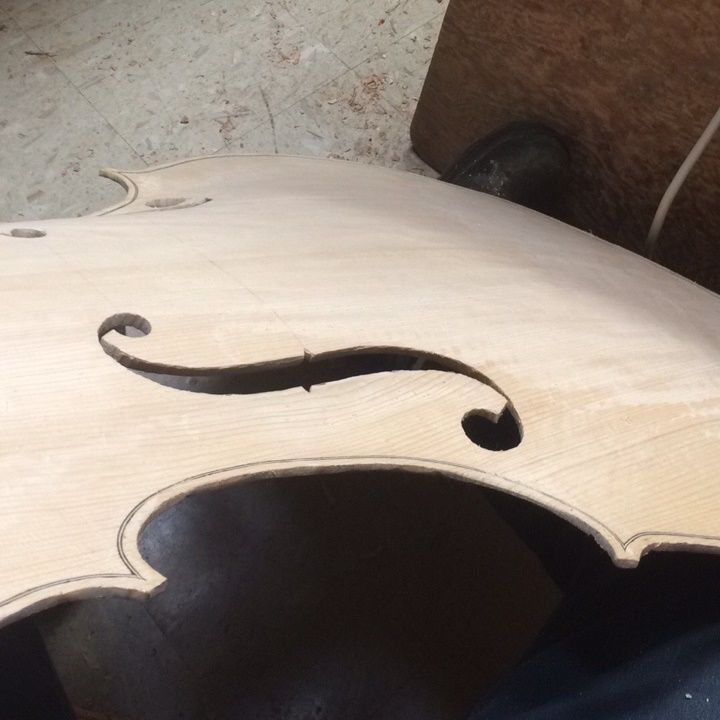
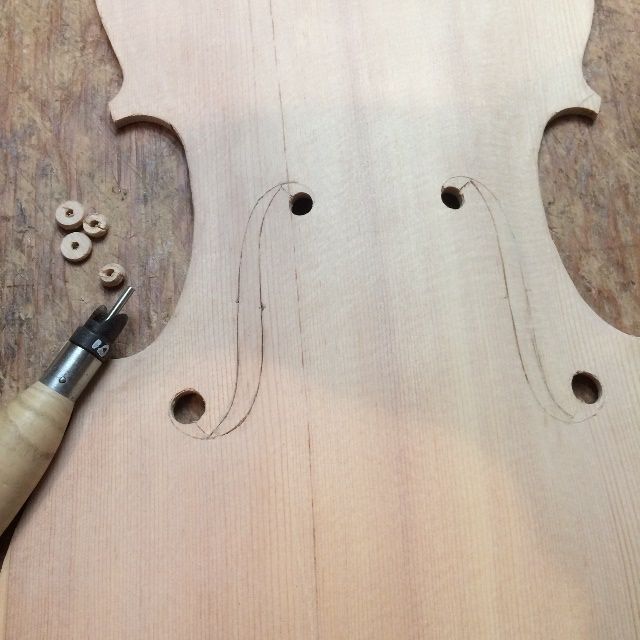
F-hole cutter work complete… Knife work remains.
Plates essentially complete: bass bar, purfling, and edgework remain.
Beginning the Scroll for the Five-String viola
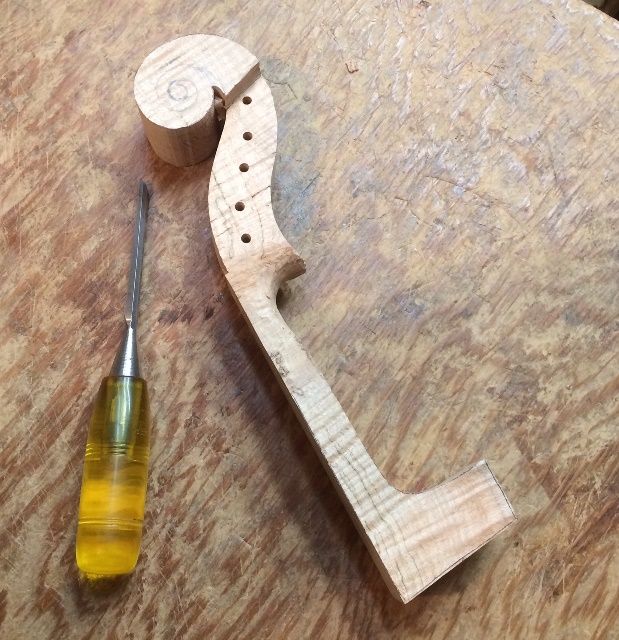
While things were being sorted around, and different tasks became logical, I decided to get a start on the scroll and neck. Didn’t get very far, but here it is:
Beginning the scroll.
There is still a long way to go, but it is feeling more as if I was getting something done, at least.