Simultaneously, I had purchased the European Maple one-piece back, as a solid wood billet, with sides, and neck billet. Additionally, I ordered the European Spruce front plate blank from International Violin Company in Baltimore Maryland.
At the time when I last posted, I had just begun varnishing the viola and had only applied the yellow base coats of varnish. Obviously, the intent is that this yellow base will provide the “golden glow” shining from within the subsequent darker-color coats of varnish.
However, as I added increasingly dark varnish layers, the changes were increasingly slight. As noted earlier, the change from raw wood to sealer was obvious. Furthermore, the change from sealed wood to yellow varnish was amazing. But the subsequent steps move more gently into the final iteration.
Front with the first color coatBack view with the first color coat
Second Color Coat
Front with a second color coat.Back with two cor coats.
Third Color-Coat
Front view with three color coats.Back with three color coats.Three color coats from an angle showing off the figured Spruce.
And Assembly!
To begin with the varnish procedure, I had removed the fingerboard and nut, to allow full access to the front plate for varnish-prep, varnishing and polishing. However, now it is time to replace those parts and begin final assembly.
I installed the soundpost, too, so that the instrument corpus could begin “getting used to” that pressure from within.
Then I re-installed the fingerboard and nut, and scraped the joint to make it completely smooth. Obviously, I will have to retouch the varnish on some of those areas.
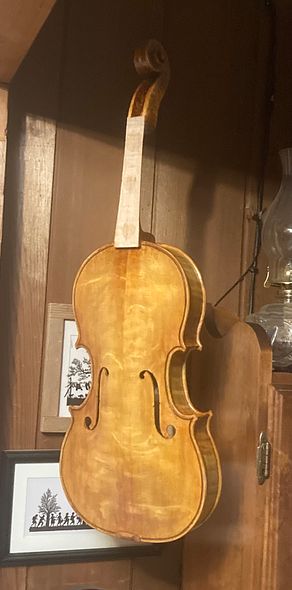
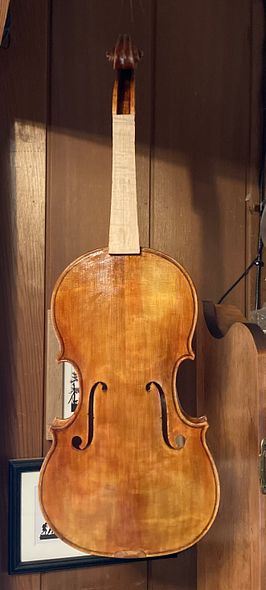
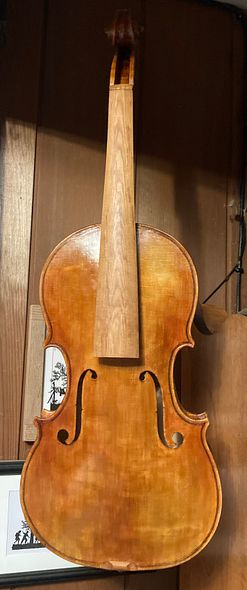
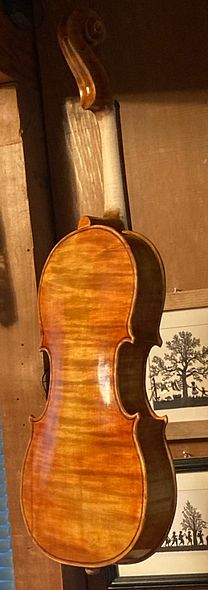
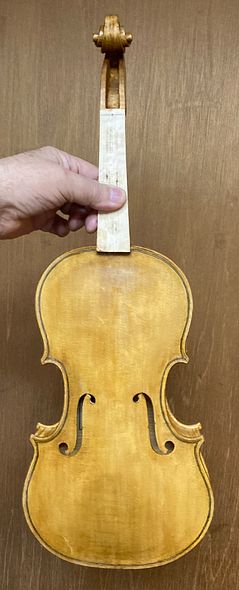
Front at final color, with Fingerboard.
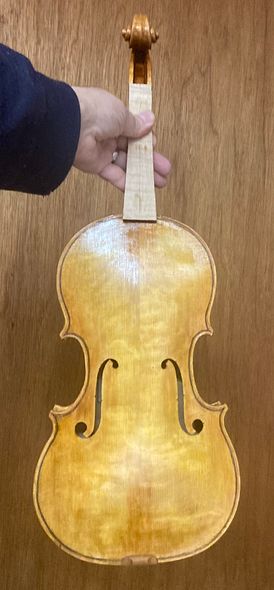
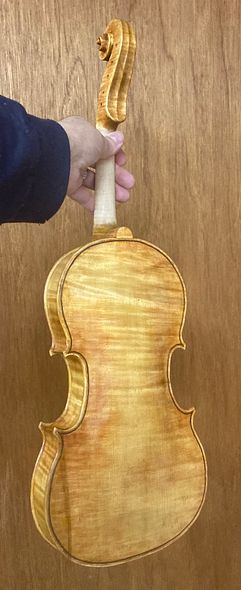
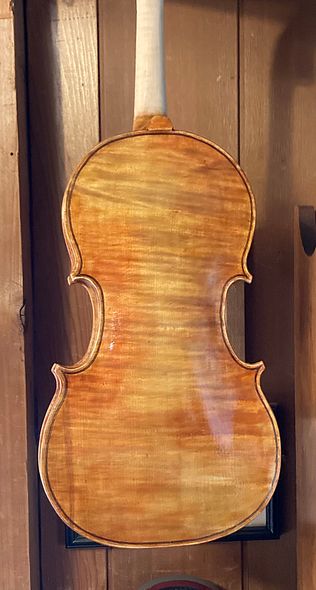
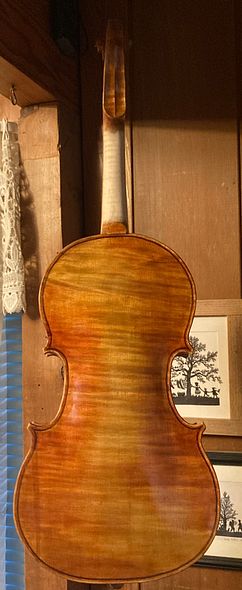
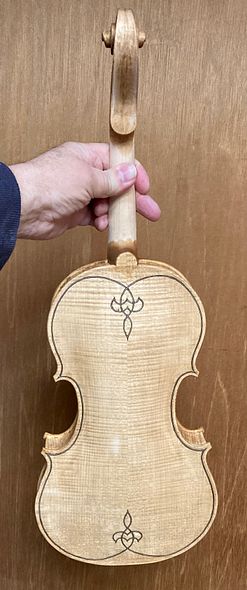
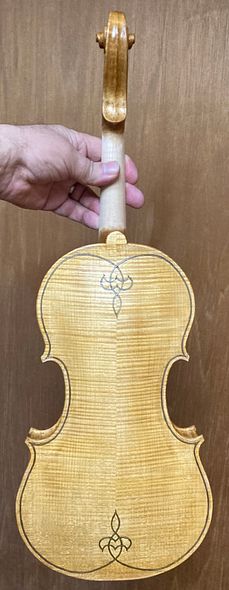
Back view at final varnish color.
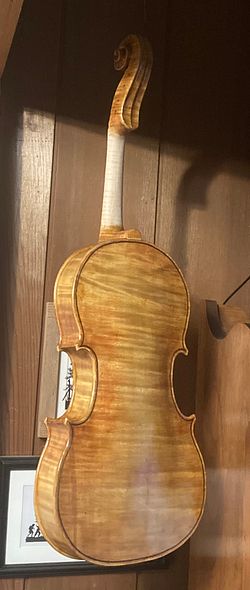
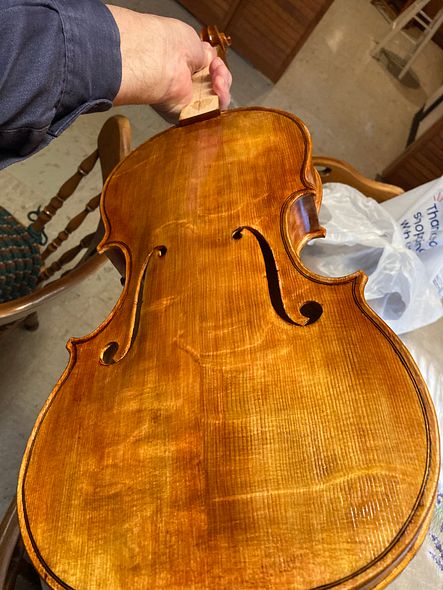
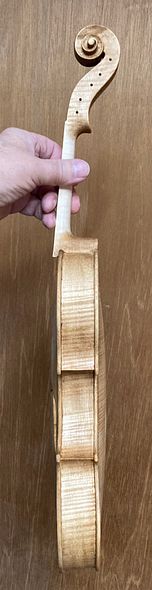
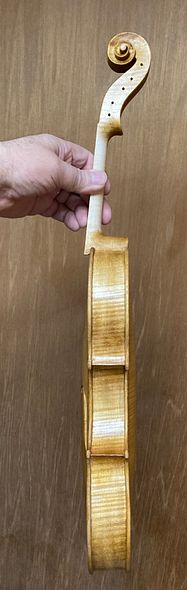
Three-quarter view, showing varnish contrasts.
What’s Next?
Following this, the next thing will be to install the “Knilling Perfection” (internally geared) tuning pegs.; Afterward, I will continue with final set-up. I can install the pegs now, but the final set-up will have to wait for the varnish to harden a little more.
“New” Five-String Bluegrass Fiddle, Begun Two Years Ago
I Began in Good Faith, Years Ago!
Originally, I began this fiddle in 2023, thinking I would “press on” and get it done soon. I had already closed up the corpus, with the dated label inside! But, due to unforeseen circumstances, I had to postpone its completion.
A commissioned instrument interrupted the flow of my “built-on-speculation” instruments. I always move any commissioned work (whether repairs or a new build) to higher-priority. I move them ahead of my usual “build it and they will come” work.
The man commissioned a five-string fiddle on one of my early models. So, I completed his instrument (#16 on the Chronology page) before completing Instruments #17, #18, and #19. I had planned otherwise, but it happened.
Slight Chaos!
I had begun all three of those instruments, simultaneously. But I did not realize that, in my array of personal labels, I had somehow skipped #16. When that came to my attention (as I worked on the commissioned fiddle) I felt I had to correct the mix-up. I had no option but to print a new sheet of labels, with a #16 in the mix. Then, I labeled his new fiddle, as though I had built it before the other three. I completed it before the others, though, but instruments #17-19 were still hanging on my workspace wall, waiting for their turn. (Sigh…)
Meanwhile, I had surgeries on my right eye (cataract surgery and corneal transplant) and had to wait for it to heal before I could do much work.
Later, my beloved wife, Ann, fell and broke her wrist, requiring surgery to repair it. At the same time, I had contracted Covid (finally…my first time!) and could not even go to the hospital with her. Fortunately, our daughter was in town, with her husband, and they took her to the ER.
By the time all that was over, I had the same surgeries in the other eye. (Yeah, it was a really productive year!)
BUT: Between all the “setbacks,” I did manage to complete instruments #17 and #18 on the Chronology page. (#18 sold almost immediately…that was nice!)
But then…
Another client called with a commission: This customer wanted a 15-3/4″ five-string viola. She lived in Switzerland., and will fly here to take delivery, so I again shunted #19 to “last in line.”
Resuming Work on Five-String #19
I have nearly completed the new commissioned viola. (It will be five-string #20…but it is not yet on the Chronology page.) So I went back and resumed work on #19.
The work had already been done up to (but not including) the purfling on the back plate. So that is where I had to begin. Unfortunately, I was still “sneaking in a few minutes, ” here and there, while completing the newest viola, so I neglected to photograph the purfling process. However, if you would like to see that process, here is a link to the purfling procedure for a large five-string viola from five years ago.
Preparing for Varnish
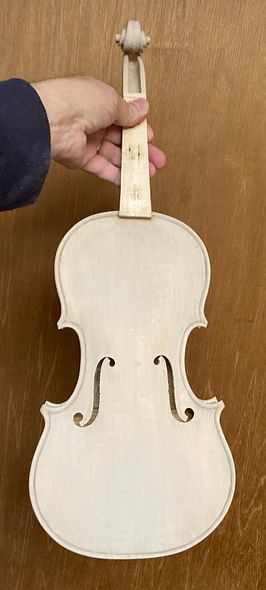
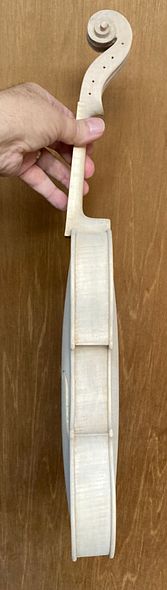
I scraped the entire instrument as smooth as I could get it, then brushed coffee all over the instrument, to raise the grain, and allow me to see areas that still needed work. I repeated this cycle until the grain would no longer swell with moisture, then I sanded it lightly all over, to remove any tiny, unnoticed fibers that might still be protruding. The instrument looked like this at that point.
Front view, in-the-white
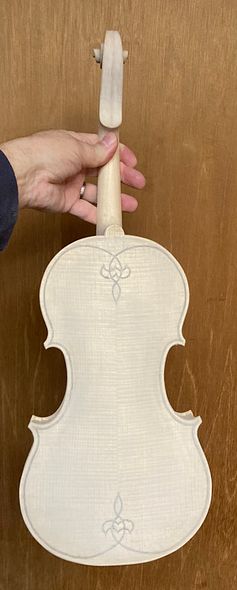
Back View, in-the-white.
Mineral Ground
I learned for Roger Hargraves that filling the natural wood-pores with a mineral will help the sound, and it prevents excessive varnish penetration. So, nowadays, I rub Gypsum powder into the raw wood surface, to fill those pores. I mix the gypsum with coffee, which adds a tiny bit of color to the wood, but when the mixture dries, it turns chalk-white, mostly obscuring the grain;
Front View with Mineral Ground.
Side with Mineral Ground.
Back view with Mineral Ground
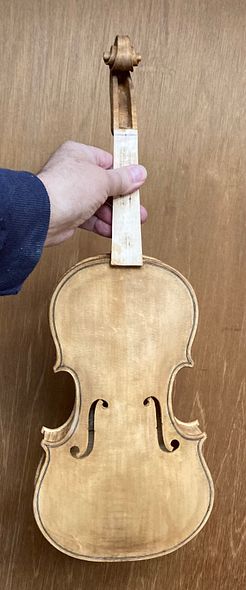
Sealer
After the mineral Ground is fully dry, I gently sand off any excess gypsum, that is sitting on the surface, so that it will not obscure anything once the varnish is in place. It still looks stark white, but does not have piles in the corners, or elsewhere.
The Sealer application always seems like magic, because, as the sealer surrounds all the perticles of mineral, the gypsum turns transparent. It literally disappears, and will never be seen again!
Front view with Sealer.
Side with Sealer.
Back View , with Sealer.
The Sealer I use is made of rosin, dissolved in a mixture of denatured alcohol and Spirits of turpentine (the one that strongly smells of pine.) It takes a few days to dry as a rule, and the fragrance of pine remains for a long time.
After the sealer has completely dried, I go over the instrument to remove any excess sealer. I can do that with a thin, flexible scraper, or stearated abrasive paper (which does not easily clog up) or by using a rag, wetted with denatured alcohol. (I think the rag with alcohol probably does the best job.)
Then it is time to begin varnishing.
Varnish Beginning
I usually begin with three coats of yellow varnish, to provide a deep “golden glow” to shine from within the subsequent darker coats of varnish:
Front view with Yellow varnish.
Side with Yellow base coat.
Back view with Yellow Varnish .
Color Coats to Come
Next, I will begin to add the colors of varnish I need, to produce the finished look I want. It requires anywhere from eight to twelve coats to achieve that look, usually, but each coat is microscopically thin, so the entire finish is still extremely thin. It will not reduce the sound quality at all, and it will protec the wood from dirt, skin-oil and other substances that might otherwise penetrate the bare wood.
I have often had people ask whether I would be willing to leave a violin unvarnished. For the above reasons (plus the fact that I would not put my name in such an instrument:) The answer has always been “No.”
Next time, we will walk through the varnishing process.
A few weeks ago, I bookmatched my plates. Then I cut ribs and necks, so as to set up “kits” for six new five-string fiddles. Afterward, I started building two of them, as parallel builds.
Since I last posted, two weeks ago, I did not exactlystay on schedule, but I didn’t get too far behind.
I had already completed the first scroll and neck, and had begun working on the second neck, when, I “kinda took an unplanned detour.”
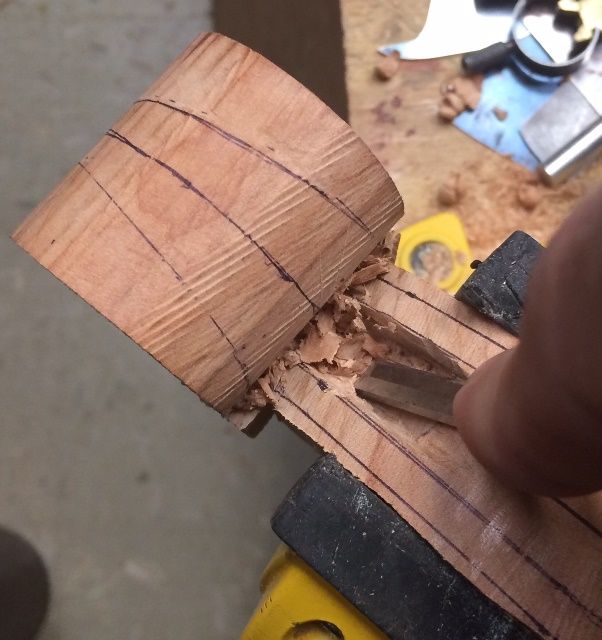
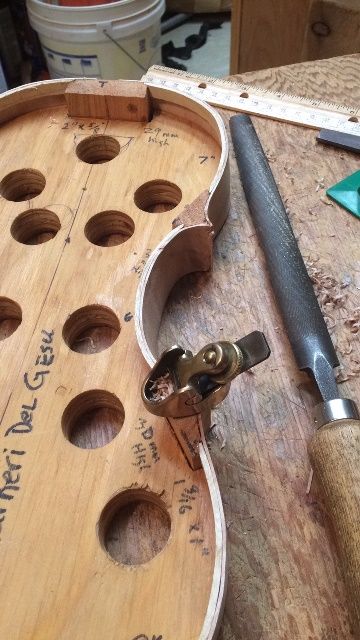
Beginning to carve the pegbox for fiddle #1.
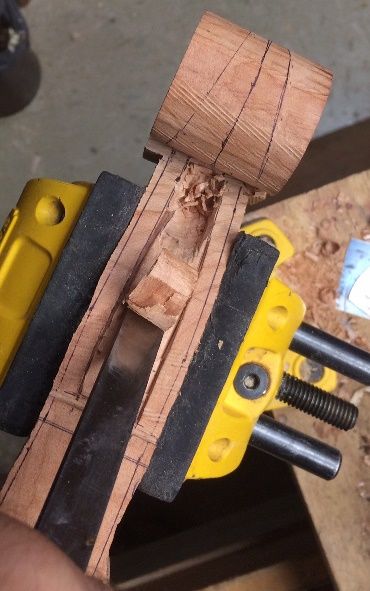
Heavy wood removal from pegbox interior.
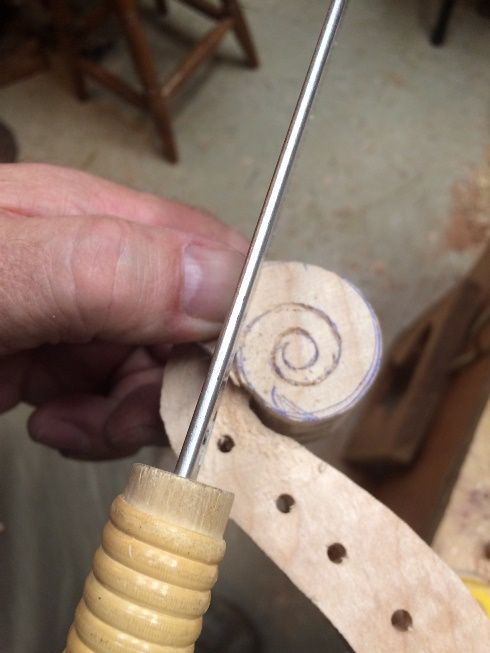
Beginning the saw-carving of the scroll
Saw-carving the scroll.
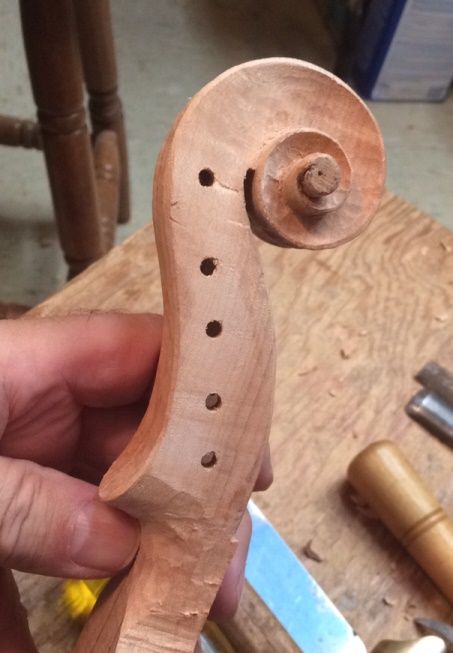
Scroll nearing completion
Scroll #1 essentially complete.
Then I Had a Small Mishap:
I had worked for 12 hours, Monday the 16th, and afterward, I felt pretty tired. Consequently, I had tired hands: Probably I had a tired brain, too, I suppose… anyway:
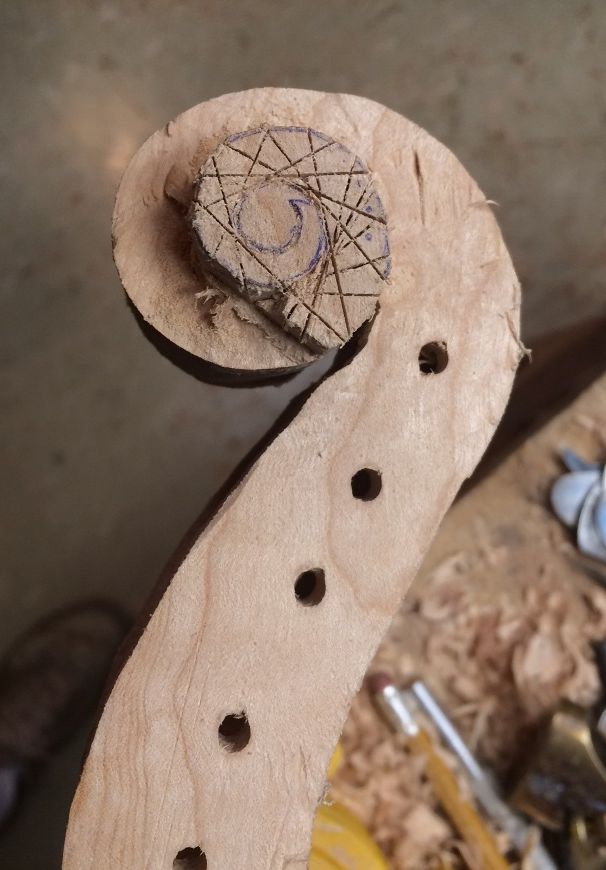
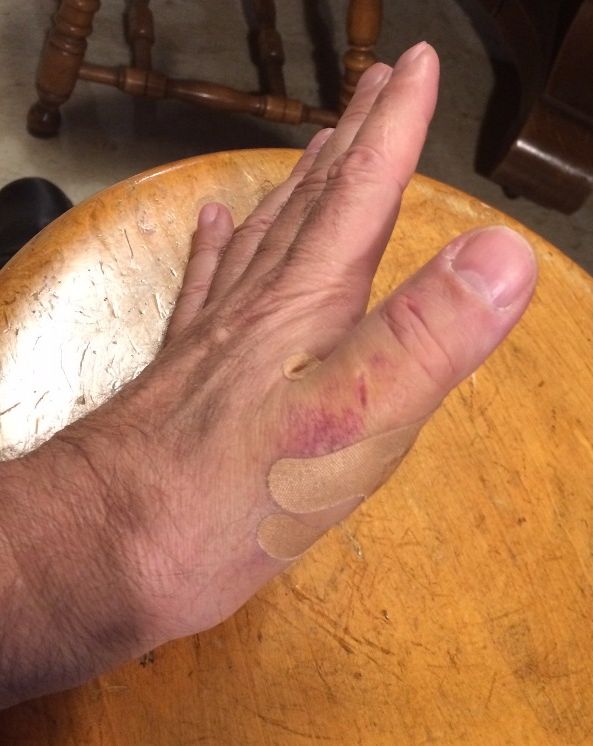
I had begun carving the second scroll. I completed the saw-carving part, and I was removing waste wood, with a small gouge, when, I slipped. annnnd, just happened to have my left hand in the path of the misdirected gouge. (sigh…)
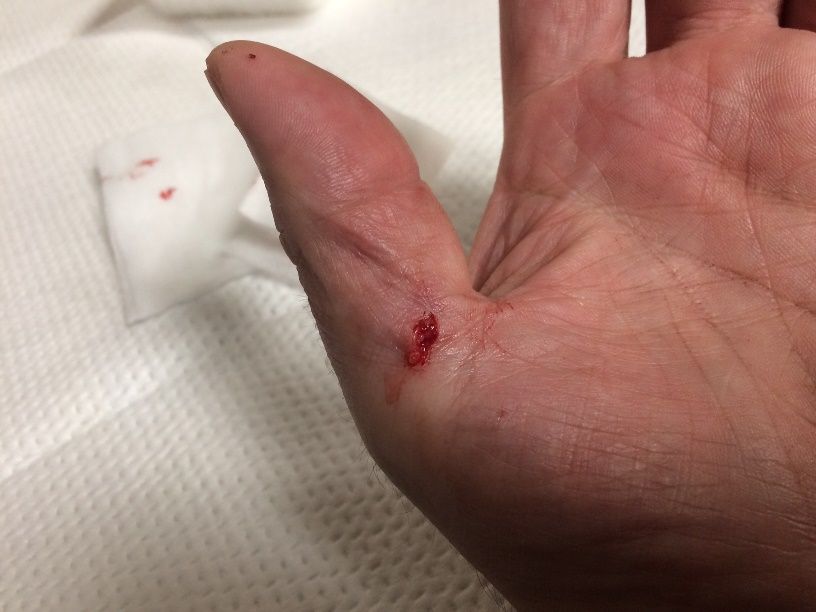
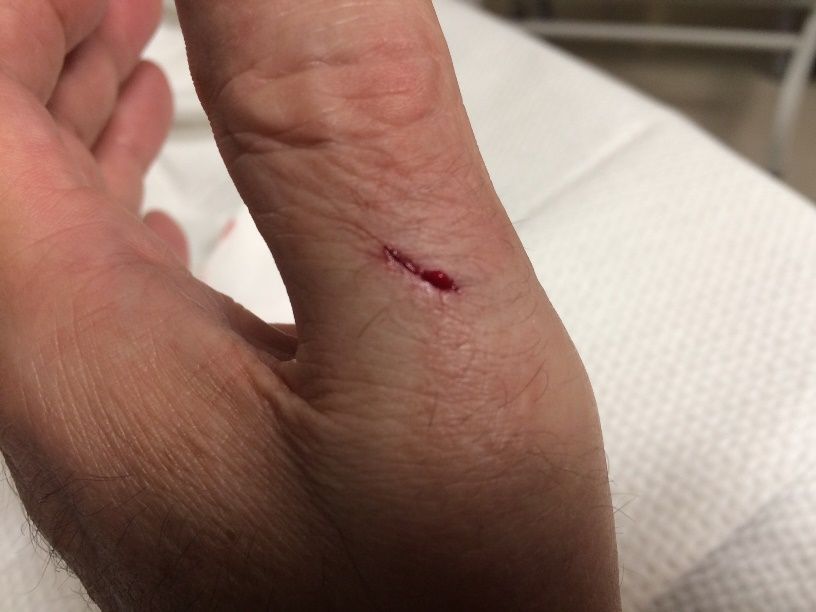
Entry wound!
Exit wound!
Both sides at once!
Urgent Care? Emergency Room?
First we tried going to an Urgent Care clinic. We arrived there, and then discovered that (a) they only work by appointment, and (b) they don’t take medicare insurance, anyway. Accordingly, I asked what my options were, and they said: “Everything else is closed! Go to the ER!” (Sigh… very expensive option!)
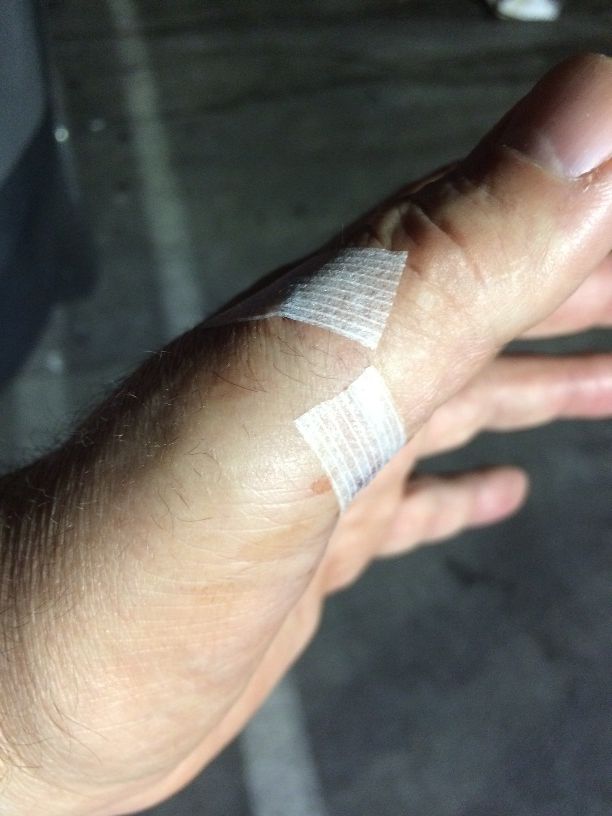
So, about 30 minute later we arrived at the Emergency Room at Saint Vincent Hospital. They were busy as usual, so we waited for about four hours. But after that, the ER people washed it out with sterile water, X-Rayed it to eliminate the possibility of torn bone or tendons, and applied two little “Steri-Strips!”
Steri-Strips from the ER.
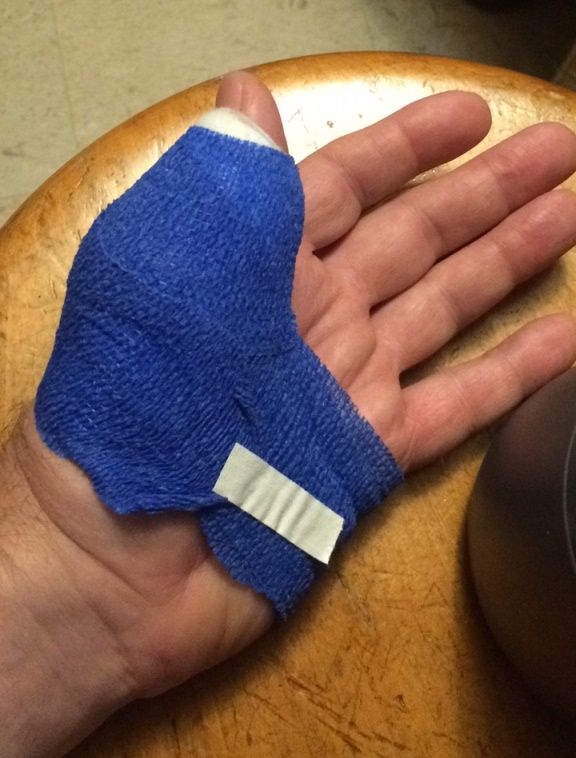
I guess that was normal, but it felt pretty “exposed,” and was very prone to bumps (which were pretty uncomfortable when they happened.) So, after we got home, Ann bandaged me up with a heavily padded dressing so that I could sleep without bumping it. That was a real help, and, as a result, I slept well.
However, I kind of puttered around, the next day…partly too tired, I suppose, as we had arrived home somewhat after 3AM, and we got to bed after 4AM. Partly, I was just not feeling real good. Anyway, I had other things that needed doing, so I didn’t work on fiddles for that day.
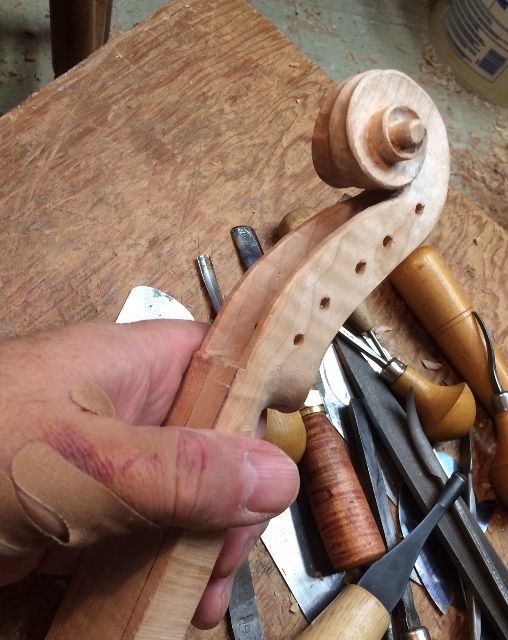
Bandage for protection.
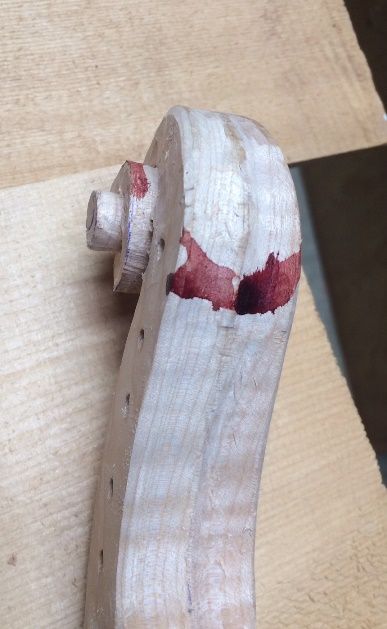
Red Violin beginning? This was the second scroll, in progress when I slipped.
Back to Work!
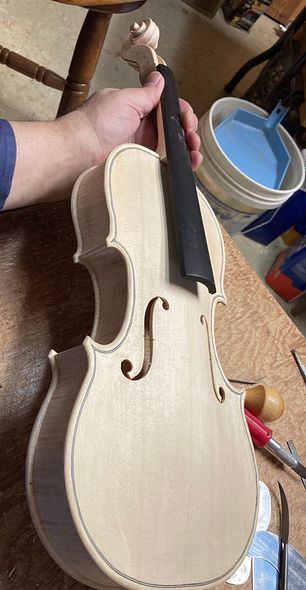
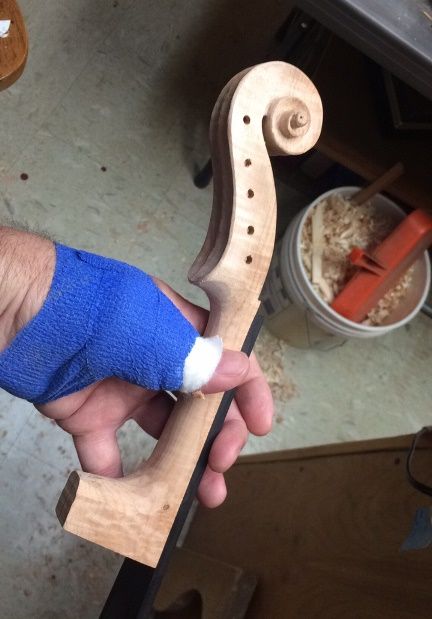
I got back to work on Wednesday. It turned out that I really needed two hands for most things, so it slowed me down rather badly, having a bulky bandage on the left paw. However, I was finally able to get the fingerboard installed on the first scroll/neck so that I could shape them as a unit.
Fingerboard installed the second day after the injury.
That was kind of encouraging, seeing some progress again.
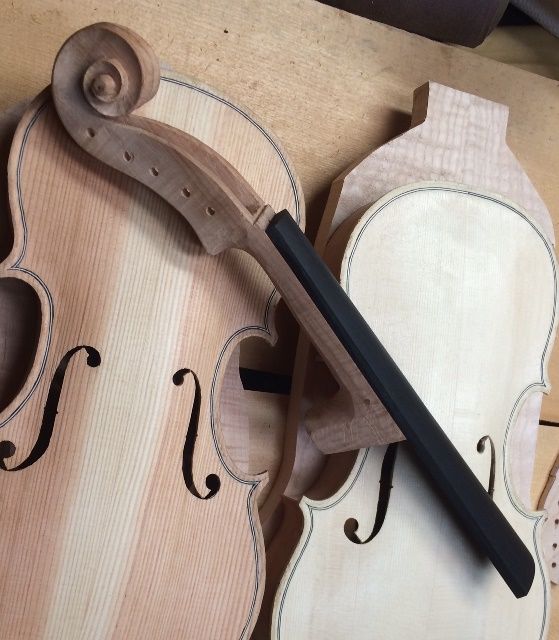
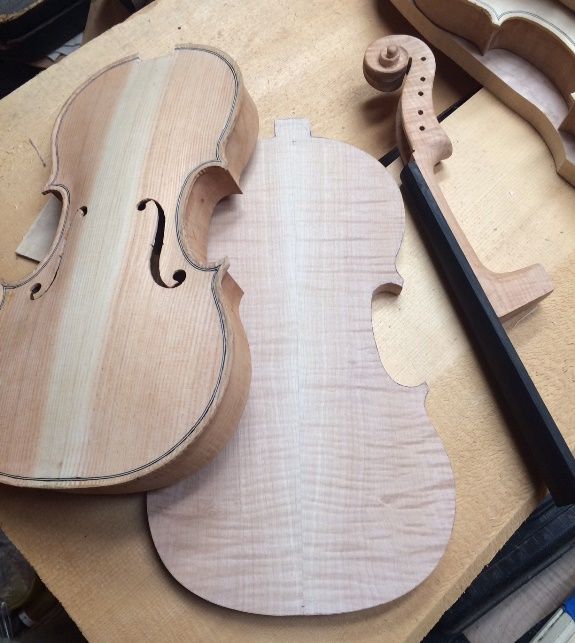
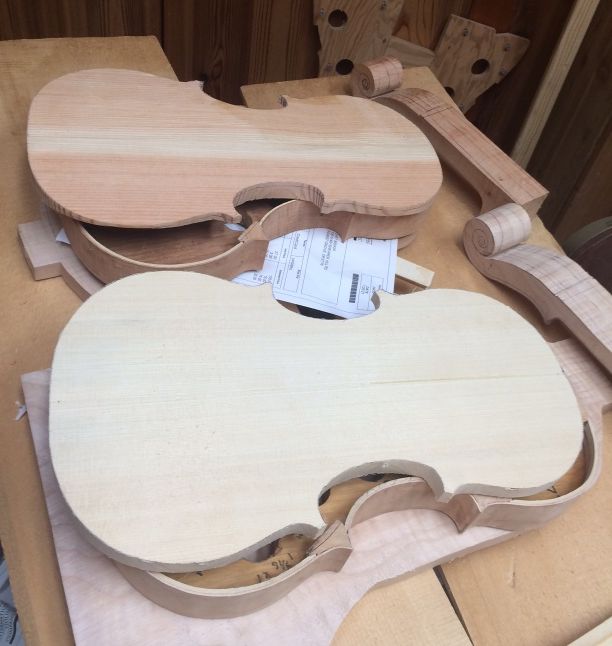
Neck #1 with the two completed front plates and garland assemblies.
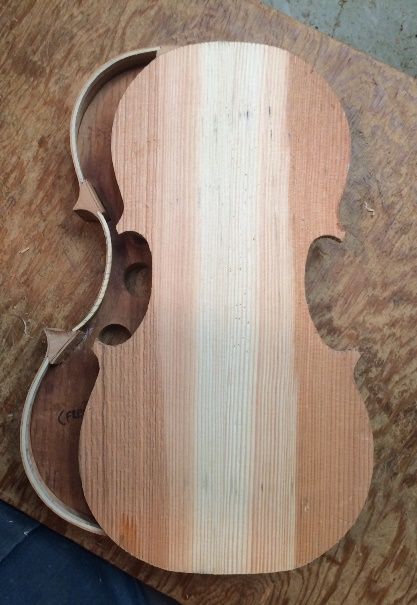
I had also traced and cut out the back plate for fiddle #1. (Big Leaf Maple: Pretty stuff!)
Then I set the neck on fiddle #1:
Beginning the neck mortise. Notice the hard, heavy winter reeds in the Douglas Fir front plate.
The cut-out in the front plate for the neck mortise.
Completed neck mortise
Completed Neck-set. (Back of the neck heel will still have to be sawn off.)
Healing up!
After that, we had appointments with various people, so I didn’t get a lot done on Thursday or Friday. By the time the weekend had rolled around, I had the biggest bandages off, and was sporting a plain finger bandage, but I had to be pretty careful. Bumps were still pretty unpleasant.
Thumb exit wound, healing well.
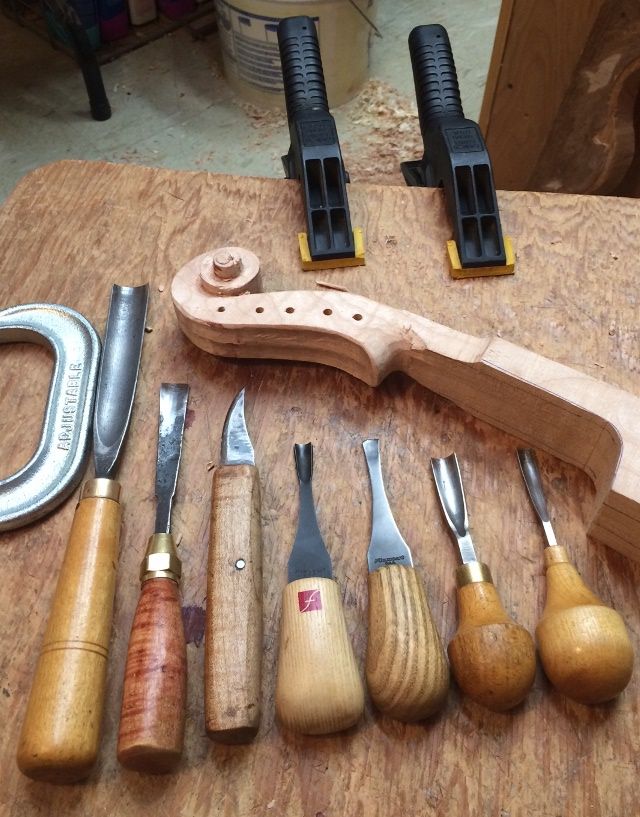
So, after having removed the bulky bandage, I went back to work on fiddle #2, carving that “Red Violin” scroll into just a plain, “five-string fiddle scroll.” It looked as though the majority of the “gore” would simply be carved away: so, no “Red Violin!” (By the way, that little gouge, third from the right, is the one that perforated my thumb.)
Beginning work on the second scroll, again.
Second scroll nearing completion.
I will post more again, soon. Sorry for the hiatus: it wasn’t intentional. 🙂
Build Progress for a couple of new “5-string Bluegrass fiddles:”
Last time:
Last post showed the garlands complete, and ready to be leveled:
Garlands with linings installed, ready for leveling.
I began the leveling process using a file and a finger plane, until the fragile rib-edges were level with the linings.
Beginning the levelling process.
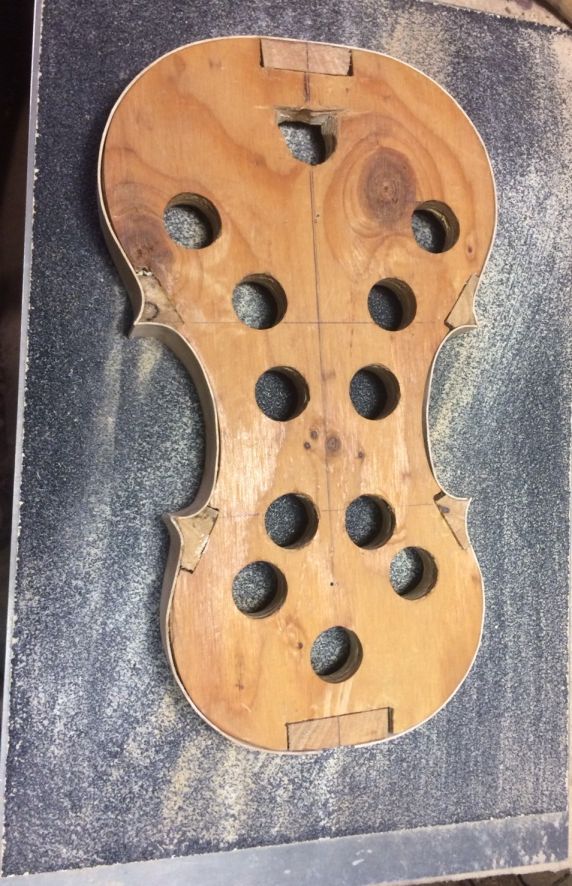
Then I completed the leveling by rubbing the garland on a sanding board.
Flattening the garland on a sanding board.
Tracing the plates
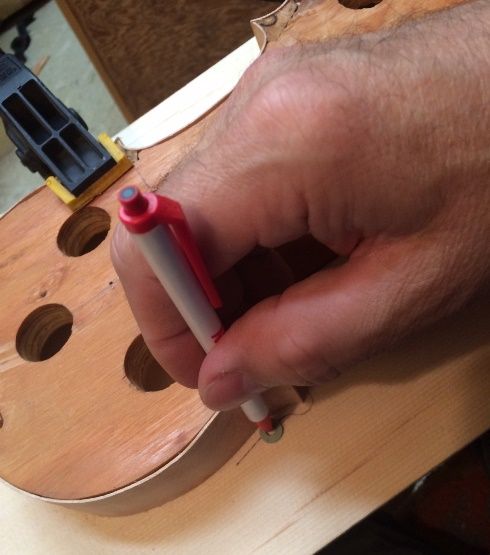
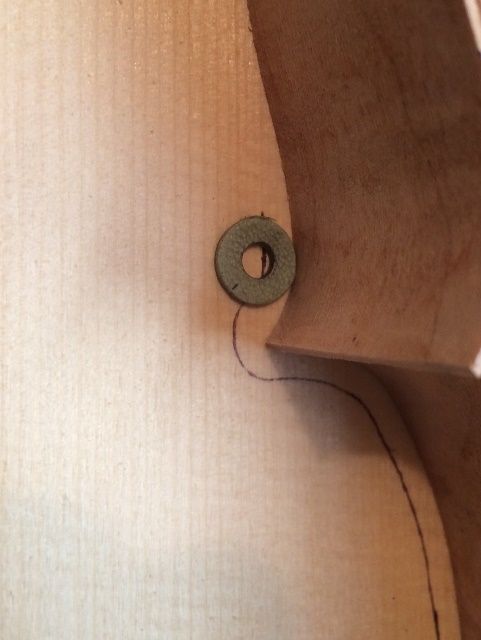
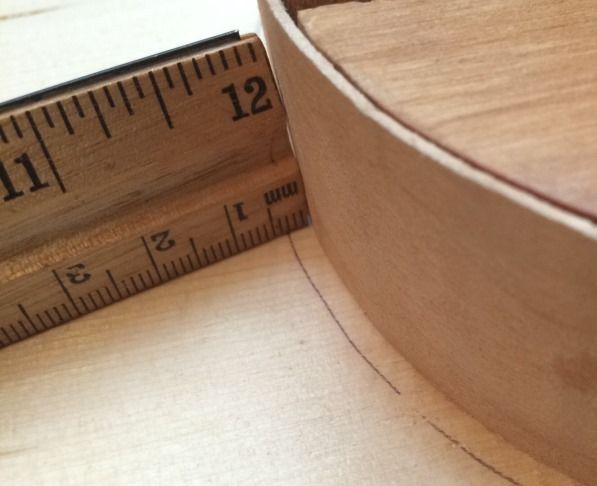
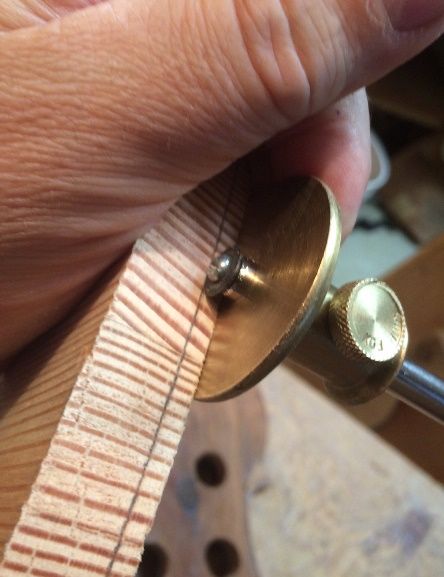
Once the garlands were flat, I could use them to trace the outline of the plates: I used a small washer as a tracing tool– as a spacer, to give me the overhang distance I want (3mm.)
Tracing the outline of the plate, using a washer and a ballpoint pen.
The washer has to be the right size to put the ink line 3mm away from the rib.
Pretty close, I’d say!
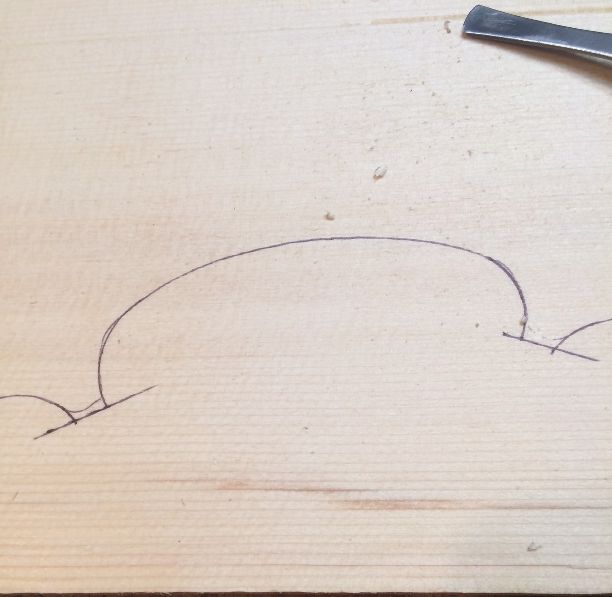
Correcting the corners and cutting out the plates
I really don’t want the “round corners ” produced by the washer, but they do give me a starting point from which to correct the corners before cutting out the plates:
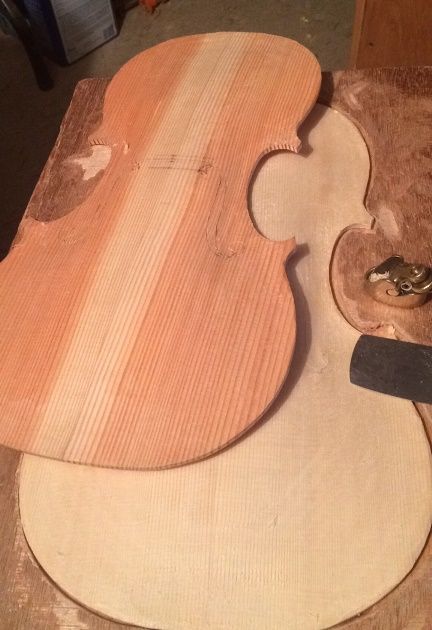
Corrected corner shapes laid out, on Englemann Spruce, using a straightedge and a circle template.
Both plates are ready for arching. I enjoy using Oregon woods when I can.
Arching the plates:
Arching the plates is a critical step, because the arching pretty much controls the tone quality. In fact, it may be the single most inportant factor in achieving good tone. I begin by scribing the edge-thickness of the plates and then I begin removing waste wood to complete the rough arching:
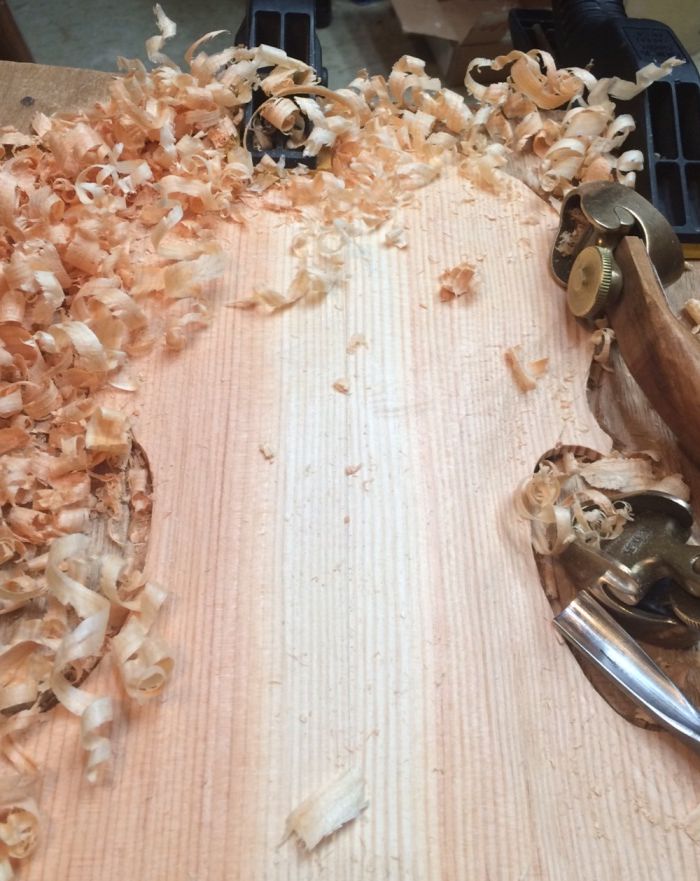
Scribing the edge thickness for the Douglas Fir front plate.
Rough-arching the Douglas Fir plate, using planes and gouges.
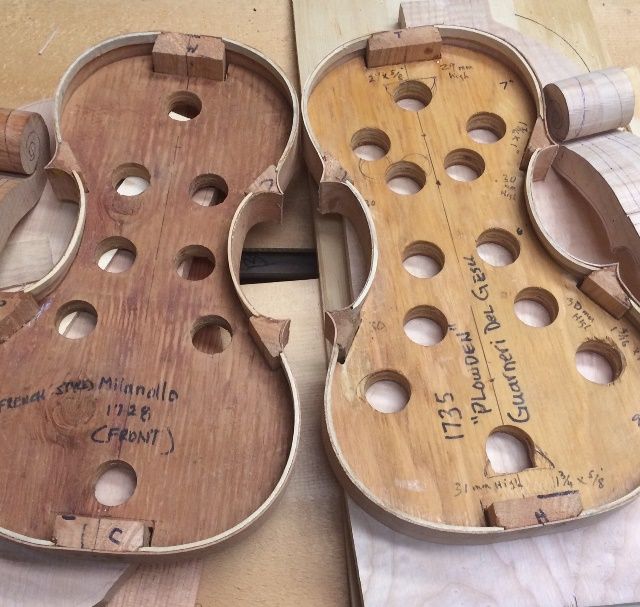
I use arching templates to establish the shape of the arching, and then fair-in the parts in between the templates. (The templates for the back plate are slightly different, but all of these things matter: I have to use them correctly. And, although I can get the arching “close” without the templates, quite honestly, “close” isn’t good enough.)
This top is from the previous fiddle, but I used the same templates, so here they are!
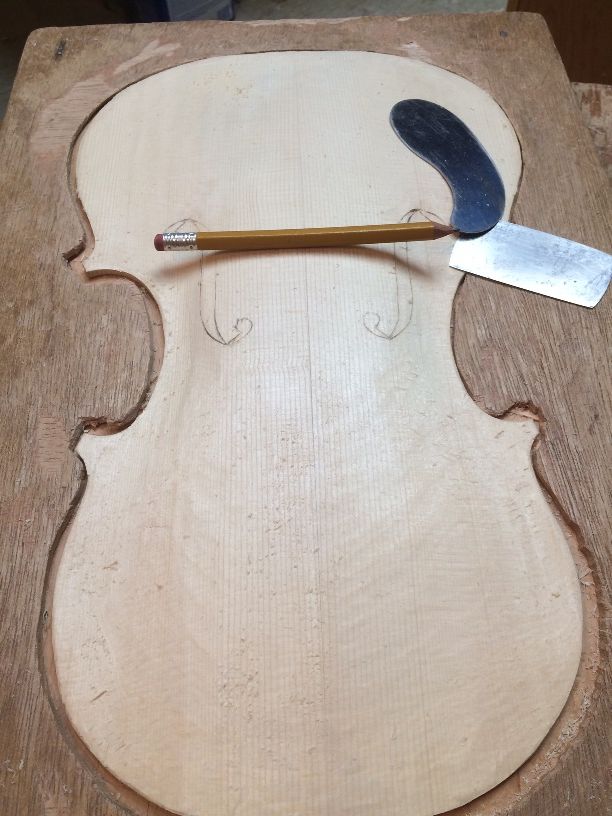
Laying out F-holes, and incising them.
After the arching shape is very close to correct, I use templates to lay out the f-hole shapes and locations, and then use a knife to incise the lines deeply, so that I can’t accidentally remove the lines through further shaping.
F-holes laid out and incised on both front plates.
Then I refine the arching, using gouges, planes and scrapers, until the shape is exactly what I want.
Refining the arching on the Englemann Spruce plate.
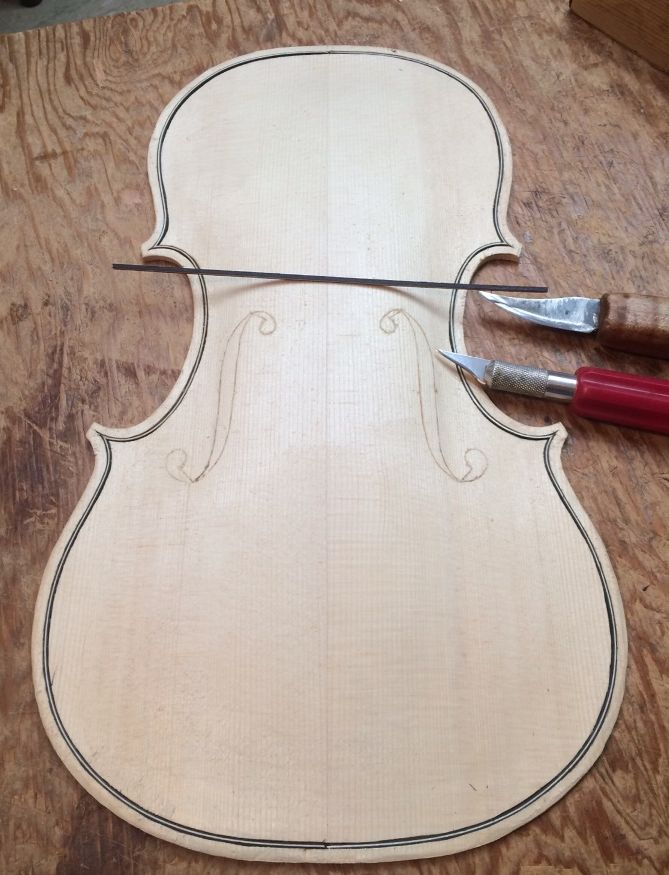
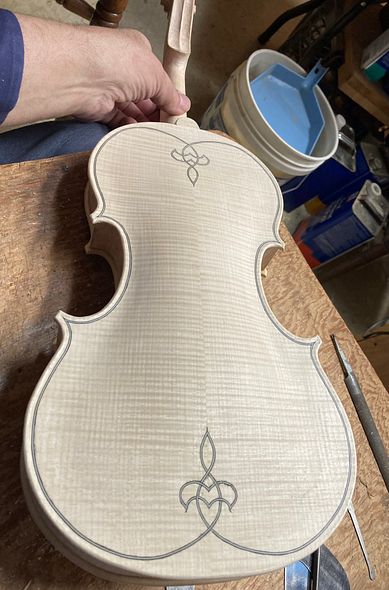
Both front plates ready to begin purfling.
Purfling:
The word “purfling” evidently comes from the old Italian “por filo” meaning edging. It supposedly helps strengthen the edge, and it certainly helps “define” the edge, and…it looks nice. Though there are examples of old intruments without purfling, allof the better “Old Master” makers used it, and I will never make an instrument without it. (Besides…I like it.)
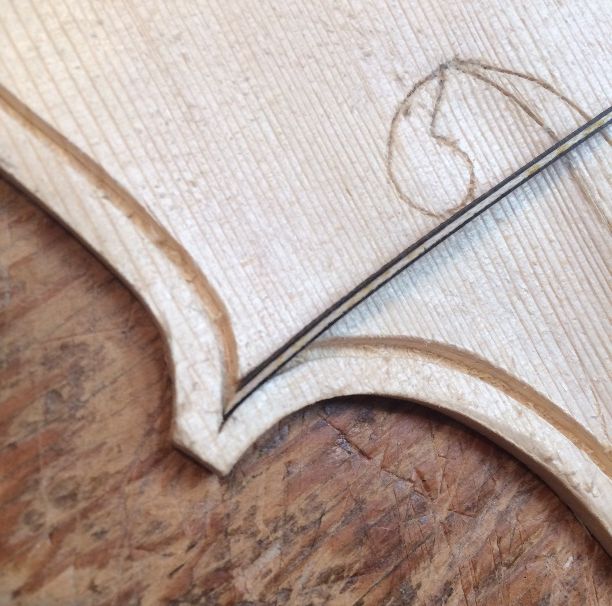
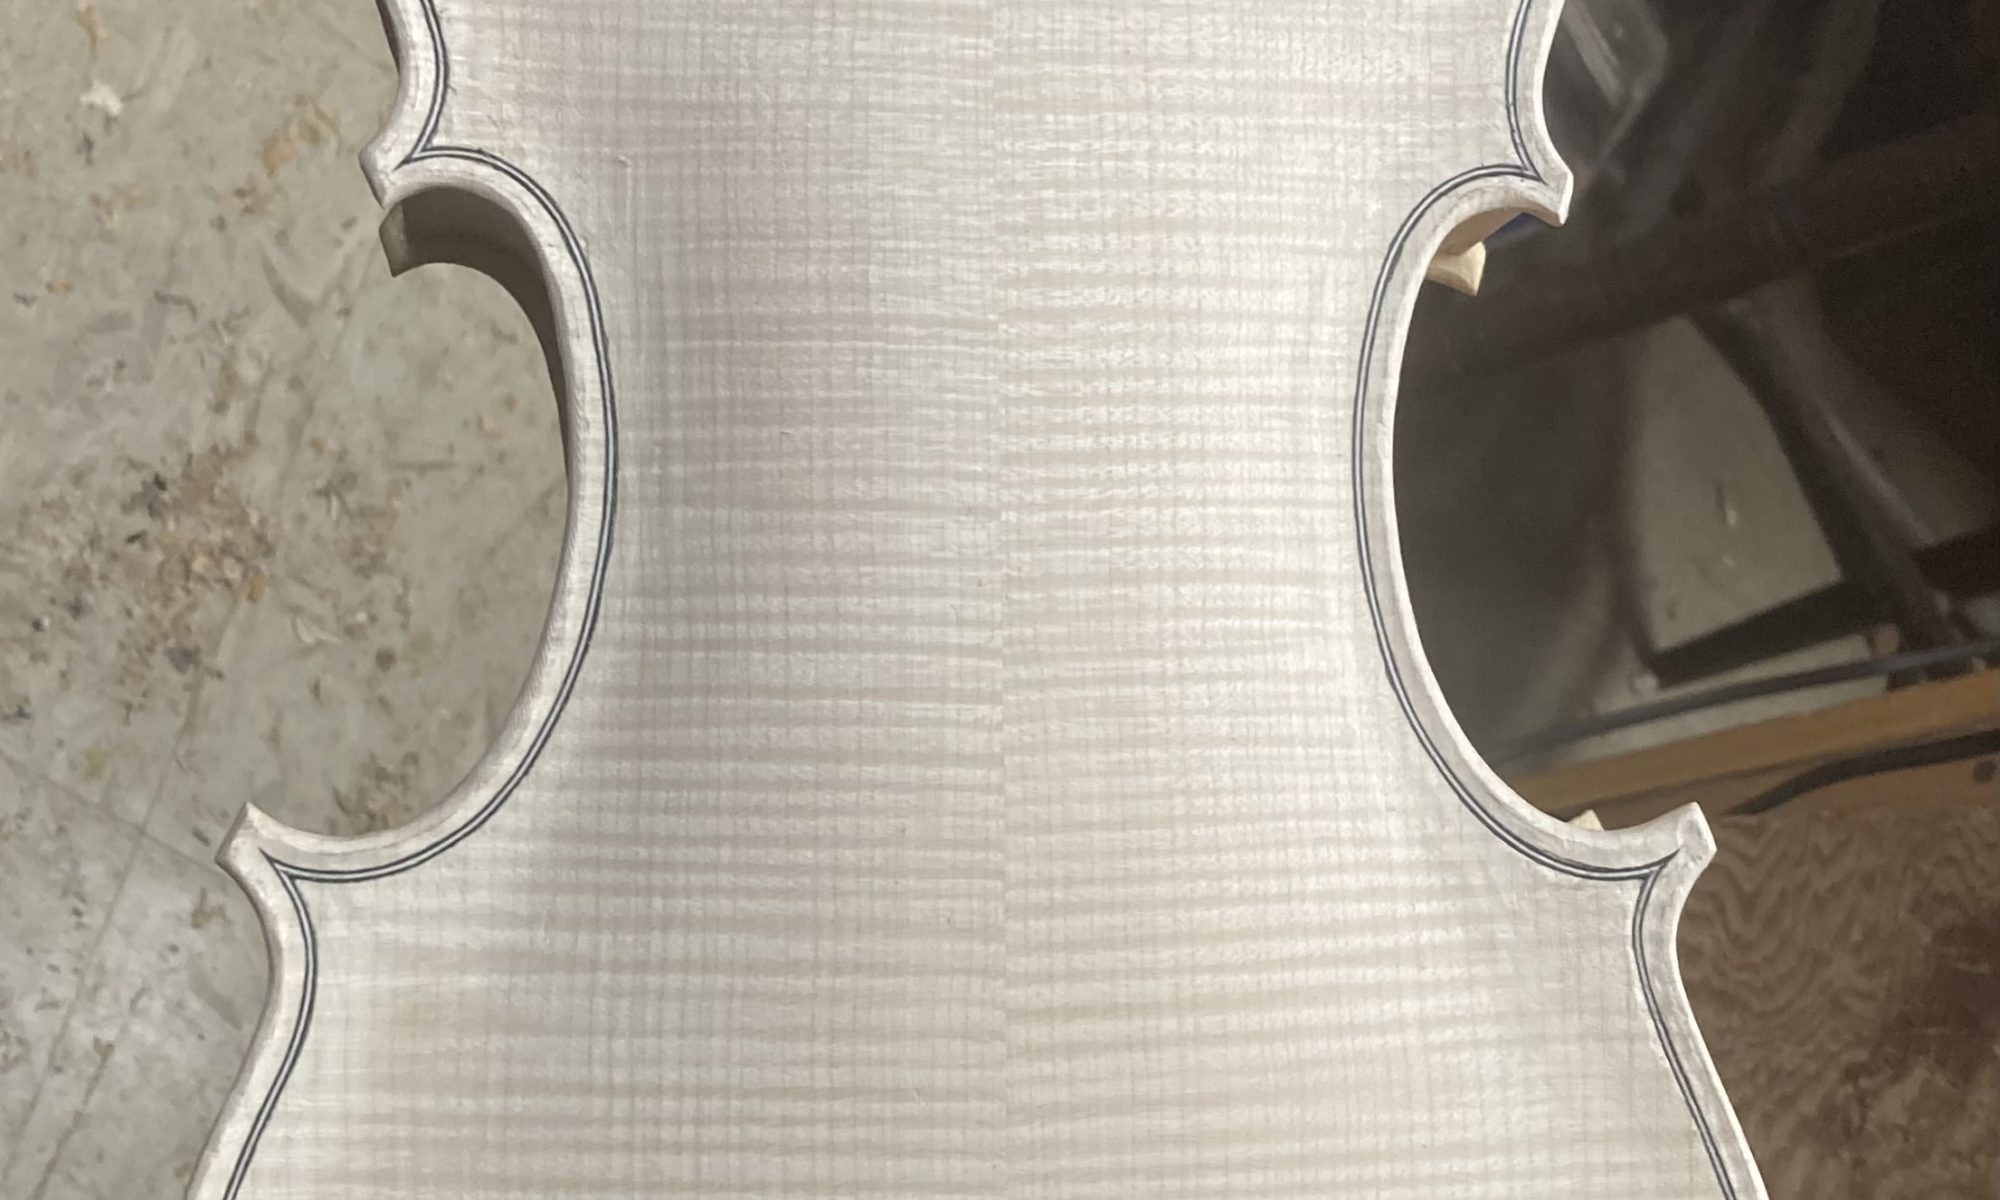
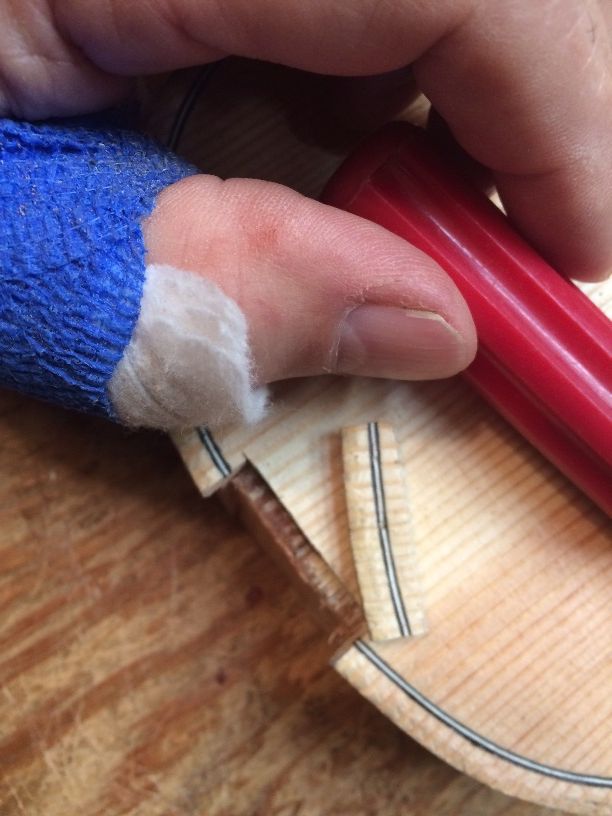
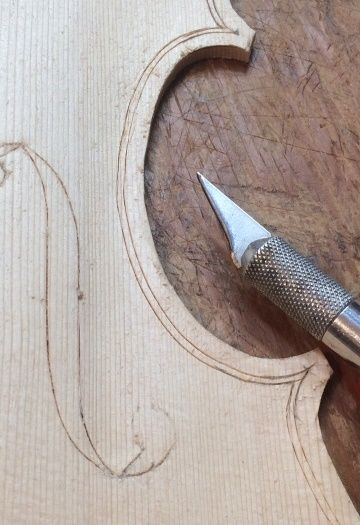
I position the purfling beginning at 4mm inside the outer rim of the plates, and mark the location of both sides of the slot, using a purfling marker (sometimes called a purfling cutter.) The marker won’t work for the corners, so I have to lay them out using a pencil.
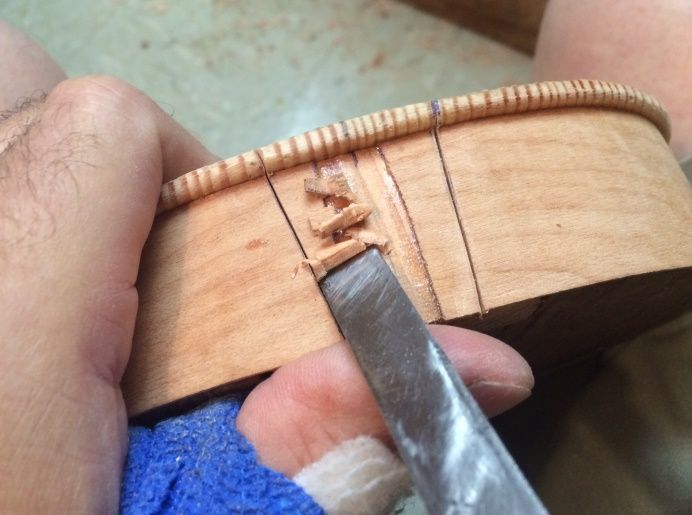
Then I use a knife to incise those lines deeply enough to receive the actual purfling strips.
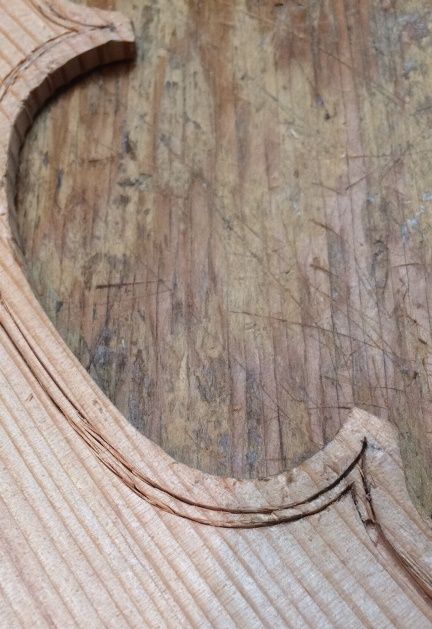
Beginning purfling slot in Englemann Spruce front plate.Douglas Fir is much more difficult to incise, because the winter growth rings are very hard.
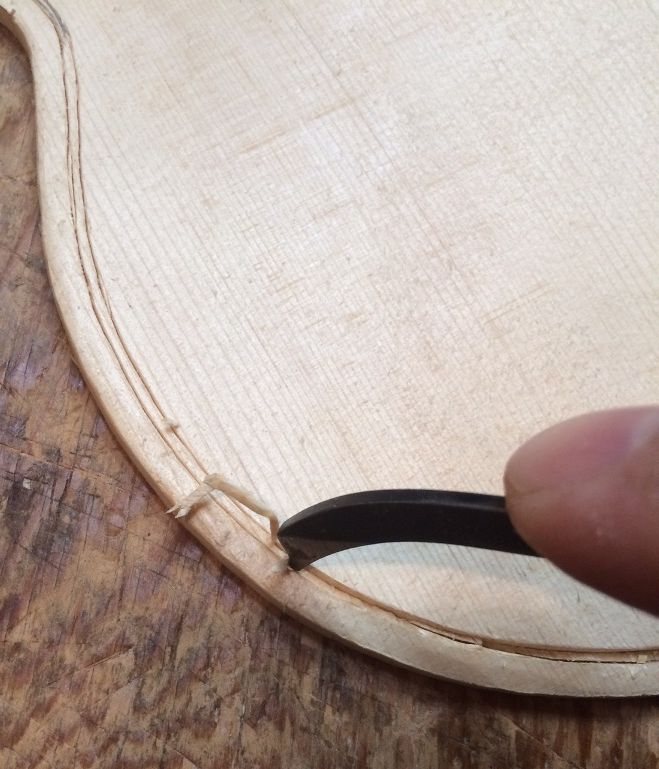
Picking waste wood from the purfling slots.
Finally, when the slots are complete, I can begin inserting the actual purfling strips. The strips come as 32″ long three-ply veneers, and are very brittle. I have to use the bending iron to prepare them for insertion into the slots.
Purfling slot completed in Douglas Fir front plate.
Ready to insert purfling strips in the Englemann Spruce plate…but not without bending them first!
Purfling, inserted dry, on the Englemann Spruce front plate. Ready for hot hide glue!
Gluing the Purfling:
After the purfling strips are correctly fitted, dry, I carefully lift them out, one by one, and slip hot hide glue into the slot beneath each strip, then quickly force the strip back into the slot, ramming it home with a special tool.
When all is complete, I allow the purfling to dry, before moving on to cutting the channel, performing the final edgework, and fairing the channels into the arching…but those are stories for another day. 🙂
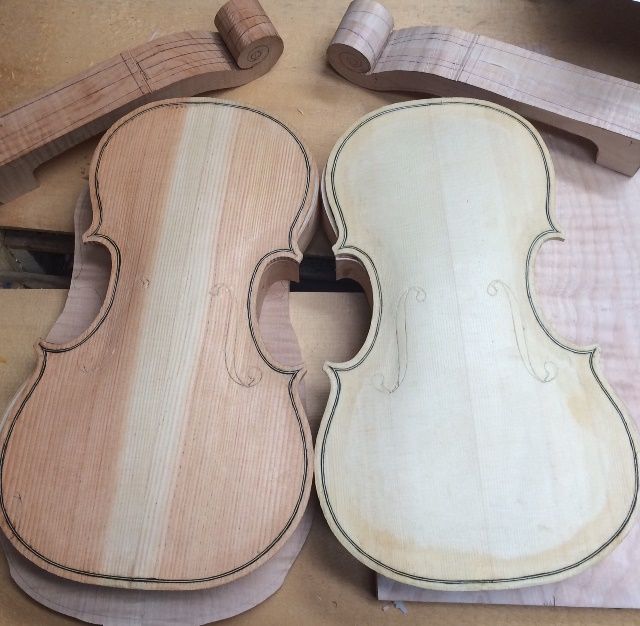
Both plates’ purfling complete, still wet from gluing.


.jpg)

.JPG)