Originally, when I first began making instruments, I laid out the scrolls with a pencil and simply started carving. However, that was extremely labor intensive and not very accurate, either. As a result, it was very easy for me to lose track of where I was going, and ruin a scroll by carving away wood I really needed. (Obviously, that is a “bitter pill to swallow,” having to scrap a scroll and start over.)
Learning from a Better Maker
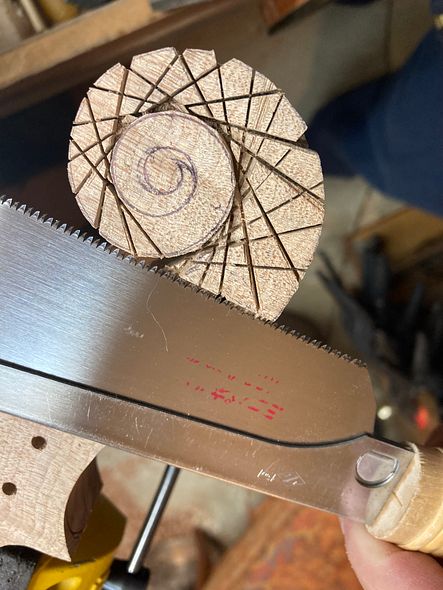
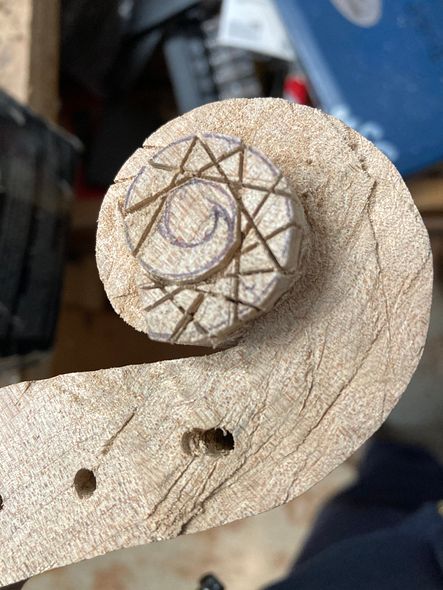
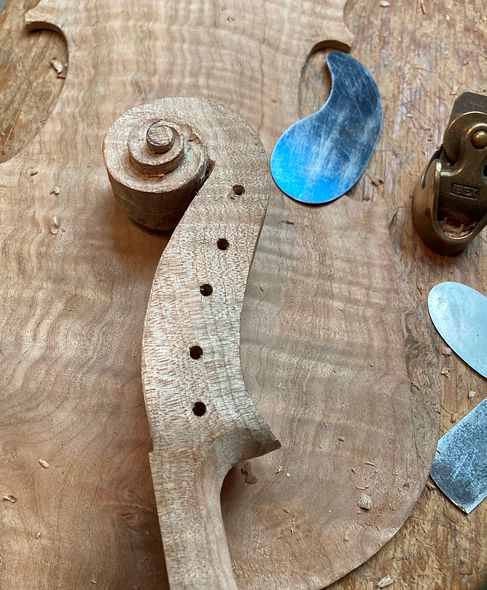
So, then, what has changed? Fortunately, I watched how a viola maker in Brazil (Luis Manfio, of Sao Paulo) carves his scrolls, on a photo-essay he once posted. To begin with, he used a fine-toothed saw to cut “tangents” to the scroll pattern. Then, he used the same saw to follow the side surfaces of the scroll and remove the scrap wood. Understandably, this was a much better way than I had been attempting, so, ever since then, I have followed that path.
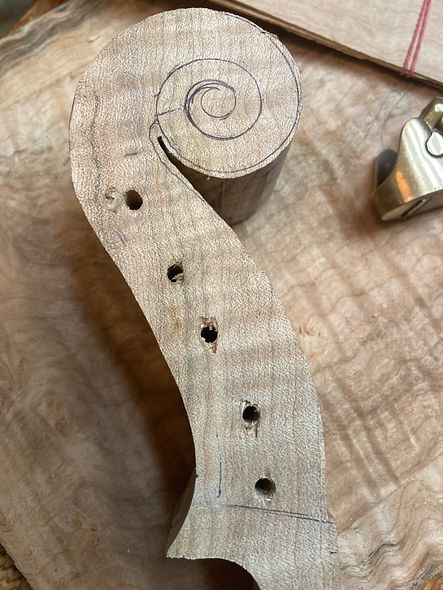
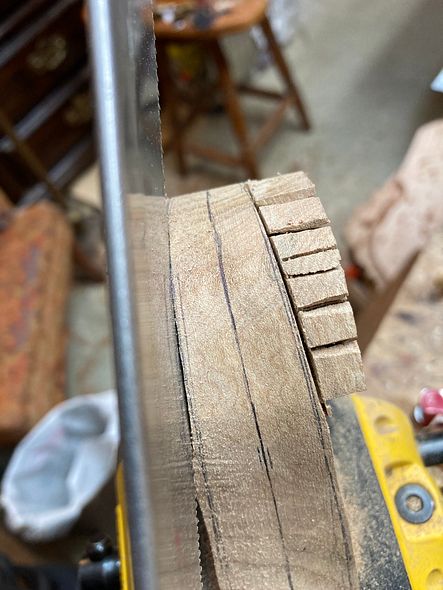
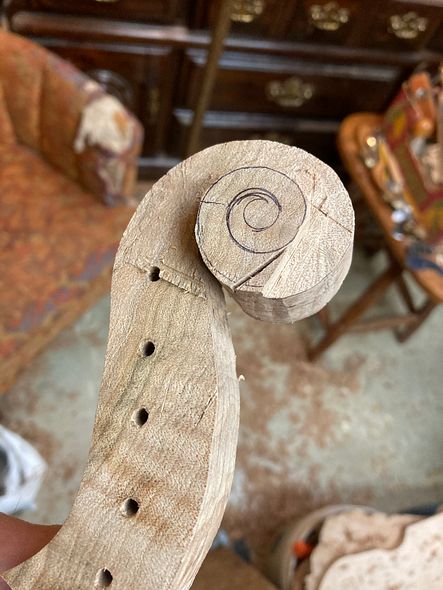
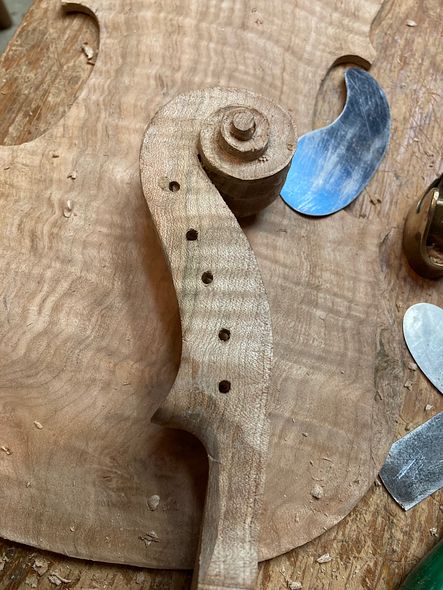
Step one: Five String Scroll blank, laid out for carving.Also, the Volute and pegbox layout.Step two: Cutting tangents to the scroll curves.Step three: Cutting the volute lines, to remove the scrap wood.The resulting scroll blank still needs more tangents cutThis is how the final tangents look. (Notice, too, an “error” pilot hole. It will be plugged befor the real peg holes are drilled.)
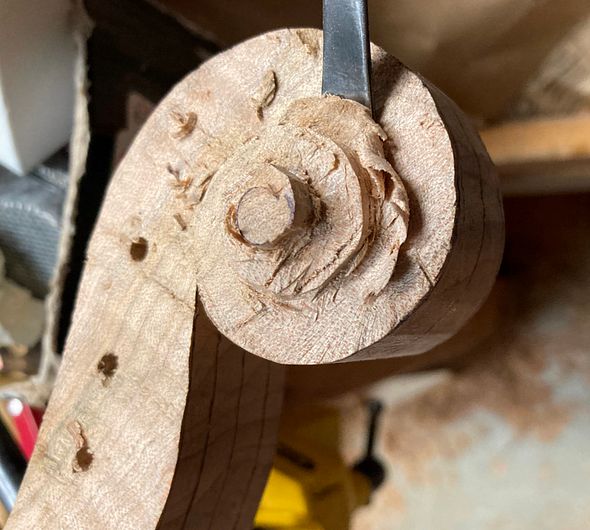
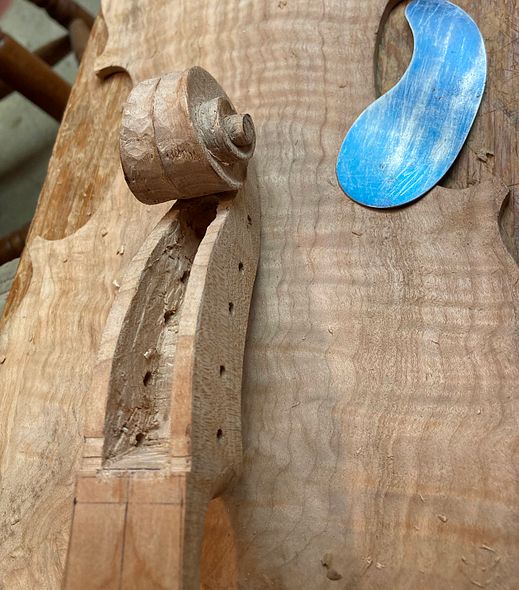
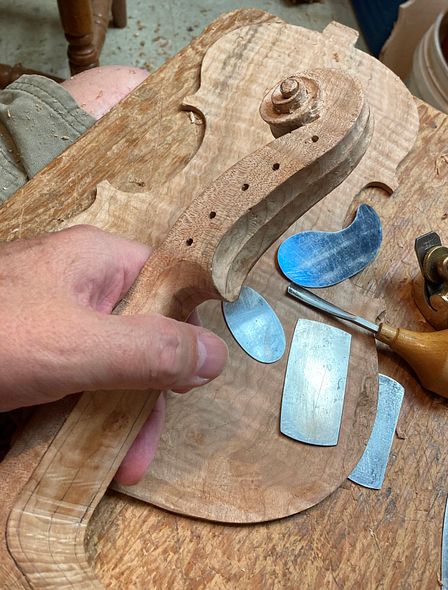
Then I carefully cut away the waste wood from the center area of the scroll, using small gouges.
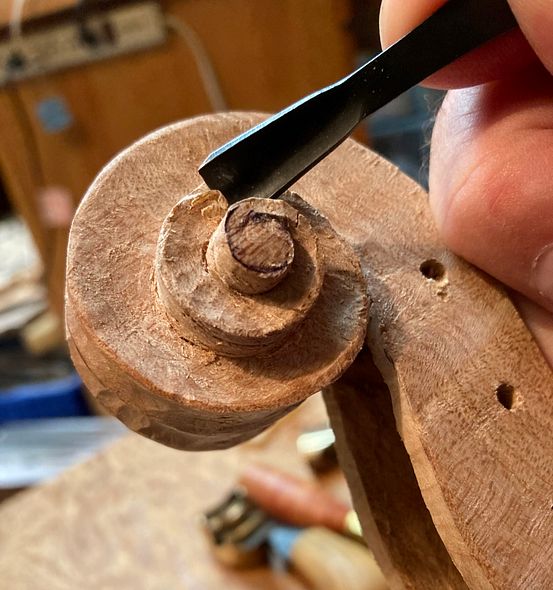
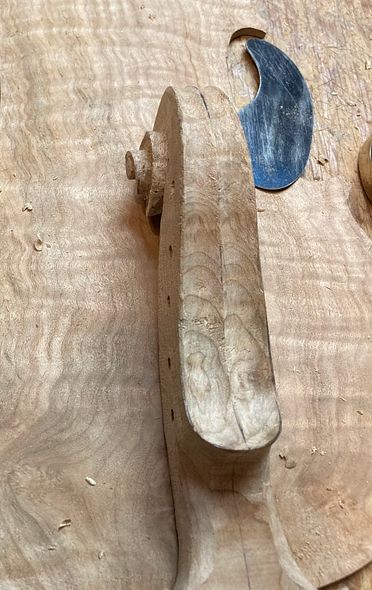
Using a small gouige to remove the rough wood from around the scroll “eye”Undercutting the turns of the scroll, using a small curved gougeRough carved pegbox and scroll, front viewRough-carved scroll and pegbox from side and backCloser view of rough-carved back of scrollTreble-side view of rough-carved scroll. (Additionally, notice that the “error” hole has been plugged.)Bass side of rough-carved scroll.
Installing the Fingerboard
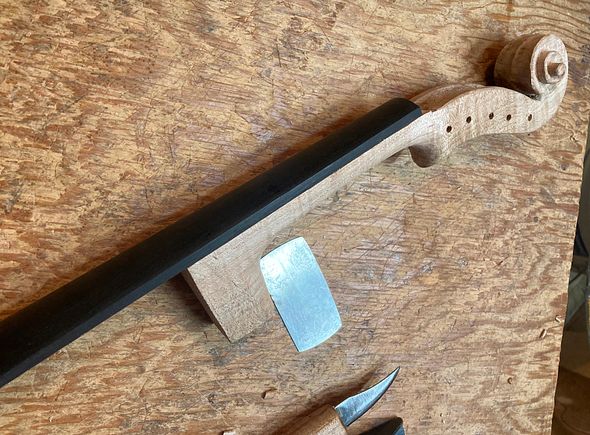
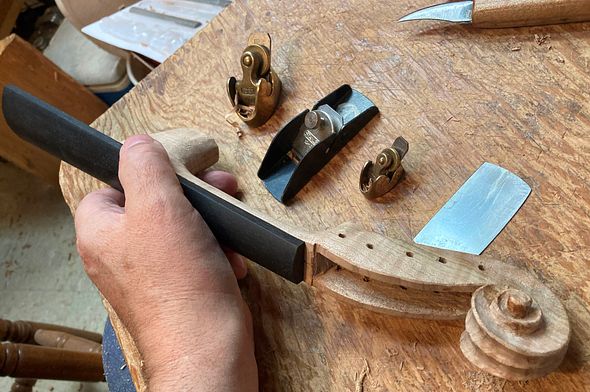
After the scroll is close enough to correct that it will not be changing much, I will trim off the excess wood from the sides of the “handle-portion” of the neck. Then, I will temporarily install the fingerboard, using three “dots” of hot hide glue.
Fingerboard temporarily installed and being shaped along with the neckShaping the fingerboard and neck, and perfecting the scroll
Subsequently, the next step is to install the neck into the neck-block on the instrument.
My last post showed the six “kits” I had built. The post included bookmatching the five-string fiddle plates, cutting the profiles of the Big Leaf Maple necks and scrolls, and cutting appropriate ribs to size. As a result, I ended up with six kits, including bass bar blanks all cut from the same billet of Englemann Spruce, and a big pile of linings ready to bend. ( I thought the linings were willow, but I now suspect may be poplar, instead.)
Five of these front plates ar Englemann Spruce, but one is Douglas Fir. I rarely find Douglas Fir that will work for tonewood, but a friend brought me a pickup-load of firewood, and I found some that sounds great. (As you can see, I am not a “snob” about where I get my wood. If I need special wood, I buy it, but I frequently use Oregon woods.)
(In case anyone reading this is not aware, I build all my instruments (except the fittings, as a rule) entirely from the raw materials. I make all my molds by hand, and all my templates by hand. I have even made many of my tools. So every instrument is genuinely “handmade in Oregon by Chet Bishop.”) 🙂
Four of the six assembled “kits.”
I set aside four of the six “kits,” just to get them out of the work area. Then I began work on the remaining two kits.
Two of the four kits in storage.
Beginning the Builds
The first step after shaping the blocks (last post) is to bend the ribs and linings. Then I can glue the ribs to the prepared blocks, using hot hide glue, and finally glue the linings to the ribs.
I rub a heavy coat of candle-wax (“paraffin” in the US) on the outer rims of my molds. This will prevent a “sneaky” drop of hide-glue from accidentally bonding the ribs to the molds instead of just to the blocks.
(A rib accidentally glued to the mold can be a disaster if I don’t realize my mistake in time. The glue is definitely stronger than the rib. It will destroy the rib, if I don’t catch it early enough to use hot water or steam to release it. But the wax coating pretty much eliminates that problem.)
I used a bending iron and a thin aluminum bending strap, to hand-shape the ribs, and then put them aside in paired sets, with the respective molds for which they are intended.
Ribs and linings bent and ready to install.
Installing the Ribs
I installed the center-bout ribs first: they can be difficult, so I’m glad they are first. But the realreason they are first, is that the upper and lower ribs will overlap the ends of the center ribs: they do not have a mitered corner, but a lapped corner, which if done correctly, is essentially invisible.
A pair of center-bout ribs installed.
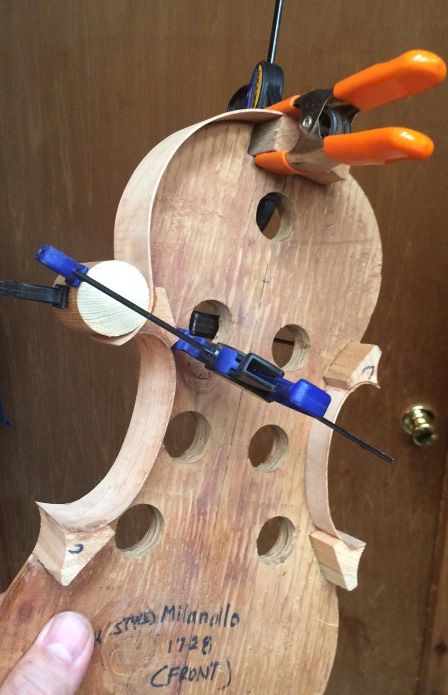
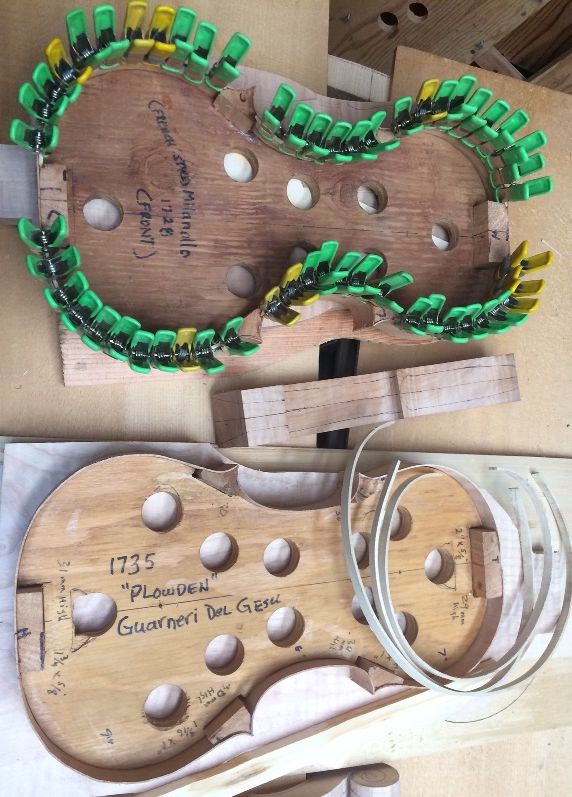
I frequently use these “French-style” molds, (flush on the back) which allow me to install the front linings and still easily remove the mold. (Italian-style molds are centered on the ribs…I use that kind, too.)
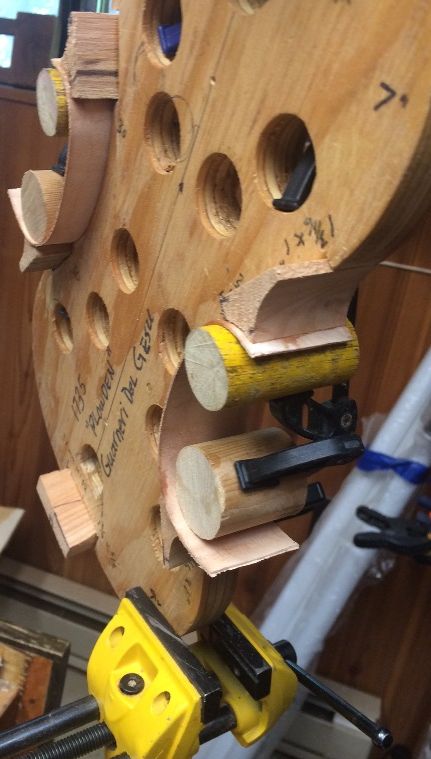
I used cylindrical clamping cauls of appropriate sizes (dowels, broom-handles…whatever) and f-clamps to quickly secure the rib ends before the hot hide glue gels. If I make a mistake, I can steam the joint loose with a teapot, and do it over, correctly.
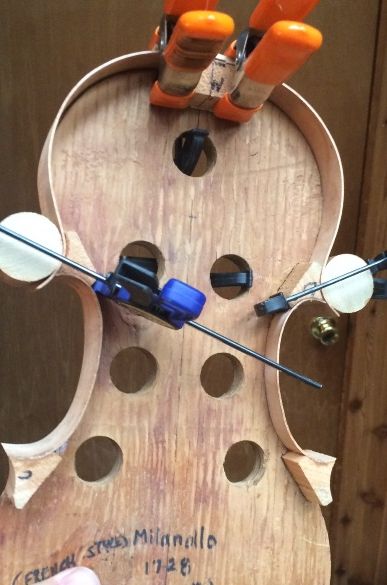
After the center-bout ribs dry, I shape the ends of the ribs to match the curvature of the blocks. Then the upper and lower ribs can be glued to the perfectly-shaped block and rib. Finally, I begin installing the upper and lower ribs.
First upper rib installed: notice the shaped endes of the center-bout ribs.
A pair of matching upper ribs installed.
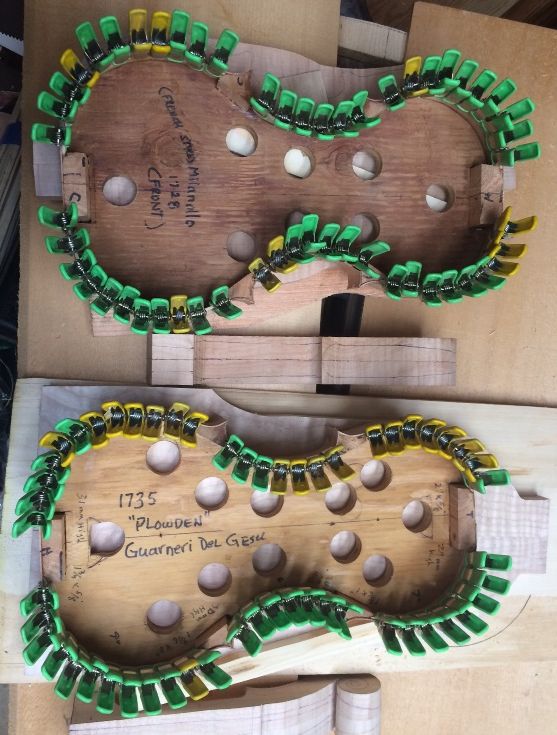
All the upper and lower ribs installed. (Looking from the back side of the mold.)
Two completed rib-sets, ready to be trimmed before adding linings. (Lots of smoke blowing in from the fires this season, making the light kind of red.)
Necks!
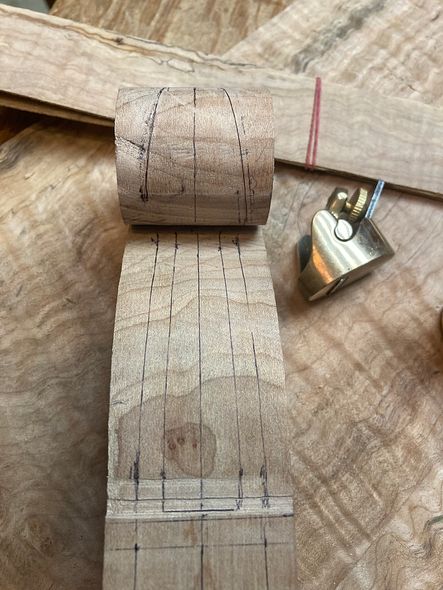
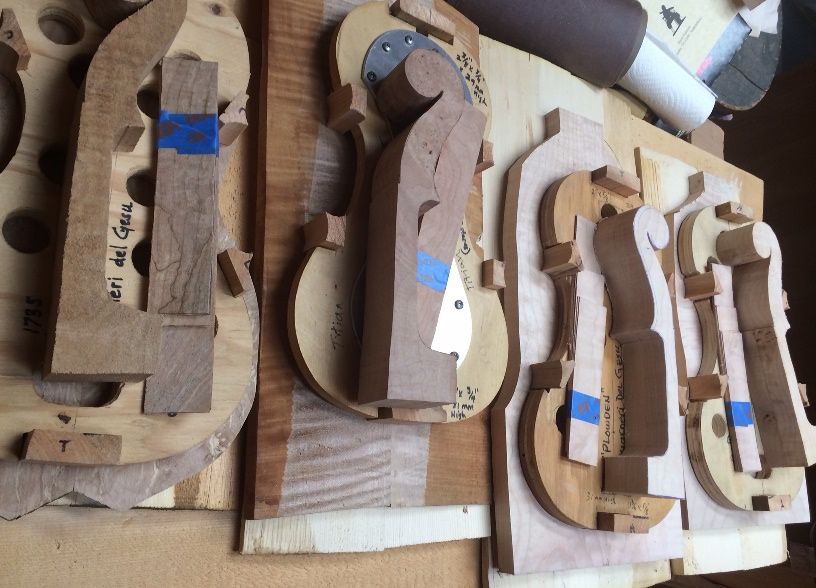
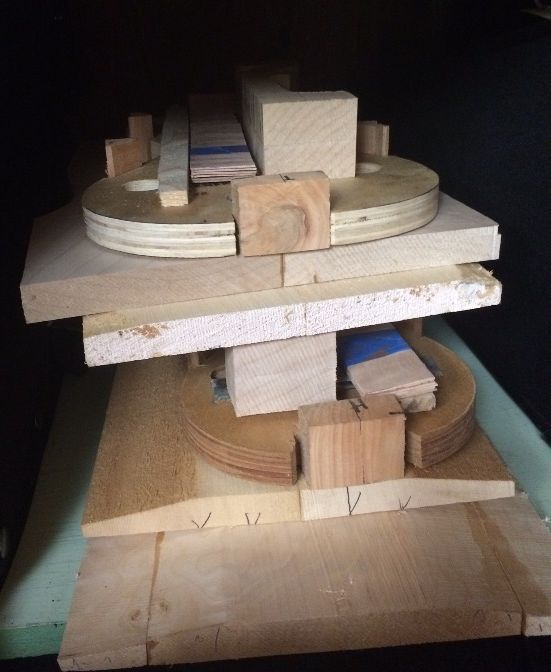
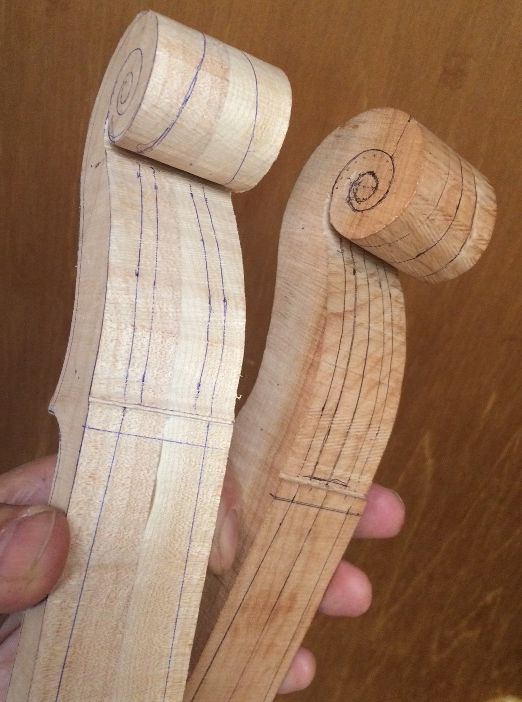
While waiting for glue to dry on the ribs, I laid out the necks so that I will be ready to begin carving them.
Necks laid out for carving.
Linings!
After trimming all the corners, so that they look as though the ribs come together as one, I begin installing the linings. I cut a small mortise on each side of each block, flush with the rib, so that the lining will be glued tightly to the rib, and into the block mortise. I secure them all using hot hide glue.
Next, I cut the linings to length, shaping the ends to closely fit the prepared mortises. Then, I coat about 7mm of the edge of the rib, and the entire mating surface of the lining with hot hide-glue and insert the lining into the mortises and push it to the correct level, corresponding to the ribs. Finally, moving rapidly, I secure it with small spring-clamps.
One set of linings fully installed: one to go!
All the front linings installed in both molds.
I made a good deal of progress yesterday, and had hoped to make more progress today, but there were some household repairs that needed to be addressed first; so I didn’t begin working on violins until mid-afternoon.
Tomorrow I will level the fronts of the garlands and trace the front plates… I hope. 🙂
A shop in Charlotte, NC has agreed to take one of my fiddles on consignment.
The shop is called “The Violin Shoppe” and is a pretty important outlet in that area for stringed instruments, so I am thrilled to be represented there.
One of the owners, Glen Alexander, is a great fiddler, and demonstrated the posiblities offered by my little five-string viola, on his facebook page as well as on YouTube.
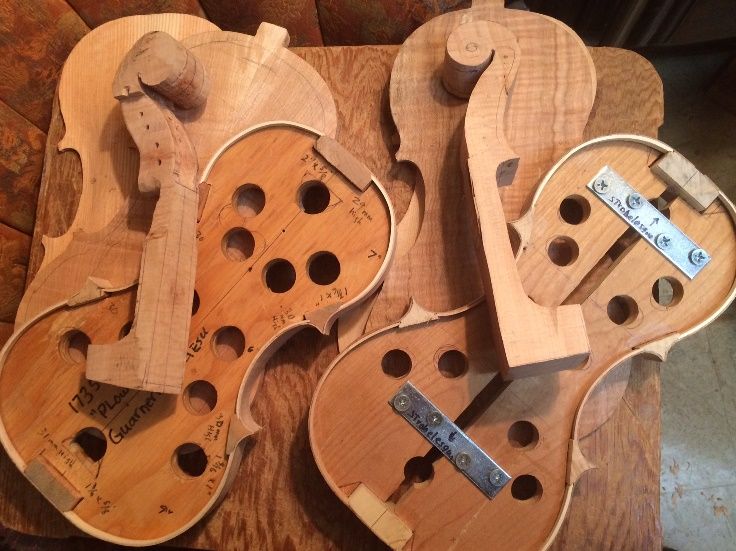
The last two commissions were a five-string on the original Oliver Pattern and a five-string on the slightly-wider Guarneri pattern. Both sounded great, and both customers are very happy. So, that left me wondering which one to do next. The obvious answer: Both!
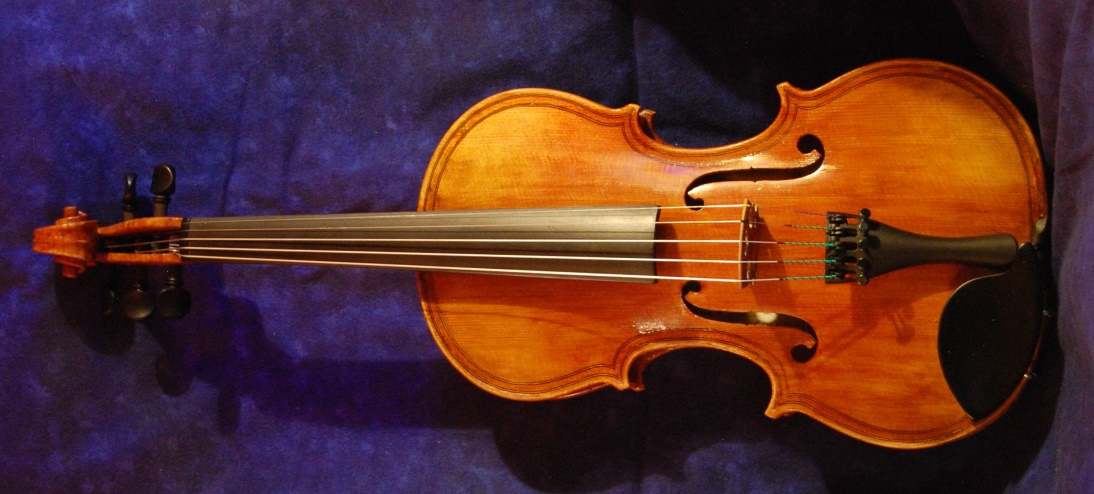
Five String fiddles Guarneri and Oliver, side by side.
I’m trying a new neck and scroll design on the Guarneri model. I hope it works well, because I really like the graceful look.
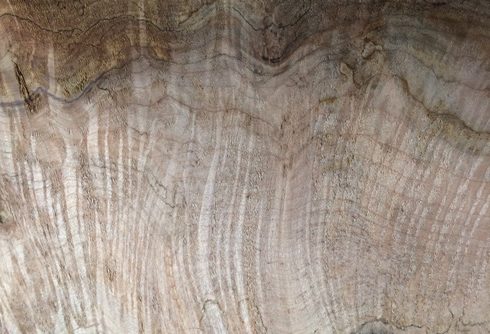
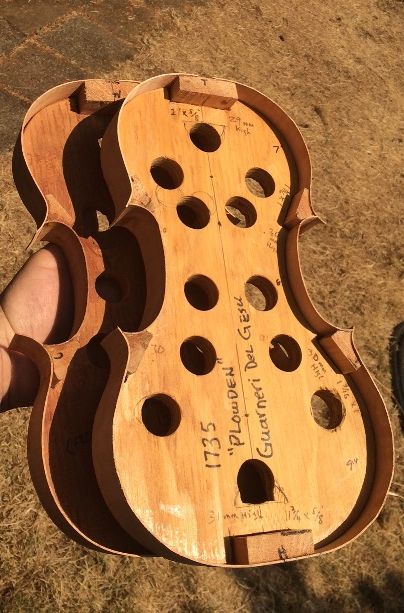
The instrument on the left (modeled after the 1735 “Plowden” Guarneri, with modifications to acommodate five strings) is left-over Oregon Big Leaf maple from building a five-string double bass, during the summer of last year (same as the Andy Pastor commission fiddle.)
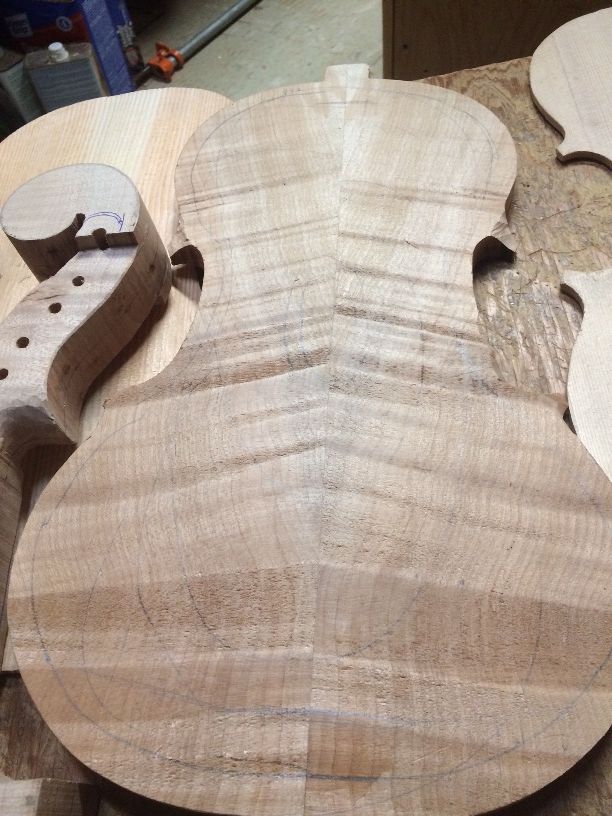
Heavily Flamed Maple for the back plate.
The scroll (also Oregon Big Leaf Maple) is from a tree on the property where my wife grew up, and so are the ribs. The back is from a tree on the next ridge of hills west: about ten miles by road, probably three miles in direct line-of-flight. (Same one from which the recent double bass was taken, as well as several other instruments I have made. The late Terry Howell, of Howell Tree Farm, gave me the entire log, so I have a good supply.)
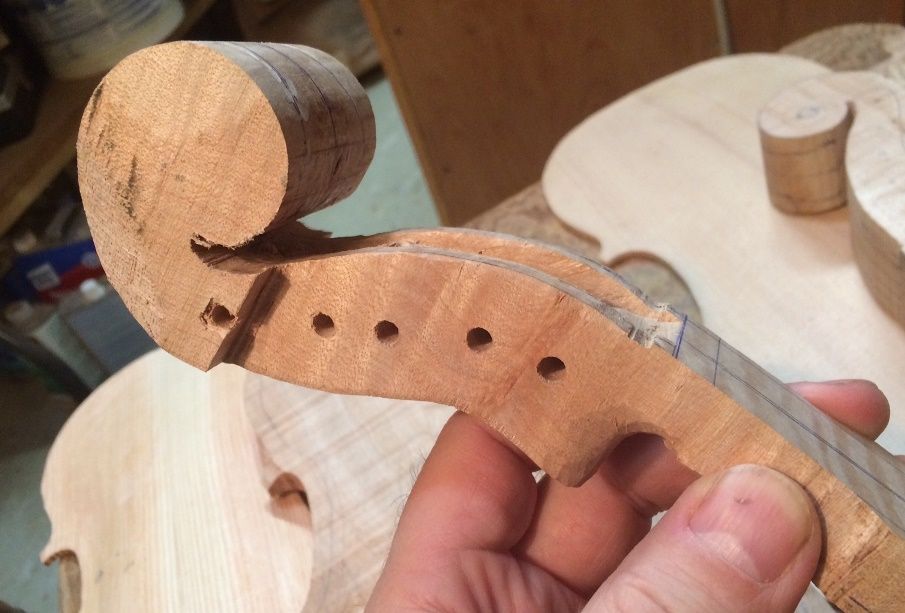
Heavily flamed maple neck in progress.
Experiment:
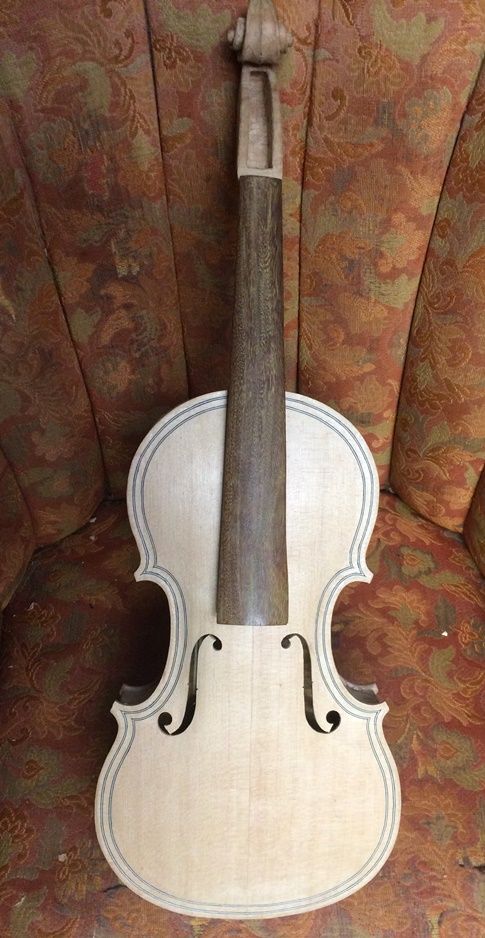
I have also decided to try an experiment: This will be the first time I have attempted a 5-string bluegrass fiddle with a belly of Douglas Fir, as opposed to Spruce. Otto Erdesz was famous for using it successfully in many of his instruments, so, when a friend gave me some very straight, split Douglas Fir, I decided to make the attempt, on the Guarneri model. It is quite dense compared to spruce, but it rings like a bell, when I tap it with my finger, so, I think it will be good.
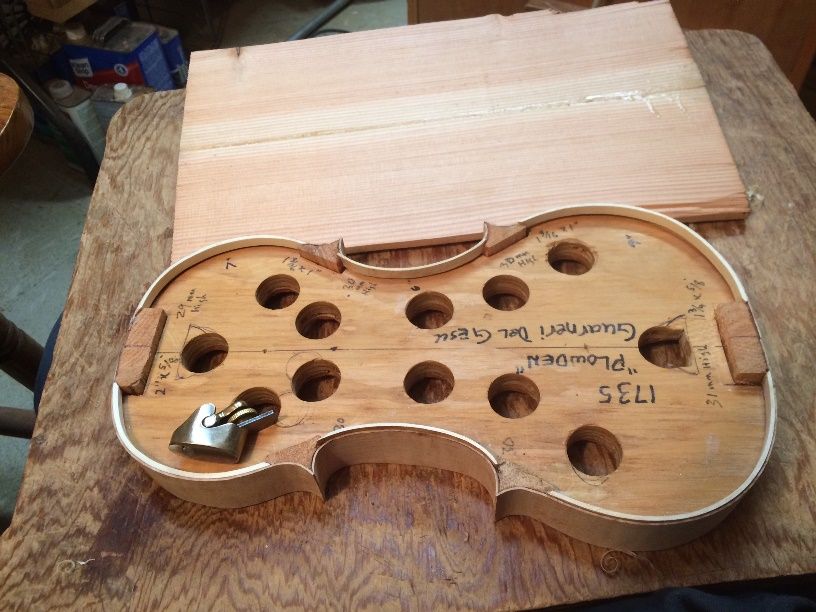
Bookmatched Douglas fir top plate with Guarneri-model garland.
Douglas Fir Top Plate arching complete.
The back, as well as the ribs and the scroll on the right-hand instrument above (the Oliver-model) are all from the tree on my Mother- and Father-in-law’s property. The belly, as usual, is Sitka Spruce.
Spruce belly, Oregon Big Leaf Maple back and scroll.
So, that is where things stand, today:
All the parts for the two new 5-string fiddles.
Slow Start due to Repairs and other Responsibilities
This has been a slow start: 2021 saw me needing to repair my ancient bandsaw, and, even more depressing, my drill press had succumbed to the misguided attention of a marauding mouse. (The little wretch had crawled up through the ventilation holes of the electric motor and chewed off all the insulation from about 4″ of wire!)
Saw:
The bandsaw required disassembly and drilling out a worn, threaded hole, and retapping for a helicoil. The machine will probably outlast me, now.
Drill Press:
The drill press motor had to be taken apart and a new wire soldered in place. (A friend did that one for me. I really lack confidence when it comes to electric motor repair.) Fortunately, the damage was limited to just that one wire. (Maybe the plastic insulation gave the mouse a belly-ache.)
Back in business:
At any rate, I now have both machines running again, and I was able to saw out the profiles for the remaining plates as well as drilling the pilot holes in each scroll.
I should be able to get more done, now. (Gotta prune the apple-trees, too… Spring is on the way!)
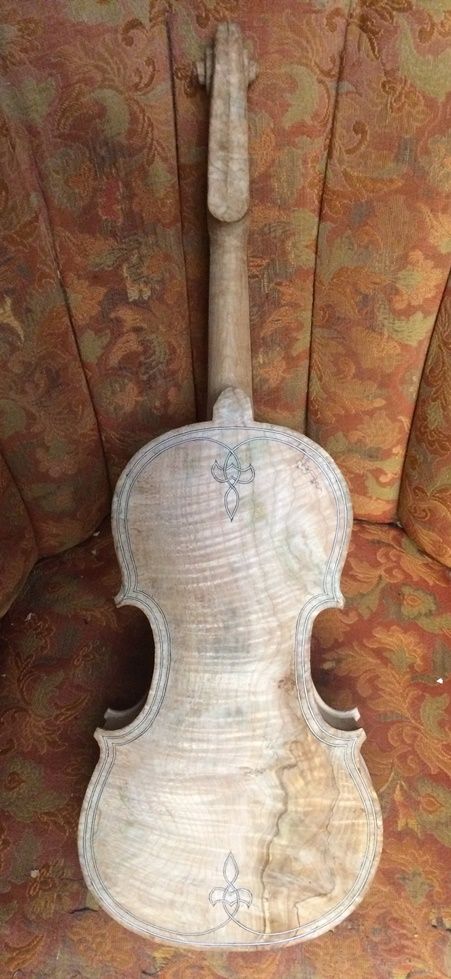
Back in December, I received a commission for a new 5-string “Bluegrass” fiddle. It was to be made on the same form as one of my earlier instruments but have a two-piece, straight-grained Sitka spruce top and a very wild-grained Oregon Big Leaf maple back, sides and neck. The customer specifically requested Ipe for the Fingerboard, saddle and nut. Ipe is extremely hard, dense wood, but not threatened or scarce, as ebony is becoming. It has an odd color when under the knife, and leaves a bright yellow dust when it is scraped or sawn, but it finishes to a nice dark brown and darkens further with age.
Wild Grain Makes for Tough Carving
The last time I posted, I was just beginning the back plate arching. It was tough carving, as it is extremely “wild” flame, and the Big Leaf Maple grain is anything but straight. The result, of course, is some very beautiful wood. But it is hard work, regardless. The blades must be kept razor-sharp, and cuts must be kept shallow in depth.
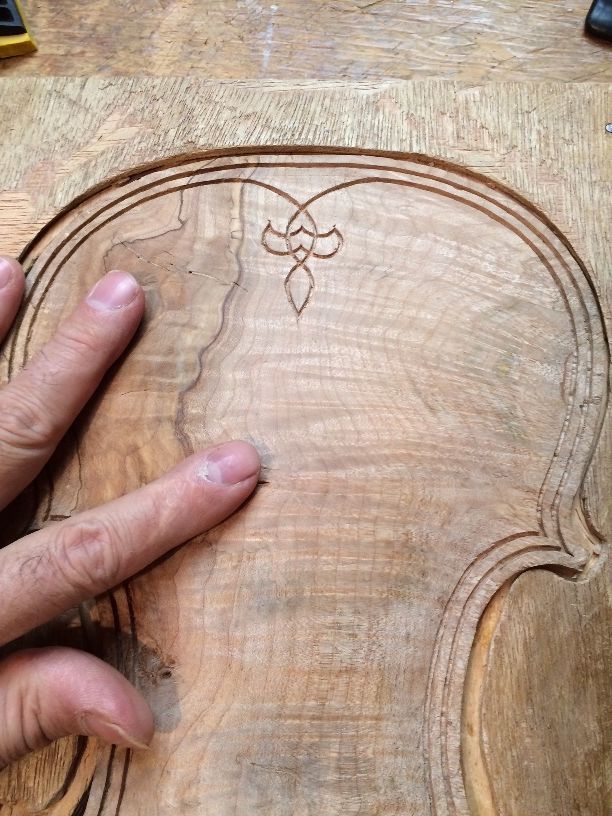
The purfling requested was not only double purfling (favored by a few of the early masters, especially those of Brescia) but was to include a purfling weave, as well, in the form of a modified “fleur-de-lis.” This is a design I came up with on my first five-string fiddle, and have continued to use, in a variety of forms, ever since.
Working on the back purfling slots.
I like the look of the double-purfling and the weave, but it is pretty hard on my hands, as I still do all my purfling inlays by hand. I know a lot of makers use a Dremel-tool, or something similar. Perhaps I eventually will succumb to that “new-fangled” tool as well.
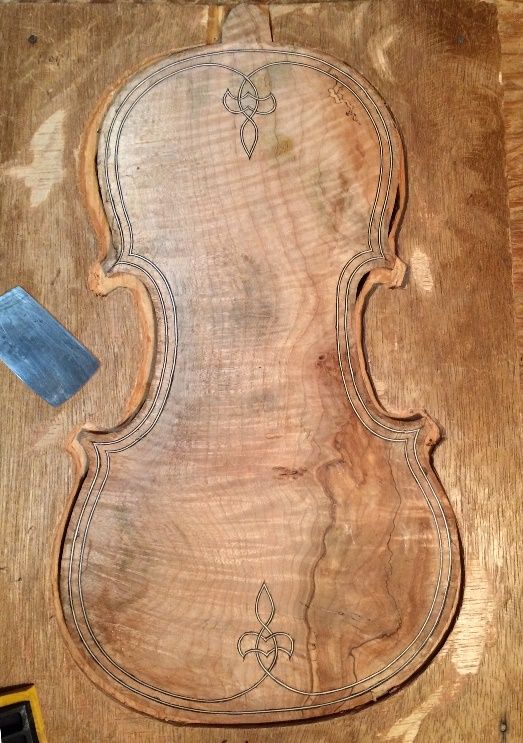
At any rate, here is the back plate, with the purfling complete:
Back plate complete, ready for final scraping and graduation.
Closing up the “Corpus”
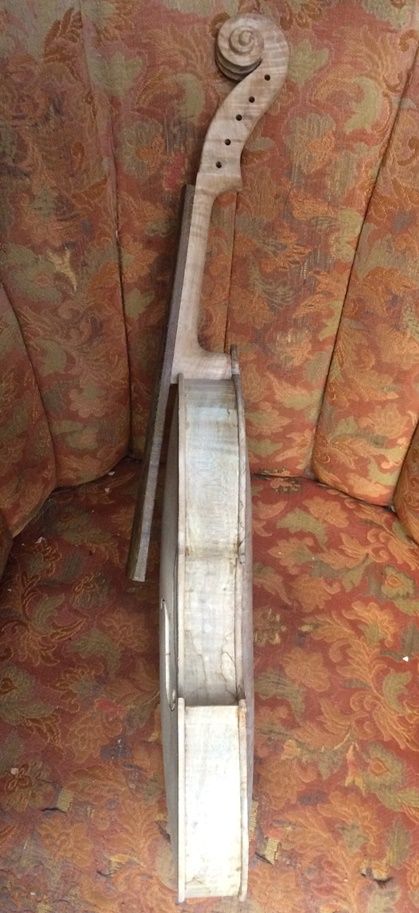
I closed up the corpus a few nights ago: all that is left to do before varnishing is to complete the final carving of the neck heel, and all the final edgework, so that the wood is “varnish-ready.”
Closed corpus, side view. (Note the heel yet to be carved; edgework incomplete.)
Closed Corpus, back view…button still too long; heel uncarved.
Closed Corpus, Front view. Corners and edgework still not done.
I will show one more progress report during the varnishing process, and the last for set-up and playing.
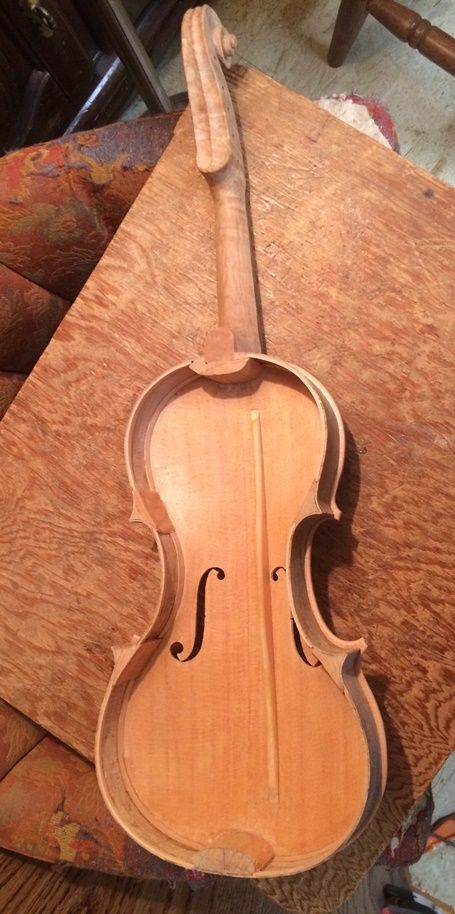
Before I could prepare the back plate of this five-string fiddle, I had to complete the rest of the corpus (body of the violin:) First, the inside willow blocks and willow linings had to be tapered and shaped so they are completely smooth. Then, the back of the entire corpus (including the heel of the neck) has to be leveled, so that it will lie flat on the back plate. So, here is the main part of the 5-string violin, with the interior clean and smooth, and the back leveled and flat:
Inside complete, and back leveled.
Beginning the Back Plate
I clamped the corpus flat on the back plate billet, then traced around the ribs, using a small washer to establish the correct rib overhang. Then I corrected the corners, using a straightedge and a series of circle patterns. Finally, I cut out the plate “footprint”, and began the arching process. Oregon Big Leaf Maple is a relatively soft maple, but it is still a good deal harder and tougher than Sitka spruce, so the back plate is a lot more work to carve. Here is the beginning:
Beginning Back Plate arching.
In the above photo, the back plate is sitting in a work cradle, so that it will stay in place while I carve it. The Ibex plane in the photo has been slightly modified, to add the palm-fitting handle. This reduces the stress on my fingers and transfers the force to the palm of my hand as opposed to my thumb and forefinger. (To Ibex plane-owners: you will observe that I have removed the adjusting screw and reinstalled it upside down to allow insertion of the maple handle.)
I have been on vacation for two weeks, which has allowed me to accomplish more work than usual, in a shorter period of time. I go back to my regular job, on Monday, though, so things are about to slow to a crawl. (Sorry…that’s life. :-))


.JPG)

.jpg)