16-1/2″ 5-string Viola nearing completion

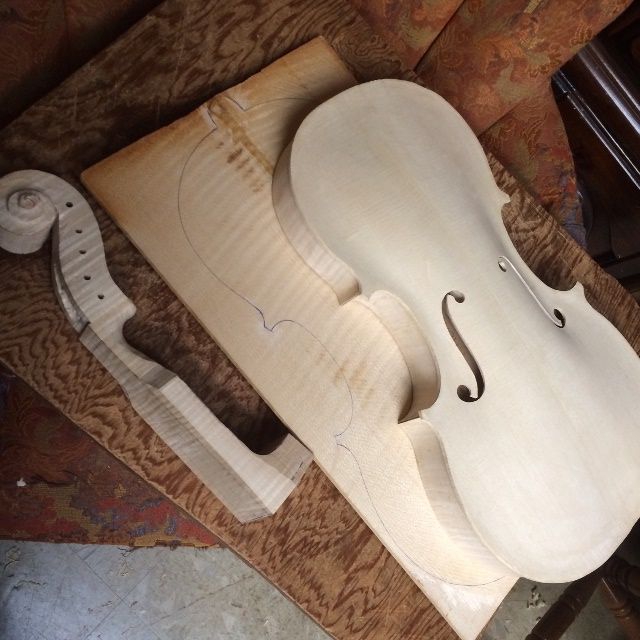
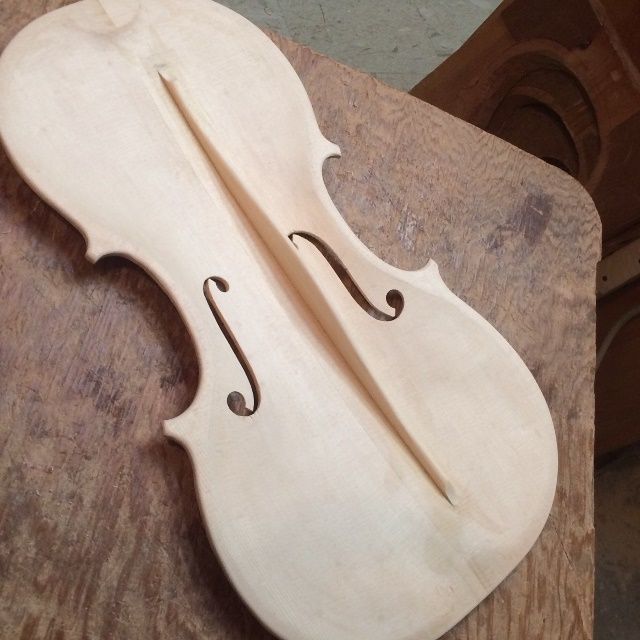
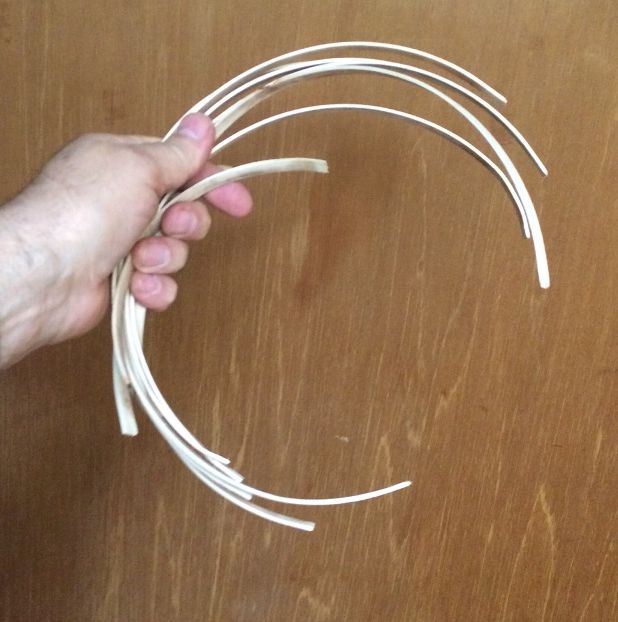
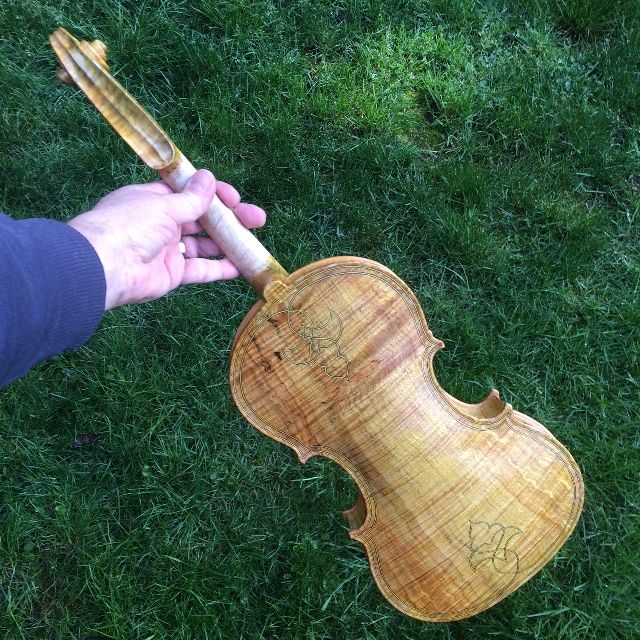
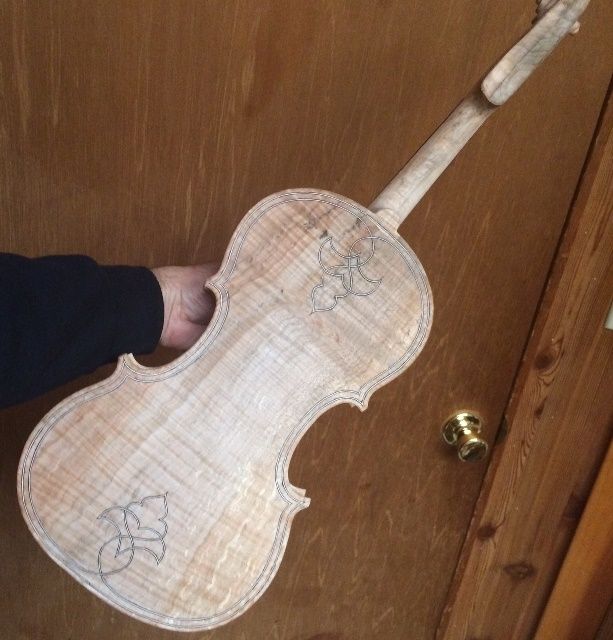
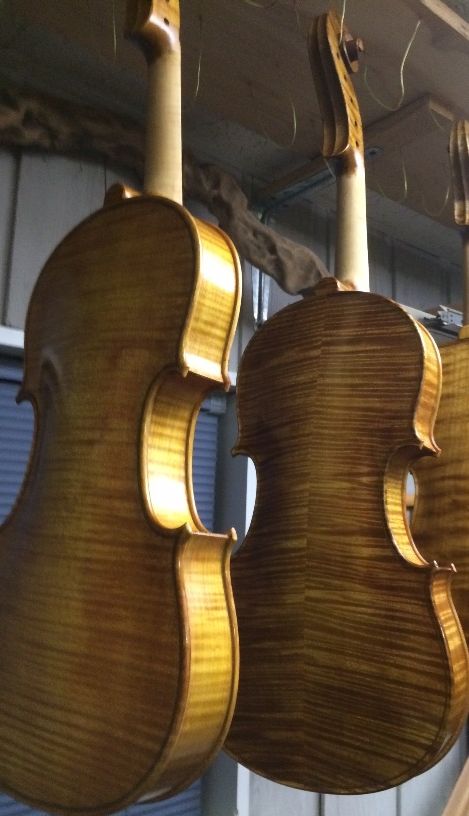
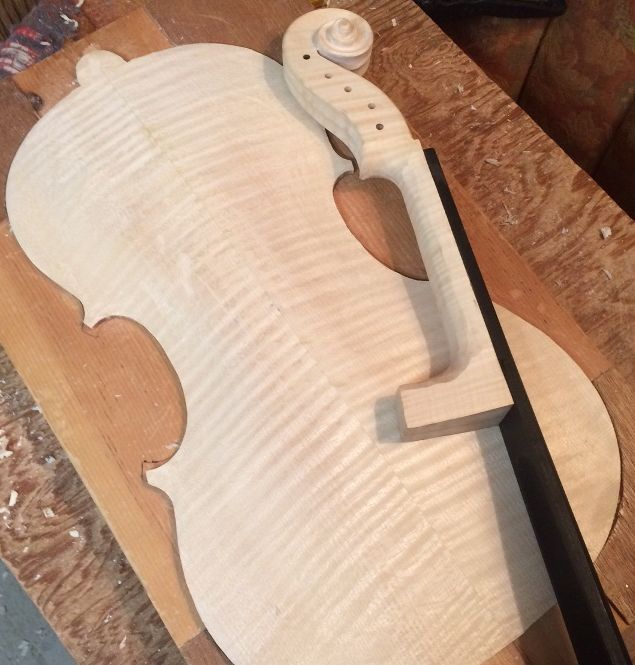
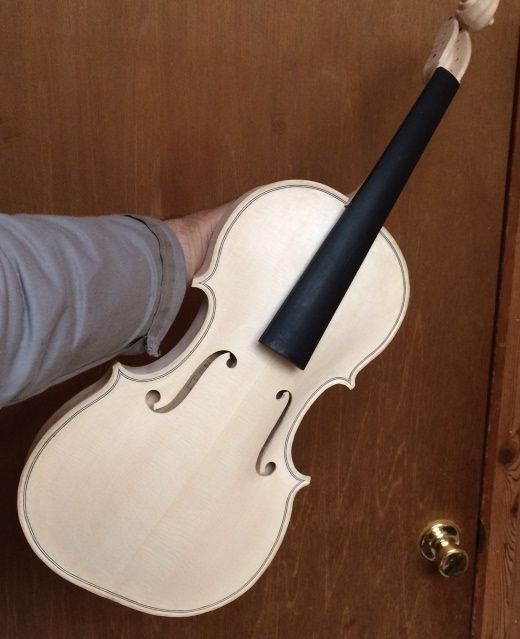
Almost done with the Wood Work parts on the 16-1/2″ five-string Viola!

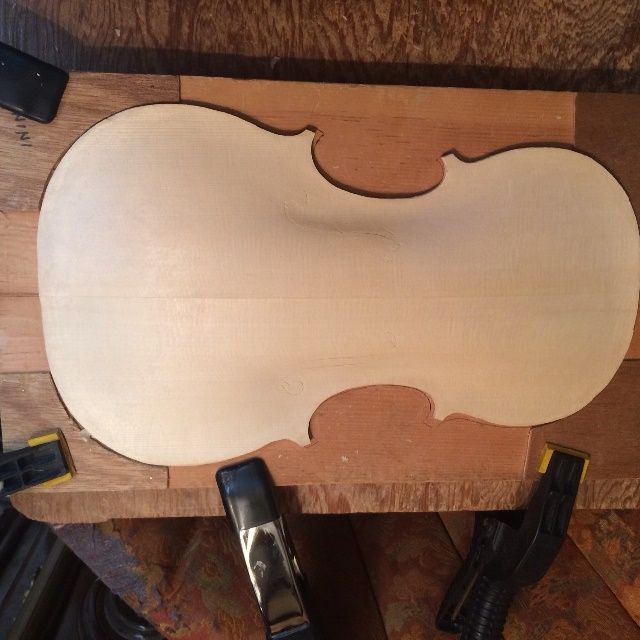
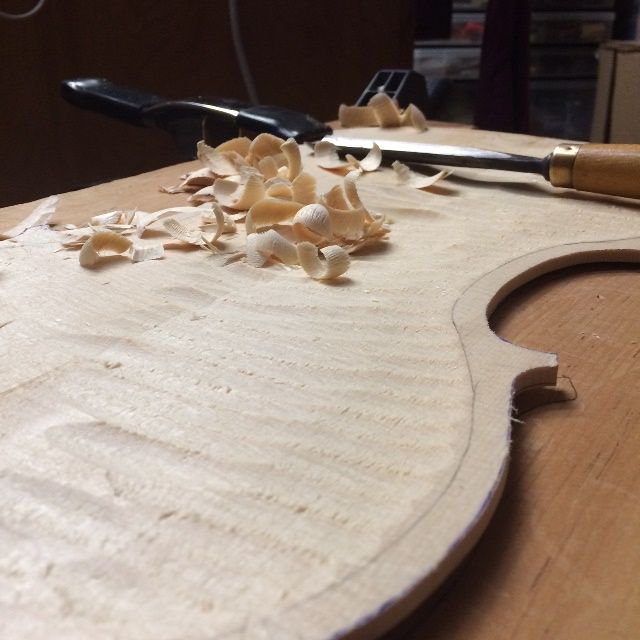
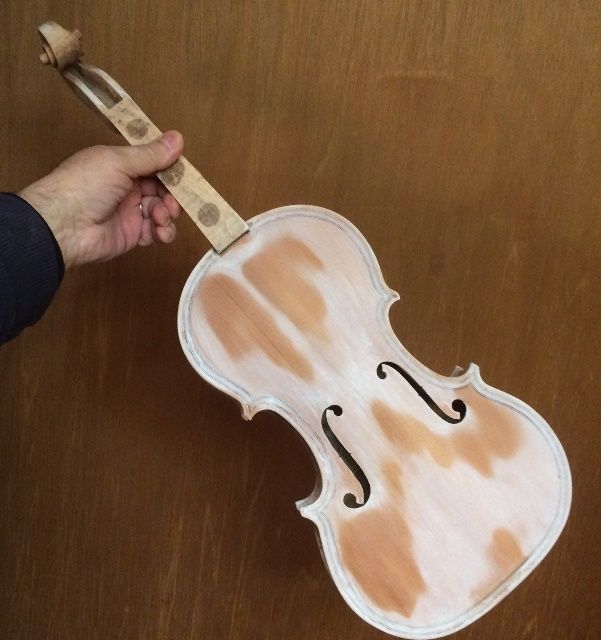
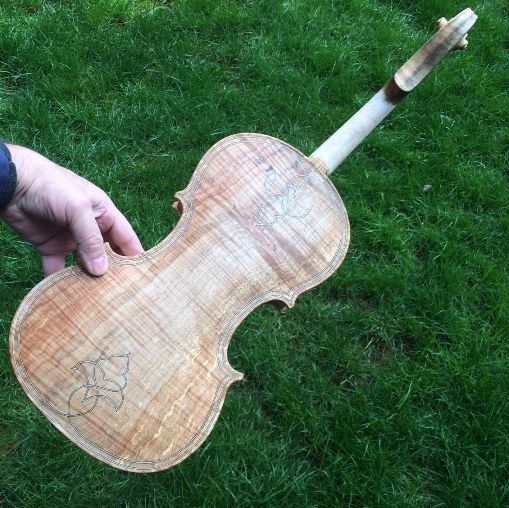
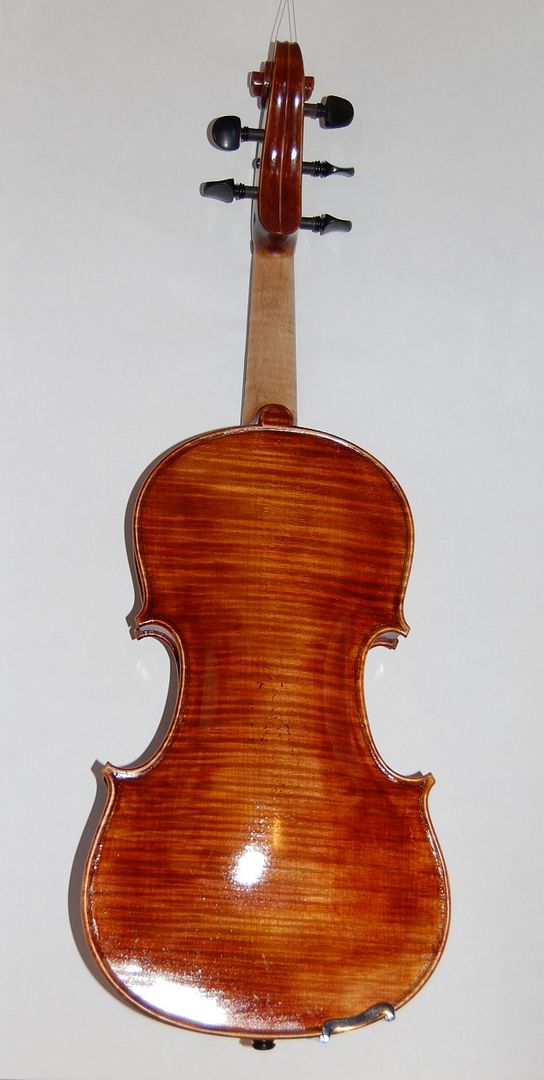
Completing Arching of the back plate.

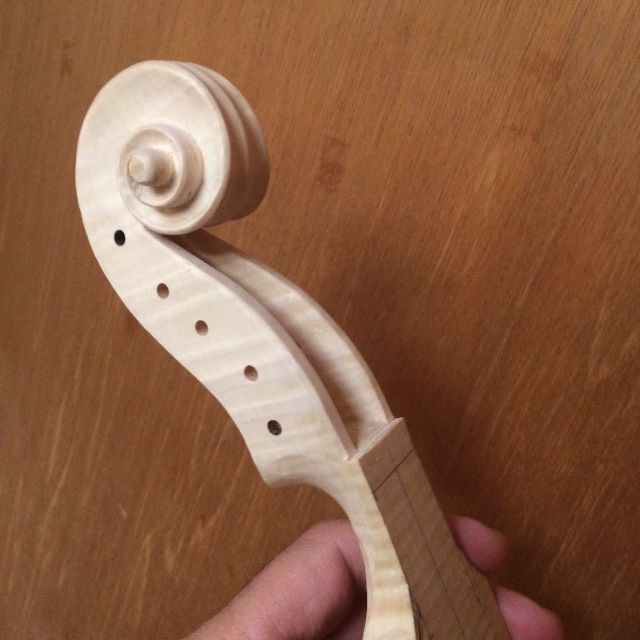
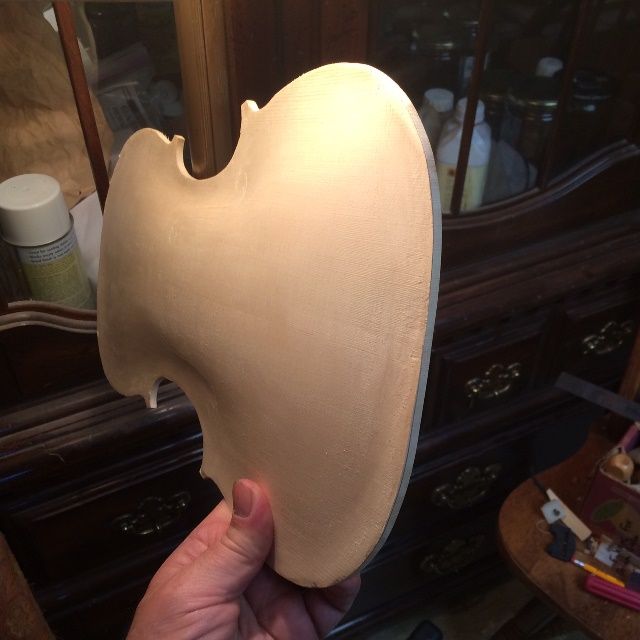
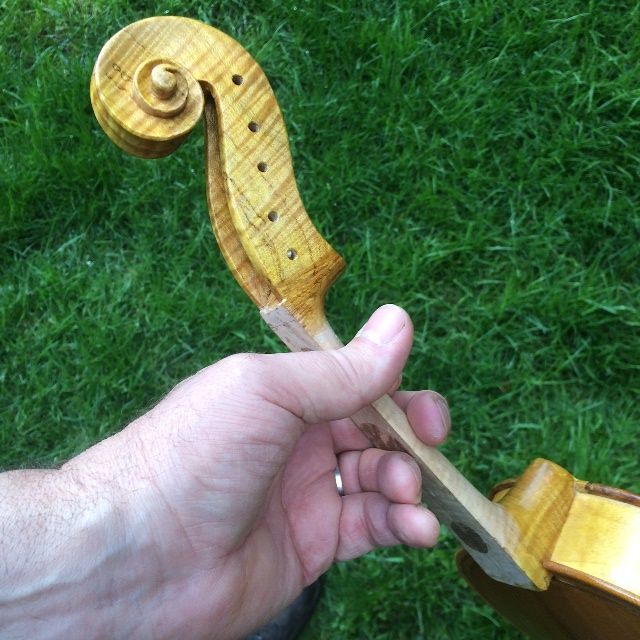
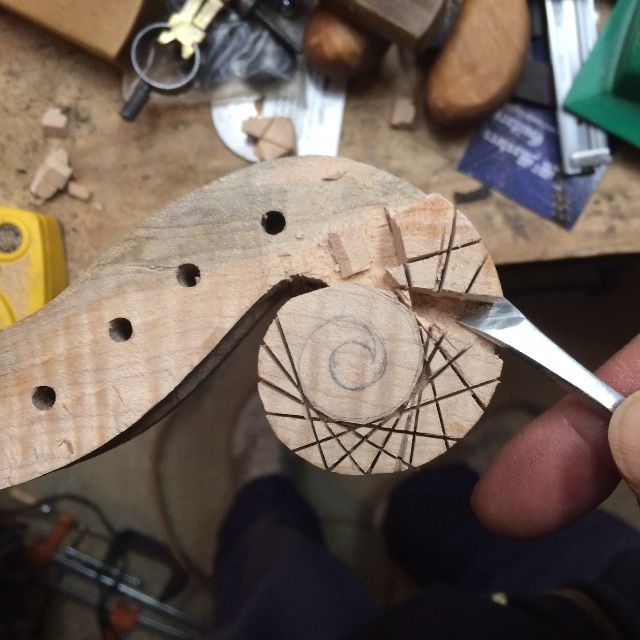
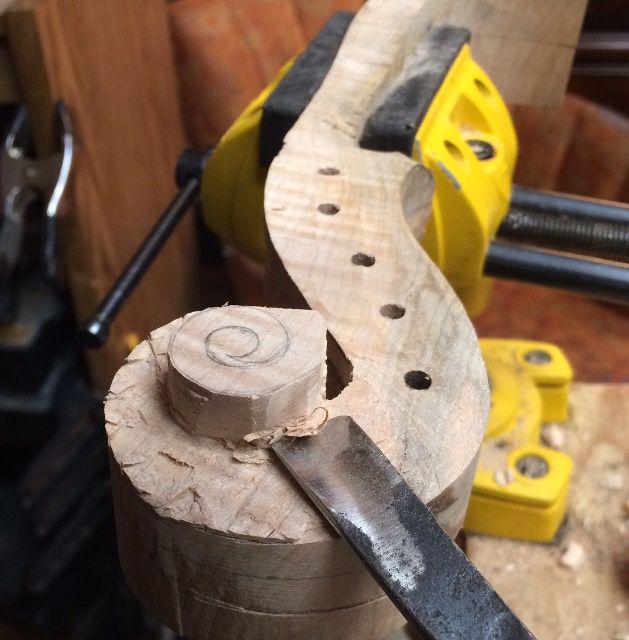
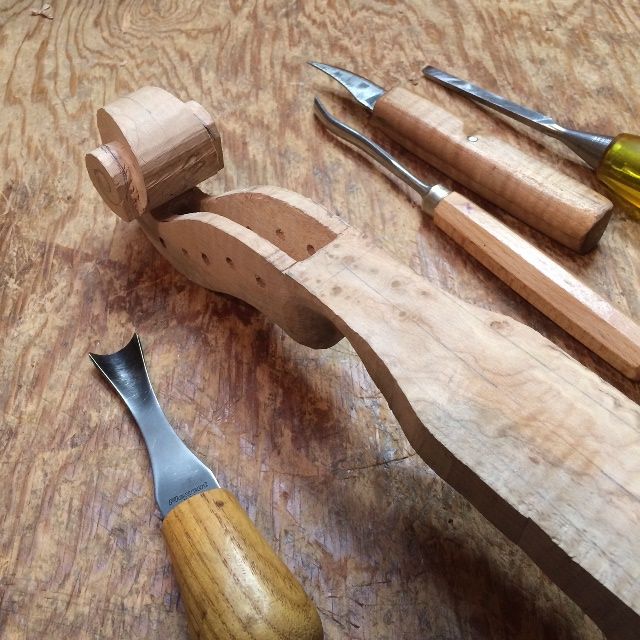
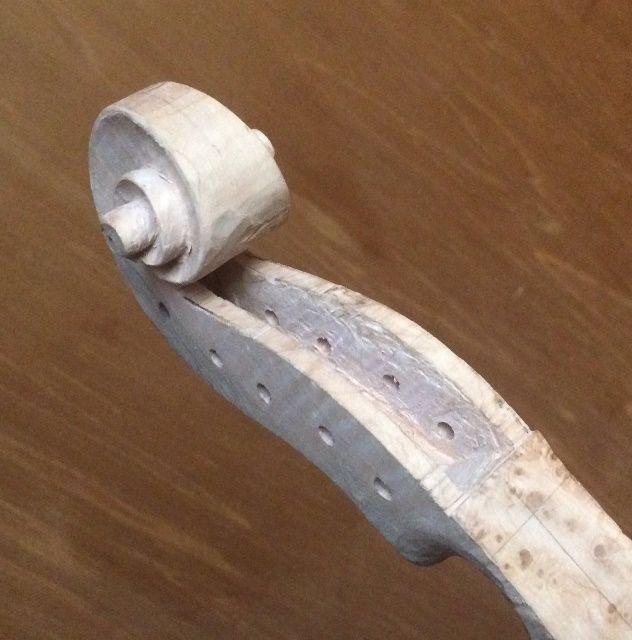
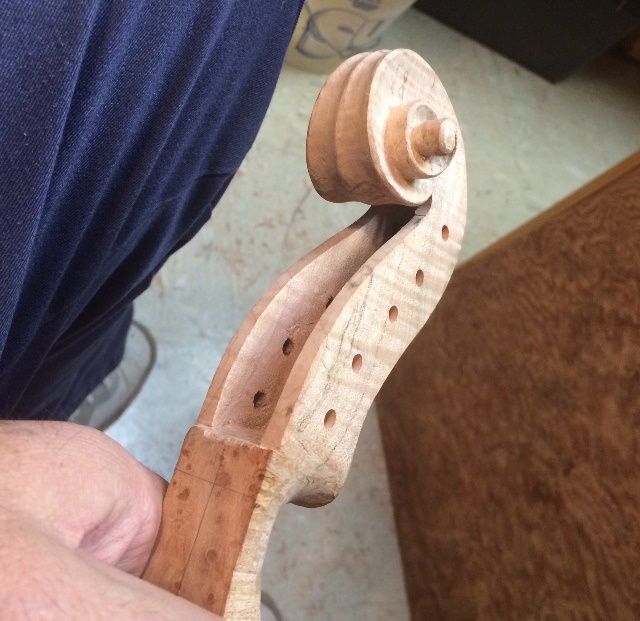
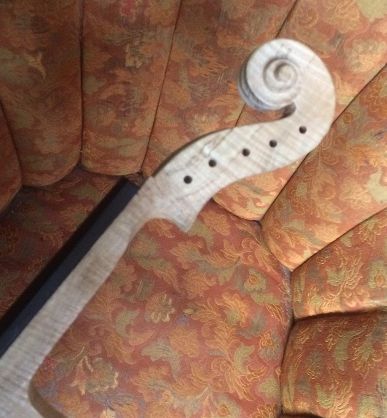
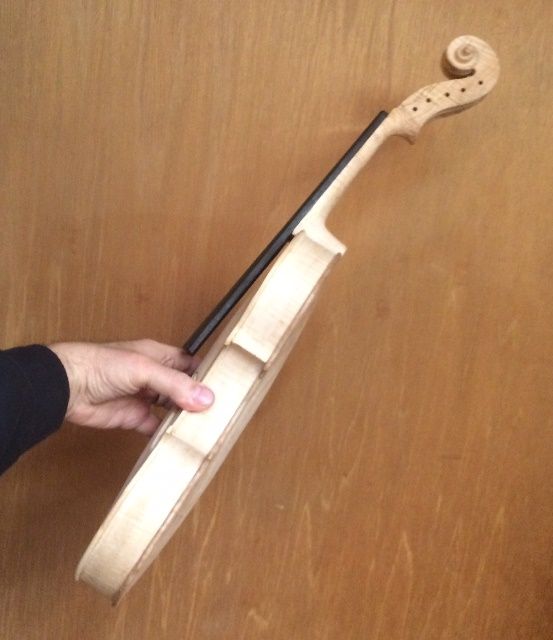
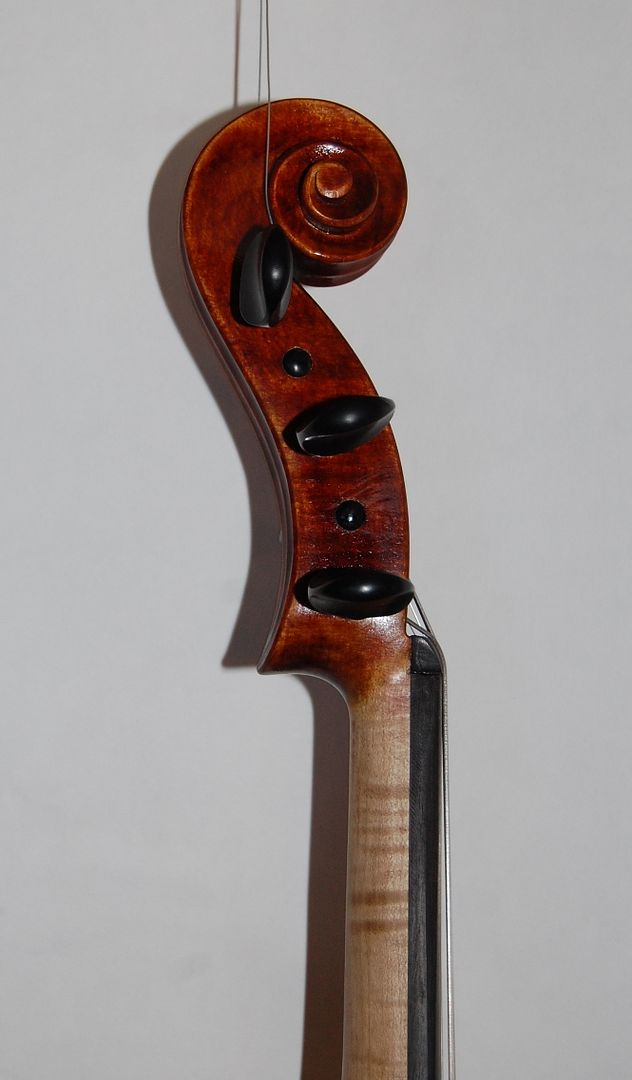
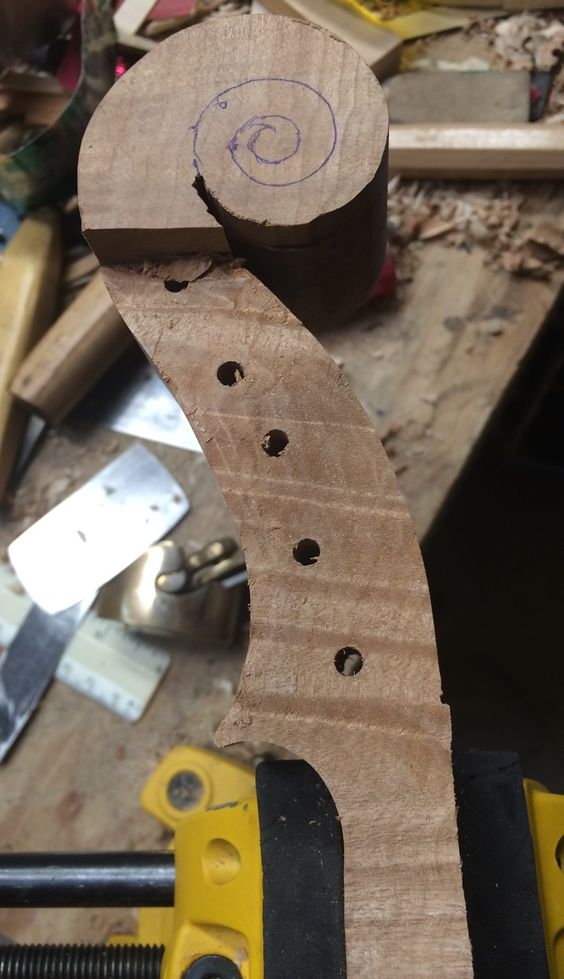
When I last posted, I was nearly done arching the back plate, and nearly done shaping the neck:

16-1/2" Five string viola Arching nearly complete; Neck nearly complete.
Arching nearly complete; Neck nearly complete.

Setting the neck

I forgot to take photos during this process: sorry. I get wrapped up in the work and forget all about taking photos.

Setting a neck follows this course of action:

    1. Prepare the neck heel– angles and dimensions all correct. Heel absolutely flat, all mating surfaces absolutely smooth.
    2. Lay out and cut out the mortise in the neck block on the corpus. I try to give myself some room for adjustment. It is always a mistake to try to cut exactly to the layout lines in the first attempt.
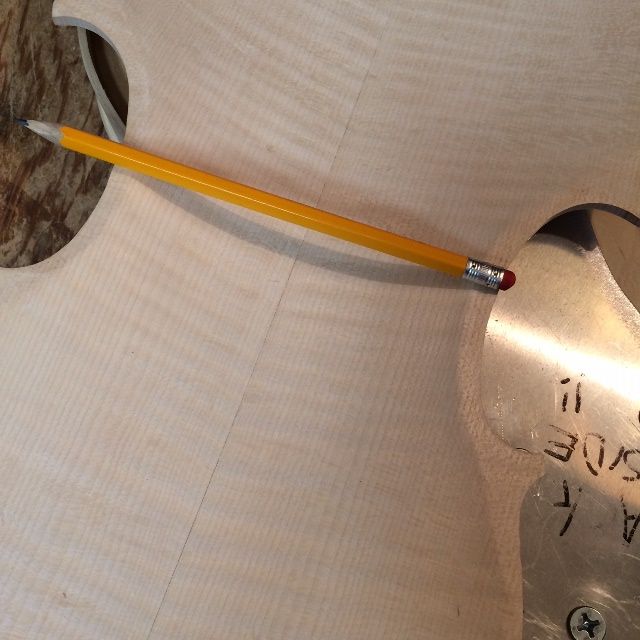
    3. Check all measurements with every single change:
      1. how does the centerline of the neck fit, relative to the centerline of the corpus?
      2. how does the transverse level of the neck match the level of the corpus?
      3. how does the pitch (front-to-back) angle compare to what is correct?
      4. how does the distance between the nut line and the top edge of the front plate compare with the correct distance?
      5. how does the height of the lower edge of the fingerboard above the edge of the front plate match the correct height?
    4. When the final fit is perfect, checking ALL measurements, remove the neck and slather in the hot hide glue, and immediately ram the neck into place one last time, making a fast re-check of all measurements, to make sure nothing moved out of place.
    5. Let it dry!
16-1/2" Five String Viola Neck set complete!
Neck set complete!

You will notice that I set my neck before closing the corpus. I find it easier and faster, and it allows me to achieve a perfect fit against the back button.

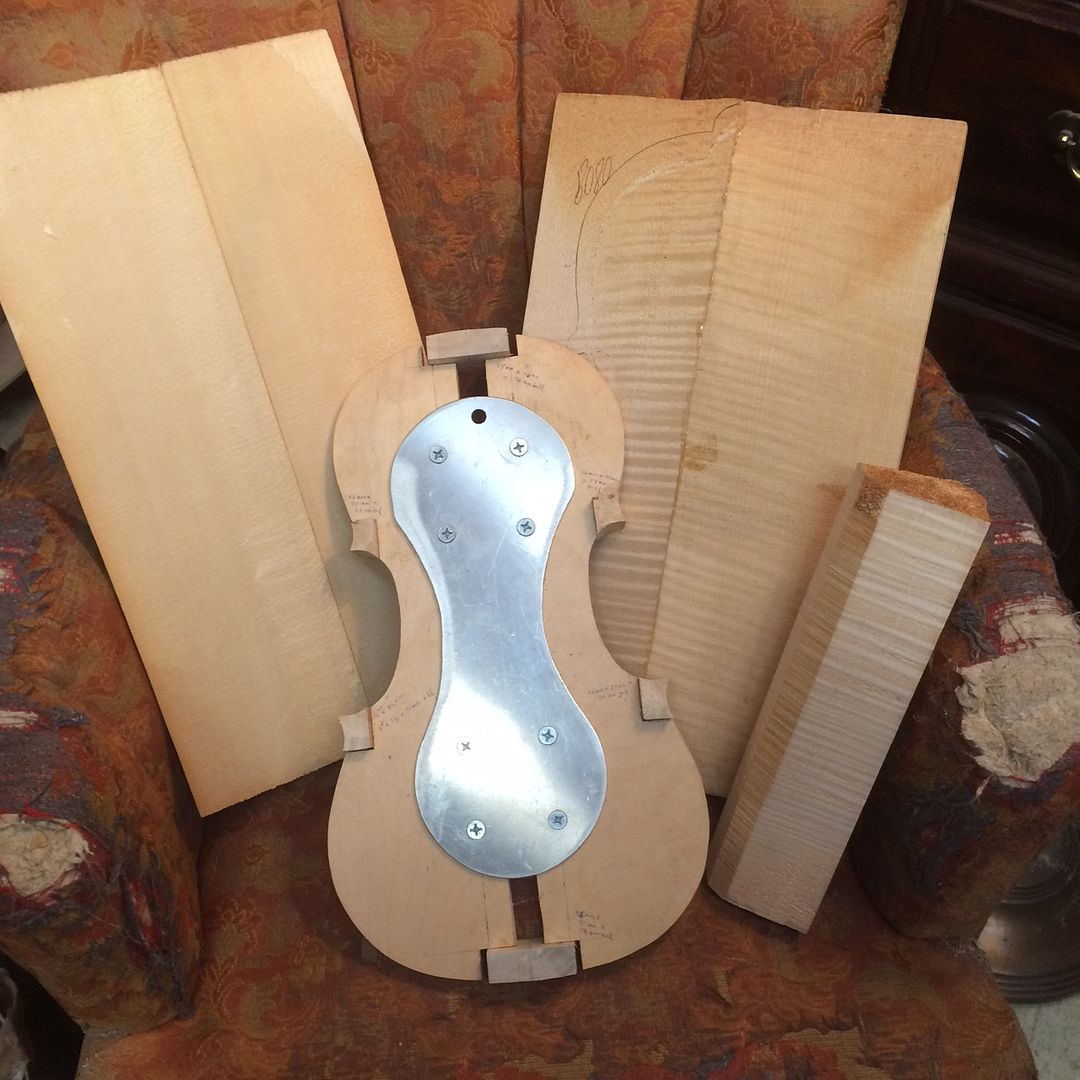
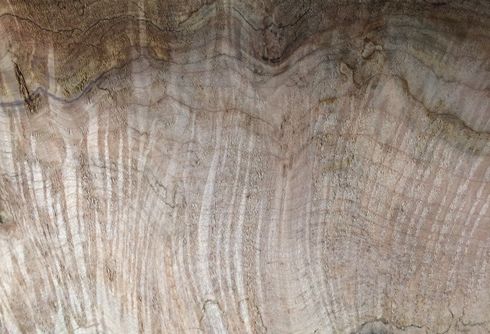
Graduating the Back Plate

The next step was to carve out the interior of the back plate, to achieve ideal thicknesses all over. This is called “Graduating the plate” or, simply “Graduation.”

Beginning graduation of the back plate of the 16-1/2" five-string Viola.
Beginning graduation of the back plate.


Calibration of back plate of the 16-1/2" five-string Viola begun: making thickness "dots."
Calibration of “dots’ begun: circled dots are already correct. Others need carving out.


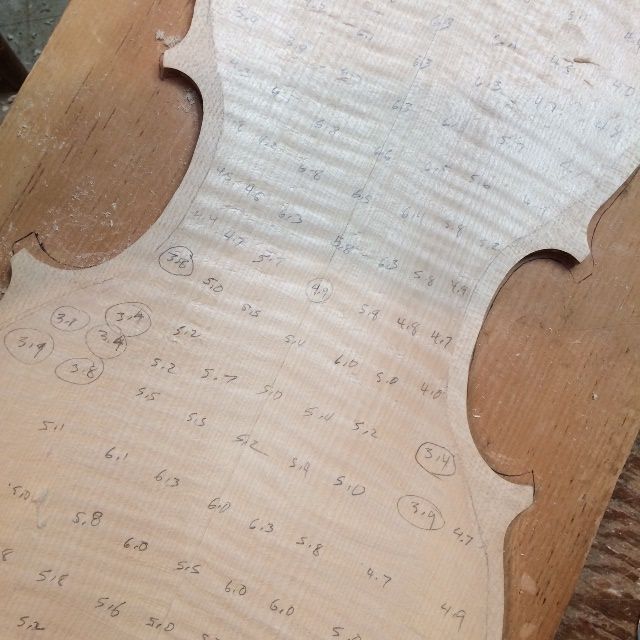
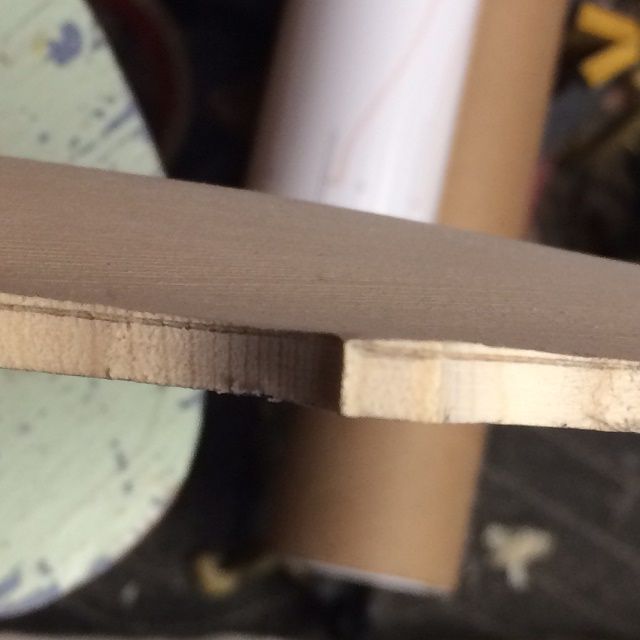
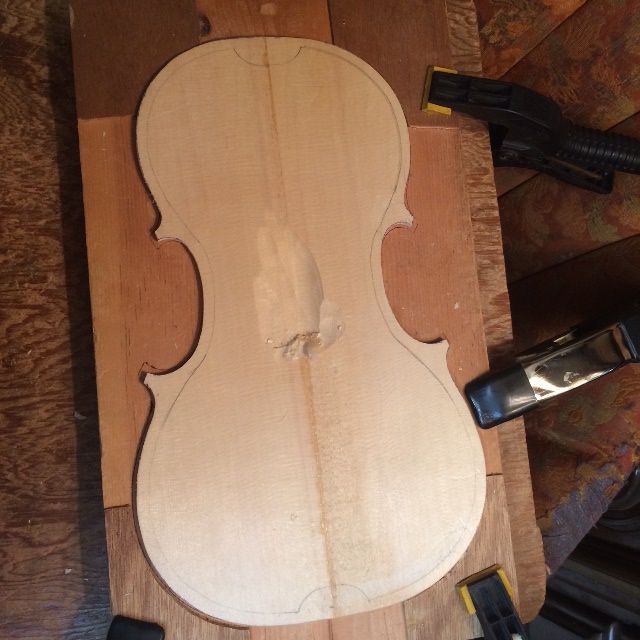
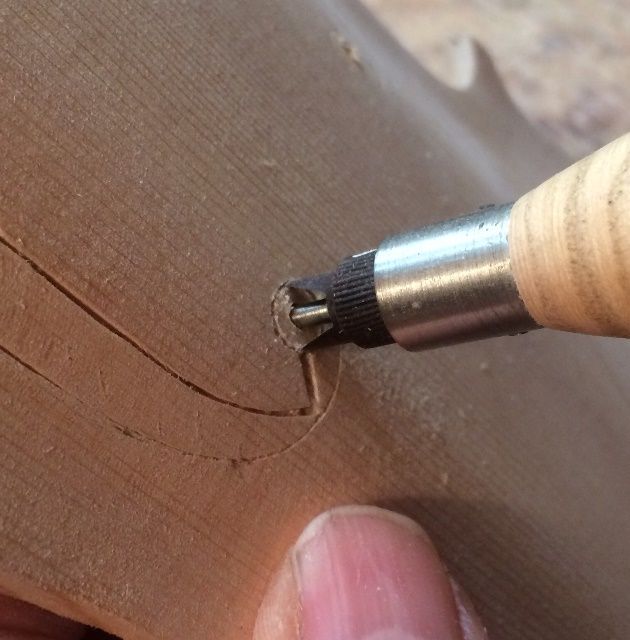
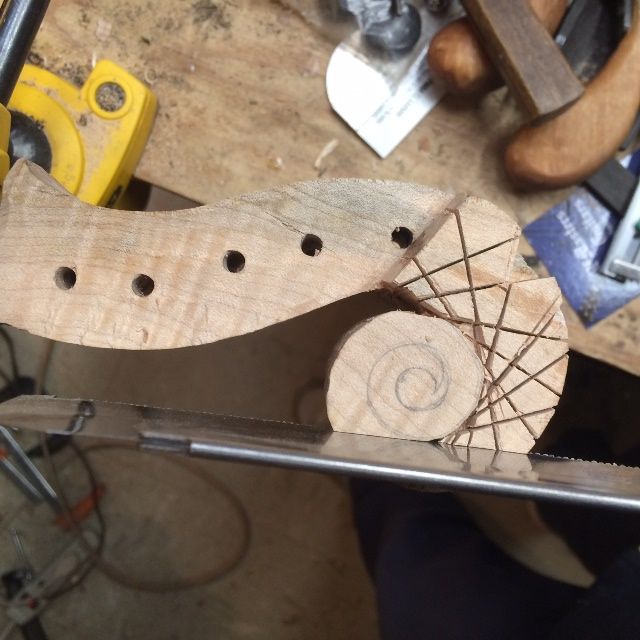
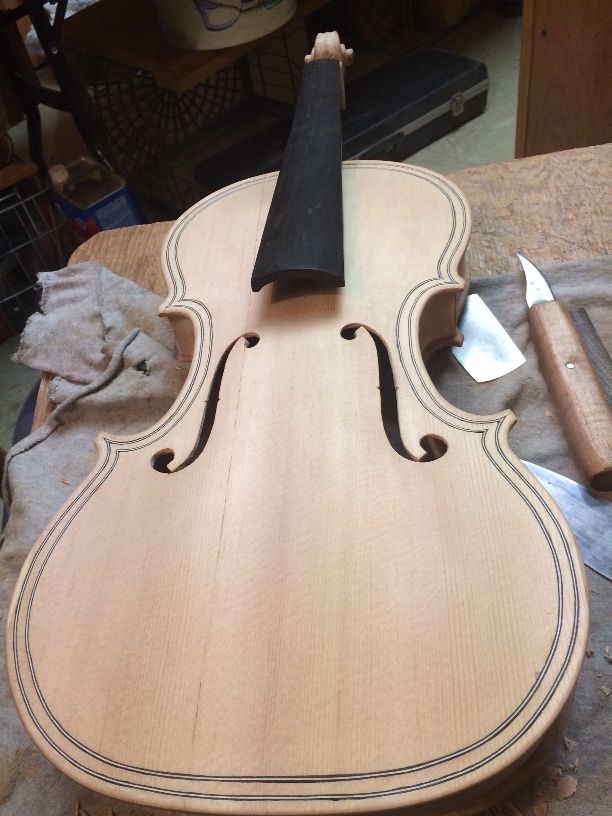
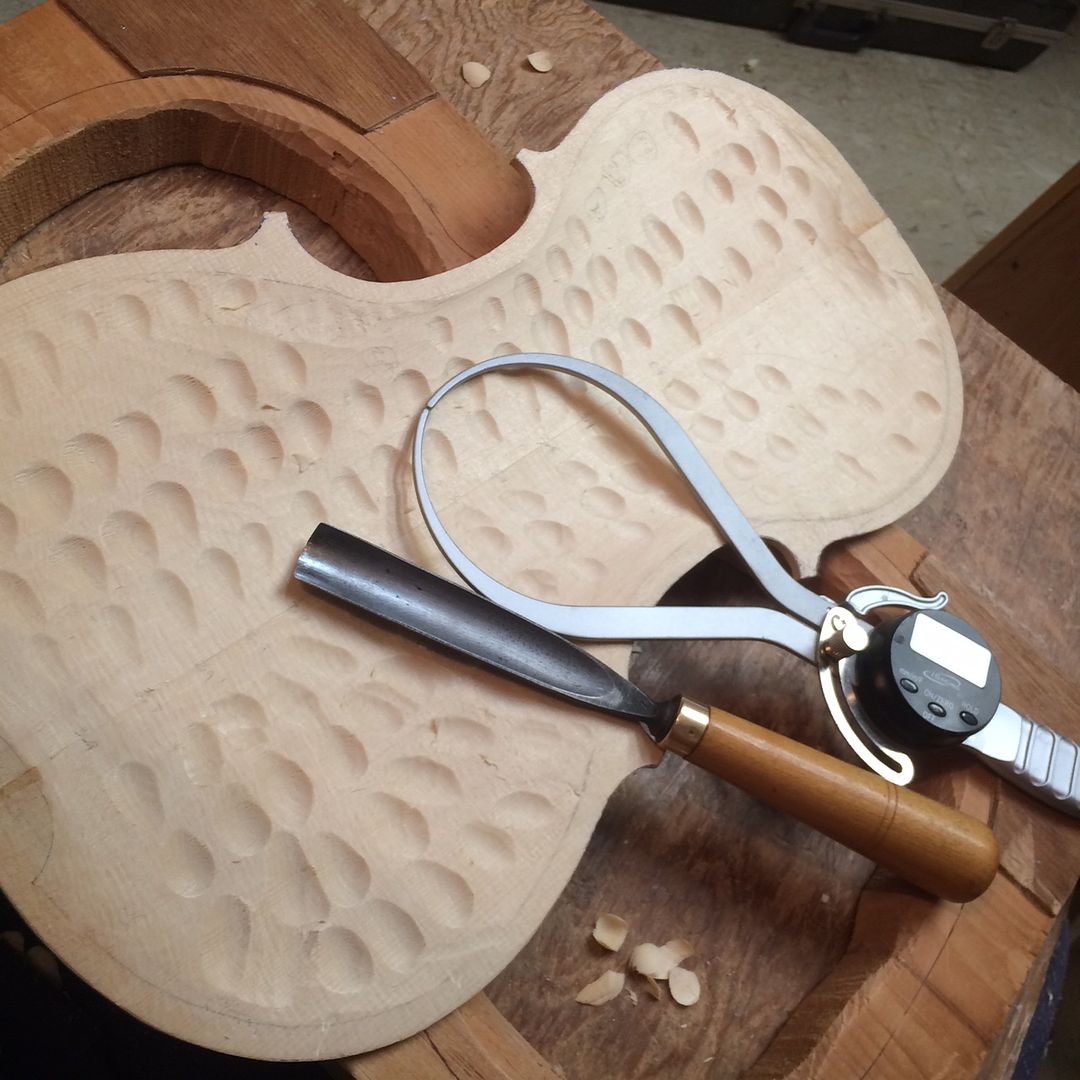
After I established the current thicknesses for all the above locations, I carved each dot to the thickness I actually desired, leaving a series of pits all over. The following photo was actually of the front plate, but it is the same idea:

Dots completed on the 16-1/2" five-string Viola, and ready to be connected, using a plane.
Dots (front plate) completed and ready to be connected, using a plane.


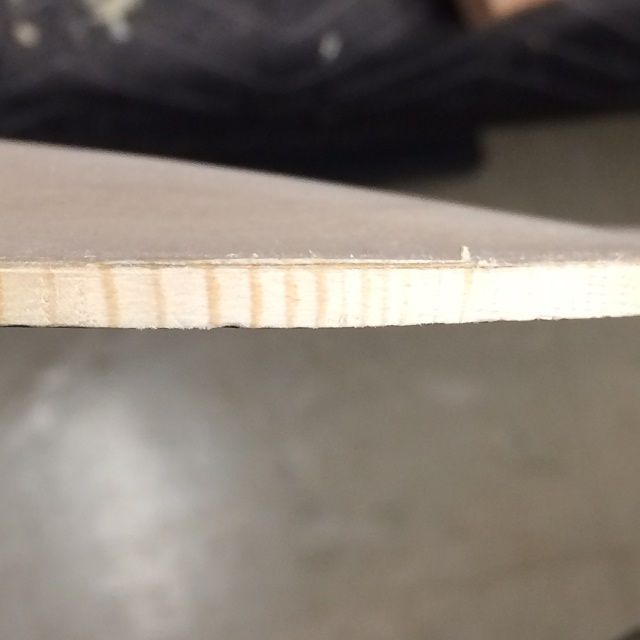
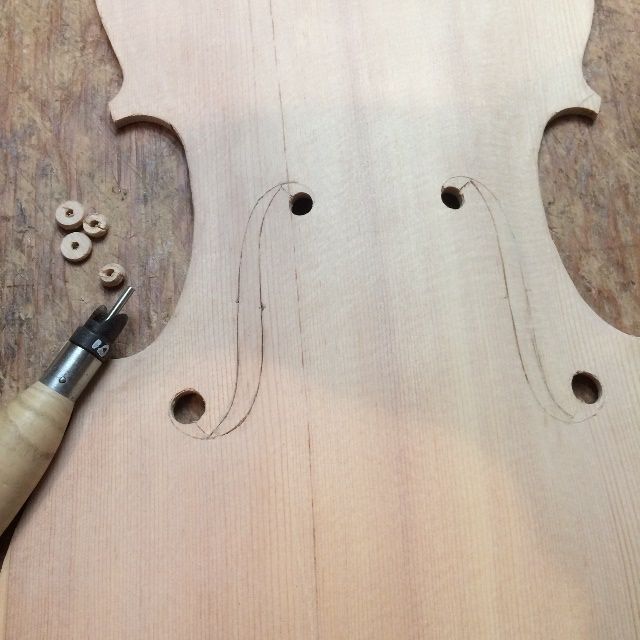
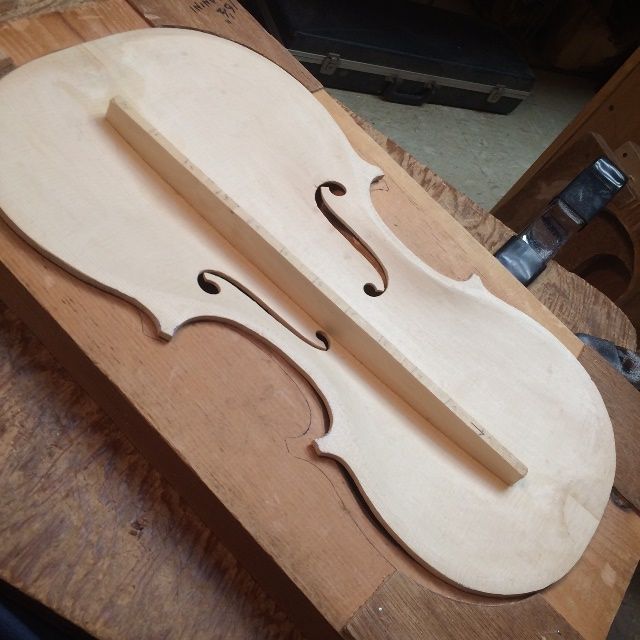
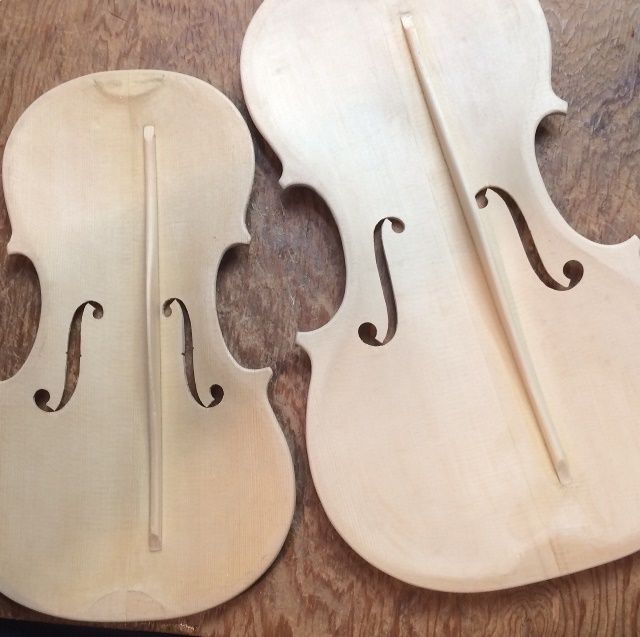
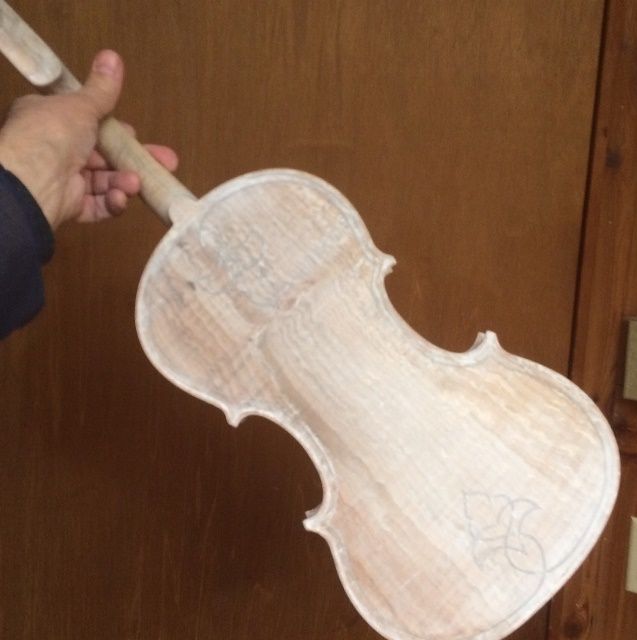
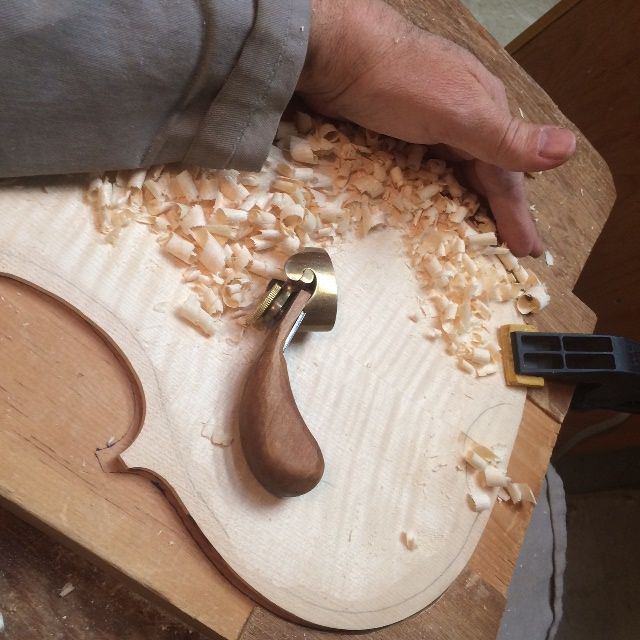
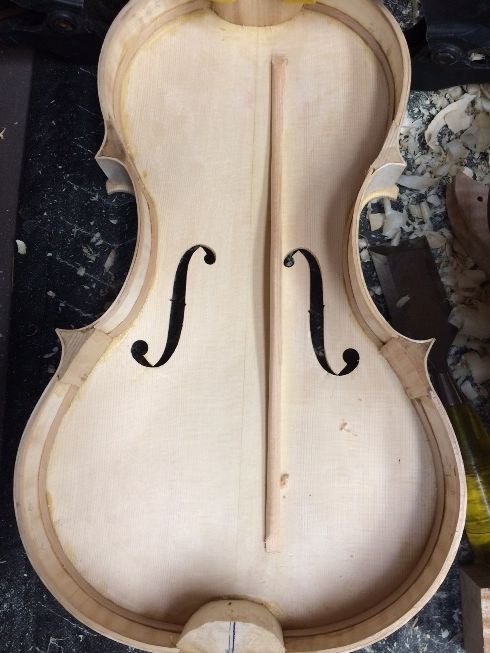
After connecting the dots, the graduation is very nearly complete. I scraped, and checked thicknesses, and scraped some more, until it looked like this:

Shadow line shows curve of completed graduation on the 16-1/2" five-string Viola.
The shadow line shows the curve of completed graduation.

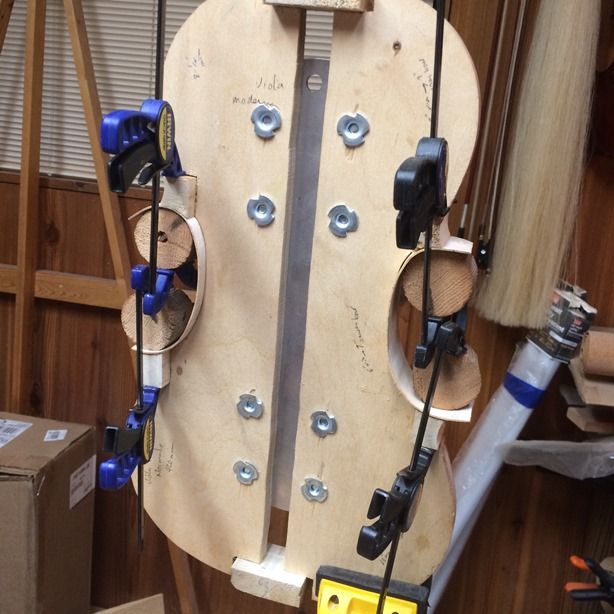
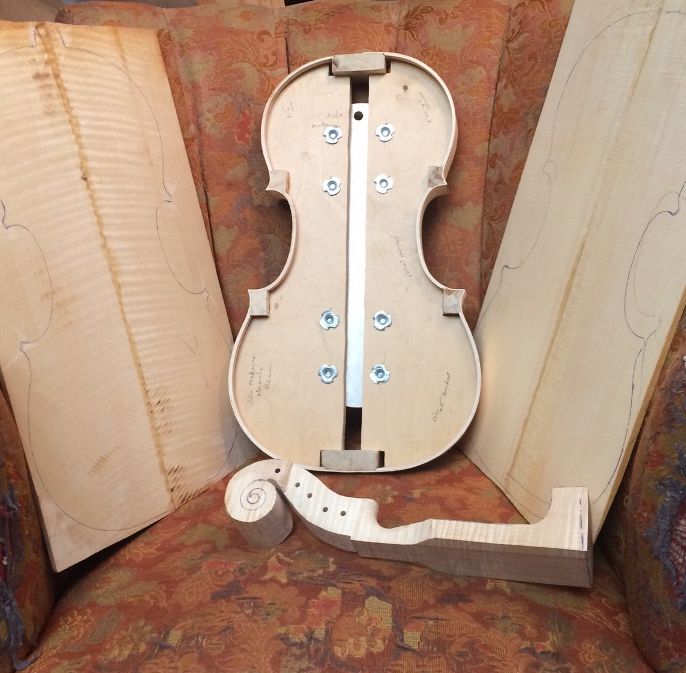
Preparing to close the Corpus

With the back plate graduation complete, I was ready to attach the plate to the corpus, except that:

    • the corpus was still attached to the mold, and
    • the blocks and linings had yet to be shaped.

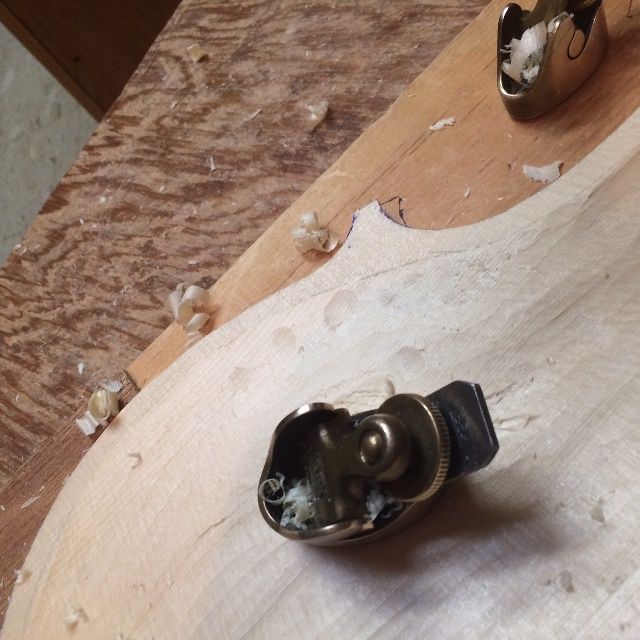
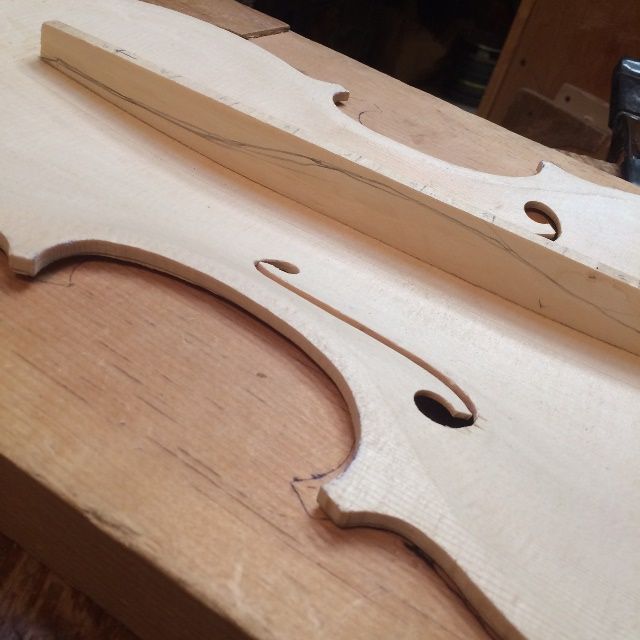
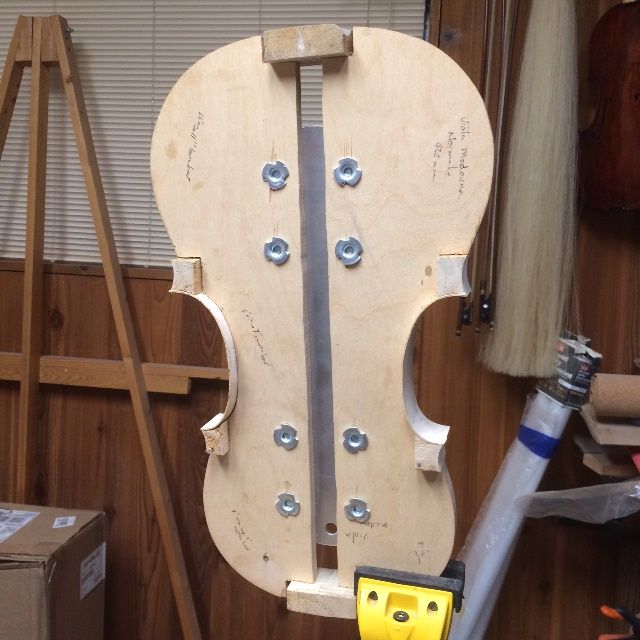
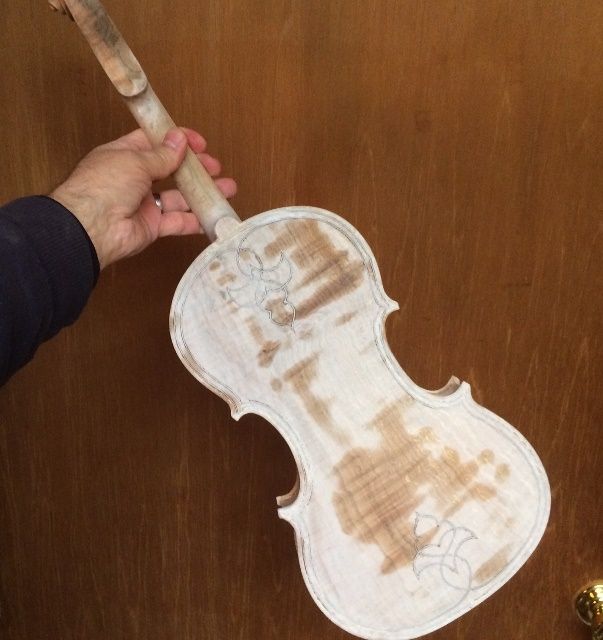
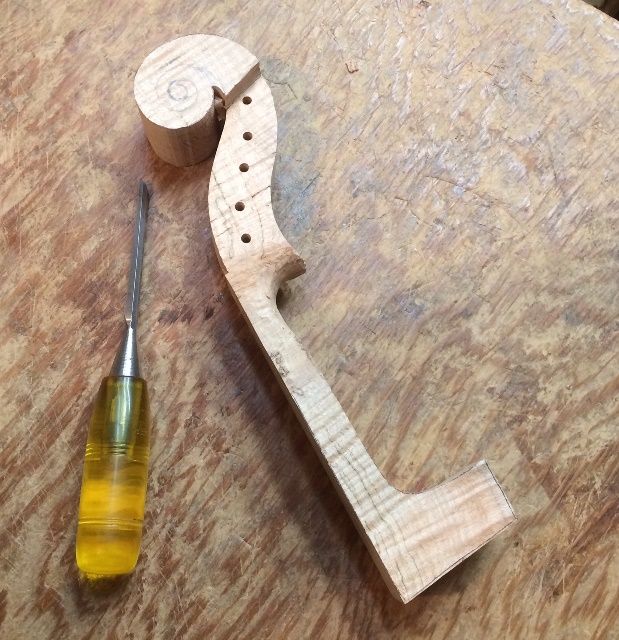
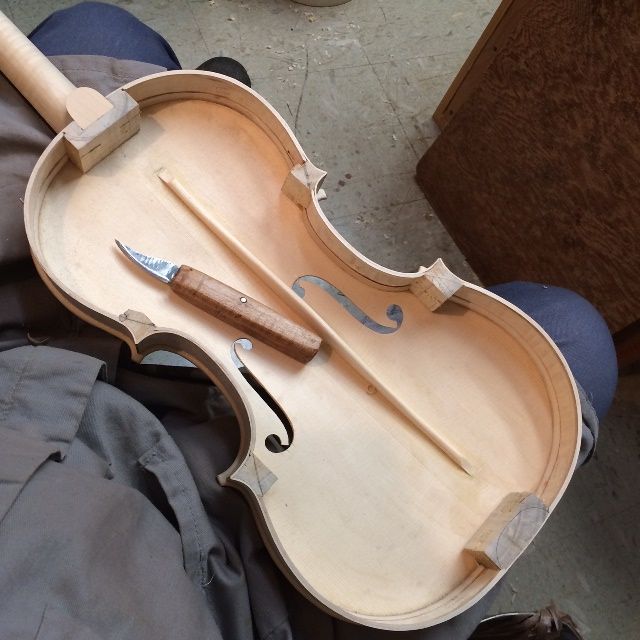
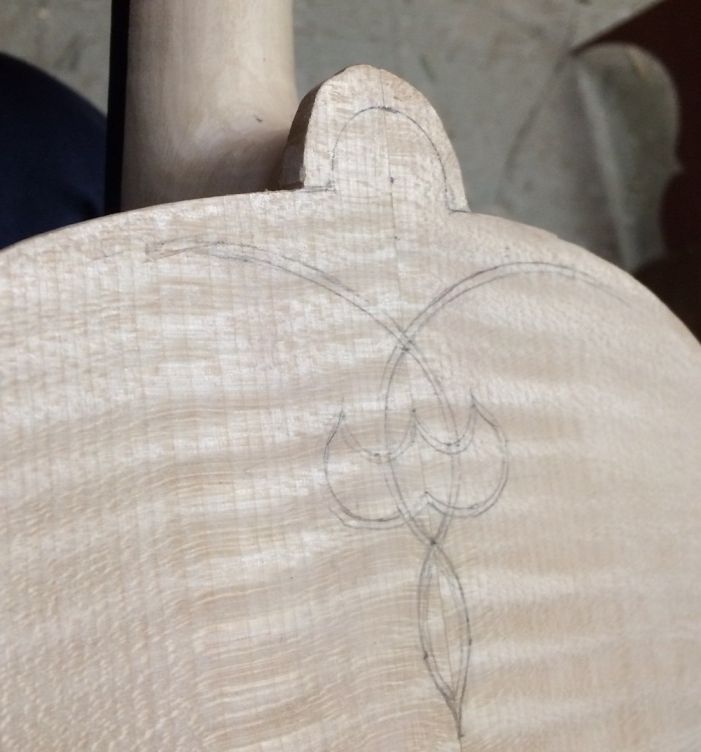
So I sketched in the planned shapes of the six blocks,  trimmed the neck-heel flush, removed the mold, and then set about shaping the inside of the blocks and linings.

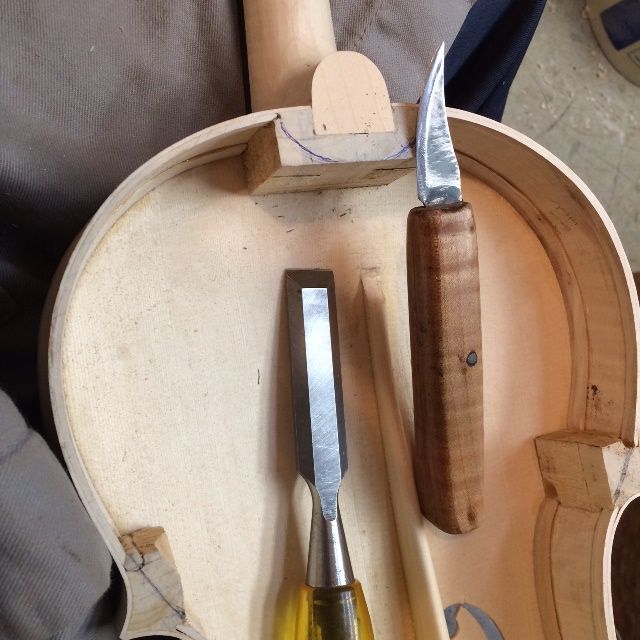
I used a knife and a chisel and a gouge to shape all of them, finishing with a scraper. The very first step was to sketch in the block shapes.

Sketching in the block shapes for the 16-1/2" five-string Viola.
Sketching in the block shapes.


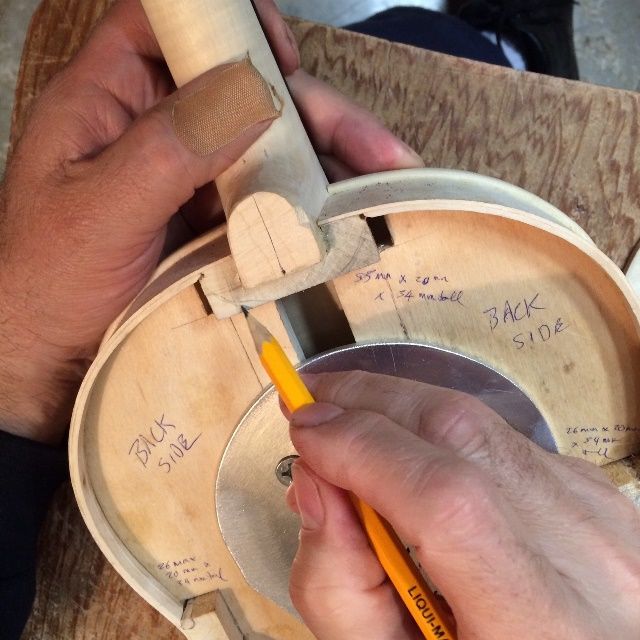
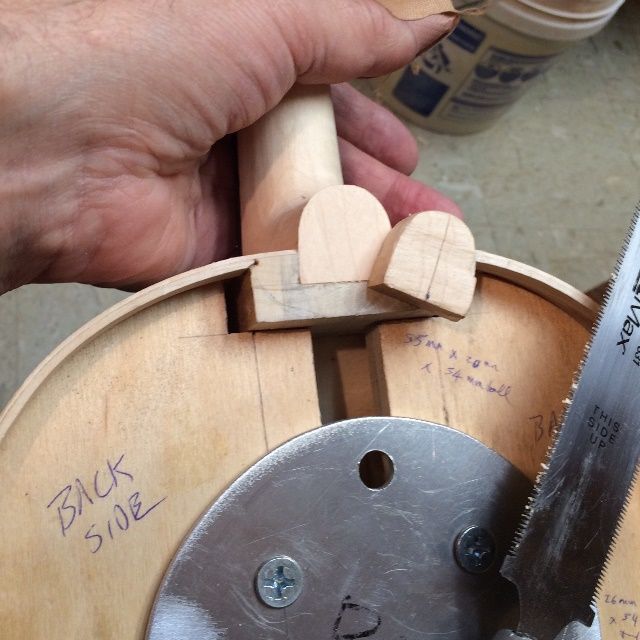
Then I cut the neck-heel off, flush with the neck block. I used a flush-cut saw for this step. It works well, but you have to watch carefully to make sure it is not wandering off the line.
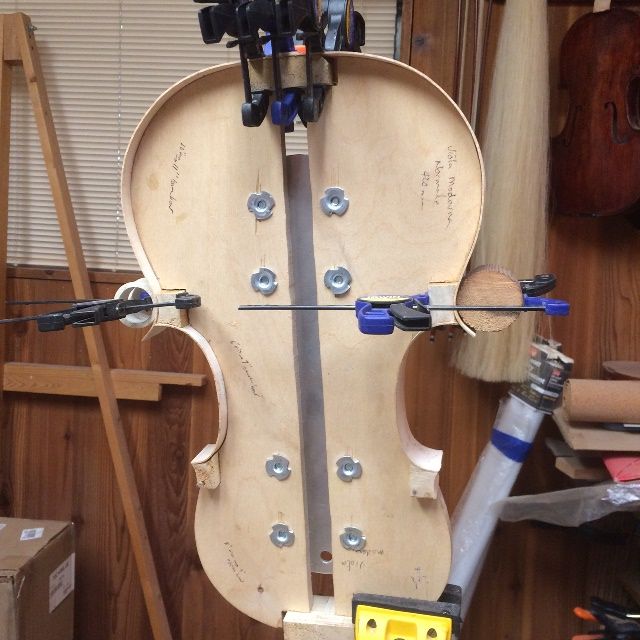
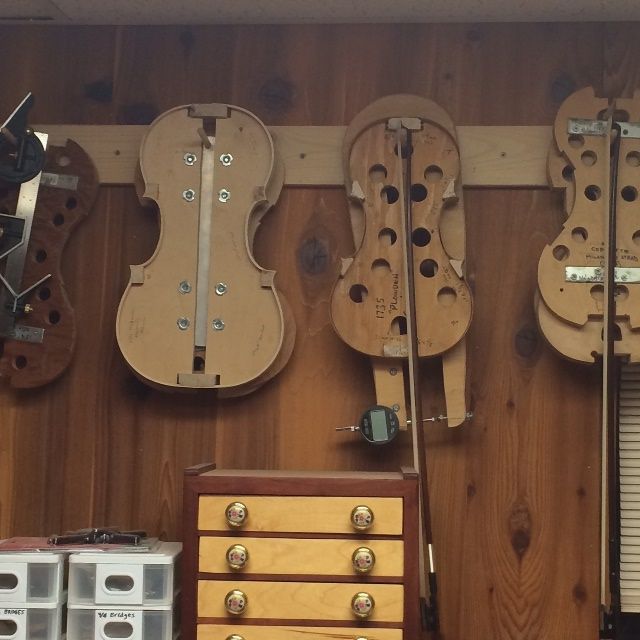
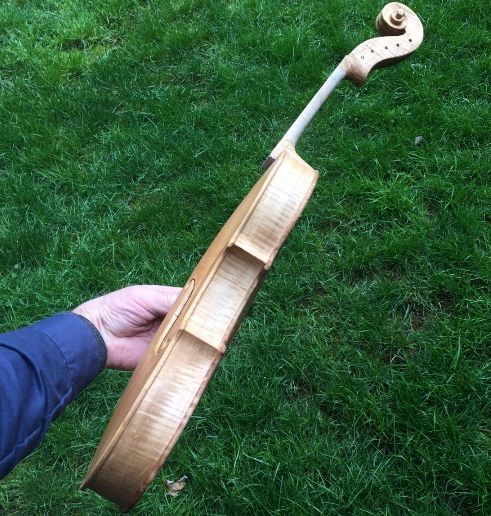
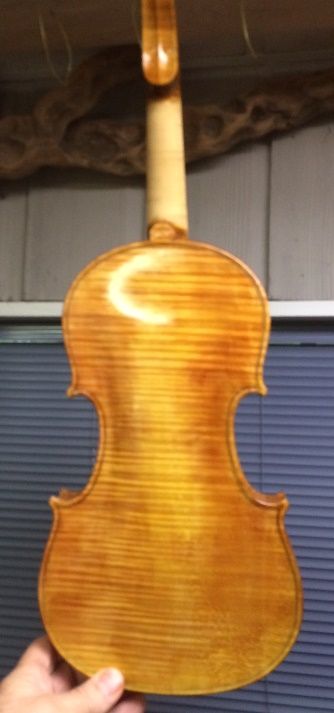
Neck heel cut off flush with the neck block in the 16-1/2" five-string Viola.
Neck-heel cut off flush with the neck block.

Removing the Mold

Then I leveled the back of the garland, using a sanding board, and I was pretty much ready to remove the mold. I popped the glue-lines loose from where the blocks were attached to the mold and lifted the mold out. It is a collapsible mold, so I removed the bolts and took the mold out in three pieces. That left me with a completed corpus, and a neck already set, but no mold. At this point the structure is extremely fragile: I have to be very careful until the back plate is glued on, making the structure rigid and strong again.

Mold is out! Preparing to shape the blocks in the 16-1/2" five-string Viola.
Mold is out! Preparing to shape the blocks.


No mold means no support! Be very careful! The 16-1/2" five-string Viola is very fragile at this point.
No mold means no support! Be very careful!

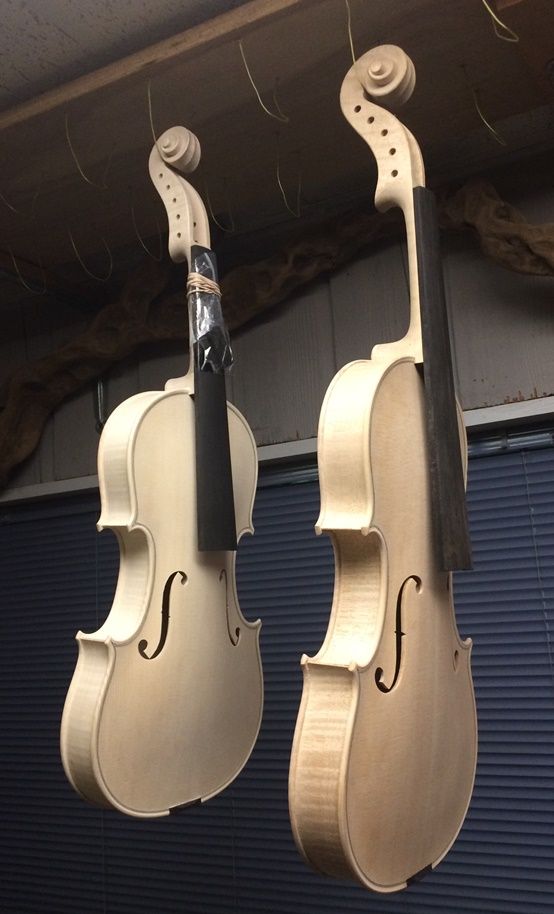
The next photo is from an earlier instrument, because I forgot to take a picture of the shaped blocks in this instrument:
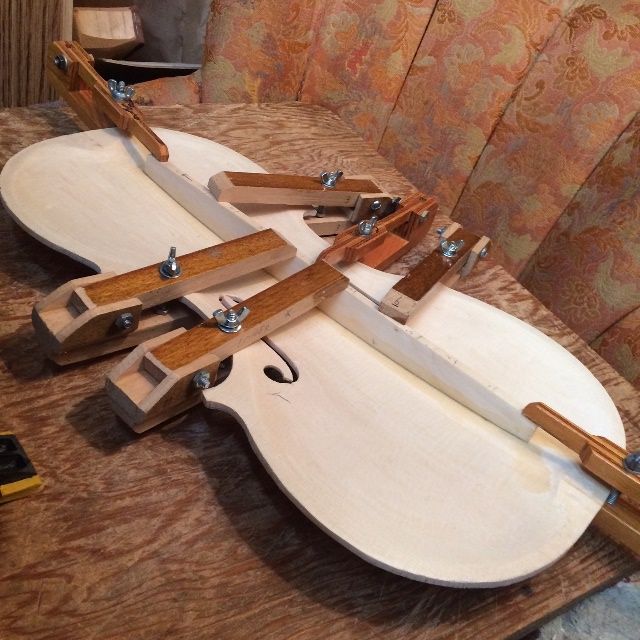
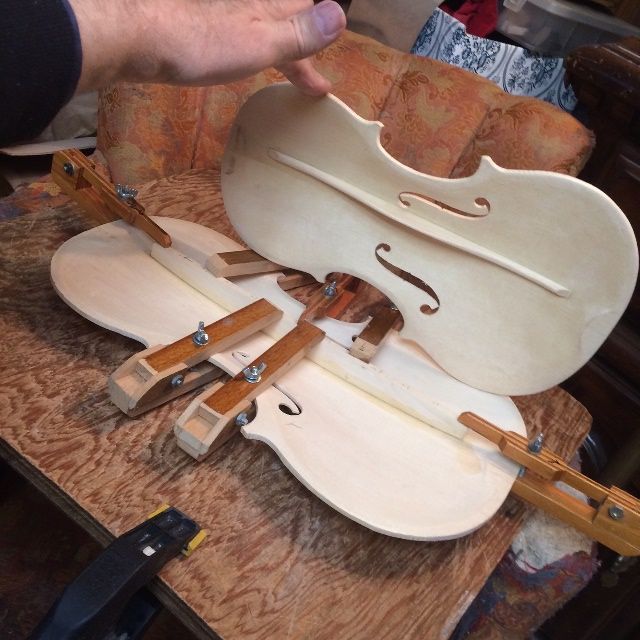
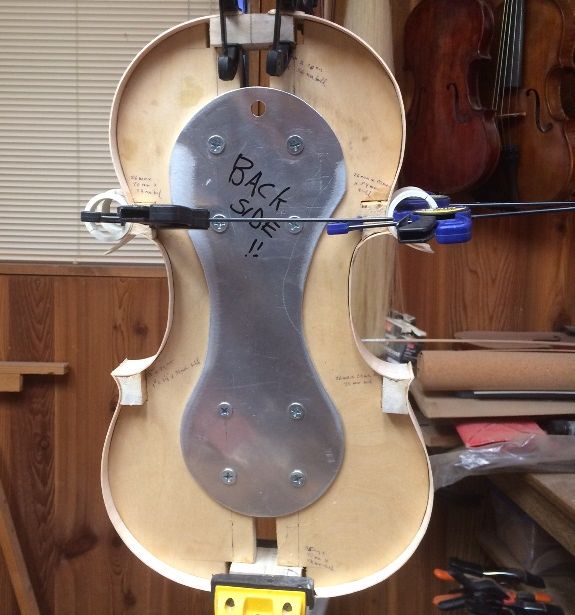
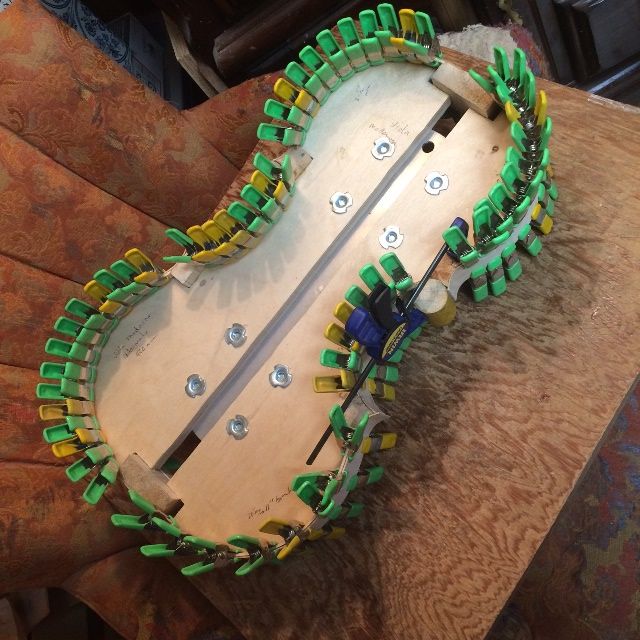
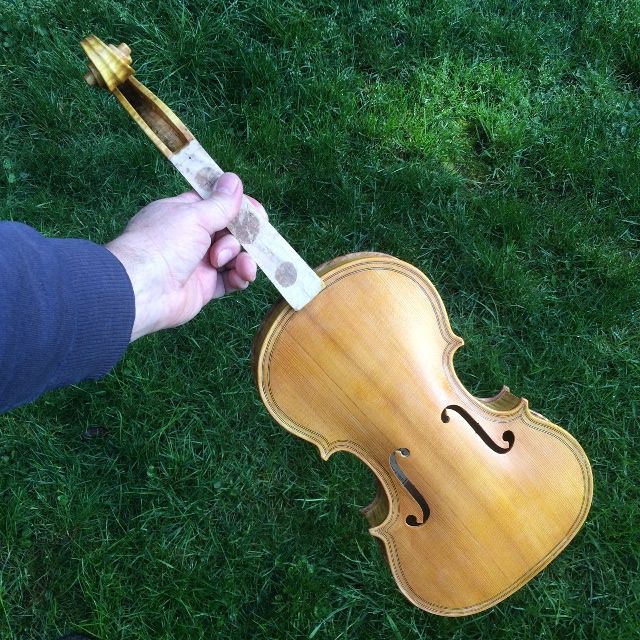
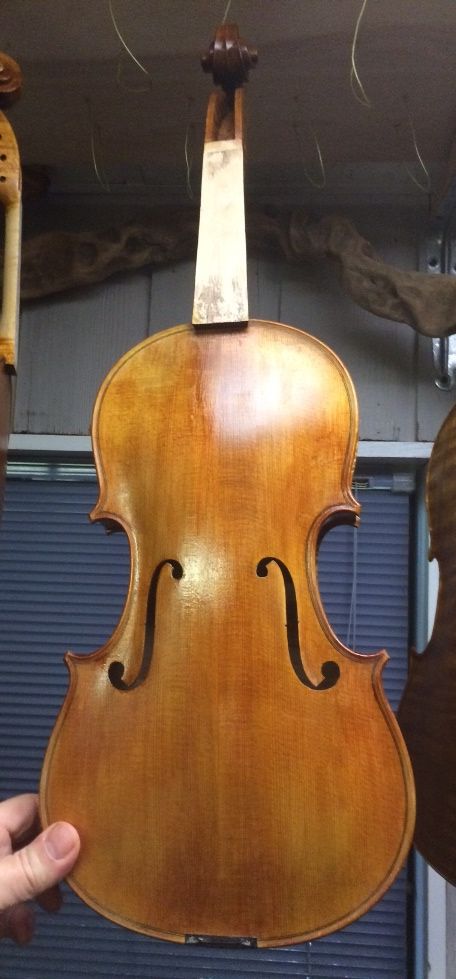
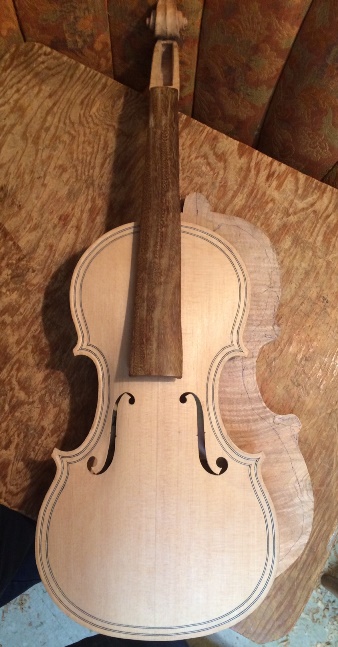
The general shape of the finished blocks (earlier five-string viola.)
The general shape of the finished blocks (earlier instrument.)

Closing the Corpus

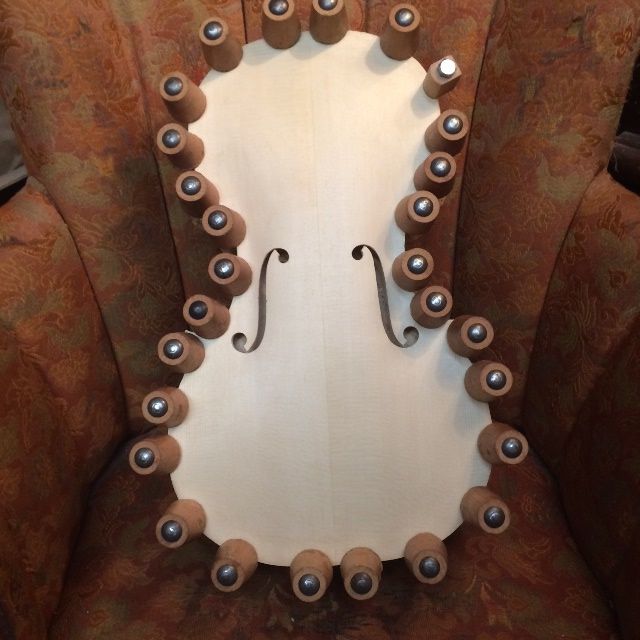
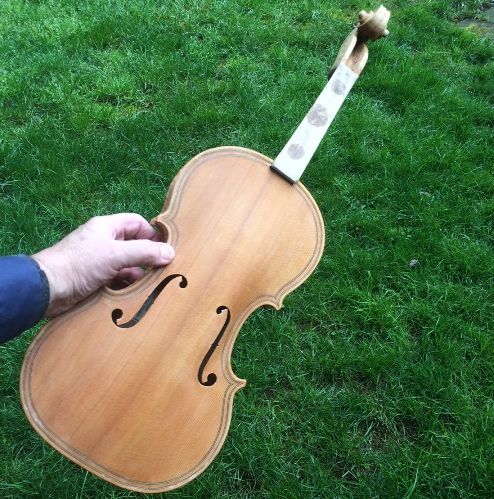
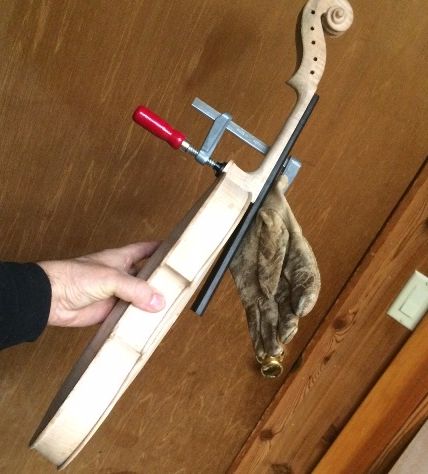
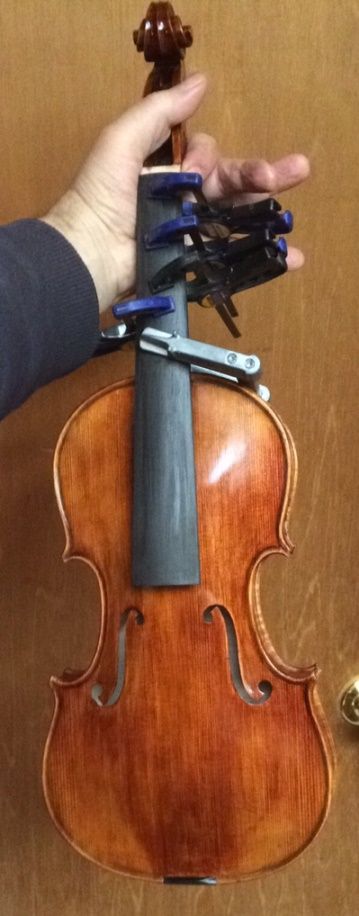
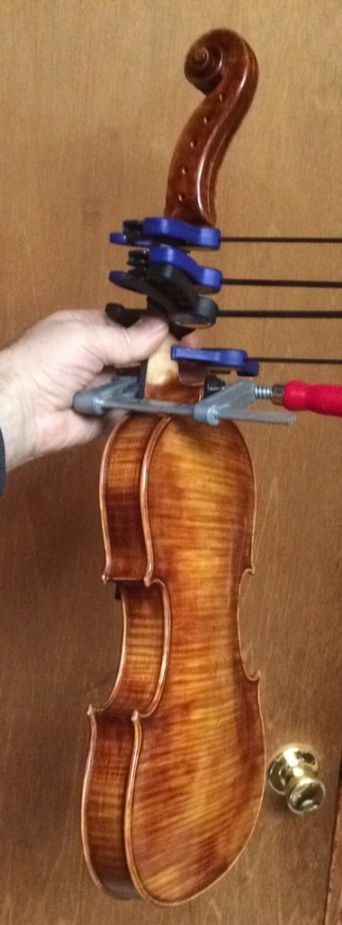
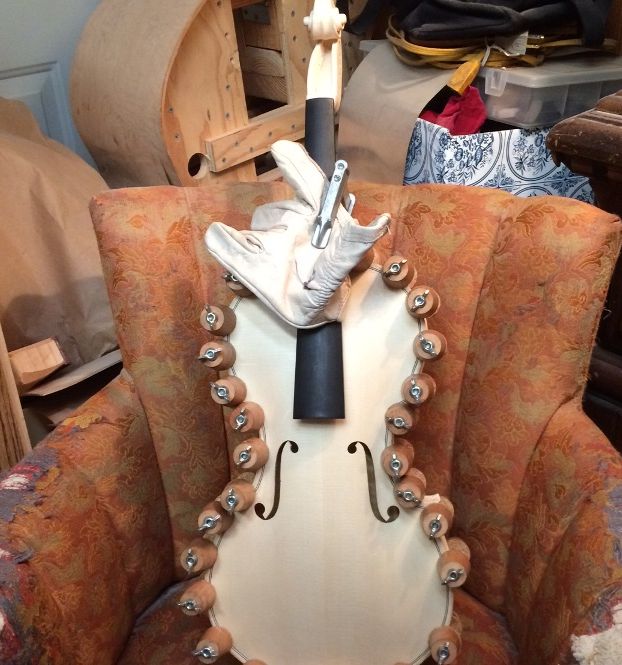
Then I installed the label, and dry-clamped the back plate to the corpus, using spool-clamps, checking carefully to see that my position was correct, and that the overhang was equal all the way around.

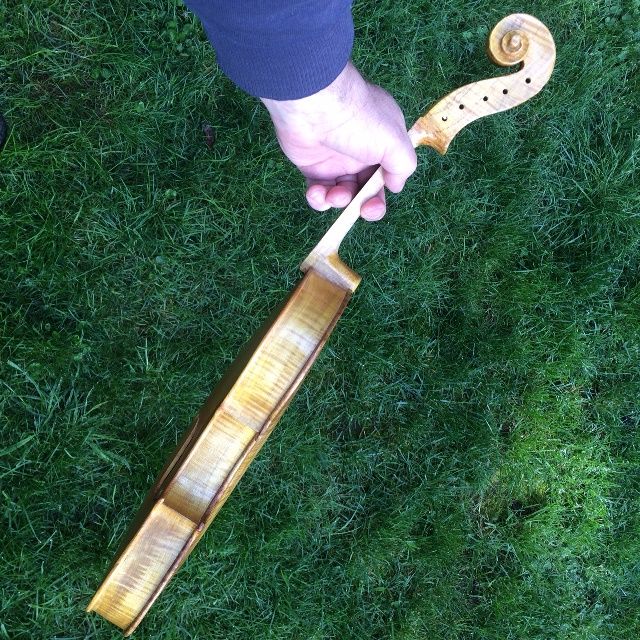
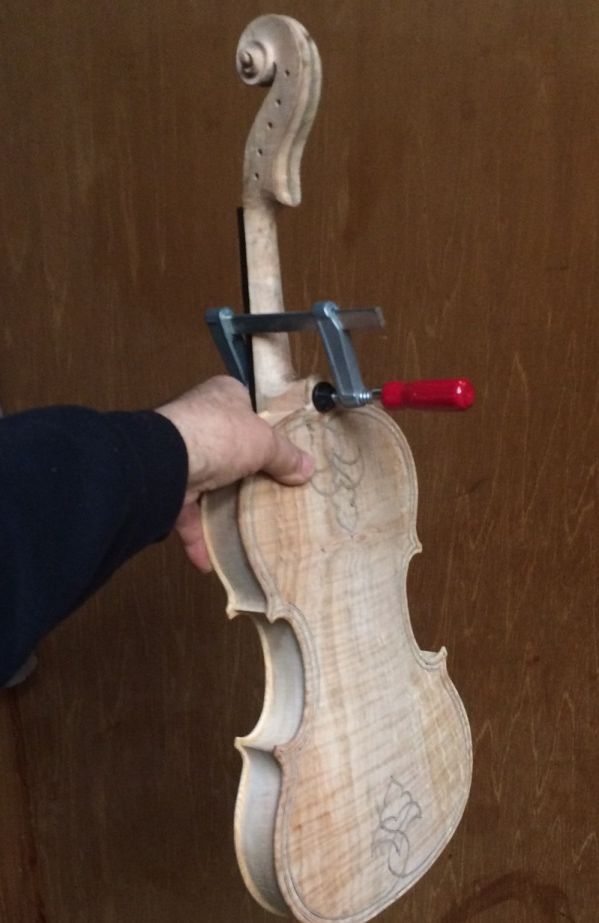
I then removed a few clamps at a time, and slipped hot hide glue into the joint, using a thin palette knife, and quickly replaced the clamps. When I had spool-clamps all around the perimeter, I added one last clamp, a padded C-clamp, to ensure that the joint between the neck heel and the back button was fully closed and tight. I used a glove to pad the neck, and clamped it securely.

16-1/2" Five String Viola Closed Corpus, with bass in the background. Glove is padding.
Closed Corpus, with bass in the background. (Gotta get going on that double bass again!)


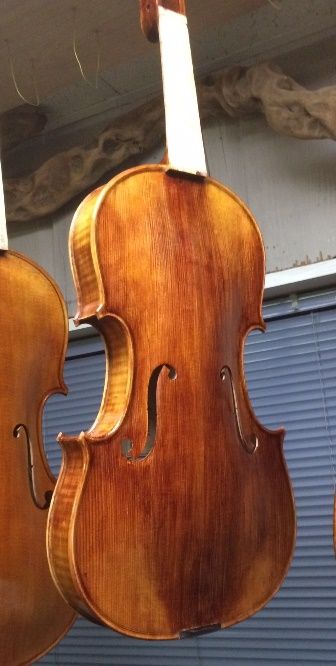
The next thing will be to trim the neck heel and back button together, as they are the key to the strength of the joint, and must hereafter function as one.

Neck heel and back button of 16-1/2" five-string Viola awaiting final shaping. Planned purfling weave sketched in.
Neck-heel and back button awaiting final shaping. Planned purfling-weave sketched in.


But I will leave those steps for a later post…this one is already too long. (sorry…)


Thanks for looking.


Progress moving forward!

Making advances on the 16-1/2″ 5-String Viola.

Status as of my last post:

I had installed the European Spruce front plate on the garland, and showed the partially assembled corpus in spool-clamps. So, here is the partially completed corpus, out of the clamps and stacked with the rest of the parts:

16-1/2" five-string Viola garland with top plate installed, back plate traced, and scroll begun.
Garland with top plate installed, back plate traced, and scroll begun.


Scroll Work

So, I took a break from working on the plates, and worked on the scroll. It is made of highly flamed European Maple.

I completed the carving of the turns of the volute, and cleared it up until it was nearly complete, including the chamfers around the edges. I used an assortment of small gouges to carve the undercuts, and completed the work using scrapers.

16-1/2" five-string Viola scroll and pegbox essentially complete.
Scroll and pegbox essentially complete. Ready to temporarily attach the fingerboard.


Back Plate Beginning

Then I decided I had better get the European Maple back plate caught up to everything else, so I cut out the traced shape on my small bandsaw, and cleaned and smoothed the perimeter on the oscillating spindle-sander.  I began the outside arching, using a toothed-blade finger-plane, and then switching to a smooth-blade finger plane, stopping only because I was getting tired.

I will still have a great deal of careful shaping and scraping before the back arching is truly complete. But before I stopped for the evening, I temporarily glued and clamped the ebony fingerboard to the neck, knowing that I will remove it after setting the neck and before varnishing.  So, here is where the instrument sits tonight:

16-1/2" five-string Viola back arching nearly complete, neck and fingerboard joined.
Back arching nearly complete, neck and fingerboard joined.


You will notice that I also began shaping the “handle” portion of the neck. I shape it along with the fingerboard, dressing the fingerboard to get the curvature perfect, and shaping the “handle” part of the neck for optimum playability and feel.

But, when the arching is complete, I can sweep straight on into graduation, because, of course, the back plate has no f-holes, let alone a bass bar.  (I do have to remember to install the label before I close the corpus. I don’t enjoy trying to install a label with tweezers, through an f-hole.)

Next Steps

The next things on my agenda will be to complete the arching, complete the graduation, and get going on purfling the front plate.

Many makers install the purfling before they begin graduation, but I always had a problem with the overhang being uneven when I did that, so I switched to purfling after the plate is installed on the garland, and the overhang has been satisfactorily established.

I also usually set the neck before removing the mold, so that, when I go to install the back plate, the neck heel is already perfectly flush with the back of the garland, and the back plate fits flush and tight, all the way around. Everyone has their preferences and idiosyncrasies, I guess.

My expectation is that I should have the neck installed by the end of the week…and maybe the back plate, too. But there are always other demands on my time, so it may be next week before either of those is complete.

Thanks for looking.


More Progress on the 16-1/2″ Five-String Viola

Progress on the 16-1/2″ five-string Viola

Beginning the plates

When I last posted, I had traced the shape of the garland onto the plates and was ready to cut out the plates. I decided to wait on the back plate, but the front plate was ready to go,  so I cut it out, using my band saw, and smoothed the edges, using the spindle sander and files. (I have built precisely one instrument without power tools of any sort: One of my early teachers required it, so I complied, but it convinced me that, at my age, I need to save my joints for the things that I have to do by hand, rather than beating them to death just on principle. Besides, I am convinced that if the old masters had possessed power tools, they would have used them without question. They were very practical people.)

So, with the front plate cut to shape, I first marked the edge at a thickness of 4.5 mm. I used a wheel-style marking gauge, with a sharp disc, to mark the thickness and scribe it into the edge of the plate, all the way around. Then I began cutting away waste wood to achieve the desired arching shape. I checked a poster (Published by The Strad) of the “Conte Vitale” 1676 viola by Andrea Guarneri . It is one of the most frequently copied violas in the world, as it is a large viola that works very well, and copies of it frequently work very well, too. I am modifying the pattern a little for superior playability, but I have made this model before, so it is not “guesswork.”

I forgot to take pictures, initially, but here are a couple, belatedly:

Remaining scribe-line for edge-thickness on the 16-1/2" five-string Viola.
Remaining scribe-line for edge-thickness. I plane down to the line all around, eventually.


Line beginning to disappear on the edge of the 16-1/2" five-string Viola.
Line beginning to disappear.


Arching complete on the front plate of the 16-1/2" five-string Viola.
Arching complete.


Arching complete and f-holes laid out for the 16-1/2" five-string Viola.
Arching complete and f-holes laid out.

F-hole Layout and Incision

Once the arching was complete, right down to scraping, I laid out the f-holes, and incised them deeply into the European Spruce of the front plate. Incising the f-hole outline allows me to turn the plate and sight over the edge of the plate at the profile. I want the main stem of the f-hole to be essentially parallel with the plane of the ribs, when seen from the side. I use this as a final correction for the arching, and without exception, it has required me to correct the shape of the arching before moving on.

F-holes laid out and incised deeply on the front plate of the 16-1/2" five-string Viola.
F-holes laid out and incised deeply.

Graduation

Once the arching is truly completed, and I am satisfied with the f-holes, I begin graduating the inside of the plate. This means that I am carving the inside of the plate to “match the outside,” in that it will be an appropriate thickness all over. I usually want the center area between the f-holes one thickness, the band running up the center to each end slightly thinner, and the wing areas outside that area quite a bit thinner. There is no “set” thickness, and each luthier has to make choices in order to achieve what he or she wants from an instrument. Getting what you hope for depends on those choices you make, and the choices were (hopefully) made intelligently,  based on the type and density of the chosen wood, the shape of the arching, and so forth. Getting the arching and graduations right is a lot of carving on a large instrument, but it pays off in quality of sound.

beginning to carve the interior of the front plate of the 16-1/2" five-string Viola.
Beginning to carve the interior for thickness graduation.


Carving away the waste wood from the interior of the 16-1/2" five-string Viola.
Carving away all this waste wood produces a lot of shavings. Fortunately, we heat our home with wood, and the shavings are great for starting the morning fire. 🙂


Carving thickness "dots" for the front plate of the 16-1/2" five-string Viola.
Once I am getting close, I carve “dots,” calibrated to specified thicknesses.


Connecting the thickness "dots" on the front plate of the 16-1/2" five-string Viola, by planing.
“Connecting the dots,” using a finger plane.


Frequently I can see the traces of the incised f-holes from the inside by the time I am finished with the graduation of the front plate. And, believe it or not, I  always can easily see light through the spruce plate, in the thinner areas, if I hold it up to a lamp.

Cutting out the F-holes

I use a special tool to cut the upper and lower eyes of the two f-holes, then use a small knife to finish cutting them out.

f-hole cutter, boring the "eyes" of the f-holes on the 16-1/2" five-string Viola.
I use an f-hole cutter to open the upper and lower “eyes” of the f-holes.


Ready to cut out the stems of the f-holes on the 16-1/2" five-string Viola.
Ready to cut out the stems of the f-holes. (Earlier instrument…I forgot to take pictures…)


Bass Bar

Once the f-holes are cut out and refined, the next thing is the bass bar. This is the only brace attached to the inside of a violin, viola or cello: it supports the bass foot of the bridge, and provides for clarity and strength to the bass notes. An instrument with a weak bass bar will not sound good.

Bass bar fitted, glued and clamped, in the 16-1/2" five-string Viola front plate.
Bass bar fitted, glued and clamped.


With no point of reference, it is hard to realize the size of that plate: so here is a standard violin-sized plate for comparison: A 16-1/2″ viola is pretty big.

Size comparison with violin plate and bassbar: 16-1/2" five-string Viola compared to a violin.
Size comparison with violin plate and bass bar.


Bass bar glued into the 16-1/2" five-string Viola, and ready for trimming to shape.
Bass bar glued, and ready for trimming to shape.


Proposed shape of completed bass bar in the 16-1/2" five-string Viola.
Proposed shape of the completed bass bar.


I cut the bass bar to the desired shape, using gouges, planes and scrapers.

Completed bass bar in the 16-1/2" five-string Viola.
Completed bass bar.


Another size comparison between the 16-1/2" five-string Viola and a violin.
Another size comparison. Same violin plate.


Inner Edgework

I know it will be difficult to accomplish the inner edgework after the plate is installed, so I always do that first. I also trim and shape the linings, so that they taper smoothly into the ribs.

Installing the Front Plate

I dry-clamped the plate to the Garland, and then, using a thin palette knife, slipped hot hide glue (on the thin side, for easy removal if needed) into the unclamped areas and immediately applied padded spool clamps to tightly hold the plate until the glue could dry. Then I removed the first few clamps and inserted glue there, and reclamped. My wife thinks the instrument looks as though it is wearing hair-curlers at this point. 🙂

Front plate of the 16-1/2" five-string Viola installed, glued and clamped to the garland.
Front plate installed, glued and clamped.


And that is where the instrument rests for tonight.


Thanks for looking.

16-1/2″ Five-String Viola Beginning

16-1/2″ 5-string Viola on the way!

New Project!

This is the first large 5-string viola I have made. So far, most players have been quite firm about wanting the same scale length as a violin…and an instrument that will fit in their fiddle case. So that is what I have mostly made. But lately, there seems to have been an increased interest in five-string violas. Some were interested specifically in a smaller viola (hence the current, nearly completed 5-string 15″ Viola,) but more recently, there were two players who were really interested in a large 5-string viola. A 16-1/2″ Viola with a high E string.

So… here we go! I already had European Maple and Spruce billets set aside from earlier “shopping trips,” and everything else that I needed to build a big viola. All I had to do was to finish the instruments already on the bench! They are now out of the way, except for completing the varnish and final set-up of the 15″ 5-string viola… so I am good to go. Here are most of the materials, with the plates already bookmatched.


Materials for new 5-string Viola.

Making, Bending and Installing Ribs

The blocks were already in the mold, and shaped. It was time to start working on ribs. I thinned the ribs to the proper thickness, using a fixture I made for my oscillating spindle sander (one of my few power-tools.) Then I bent each of them to the proper shape, using a hot bending iron.

When I had all six ribs shaped, I installed the two center-bout (often called “C-bout”) ribs, and secured them with hot hide glue and clamps. You can see that clamping to a curved surface is not easy. I held the mold in a small vise, then secured each joint using hot hide glue, cylindrical wooden cauls, and f-style clamps.

Center ribs installed on 16-1/2" five-string Viola.
Center ribs installed on 16-1/2″ five-string Viola.


When the glue holding the center-bout ribs was dry,  I trimmed the ends of the ribs, using the spindle sander again, and installed the lower bout ribs. The joint at the center of the instrument, between the lower ribs, has to be pretty close to perfect, as it will always be visible and any discrepancies will be glaringly obvious under the varnish.

Center ribs trimmed to match the curvature of the blocks of the 16-1/2" five-string Viola.
Center ribs trimmed to match the curvature of the blocks.


Lower ribs installed on the 16-1/2" five-string Viola.
Lower ribs installed.


Finally, I installed the upper ribs. There is no joint between the upper ribs: in fact, they don’t even have to touch. The neck mortise will remove the middle section regardless of how good my joinery is, so I leave a gap there to allow for easy installation of the ribs. (Meaning, I only have to concern myself with how the ribs fit the corner blocks and that they cleanly follow the mold up to the neck block.)

Upper ribs installed on the 16-1/2" five-string Viola.
Upper ribs installed.


Making, Bending and Installing Linings

While I was bending ribs, and still had the iron hot, I went ahead and cut and bent a supply of linings. The linings, like the blocks, are made of willow, because I like the way it works. The linings serve to triple the gluing surface of the edges of the ribs, where they contact the plates, as well as strengthening the rib garland.

Linings bent and ready to install on the 16-1/2" five-string Viola.
Linings bent and ready to install.


I made a small mortise at the juncture between each rib and each block (24 of them,) and then installed the linings dry, to make certain they fit correctly. Then, one-by-one, I removed each lining, applied hot hide glue to both the rib and the lining, and quickly reinstalled the lining and secured it with a series of small spring-clamps.

Linings installed in the 16-1/2" five-string Viola, with hot hide glue and spring clamps.
Linings with hot hide glue and spring clamps.


Tracing the Shape of the Plates

When the glue holding the linings was dry, I removed the clamps and used the spindle sander to trim the ends of the rib corners. I also leveled the front and back of the garland, so that I would be able to trace the shape of the plates.  The European Maple back plate is on the left, and the European Spruce front plate is on the right.  I used a small washer as a spacer, to establish the edge overhang, and a ball-point pen to trace the shapes. You can see that I have begun work on the neck, as well, which is also made of European Maple.

Completed garland, traced plate-shapes, and partially carved neck for the 16-1/2" five-string Viola.
Completed garland, traced plate-shapes, and partially carved neck.


The garland is temporarily out of the focus of the work, now, so I hung it up, out of harm’s way, until I am ready to begin installing plates.

Rib garland of the 16-1/2" five-string Viola, completed and set aside for safe-keeping.
Rib garland completed and set aside for safe-keeping.


The next step is to actually cut out the plates and begin shaping them into the voice of a Viola. I will let that wait until a later post.


Thanks for looking.


Five-string viola Varnishing Process

Varnish Procedure For a 15″ Five-String Viola

First things first: Mineral Ground

The raw wood is quite porous, and would soak up varnish like a sponge…which would dampen the viola sound. So we don’t want that to happen! The solution to the problem seems to be to fill the pores of the wood with very fine particles of mineral of some sort. I don’t particularly want something that would form a concretion, as some makers have done, because I think that also changes the sound, but in a different way.

I used Gypsum, ground very fine in a mortar, then suspended in water, and daubed onto the surface; then vigorously rubbed into the pores. After rubbing the mineral into the entire surface (except the “handle” area of the neck) I used a damp cloth to rub all the excess gypsum back off. While it is wet, it just looks like wet wood, but as it dries, it turns chalk-white, assuring me that the surface is truly saturated with the particles.

Partially dry mineral ground, front side of 15" Five-string viola.
Partially dry mineral ground, front side.


Partially dry mineral ground, back side of 15" Five-string viola.
Partially dry mineral ground, back side.


Then, after the gypsum suspension is completely dry, I use fine sandpaper to remove any excess mineral from the surface, so that there are no thick patches of mineral.

15" Five-string viola, with Dry Mineral ground, rubbed clean.
Dry Mineral ground, rubbed clean.


Locking the mineral ground in the wood: Sealer

As you can see in the above photograph, the mineral is still saturating the surface, and obscuring the grain. However, when I apply the sealer (in this case, a mixture of rosin, turpentine, and alcohol) the mineral ground will become completely transparent, and will permanently disappear. The varnish will then be free to show off the grain of the wood.

Front side of 15" Five-string viola, with sealer.
Front side with sealer.


Side-view of 15" Five-string viola, with sealer.
Side with sealer.


Back-view of 15" Five-string viola, with sealer.
Back with sealer.


Making it Shine: Beginning the varnish

It takes a while for the sealer to dry, because of the turpentine content, but as it dries, the alcohol evaporates first, then the turpentine, leaving the rosin in the wood (which is where rosin comes from in the first place, of course) locking the gypsum particles in place. and further sealing the wood against saturation with varnish.

Before proceeding to the varnish, I carefully sanded all over, to clean up any spots that still felt rough or sticky, then wiped the entire instrument down with alcohol to remove any rosin residue from the surface.

Then I applied a first coat of yellow varnish, as I have noticed that many of the old instruments seem to have something yellow under the darker red or brown varnish. You can especially see it in the areas where the colored varnish has worn thin, or is completely gone. (Not all of them have this color, but I like it, so that is what I have chosen to do.)

So, here is the base coat of yellow varnish:

Base coat of yellow varnish on front side of 15" Five-string viola.
Base coat of yellow varnish on front side.


Base coat of yellow varnish on the side-view of the 15" Five-string viola.
Base coat of yellow varnish on the side.


Base coat of yellow varnish on the back side-view of the 15" Five-string viola.
Base coat of yellow varnish on the back side. The grain of the spalted maple is showing better, again.


Base coat of yellow varnish on scroll and neck heel of the 15" Five-string viola.
Base coat of yellow varnish on scroll and neck heel.


I do not apply varnish to the “handle” portion of the neck until everything else is completely done. After everything else is done, including set-up, I will rub down the handle area with 400-grit abrasive one last time, and then put about a dime-sized dot of shellac on a rag, on the end of my finger, and vigorously rub it into the wood of the handle area, until it is completely dry. This somewhat seals the wood against sweat and dirt, without leaving a heavy, “slick” coating that would cause drag on a player’s hand.

The rest of the varnish coats will be building color toward the final look of the instrument. I will include them in another post.


Thanks for looking.


Five-string viola Scroll and Neck Carving

Carving the scroll on a 15″ Five-string viola

Beginning with the Saw

When I first tried making an instrument (a viola) I did not know about using a saw to start, and I carved the entire scroll by hand with a set of small gouges my wife had presented me with a few years earlier. That took a long time, and it was very difficult to keep both sides symmetrical with one another.

Later, I saw a series of photos posted by a maker in Brasil, who showed how he used a thin-bladed saw to outline the scroll, making many small cuts, then removing the waste wood with a combination of saw and gouges. That was a bit of a revelation, and I enthusiastically embraced the change. It did, however, take a bit of practice to master the concept.

So here is the process:

{You can see the dark lines and spots in the wood. This is called “spalting” and is very popular with some people, though it actually is caused by a fungus. This particular Big Leaf Maple billet, along with that of the back, was salvaged from an old tree taken down on my wife’s family’s property, and is quite heavily spalted.)

First, I carefully laid out both sides of the scroll, then  I used my bandsaw to cut out the whole “footprint” of the scroll and neck.

Then I went back and laid out the volute, including the centerline, on the outside of the curve, all the way around, so I know what the scroll should look like from the front and back, as well as both sides. I also used a knife to scribe the centerline deeply enough that I will not lose it as I begin to shape the outside of the scroll.

Then I used the same bandsaw to remove the slabs from the sides of the pegbox, and a little way down into the neck: (You can see I already rounded the heel of the scroll a little, too, with a gouge. That is a personal quirk of mine…I want that heel looking “round” right from the beginning.)

Five-string viola Scroll with outline cut and slabs removed.
Scroll with outline cut and slabs removed.


Then I use a small pull-saw (Japanese style, but I don’t know what brand) to cut beside the scroll profile lines just down to where they nearly touch the sides of the volute lines around the outside of the scroll. It is very important to keep these cuts perpendicular to the centerline of the scroll.

Sawing to create the profile of the scroll on the 15" Five-string viola.
Sawing to create the profile of the scroll.


Then I use a combination of a thin saw and various gouges to remove the waste wood created by the saw.

Removing waste wood from the scroll of the 15" Five-string viola.
Removing waste wood.


Continuing to remove waste wood from the scroll of the 15" Five-string viola.
Continuing to remove waste wood.


At some point (usually, the earlier the better) I will decide to carve out the interior of the pegbox. I did not take any photos of that process this time, but there are a variety of options. Some makers use a drill to carefully excavate a series of small holes, so that it is easier to remove the waste wood between the holes. That is practical, but you have to be very careful to not go too deep, or too far off to either side. (It is easy to destroy your scroll, in other words… ask me how I know. 🙁 )

I outlined the opening with a small straight chisel, then used that same chisel to begin excavating the waste wood from the interior of the pegbox. You can also see the remaining layout lines for the neck, in this photograph.

Carving the pegbox for the scroll of the 15" Five-string viola.
Carving the pegbox.


After the pegbox was mostly complete, I began carving the turns of the scroll, as well. This is another place where it is very easy to make serious errors. I continually examine the scroll from all angles to see to it that both sides are progressing equally, and that I am achieving a satisfactory symmetry. If I can keep the two sides looking like mirror images of one another up until the final smoothing, then there is little danger that the final smoothing will change that symmetry.

Beginning to carve the turns of the scroll for the 15" Five-string viola.
Beginning to carve the turns of the scroll.


Continuing to carve pegbox and beginning to carve the scroll for the 15" Five-string viola.
Continuing to carve the pegbox and the turns of the scroll.


15" Five-string viola Scroll nearly complete; Pegbox essentially complete.
Scroll nearly complete; Pegbox essentially complete.


Once the scroll and pegbox were complete, I prepared the fingerboard and glued it in place temporarily. I need the fingerboard installed, in order to correctly set the neck. (I realize that some makers can successfully set the neck without the fingerboard, and I have done so in the past, but it is also easy to make a mistake. I like having the fingerboard correct, and use it to help me set the neck correctly.)

15" Five-string viola Scroll looking pretty close to complete: Fingerboard temporarily installed.
Scroll is complete: Fingerboard is temporarily installed.

Setting the Neck

(I did not take photos of this process, but it goes as follows:)

  1. Lay out the location and footprint of the neck mortise.
  2. Use a thin razor saw to cut the sides of the neck mortise, but not too deeply.
  3. Use very sharp chisels and gouges to remove the waste wood from within the mortise.
  4. Keep checking the fit and adjusting the mortise, until the neck fits perfectly.
  5. Glue the neck in place, using hot hide glue, and a clamp.
15" Five-string viola Neck properly set, glued and clamped. Glove is for padding.
Neck properly set, glued and clamped. Glove is for padding.

You can see in the above photograph that the neck heel has been left to be carved to the correct shape at the same time as the back button. (A lot of people do not realize that, in the violin-family instruments, the joint between the heel of the neck and the back button is critically important to the strength of the neck joint. It is not just to be pretty, as is sometimes the case in guitars.)


15" Five-string viola neck-set back view, showing plastic clamp-pad.
Neck-set back view, showing plastic clamp-pad and spalted Big-Leaf Maple back.


After I carved the heel to the correct shape, The instrument was essentially done, and final shaping and scraping for varnish preparation is the next step.

Side view of 15" Five-string viola, showing completed neck-heel.
Side view, showing completed neck-heel.


Back view of 15" Five-string viola, showing back button shape.
Back view showing back button shape.


15" Five-string viola, ready for final Varnish-prep.
Ready for final Varnish-prep.


I will save the varnishing process for the next post.


Thanks for looking.

Beginning of a “Chez Les Eveques” Five-string fiddle.

Advanced Student Instruments, including Five String Fiddles

A less expensive option:

I had originally hoped to only build “new, made from the raw wood” instruments, but, as it turns out, fewer people are willing (or able) to pay for the labor involved in building such an instrument. So, reluctantly, some years ago, I began to offer “advanced student instruments,” which meant I bought an unfinished instrument “in the white”, and completed the building, finishing and set-up as if it were my own creation, but labeling it as having been “from my shop” (meaning, not made by me,) and selling it at about 1/4-1/3 the price of my handmade instruments. For better or worse, these were a popular option, as the buyer gets a very good violin or viola, for a low price, and a 100% trade-in, if they later decide to buy one of my original handmade instruments. I named the new line of instruments “del Atelier Chez les Eveques” (From the workshop at the Bishops’ place.) I like the sound of it, and it sounds a lot more “bien sophistique” in French,  for some reason. 🙂

Five String “Chez Les Eveques”

I recently found that there were now also 5-string instruments available in the white, and, as an experiment, I bought two of them: a five-string fiddle (which seems to simply be a regular violin with a 5-string scroll,) and a 15″ 5-string viola (which, again, seems to be a normal 15″ viola body with a 5-string scroll.)

5-string violin and 5-string viola in the white
5-string violin and 5-string 15″ viola, in the white.

A good starting place:

As had been my experience in the past, the workmanship is quite good. The rest is up to me, as a rule. I do see some improvements I would make if I were in charge of the factory producing them, but that is OK, too. (Can’t give away all the secrets!)

I began the finishing process as if they were my own work; but with no specific plan, as I had no customer in mind, so I could not ask their preference.  Just my usual gound, sealer, and first varnish coats.

five string fiddles early varnish look
Early varnish look for both instruments.


Annnd … a Customer!

I was also in the midst of completing a commissioned instrument, so that was taking priority, but sometime along in the middle, there, I received a message from an individual who wanted this level of five-string fiddle. Annnd, she wanted to see what it looked like as it stood now… I actually had the customer on the phone, when I went into the next room and clumsily took two photos with my phone (see below) and sent them to her.

Five-string fiddle snapshot front
Snapshot of front.


Snapshot of back of Five-string fiddle.
Snapshot of back.


Bingo! She liked it, and said, “Let’s get it done!” So, we were off and running!

I asked questions as to her preferences, saw photos of her current existing instruments, and got a clear idea of where I was going with the look: (fairly deep color, some antiquing, etc.), and I began laying on color to suit, but sending her progress reports with photos, for approval.

Five-string fiddle Varnish getting close to completion.
Varnish getting close to completion.


Once the varnish was nearing completion, I installed the fingerboard and began set-up:

Front view of Five-string fiddle with fingerboard.
Front view with fingerboard.


Back view of Five-string fiddle with fingerboard.
Back view with fingerboard.

Having received assurance that all was well, so far, I continued on into set-up, and completed the instrument.

 Front view of Completed Five String Fiddle.
Front view of the completed instrument.

That tailpiece is hand-carved of Osage Orange, per the customer’s request: she was classically trained and does not like the multiple fine-tuners I usually supply.


Side view of the completed Five String Fiddle.
Side view of the completed instrument.


Back view of the completed Five String Fiddle.
Back view of the completed instrument.


Close-up of Five String Fiddle scroll.
Close-up of the scroll.

So…you may be thinking, “How does it sound?

Well, actually, disgustingly good! I always hope that my handmade instruments are just “head and shoulders above” the ones I buy in the white, but this is really a good five-string fiddle! The main advantage of the handmade original is that the customer gets to choose what type of (and in some cases what specific pieces of) wood will be used, as well as the overall look, and set-up. I can tailor an instrument to the needs of the specific player, if I start from the beginning with that player in mind. Not so much with the factory-made, in-the-white instruments. But, in this case, I think we have a winner!

The customer is a violist, so she knows good viola sound, and will undoubtedly mix and match strings until she finds the perfect match for her, but she is starting off with excellent balance across all five strings: nothing flabby or unfocused about that C-string at all! So, she should be able to put her favorite strings on it and get “instant gratification.” I expect so, anyway… There are so many possible combinations that I can’t say for certain that they will all work. I will ship it with a decent set of strings that work very well, and after that, it is the customer’s game, for life! 🙂

Here is her new baby, hanging in my dining room, ready to ship!

Five String Fiddle Ready to ship
Ready to start a new life!


Thanks for looking.

More 5-string Fiddle Progress

Five-String Fiddle Progress

(Further progress on building a custom-made 5-string bluegrass fiddle.)

Neck Set

The neck was ready to set into the neck-block, late last night, but I had reached my physical limit. So, today, I prepared both the neck and the garland, by ascertaining that all angles and dimensions were correct, and then laying out the shape of the neck mortise on the neck block of the garland.  This is a critical step in violin-making and always raises my blood pressure a little, as I know that, if I make a mistake, it will require serious rework to get back to a usable status.

However, this time, the job went pretty smoothly, and I was able to set the neck in a fairly short time. One thing I do a little differently than I was originally taught, is that I set the neck before installing the maple back plate. This allows me to achieve a good fit with the rib garland and neck block, and not have to worry about the fit against the back plate button. Then I saw off the stub of the neck heel, and plane and file it flush with the rib garland. After I remove the mold and add the back linings, I will level the back of the garland, and be ready to trace the back plate shape.


Five-string fiddle neck Set Complete.
Neck Set Complete: still have to remove the neck-heel stub.


Here is the completed corpus (Sitka Spruce top plate and Big Leaf maple ribs still on the mold) with the wild-grain Big-leaf maple back plate billet.

Completed Corpus of Five-string fiddle with Back Plate Billet.
Completed Corpus with Back Plate Billet.


Mold Removal

So, the next step was to remove the plywood mold. This is another stressful step because it involves literally using a hammer and chisel, to break the glue-bond between the blocks and the mold, so as to release the garland from the mold.  I used to have a difficult time doing this, because occasionally a drop of hide glue had seeped between the rib and the mold, and anchored the fragile rib material to the very solid mold. The likelihood of breaking a rib at that point became nearly 100%. Eventually, however, I learned to liberally coat all the non-gluing surfaces of the mold with candle-wax (paraffin,) by vigorously rubbing a candle over all the areas I felt were likely to get a drop of glue on them.

The result today was that, when I removed the mold, it went smoothly, and I could see a place where glue had definitely intruded but it had dried with zero adhesion to the waxy mold. (What a relief!)

Five-string fiddle mold removed, ready for back linings.
Mold removed, ready for back linings.

Installing the Back Linings

The linings are important for two reasons: they strengthen the fragile rib-edges, and they triple the gluing surfaces between the rib-garland and the front and back plates.

So, I cut the mortices in both sides of each of the six blocks to receive the lining strips, and then inserted the linings dry, to get a perfect fit.

Afterward, I removed each lining, one by one, coated them liberally with hot hide-glue, and re-inserted them, clamping immediately with small spring-clamps.

Five-string fiddle back linings installed, glued and clamped.
Back linings installed, glued and clamped.

Shaping Blocks and Linings

If you look closely you can also see, in the above photos, that I had trimmed the blocks on the front side, before removing the mold. After the glue is dry on the back linings, I will also trim the back side of the blocks, to achieve a smooth, curved surface on the interior of all the blocks. At that same time, I will taper the linings so that they are very thin on the edge toward the middle of each rib, but still 2 mm thick at the edge where they will contact the back and front plates.

After that, it will be time to level the back surface of the entire corpus (garland and neck-heel) so as to fit tightly against the back plate billet. Then I can trace the final shape of the back plate, cut it to shape, and get going on completing the back plate.

For now, I am satisfied to allow the glue to dry, and take the rest of the evening off.


Thanks for looking.

Commissioned Handmade Five-string Fiddle Beginning

Starting a new 5-String Fiddle

The Materials:

A few weeks ago I announced that a new fiddle would be beginning. Now I have a few photos to show:

The top plate is Sitka Spruce, from Bruce Harvie. The customer wanted “Oregon wood,” and the Big Leaf Maple is definitely from in my neighborhood, here in Oregon (I helped harvest it;) but the Sitka is just a species that grows here…I don’t know where it was harvested.

Wild-grain Big Leaf Maple for Five-string fiddle back and ribs!
Wild-grain Maple for back and ribs!


Fine-grained Sitka Spruce for Five-string fiddle top plate.
Fine-grained Sitka Spruce for the top plate.


Preview of the grain in the Five-string fiddle neck billet.
Preview of the grain in the neck billet.


Beginning the work of building a 5-string fiddle:

I book-matched the spruce, to form the basis for the front plate: a solid plate with a tight glue-line down the center.

I used the mold (or form, as many people prefer to call it) that matched the fiddle the customer liked best. Then I added willow blocks to become the corners and end-blocks, and I traced the intended shape of the blocks from the mold template onto the back-side of the blocks, where they are flush with the mold.

Blocks and mold with Five-string fiddle template.
Blocks and mold with template.


Five-string fiddle Preliminary block-shaping complete.
Preliminary block-shaping complete.


Added the ribs, of the spalted maple the customer liked, and glued them to the willow blocks. Afterward, I added linings, also of willow, and let them into the blocks and glued them to the ribs and the blocks.

Spalted Maple ribs and willow linings on beginning of Five-string fiddle.
Spalted Maple ribs and willow linings.


Five-string fiddle Rib garland nearly complete.
Rib garland nearly complete.


Then I traced the shape of the garland onto the top plate material, using a small washer as a spacer, and a ball-point pen as a scribe. I completed the corners using a straightedge and a series of circle templates. Finally, I marked the edge at exactly 4 mm thick, and carved the arching, using gouges and planes and scrapers.

Sitka top-plate arching complete for Five-string fiddle.
Sitka top-plate arching complete.


Then I marked the layout of the double purfling and the f-holes, and began incising them into the Sitka Spruce.

F-holes and purfling traced and cutting begun for Five-string fiddle.
F-holes and purfling traced and cutting begun.


Sometime in the midst of all the above work, I laid out and began carving the scroll and pegbox. That wild grain is very tricky to carve, as it changes direction constantly.

Rough-carved scroll and pegbox of Five-string fiddle.
Rough-carved scroll and pegbox.


I went ahead and completed the purfling and the f-holes, so that I could prepare the plate to be glued to the garland.

Completed top plate and neck work with garland for Five-string fiddle.
Completed top plate and neck work with garland.


I also added the bass-bar, chalk-fitting it to perfection, and gluing it in place, with hot hide glue. The bass-bar will be carved, planed and scraped to the proper shape after the glue dries.

Five-string fiddle Bass-bar glued and clamped.
Bass-bar glued and clamped.


Five-string fiddle Top plate glued and clamped to the garland, fingerboard glued to the neck.
Top plate glued and clamped to the garland, fingerboard glued to the neck.


The fingerboard is Ipé, as requested by the customer. It is an extremely dense hardwood, but not threatened as Ebony is beginning to be. It finishes to a dark brown and looks good, as well as wearing well. It is extremely difficult to work, though, so it may take time to become popular with makers. The saddle and the nut will also be Ipé, but the pegs will be ebony, simply because I have never mastered the lathe-turning of tuning pegs.

Working on the fingerboard for the Five-string fiddle.
Working on the fingerboard.


And that is pretty much where things stand, for now. I will try to post pictures as they become available.


Thanks for looking.

New 5-string Commission on the Way!

New Five-String Fiddle Request!

A client contacted me through this website and asked whether I could build a 5-string fiddle of primarily Oregon woods. (Sure!)

Test-Drive of existing fiddles

We made an appointment and she came for a visit. She played eight of my hand-made instruments (all good fiddles), finally declaring a particular one to be exactly what she wanted, except that she did not care for the look of the one-piece Sitka Spruce top plate. It had very wide grain on the bass side and narrower on the treble side. (It sounds great, but the looks were bothering her.) Soooo…

Custom-made Five-string!

I went into my storage and retrieved a really wild-grained piece of Big Leaf Maple, and two billets of very straight, even-grained Spruce: one of Englemann, and another of Sitka: she chose the Englemann and loved the maple. She wanted an instrument essentially the same as that first one, but without the odd-looking belly grain. (The same model; made on the same mold (form), and sounding just like it, as well.) It will be tough to do, because the one she really likes is already five years old; it has had time to settle, be re-adjusted, and settle again. (Yes, it sounds good!)

Select Woods and a Good Start

So, we went out to one of my other buildings and hand-picked some likely-looking wood for the neck and ribs, and we were ready to do business. She presented a deposit, and I suggested that she take home the one she loved, for the time being, to keep her interest up while waiting for me to complete her personal treasure. She went home happy, and I began sorting willow for blocks, finding my proper templates, and enjoying the prospect of a new five-string fiddle build. I will post follow-ups as they occur.

Thanks for looking.

I will post this over on the Bluefiddles page, as well.