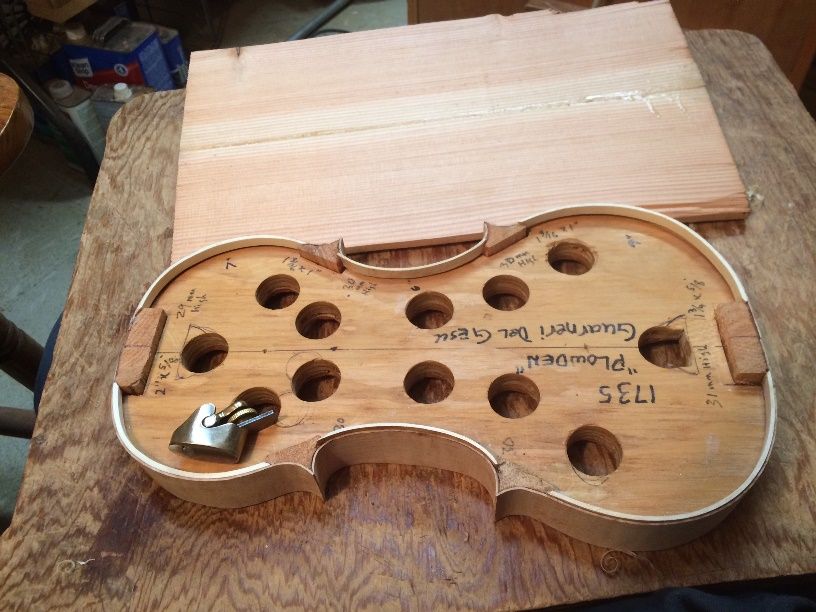
More Progress on a Commissioned 5-String Fiddle

Progress Report: 5-String Fiddle

When I last posted, it was to explain my neck and scroll procedure. Before that, I had left the project with both plates partially carved.  The garland was complete, but with linings on the front side only.

Front Plate Procedure

So, moving forward, the next thing was to complete the front plate,

front plate
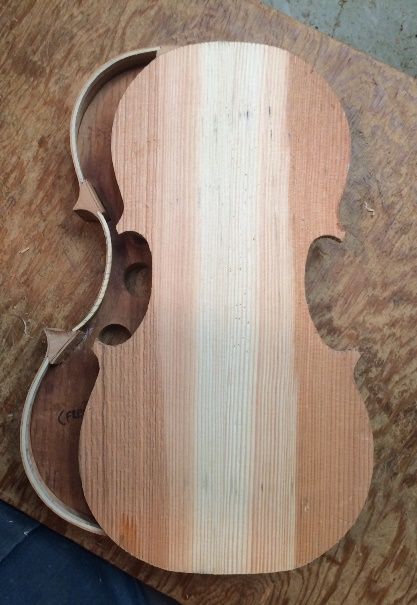
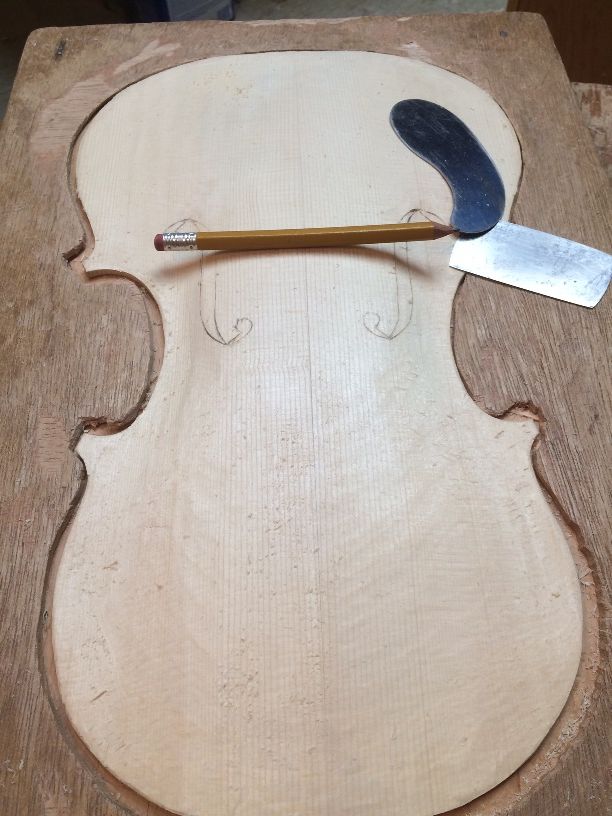
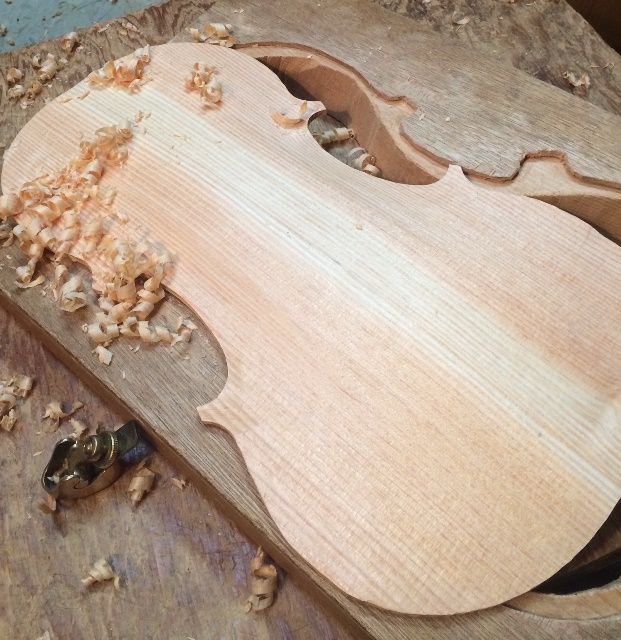
Douglas Fir Front plate outer arching nearly completed

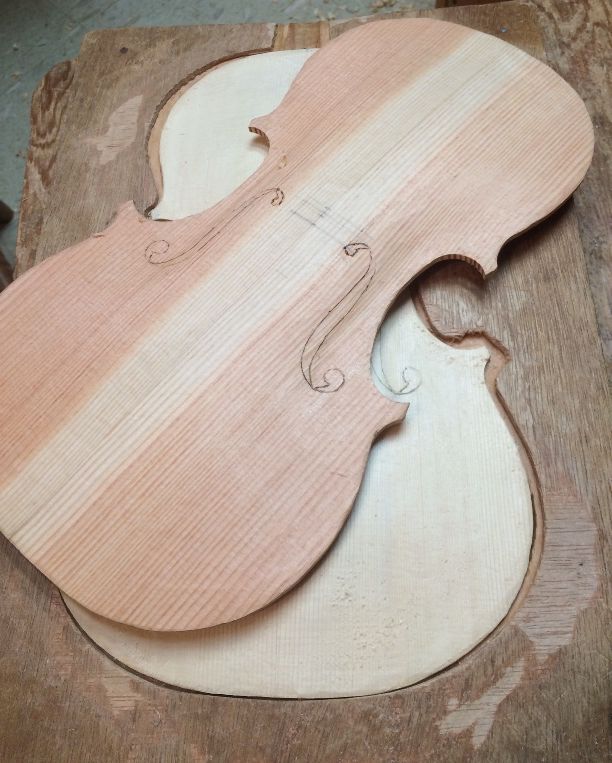
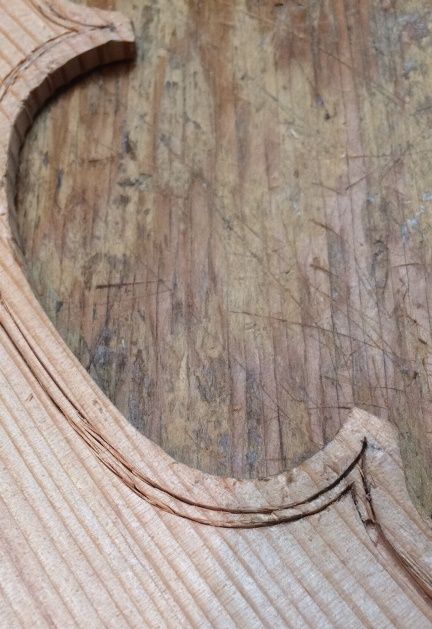
Once the arching was nearing correct values, I carved most of the interior and then began laying out f-holes and purfling lines. The Douglas Fir is extremely difficult to work with, because the winter reeds are incredibly hard, while the summer reeds are nearly as soft as spruce… so the knife tends to follow the winter reed, instead of your intended path, making it very difficult to cut a smooth line.

beginning to carve the interior
Beginning to carve the interior of the Front Plate. This part was not too hard.
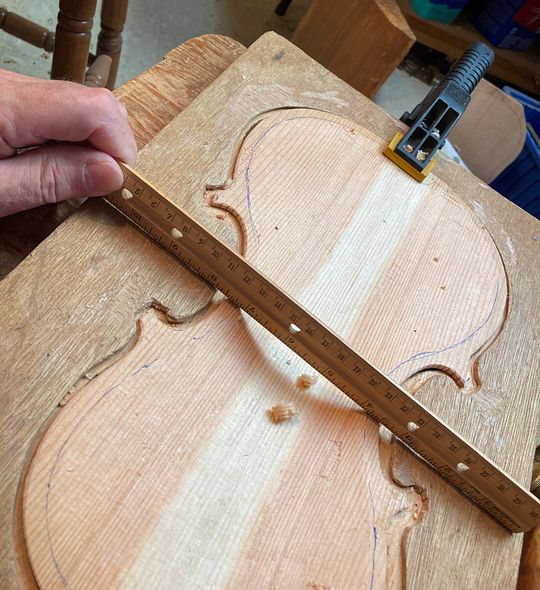
checking the depth
Checking the depth of the hollow. There is still work to do on the outside, so I have to be careful.

Purfling Procedure

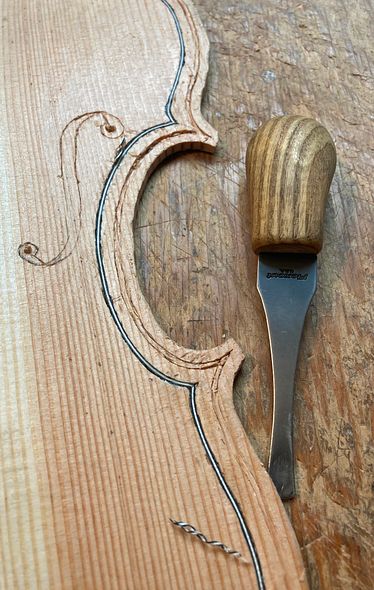
rough purfling due to hard fir sound plate
Rough beginning for purfling and sound-holes. 

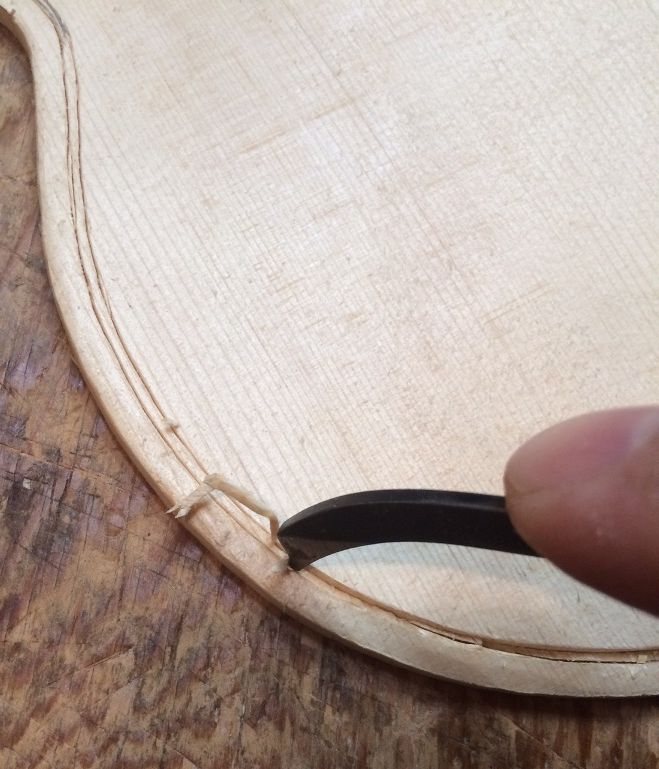
It was discouraging seeing how rough my beginning looked. But, as things progressed, I was able to clean up my lines a little and they began to look more acceptable:

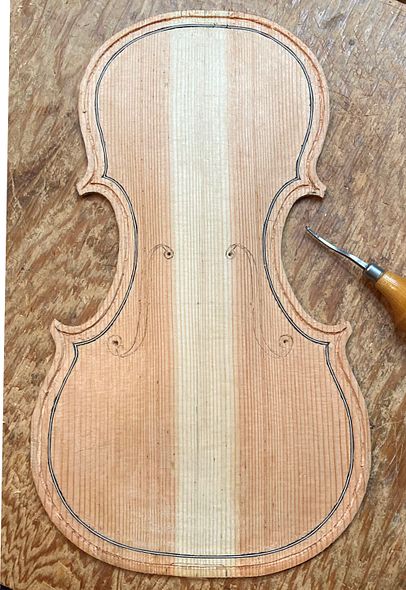
Inner line of purfling completed.

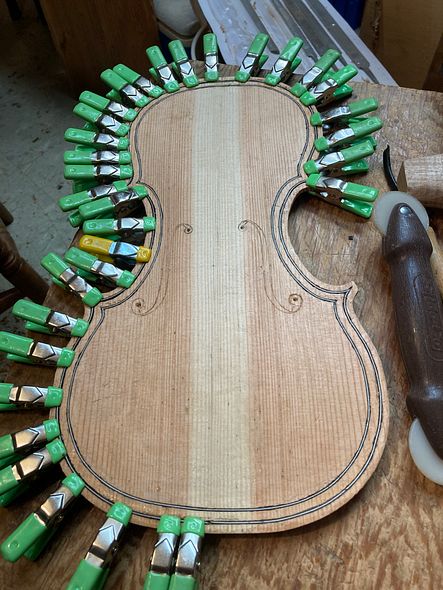
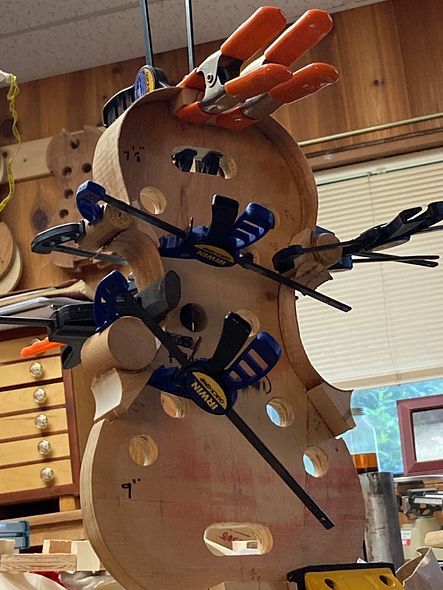
And then, The outer purfling. I was being careful to not inlay the purfling too deeply, for fear of causing problems, but that meant the purfling did not want to stay in the slots by itself, while the glue set. So I had to clamp it down until the hot hide glue gelled and set up.

clamping purfling while glue sets.
Clamping purfling while glue sets.

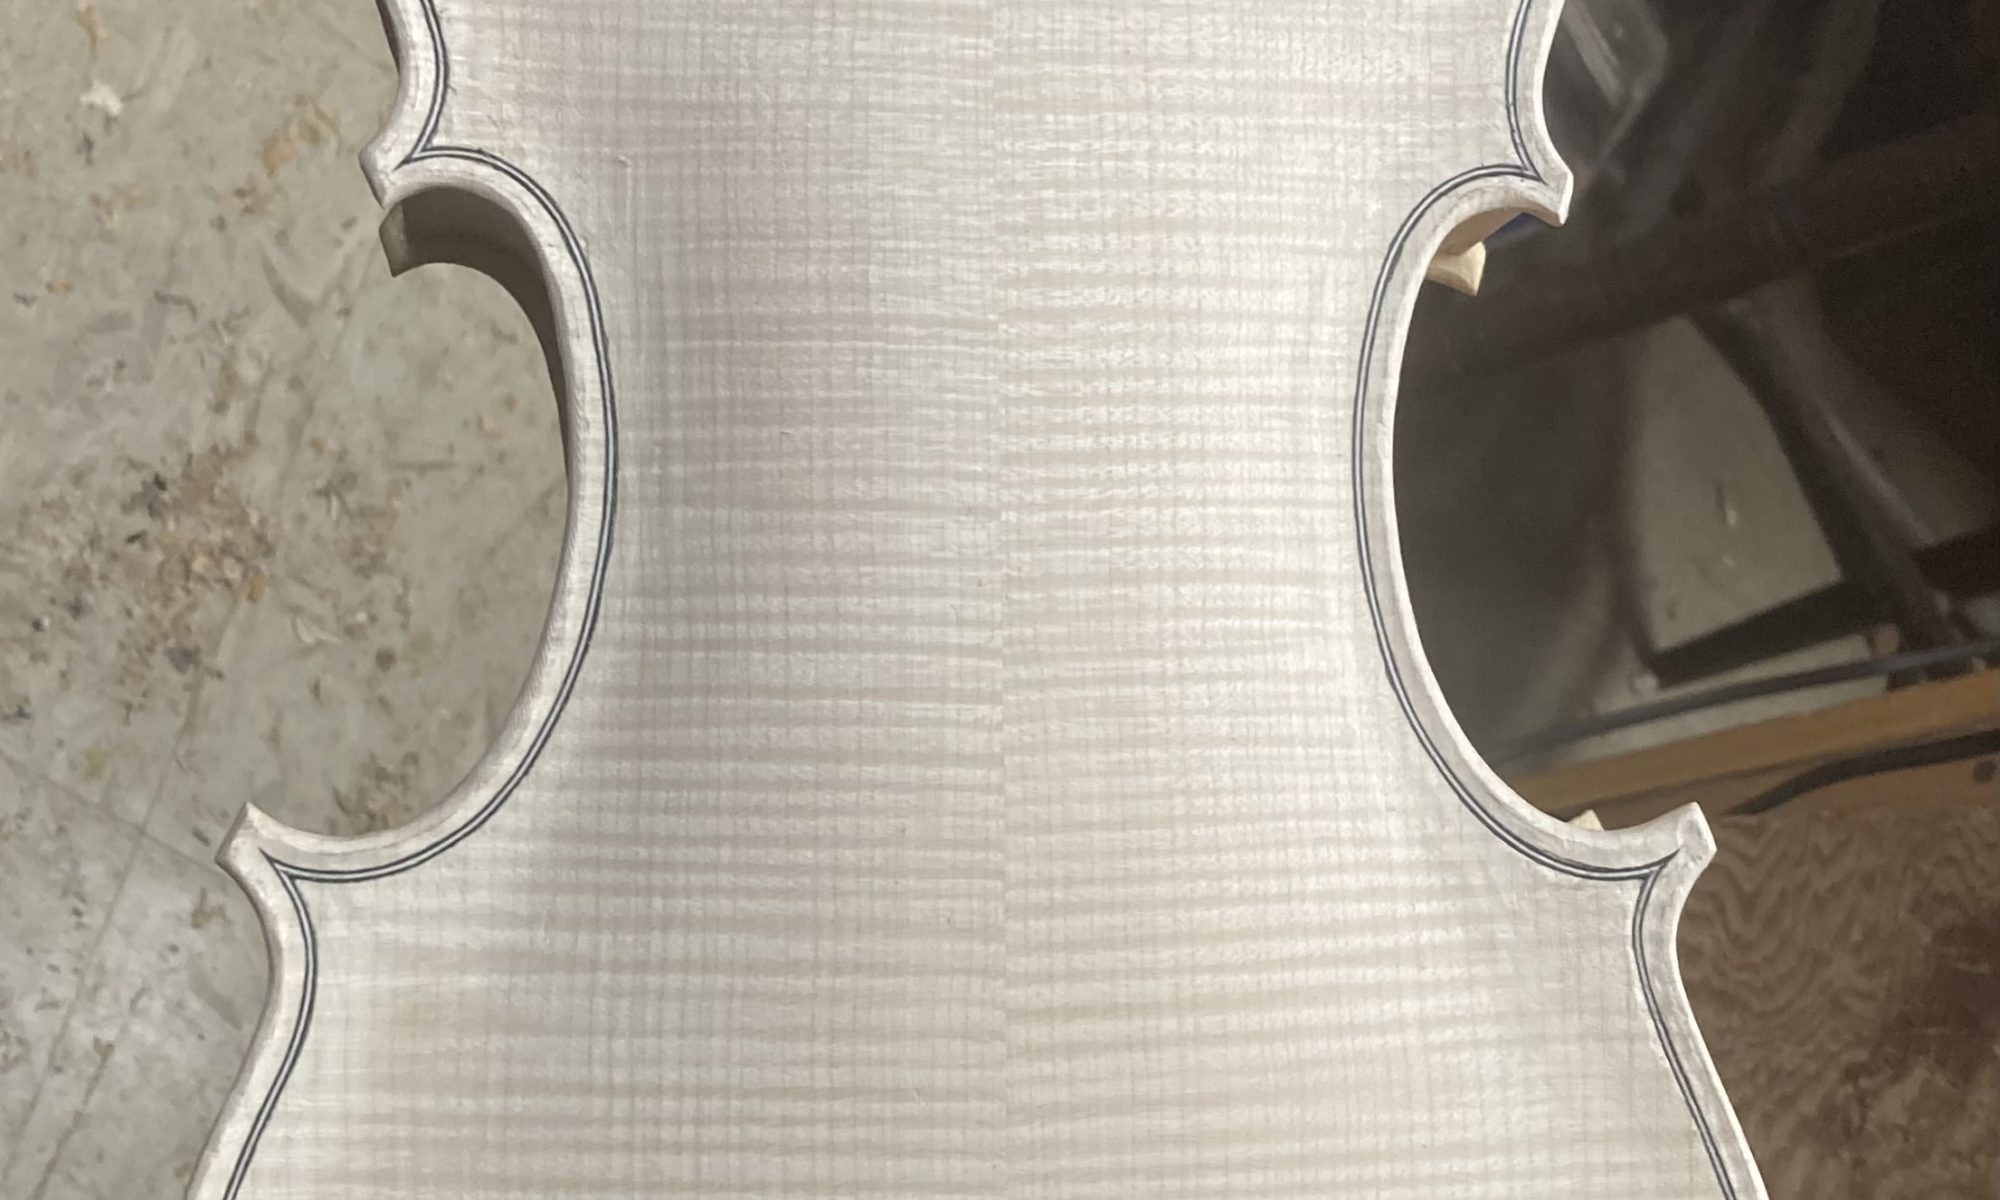
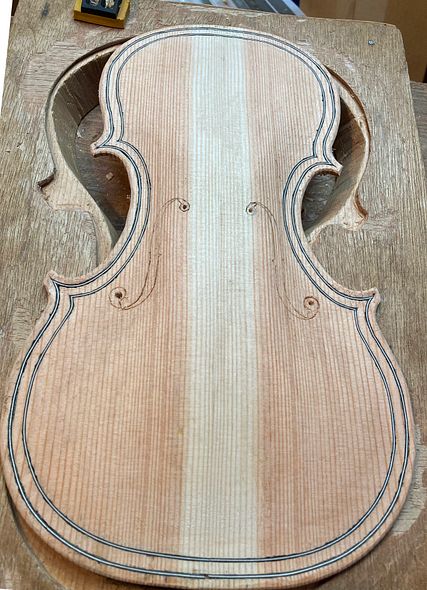
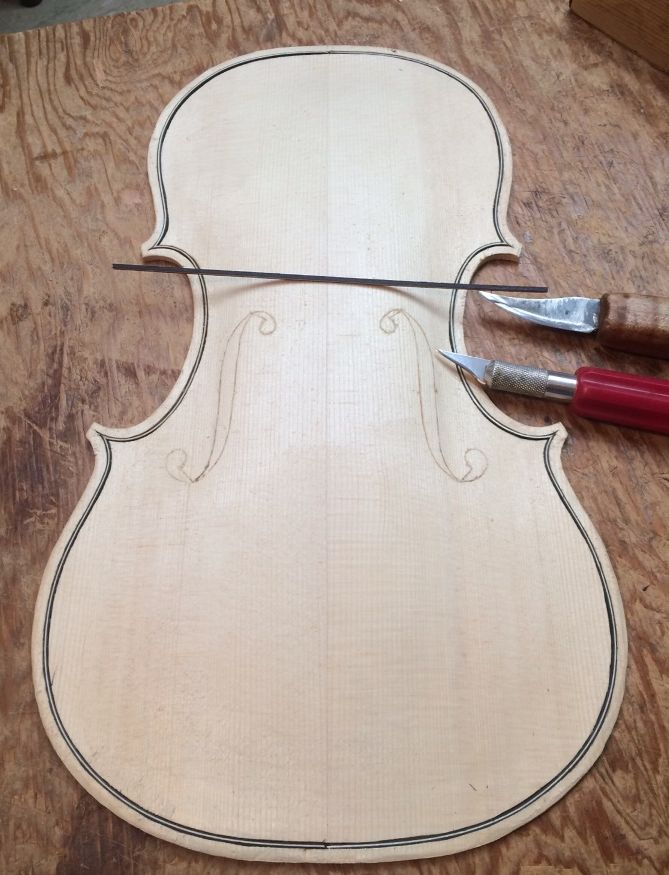
But it looked pretty good after I planed it all flush with the Douglas Fir.

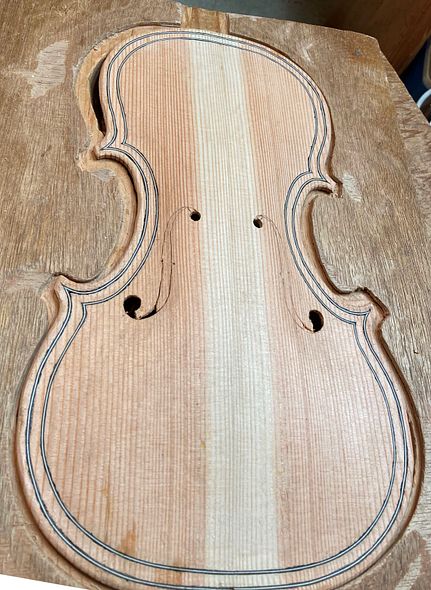
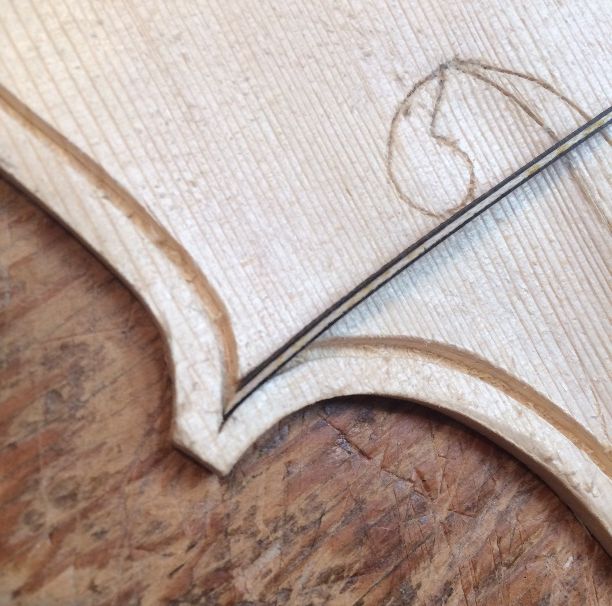
Double purfling on Douglas Fir Soundboard
Outer line of purfling copmpleted. Notice the pilot holes for the f-holes have been drilled.

When the interior and exterior were correct, I could finish cutting out the f-holes.

Beginning to cut out f-holes for a 5-string bluegrass fiddle handmade in Oregon by Chet Bishop, Luthier.
Beginning to cut out f-holes.
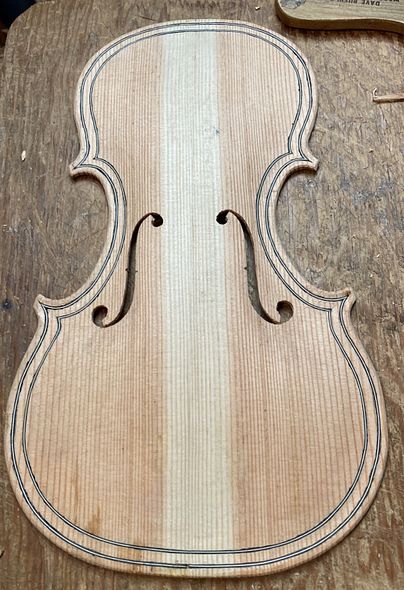
F-holes completed but rough
F-holes completed but rough. as the next few days went by, I kept returning to the f-holes with small files and perfecting the shapes.

I forgot to take pictures of the sequence of steps installing the bassbar. I constructed it of Douglas Fir, to match the top plate, and chalk-fit it to the correct location inside the plate. After the glue was dry I shaped it to the correct height, thickness and curvature. 

(There are a couple of links in the above paragraph to other builds, where I remembered to take pictures,,,sorry for the inconvenience!)

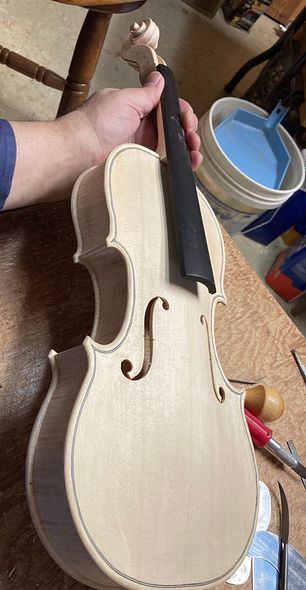
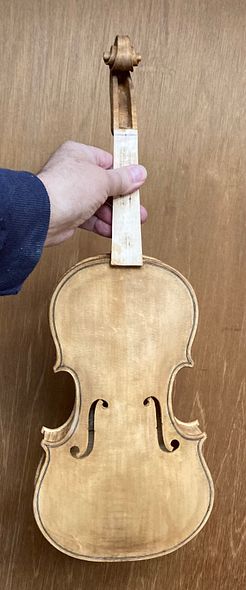
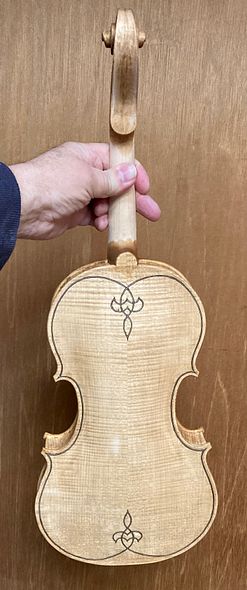
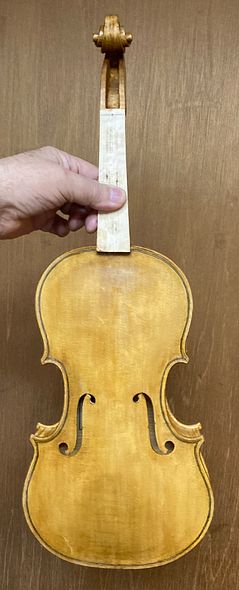
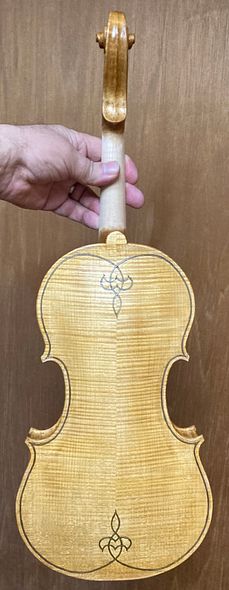
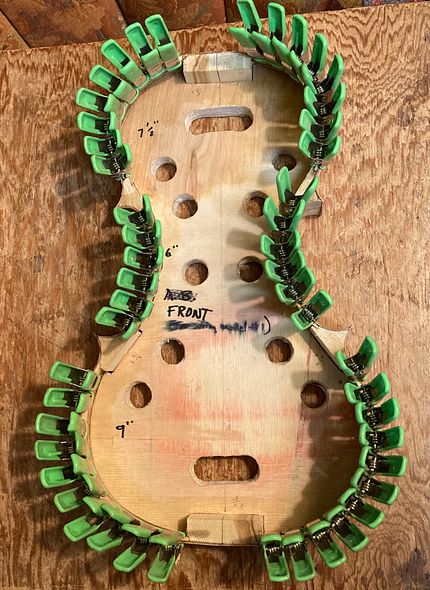
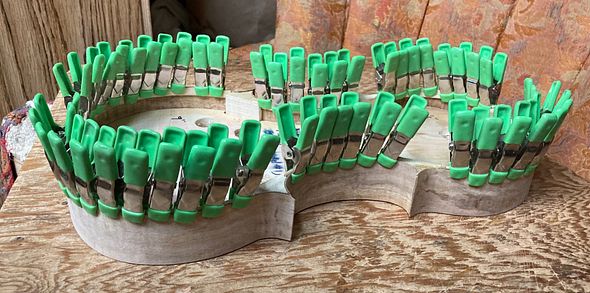
Then, after completing the inside scraping and edge preparation, I installed the front plate, using hot hide glue and spool clamps.

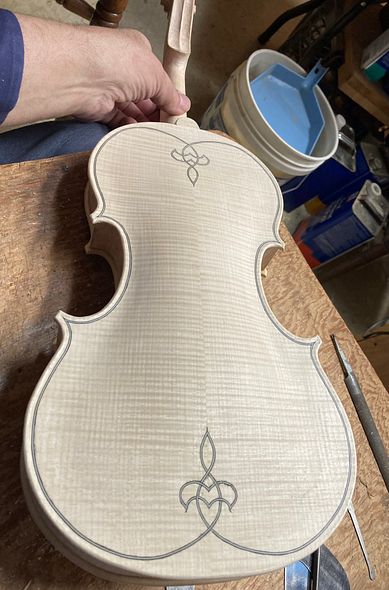
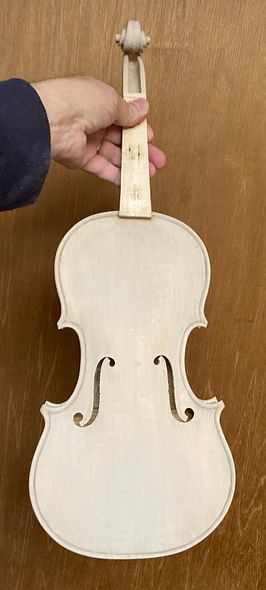
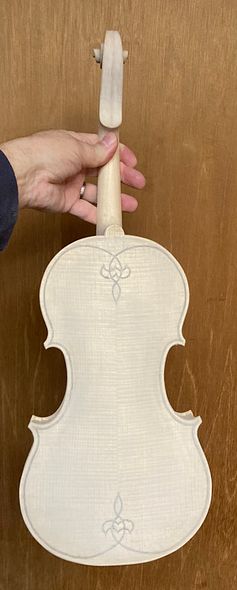
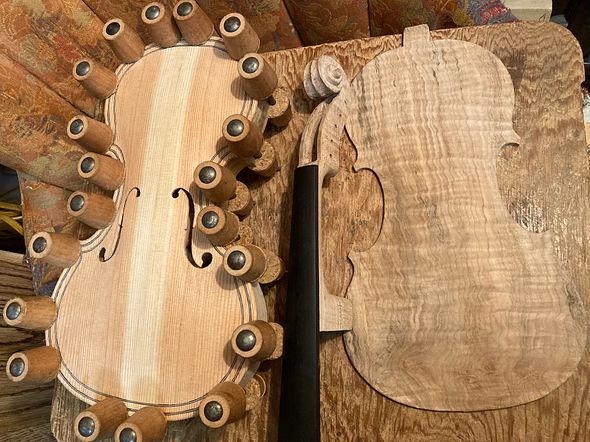
Front plate installed, with neck, fingerboard and back plate for 5-string bluegrass fiddle handmade in Oregon by Chet Bishop, Luthier.
Front plate installed, with neck, fingerboard and partially completed back plate.

Next time, I will show the procedures for setting the neck, completing the back plate and closing the corpus.

Thanks for looking!


New Commissioned Five String Fiddle On the Way!

New Commission!

Unusual  Woods

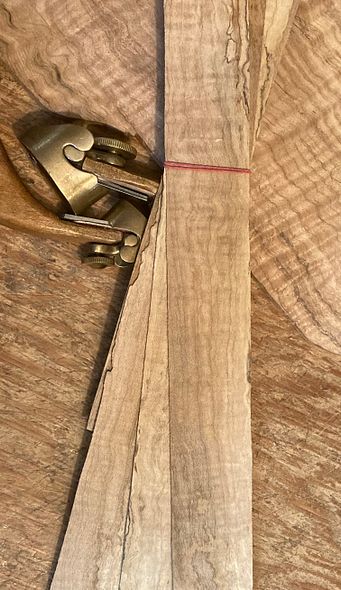
A customer ordered a new, custom-made Five String Fiddle, and it is on the way!  He chose heavily spalted, heavily-flamed, Oregon Big Leaf Maple for the back plate, the sides, the neck and scroll. My wife’s parents gave me the wood from this maple tree.

Ann used to play under and climb on this tree as a child, and we hated to see the tree cut down. Her parents still live there, less than four miles from our house. However, they had to remove the tree because it was dying. I have salvaged wood for a few instruments from that tree and they all look and sound wonderful!

Given a choice between Spruce and Douglas Fir, the customer chose the Douglas Fir, for his front plate. This tree also grew just a few miles from my home. (A famous violin and viola maker, Otto Erdescz  (1917-2000) used to make violins and violas with Douglas Fir soundboards. Professional musicians still play some of them, today. But very few luthiers use Douglas Fir. I didn’t either, until a few years ago!)

Not my usuaI Choice in times past

For many years, I refused to try such a thing. But a friend gave me a load of very straight grained Douglas Fir firewood, a few years ago.   I was splitting some of the firewood,  and the split-off piece hit the ground: it rang like a bell! I had never seen such straight-grained, clear Douglas Fir, with zero runout!

Unfortunately, that particular piece was too short for a fiddle. I had to search through the pile for a piece that was long enouigh for a violin plate.

Since then, I have made several such instruments, and they all sound great. (I find that the Spruce is definitely easier to work with, though, and, for classical, orchestral instruments, I still use only European maple and spruce.)

Customer Preferences:

This man showed up at my shop and he played all the five string instruments I had. (He really had not played 5-string instruments before. He laughed for joy, hearing the rich deep C-string on each one.  After a short while, he declared, “OK, I’m addicted!”)

He played the full range of all of them. He finally settled on my earliest unsold 5-string (#3 on the “Chronology” page) as being exactly what he wanted.

But not to buy that instrument. No! He wanted a commissioned instrument “just like that one!” (He wanted one especially built for him! Sure! We can do that!)

And, as it turned out, that was a good thing.  A week later, the next customer who came to try out all my instruments  also loved that fiddle, but she bought it that day, and drove away! So, it is gone, now!

Which Mold?

I knew which of my molds was the source of that fiddle: I have made at least four off of that specific mold. All of them have sold, now, so, for the moment, there are none available. (This instrument will “solve that problem,” for a moment, but it will disappear immediately after completion.)

The commissioning customer also wanted local wood. so that he could say, “My violin came from a tree on that hill!” So…choosing the wood was the first step.

Choosing the Wood

The model I would use had already been chosen, so that was not an issue. I also knew what the wood source would be: I still have a little of the maple my wife’s parents had given me. And, with the customer’s approval, I chose a clear piece of Douglas Fir, salvaged from the firtewood I mentioned earlier. He loved both pieces.

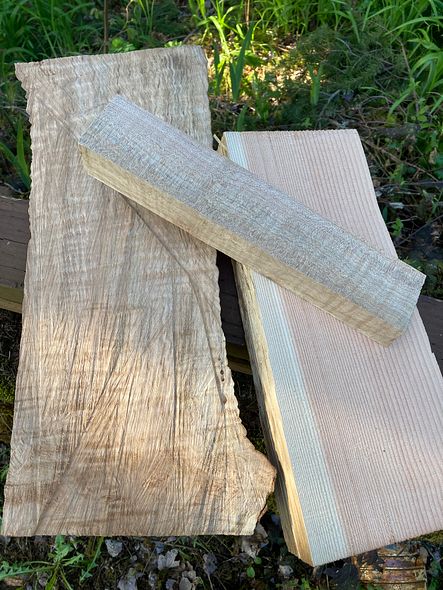
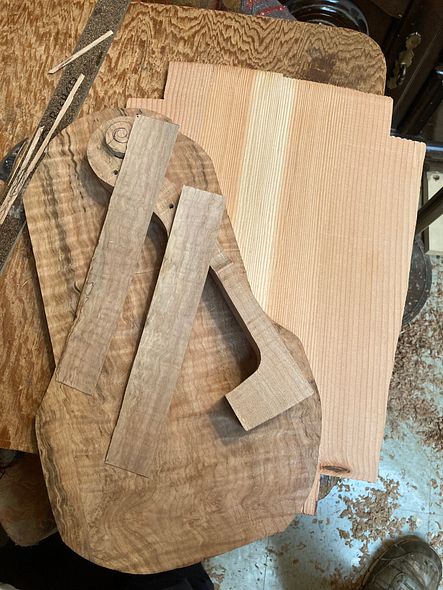
Maple and spruce for five string bluegrass fiddle handmade in Oregon by Chet Bishop, Luthier
“Fiddle in the rough!”

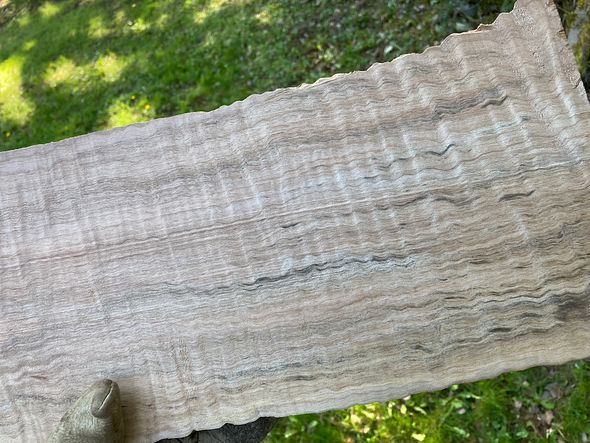
Here is a closer picture of the maple:

Heavily Spalted and Heavily Flamed Maple for five string bluegrass fiddle handmade in Oregon by Chet Bishop, luthier.
Heavily Spalted and Heavily Flamed Maple

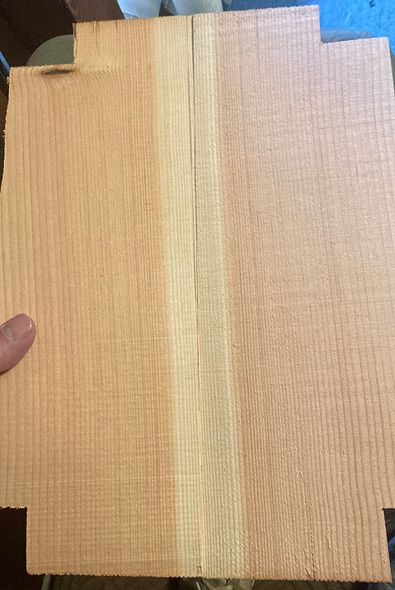
I book-matched the spruce, by cutting a single billet in two equal halves and gluing them together to make the front plate.

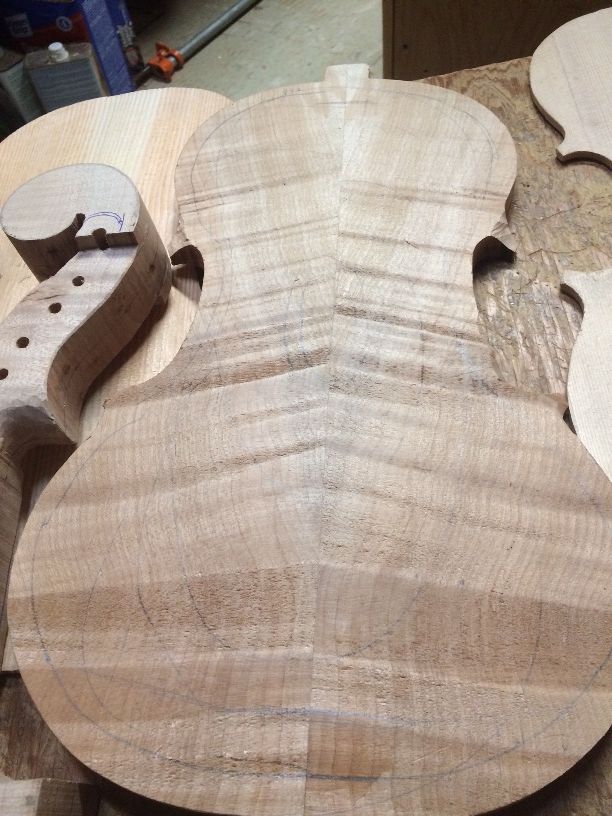
Douglas Fir for five String bluegrass fiddle, handmade in Oregon by Chet Bishop, Luthier.
Douglas Fir, cut and ready to joint and glue the Center seam

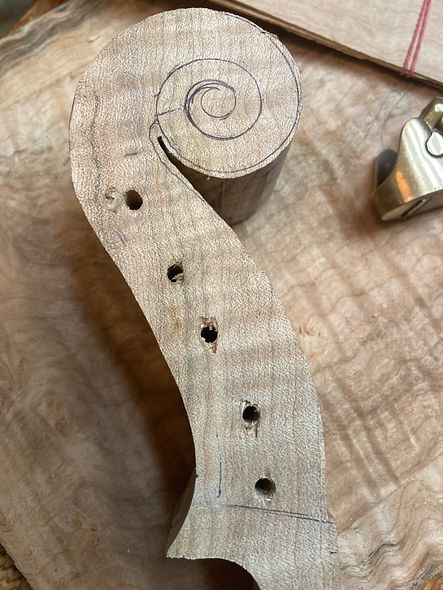
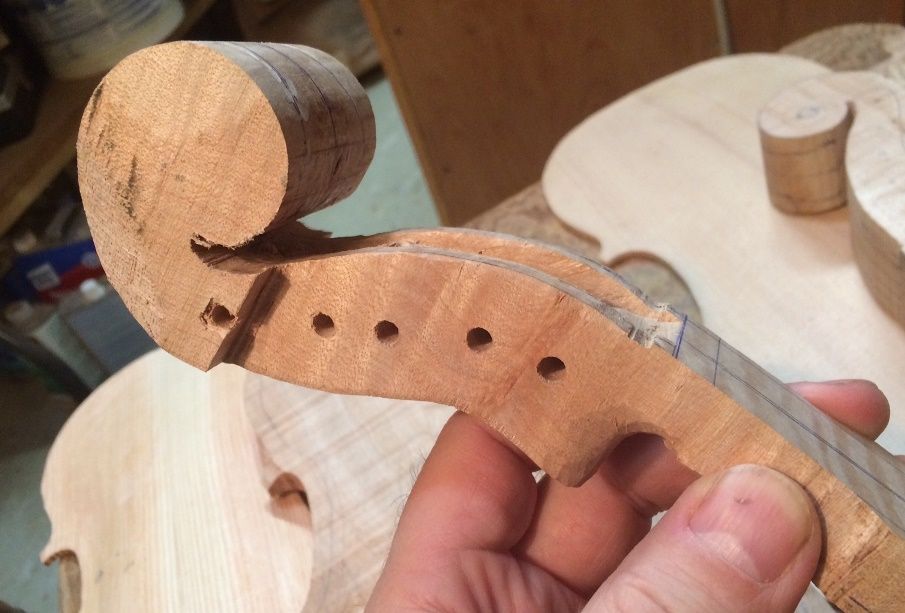
I laid out the neck outline on the billet I had chosen for the neck, and I drilled the pilot holes for the tuning pegs. Then I cut out the side profile on a bandsaw.

scroll billet for new five string bluegrass fiddle, handmade in Oregon by Chet Bishop, Luthier.
Scroll profile cut out, and pilot holes drilled.

Mold Preparation

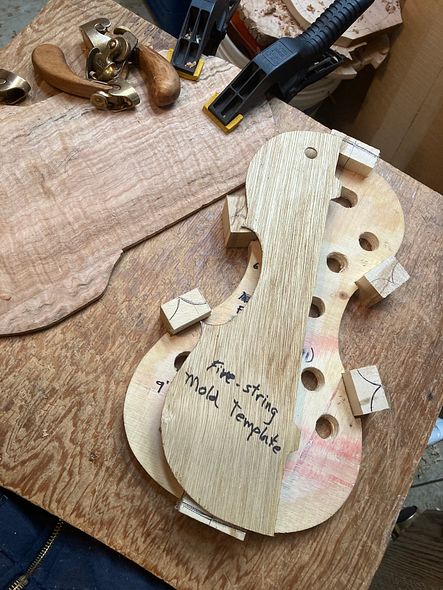
Meanwhile, I got the blocks glued into the mold. Then I  traced their shapes from my template, so the whole job could begin. I also  planed away the rough surfaces of the maple to ascertain that it actually would serve well as the back plate of a new five-string fiddle. And, I found that it was just a little too narrow in the lower bouts.

So, I “transplanted” a small piece of wood from the area above the upper bout on each side and grafted them in on the lower bouts. (This practice is not at all uncommon: It will be every bit as strong as the center seams on two-piece backs. And, once the double purfling is installed, the joints will be nearly invisible, under the varnish.)

wood for new five-string bluegrass fiddle, handmade in Oregon by Chet Bishop, Luthier.
Back plate in progress, blocks in the mold, and the shapes traced from the template.

Preparing the Ribs

I had chosen wood for the ribs, as well, and I sawed them to a thickness of a little over 2 mm. I thinned them, using a wooden fixture I made, clamped to my oscillating spindle-sander. The fixture allows me to  gradually reduce the thickness to 1 mm.

Here are the ribs:

Ribs for new five string bluegrass fiddle, handmade in Oregon by Chet Bishop, Luthier.
Rib-stock, sawn and thinned: ready to be cut to size and bent.

Installing the Ribs

Next, I cut the ribs to the correct length and width. I carefully considered which grain from one side would “mirror” which grain on the other side. I had already been tinkering on the neck, as you can see in this photo, but I will explain that process later.  (It isn’t always possible to do everything in a precise order. While I am waiting for  glue to dry on one section, for example, I may jump ahead on another piece.) You can see the bookmatched front plate, too.

Wood for new five string bluegrass fiddle handmade in Oregon by Chet Bishop, Luthier.
Bookmatched top plate, neck and back billets in progress, and rib samples, cut to size.

I cut all six ribs, and marked them as to inside, outside, upper and lower ends, etc, as well as which side of the fiddle they would call their home…treble or bass side.

Then I bent the ribs using a hot “bending iron” (actually made of aluminum, but, in the old days, they were iron.)

(I forgot to take photos of the shaped blocks: Sorry.)

I had cut and shaped the corner and end blocks, already, so I applied a generous coat of hot hide glue to one block at a time. then, I clamped the rib into the block surfaces, making certain that everything fit correctly before tightening the clamps.

First, I installed the center bout ribs, and when the glue had dried, I used the spindle-sander to trim the ends of those ribs to match the curvature of the outer faces of the corner block, so I could install the upper and lower ribs. Here are the upper ribs, glued and clamped:

ribs installed for a new 5-string bluegrass fiddle handmade in Oregon by Chet Bishop, Luthier.
Center and Upper bout ribs installed, using hot hide glue and clamps.

The lower end of the bass-side center bout rib was not fully tight, so I reglued it and reclamped it. (left lower side of photo.)

Then, when that glue was dry, I installed the lower ribs, by turning the mold upside down in the vise, so I could see clearly. It also meant that both hands were free to adjust the rib position, and apply clamps.

All ribs installed on new 5-string bluegrass fiddle handmade in Oregon by Chet Bishop, Luthier.
All the ribs are installed, but still need to be trimmed, before installing the linings.

Linings bent and installed

I also did not take photos of bending and installing the linings. (Sorry.) Here are two photos of the result, still in clamps.

Linings installed in new 5-string Bluegrass fiddle, handmade in Oregon by Chet Bishop. Luthier.
Front view of linings clamped in place.
Garland with linings installed, for 5-string bluegrass fiddle handmade in Oregon by Chet Bishop, Luthier.
Side view of lining clamps and rib garland.

Tracing the plates

Once the linings were installed and the ribs thus strengthened, I could trace the shape of the plates, and begin cutting things out.

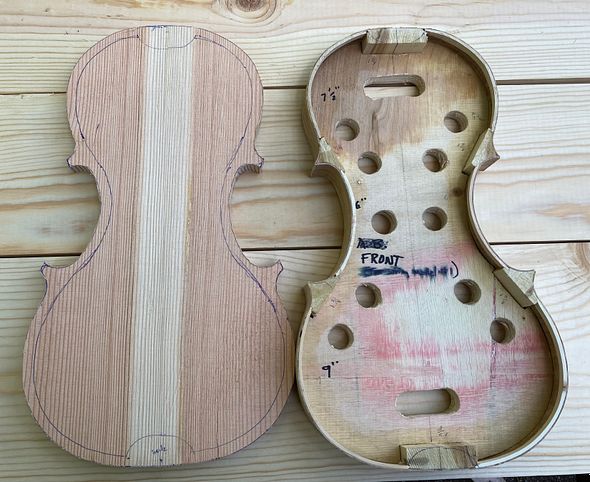
Completed garland and billet for front plate for 5-string bluegrass fiddle, handmade in Oregon by Chet Bishop, Luthier.
Garland and Front plate billet cut to shape.
New 5-string bluegrass fiddel in progress, handmade in Oregon by Chet Bishop Luthier.
And, that is the progress, so far!

Thanks for looking! I will try to keep everyone posted as to progress.

Video Proof! Feedback on the 5-String Viola Conversion!

I finally got some publishable feedback!

Earlier this year, I converted one of my classical 16-1/2″ violas (Instrument #18 (viola #7) on this page)  to a 5-string, for this young player. (Story here.)

I shipped it to him and it arrived just after his birthday. He has been playing it ever since.

Happy Player

The young man truly has been pleased with it: He loved the tone, loved the balance, etc. But he was reluctant to allow me to publish a video of him playing it. He wanted more time to practice.

He just had a hard time getting used to having five strings. Quite a few classically trained players have told me that this was a problem.  They felt that strings just seemed to appear in the wrong places. (I can understand that: there is a string right down the middle of the fingerboard that wasn’t there before! Besides, the angle in string crossings demands more of the player: it is much flatter, requiring more precision.)

Achievable Goals

He sent me several “progress reports,” over the next few months.  All of them sounded good, to me, but he was still working on “getting comfortable” with the new instrument, and did not want them made public. Until today, I did not have his blessing to share any of them.

One of his stated goals was to be able to play Bach’s Cello Suite #6 on the viola. It was originally written for a 5-string cello: A very good cellist can play it on a four-string cello. But, the best violist cannot play Suite #6 on a classical 4-string viola in the original key.  The classical cello used “thumb-position” fingering to play it. “Thumb-position” is not usable on a viola.

The young man bought the 5-string viola to overcome that specific hurdle, so he is working on that piece in this video :

I especially appreciate this video. It showcases both ends of the range of the Viola, and it shows that the instrument speaks quickly and easily, in fast attacks.

He hasn’t “spoken up” online yet (and he may not) but the music tells me he is happy with the instrument.

Hope you enjoy it.

More Progress on the first two of Six Fiddles. (8/9/21)

Build Progress for a couple of new “5-string Bluegrass fiddles:”

Last time:

Last post showed the garlands complete, and ready to be leveled:

garlands for two five string fiddles made in Oregon by Chet Bishop
Garlands with linings installed, ready for leveling.


I began the leveling process using a file and a finger plane, until the fragile rib-edges were level with the linings.

garland for five string fiddle made in Oregon by Chet Bishop
Beginning the levelling process.


Then I completed the leveling by rubbing the garland on a sanding board.

five string fiddle in the making
Flattening the garland on a sanding board.


Tracing the plates

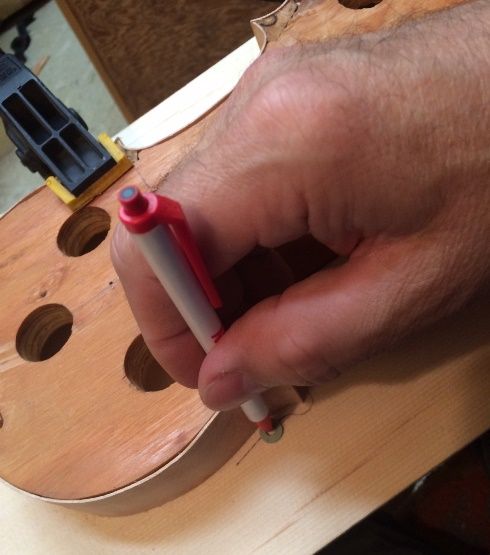
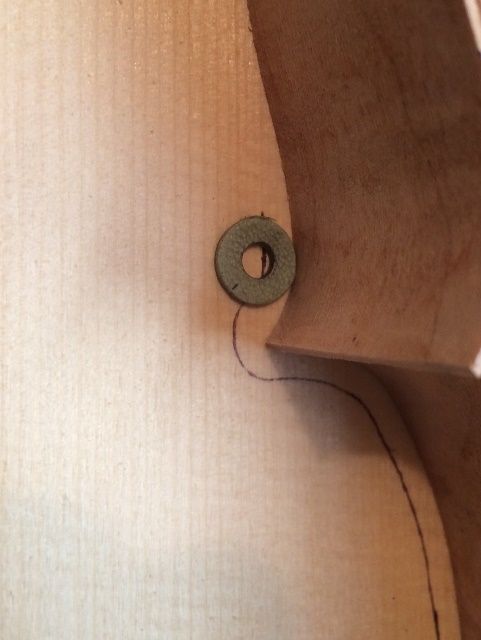
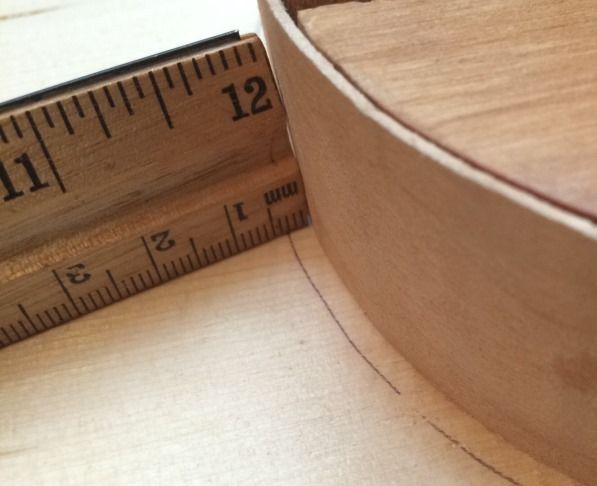
Once the garlands were flat, I could use them to trace the outline of the plates: I used a small washer as a tracing tool– as a spacer, to give me the overhang distance I want (3mm.)

tracing the front plate for a 5-string bluegrass fiddle handmade in Oregon by Chet Bishop
Tracing the outline of the plate, using a washer and a ballpoint pen.


five string fiddle in the making.
The washer has to be the right size to put the ink line 3mm away from the rib.


overhang for five string fiddle handmade by Chet Bishop In Oregon
Pretty close, I’d say!


Correcting the corners and cutting out the plates

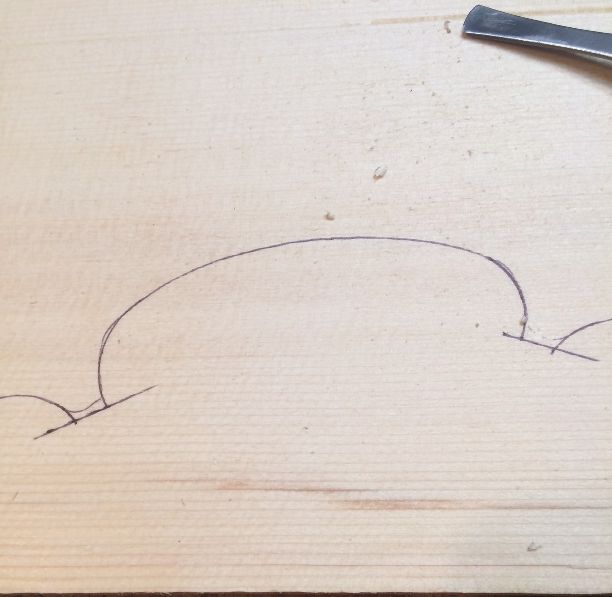
I really don’t want the “round corners ” produced by the washer, but they do give me a starting point from which to correct the corners before cutting out the plates:

corner shapes for 5-string fiddles handmade in Oregon by Chet Bishop
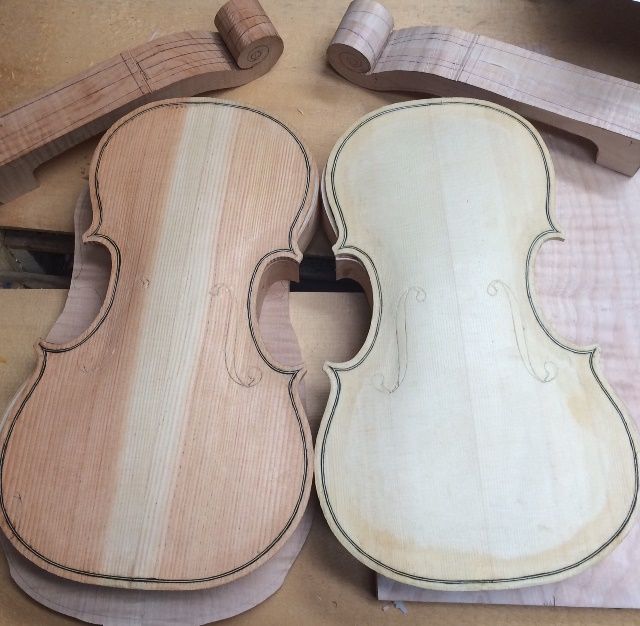
Corrected corner shapes laid out, on Englemann Spruce, using a straightedge and a circle template.


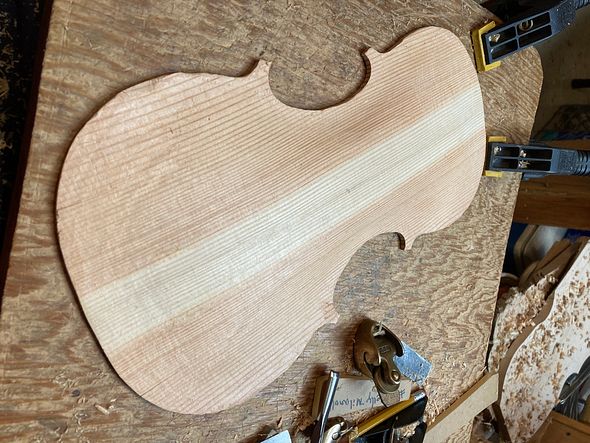
Douglas fir front plate cut out for 5-string bluegrass fiddle handmade in Oregon by Chet Bishop
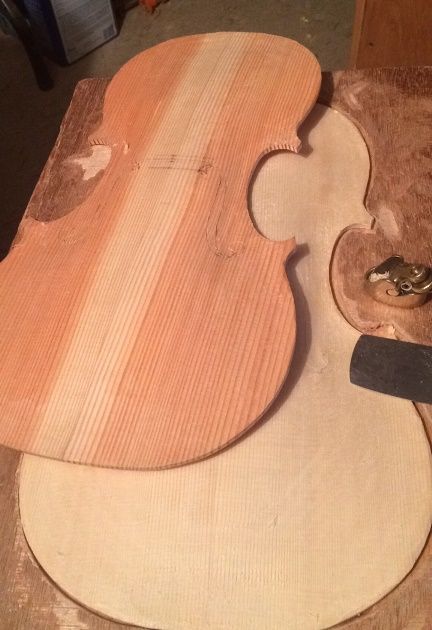
Douglas Fir Front plate cut out and ready for arching. Uncommon wood, but good!


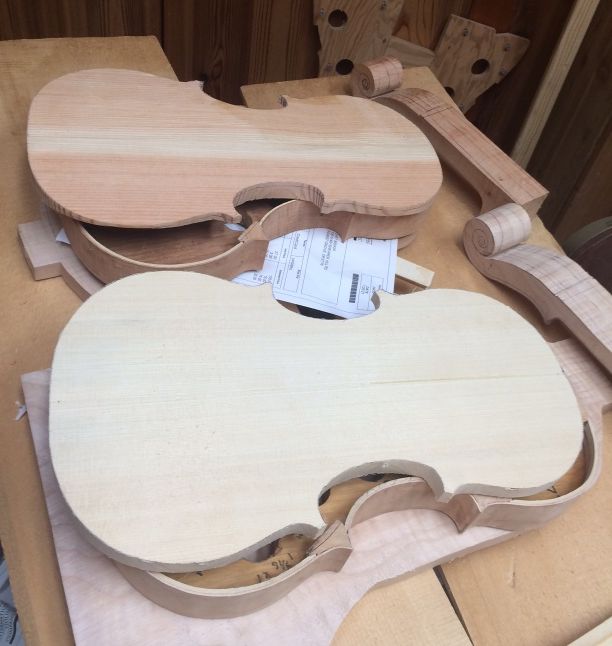
two plates for five string fiddles handmade in Oregon by Chet Bishop
Both plates are ready for arching. I enjoy using Oregon woods when I can.


Arching the plates:

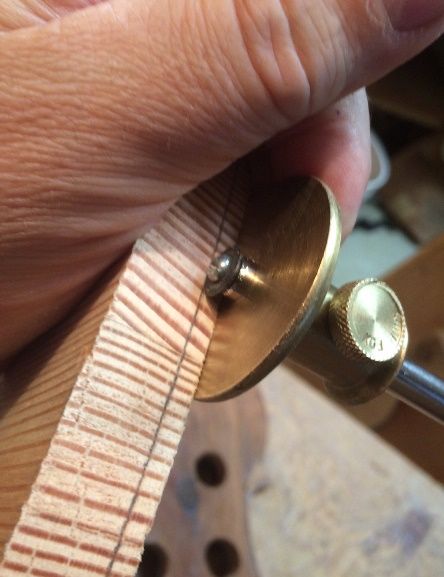
Arching the plates is a critical step, because the arching pretty much controls the tone quality. In fact, it may be the single most inportant factor in achieving good tone. I begin by scribing the edge-thickness of the plates and then I  begin removing waste wood to complete the rough arching:

Scribing the edge thickness for a 5-string fiddle handmade in Oregon by Chet Bishop
Scribing the edge thickness for the Douglas Fir front plate.


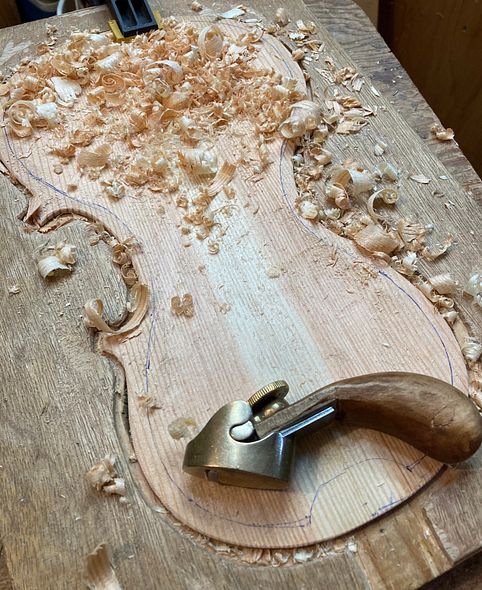
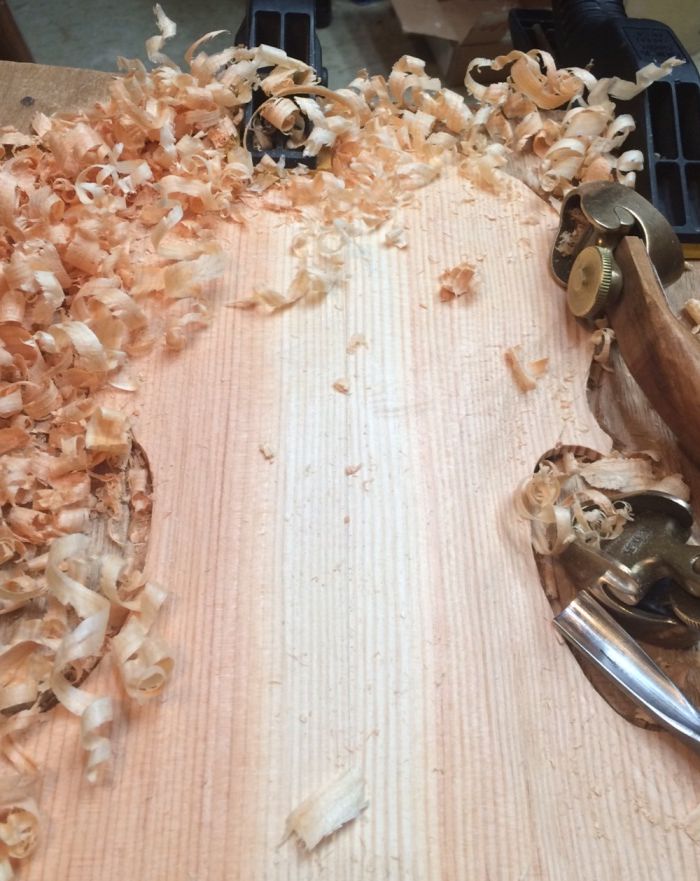
planing a front plate for a 5-string fiddle handmade in Oregon by Chet Bishop
Rough-arching the Douglas Fir plate, using planes and gouges.


I use arching templates to establish the shape of the arching, and then fair-in the parts in between the templates. (The templates for the back plate are slightly different, but all of these things matter: I have to use them correctly. And, although I can get the arching “close” without the templates, quite honestly, “close” isn’t good enough.)

arching templated for 5-string bluegrass fiddle handmade in Oregon by Chet Bishop
This top is from the previous fiddle, but I used the same templates, so here they are!

Laying out F-holes, and incising them.

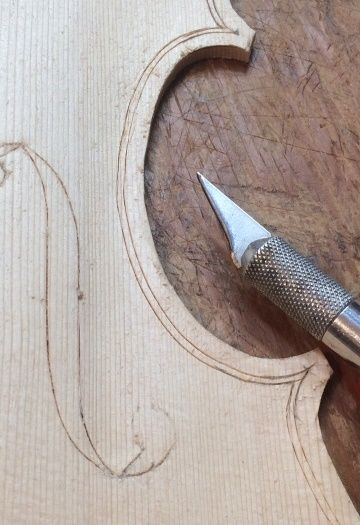
After the arching shape is very close to correct, I use templates to lay out the f-hole shapes and locations, and then use a knife to incise the lines deeply, so that I can’t accidentally remove the lines through further shaping.

f-hole layout for five-string fiddles handmade in Oregon by Chet Bishop
F-holes laid out and incised on both front plates.


Then I refine the arching, using gouges, planes and scrapers, until the shape is exactly what I want.

refining the arching on a 5-string bluegrass fiddle handmade in Oregon by Chet Bishop
Refining the arching on the Englemann Spruce plate.


two plated for 5-string bluegrass fiddles handmade in Oregon by Chet Bishop
Both front plates ready to begin purfling.

Purfling:

The word “purfling” evidently comes from the old Italian “por filo” meaning edging.  It supposedly helps strengthen the edge, and it certainly helps “define” the edge, and…it looks nice. Though there are examples of old intruments without purfling, all of the better “Old Master” makers used it, and I will never make an instrument without it. (Besides…I like it.)

I position the purfling beginning at 4mm inside the outer rim of the plates, and mark the location of both sides of the slot, using a purfling marker (sometimes called a purfling cutter.) The marker won’t work for the corners, so I have to lay them out using a pencil.

Then I use a knife to incise those lines deeply enough to receive the actual purfling strips.

purfling laid out for 5-string bluegrass fiddle handmade in Oregon by Chet Bishop
Beginning purfling slot in Englemann Spruce front plate.
Douglas Fir is much more difficult to incise, because the winter growth rings are very hard.


picking waste wood from the purfling slots on a 5-string fiddle handmade in Oregon by Chet Bishop
Picking waste wood from the purfling slots.


Finally, when the slots are complete, I can begin inserting the actual purfling strips. The strips come as 32″ long three-ply veneers, and are very brittle. I have to use the bending iron to prepare them for insertion into the slots.

plate ready for purfling for a 5-string bluegrass fiddle handmade in Oregon by Chet Bishop
Purfling slot completed in Douglas Fir front plate.


inserting purfling in a 5-string bluegrass fiddle front plate, handmade in Oregon by Chet Bishop
Ready to insert purfling strips in the Englemann Spruce plate…but not without bending them first!


Purfling, inserted dry, into front plate of 5-string fiddle handmade in Oregon by Chet Bishop
Purfling, inserted dry, on the Englemann Spruce front plate. Ready for hot hide glue!


Gluing the Purfling:

After the purfling strips are correctly fitted, dry, I carefully lift them out, one by one, and slip hot hide glue into the slot beneath each strip, then quickly force the strip back into the slot, ramming it home with a special tool.

When all is complete, I allow the purfling to dry, before moving on to cutting the channel, performing the final edgework, and fairing the channels into the arching…but those are stories for another day.  🙂

Completed purfling for two 5-string bluegrass fiddles handmade in Oregon by Chet Bishop
Both plates’ purfling complete, still wet from gluing.


Thanks for looking.

Five String Fiddle Finally Complete

Finally Done!

This one took awhile: Lots of sidetracks and other projects to complete. But it is finally done!

Back, Neck and sides

The back, sides and neck are from the “scrap” left over from building that five-string double bass last summer. This is the “sister-instrument” to the commission I built last winter, from the same wood-source, but the other side of the bass.

This and several other of my instruments are all from a log given me by the late Terry Howell. I have made one cello, one bass and several five-string fiddles from the wood of that log, and I still have a lifetime supply, thanks to Terry’s generosity. (see that story, here)

Front Plate

The front plate, however, is a first for me: Douglas Fir! This is unusual, but not unheard of: there are a number of professional instruments by Otto Erdesz out there being played whose front plates were made of Douglas fir. Will I always use it? Nope! But this turned out very well indeed! I am more confortable using spruce, and probably will continue to mostly use spruce, but it was quite an eye-opening experience to try the Douglas Fir.

The sound is very big, with a very clear, deep C-String, and perfect balance across all five strings. This fiddle will “cut through the mix” in a band, but can also play pianissimo when needed.

Overall, I am very well satisfied with the final result on this fiddle. I am confident that a buyer will find it a thrill to play.

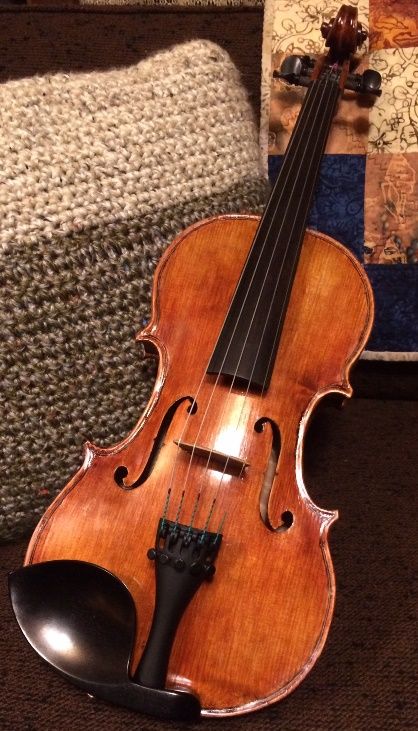
Front view of handmade five-string bluegrasss fiddle.
Front is made of Oregon Douglas Fir: this is unusual, but not a first. Otto Erdesz used to use Douglas fir for front plates.


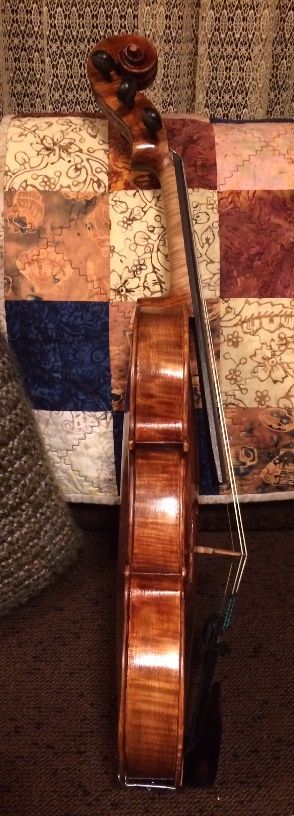
Side view of handmade 5-string bluegrass fiddle, made of Oregon Big Leaf Maple and Oregon Fouglas Fir.
Sides and neck are made from Oregon Big Leaf Maple. I have the entire log they came from.


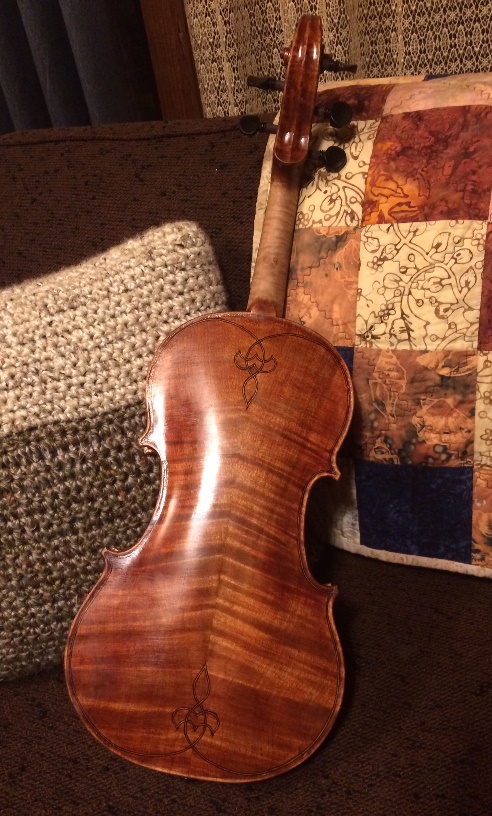
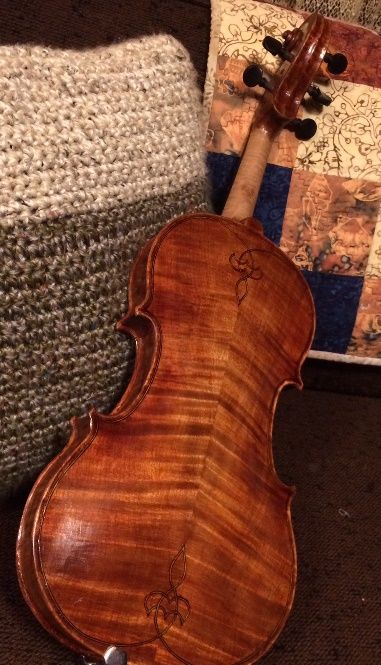
Back view of Oregon handmade five-string fiddle, or Oregon Big Leaf Maple.
Back plate is also that same Big Leaf Maple.


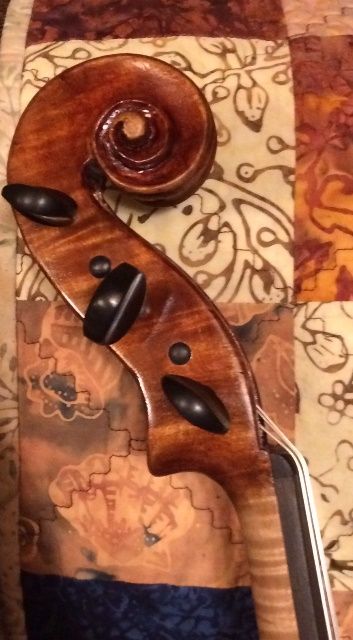
Scroll of handmade 5-string bluegrass fiddle by Chet Bishop.
The Scroll, too, came from that same log.


Thanks for looking!
 

2021: Two New Five-String Fiddles on the Way

Two New Handmade Five String Fiddles Begun

One Guarneri-Style, One Oliver

The last two commissions were a five-string on the original Oliver Pattern and a five-string on the slightly-wider Guarneri pattern. Both sounded great, and both customers are very happy. So, that left me wondering which one to do next. The obvious answer: Both!


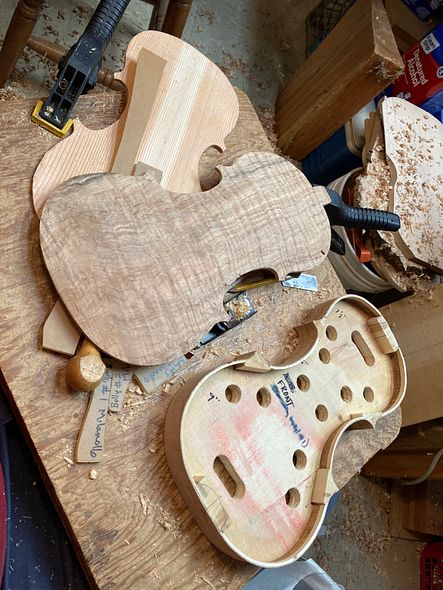
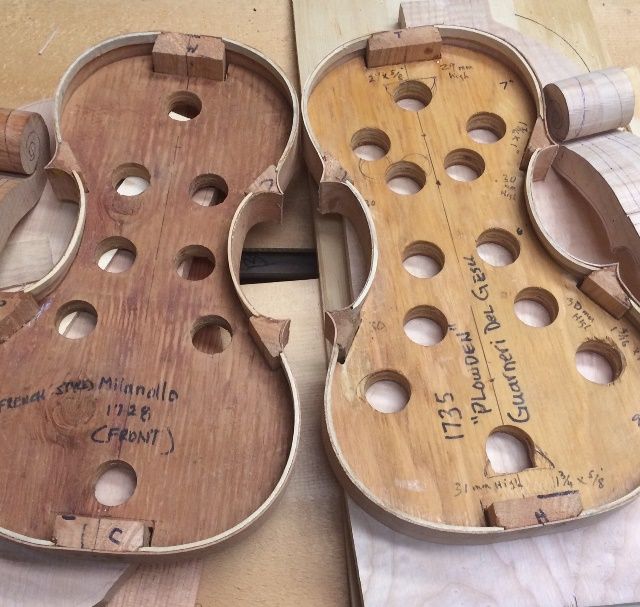
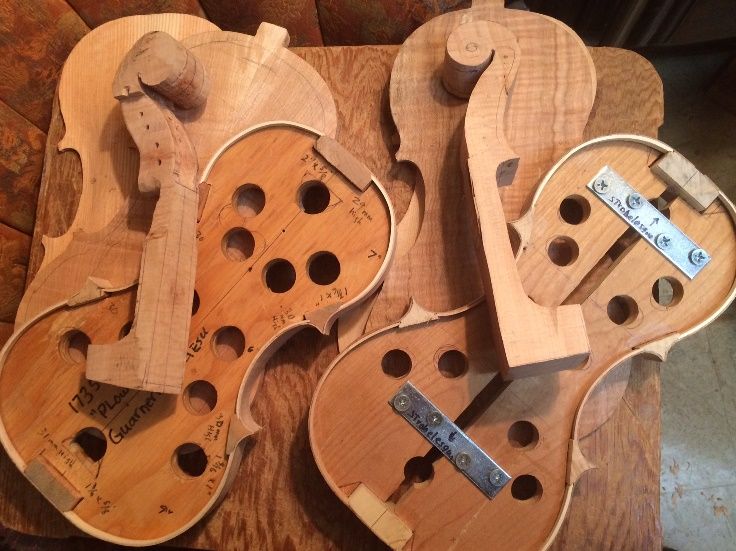
Five String fiddles Guarneri and Oliver, side by side.


I’m trying a new neck and scroll design on the Guarneri model. I hope it works well, because I really like the graceful look.

The instrument on the left (modeled after the 1735 “Plowden” Guarneri, with modifications to acommodate five strings) is  left-over Oregon Big Leaf maple from building a five-string double bass, during the summer of last year (same as the Andy Pastor commission fiddle.)

Heavily Flamed Maple for the back plate.


The scroll (also Oregon Big Leaf Maple) is from a tree on the property where my wife grew up, and so are the ribs.  The back is from a tree on the next ridge of hills west: about ten miles by road, probably three miles in direct line-of-flight. (Same one from which the recent double bass was taken, as well as several other instruments I have made. The late Terry Howell, of Howell Tree Farm, gave me the entire log, so I have a good supply.)

Heavily flamed maple neck in progress.

Experiment:

I have also decided to try an experiment: This will be the first time I have attempted a 5-string bluegrass fiddle with a belly of Douglas Fir, as opposed to Spruce. Otto Erdesz was famous for using it successfully in many of his instruments, so, when a friend gave me some very straight, split Douglas Fir, I decided to make the attempt, on the Guarneri model. It is quite dense compared to spruce, but it rings like a bell, when I tap it with my finger, so, I think it will be good.

Bookmatched Douglas fir top plate with Guarneri-model garland.


Douglas Fir Top Plate arching complete.


The back, as well as the ribs and the scroll on the right-hand instrument above (the Oliver-model) are all from the tree on my Mother- and Father-in-law’s property. The belly, as usual, is Sitka Spruce.

Spruce belly, Oregon Big Leaf Maple back and scroll.


So, that is where things stand, today:

All the parts for the two new 5-string fiddles.

Slow Start due to Repairs and other Responsibilities

This has been a slow start: 2021 saw me needing to repair my ancient bandsaw, and, even more depressing, my drill press had succumbed to the misguided attention of a marauding mouse. (The little wretch had crawled up through the ventilation holes of the electric motor and chewed off all the insulation from about 4″ of wire!)

Saw:

The bandsaw required disassembly and drilling out a worn, threaded hole, and retapping for a helicoil. The machine will probably outlast me, now.

Drill Press:

The drill press motor had to be taken apart and a new wire soldered in place. (A friend did that one for me. I really lack confidence when it comes to electric motor repair.) Fortunately, the damage was limited to just that one wire. (Maybe the plastic insulation gave the mouse a belly-ache.)

Back in business:

At any rate, I now have both machines running again, and I was able to saw out the profiles for the remaining plates as well as drilling the pilot holes in each scroll.

I should be able to get more done, now. (Gotta prune the apple-trees, too… Spring is on the way!)


Thanks for looking.