Preparing for the Neck-set

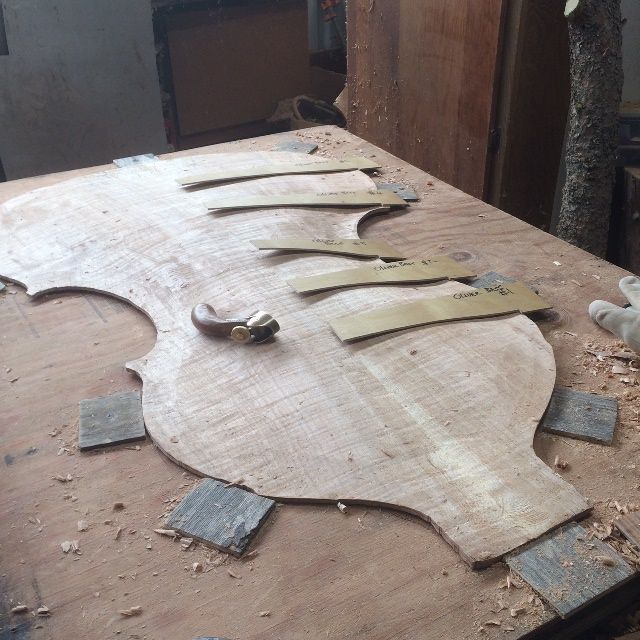
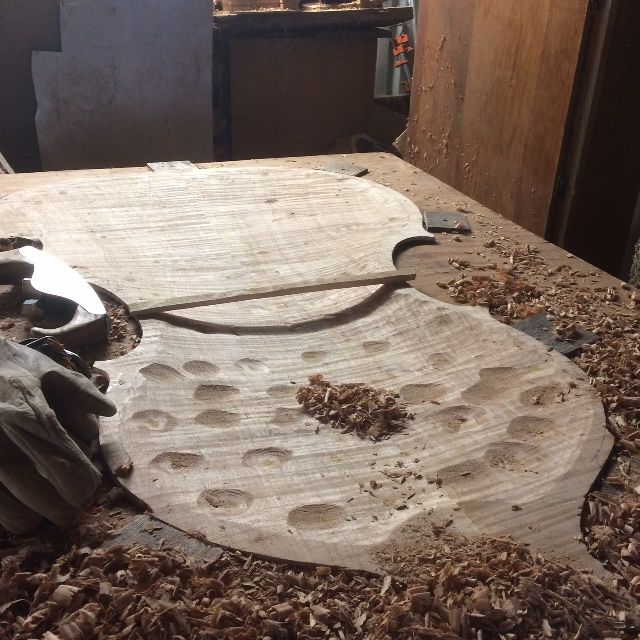
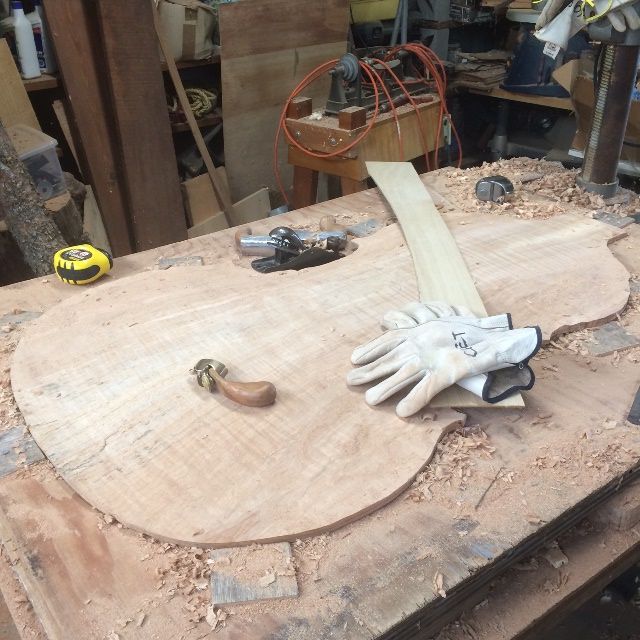
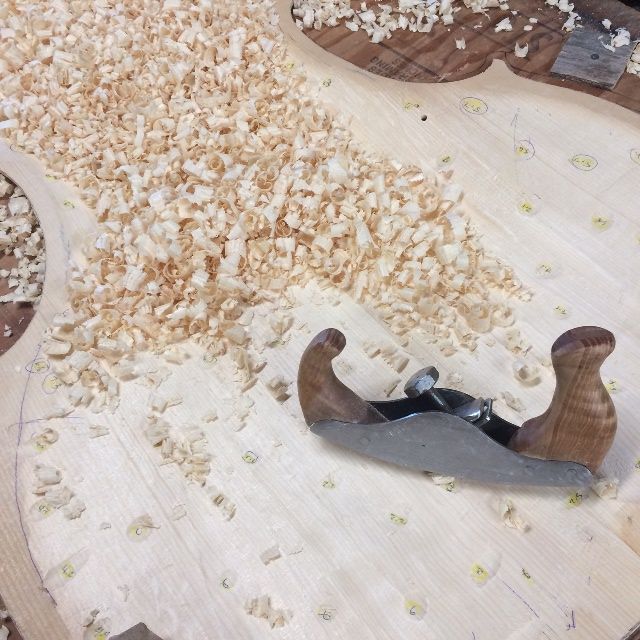
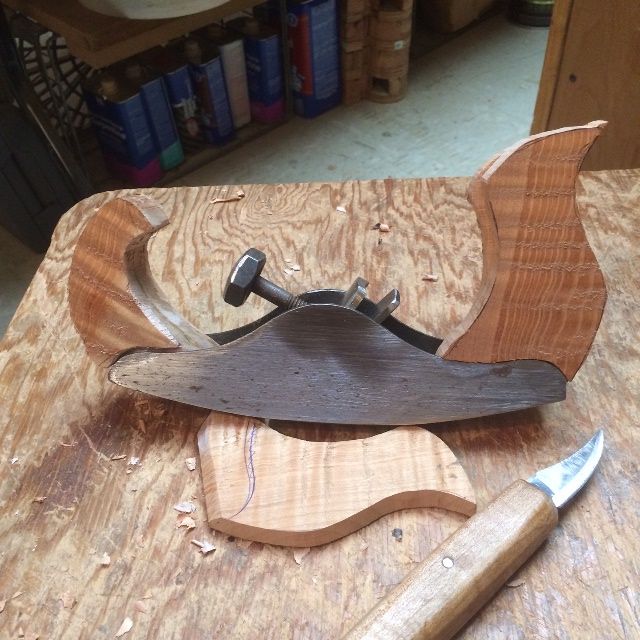
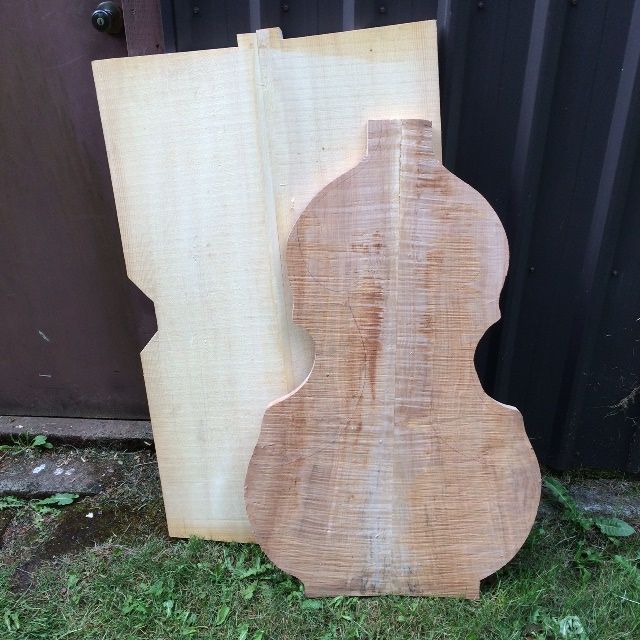
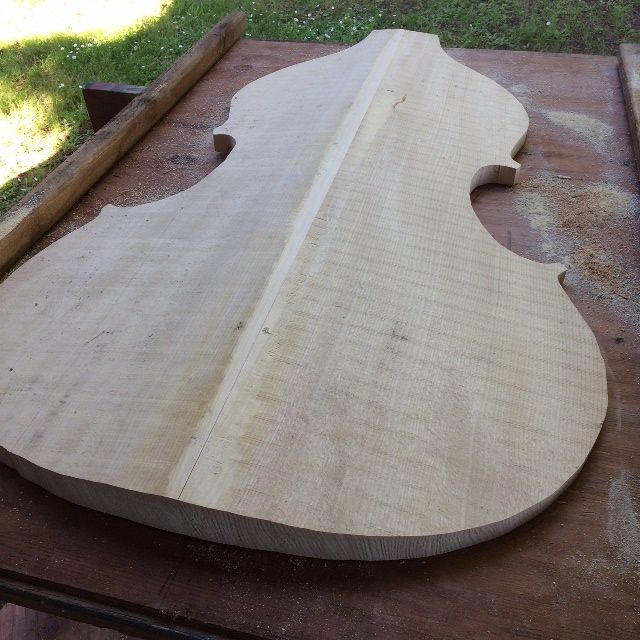
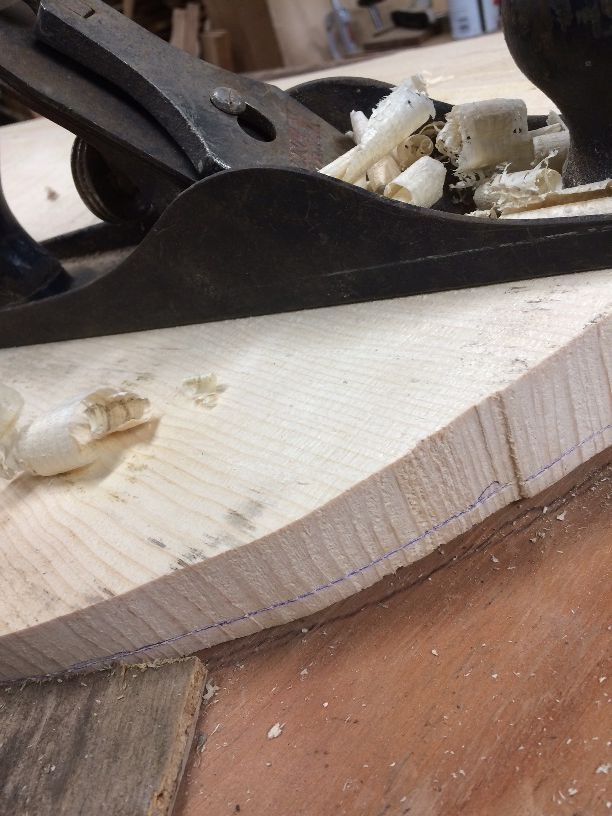
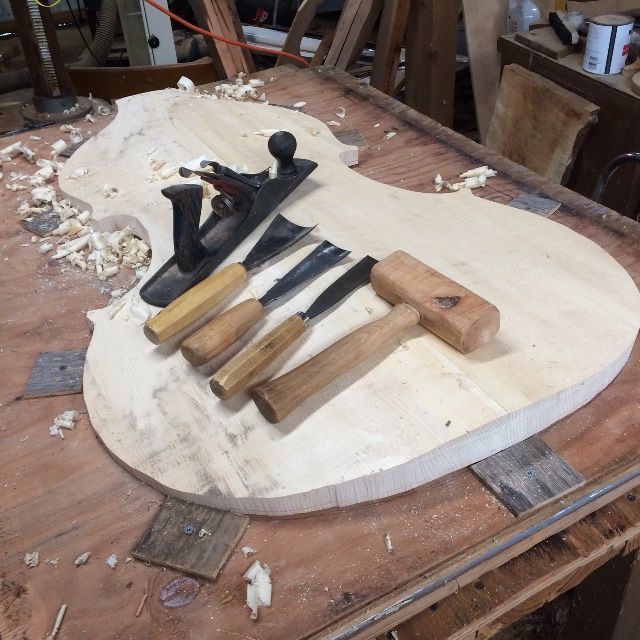
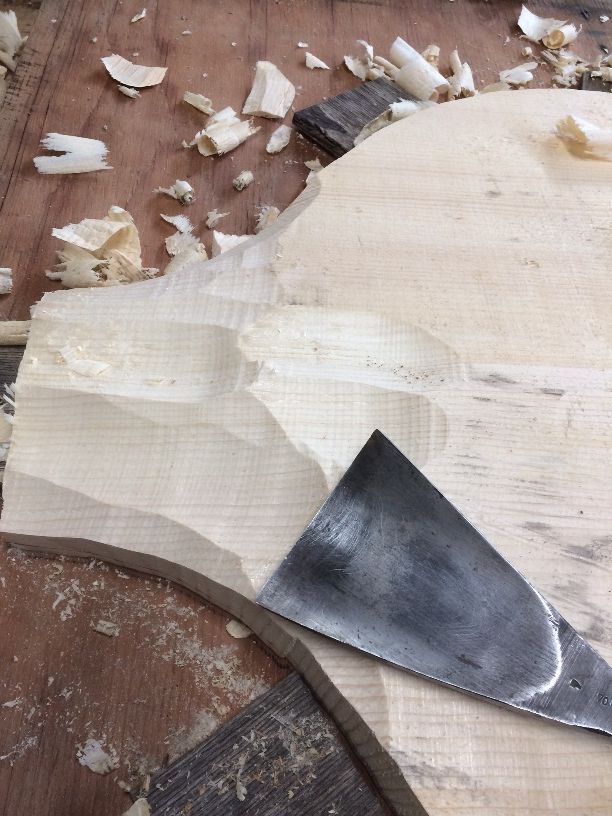
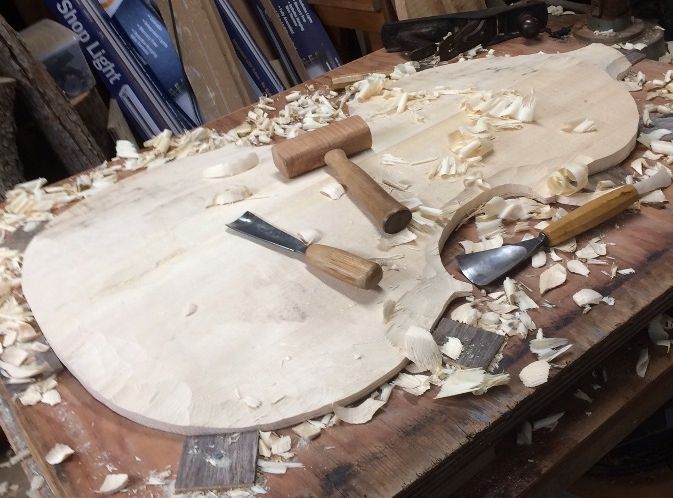
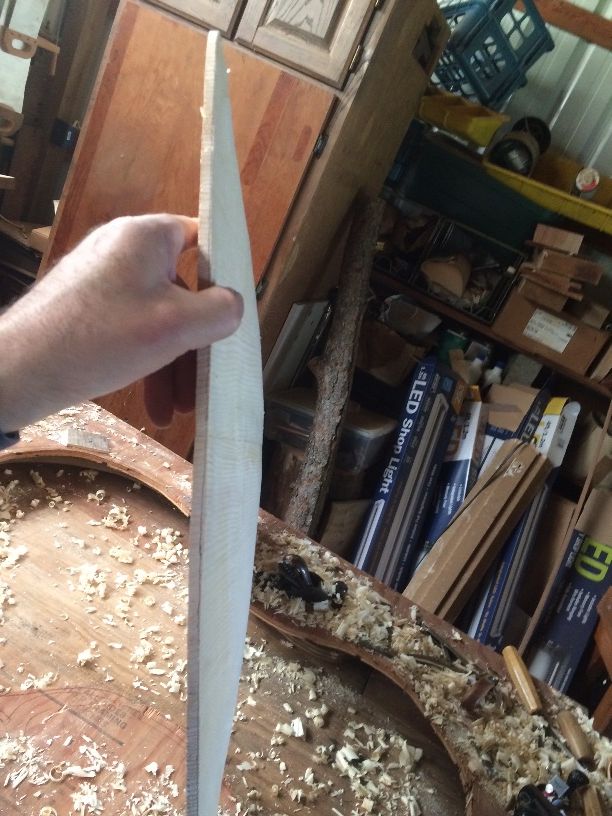
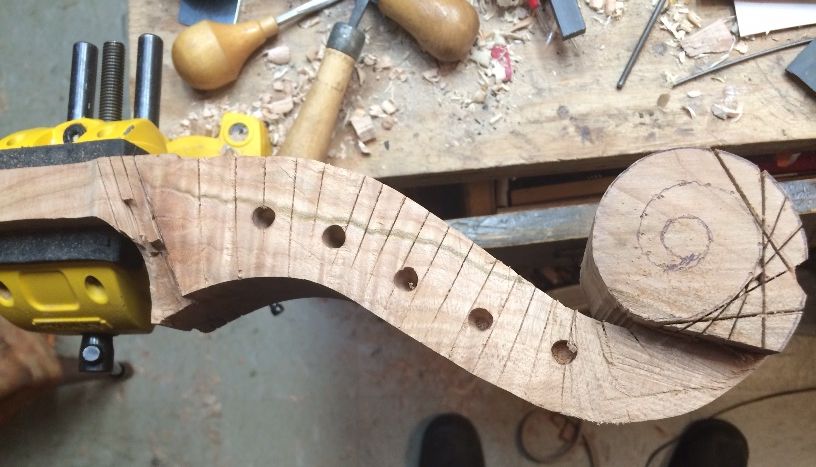
Preparing the  neck-heel and the neck-block

Measurements for the Neck-set:

There are five measurements to consider in setting a neck on any violin-family instrument:

  1.  Obviously, the distance between the nut and the upper edge of the front plate is a critical measurement.  One has to know what is required for the instrument in question and make a mark on each side of the neck heel, as to how deeply it is to be inserted into the neck block.
  2. The height of the overstand (distance between the top edge of the front plate and the joint between the fingerboard and the neck.) This measurement is taken from the front of the upper edge of the front plate, right beside the neck, vertically, to the top edge of the neck, proper (joint with the fingerboard.)
  3. The last three are all angles: The plane of the “floor of the neck mortise” must be perpendicular to the centerline of the instrument, and the plane of the bottom end of the neck, proper, must be perpendicular to the centerline of the neck, laterally. If these are both correct, then the fingerboard should project directly along the centerline of the front plate. Any lateral variance from centered is not good.
  4. The centerline of the neck mortise, from front to back, must be perpendicular to the plane of the plates, laterally, so that it literally “connects” the centerline of the back plate to the centerline of the front plate. Simultaneously, the “footprint” of the neck heel should be bilaterally symmetrical about the centerline of the neck heel. The result should be that the plane of the neck face (when viewed from the scroll) should be parallel with the plane of the plates. (No “twist,” or “roll” in either direction.)
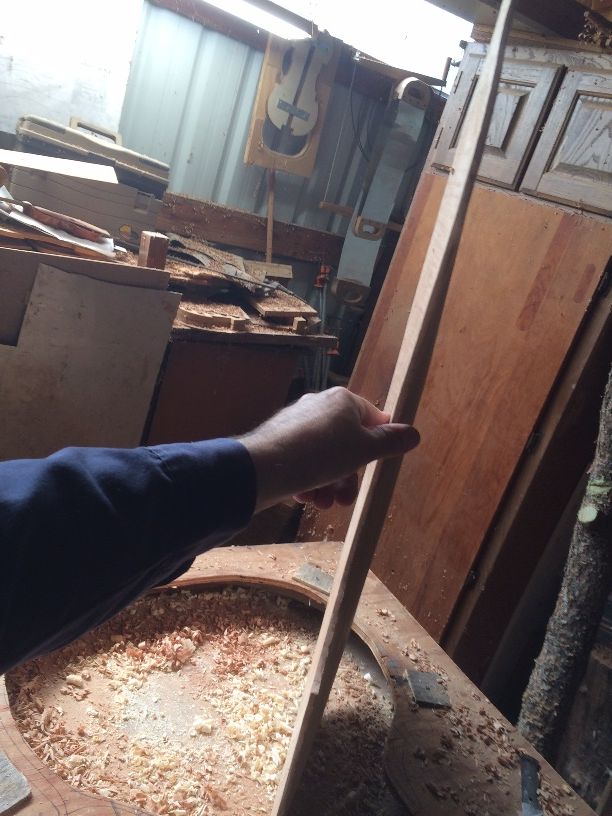
  5. Finally, the “Projection angle” should be such that the height of the “projected fingerboard angle” should be at the appropriate height for the instrument in question at the bridge line. (This can either be literally measured as a projection height at the bridge line, or, if you know how high the end of the fingerboard will be if all other factors are correct, you can simply measure it there. The danger in this is that if the other measurements are not quite right, and you simply measure the height of the end of the fingerboard, then the projection angle will be wrong, and you will not discover it until it is too late to correct it. (Ask me how I know!)

Planning the Neck-Set

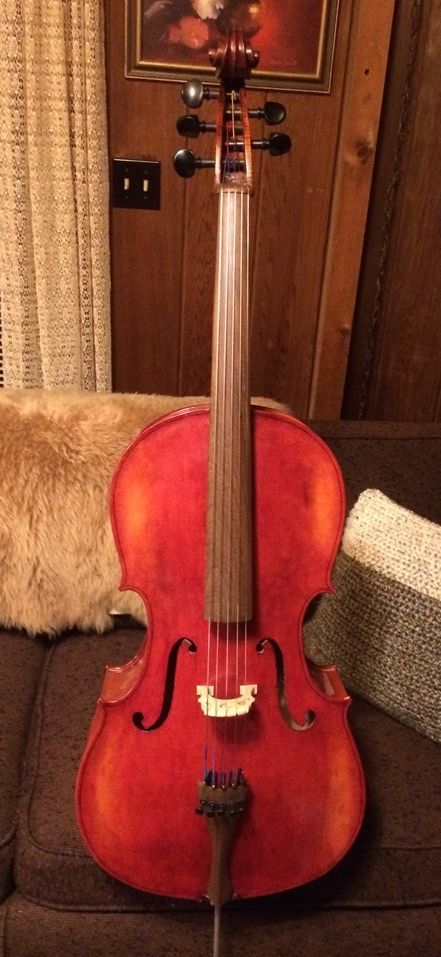
In the case of a bass, with a removable neck,  as well as all the other enormities of a double bass (as opposed to the smaller instruments) I had to not only consider the five measurements listed above, but consider how to achieve those angles reliably when removing and reinstalling the neck repeatedly. It all has to come together correctly without the customer having to “measure” anything, except to correctly carry out the assembly and minimal set-up.

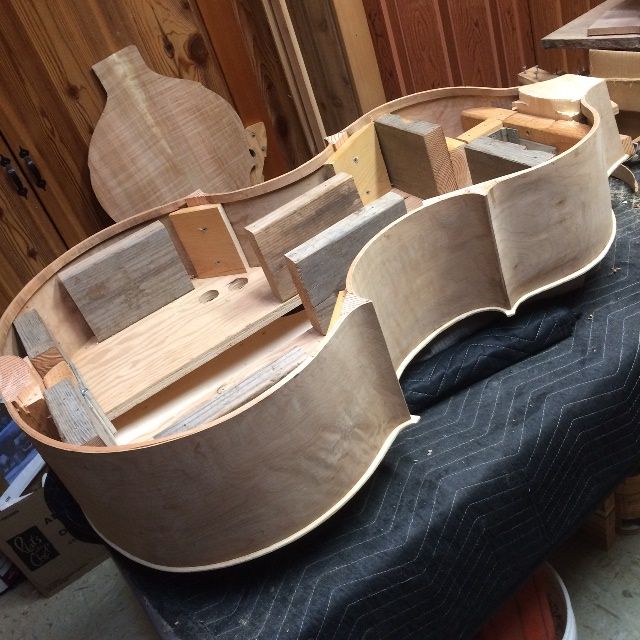
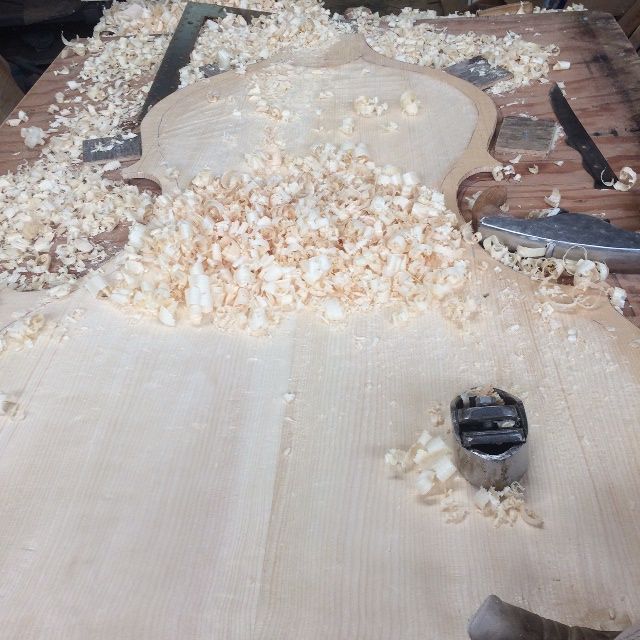
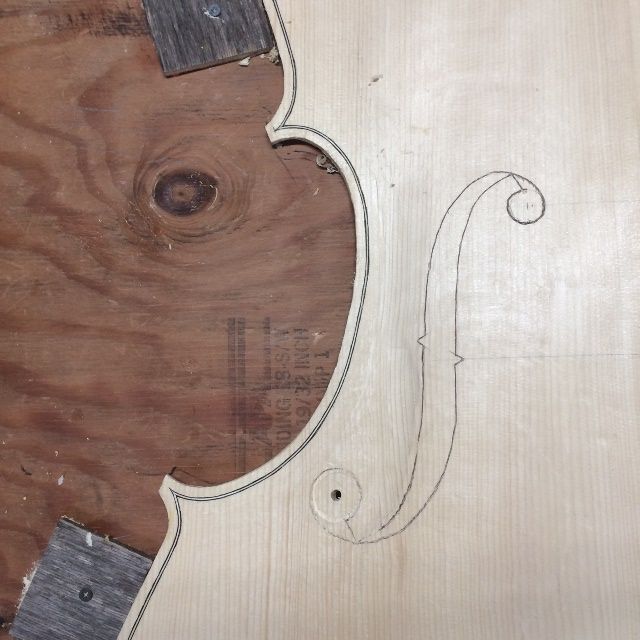
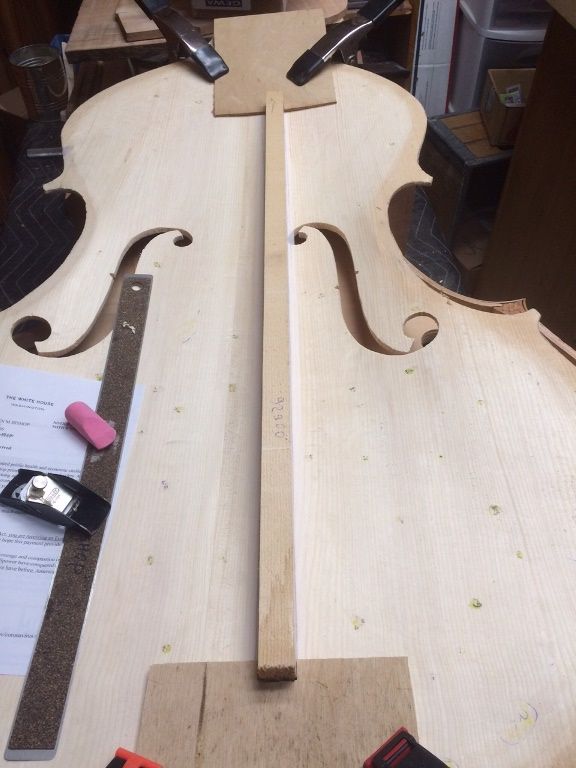
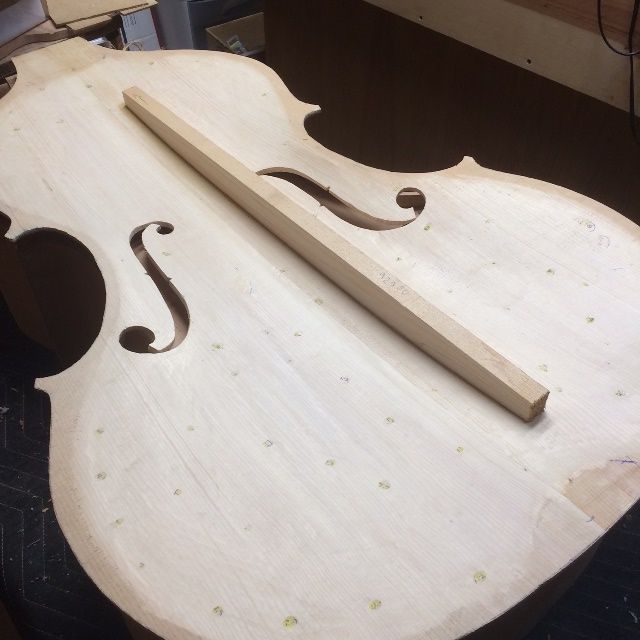
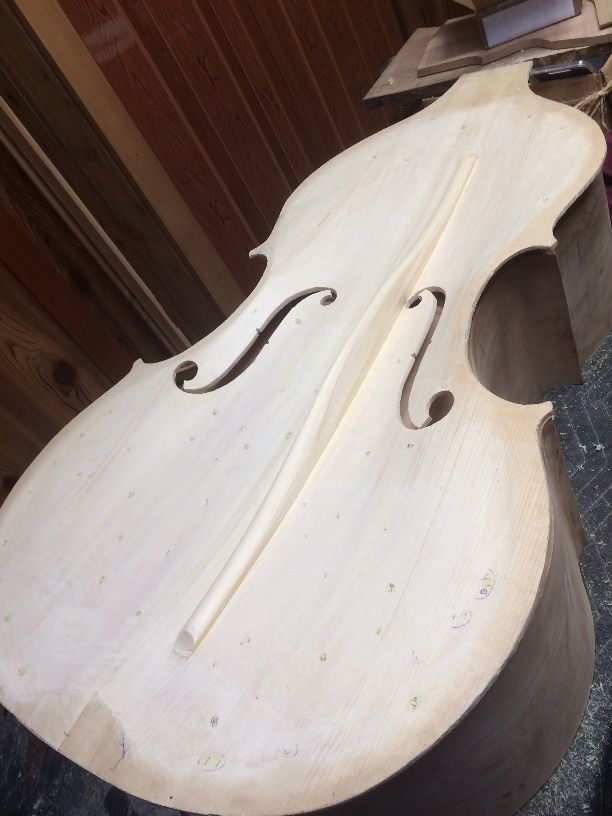
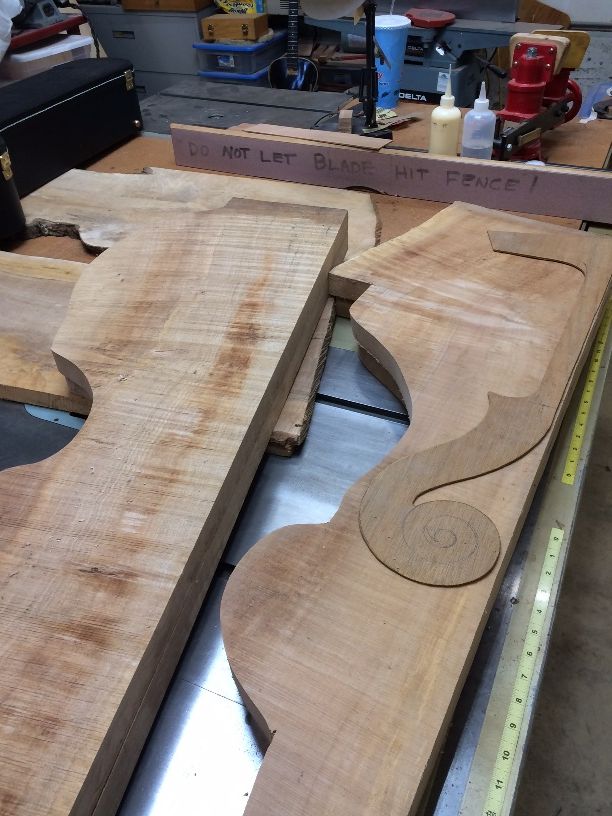
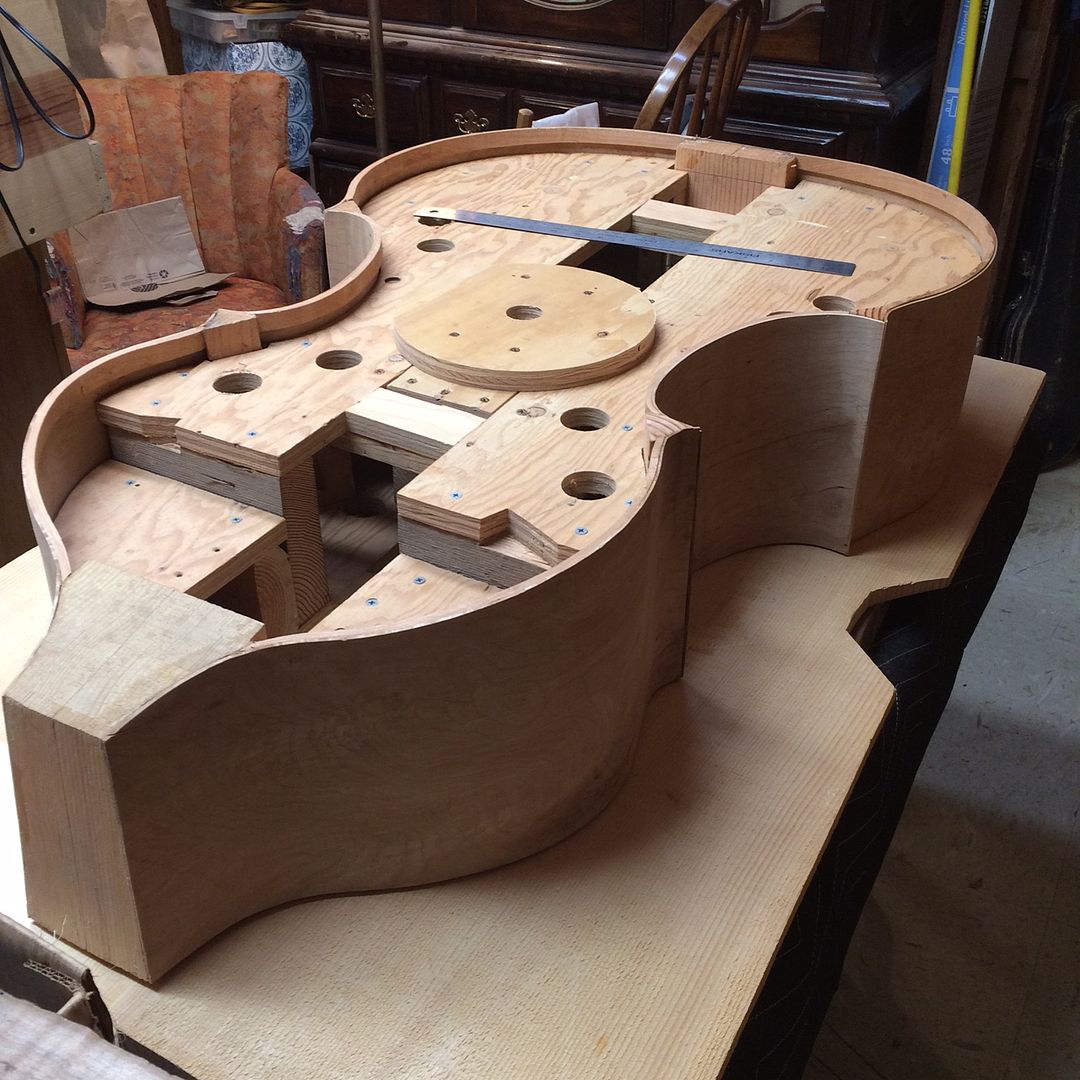
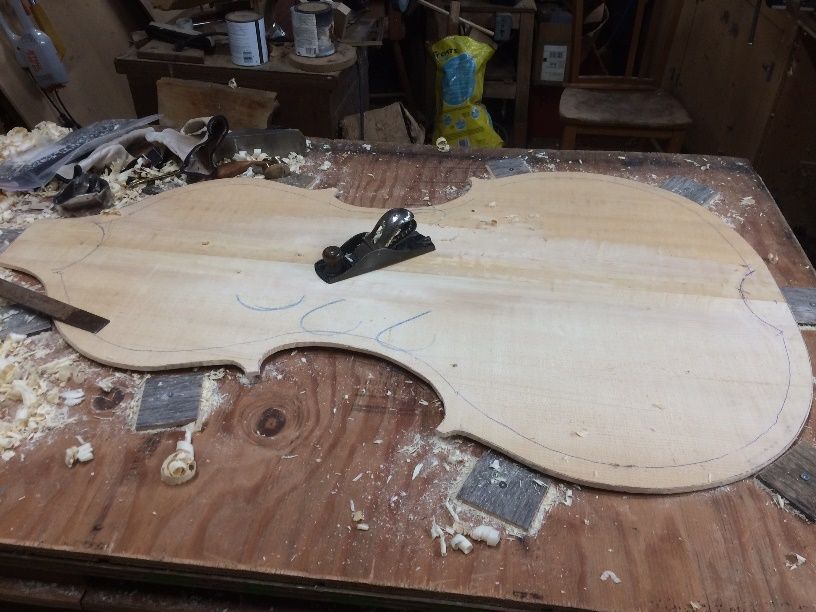
Cutting the Neck-mortise

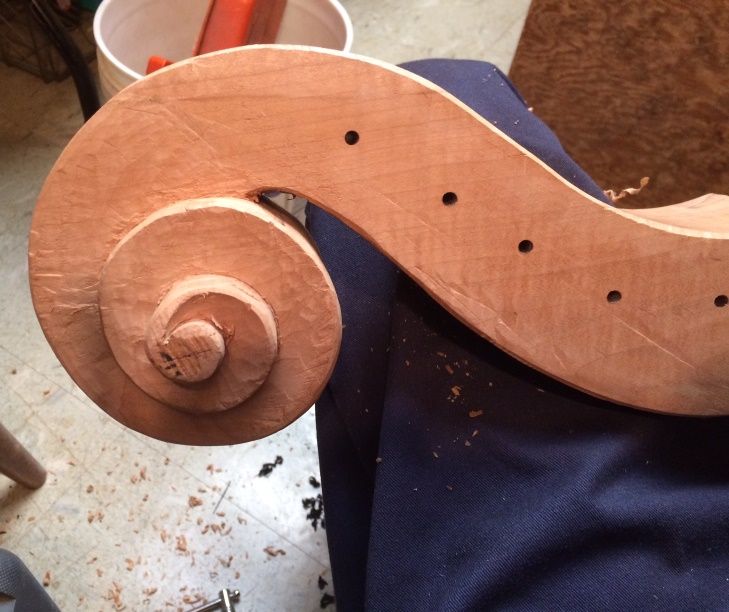
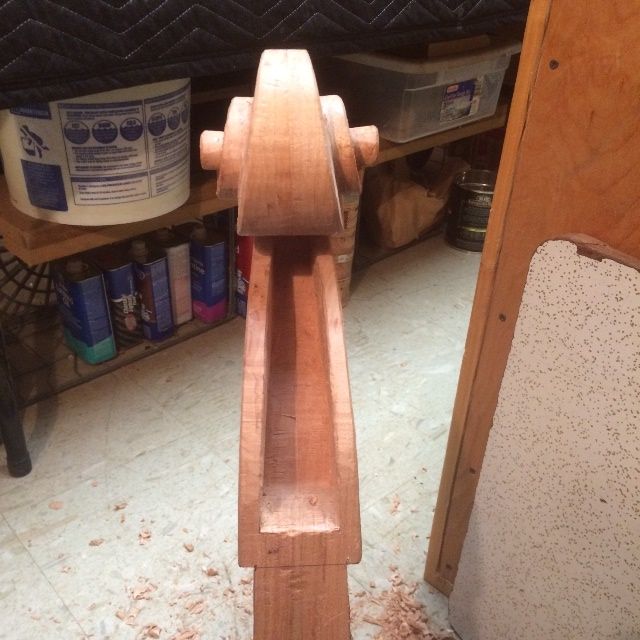
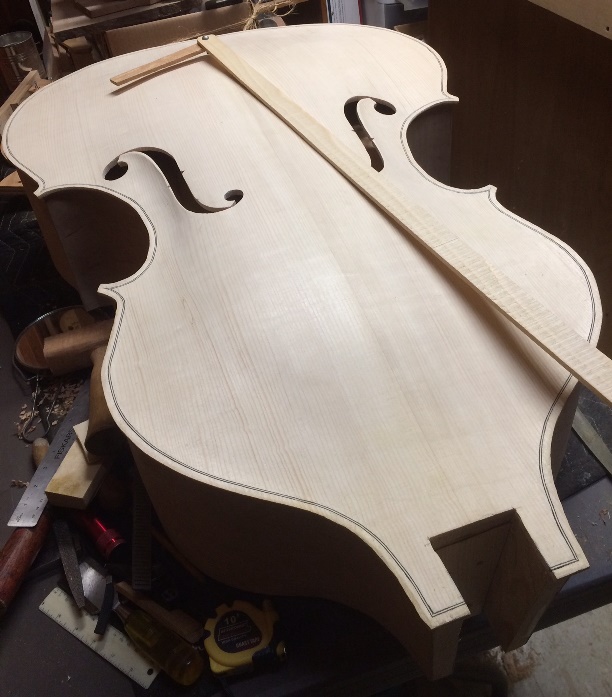
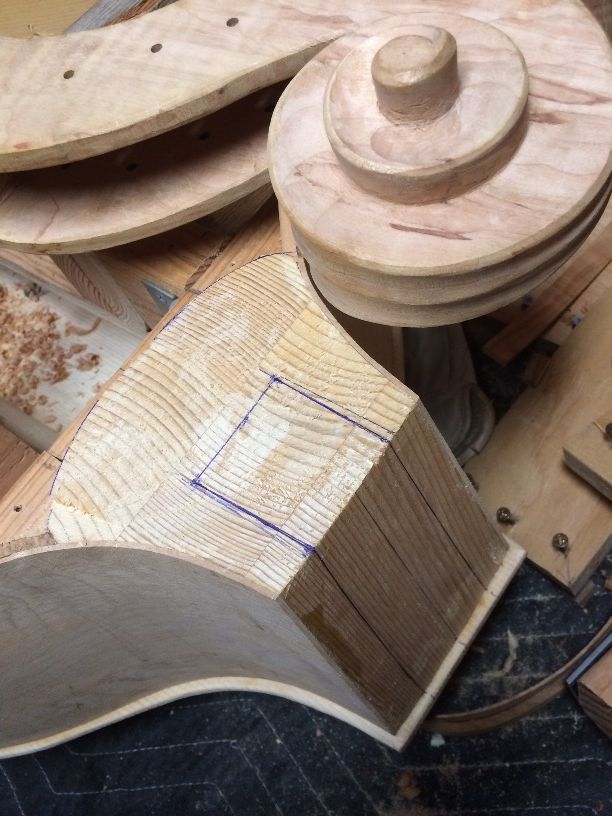
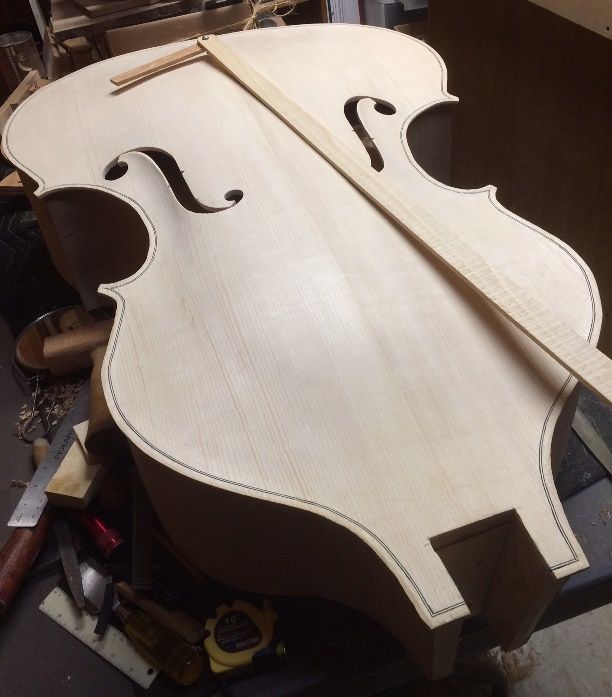
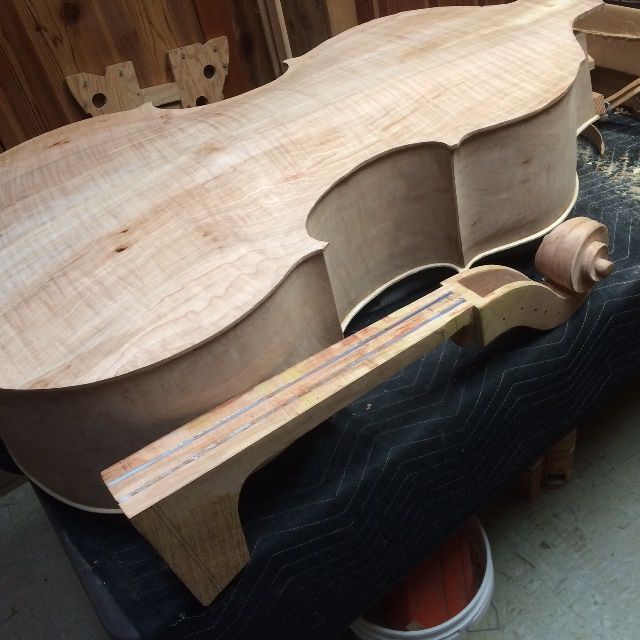
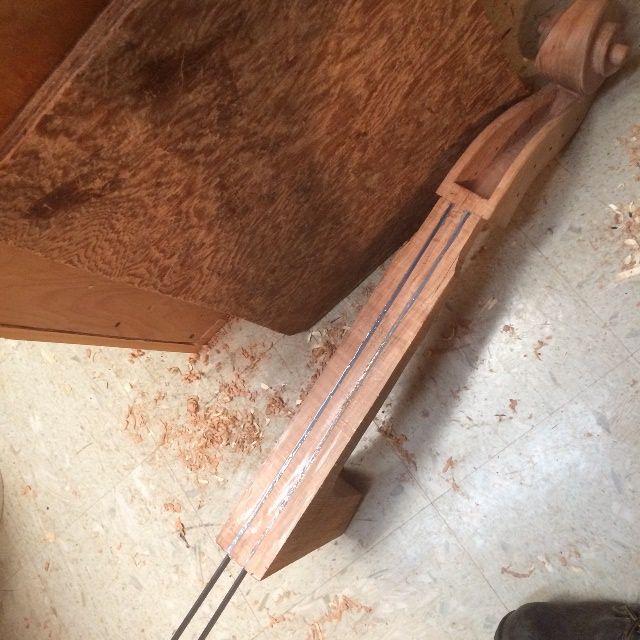
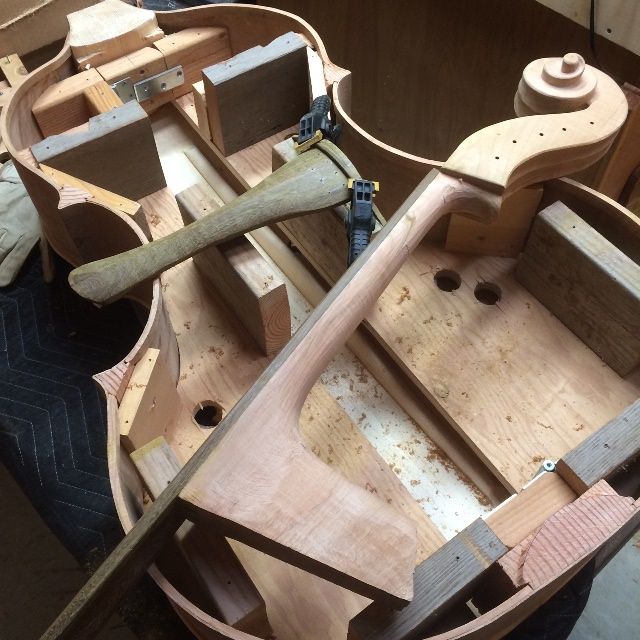
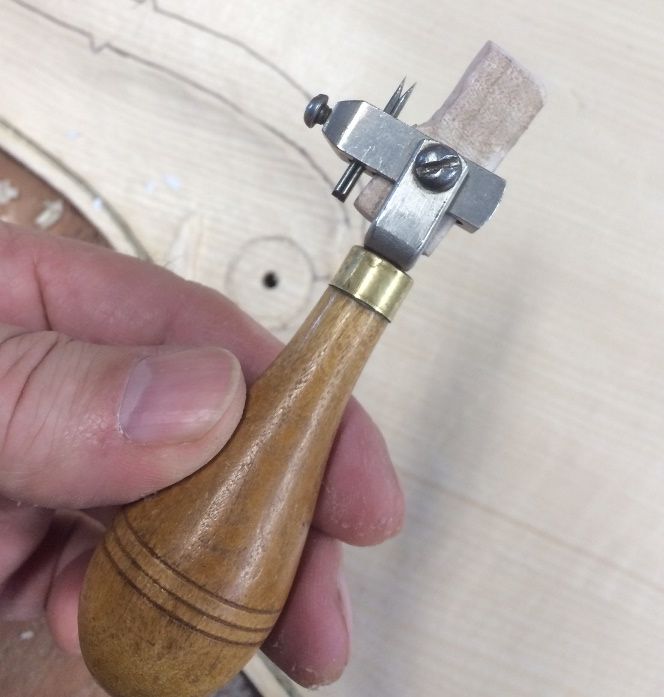
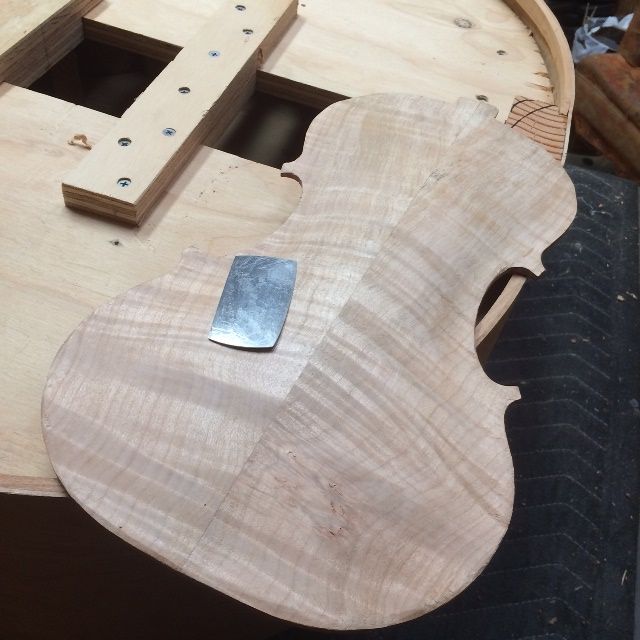
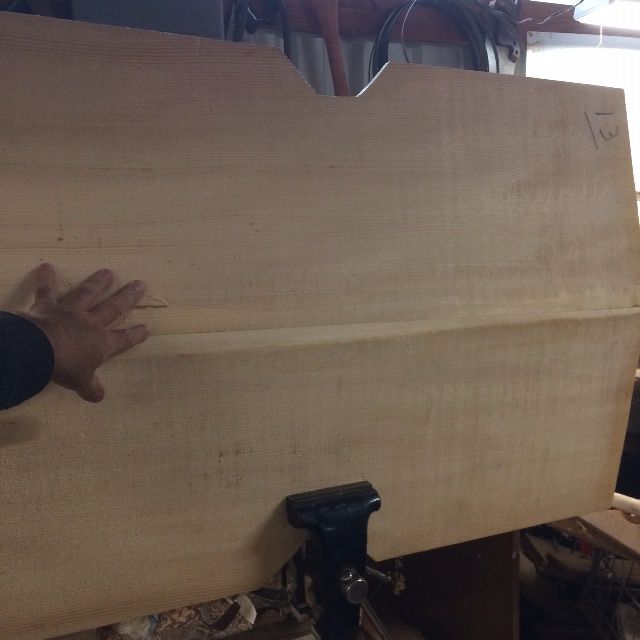
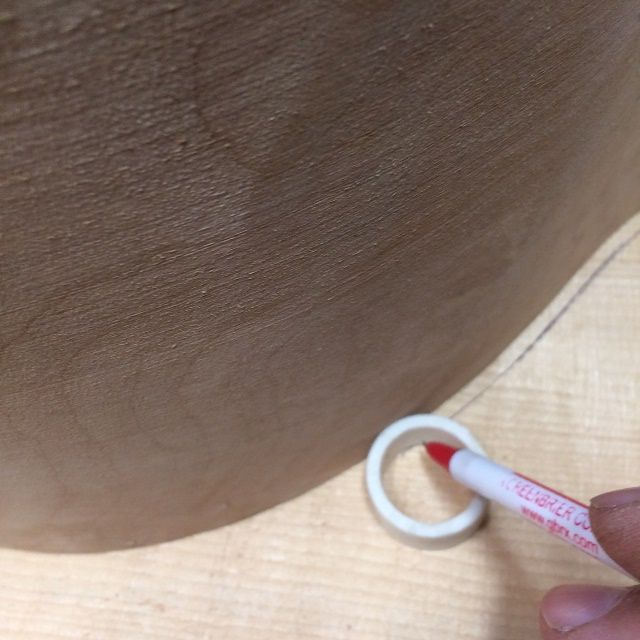
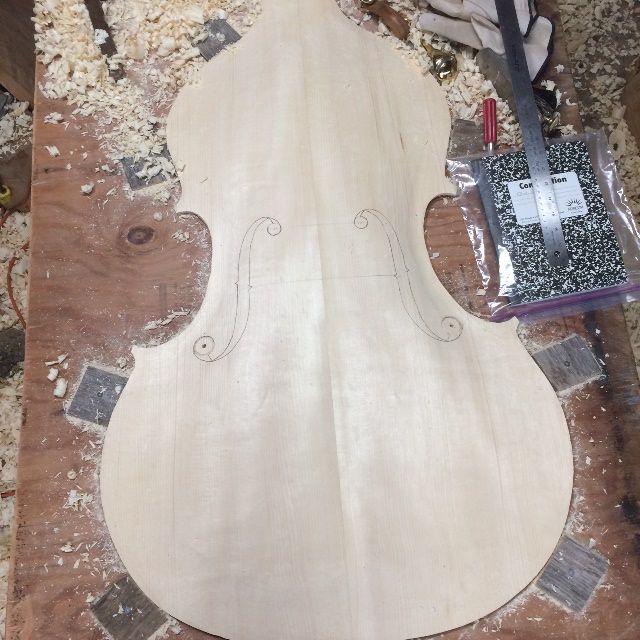
I had already cut the “footprint” of the neck-heel, so I took measurements and laid out the proper shape on the end of the neck-block, where the mortise was to be cut. I worked from the centerline of the neck block, so there was less chance of ending up with a skewed neck.

Neck-Mortise laid out for a five-string double bass.
Neck-Mortise laid out.


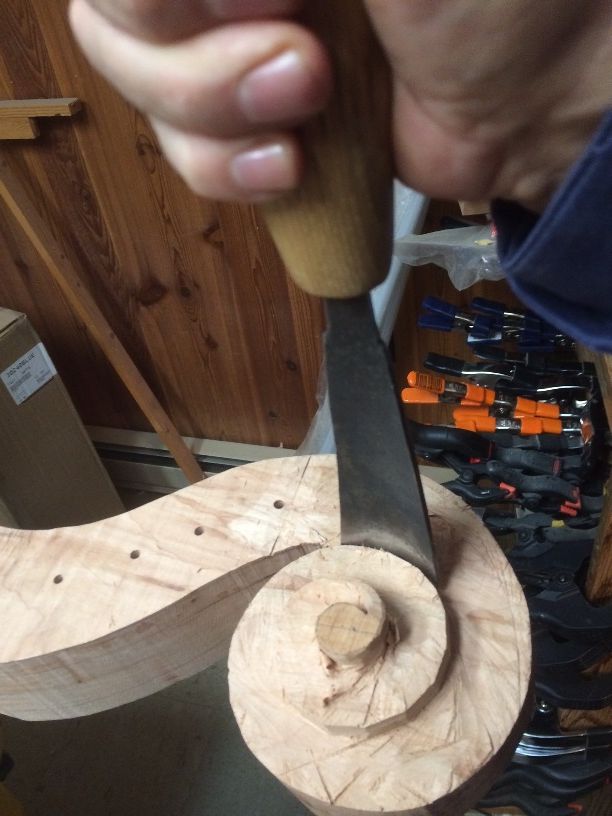
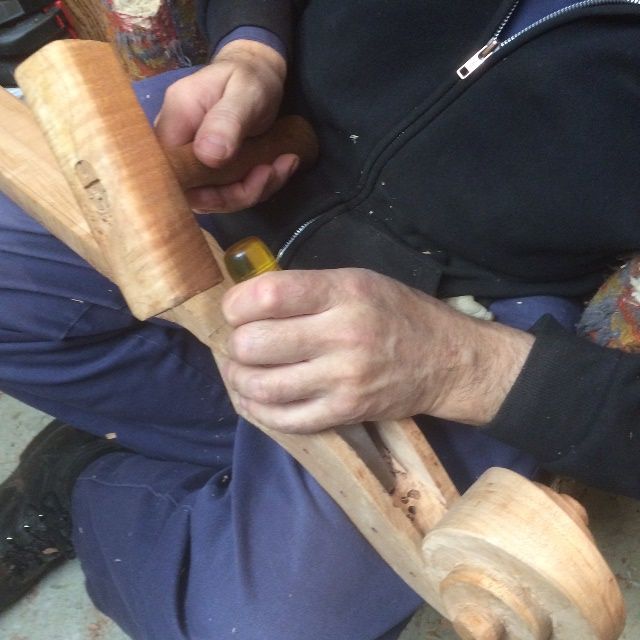
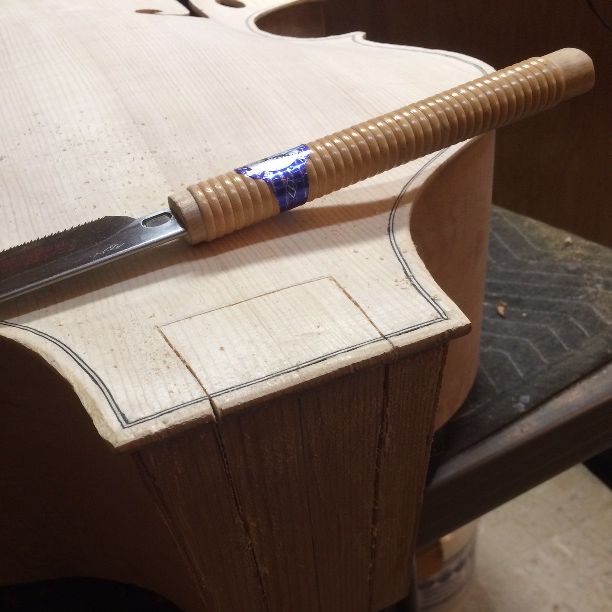
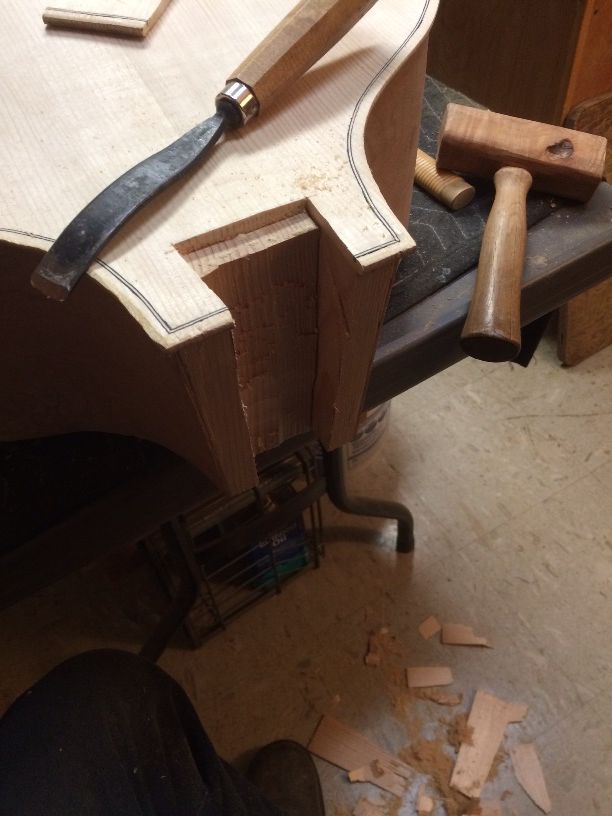
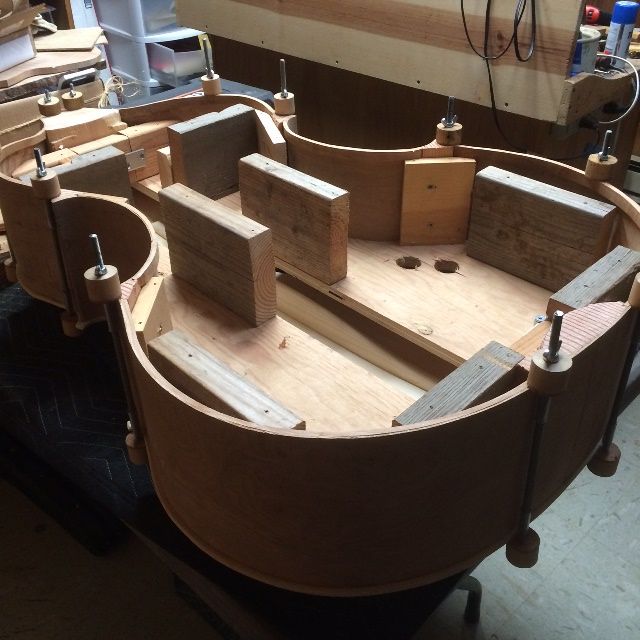
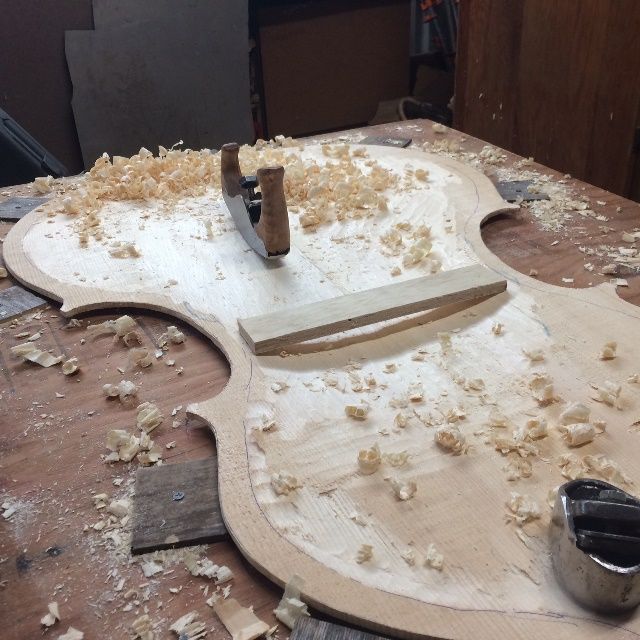
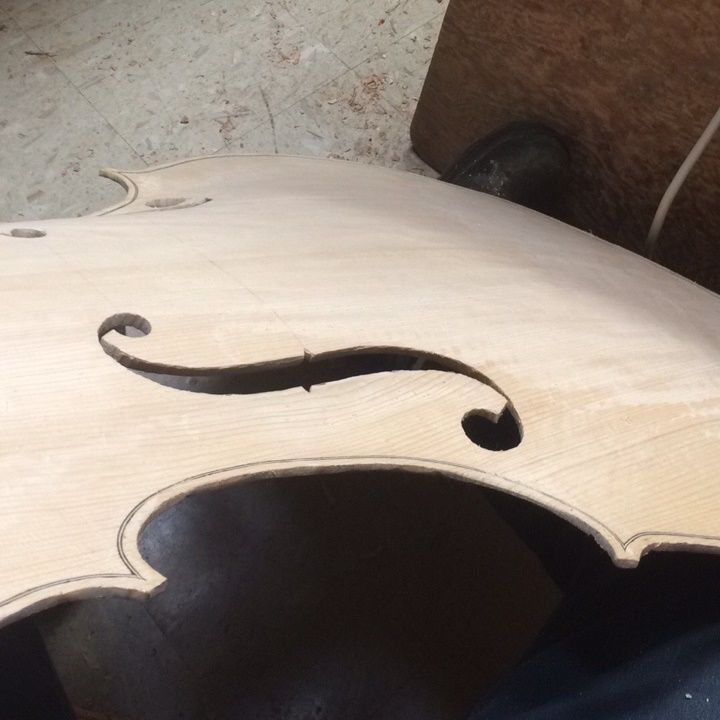
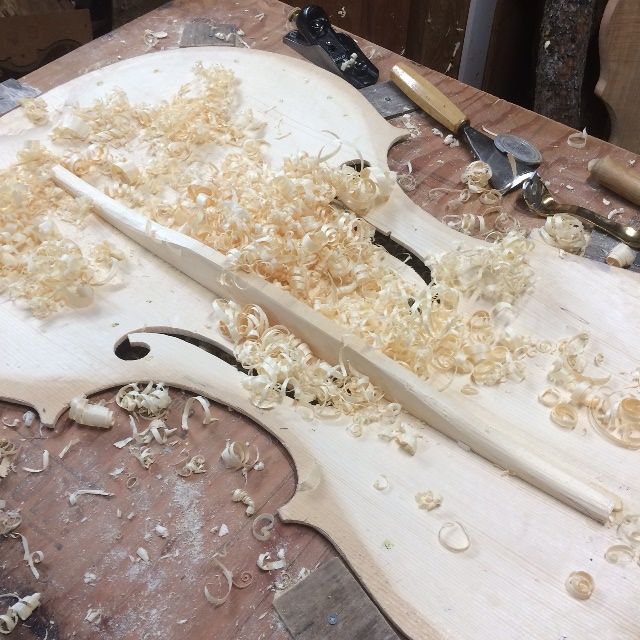
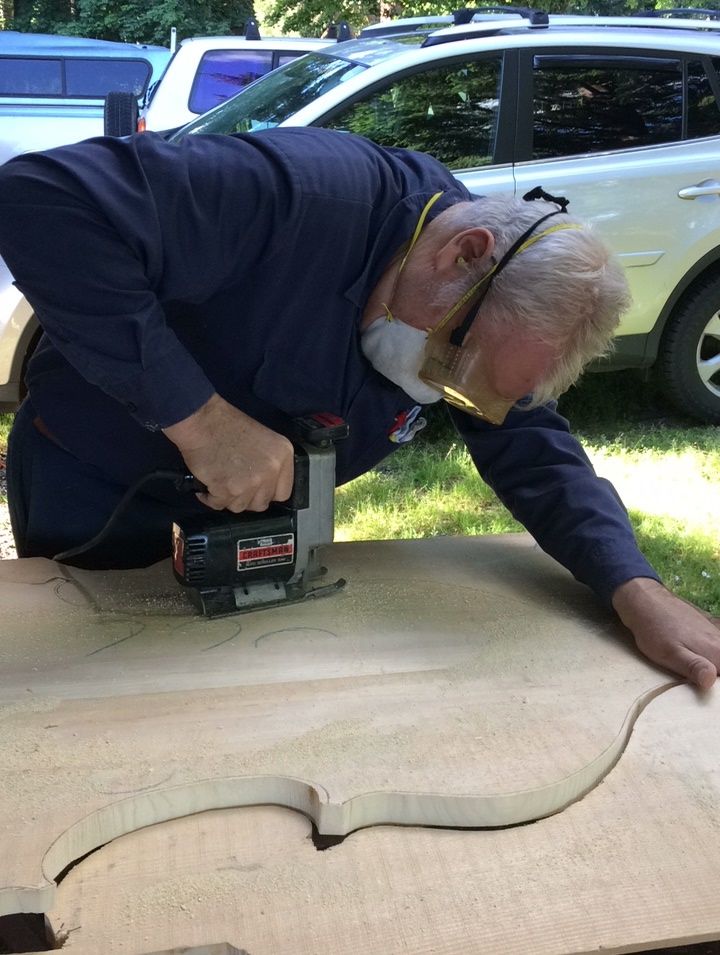
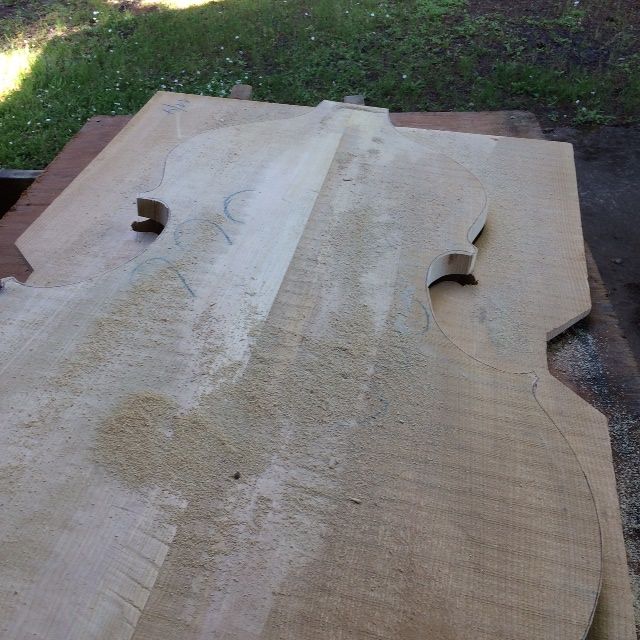
Then I turned the corpus over and began sawing the sides of the mortise, using a thin-bladed Japanese pull-saw:

Sawing the neck-mortise for a five-string double bass.
Sawing the neck-mortise.


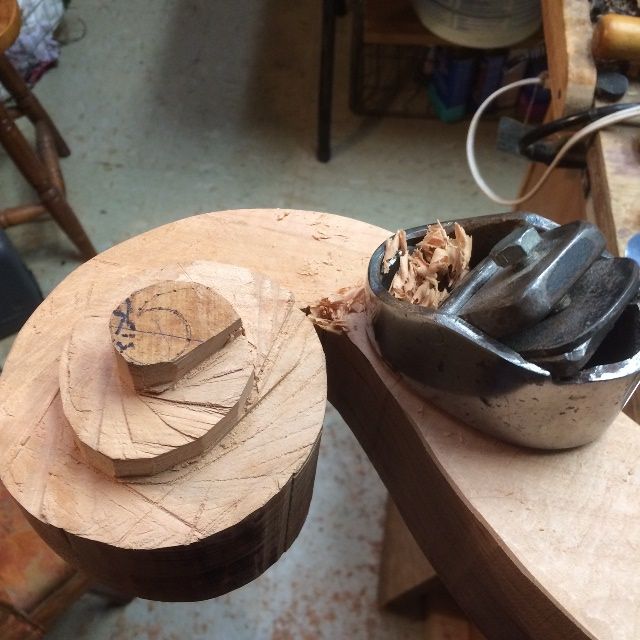
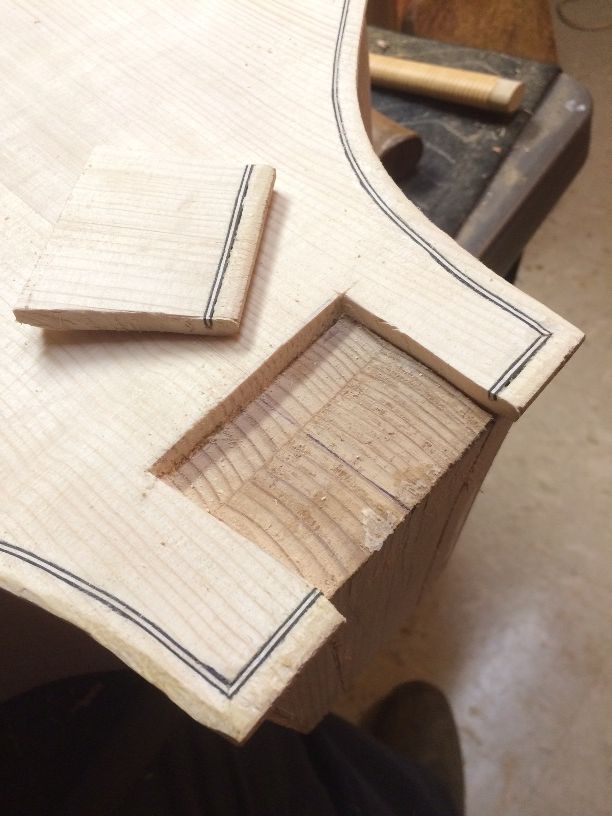
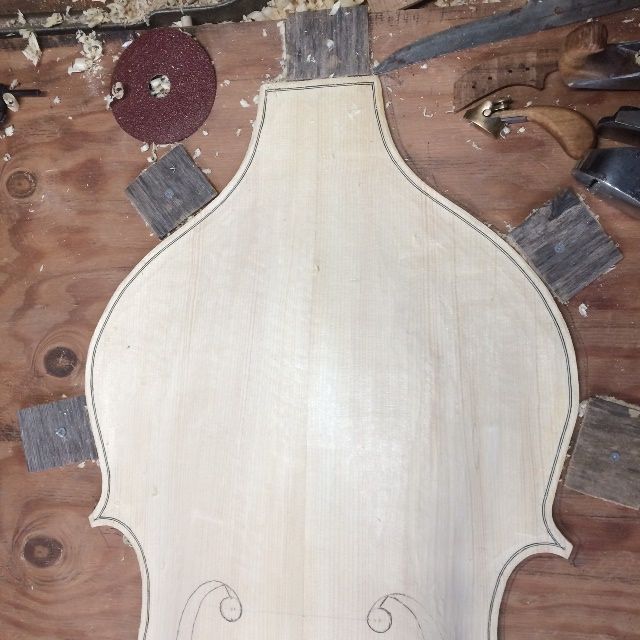
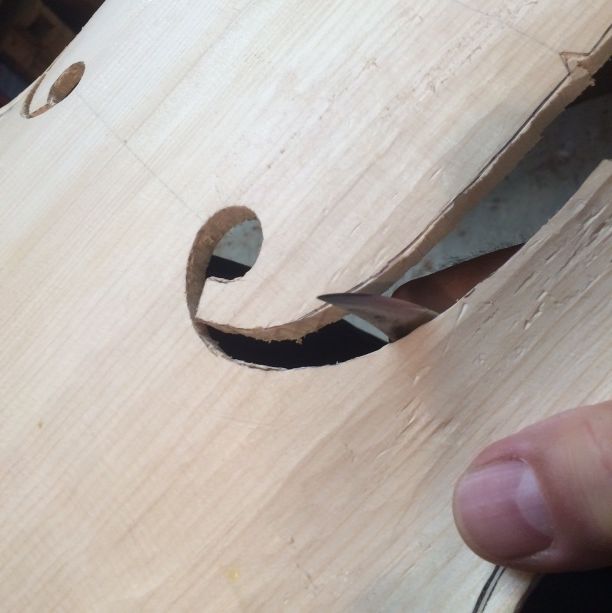
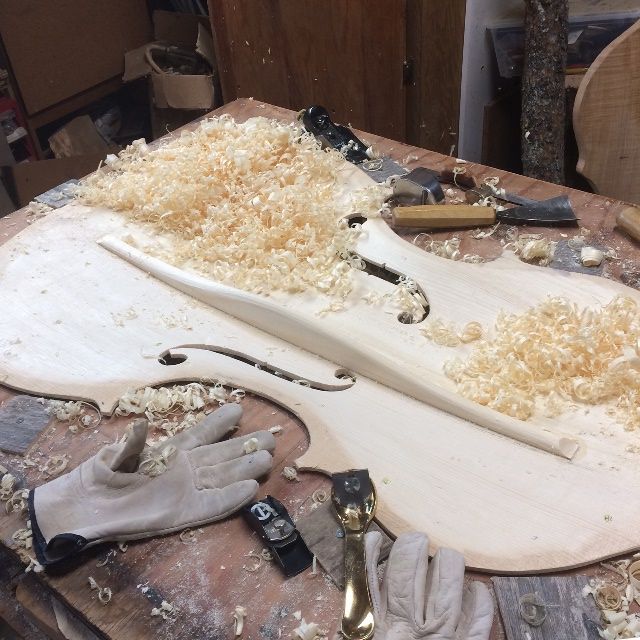
Once I had the two sides sawed out, I sawed across the line between the two sides and separated the rectangle of the front plate wood from the neck block, to expose the neck block, allowing me to use chisels for most of the remaining removal of wood from the neck-mortise.

Ready to chisel out the neck-mortise for a 5-string double bass.
Ready to chisel out the neck-mortise.


Chiseling out the neck-mortise for a five-string double bass.
Chiseling out the neck-mortise.


Neck-Mortise complete for 5-string double bass.
Neck-mortise complete, with homemade projection gauge.


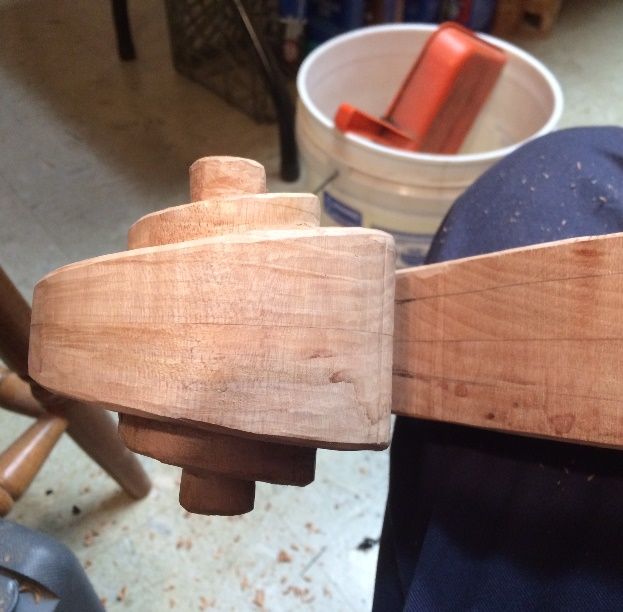
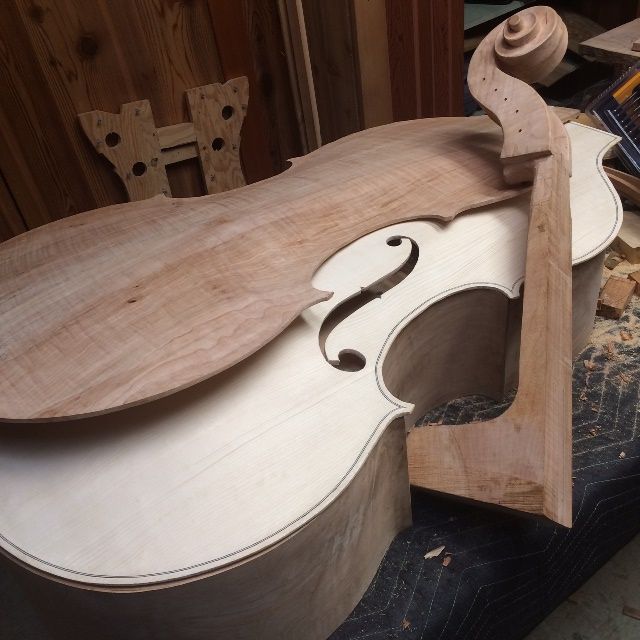
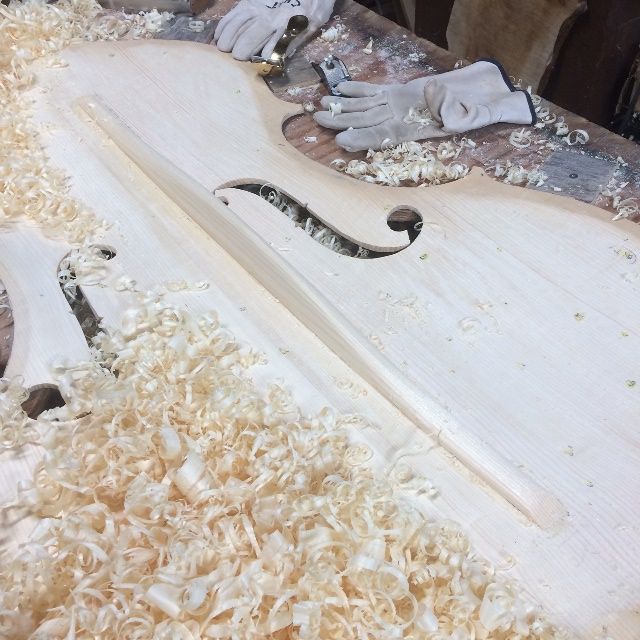
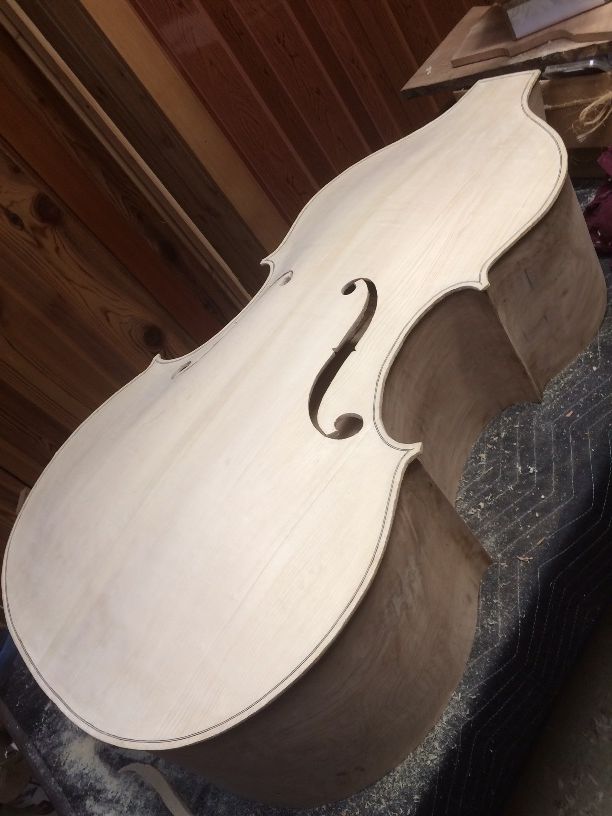
I checked the fit continually until all five measurements were correct, then removed the neck from the mortise, and began fabricating the “removable neck” apparatus that will enable the player to pack up his or her bass and transport it safely.

One of the things that concerned me was the possibility of wood changing shape through wear or stress. And, since the neck is to be secured by a bolt, how can I be sure that the bolt will not gradually wear into the wood, causing a loose fit?

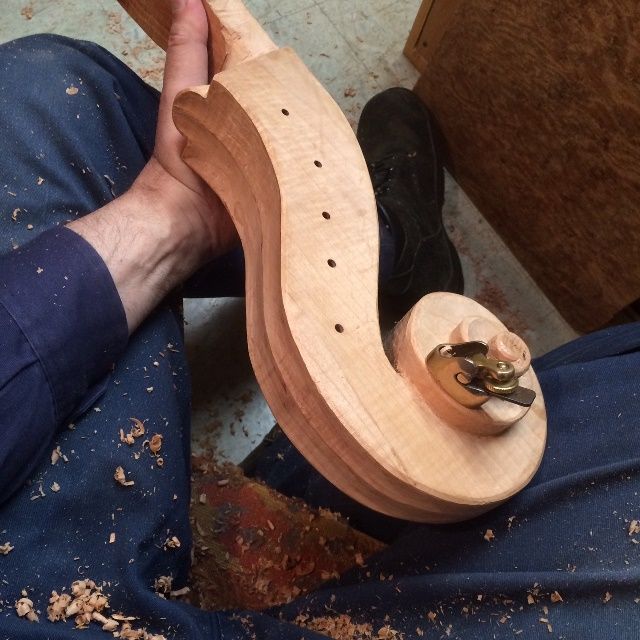
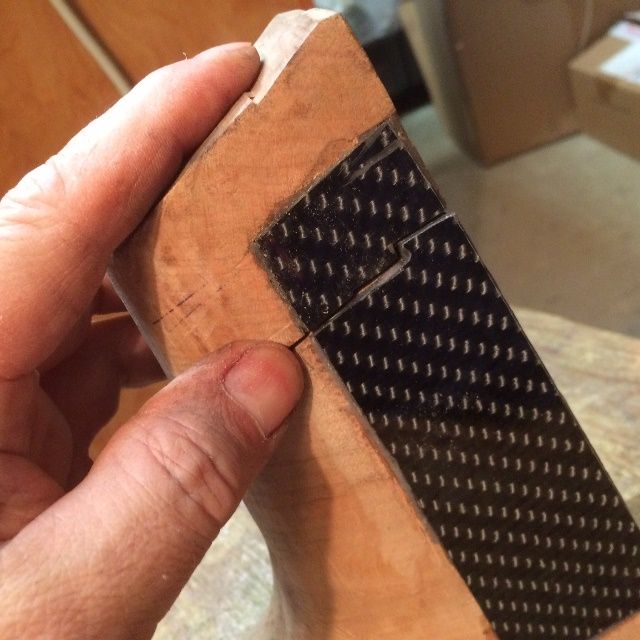
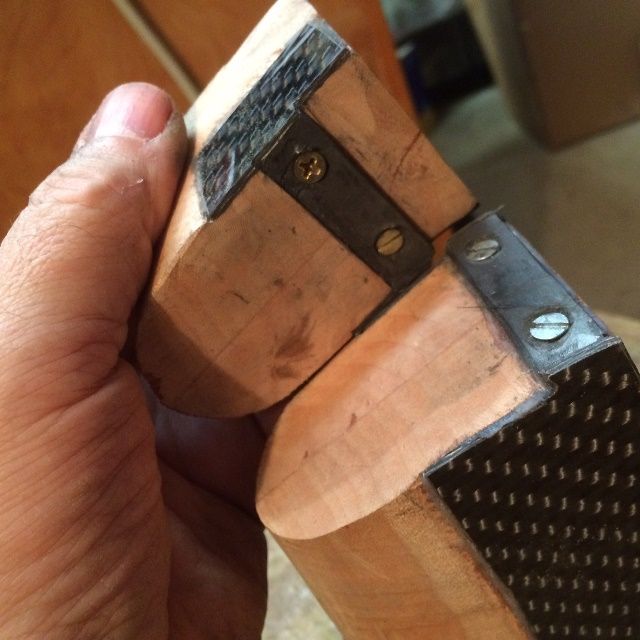
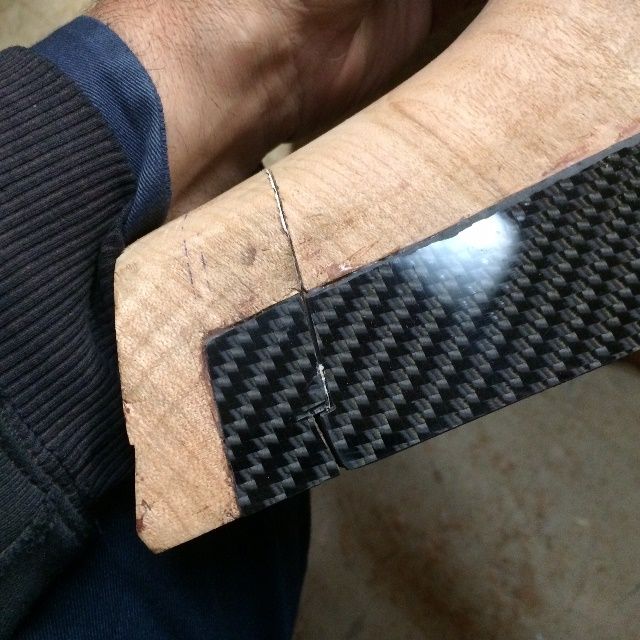
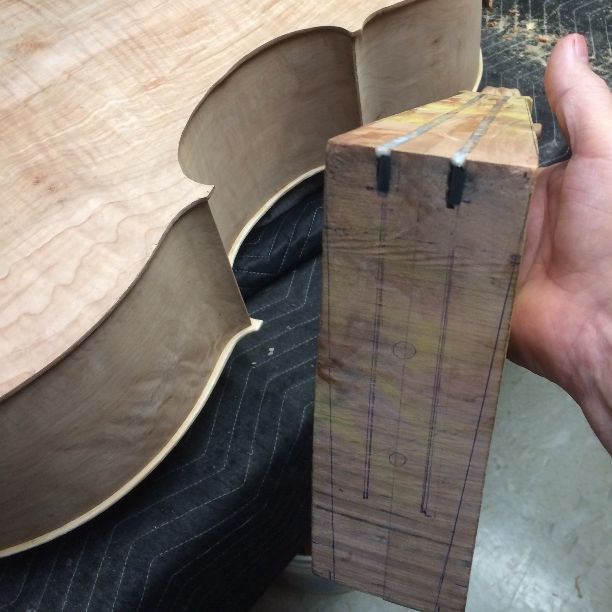
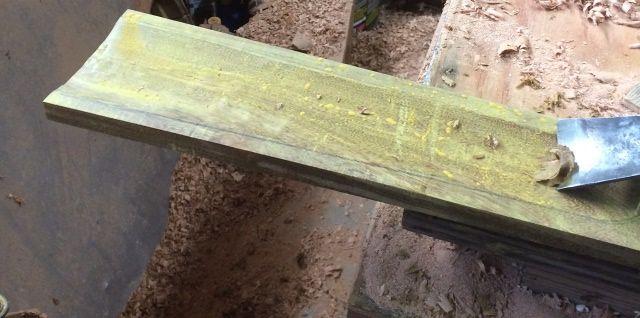
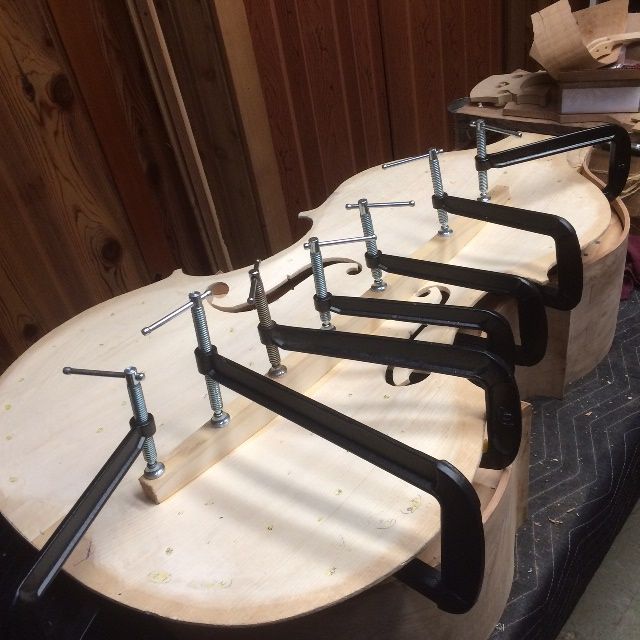
After fitting the neck to the corpus, as outlined above, I inlaid 1/16″ Carbon Fiber plate on both sides of the neck heel, to provide smooth, stable fit every time and simultaneously guard against a heel crack, as the CF plate is not only inlaid into the sides of the neck, but it is bedded in epoxy, so it is a permanent part of the neck heel, providing support as well as a smooth surface to the sides.

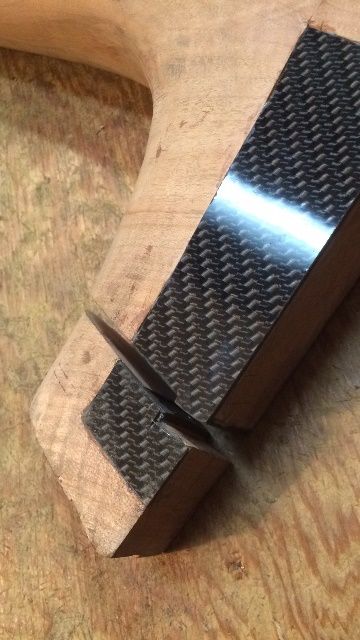
I used screws and epoxy to mount bars of CF across the ends of the “joint” between the neck heel and the portion of the neck heel that will be permanently mounted to the corpus (and secured to the block and button,) so that a bar of CF on the neck heel slides under a similar bar in the mortise, thus providing an anchor of sorts.

Carbon fiber reinforcements and locking joint for five-string double bass.
Carbon fiber reinforcements and locking joint.


Locking mechanism for five-string double bass removable neck.


Locking anchor-bars for five-string double bass removable neck.
Locking anchor-bars for removable neck.

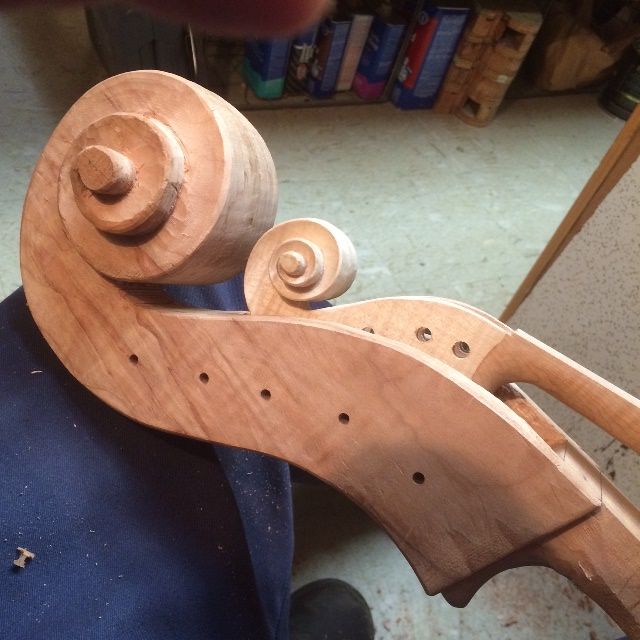
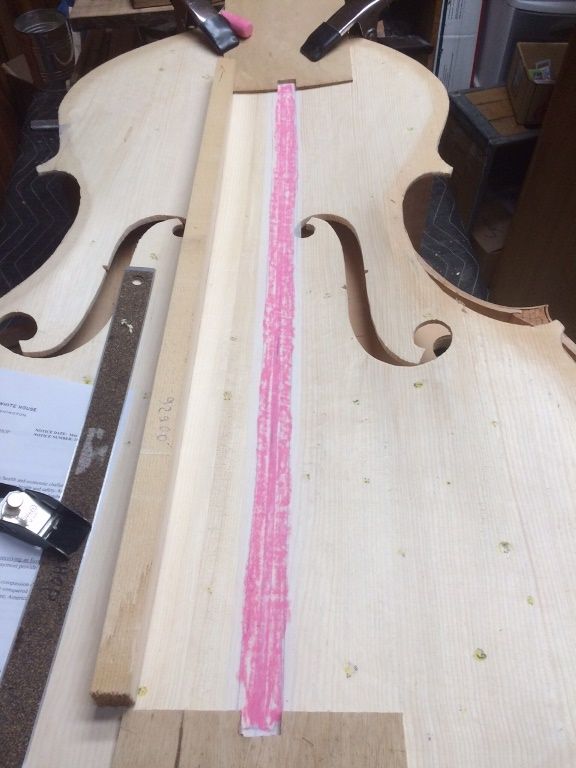
Then I re-attached the two portions of the neck heel using a piece of paper glued between them, so that I could check the neck-set one last time, before gluing the root end in place and drilling the removable portion to receive the bolt. The paper provides a “breakaway joint” that will be relatively easy to separate after the heel root is glued home. it is only glued with a few “stripes of glue on each face, so the paper will tear apart and allow me to extract the removable portion the neck and finally complete the drilling, installation of a threaded insert, etc., and thus complete the neck set.

Heel joint with paper breakaway layer.


Neck, Fingerboard and Fittings

Neck Progress

Reinforcing the Neck

When I last posted, I showed the garland with the Sitka Spruce front plate installed, and the completed Oregon Big Leaf maple back plate sitting on it (because I wanted to see it that way) with the neck block (also Oregon Big Leaf Maple) beside it. You can see in that photo that I had already installed carbon fiber reinforcement rods, bedded in epoxy, to stiffen the neck. But I didn’t say how they got there.

Completed parts for a five-string double bass.
See the reinforcements in the neck?


The problem with maple is that it is fairly flexible. Usually, that is not a concern, because the instrument necks also have a fingerboard added on (usually of ebony) which is very stiff, so that the flexibility of the maple is not much of an issue. But, when the fingerboards become thin, after years of being used, re-surfaced, and used again, the frequent “re-dressing” of the fingerboards thins them to the point they are no longer stiff enough to bear the stress of the string tension, and the neck begins to bow forward, under string tension.

Carbon fiber is very light and extremely stiff, so it makes an ideal material for reinforcement. Carbon fiber rods are available in a variety of shapes and sizes. I chose 1/8″ x 1/2″, and they arrived in two-foot lengths from the “Dragonplate” company.

I do not have a router table, nor even a table saw, so I used my hand-held circular cut-off saw (commonly called a “skill-saw” as “Skilsaw” was an early brand of this sort of tool.) I set the blade on the saw to 5/8″ deep, and, having already drawn the lines where the cuts should go, I clamped the neck block in the vise, with a block beside it to guide the saw, and simply sawed slots into which to fit the carbon rods. The slots did not fit well, as the blade was not wide enough, so I attempted to use a hand-held router to widen the slots, but I did not have the correct bit for the router, and they were very expensive at the local hardware store, so I carved out the remaining wood, using my knife and a small chisel.

Once the slots were satisfactory, I mixed my epoxy, filled the slots, and pressed home the carbon rods. The epoxy I chose to use was advertised as “15-minute” epoxy, but all it meant was that I would have 15 minutes of working time, in which to get the rods in place, the epoxy smoothed over the tops of them, where it had squeezed out, and be done tinkering with it. It turned out to achieve full cure in about 24-hours… by the next day, in other words. No problem: I had plenty of other work to do while I waited.

Neck block for five-string double bass with carbon fiber rods bedded in epoxy.
Neck block with carbon fiber rods bedded in epoxy, waiting to be trimmed.

So, I scraped all the excess epoxy off of the neck joint face, where it would be glued to the fingerboard, and waited until the epoxy had fully cured, before sawing off the excess carbon fiber rods, using a hacksaw.

Neck block for five-string double bass with carbon fiber reinforcement rods trimmed to length..
Neck block with carbon fiber reinforcement rods trimmed to length.

The result is a five-string double bass neck that will never become bowed or warped.

Ipé Fingerboard and Tailpiece

I chose to use Ipé instead of ebony for my fingerboard and other fittings, as it is more readily available, it is not a threatened species, and I like the finished color (dark brown.)

Ipé is an extremely hard, dense, South American hardwood, similar to Ebony, in terms of hardness and durability. It is difficult to work, as are all the extremely hard, dense, tropical woods, but I like the finished product. Here is a fingerboard on a five-string cello I made some time ago:

Ipe fingerboard on five-string cello.
Ipe fingerboard on five-string violoncello piccolo.

So, I decided on the shape and size of the fingerboard and tailpiece, and then cut them out on my bandsaw.  Then I used gouges and planes to shape them appropriately.

Fingerboard underside for five-string double bass being carved of Ipe wood.
Fingerboard underside being carved of Ipe wood.


The dust from sawing, planing, scraping or sanding Ipé wood is a bright yellow color, and it fills the pores of the wood, giving the wood a greenish-yellow look while it is being worked. But that color disappears entirely when the wood is finished, and the Ipé becomes a dark brown color.

I glued the fingerboard to the neck block when it was nearly complete, and then completed the shaping of the fingerboard with the neck as a unit. The tailpiece, too, is only partially completed.

Fingerboard and tailpiece for five-string double bass.
Fingerboard and tailpiece waiting to be completed. Fingerboard is glued and clamped to the neck.


My wife was a little perplexed about the odd color of the Ipé wood, so, after completing the preliminary dressing of the fingerboard, I used a paper towel, and rubbed the fingerboard down with turpentine, to show the color as it will look when finished. I also rubbed a small portion of the tailpiece, to show the stark contrast between the color of the Ipé when freshly worked, and when finished. (The turpentine is not the finish, obviously, but the color will be very similar, as a light coat of linseed oil rubbed into the wood probably will constitute the finish.)

Fingerboard and tailpiece for five-string double bass with turpentine.
Fingerboard and tailpiece with turpentine to show the true wood color.


I went ahead and began the shaping of the neck at the same time, so it is beginning to look the way it will be when completed. When the neck shape is correct, I can begin the neck-set procedure. This is the first time I have attempted a removable neck, so I am a little apprehensive about it. All I can do is press on, and see how it works.

Here is how it all looks right now:

Neck and tailpiece for five-string double bass.
Neck and tailpiece for five-string double bass. Notice the “fret” bent and clamped to the tailpiece.

When completed, the tailpiece will accommodate five strings, and have a “fret” inlaid across the upper end, to provide a hard “stop” for all the strings at the same point. The “Fret” is made of Ipé wood, too, bent to shape with heat and pressure, then clamped to the tailpiece to cool in that shape. Next, I will cut the slot in the tailpiece to allow the fret to be inlaid into the tailpiece, and drill the holes for the string-slots and the tailgut wire.

After that, I will begin the neck-set, I hope.


Thanks for looking.

Both Plates Complete: Front installed!

Back plate completed

Completing the Arching

When I last posted, the back plate was in progress, but even the arching was not completed, let alone the interior carving. Now it is all complete, the front plate has been installed, and the fingerboard, the neck and the tailpiece are underway! Things are moving along!

I did make a set of arching templates before moving on with the arching:

Set of cross-arching templates for the five-string double bass.

Those templates helped me to see the shape more clearly, and to know what changes to make, to improve.

So, here is the completed back arching, after scraping, so that you can see the flame in the Oregon Big Leaf Maple back:

Arching complete on back plate for five-string double bass .
Arching complete on back plate. Pretty wood, isn’t it?

Inside Carving

Carving the interior is always a daunting task…that is a lot of wood to move! But, one scoop at a time, it does get done!

Beginning the inside carving of the back plate for the five-string double bass.
Beginning the inside carving of the back plate.


Once I had the whole plate beginning to take shape, I carved “dots” all over the plate, checking thickness as I carved, until I had a pattern of correctly graduated “dots all over the plate. Each dot had a measurement written in the center, matching the graduation “map” I had chosen to emulate.

Then it was time to “connect the dots.”

Graduation
Graduation “dots” for back plate.


Connecting the dots for graduation of a five string double bass.
Connecting the dots.


Graduation of five string double bass back plate is nearly complete.
Graduation of the back plate is nearly complete.


It is always amazing to me how light the plates become after all that waste wood is removed. In this picture, you can see how thin the plate is, with the graduation complete.

Graduation of the back plate of the 5-string double bass is complete.
Graduation of the back plate is complete.


I took the plate inside, and stacked all the parts together so that I could see the progress:

All the main parts complete, and stacked on the garland of the five-string double bass.
All the main parts complete, and stacked on the garland.

What is next?

I needed to complete the neck, which means I needed to design, cut out, and shape the fingerboard and glue it to the neck block so that I could finish shaping them as a unit. Meanwhile, I could install the front plate, and get ready for the neck-set, once the neck was ready.

Front Plate installation

I completed a preliminary shaping of the blocks and shaped the linings, front and back. Then I carefully positioned the garland on the front plate, and temporarily clamped them together, using several spool clamps.

Garland and Front plate for the five-string double bass assembled and clamped.
Garland and Front plate assembled and clamped.


Then I removed the clamps from one area at a time, used a thin palette knife to slip hot hide glue into the joint, and re-clamped immediately, adding more clamps as needed. Then I moved to the next area and repeated that pattern. Soon I had the entire front plate glued, and secured to the garland with clamps.

Front plate and garland assembled, glued and clamped for the five-string double bass.
Front plate and garland assembled, glued and clamped.


And, when I removed the clamps in the morning, the project was beginning to look like a bass!

Front plate and garland for five string double bass.
Front plate and garland, with the clamps off.


I liked the looks so much, I stacked the parts together again, to see how it would look, all together. The back plate is just sitting there, again, not bent to fit the garland or anything. I will add purfling after installing the plate, I think, so I can be sure the overhang is correct, and that the purfling follows the finished edge.

Back plate sitting on garland assembly with front plate of five-string double bass.
Back plate sitting on garland assembly with front plate, and neck assembly.


There is still a  long way to go, but I will put more in the next post.


Thanks for looking.

Beginning the Back Plate

Back Plate Arching

Traced and cut out the Plate

When I last posted, I had flattened the back plate, using a plane, but the shape was still oversized.

Flattened back plate for five-string double bass.
Flattened back plate for 5-string double bass.

So I traced out the plate shape using a small section of plastic pipe as a guide, and a ball-point pen inside the pipe to make the mark. Then I cut out the plate using my very old Craftsman “Auto-Scroller” saber saw.

My beloved wife, Ann, bought me this saw when we had been married for less than two years, and it has served me well for the last 38 years, but this may be the final plate it will cut out. It overheated rather badly during the cut. 🙁

Back Plate for five-string double bass traced and cut to shape.
Back Plate traced and cut to shape.


Once the plate was cut out, I used my curved-sole scrub-plane to remove waste wood, and rapidly bring the plate to near the proper thickness around the edge. As the thickness gets close to the target dimension, I switch over to the Ibex Finger-plane with the toothed blade and the wooden handle, to complete the thicknessing of the plate edge. The Oregon Big Leaf Maple is much more difficult to carve than the Spruce was, both because it is harder, and because the grain is highly flamed, meaning that it changes directions every centimeter or so, resisting all efforts to smoothly plane off the wood. The toothed plane helps, but when I start getting close to the right thickness, I will have to switch over to a scraper before the tear-outs from planing are too deep to be removed.

Arching of the five-string double bass back plate underway.
Arching of the back plate is underway.


You can see the longitudinal arching template in the above photo: it is just a thin piece of plywood with an 11′-3″ radius circle section cut out of it so as to leave the correct arching height in the center. I used that to help me establish the longitudinal arching. The Ibex plane is on the plate, and the scrub-plane is almost out of sight behind a small block-plane in the background. The small block-plane is helpful for smoothing the ridges left by the scrub-plane.

I am working to the rough sketch I made before beginning, with the plan for the back arching: (I did change the plan a little. I realized that I could extend the arching a little further “north,” as I have tapered the entire garland a little, so that the bend in the upper bouts will not be so severe, and the arching may be able to follow it a little way before flattening out to avoid the compound curve. It’s worth a try, anyway, and will not hurt anything.)

Rough sketch of arching plan for the five-string double bass back plate.
Rough sketch of arching-plan for the back plate.


Arching of the back-plate for a five-string double bass still in progress.
Arching of the back-plate still in progress. Scrub-plane is more visible in this picture.


My hands and shoulders were getting too tired, so I went inside and used small finger-planes, files, and scrapers to refine the scroll. I am waiting on an order of carbon-fiber reinforcement materials to complete the neck, but other than that, I am pleased with how it is turning out.

Scroll for a five-string double bass nearing completion.
Scroll is nearing completion.


I also completed the scraping of the Sitka Spruce belly, and it is pretty much ready to be glued to the garland.

Front plate and Garland for a five-string double bass, ready to be joined.
Front plate and Garland, ready to be joined.


I pretty much wore myself out on this stretch: I’m looking like a tired old man, here. And I thought I was smiling…

The luthier with five-string double bass in progress.


Anyway…that is the current status.


Thanks for looking.

More Work on the Double Bass Plates

Front Plate Inside Carving

Rough carving the inside of the Front plate

As I said in the post regarding tools, I built the little curved-sole scrub-plane with the specific intent of using it to carve out the inside of the Sitka Spruce front plate for this Five-string Double Bass.

Rough-carving the interior of the Five-string Double Bass front plate.
Rough-carving the interior, using the scrub plane.


Carving Dots

As the depth approached the correct value, I began switching over to the palm plane, there in the foreground. But as it turned out, I actually had a long way to go before I was anywhere near too thin.

I used the bass caliper to register thicknesses all over the plate, and then began carving “dots” at each location, to the desired thickness.

Carving
Carving “dots” of correct thicknesses all over the plate.


As I found (or created) spots that were at the correct thickness, I wrote in the thickness, and highlighted them in yellow, to warn myself against going any deeper. Eventually, I had mapped out the entire plate at least approximately according to this diagram from Peter Chandler’s book “So you want to build a Double Bass”:

Graduation map from Peter Chandler.


He had derived these measurements from a fine old master bass by Domenico Busan, which conveniently happened to be disassembled for repairs and restoration. He said that he had subsequently used these values on all his basses, and it always worked well. (Sounds good to me!)

I kept carving until I had “dots” all over the plate.

Thicknessing Dots completed.


Connecting the Dots

Then I began “Connecting the Dots”:

Connecting the dots on the five-string Double Bass.
Connecting the dots.


As I planed away the excess wood, the “dots” got smaller and smaller, and, in some areas disappeared. By that point I had switched over to the palm plane which is less aggressive and makes a  smoother surface.

Planing with the Palm Plane.

But eventually, it was pretty much all done, and time to cut out the f-holes. However, I decided to install the purfling first, and then cut out the f-holes.


Purfling installed:

I did not take pictures while this step was in progress: I just got going and pressed on until the job was finished, then took a few pictures. Sorry. I don’t always think about pictures.

I used this old purfling marker to trace my lines, then a thin-bladed knife to slice along the lines to make a slot…then picked out the waste wood and inlaid the purfling.

Old purfling tool: missing part replaced with maple.


Upper bouts of five-string double bass with purfling installed.
Upper bouts with purfling installed.


Bass F-hole incised and center bout with purfling on five-string double bass.
Bass F-hole incised and center-bout with purfling.

Cutting the F-holes

I used a coping saw to cut out the f-holes. It was slow and laborious but it worked, and there was little chance of any catastrophic errors. The result was two f-holes cut within a millimeter of the line and no errors. It is starting to look like a double bass!

f-holes in five-string double bass cut out.
F-holes cut out.


Rough cut f-hole on 5-string double bass ready for refinement.
Rough-cut f-hole ready for refinement.


Using a knife to refine the f-holes on a five-string double bass.
Using a knife to refine the f-holes. ( I will finish them with a file.)


Bass-bar fitting

Fitting fixtures for fitting the bass-bar on a five-string double bass.
Fitting fixtures for fitting the Sitka Spruce bass-bar.


I use a very thin paper gauze tape for chalk-fitting bass-bars.

Chalk-fitting tape
This is the tape I use, along with sidewalk chalk.


Paper tape with chalk applied
Paper tape with chalk applied.


The trick is to press the bar into the chalked tape, and “wiggle it” slightly, to pick up chalk on the high spots. then plane off just the chalked places and do it again, until all of the bass-bar comes up with chalk on it. That achieves a perfect fit. When the tape is finally removed, it takes all the chalk with it.

Then I warm the wood using a heat gun, apply a liberal coating of hot hide glue to both surfaces and clamp the bar in place. I leave it overnight to dry, just to make certain it will not pop back off (I have had it happen.)

Bass bar for the five-string double bass, fitted, glued and clamped.
Bass bar fitted, glued and clamped.


Fitted bass-bar for five-string double bass, ready to carve to shape.
Installed bass-bar, ready to carve to shape.

The properly-installed bass-bar still has to be carved to the appropriate shape. I use planes to accomplish the carving.

Beginning to carve the bass-bar on a five-string double bass.
Beginning to carve the bass-bar.


Bass bar nearly complete for a five-string double bass.
Bass bar nearly complete.


bass bar complete
Bass bar complete


Interior of completed Front plate sitting on the garland of a five-string double bass.
Interior of completed Front plate sitting on the garland.


Completed front plate resting on the garland of a five-string double bass.
Completed front plate resting on the garland. (Starting to look like a double bass!)


Back Plate Vision

There is still a good deal to be done, before I can install the Front plate, so I am stopping there for the time being.

But I really wanted to get a foretaste of what the Big Leaf maple of the back is going to look like; so I planed the inside and outside of the back plate flat, just to have a look at it:

Back plate inside surface for a five-string double bass.
Back plate inside surface.


Back plate outside surface, for a five-string double bass.
Back plate outside surface.


It is pretty stuff! I am really looking forward to seeing it completed.


Thanks for looking.


And, occasionally, Gifts!

Gift Box

Why a box?

An elderly couple of friends gave me a large pile of highly flamed “fiddleback” maple, hoping I could build fiddles of the wood. This was Big Leaf Maple wood that the woman’s father had salvaged specifically because of the beautiful grain, perhaps fifty years ago, while making wood to heat his home.

Unfortunately, the wood turned out to be riddled with worm damage so that most of it is unusable. I felt bad about it, because she had hoped, all through the years, to have a box or something made of the wood, and now it seemed to be lost.

I had just repaired my bandsaw, though, while in the process of building the five-string double bass, and was busy cutting up billets of violin-wood to see what I really had that would be useable. I salvaged a few pieces of their maple wood that (maybe) could make a violin, and enough thin slices that I thought I would try a box for her.

When most people think of a box, they are thinking of a rectangular enclosure of some sort: but, I’m a violin maker! So…I bent the wood into an oval, and went from there:

There was not enough solid wood to do very much, so the heavier sections are from a different tree; one cut from the yard of my wife’s family home.

Gift box showing bent body, inlaid top, solid base and lid.


I inlaid the fiddleback maple section about 3 mm thick, into the lid which was also flamed maple, but not as spectacular. I trimmed it with purfling left over from the building of the five-string double bass.

The sides were only a little over a millimeter thick and bent around a hot iron made for that purpose. But they would be too fragile, if that was all that was there, and there would also be no secure way to fasten them to the base. So there is a 4 mm raised section glued to the base and the sides wrap around that “plug.” I added a 5 mm thick ring around the top, the same size as the bottom plug, in order to reinforce the upper edge.

Then I inlaid a 7 mm wide by 2 mm thick band of bent willow wood into the lid, positioned so that it fits cleanly inside the upper ring. As it happens, the lid fits perfectly in one direction, but if you turn it 180 degrees, it is very loose. So I stamped my name in the base and the lid: when you open the lid, if both are readable or if both are upside down, then the lid will fit.

Interior of bentwood box.


I varnished the bentwood box pretty much the same as I do my violins, and delivered it the following Saturday.

Both the husband and wife seemed quite pleased, so I am happy too.

Completed bentwood box.


Thanks for looking,

Homemade Tools for Bass-Carving

A History of Homemade Tools.

Bass Caliper

As I was ready to begin the inside carving of the front plate, I realized that the little caliper I use for graduating violins and violas was simply not going to serve. I had a much larger caliper I had built 13 or 14 years ago, when I built my first bass, but it had been hanging in my workshop untouched for all those years and I was afraid that the battery might have corroded and ruined the digital indicator.

I had purchased the electronic tool from Harbor Freight, back in 2006 for about $10 (If I remember correctly,) and built the caliper out of hardware from a local outlet and a scrap of 1″ plywood decking. It was pretty crude, but it worked and was quite accurate.

Bass caliper, hanging amongst molds and templates.

I took out the little “battery-tray” thing, to see if my fears were justified, and it seemed as though the battery had not leaked, but was simply dead. So I went and bought a new battery, inserted it, and “Hey! It works!”

Bass caliper
Bass Caliper with large display.

One of the things I like about the tool is that I can actually read the display. My small caliper has such a tiny display that I have difficulty reading it. Notice that it is reading .03 mm when it is not in use. The plywood flexes that much, under the weight of the lower jaw, so I hold the instrument upright and level, and press the “zero” function. Then it reads “zero” when it is held upright, and .03 mm when it is lying flat on its side.

So that was the first tool I was concerned about. The next concern was that I really did not want to gouge out the interior with mallet and gouges, as I had done the exterior. I was fearful of cutting too deep. So, in my mind, a “scrub-plane” with a curved sole was in order.

Curved-sole Scrub-plane

This also was one I began years ago, but did not complete soon enough to use it on the bass, nor even the cellos I made later, so the pieces languished in my toolbox drawer, waiting for me to finish the job.

I had made the body by welding together a slice of scrap stainless steel pipe, and some mild steel plate, along with a little section of angle iron and a 1/4″ pin. The cap iron was a shorter section of the same slice of stainless pipe, and the blade was (if I remember correctly) a piece of A1 tool steel. I had even gone so far as to cut sections of curly maple for handles, but had stopped there, and all the pieces were together in the toolbox. So– the time had come!

Pieces of the curved sole scrub plane.
Pieces of the curved-sole scrub-plane.


Bottom view of Curved-sole Scrub-plane, for carving double bass plates.
Bottom view of Curved-sole Scrub-plane.


Partially assembled plane for carving double bass plates.
Partially assembled plane.


Completed Curved-Sole Scrub-Plane for carving double bass plates.
Completed Curved-Sole Scrub-Plane.

The completed plane, after a little adjusting, worked very well, and fit my hands comfortably, so the task of carving the inside of the bass front plate went very well.

Carving the inside of the Double Bass front plate using the Curved-sole Scrub-plane.


The only fault in the scrub-plane, because of the deeply curved sole, is that it tends to leave a rather un-smooth surface– like ruts in a dirt road. So, as I got closer to the desired thickness of the plate I was going to need a plane with a much less aggressive curved sole, and broader, as well, to produce a smooth surface.

Palm Plane

Fortunately, this one, I had built during my first bass-build, though it had not seen much use, as I never really got it adjusted right, and was busy enough that I just set it aside and completed the first bass using other tools. I got it back out and carefully sharpened the blade and adjusted the depth of the cut, and it turned out to work splendidly, though it took a little practice to get the angle in my grip just right.

Steel Palm Plane for smoothing interior of the double bass front plate.
Steel Palm Plane.


Steel Palm plane with wooden finger plane.
Steel Palm plane with a wooden finger plane.

All of the planes I have built work on the same principle: a blade is fixed at a given angle, and clamped in place by means of a cap-iron that slides under a transverse pin, and a screw that wedges the cap-iron between the pin and the blade. The principle is very old, and works well. It is used in many commercial planes, and predates all the companies that use it.

This little wooden plane was the first one I ever made. It is made of Padauk wood and is pretty crude, but it works well. (Ibex planes work better, but at the time I made it I had no money for an Ibex plane.)

Wooden plane disassembled.
Wooden plane disassembled. The thin end of the cap iron slides under the pin.


It is not a really tiny plane, but it fits my thumb and forefinger pretty comfortably. The blade was a section of scraper blade, and, while it works, I think I could improve it with a better choice of steel.

Wooden plane showing interior and relative size.


Assembled Padauk-wood plane.


Other Tools

The other tools (below) I had made years ago, and have been using regularly.

Homemade knives from an old sawzall blade.


Homemade gouges, forged from plow-steel or drill rod.

Many of my other tools are homemade, too– spool-clamps, scrapers, work cradles, templates and molds are all hand-made originals, as well as my workbench (which is usually buried in tools and materials…sorry).

So…that’s how I acquire tools! 🙂

Rationale

You might ask, “Why would you go to all that trouble when you can buy professional-level tools for reasonable prices?” The answer is two-fold:

In the first place, I really enjoy making tools! And then, there is a special joy in finding that the tools I make usually work very well, so I then have the pleasant experience of making musical instruments using the tools I  made.

But the second reason is financial in nature: I simply did not have the extra money to buy every tool I needed when I began building instruments. But one does not have to expend a great deal of cash, to get started in a craft, if one is willing to think, read, and learn the skills to make tools.

The time I spend building a tool is repaid many times over, by the pleasure I get in using the tool and the fact that all these tools will be used for many years to come, as I continue to build instruments. Are there sometimes failures? Once in a while an idea doesn’t work as well as I expected, but usually I find it very rewarding to make my own tools.


Thanks for looking.


5-string fiddle from bass back

5-string Fiddle Back from Bass Back Scrap!

I don’t like wasting tonewood!

So, when I saw that there were two sections of “scrap” left over, near where the neck end of the five-string double bass back was cut out, I realized that a 5-string fiddle back could fit into each of those two pieces.

So, I salvaged the wood, and not only got two backs, but also the neck blanks for two 5-string fiddles.

Five-string fiddle back cut from the scrap left from a 5-string double bass back.

Five-string fiddle back cut from the scrap left from a 5-string double bass back.

Arching the Plate

Five string fiddle begun, with back and neck from scrap from a 5-string double bass back.


I really like the look of the Oregon Big Leaf Maple back wood. I enjoyed arching the plate.

Five-string fiddle back arching nearly complete.
Five-string fiddle back arching nearly complete. It is sitting on the five-string double bass garland whose back provided the scrap for the fiddle-back.

Purfling the Plate

On all my five-string instruments I usually include a purfling weave. It is a modified fleur-de-lis I designed for my first five-string fiddle and have continued to use on subsequent work.

Five-string fiddle back with purfling slots incised and ready to complete.

In this photo, the slots for the purfling have been incised, but not cut deeply, so the next step is to slice deeply enough that the waste wood can be removed from between the cuts, and the purfling strips inlaid in the resulting slot.

I will include the purfling process in subsequent posts.


Thanks for looking.

Beginning the Plates

Beginning the Plates

Bookmatching the Plates

When I last posted, I had the garland pretty much complete, and the materials were prepared for the neck and the front and back plates.  I had cut the back plate roughly to shape, in order to use as much of the “fall-off” material from the back plates, as possible, from which to make the neck.

I went ahead with the neck and scroll, just because I find it encouraging to have some of the “pretty” work done, as it makes me feel that I am making progress. You can see the neck progress, here.

But at some point, one has to go ahead with the task of bookmatching the plates and getting them ready to carve.

Sitka Spruce front plate halves for the five-string double bass.
Rough shape of five-string double bass back plate, and template for the neck.
Rough shape of the five-string double bass back plate, with the template for the neck. The neck was cut out of the scrap from the back.


So, for the front and back plates, the next thing on the agenda was to plane the center-joints absolutely flat and straight and then glue them together. It took two tries on each of them, as it turned out that while they were technically “straight”, and if I put a try-square at any given point, they seemed to be square…in reality, there was a longitudinal twist to the surface I had planed, and the fit was not acceptable. (sigh…) No big deal… I just had to saw the joint back apart, and try again.

Finally, I got everything lined up correctly; then I glued and clamped the plate halves together, and produced the plate banks, ready to trace the actual shapes.

Sitka spruce front plate for five-string double bass, bookmatched and ready to glue.
Sitka spruce front plate for five-string double bass, bookmatched, and ready to glue.


Front and back plates for five-string double bass, bookmatched and ready to trace shapes.
Front and back plates, bookmatched, and ready to trace shapes.

Tracing the plates

Sitka spruce front plate for five-string double bass, ready to trace the shape.
Sitka spruce front plate, ready to trace the shape.


Ready to trace the shape of the front plate of the five-string double bass.
Ready to trace the shape of the garland onto the front plate.


Using a pipe spacer to trace the shape of the five-string double bass front plate.
Using a pipe spacer to trace the shape of the garland onto the Front plate.


Tracing the plate out with a pipe spacer like that enables me to establish a very even overhang of about 4.5 mm. The problem is, it also makes round corners, which I did not want. So I had to correct, the corners, using a long straightedge to “point” the corners toward the center of the plate at the far end, and then use circle templates to extend the curvature of the plate edge above and below the corner to meet the straight lines. (Incidentally, the reason I have stopped using a washer for a spacer, is that any washer small enough to have the right distance from outside to inside also is so thin that if there is the smallest change in the fit between the plate and the garland, the washer will slide under the garland, changing the overhang distance to zero. The thin slice of PVC pipe never does that.)

Cutting out the Front Plate

I used an old Craftsman “Auto-scroller” saber-saw (Hand-held jigsaw) to cut out the perimeter of the front plate. Ann, my beloved wife, bought me that saw 36 years ago, when we had been married for only about three years. That little saw has a lot of miles on it!

Cutting out the completed shape of the front plate for the five-string double bass.
Cutting out the completed shape of the front plate. I am not attempting to cut exactly to the lines. I will correct to the lines, after the arching has been completed.


Cutting is complete: the front plate for the five-string double bass is ready for arching.
Inside view: the cutting is complete: the front plate is ready for arching.


Outside view of the front plate for the 5-string double bass.
Outside view of the front plate.

Arching is Next:

Before I could begin arching, I needed to mark the intended plate thickness: I used a marking tool to scribe a line all the way around the plate at 6 mm. Before the plate is done, this will be reduced to 5 mm in most areas. I used a ballpoint pen to highlight the groove so that I could more easily see it when I am working, and not accidentally go past it.

Edge-thickness scribed into front plate for the 5-string double bass.
Edge-thickness scribed into front plate.


Then I secured the plate in a cradle especially made to fit this design, and secured it in place by affixing small squares of 1/4″ plywood around the perimeter so that the plate will not shift laterally, while I am working on it. The reason the little stop-blocks are so thin is that I do not want them to be in the way when I am planing the edges.

Front plate for the 5-string double bass secured in a work cradle.
Front plate secured in a work cradle.


Tools for arching the five-string double bass.
Tools for arching: cradle, gouges and planes.


Sculpting the front plate arch for a five-string double bass.
Sculpting the front plate arch.


five string double bass arching in progress.
Front plate arching in progress!


Planing the arching surface smooth on a 5-string double bass.
Planing the arching surface smooth.


Planes used to shape the 5-string double bass.
Some of the planes used to shape the bass.


Shadow line defining the longitudinal arching shape of the 5-string double bass.
Shadow line defining the longitudinal arching shape.


Transverse arching shape of the 5-string double bass.
Transverse arching shape.


Arching for the 5-string double bass nearing completion.
Arching nearing completion.


Arching and outline completed for the 5-string double bass.
Arching and outline completed.


Time to lay out the F-holes!

F-holes laid out for 5-string double bass.
F-holes laid out, incised, and inked.

When I build the smaller instruments, I inside the f-hole perimeters quite deeply, knowing that, without exception, I end up needing to correct the arching, using the f-hole side-profile as a guide. I want the “stem” portion of the f-holes to be essentially parallel to the plane of the garland-plate joint when viewed from the side. On the violins and violas I have built, I have universally found that, in spite of my best intentions, I have left too much “puffiness” in the area of the lower wings of the f-holes and I need to plane away more wood. If I have incised them deeply enough, I don’t lose the marks when I remove the wood.

I was quite pleased to find that, on this instrument, the side profile was exactly what I had hoped for, as soon as I laid it out.  So I incised them, but not very deeply, and then inked them with a ball-point pen, so that I could easily see them while perfecting the arching later, using a scraper.

So– the next step will be to complete the “graduation” of the plate– carving away the majority of the wood thickness from the inside of the plate, so that the plate is the correct thickness all over…ranging from 9mm at the center, all the way down to 5mm in the flanks.

Ready to carve the front plate graduations of the five-string double bass.
Ready to carve the front plate graduations.

But…I will leave that post for another day.

Thanks for looking.


Beginning the Neck

Beginning the Neck and Scroll

Laminating the Neck-billet

All of the Big Leaf maple portions of this bass are made from a log I was given, years ago, by the late Terry Howell. The fellow I hired to mill it up said he did not know how to do quarter-sawing or flitch-sawing, so I settled for plane-sawing, which means that all I have is slabs. That is OK, because I like using slab-sawn wood, especially for backs; but it also meant I had no pieces thick enough for a neck on a bass. So…I chose to glue-laminate the neck billet, and produce a piece thick enough to use.

Contrary to my usual rule of “nothing but hot hide-glue,” I chose to use Titebond on this, reasoning that it is not supposed to ever come apart. One of the reasons we usually stick with hot hide glue is that it is always reversible. Titebond is not.) My son Brian lent me about a dozen clamps to make the job easier. He makes exquisite guitars, and learned early the value of having lots of clamps available.

Neck billet bookmatched, glued and clamped for the five-string double bass.
Neck billet bookmatched, glued and clamped.


The resulting billet was still about 3/4″ too narrow to accommodate the “ears” of the scroll, so I added a layer on each side, carefully chosen from nearby grain, so they would match (hopefully), and not be too obtrusive.

Extra wood glued on for
Extra wood glued on for “ears.”

Carving the scroll

Finally, I drew in the planned shape of the entire scroll and pegbox, and proceeded to cut away as much waste-wood as possible, using a saw.


scroll and pegbox from a five-string cello.
I forgot to photograph the initial carving portion, so this is from a five-string cello I made earlier. The same process is followed.


Saw-work on a viola scroll.
Saw-work on a viola scroll…I forgot to photograph this step on this bass.


Removing waste wood using gouges.
Removing waste wood using gouges. (Again, this is a viola scroll; but the same principle applies.)


All saw-work is done on the five-string bass scroll.
All saw-work is done on the scroll…time to remove wood using gouges and planes.


Removing waste wood from the 5-string double bass scroll, using a gouge.
Removing waste wood using a gouge.


Removing waste wood from the 5-string double bass scroll using a palm-plane.
Removing waste wood using a palm-plane.


Waste wood has mostly been removed from the 5-string double bass scroll.
Waste wood has mostly been removed. Time to begin the pegbox and volute.

Carving the Pegbox

Pegbox drawn and ready to carve, for the 5-string double bass.
Pegbox has been drawn and is ready to carve.


Beginning the interior of the pegbox for the 5-string double bass.
Beginning the interior of the pegbox.


Pegbox carving is complete for the 5-string double bass.
Pegbox carving is complete.

Carving the Volute

Beginning the volute for the 5-string double bass scroll.

Bass Scrolls are BIG!

Large viola scroll inside the five-string double bass scroll.
That large viola scroll fits easily…loosely…inside the bass pegbox. Reminds me of a mother monkey cuddling her baby. The bass scroll is simply huge, compared to any other instrument I build. (No, I will never build an octobass.)

As you can see, there is a lot that goes into carving a scroll…and this thing is really big! So, though I’m not done, I will go ahead and post this, and share the rest as it gets done. (The turns of the scroll will be more deeply undercut, and all surfaces more refined.)


Thanks for looking