
Neck Progress
Reinforcing the Neck
When I last posted, I showed the garland with the Sitka Spruce front plate installed, and the completed Oregon Big Leaf maple back plate sitting on it (because I wanted to see it that way) with the neck block (also Oregon Big Leaf Maple) beside it. You can see in that photo that I had already installed carbon fiber reinforcement rods, bedded in epoxy, to stiffen the neck. But I didn’t say how they got there.
The problem with maple is that it is fairly flexible. Usually, that is not a concern, because the instrument necks also have a fingerboard added on (usually of ebony) which is very stiff, so that the flexibility of the maple is not much of an issue. But, when the fingerboards become thin, after years of being used, re-surfaced, and used again, the frequent “re-dressing” of the fingerboards thins them to the point they are no longer stiff enough to bear the stress of the string tension, and the neck begins to bow forward, under string tension.
Carbon fiber is very light and extremely stiff, so it makes an ideal material for reinforcement. Carbon fiber rods are available in a variety of shapes and sizes. I chose 1/8″ x 1/2″, and they arrived in two-foot lengths from the “Dragonplate” company.
I do not have a router table, nor even a table saw, so I used my hand-held circular cut-off saw (commonly called a “skill-saw” as “Skilsaw” was an early brand of this sort of tool.) I set the blade on the saw to 5/8″ deep, and, having already drawn the lines where the cuts should go, I clamped the neck block in the vise, with a block beside it to guide the saw, and simply sawed slots into which to fit the carbon rods. The slots did not fit well, as the blade was not wide enough, so I attempted to use a hand-held router to widen the slots, but I did not have the correct bit for the router, and they were very expensive at the local hardware store, so I carved out the remaining wood, using my knife and a small chisel.
Once the slots were satisfactory, I mixed my epoxy, filled the slots, and pressed home the carbon rods. The epoxy I chose to use was advertised as “15-minute” epoxy, but all it meant was that I would have 15 minutes of working time, in which to get the rods in place, the epoxy smoothed over the tops of them, where it had squeezed out, and be done tinkering with it. It turned out to achieve full cure in about 24-hours… by the next day, in other words. No problem: I had plenty of other work to do while I waited.
So, I scraped all the excess epoxy off of the neck joint face, where it would be glued to the fingerboard, and waited until the epoxy had fully cured, before sawing off the excess carbon fiber rods, using a hacksaw.
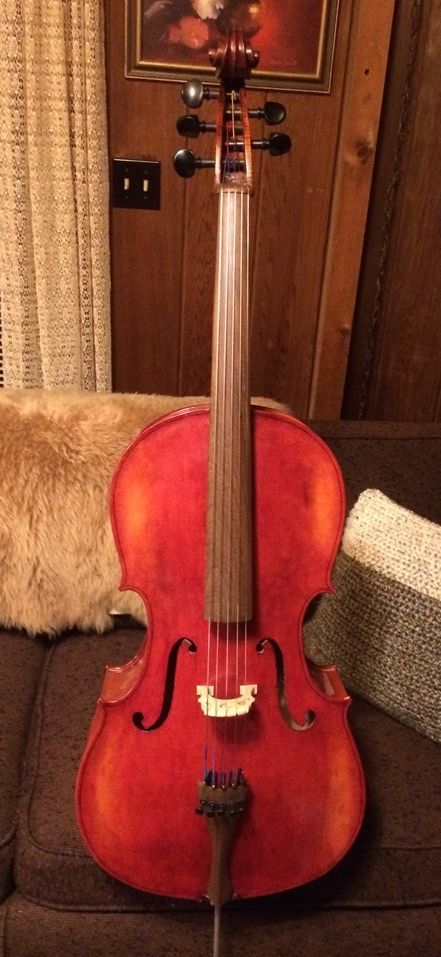
The result is a five-string double bass neck that will never become bowed or warped.
Ipé Fingerboard and Tailpiece
I chose to use Ipé instead of ebony for my fingerboard and other fittings, as it is more readily available, it is not a threatened species, and I like the finished color (dark brown.)
Ipé is an extremely hard, dense, South American hardwood, similar to Ebony, in terms of hardness and durability. It is difficult to work, as are all the extremely hard, dense, tropical woods, but I like the finished product. Here is a fingerboard on a five-string cello I made some time ago:
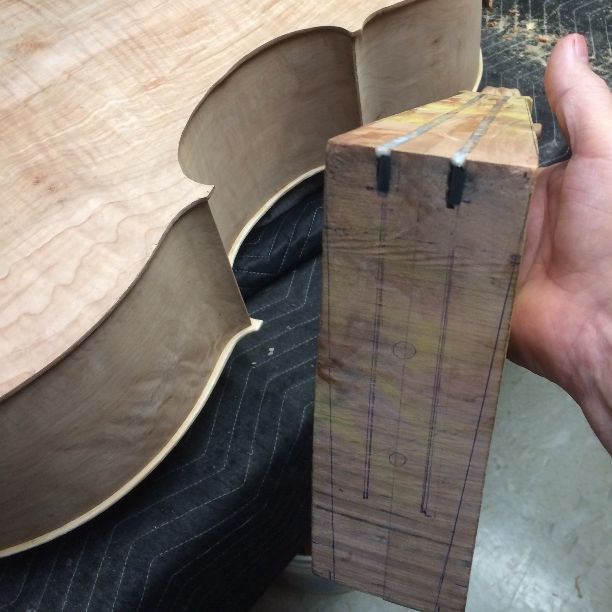
So, I decided on the shape and size of the fingerboard and tailpiece, and then cut them out on my bandsaw. Then I used gouges and planes to shape them appropriately.
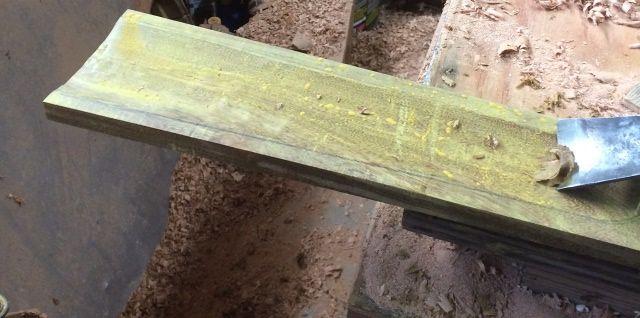
The dust from sawing, planing, scraping or sanding Ipé wood is a bright yellow color, and it fills the pores of the wood, giving the wood a greenish-yellow look while it is being worked. But that color disappears entirely when the wood is finished, and the Ipé becomes a dark brown color.
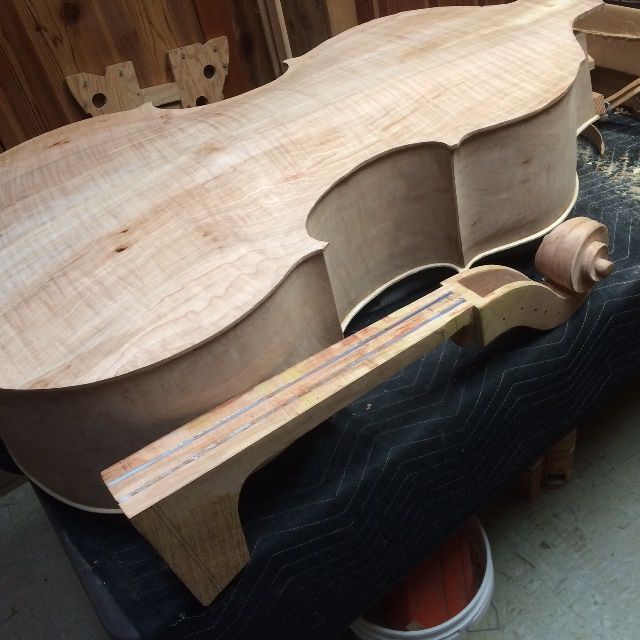
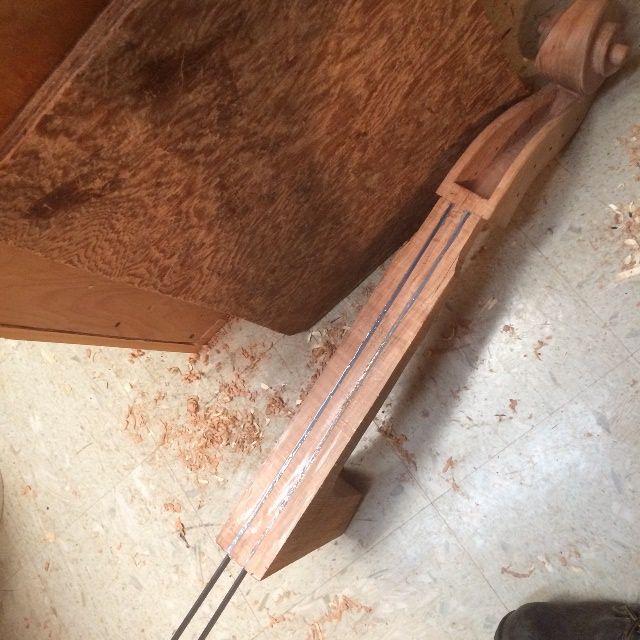
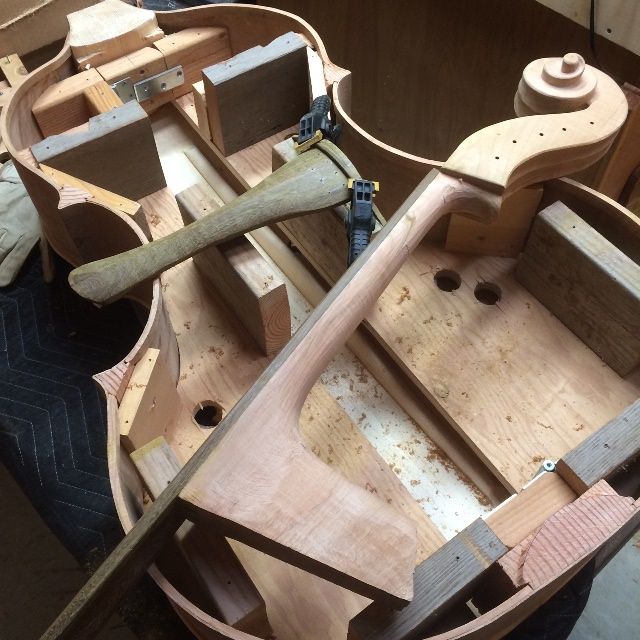
I glued the fingerboard to the neck block when it was nearly complete, and then completed the shaping of the fingerboard with the neck as a unit. The tailpiece, too, is only partially completed.
.JPG)
My wife was a little perplexed about the odd color of the Ipé wood, so, after completing the preliminary dressing of the fingerboard, I used a paper towel, and rubbed the fingerboard down with turpentine, to show the color as it will look when finished. I also rubbed a small portion of the tailpiece, to show the stark contrast between the color of the Ipé when freshly worked, and when finished. (The turpentine is not the finish, obviously, but the color will be very similar, as a light coat of linseed oil rubbed into the wood probably will constitute the finish.)

I went ahead and began the shaping of the neck at the same time, so it is beginning to look the way it will be when completed. When the neck shape is correct, I can begin the neck-set procedure. This is the first time I have attempted a removable neck, so I am a little apprehensive about it. All I can do is press on, and see how it works.
Here is how it all looks right now:
When completed, the tailpiece will accommodate five strings, and have a “fret” inlaid across the upper end, to provide a hard “stop” for all the strings at the same point. The “Fret” is made of Ipé wood, too, bent to shape with heat and pressure, then clamped to the tailpiece to cool in that shape. Next, I will cut the slot in the tailpiece to allow the fret to be inlaid into the tailpiece, and drill the holes for the string-slots and the tailgut wire.
After that, I will begin the neck-set, I hope.
Thanks for looking.