Finishing Procedure for an Oliver Five String Fiddle

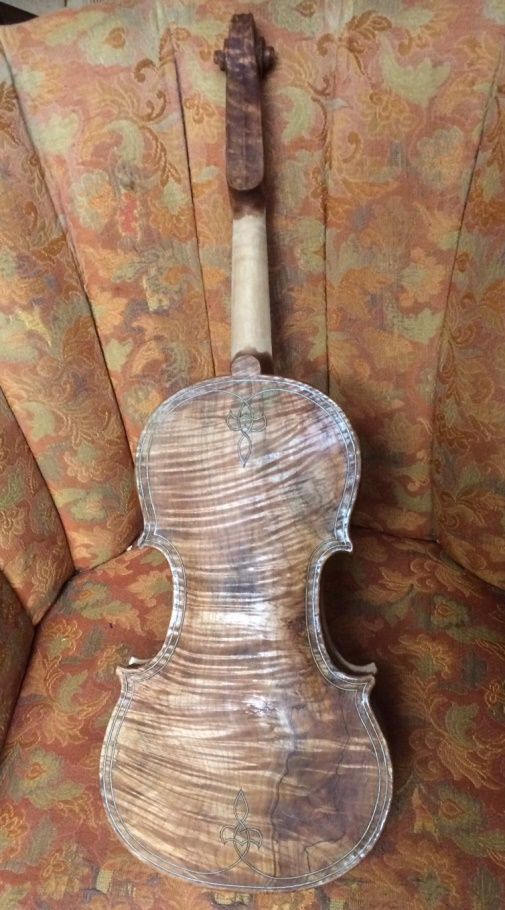
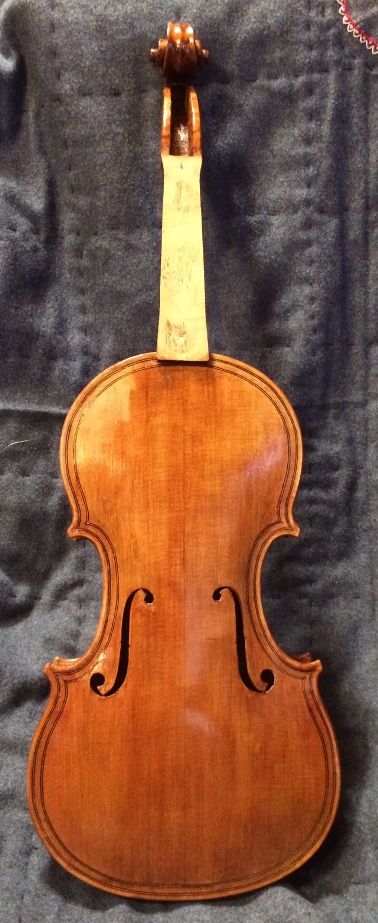
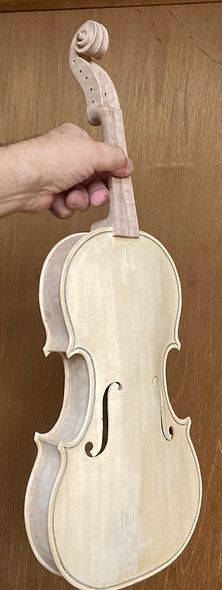
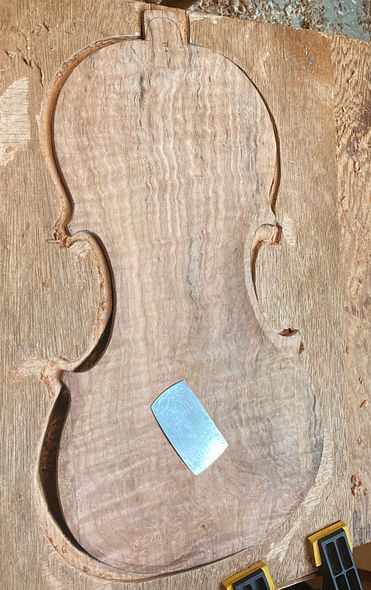
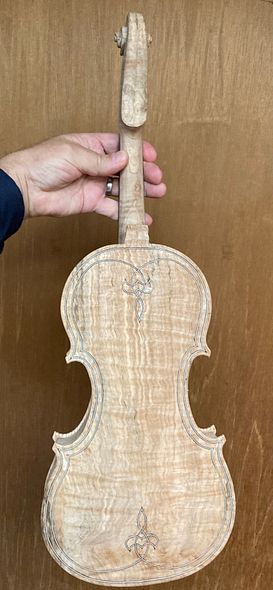
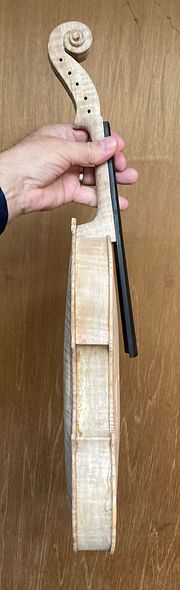
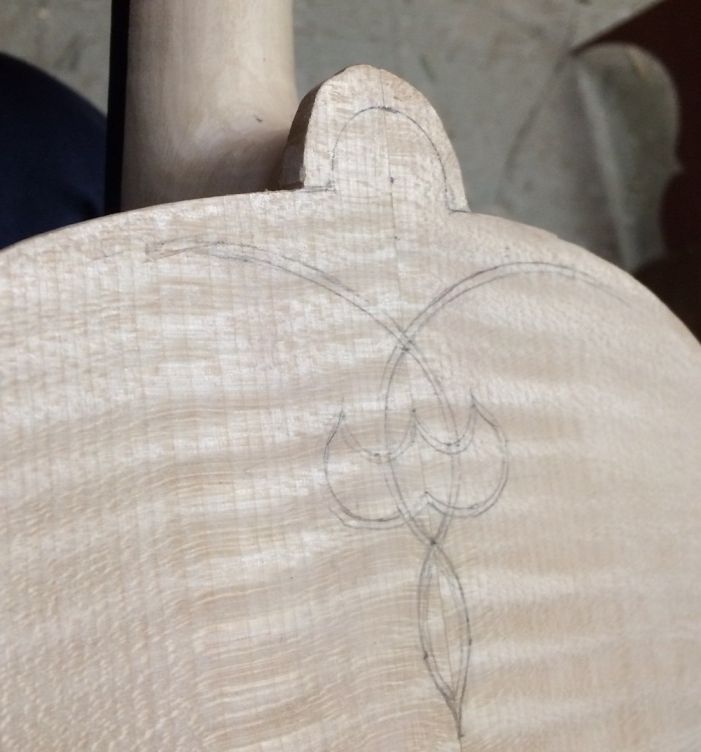
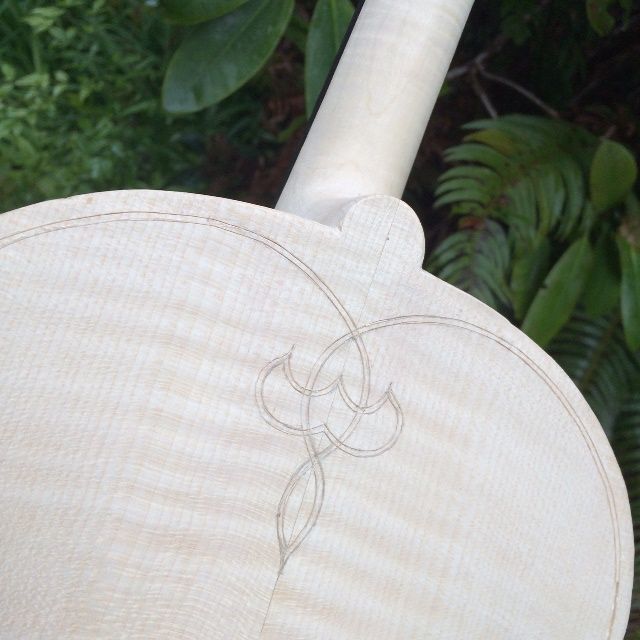
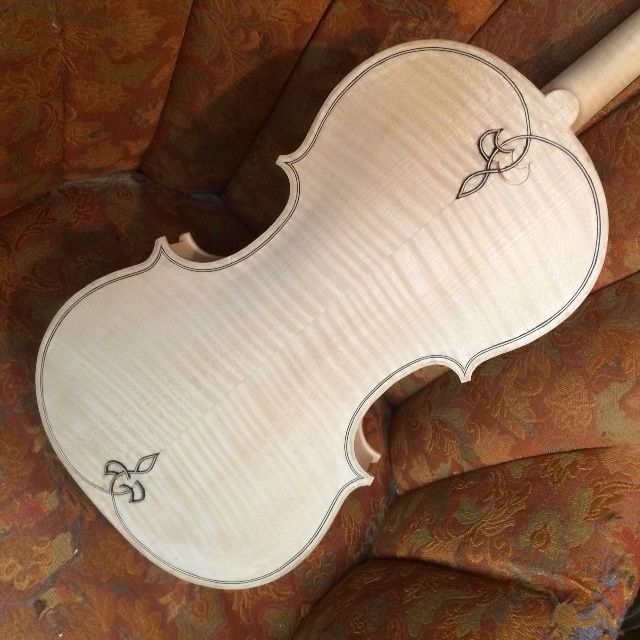
Starting With Bare Wood

Last time, I gave a preview of some of the varnish procedure.

But, to be more specific, let’s walk through the varnishing process:

Bare wood front of five string handmade bluegrass fiddle handcrafted in Oregon by artisanal luthier Chet Bishop
Bare wood, front view
Bare wood back of five string handmade bluegrass fiddle handcrafted in Oregon by artisanal luthier Chet Bishop
Bare wood, back view

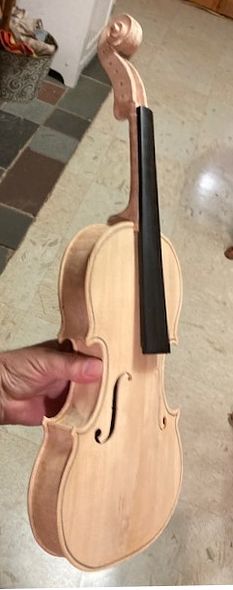
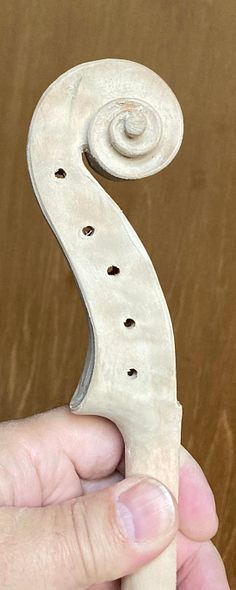
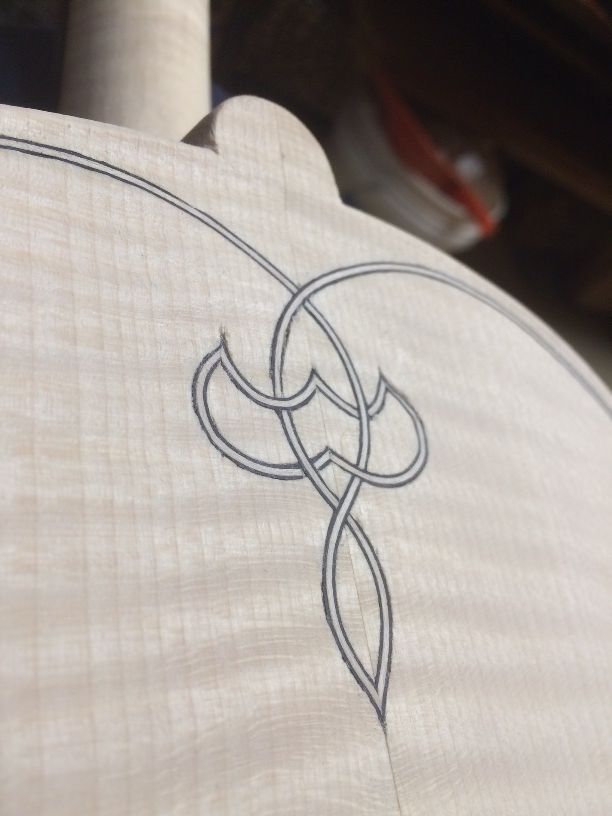
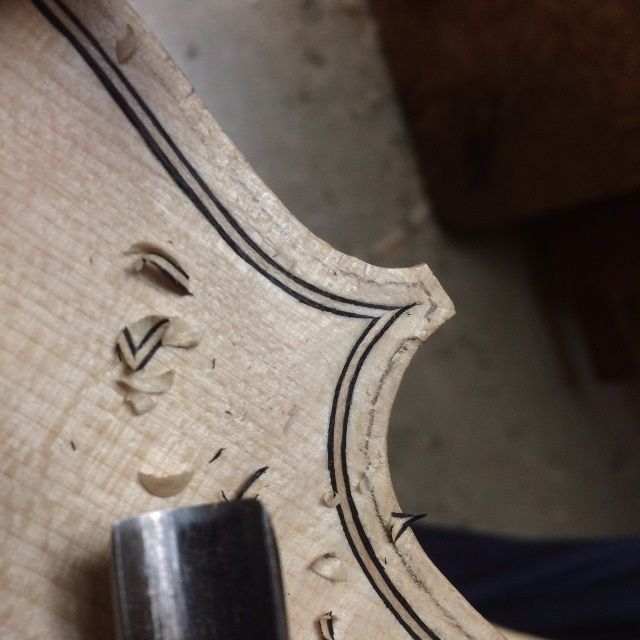
Peparing for Varnish

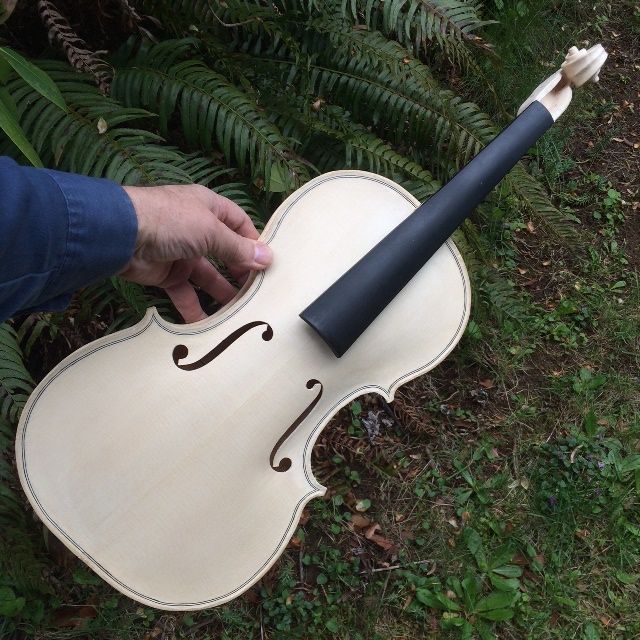
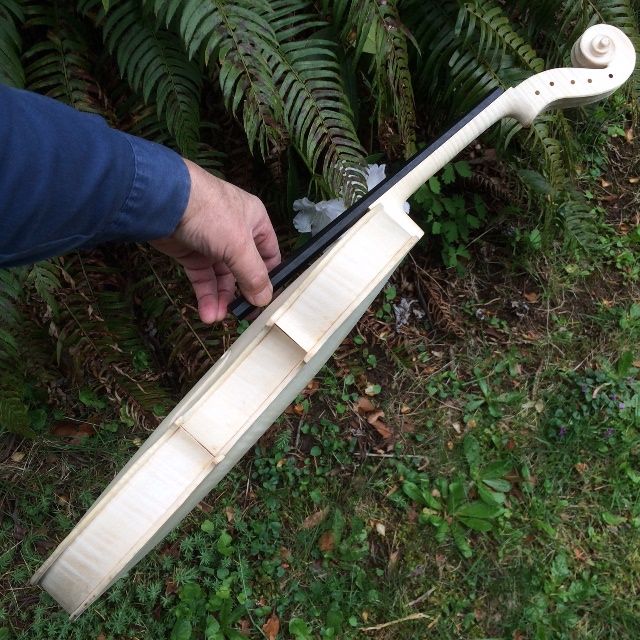
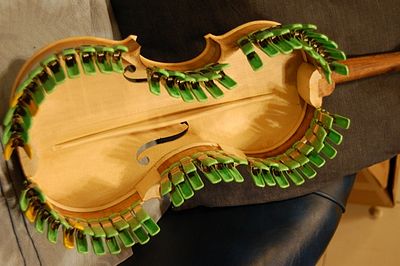
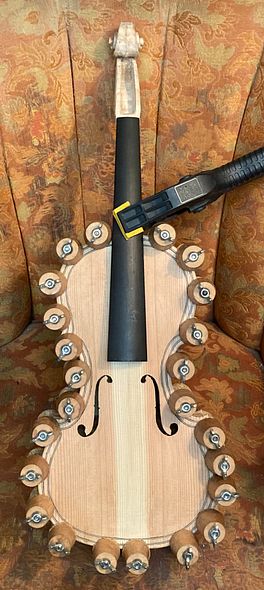
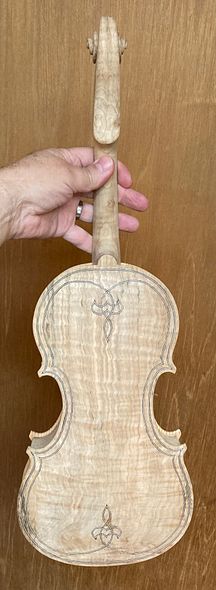
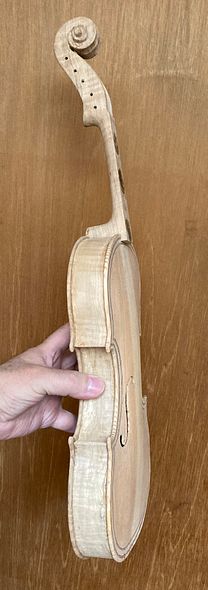
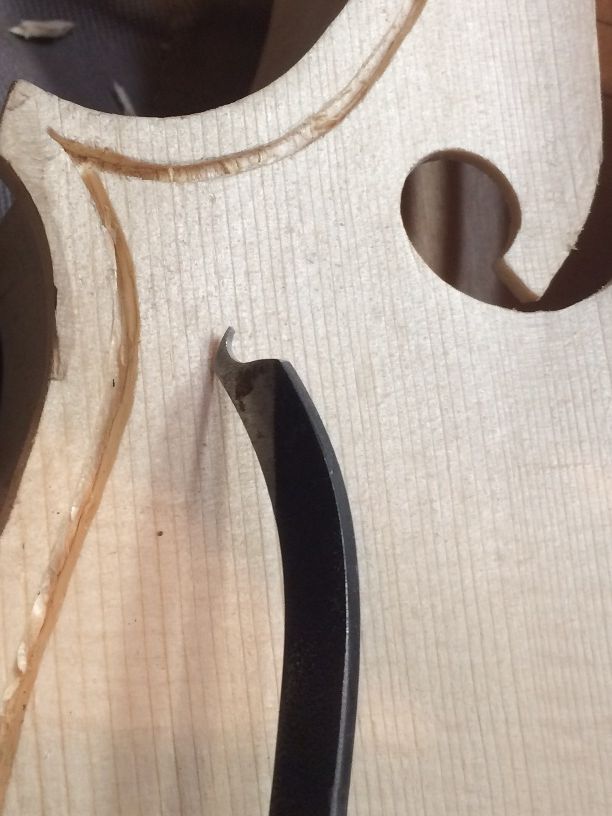
First, I removed the fingerboard to give me access to every square milimeter of the outside of the instrument. Next, I used low-angle light, to cast dark shadows so that I could see all the discontinuities, humps and hollows. Then, I gently scraped all the surfaces to remove all of those discontinuities.

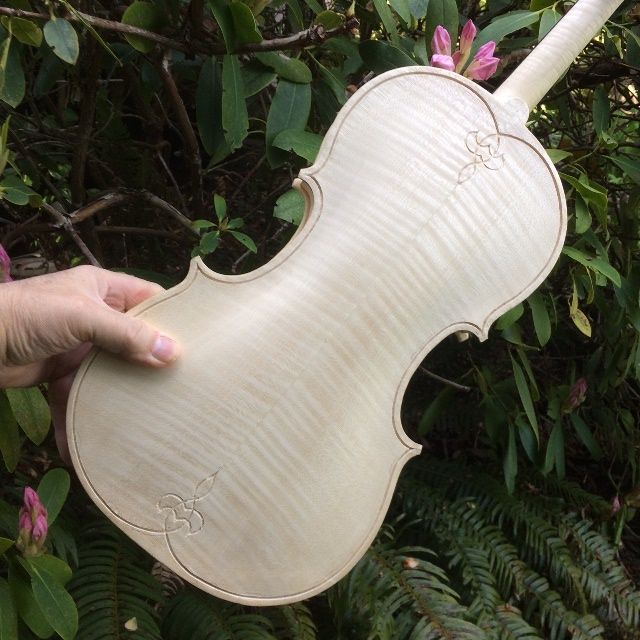
Finally, I was ready for the varnish procedure:

Five string fiddle ready for finishing, handmade in Oregon by artisanal luthier Chet Bishop
Bare wood, scraped and ready for finish

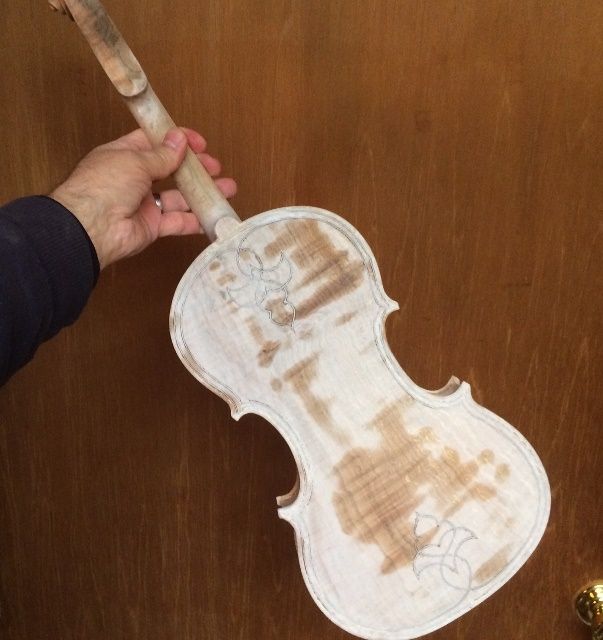
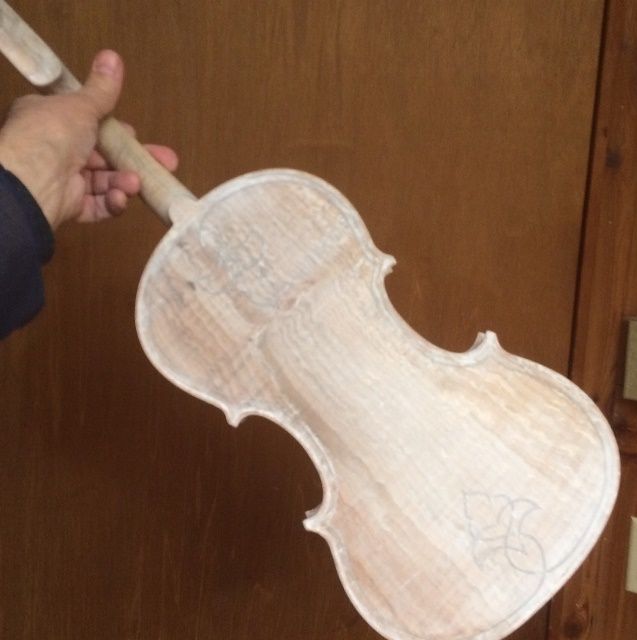
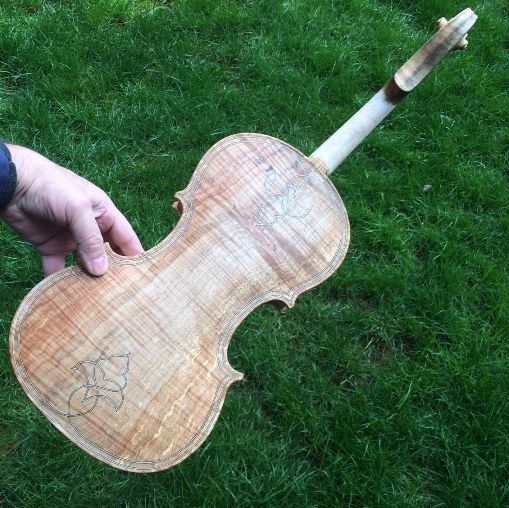
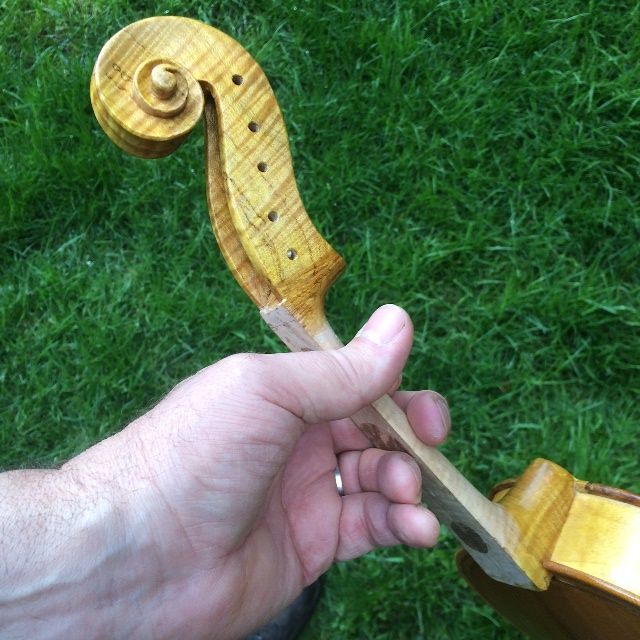
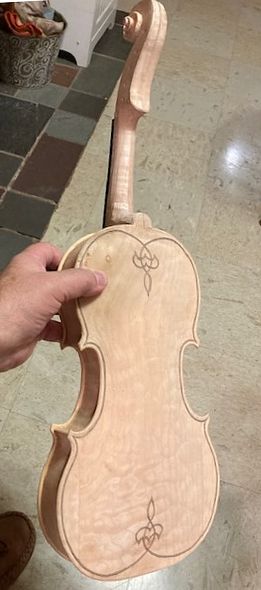
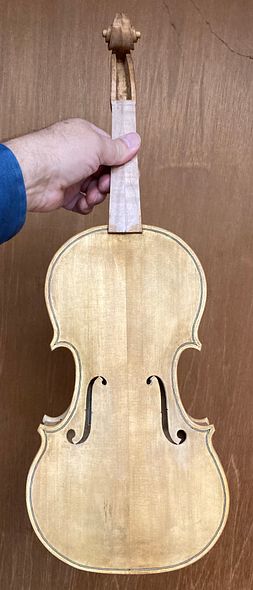
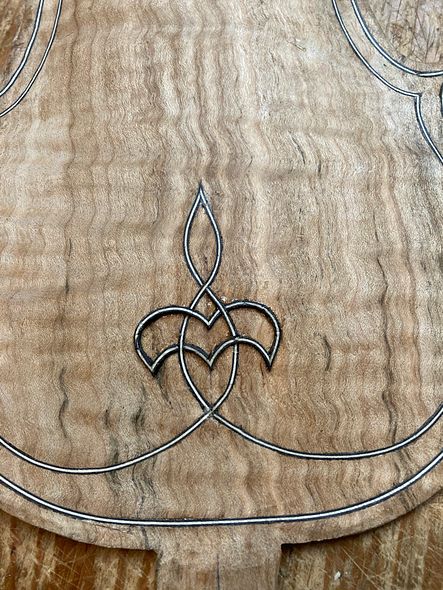
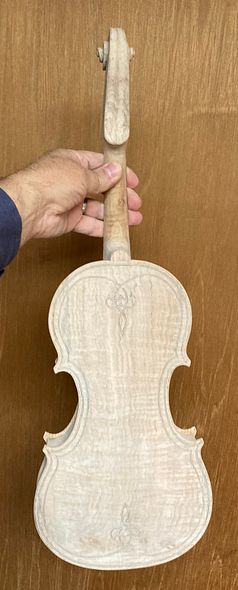
Mineral Ground to Close the Pores

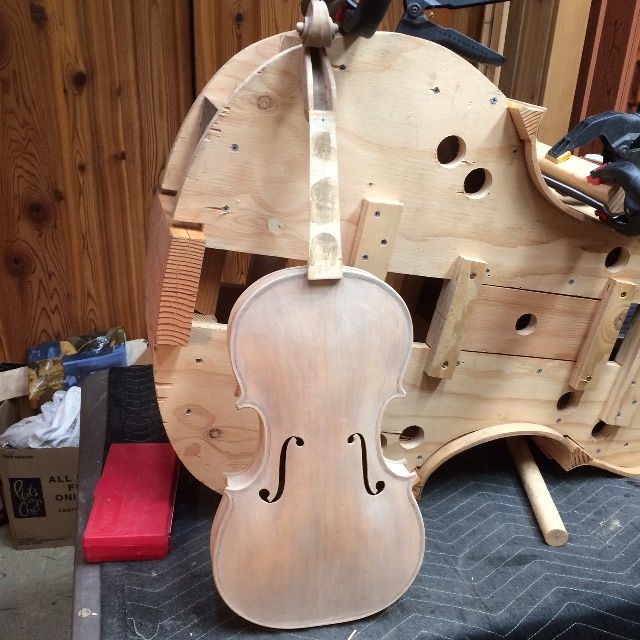
To begin with, I used a suspension of fine particles of gypsum in either water or coffee, to form a mineral ground.  First, I brushed the mixture onto all the outside surface except the handle area of the neck, Then, using my fingers, I rubbed the mixture into the wood, so as to fill the natural pores wtih “nano-particles” of the gypsum.

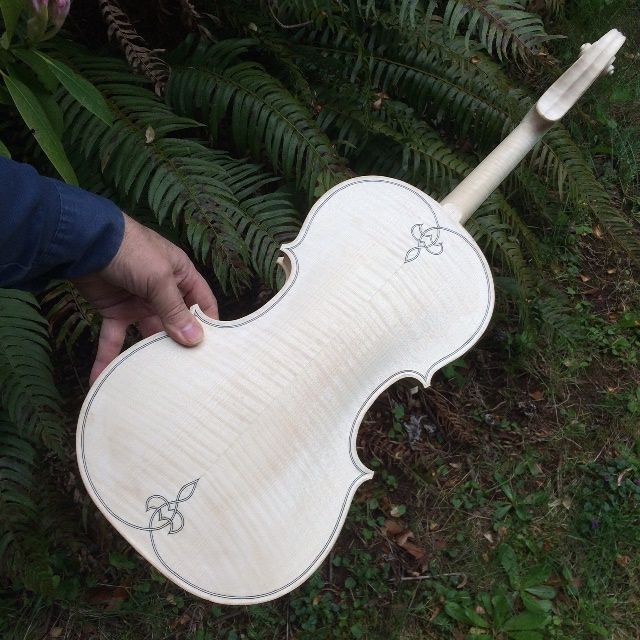
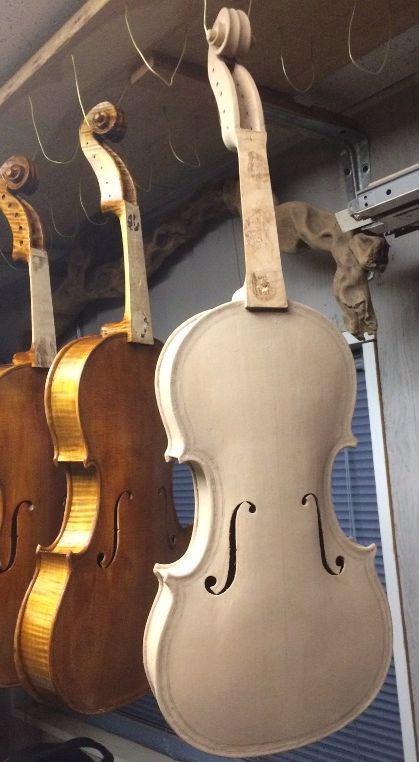
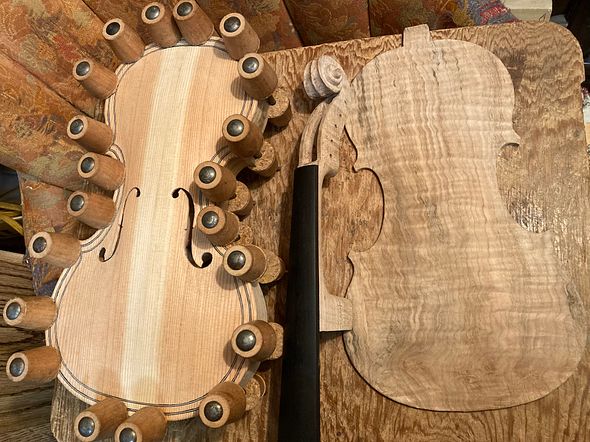
After the mixture dries, the instrument looks chalk-white, and the mineral ground obscures the wood grain.

Front view of five string fiddle in gypsum, ready for varnishing.
Dry Gypsum, Front View
Side view of five string fiddle in dry mineral ground
Side View, Dry Gypsum ground.
five string fiddle back in dry mineral ground
Back view, Dry Gypsum ground
Five String scroll in dry Mineral Ground
Scroll with Dry Gypsum ground

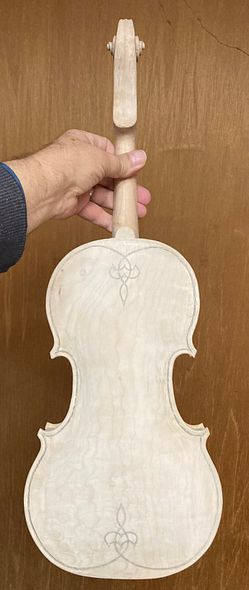
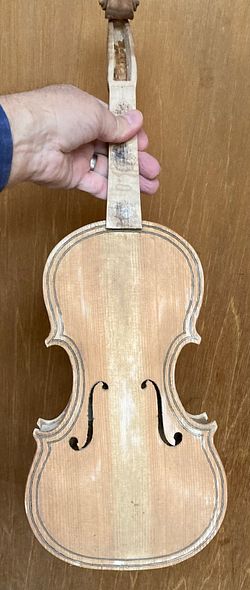
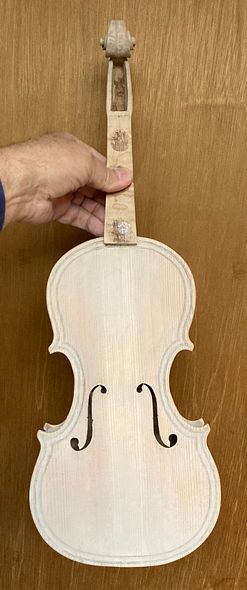
Then, I used 400-grit sandpaper to very lightly rub off any excess dry gypsum, which still left the violin looking stark-white, as the gypsum had filled the pores of the wood.

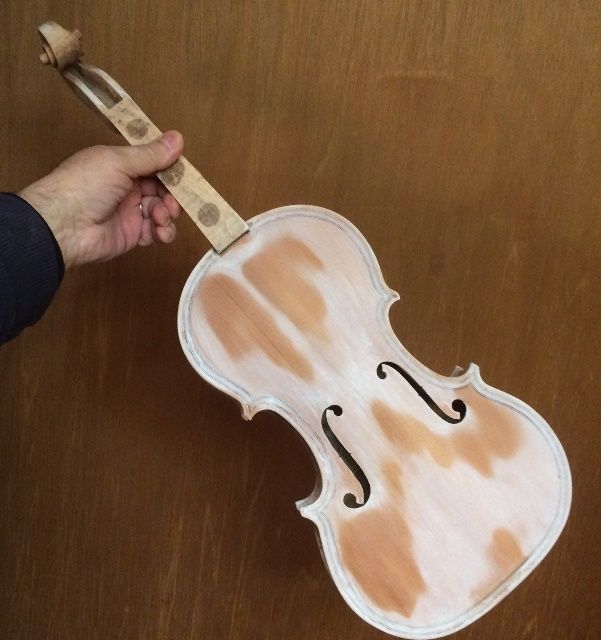
Obviously, that (mineral ground) stage of the process looks pretty awful. but the next step (sealer application) always feels like “magic” to me. The sealer makes the mineral ground permanently “disappear!”
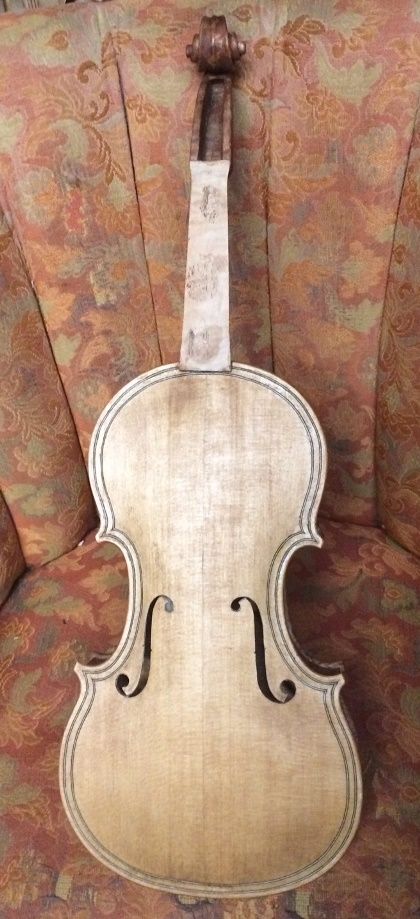
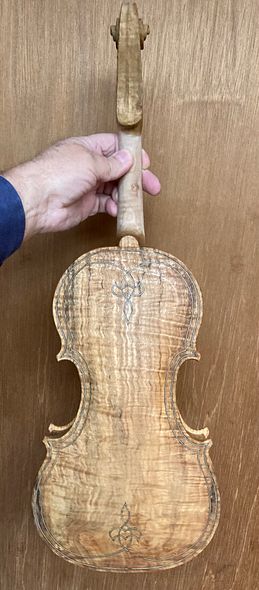
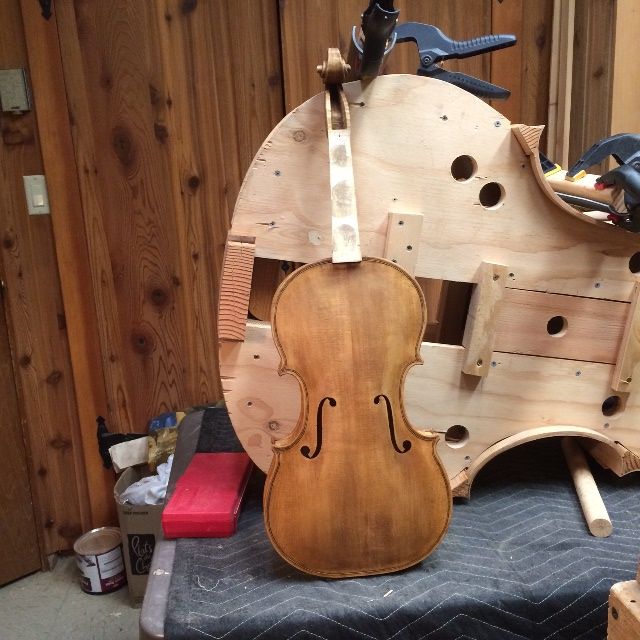
Sealer

For the last ten years, or so. I have used a sealer which is simply a thin solution of rosin in alcohol. Sometimes, I use turpentine instead of (or in addition to) the alcohol. Either way, the solvent carries the rosin into the pores, surrounding the particles of gypsum, and thereby rendering the particles tranparent. (However, on this fiddle, I chose to use alcohol as the solvent.)

Front of five string fiddle with rosin sealer applied
Front view with sealer
side view with sealer
Side View With Sealer
back view with Sealer
Back View With Sealer
Scroll with Sealer
Scroll With Sealer

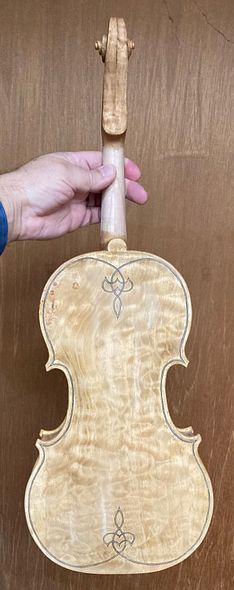
Obviously, the mineral ground has done its work, plugging the pores against penetration by varnish. However, it has also become permanently invisible.

NOW we Varnish!

When I began making violins, I was using oil varnishes. Later, I switched to spirit varnishes. Today, I am still using a spirit varnish.

The main chemical difference between the two is that an oil varnish is composed of a mixture of a drying oil and a resin of some kind. The varnish-maker cooked the oil and resins together at a high heat, thereby forming a polymer, which is no longer either oil or resin. It does not dry by evaporation so much as by a continuation of the poymerization process, and by “off-gassing” the volatile portions left in the mix.

Varnish makers prepare the spirit varnishes, on the other hand, by dissolving one or more resins in a solvent. Incidentally, the solvent is usually, (but not always) alcohol. When the solvent evarporates, the resin (or resins) remain(s) in and on the wood, to finish hardening. (The mineral ground helps  to prevent deep penetration of the varnish into the wood. This is desireable because the varnish-saturated wood does not vibrate the same in comparison to the unsaturated wood, and it can thereby dampen the sound.)

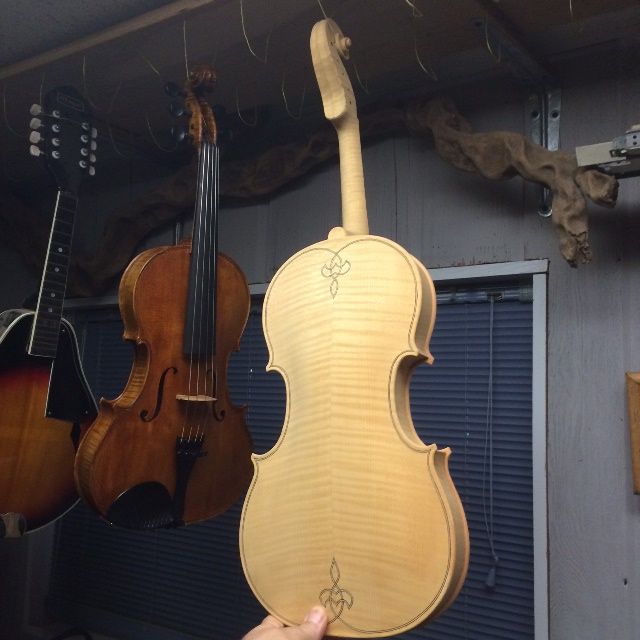
I always begin with a yellow varnish, so that the yellow base coats will “shine through” any thin areas of the darker vanish, providing a reflective “glow” from within.

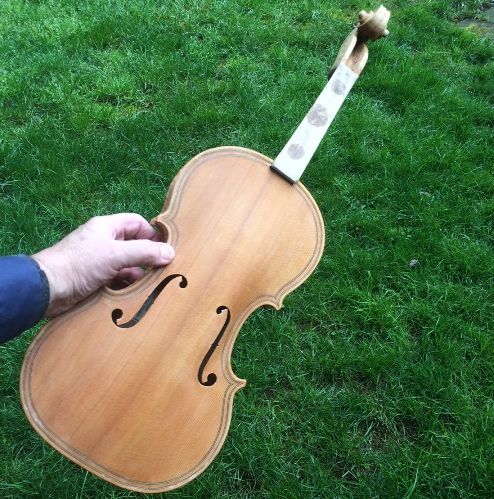
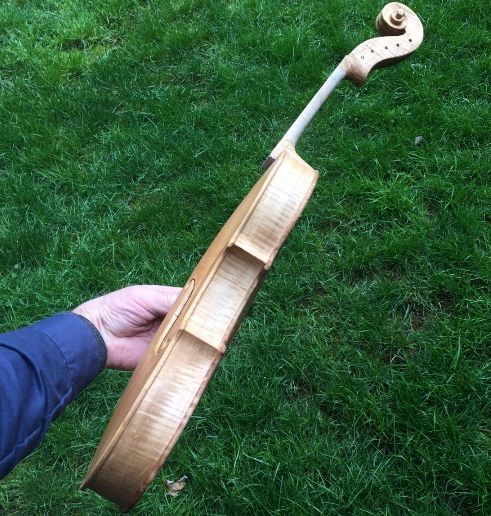
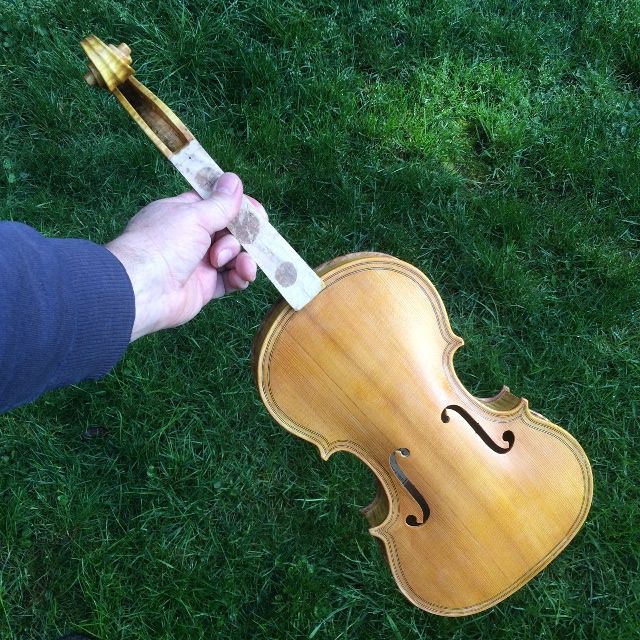
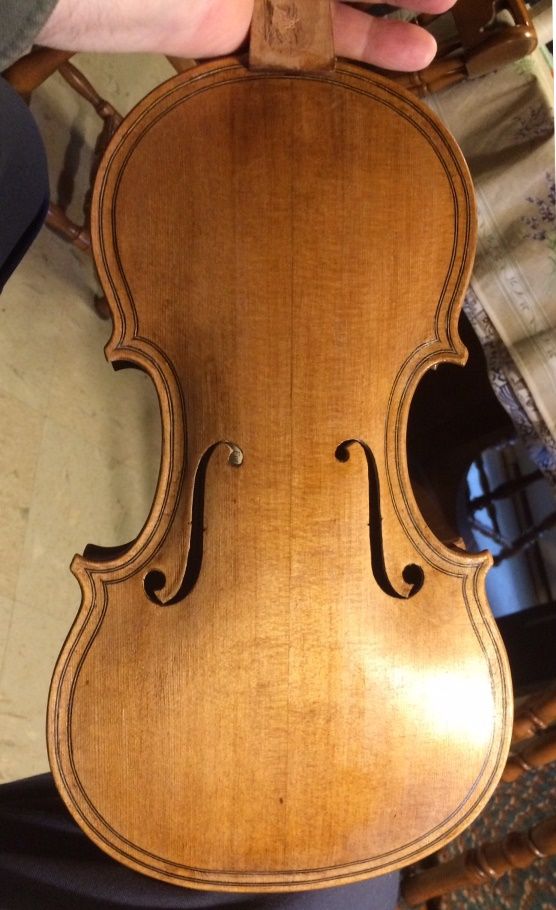
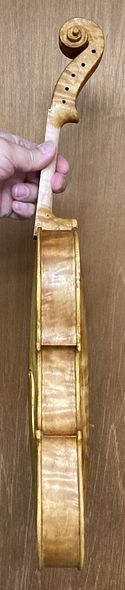
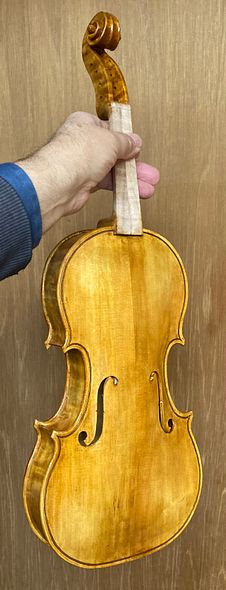
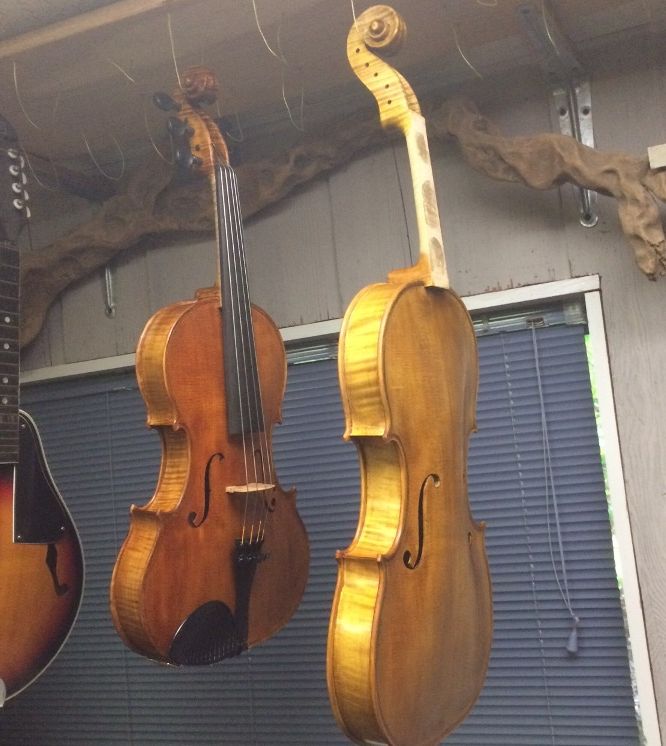
Yellow Varnish Base Coats

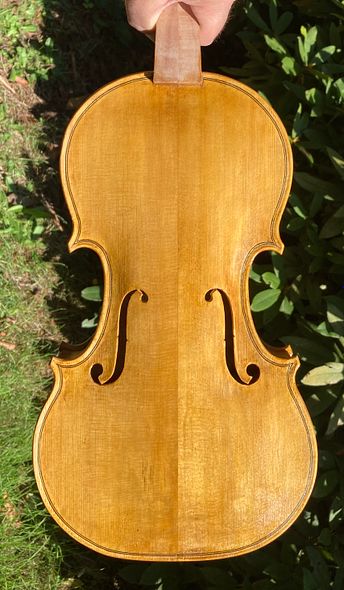
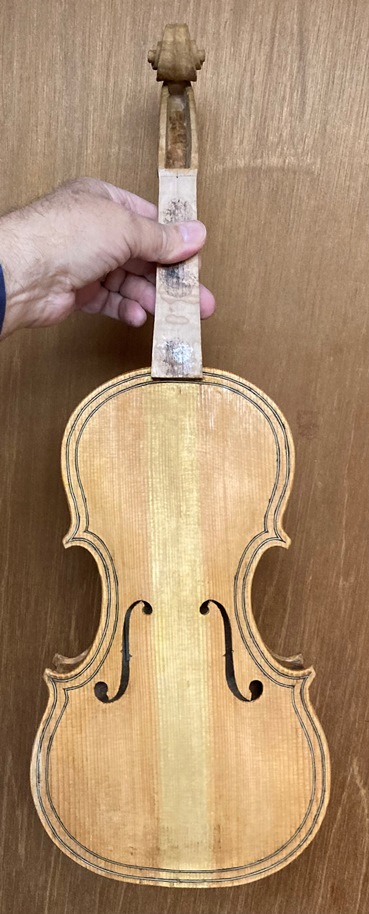
Here is the fiddle with two coats of yellow varnish:

Two coats yellow varnish on a handmade bluegrass five string fiddle handcrafted in Oregon by artisanal luthier Chet Bishop
Front View, two coats Yellow
Treble side view five string fiddle 2-coats yellow varnish
Side View, Two Coats Yellow
Back view 5-string handmade bluegrass fiddle with two coats yellow varnish, handcrafted in Oregon by luthier Chet Bishop
Back view with two coats yellow varnish
5-string bluegrass fiddle scroll with two coats of yellow varnish; handcrafted in Oregon by artisanal luthier, Chet Bishop.
Scroll with two coats yellow

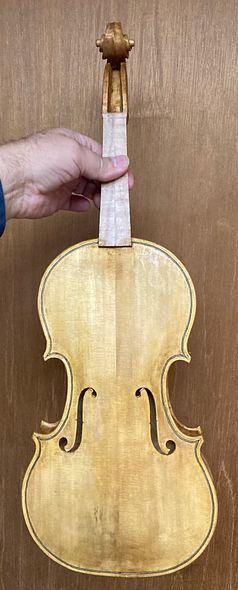
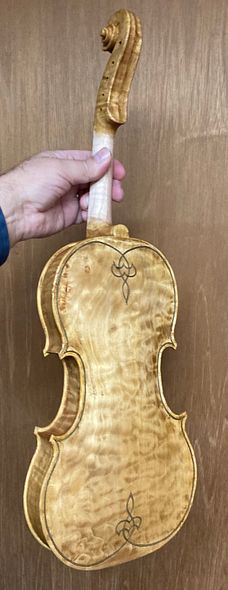
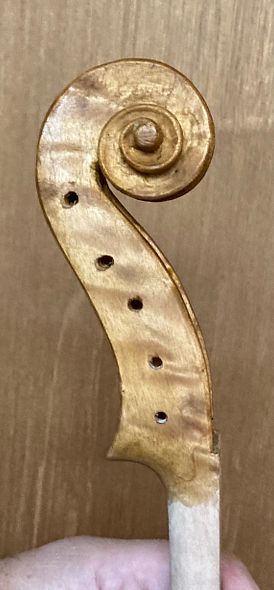
The grain begins to become more visible with thje addition of the varnish. There is a temptation to stop early, because the grain becomes highly visible after about three or four coats of varnish. But it will look better with more.
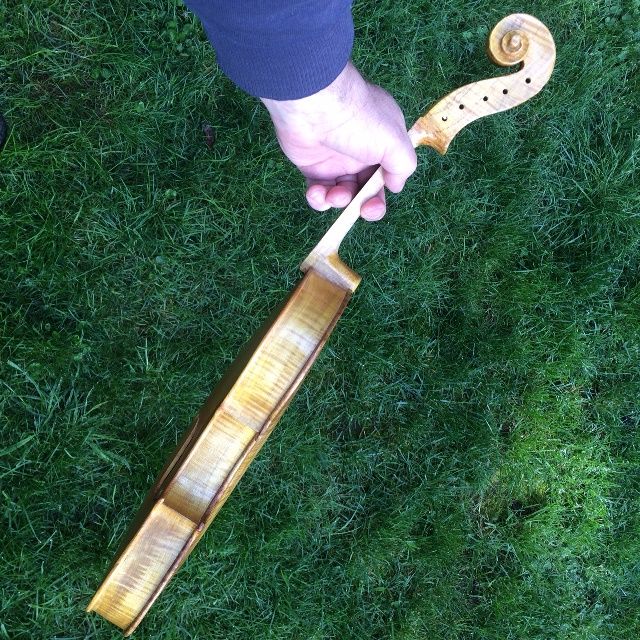
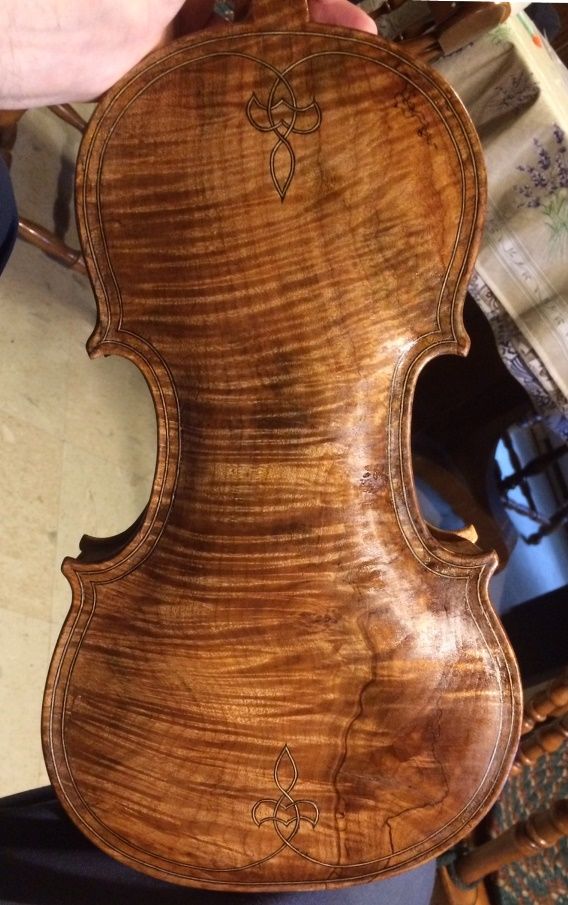
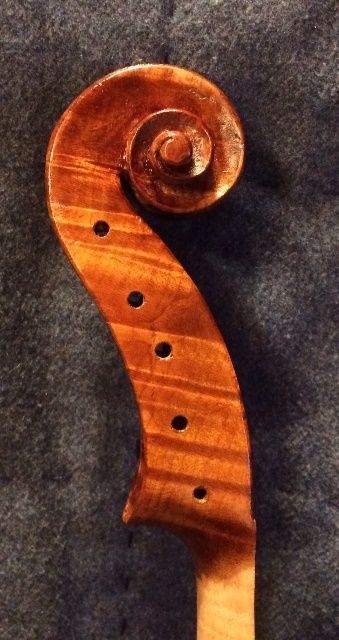
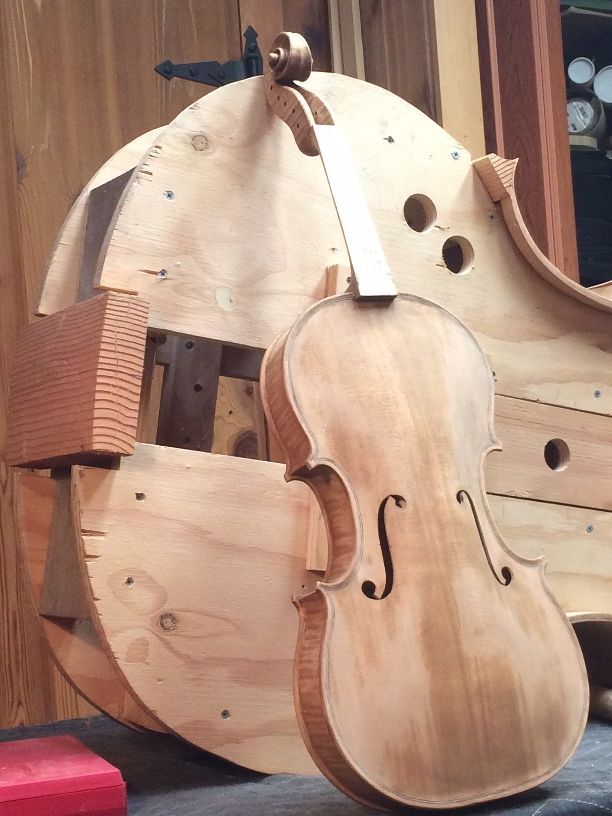
Building the Color

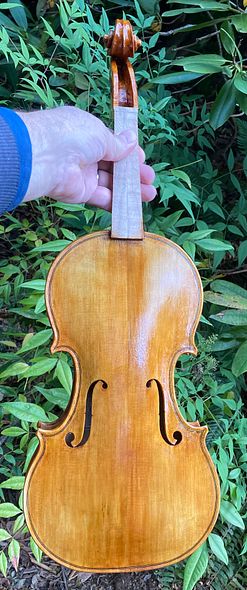
I began deepenind the color by simply adding a thin coat of brown varnish, over the yellow base coats.

One thin coat of brown varnish over the yellow varnish
Deepening the color: one coat brown varnish.

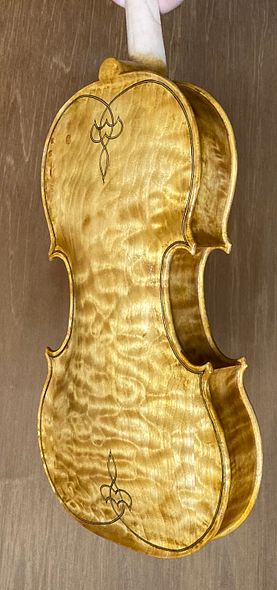
I loved this look…it seemed as though the Quilted Maple wood was in flames, or perhaps as if I was seeing an incredibly dramatic sunset in progress. But I knew it needed more.
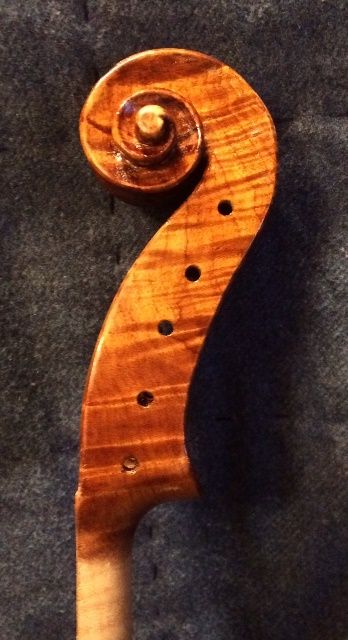
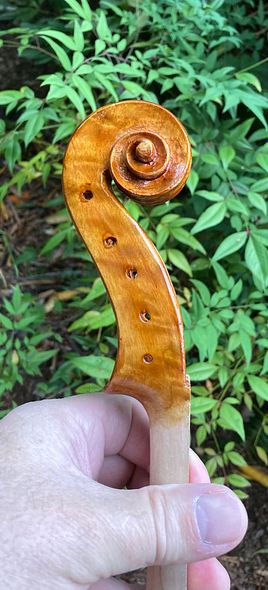
two coats brown over yellow
Two coats brown over yellow. Back
two coats brown over yellow front
Brown  (two coats) over yellow, front view
Brown over yellow varnish on scroll of five-string bluegrass fiddle handcrafted in Oregon by artisanal luthier Chet Bishop,
Scroll with Brown varnish over Yellow

Shading

Obviously, (as you can see) I am applying more color in certain areas. I am attempting, thereby, to give the impression of truly aged varnish (where the colored varnish has ben worn away in certain areas through much use.) Some people don’t like that look, but many do. Most importantly, I like it. Charles Beare was famously quoted as having said, “There is absolutely no reason  to ‘antique’ or ‘shade’ a new instrument...unless you actually hope to sell it!” (Apparently I’m in good company!)

So, I apply more varnish in the areas where hands would be least likely to touch, and where the surface is least likely to be abraded by any means. But, I try to be gentle about this, not heavy-handed. Some (few) makers deliberately damage the wood, in an effort to imitate advanced age. Their instruments sell to people who like that look, but I don’t want to do that. Therefore. I simply brush on deeper color in the areas of least wear.

Usually, I prefer instruments to be at least a little leaning toward a red-brown color, so, I needed to add some red.
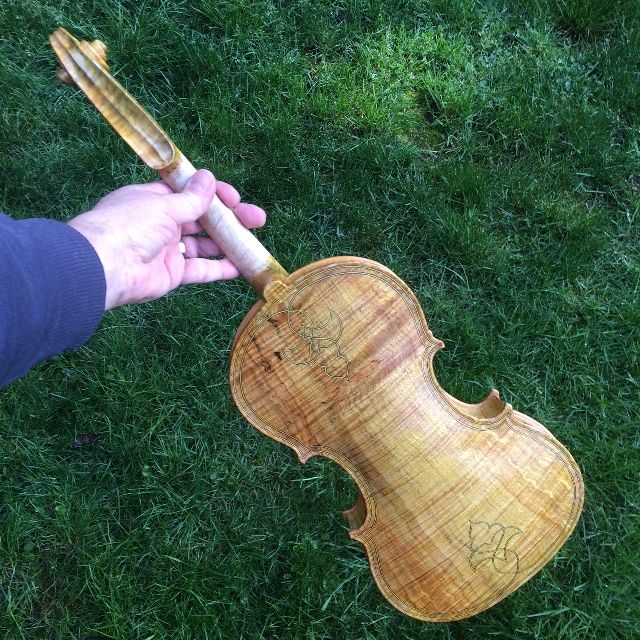
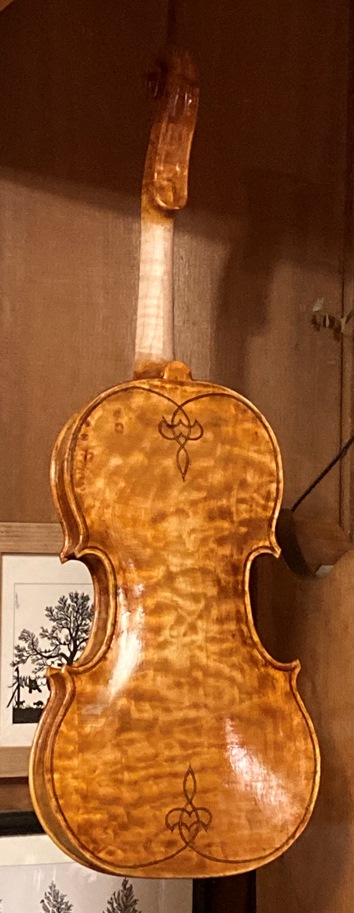
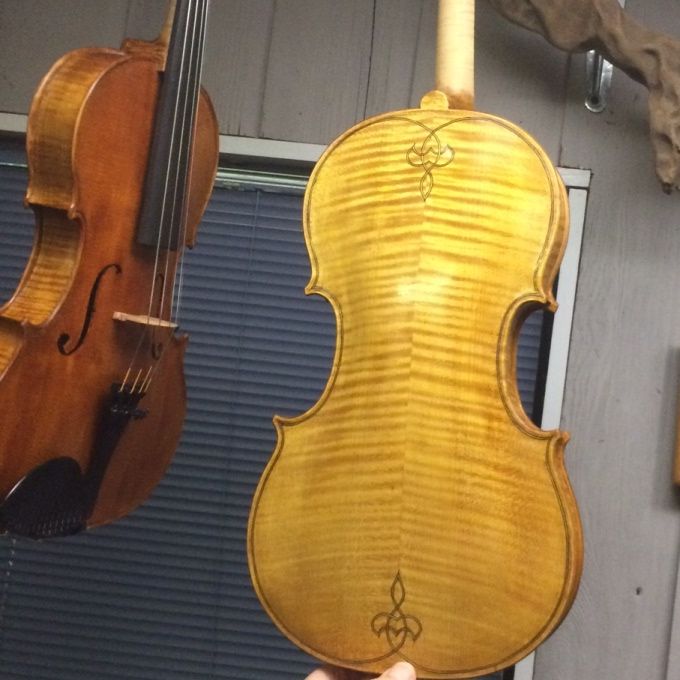
More Color

I brushed on a thin coat of red-brown varnish all over:

back of five string fiddle in varnish process.
Back view, leaning toward red
front view leaning toward red
Front view, leaning toward red
Scroll, leaning toward Red

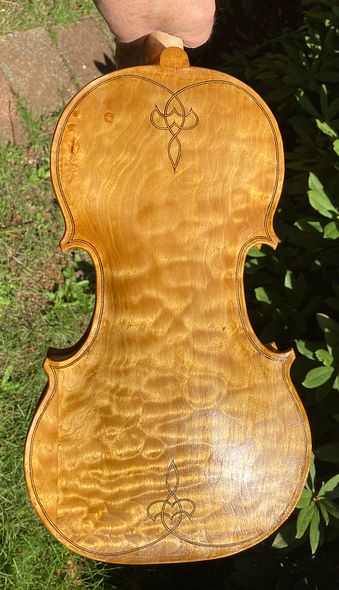
But it still needed more! Consequently, I added more brown in the corners, and allowed it to dry. Then I added more red.

Shading begun, with more red
Back with more red
Back with more red
Scroll with more red


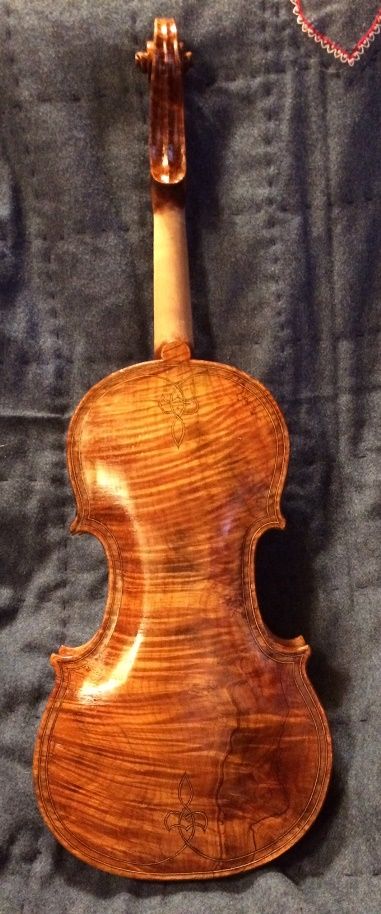
Finally, the varnish reached a depth of color about which I felt pretty good!

Final Color Front
Final Color Front
Final Color Back of handmade bluegrass 5-string fiddle, handcrafted in Oregon by artisanal luthier Chet Bishop
Final Color Back
Scroll of handmade bluegrass five string fiddle, handcrafted in Oregon by artisanal luthier Chet Bishop
 Scroll in its Final color 

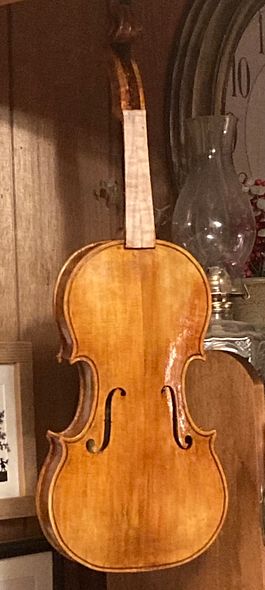
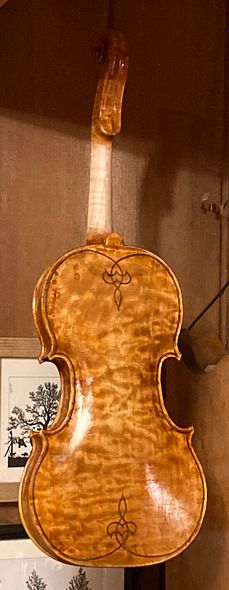
Then, I french-polished the instrument, to flatten any brush-marks. Now I will allow it to dry and harden for a couple of weeks before I set it up for playing. Otherwise, it will acquire deep fingerprints as I work on it.


Thanks for looking!

Getting “Closure!” What goes into the final assembly?

Setting the Neck

Front plate installed on five string fiddle handcrafted in Oregon by Artisanal Luthier, Chet Bishop.
Front, with rib garland, back, neck and fingerboard, nearly ready for assembly.

I failed to take photos of the actual neck-setting procedure on this violin. (Sorry.)  I will link to a series of photos from a previous instrument.  That one had a major “flesh-wound” mishap. (I accidentally thrust a gouge through my left thumb…but it does include the neck-setting process. And the wound healed!)

This one went very smoothly: I think it took less than an hour to achieve a perfect fit. Then I removed the interior mold, and installed the back linings, so that the corpus was complete and ready to receive the back plate.

Installing the back linings on a 5-string fiddle handcrafted in Oregon by Chet Bishop, artisanal Luthier.
Back linings, installed on an earlier instrument. Once again, I forgot to take pictures.

Completing the Back Plate

I also had to complete the back plate. I had already completed the outside arching, and most of the interior carving, as well. Still had to finish scraping the interior dead-smooth, then install the purfling, and the label.

Imterior of back plate of five string fiddle handcrafted in Oregon by Chet Bishop, artisanal Luthier.
Completing the interior of the back plate.


Beginning the purfling weave on the back plate of a 5-string fiddle handcrafted in Oregon by Chet Bishop, artisanal Luthier.
Beginning the purfling weave on the back plate.


Partway done with back plate purfling on 5-string fiddle handcrafted in Oregon by Chet Bishop, artisanal Luthier.
Partway done with back plate purfling.


Completing the purfling weave on a 5-string fiddle handcrafted in Oregon by Chet Bishop, artisanal luthier.
Completing the purfling weave inlay.

Once the plate was truly complete, I added the label, and installed the back plate on the corpus.

Installing the back plate on a 5-string fiddle handcrafted in Oregon by Chet Bishop, artisanal luthier.
The spool clamps hold the entire perimeter while the glue sets. the spring clamp holds the neck heel and button tightly in place.
Back plate installed, on a 5-string fiddle handcrafted in Oregon by artisanal luthier, Chet Bishop.
Back plate installed: notice that the button is far oversized. (See next photo.)
Side view of oversized button on a 5-string fiddle handcrafted in Oregon by artisanal Luthier, Chet Bishop.
The back button is deliberately left oversize, to be carved to final shape as a unit with the neck heel.
Button and heel carved to match, on 5-string fiddle handcrafted in Oregon by artisanal luthier, Chet Bishop.
Neck heel and button carved to match.

Preparing for the Varnish

I removed the fingerboard, to give me easy access to all parts of the front of the fiddle. Notice that the fingerboard had only been held by three “dots” of hide glue. even so, the glue took off a microscopically thin layer of ebony when I removed the fingerboard. (That is what the “black stuff” is.)

5-string fiddle in the white, handcrafted in Oregon by Chet Bishop, artisanal Luthier.
Fiddle “completed in the white.” Ready for all varnish-prep work.

Edgework and Varnish Prep

All final shaping has to be completed at this point: any bumps, humps and hollows have to be carefully addressed, using a sharp scraper, before the mineral ground is applied. The mineral ground is a suspension of extremely fine particles that “plug” the pores in the wood, so that the varnish does not penetrate deeply and deaden the sound.

I apply it wet, with a brush, and vigorously rub it into the wood with my bare fingers, then rub off as much of the excess material left on the surface as I can. It is not supposed to be “on” the surface, so much as “in” the surface of the wood.

Wet mineral ground on 5-string fiddle handcrafted in Oregon by artisanal Luthier, Chet Bishop.
Front side, with wet mineral ground.

The wet mineral ground temporarily darkens the wood, but, as it dries, it turns stark white.

Dry mineral ground on 5-string fiddle handcrafted in Oregon by Chet Bishop, artisanal luthier.
Dry mineral ground.

The next step is always pretty amazing: when I brush on the sealer, it surrounds all the “white” particles in the wood, and they become transparent. Look at the “before and after” photos of the back plate, as the sealer is applied:

Back plate of five string fiddle with dry mineral ground. Handcrafted in Oregon, by Chet Bishop, artisanal luthier.
Back plate with dry mineral ground.
Back plate with sealer on 5-string fiddle handcrafted in Oregon by Chet Bishop, artisanal luthier.
Same plate with sealer applied.

From this point forward, it is just a matter of applying numerous coats of varnish, and adjusting the color as the process progresses. Furthermore, I want all the parts to “fit together” in terms of color. (You can see that there is a difference between the front and back color, for example.)

Next time, we will talk about color varnish coats.

Thanks for looking.


16-1/2″ 5-string Viola Varnish Sequence

Varnishing Process for the 16-1/2″ five-string Viola:

All Smoothing and Varnish-prep is done:

When I last posted, the final woodwork had been completed. I had twice wetted down the wood, to raise the grain, and scraped and sanded away the rough raised grain. The wood was stable enough to commence the tanning process.

After the wood is smooth, there will be:

    1. a tanning treatment,
    2. a mineral ground treatment,
    3. a sealer, to lock the mineral ground in place, and
    4. finally, the varnish itself in a series of 6-12 coats, depending on color.

Tanning the Wood

People who live in very sunny regions (New Mexico, for instance) need no light booth: they simply hang their instrument out in the sun for a few hours and it takes on a deep yellow-tan color. I live in Oregon. Western Oregon, between Portland and the coast. We are more likely to achieve a patina of bird-droppings than a sun-tan, if we hang instruments outdoors. (Sigh…)

So, a number of years ago, I bought an old cabinet, about seven feet tall, lined it with aluminum foil as a reflector, wired it with a strong UV source (two 48″ fluorescent UV tubes in a shop-light fixture), and I hang my instruments in it overnight. To heighten the effect, I brush on a coat of very diluted Sodium nitrite and let it dry before I expose it to the UV. This works pretty well, and I have pretty much adopted it as a normal pre-varnish treatment.

Tanned front of 16-1/2" 5-string viola
Tanned front side of the 16-1/2″ five-string Viola.


16-1/2" Five String Viola tanned back side.
Tanned back side of the same instrument.

Mineral Ground:

Years ago, an excellent luthier in Europe posted a detailed explanation of why and how he employs a mineral ground in his instruments, to improve projection. I tried it (because, “if it is good enough for Roger Hargraves…”) and immediately started getting better reviews on the sound of my instruments.

So…obviously, that became part of my process, as well. I use gypsum powder, suspended in coffee (gotta wake up the tone!) so as to achieve a little deeper color in the same move. I rub it in vigorously, trying to get the particles of gypsum to actually penetrate the pores of the wood, then rub off the excess with a rag, before it is fully dry.  When it is dry, it obscures the grain, and turns a chalky white color.

Mineral ground drying on 16-1/2" Five-String Viola.
Mineral ground drying on 16-1/2″ 5-string Viola. (5-string bass beginning in background.)


Mineral Ground is dry on the 16-1/2" Five-String Viola.
Mineral Ground is dry. I will sand off any excess mineral, and then apply the sealer.


Sealer

16-1/2" Five-String Viola with Sealer coat, front view.
Sealer coat, front view.


16-1/2" Five-String Viola with Sealer coat, back view.
Sealer coat, back view.


The sealer, in this case, is simply rosin, dissolved in turpentine and alcohol. The mixture soaks into the wood, causing the mineral ground to become transparent, then the solvents evaporate, leaving the rosin in the wood. The mineral ground will never again be visible.

Varnish Beginning

When the sealer is dry, I sand lightly, using 320 grit, to remove any lumps I may not have seen, and then I am ready to begin varnishing. I always begin with two base-coats of very yellow/gold varnish, so that the gold color will shine through the darker color coats.

16-1/2" Five-String Viola with Two coats of yellow varnish, side and front view.
Two coats of yellow varnish, side and front view.


16-1/2" Five-String Viola with Two coats of yellow varnish, back view.
Two coats of yellow varnish, back view.

I like the way the European Maple and Spruce are shining through the varnish. I think they will sound great, too. Tapping on the corpus, it sounds as though it will have a big, deep voice.

I will follow the completion of the varnish process in a later post.


Thanks for looking.


Final woodwork on 5-string 16-1/2″ Viola

Last “woodwork” tasks on the 16-1/2″ five-string Viola:

Last time, we finished up with the neck set, and the corpus closed, but all the edgework (and final shaping of the neck heel, etc.) left to be done.

Closed corpus of the 16-1/2" five-string Viola: purfling weave sketched, heel/button need carving.
Closed corpus, purfling weave sketched, heel/button need carving.


Carving the heel/button combination

The neck heel and the back button, together, make up the majority of the strength of the neck-joint. I once had a cello come in for repair, fully up to tension, but “something was loose.” Yeah, the ONLY glue still holding in the neck-joint was the glue between the neck heel and back button! I removed the neck, cleaned out the old glue, and re-glued the entire joint: but I never forgot that the heel/button connection alone had held the entire load of the string tension! So I make certain that this joint is perfect, and the two are carved as one piece after gluing.

There is also a specific measurement from the center of the neck-heel curve to the top edge of each side of the front plate where it joins the back: in violas, I shoot for exactly 27mm.

Heel and button carved on the 16-1/2" five-string Viola: ready to begin purfling.
Heel and button carved: ready to begin purfling. I have laid out the purfling and incised it.


Purfling

I used to struggle with cutting the purfling slot (I still do, but for different reasons) because I was trying to cut the full depth in a single pass, or maybe two. One of my teachers corrected me, saying that the first pass around, with the knife, is just to “darken the lines” left by the marker. Then it is relatively easy for the blade to follow the groove for subsequent fast passes, each making the slice a little deeper. Finally, I use a special tool to pick out the waste wood from between the lines.

Purfling pick with front plate of 16-1/2" five-string Viola.
Purfling-pick with front plate.

One problem I faced with the back plate that I had not noticed so much, on the front plate, even though it had the same issue: This purfling is a little wider than what I usually use, so, in spite of the fact that I marked out the correct width, my pick tools (all of them) are made for the narrower purfling, and they do not readily make the slot the correct width. That meant a lot of going back and widening things just a little bit (0.5 mm, usually.) The European spruce of the front plate is soft, and quite forgiving. The harder European maple back plate does not give at all, so if the slot is too narrow, the strip is not going in, at all.

Another issue is that the purfling weave is on top of a fairly thin portion of the back plate, so I could not cut my slots as deeply as I wanted to. Thus, there was very little wood-support for the purfling, and the pieces were difficult to fit, whereas, around the perimeter, I could cut a slot for the full depth of the purfling strips and achieve full support. Ah, well…that’s life. But there were some joints I am not so happy with.

Anyway, this is how the purfling went:

I cut the center bout slots, first, along with the corners of the 16-1/2" five-string Viola.
I cut the center bout slots, first, along with the corners.


The goal is to complete the whole slot before inserting any purfling on the 16-1/2" five-string Viola.
The goal is to complete the whole slot before inserting any purfling. (Notice the shallow purfling-weave slots.)


Installing the purfling

As I did on the front plate, I installed the center-bout strips first, dry, and then the rest of the perimeter. I glued the perimeter in completely, before beginning the purfling weaves, themselves.

In the case of the purfling weaves, since the slots were so shallow, I glued each piece as I installed it, then worked on the other end of the instrument while the glue from that piece set up and began to hold.

Outer perimeter complete...working on the purfling weaves for the 16-1/2" five-string Viola.
Outer perimeter complete…working on the weaves.


Purfling weave nearly done on the 16-1/2" five-string Viola. Notice that some joints are not as clean as others.
Purfling weave is nearly complete. Notice that some joints are not as clean as others.


Completed purfling weave on the 16-1/2" five-string Viola: still needs to be planed flush.
Completed purfling weave: still needs to be planed flush.


Completed purfling weave on the 16-1/2" five-string Viola...warts and all.
Completed purfling weave…”warts and all.” I may elect to go back and improve things a little. (Probably not.)
The other weave on the 16-1/2" five-string Viola turned out a little better.
The other weave turned out a little better.

The Channel

Once the purfling is all in place, and planed flush, it is time to carve the “channel.” This is a slight “ditch” that runs all the way around the perimeter: the bottom of the “ditch” is usually at the purfling, while the outer edge of the ditch ends exactly at a line called the “crest,” which is about 40% of the distance in, from the outer edge of the plate to the outer edge of the purfling. The inner edge of the “ditch”  will be planed and scraped back to “fair” into the surface of the arching, without any lumps or hollows.

Notice the pencil-line marking the crest of the edge on the 16-1/2" five-string Viola.
Notice the pencil-line “crest”, between the purfling and the plate-edge.


Edgework

Finally, after all the surface of the plate is correct, I plane, scrape and sand the edges themselves, so that the outer curve of the plate edge perfectly meets the inner curve of the channel, all the way around the plate.

In this case, I did not take the picture until after I had completed the next step, which was to wet the whole structure down with water, in order to deliberately raise the grain, so that any imperfections, or compressed areas, will rise up and be seen…and subsequently, be scraped and sanded flush again. All this to say, please understand the “rough” surface of all the wood.

Edgework of the 16-1/2" five-string Viola complete, but still rough with raised grain.
Edgework complete, but still rough with raised grain.


So…that means the whole instrument is now complete, minus the varnish prep-work, and the actual varnish and set-up!

16-1/2" five-string Viola Front ready for varnish.
Front ready for varnish.


16-1/2" five-string Viola Side ready for varnish.
Side ready for varnish.


16-1/2" five-string Viola Back ready for varnish.
Back ready for varnish.


Varnish Sequence

I will post the varnish sequence as it occurs, but, for now, know that the sequence will include at least two “wet-it-down, let-it-dry, and scrape/sand-it-smooth” iterations. The idea is to produce a surface that will no longer respond to moisture by raising the grain. This is particularly important on the handle portion of the neck, where the moisture from players’ hands will certainly be in contact with the wood, every time the instrument is played. But, under the varnish, the slightest discontinuity will become glaringly obvious, so that is important as well.

After the wood is smooth, there will be:

    1. a tanning treatment,
    2. a mineral ground treatment,
    3. a sealer, to lock the mineral ground in place, and
    4. finally, the varnish itself in a series of 6-12 coats, depending on color.


Enough for today.


Thanks for looking.


Five-string viola Varnishing Process

Varnish Procedure For a 15″ Five-String Viola

First things first: Mineral Ground

The raw wood is quite porous, and would soak up varnish like a sponge…which would dampen the viola sound. So we don’t want that to happen! The solution to the problem seems to be to fill the pores of the wood with very fine particles of mineral of some sort. I don’t particularly want something that would form a concretion, as some makers have done, because I think that also changes the sound, but in a different way.

I used Gypsum, ground very fine in a mortar, then suspended in water, and daubed onto the surface; then vigorously rubbed into the pores. After rubbing the mineral into the entire surface (except the “handle” area of the neck) I used a damp cloth to rub all the excess gypsum back off. While it is wet, it just looks like wet wood, but as it dries, it turns chalk-white, assuring me that the surface is truly saturated with the particles.

Partially dry mineral ground, front side of 15" Five-string viola.
Partially dry mineral ground, front side.


Partially dry mineral ground, back side of 15" Five-string viola.
Partially dry mineral ground, back side.


Then, after the gypsum suspension is completely dry, I use fine sandpaper to remove any excess mineral from the surface, so that there are no thick patches of mineral.

15" Five-string viola, with Dry Mineral ground, rubbed clean.
Dry Mineral ground, rubbed clean.


Locking the mineral ground in the wood: Sealer

As you can see in the above photograph, the mineral is still saturating the surface, and obscuring the grain. However, when I apply the sealer (in this case, a mixture of rosin, turpentine, and alcohol) the mineral ground will become completely transparent, and will permanently disappear. The varnish will then be free to show off the grain of the wood.

Front side of 15" Five-string viola, with sealer.
Front side with sealer.


Side-view of 15" Five-string viola, with sealer.
Side with sealer.


Back-view of 15" Five-string viola, with sealer.
Back with sealer.


Making it Shine: Beginning the varnish

It takes a while for the sealer to dry, because of the turpentine content, but as it dries, the alcohol evaporates first, then the turpentine, leaving the rosin in the wood (which is where rosin comes from in the first place, of course) locking the gypsum particles in place. and further sealing the wood against saturation with varnish.

Before proceeding to the varnish, I carefully sanded all over, to clean up any spots that still felt rough or sticky, then wiped the entire instrument down with alcohol to remove any rosin residue from the surface.

Then I applied a first coat of yellow varnish, as I have noticed that many of the old instruments seem to have something yellow under the darker red or brown varnish. You can especially see it in the areas where the colored varnish has worn thin, or is completely gone. (Not all of them have this color, but I like it, so that is what I have chosen to do.)

So, here is the base coat of yellow varnish:

Base coat of yellow varnish on front side of 15" Five-string viola.
Base coat of yellow varnish on front side.


Base coat of yellow varnish on the side-view of the 15" Five-string viola.
Base coat of yellow varnish on the side.


Base coat of yellow varnish on the back side-view of the 15" Five-string viola.
Base coat of yellow varnish on the back side. The grain of the spalted maple is showing better, again.


Base coat of yellow varnish on scroll and neck heel of the 15" Five-string viola.
Base coat of yellow varnish on scroll and neck heel.


I do not apply varnish to the “handle” portion of the neck until everything else is completely done. After everything else is done, including set-up, I will rub down the handle area with 400-grit abrasive one last time, and then put about a dime-sized dot of shellac on a rag, on the end of my finger, and vigorously rub it into the wood of the handle area, until it is completely dry. This somewhat seals the wood against sweat and dirt, without leaving a heavy, “slick” coating that would cause drag on a player’s hand.

The rest of the varnish coats will be building color toward the final look of the instrument. I will include them in another post.


Thanks for looking.


Commissioned 5-String Varnish Progress

Varnish Progress on the Commissioned 5-String Fiddle

Varnish Procedure for All my Instruments:

  1. Complete all scraping, shaping and smoothing: varnish preparation.
  2. Wet the instrument down to raise the grain, then
  3. Lightly sand with fine-grit abrasive, to remove rough bits of raised wood.
  4. Rub in a mineral ground, then use a rag to remove excess.
  5. After the ground dries, sand lightly again, to remove any rough excess mineral.
  6. Seal using turpentine and rosin.
  7. After the sealer is dry, begin adding coats of varnish.

Following the above format, here are the results:

Dried Mineral Ground, on the Five-String Fiddle, compared with varnished instruments.
Dried Mineral Ground, compared with varnished instruments.


Five-String Fiddle front view with sealer
Front view with sealer…mineral has disappeared.


Five-String Fiddle Side view with sealer
Side view with sealer…the grain is visible; the ground is transparent.


Five-String Fiddle back with sealer
Back with sealer; the grain is very visible, the ground has disappeared.


Now the varnishing begins!

The mineral ground was intended to close all the open pores in the wood so that the varnish will not saturate the wood. Then the sealer locks the mineral ground in place and causes it to become transparent. (Think “wet t-shirt material.” White stuff becomes transparent when wet, as a rule.)

So, now the varnish further seals the wood and begins to add gloss and protection from moisture, dirt, etc. And, if we do it correctly, it will add the color we want, as well, without losing transparency.

I have used both oil varnishes and spirit varnishes. I believe the old masters used oil varnish, but currently, I have moved to spirit varnish. Perhaps one day I will use oil varnishes again

Spirit varnish dries so rapidly that I can usually apply four coats of varnish the first day. So here is the fiddle with four coats of spirit varnish:

Five-String Fiddle with four coats varnish front view
Front, with four coats varnish…still pretty yellow.


Five-String Fiddle side with four coats varnish
Bass side with four coats of varnish: Too much contrast between side and front plate.


Five-String Fiddle back plate with four coats of varnish
Back plate with four coats of varnish… looking pretty nice!


Leveling the varnish

So, then, after the first few coats have dried hard,  we sand lightly to remove brush marks, sags, drips, etc. and begin to add color coats. Usually, I have a pattern of shading I use, to emulate light “wear” patterns. This one has very little of that.

Five-String Fiddle Final color front plate
Final color front plate…the light patch on the upper left is a reflection.


Five-String Fiddle Final color treble side
Final color treble side: notice that the front and side match nicely, now.


Five-String Fiddle Final color bass side
Final color bass side.


Five-String Fiddle Final color back plate
Final color back plate.


Five-String Fiddle Final color bass side scroll
Final color bass side scroll.


Five-String Fiddle Final color treble side scroll
Final color treble side scroll.


Final Finish Work

So, now we will let the varnish thoroughly dry, and harden; after which there may be retouching and minor changes to make, but the main focus will become set-up after that. (In case anyone is interested, the customer has been kept abreast of every step in the build, and is getting quite anxious to take possession.)  🙂

Thanks for looking!