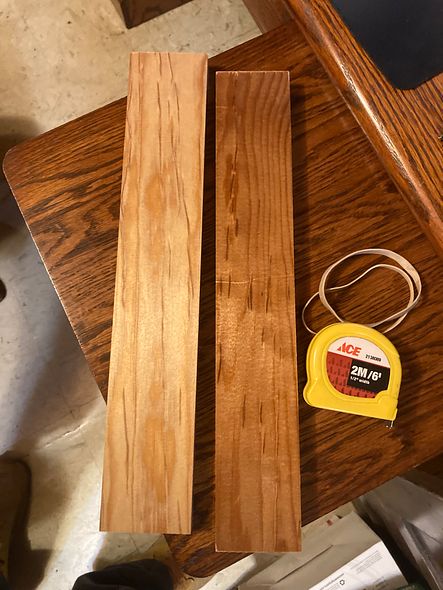
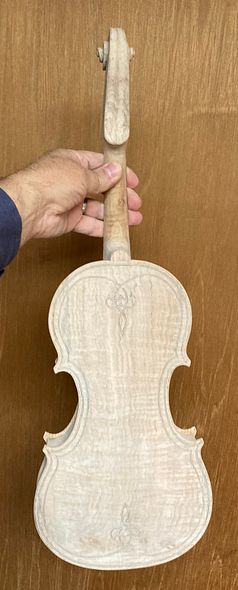
Simultaneously, I had purchased the European Maple one-piece back, as a solid wood billet, with sides, and neck billet. Additionally, I ordered the European Spruce front plate blank from International Violin Company in Baltimore Maryland.
At the time when I last posted, I had just begun varnishing the viola and had only applied the yellow base coats of varnish. Obviously, the intent is that this yellow base will provide the “golden glow” shining from within the subsequent darker-color coats of varnish.
However, as I added increasingly dark varnish layers, the changes were increasingly slight. As noted earlier, the change from raw wood to sealer was obvious. Furthermore, the change from sealed wood to yellow varnish was amazing. But the subsequent steps move more gently into the final iteration.
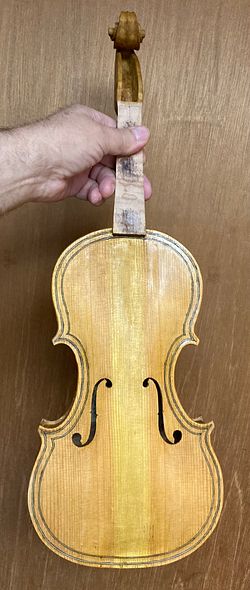
Front with the first color coatBack view with the first color coat
Second Color Coat
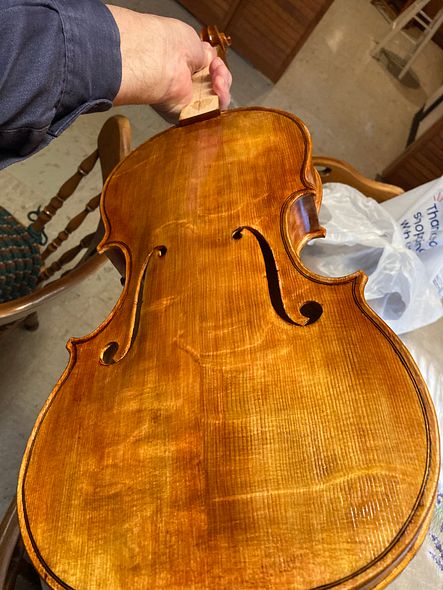
Front with a second color coat.Back with two cor coats.
Third Color-Coat
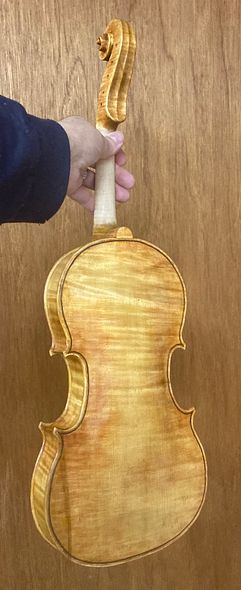
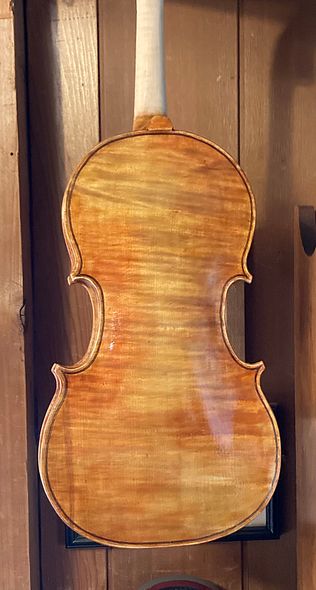
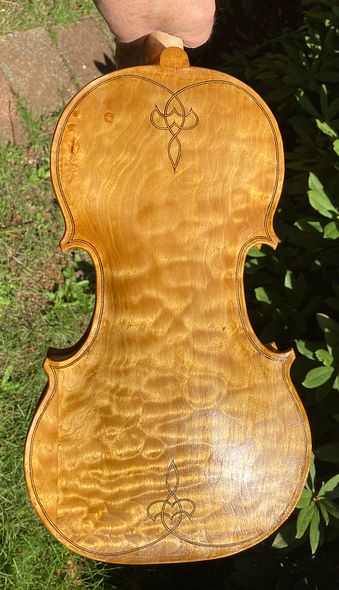
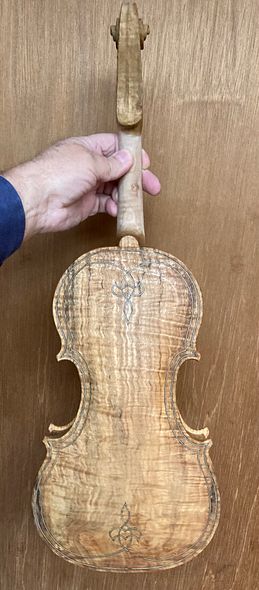
Front view with three color coats.Back with three color coats.Three color coats from an angle showing off the figured Spruce.
And Assembly!
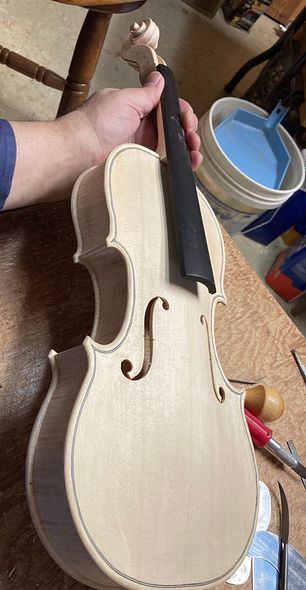
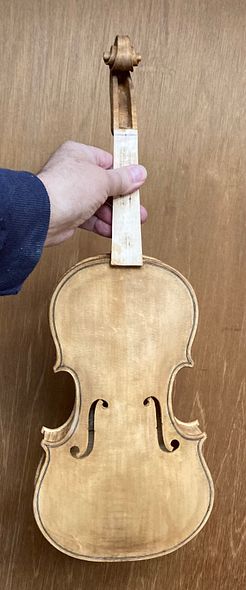
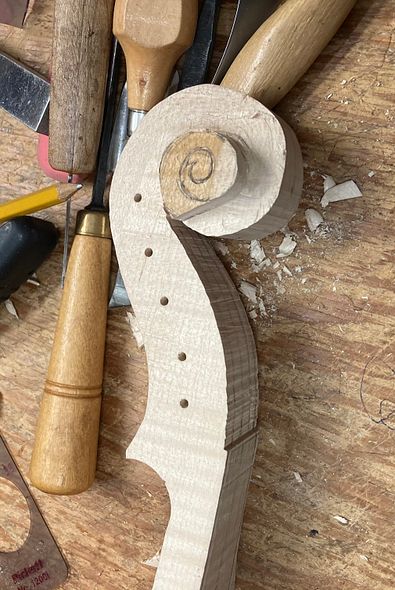
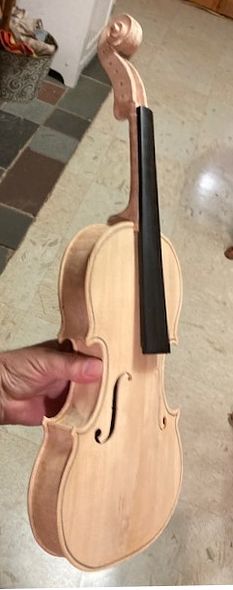
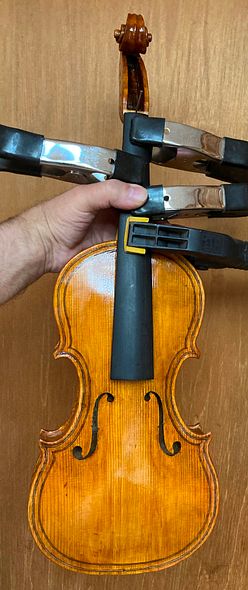
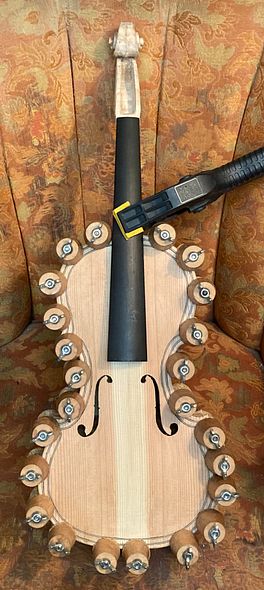
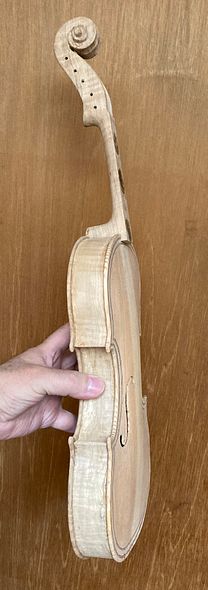
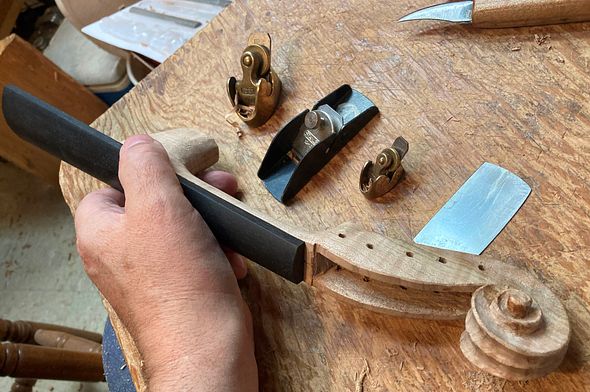
To begin with the varnish procedure, I had removed the fingerboard and nut, to allow full access to the front plate for varnish-prep, varnishing and polishing. However, now it is time to replace those parts and begin final assembly.
I installed the soundpost, too, so that the instrument corpus could begin “getting used to” that pressure from within.
Then I re-installed the fingerboard and nut, and scraped the joint to make it completely smooth. Obviously, I will have to retouch the varnish on some of those areas.
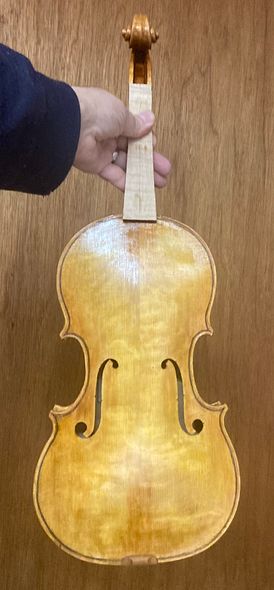
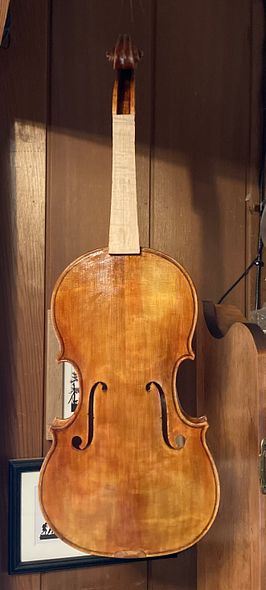
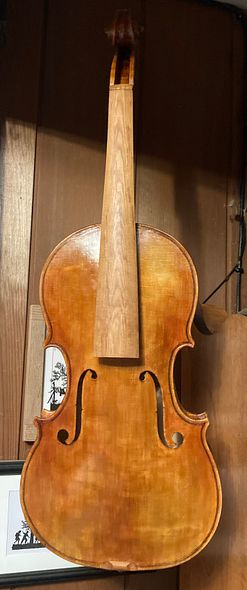
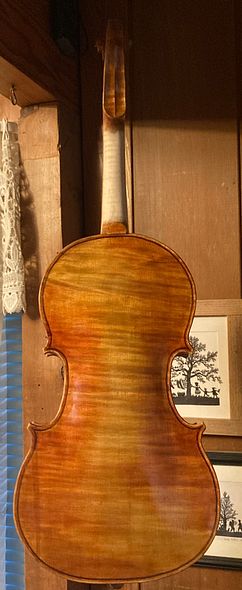
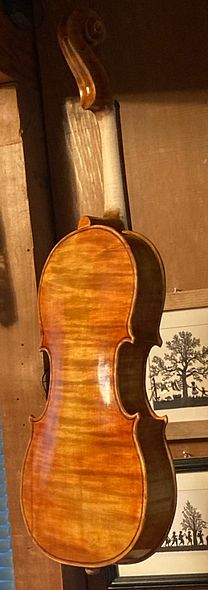
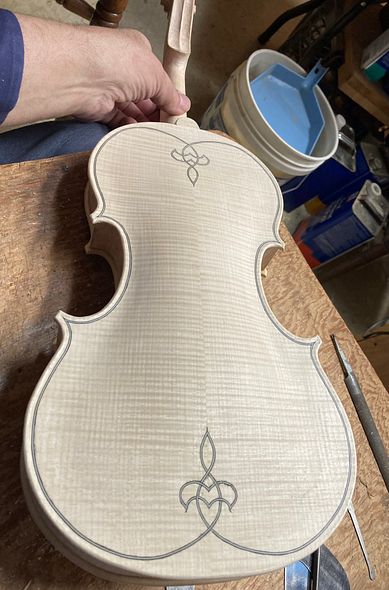
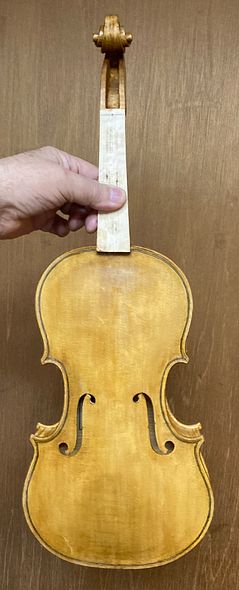
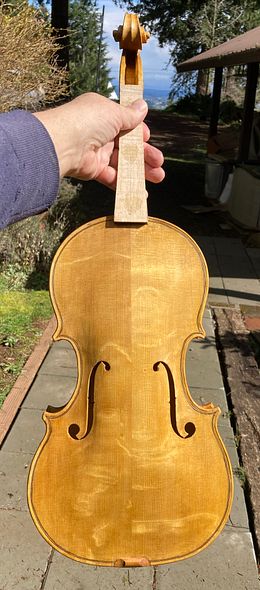
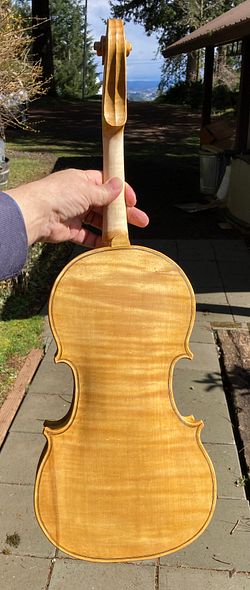
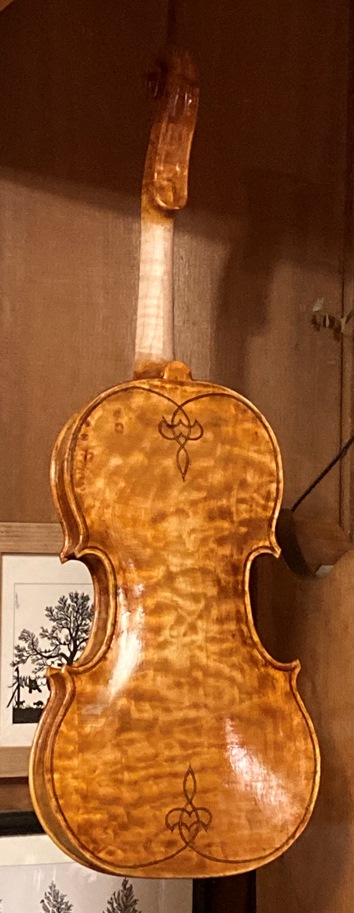
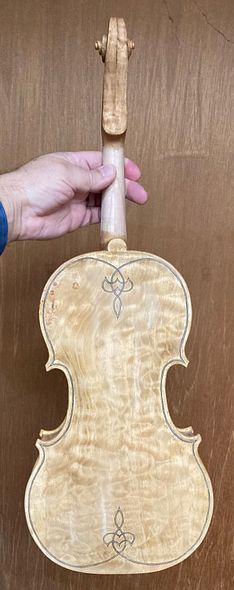
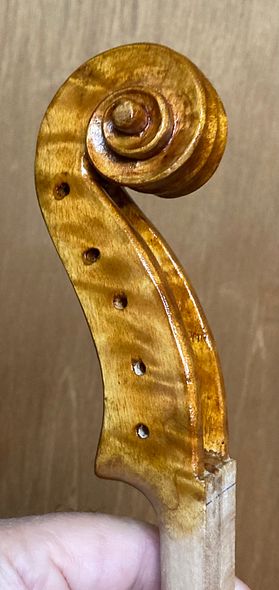
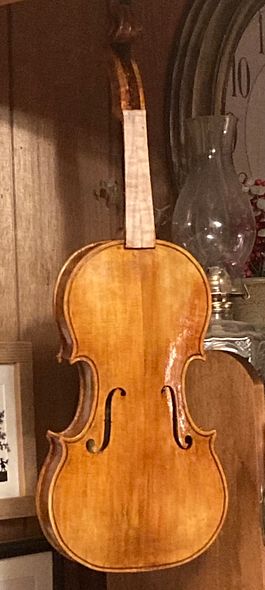
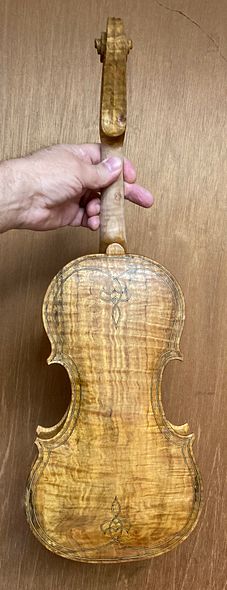
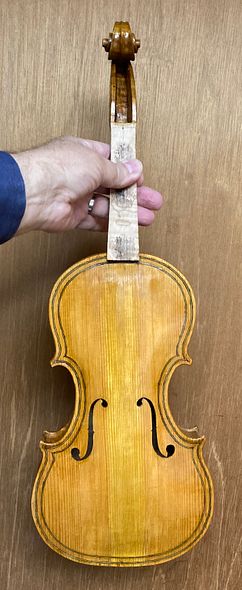
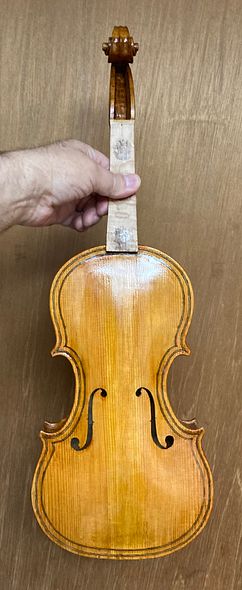
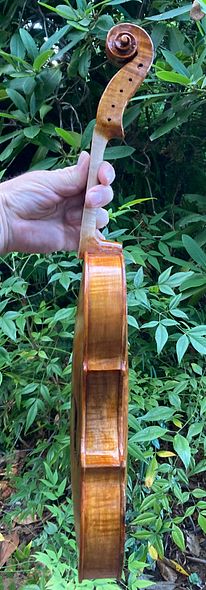
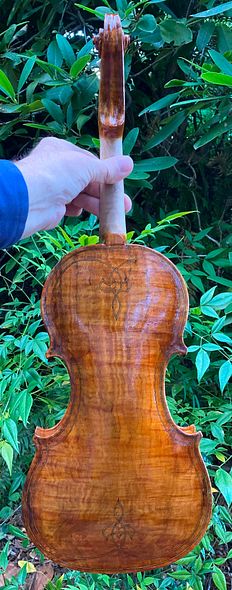
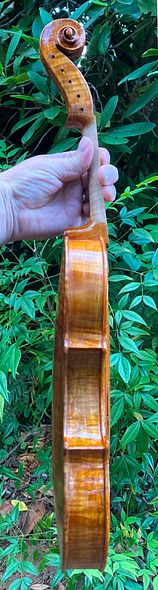
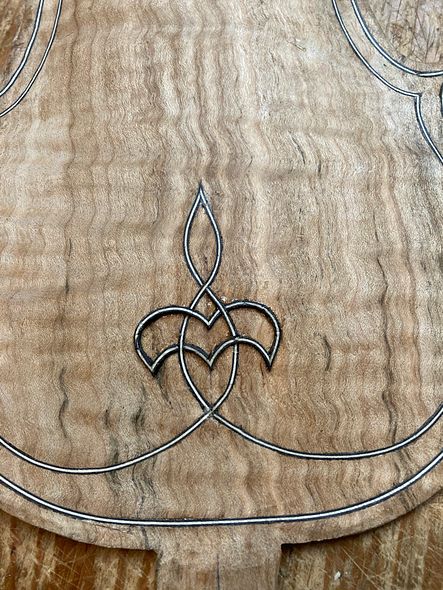
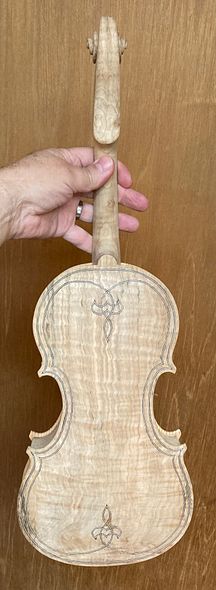
Front at final color, with Fingerboard.
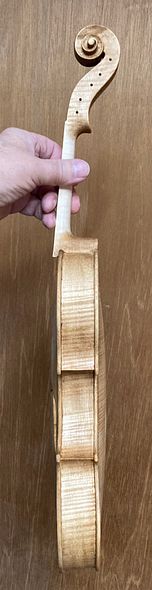
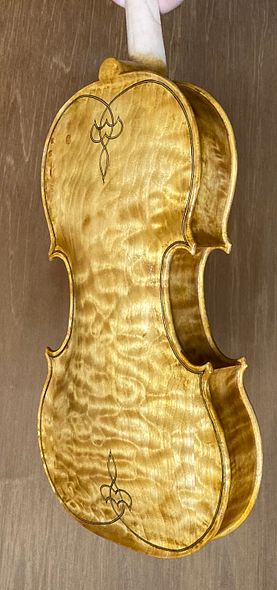
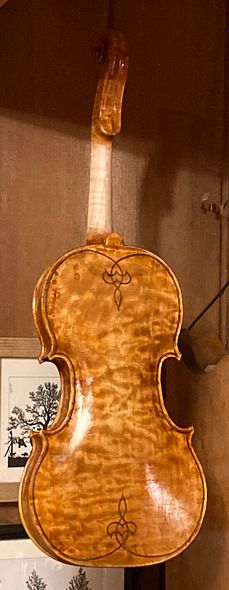
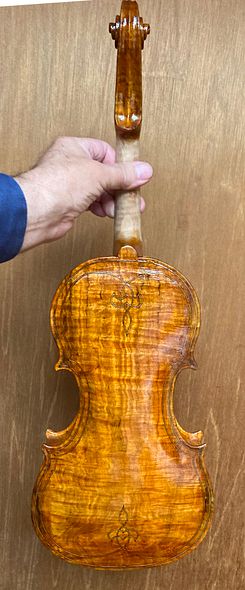
Back view at final varnish color.
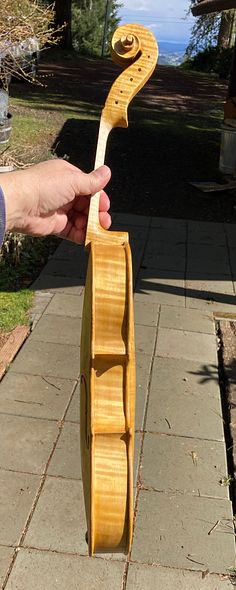
Three-quarter view, showing varnish contrasts.
What’s Next?
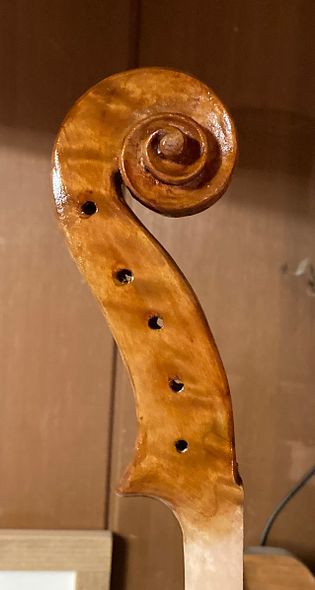
Following this, the next thing will be to install the “Knilling Perfection” (internally geared) tuning pegs.; Afterward, I will continue with final set-up. I can install the pegs now, but the final set-up will have to wait for the varnish to harden a little more.
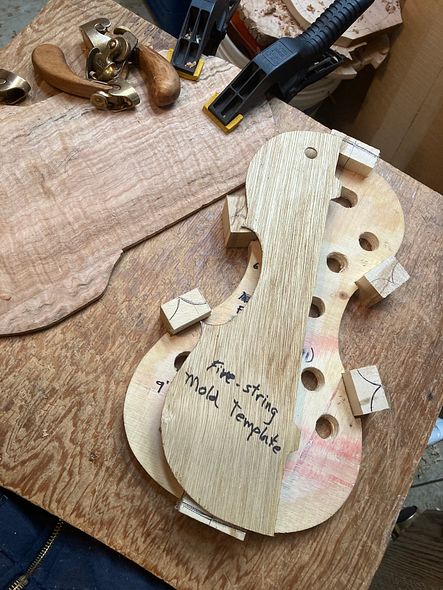
“New” Five-String Bluegrass Fiddle, Begun Two Years Ago
I Began in Good Faith, Years Ago!
Originally, I began this fiddle in 2023, thinking I would “press on” and get it done soon. I had already closed up the corpus, with the dated label inside! But, due to unforeseen circumstances, I had to postpone its completion.
A commissioned instrument interrupted the flow of my “built-on-speculation” instruments. I always move any commissioned work (whether repairs or a new build) to higher-priority. I move them ahead of my usual “build it and they will come” work.
The man commissioned a five-string fiddle on one of my early models. So, I completed his instrument (#16 on the Chronology page) before completing Instruments #17, #18, and #19. I had planned otherwise, but it happened.
Slight Chaos!
I had begun all three of those instruments, simultaneously. But I did not realize that, in my array of personal labels, I had somehow skipped #16. When that came to my attention (as I worked on the commissioned fiddle) I felt I had to correct the mix-up. I had no option but to print a new sheet of labels, with a #16 in the mix. Then, I labeled his new fiddle, as though I had built it before the other three. I completed it before the others, though, but instruments #17-19 were still hanging on my workspace wall, waiting for their turn. (Sigh…)
Meanwhile, I had surgeries on my right eye (cataract surgery and corneal transplant) and had to wait for it to heal before I could do much work.
Later, my beloved wife, Ann, fell and broke her wrist, requiring surgery to repair it. At the same time, I had contracted Covid (finally…my first time!) and could not even go to the hospital with her. Fortunately, our daughter was in town, with her husband, and they took her to the ER.
By the time all that was over, I had the same surgeries in the other eye. (Yeah, it was a really productive year!)
BUT: Between all the “setbacks,” I did manage to complete instruments #17 and #18 on the Chronology page. (#18 sold almost immediately…that was nice!)
But then…
Another client called with a commission: This customer wanted a 15-3/4″ five-string viola. She lived in Switzerland., and will fly here to take delivery, so I again shunted #19 to “last in line.”
Resuming Work on Five-String #19
I have nearly completed the new commissioned viola. (It will be five-string #20…but it is not yet on the Chronology page.) So I went back and resumed work on #19.
The work had already been done up to (but not including) the purfling on the back plate. So that is where I had to begin. Unfortunately, I was still “sneaking in a few minutes, ” here and there, while completing the newest viola, so I neglected to photograph the purfling process. However, if you would like to see that process, here is a link to the purfling procedure for a large five-string viola from five years ago.
Preparing for Varnish
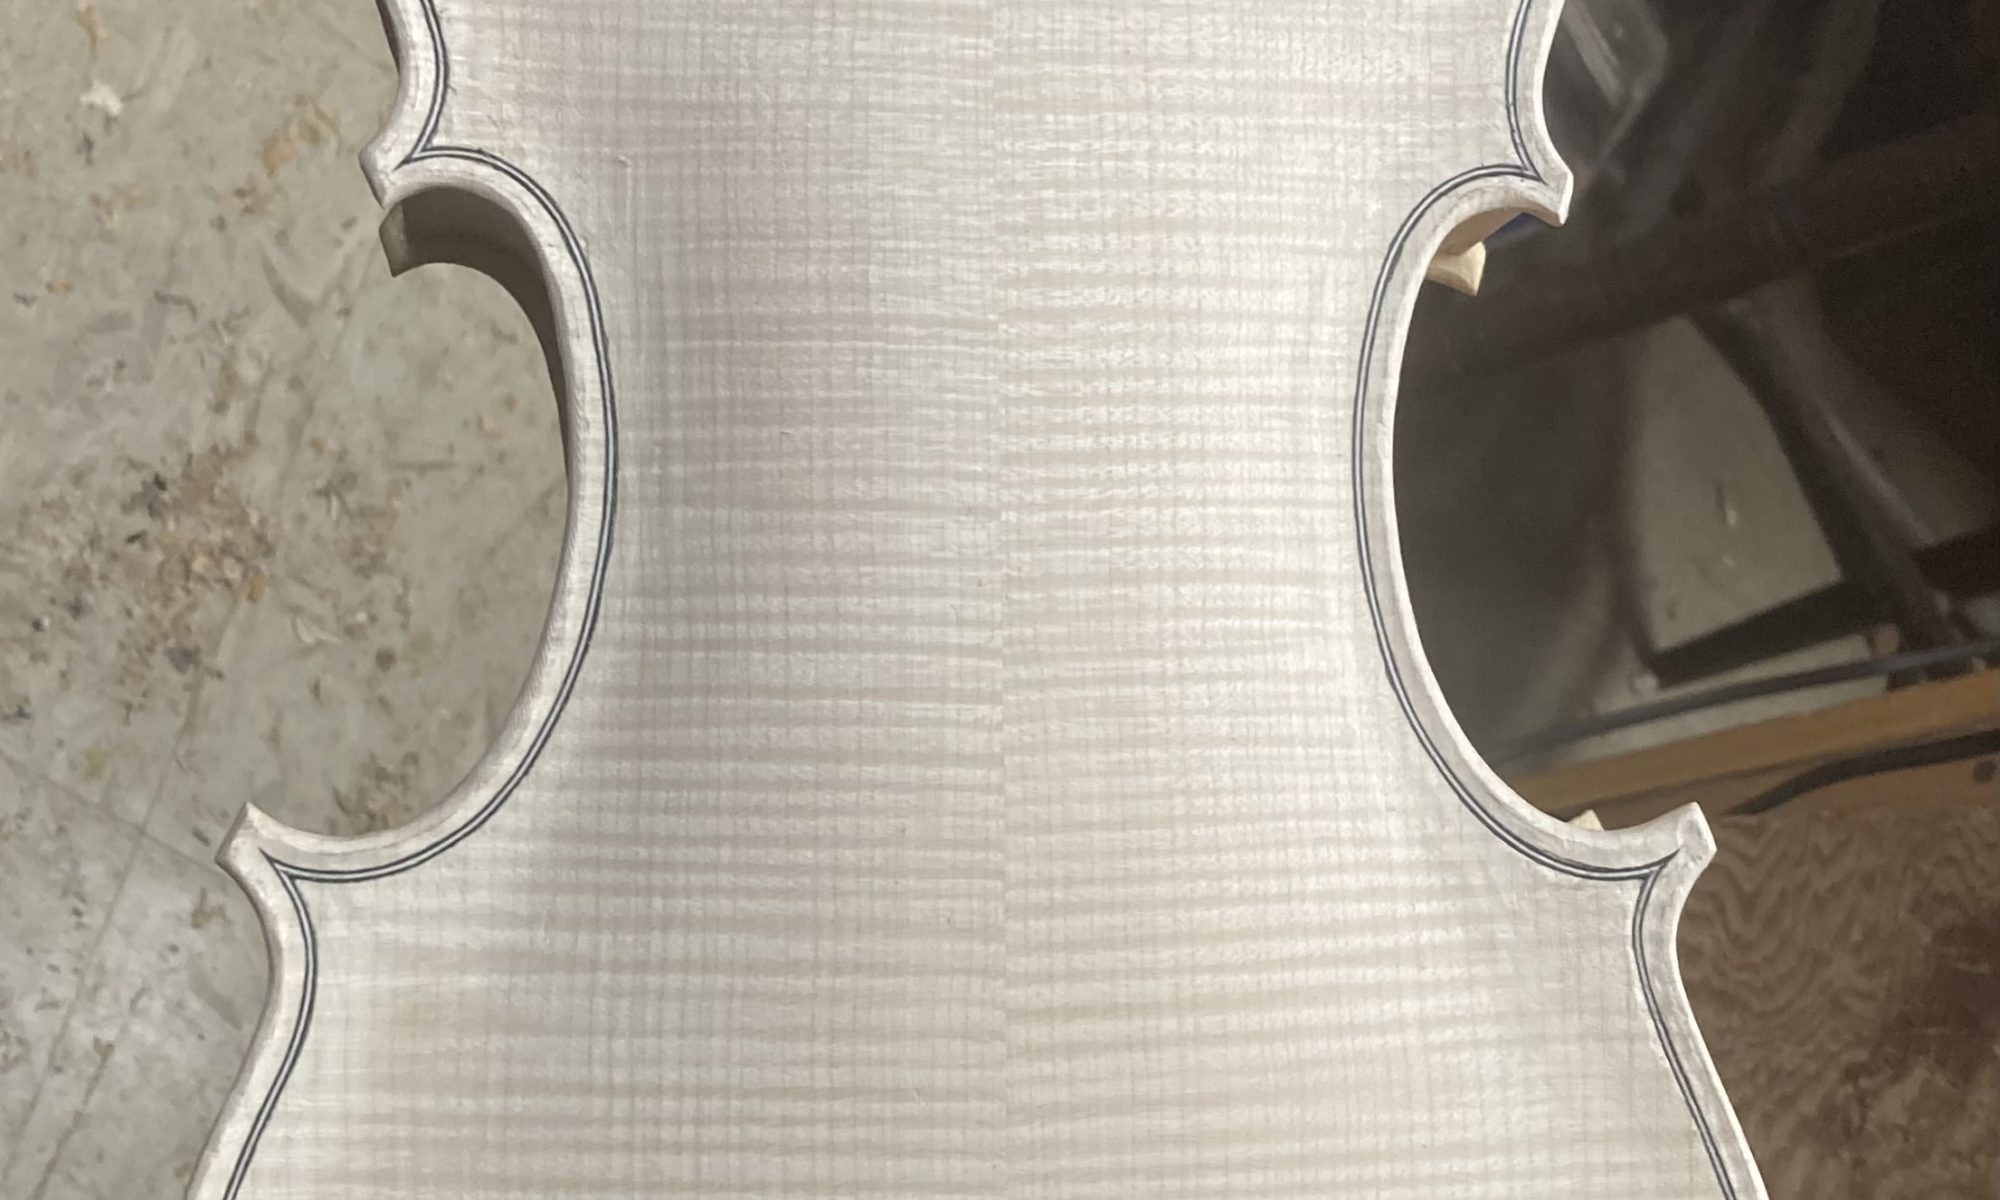
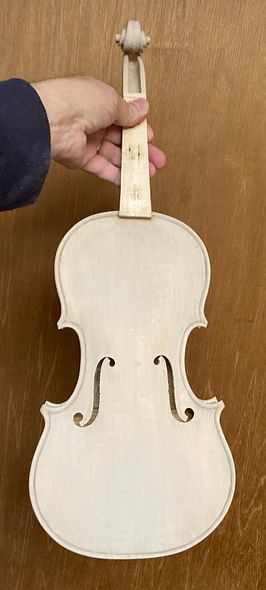
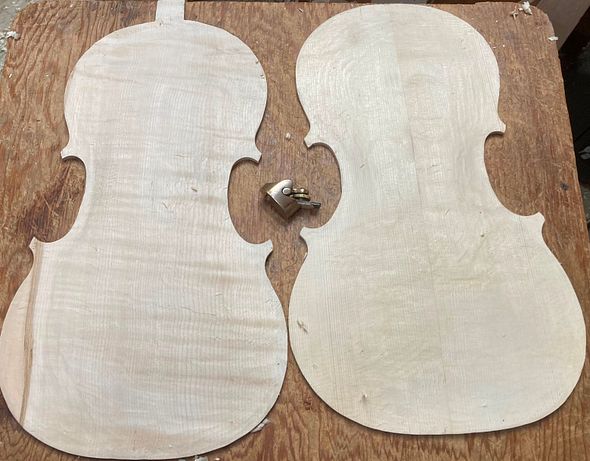
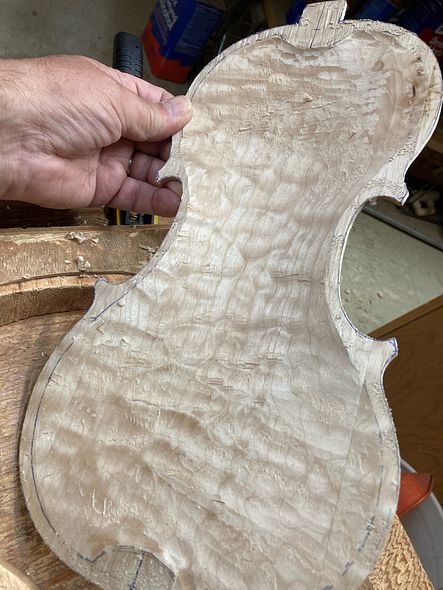
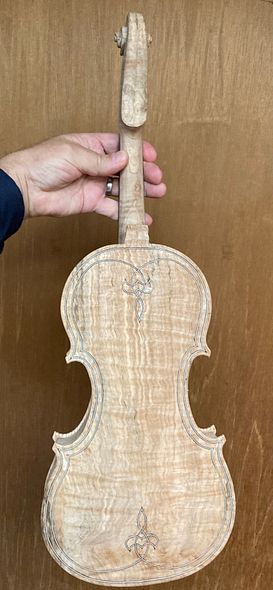
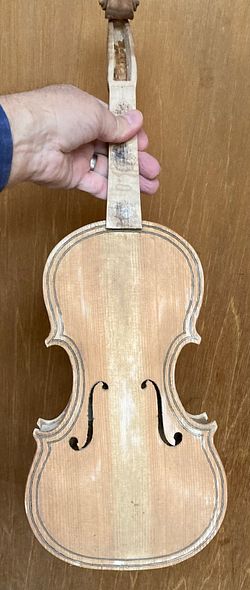
I scraped the entire instrument as smooth as I could get it, then brushed coffee all over the instrument, to raise the grain, and allow me to see areas that still needed work. I repeated this cycle until the grain would no longer swell with moisture, then I sanded it lightly all over, to remove any tiny, unnoticed fibers that might still be protruding. The instrument looked like this at that point.
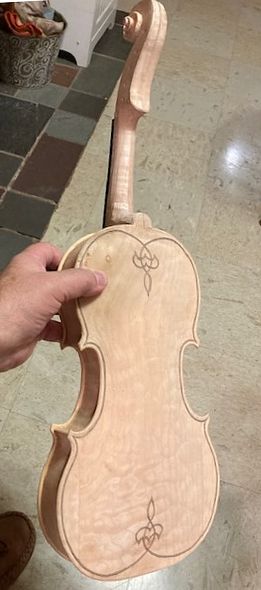
Front view, in-the-white
Back View, in-the-white.
Mineral Ground
I learned for Roger Hargraves that filling the natural wood-pores with a mineral will help the sound, and it prevents excessive varnish penetration. So, nowadays, I rub Gypsum powder into the raw wood surface, to fill those pores. I mix the gypsum with coffee, which adds a tiny bit of color to the wood, but when the mixture dries, it turns chalk-white, mostly obscuring the grain;
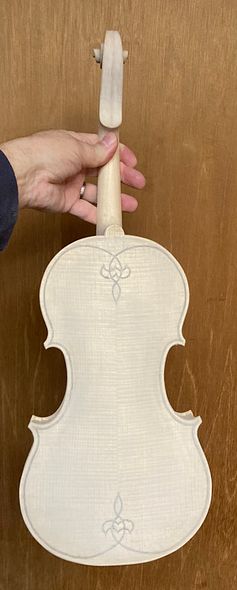
Front View with Mineral Ground.
Side with Mineral Ground.
Back view with Mineral Ground
Sealer
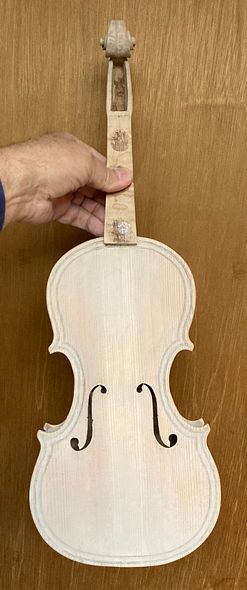
After the mineral Ground is fully dry, I gently sand off any excess gypsum, that is sitting on the surface, so that it will not obscure anything once the varnish is in place. It still looks stark white, but does not have piles in the corners, or elsewhere.
The Sealer application always seems like magic, because, as the sealer surrounds all the perticles of mineral, the gypsum turns transparent. It literally disappears, and will never be seen again!
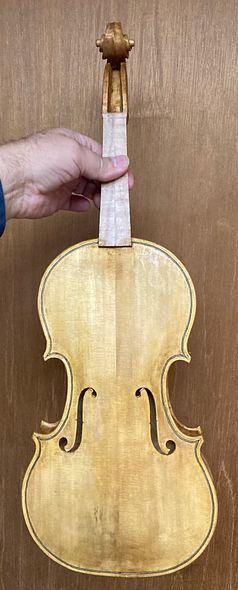
Front view with Sealer.
Side with Sealer.
Back View , with Sealer.
The Sealer I use is made of rosin, dissolved in a mixture of denatured alcohol and Spirits of turpentine (the one that strongly smells of pine.) It takes a few days to dry as a rule, and the fragrance of pine remains for a long time.
After the sealer has completely dried, I go over the instrument to remove any excess sealer. I can do that with a thin, flexible scraper, or stearated abrasive paper (which does not easily clog up) or by using a rag, wetted with denatured alcohol. (I think the rag with alcohol probably does the best job.)
Then it is time to begin varnishing.
Varnish Beginning
I usually begin with three coats of yellow varnish, to provide a deep “golden glow” to shine from within the subsequent darker coats of varnish:
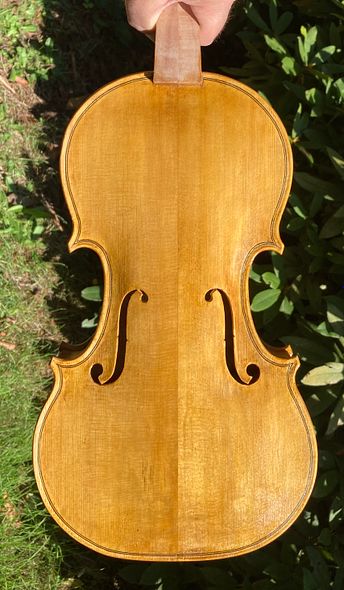
Front view with Yellow varnish.
Side with Yellow base coat.
Back view with Yellow Varnish .
Color Coats to Come
Next, I will begin to add the colors of varnish I need, to produce the finished look I want. It requires anywhere from eight to twelve coats to achieve that look, usually, but each coat is microscopically thin, so the entire finish is still extremely thin. It will not reduce the sound quality at all, and it will protec the wood from dirt, skin-oil and other substances that might otherwise penetrate the bare wood.
I have often had people ask whether I would be willing to leave a violin unvarnished. For the above reasons (plus the fact that I would not put my name in such an instrument:) The answer has always been “No.”
Next time, we will walk through the varnishing process.
To begin with, last year, a professional violist in Switzerland contacted me, asking about commissioning a 15-3/4″ 5-string viola. With this in mind, we discussed the project at length. We ascertained her specific requirements. Obviously, that is her privilege, since she was ordering a commissioned instrument.
Meanwhile, I had undergone surgery on both eyes. As a result, I could not do anydetailed work until my eyes healed. The client was very patient: I chose the wood for her instrument, to her approval (European Spruce and Maple,) and ordered the special material for her fittings.
Choosing Materials
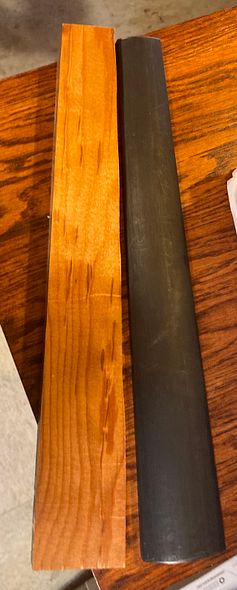
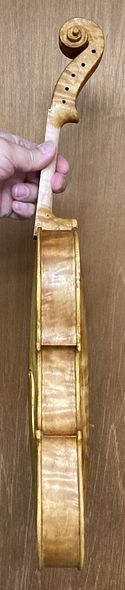
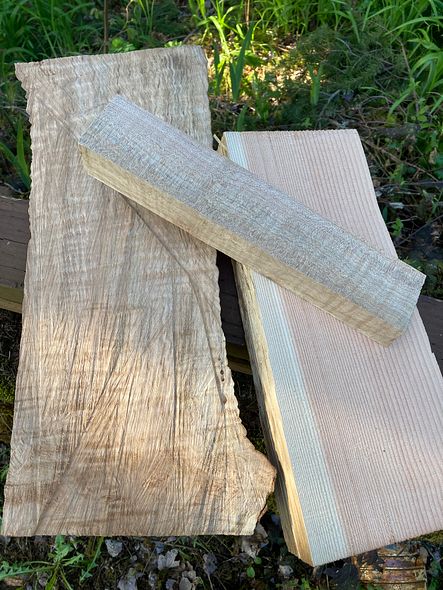
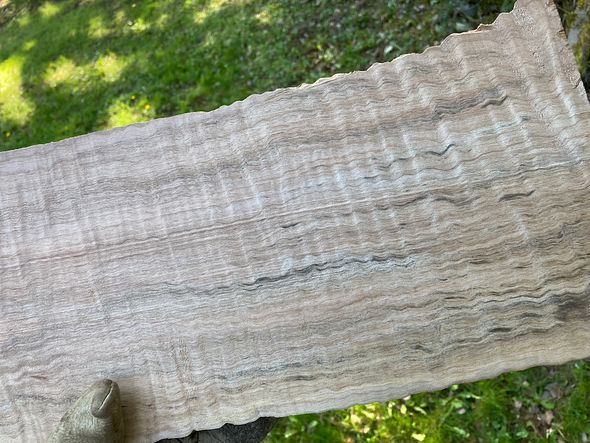
European Spruce front plate materialOne-Piece European Maple Back PlateSonowood for fittings, as the billets arrived
Out of concern for endangered tropical woods, the request specified that I use a Swiss product, “Sonowood” for the fingerboard and other fittings. In this case, the Sonowood is Spruce. They heated it enough to liquefy the internal lignin. Next, they compressed it to three times its natural density. The resulting product is as hard and wear-resistant as ebony. But Sonowood is not endangered: it is Spruce!
Carving The Fittings
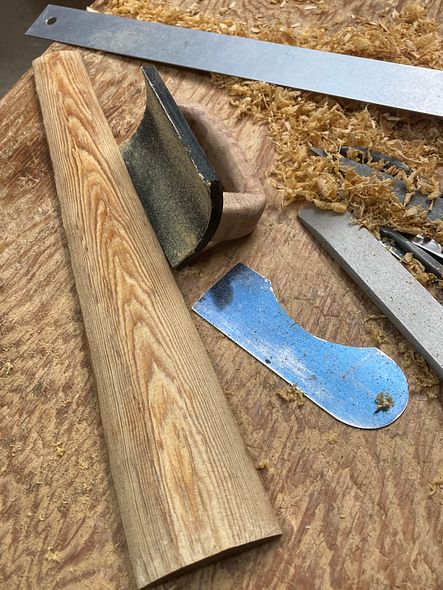
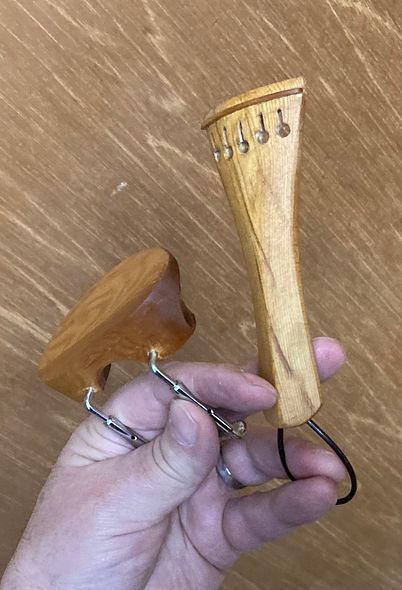
On the other hand, Sonowood is expensive and difficult to work with. It was good that I ordered it early. It took a long time to arrive, and I learned its working properties by carving the fingerboard. Then I made the chinrest, the tailpiece, and the end button. I saved the nut and saddle for last, as I had to fit them to the fingerboard and front plate.
Fingerboard footprint copied from Ebony fingerboard billet.Carving the fingerboardHandmade Chinrest and TailpieceEnd Button, with Paua Shell dot
Beginning the Rib Garland
While I was waiting to receive the Sonowood billets, I had prepared the ribstock, bent the ribs, and installed them into the mold.
Ribs installed in GarlandRib Garland with linings installed
Beginning the Plates
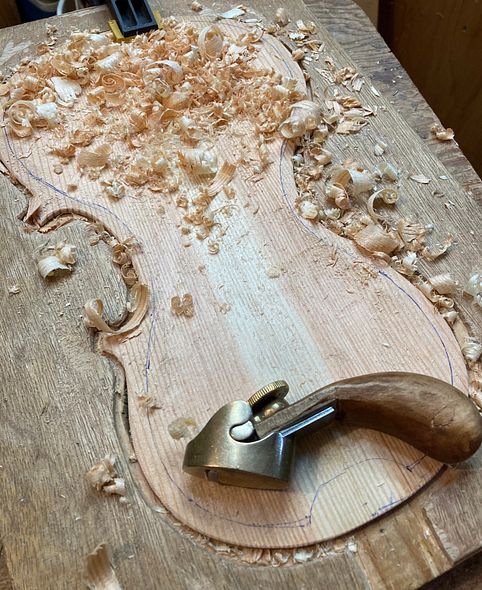
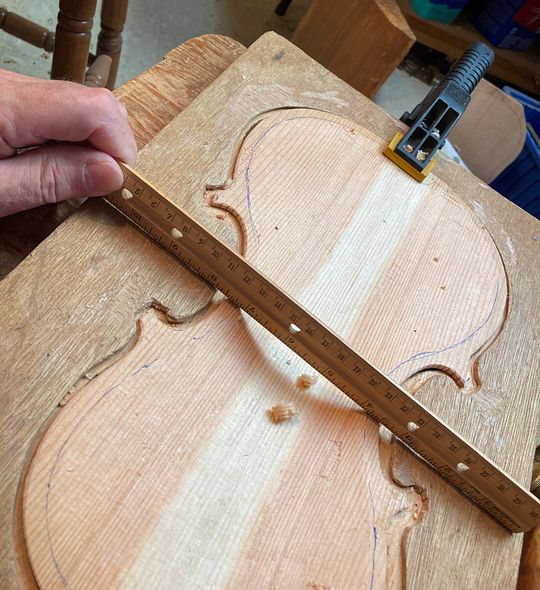
Next, I installed the linings, traced the plates and began carving.
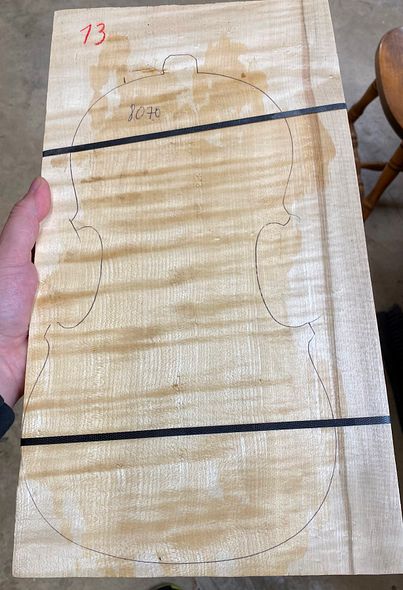
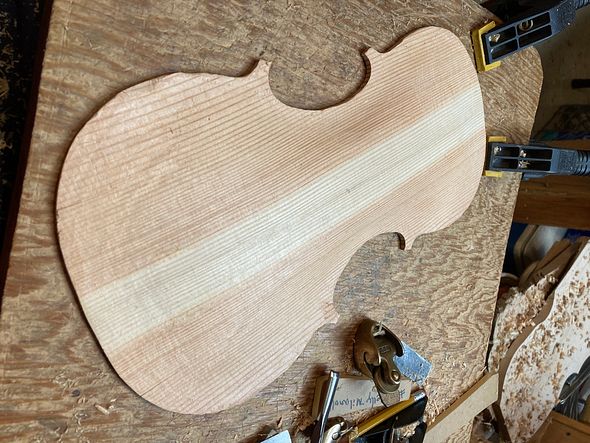
Footprint of front and back plates, ready to carve. Dark streak on back plate is heartwood.
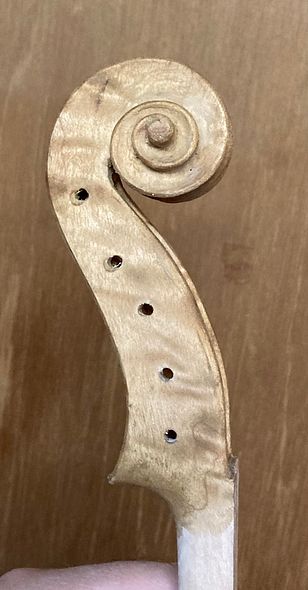
Neck and Scroll
Simultaneously, I also laid out and began carving the neck and scroll.
Beginning the Scroll
Once I had completed all the parts, I assembled them and began finishing.
Beginning Varnishing
To “Cut to the Chase,” as people often say, here is how viola looks, today. I have applied the base coats of yellow varnish , and I will soon begin applying the darker layers of varnish.
Front side with Yellow Base CoatsSide View with Yellow Base CoatsBack View with Yellow Base Coats
I will post more, as things progress toward completion.
Last time, I gave a preview of some of the varnish procedure.
But, to be more specific, let’s walk through the varnishing process:
Bare wood, front viewBare wood, back view
Peparing for Varnish
First, I removed the fingerboard to give me access to every square milimeter of the outside of the instrument. Next, I used low-angle light, to cast dark shadows so that I could see all the discontinuities, humps and hollows. Then, I gently scraped all the surfaces to remove all of those discontinuities.
Finally, I was ready for the varnish procedure:
Bare wood, scraped and ready for finish
Mineral Ground to Close the Pores
To begin with, I used a suspension of fine particles of gypsum in either water or coffee, to form a mineral ground. First, I brushed the mixture onto all the outside surface except the handle area of the neck, Then, using my fingers, I rubbed the mixture into the wood, so as to fill the natural pores wtih “nano-particles” of the gypsum.
After the mixture dries, the instrument looks chalk-white, and the mineral ground obscures the wood grain.
Dry Gypsum, Front ViewSide View, Dry Gypsum ground.Back view, Dry Gypsum groundScroll with Dry Gypsum ground
Then, I used 400-grit sandpaper to very lightly rub off any excess dry gypsum, which still left the violin looking stark-white, as the gypsum had filled the pores of the wood.
Obviously, that (mineral ground) stage of the process looks pretty awful. but the next step (sealer application) always feels like “magic” to me. The sealer makes the mineral ground permanently “disappear!”
Sealer
For the last ten years, or so. I have used a sealer which is simply a thin solution of rosin in alcohol. Sometimes, I use turpentine instead of (or in addition to) the alcohol. Either way, the solvent carries the rosin into the pores, surrounding the particles of gypsum, and thereby rendering the particles tranparent. (However, on this fiddle, I chose to use alcohol as the solvent.)
Front view with sealerSide View With SealerBack View With SealerScroll With Sealer
Obviously, the mineral ground has done its work, plugging the pores against penetration by varnish. However, it has also become permanently invisible.
NOW we Varnish!
When I began making violins, I was using oil varnishes. Later, I switched to spirit varnishes. Today, I am still using a spirit varnish.
The main chemical difference between the two is that an oil varnish is composed of a mixture of a drying oil and a resin of some kind. The varnish-maker cooked the oil and resins together at a high heat, thereby forming a polymer, which is no longer either oil or resin. It does not dry by evaporation so much as by a continuation of the poymerization process, and by “off-gassing” the volatile portions left in the mix.
Varnish makers prepare the spirit varnishes, on the other hand, by dissolving one or more resins in a solvent. Incidentally, the solvent is usually, (but not always) alcohol. When the solvent evarporates, the resin (or resins) remain(s) in and on the wood, to finish hardening. (The mineral ground helps to prevent deep penetration of the varnish into the wood. This is desireable because the varnish-saturated wood does not vibrate the same in comparison to the unsaturated wood, and it can thereby dampen the sound.)
I always begin with a yellow varnish, so that the yellow base coats will “shine through” any thin areas of the darker vanish, providing a reflective “glow” from within.
Yellow Varnish Base Coats
Here is the fiddle with two coats of yellow varnish:
Front View, two coats YellowSide View, Two Coats YellowBack view with two coats yellow varnishScroll with two coats yellow
The grain begins to become more visible with thje addition of the varnish. There is a temptation to stop early, because the grain becomes highly visible after about three or four coats of varnish. But it will look better with more.
Building the Color
I began deepenind the color by simply adding a thin coat of brown varnish, over the yellow base coats.
Deepening the color: one coat brown varnish.
I loved this look…it seemed as though the Quilted Maple wood was in flames, or perhaps as if I was seeing an incredibly dramatic sunset in progress. But I knew it needed more.
Two coats brown over yellow. BackBrown (two coats) over yellow, front viewScroll with Brown varnish over Yellow
Shading
Obviously, (as you can see) I am applying more color in certain areas. I am attempting, thereby, to give the impression of truly aged varnish (where the colored varnish has ben worn away in certain areas through much use.) Some people don’t like that look, but many do. Most importantly, Ilike it. Charles Beare was famously quoted as having said, “There is absolutely no reason to ‘antique’ or ‘shade’ a new instrument...unless you actually hope to sellit!” (Apparently I’m in good company!)
So, I apply more varnish in the areas where hands would be least likely to touch, and where the surface is least likely to be abraded by any means. But, I try to be gentle about this, not heavy-handed. Some (few) makers deliberately damage the wood, in an effort to imitate advanced age. Their instruments sell to people who like that look, but I don’t want to do that. Therefore. I simply brush on deeper color in the areas of least wear.
Usually, I prefer instruments to be at least a little leaning toward a red-brown color, so, I needed to add some red.
More Color
I brushed on a thin coat of red-brown varnish all over:
Back view, leaning toward redFront view, leaning toward redScroll, leaning toward Red
But it still needed more! Consequently, I added more brown in the corners, and allowed it to dry. Then I added more red.
Shading begun, with more redBack with more redScroll with more red
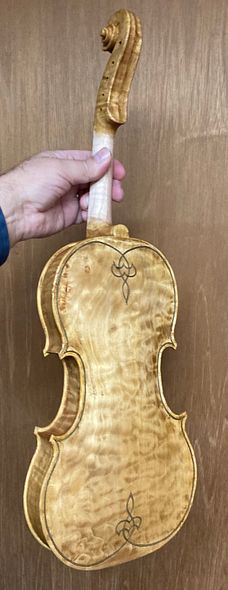
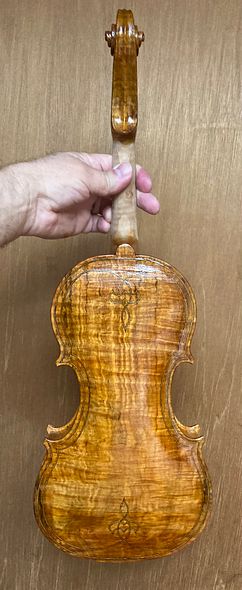
Finally, the varnish reached a depth of color about which I felt pretty good!
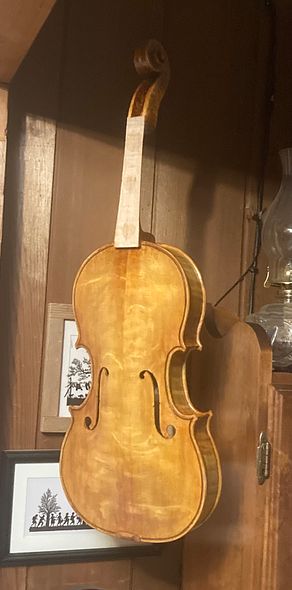
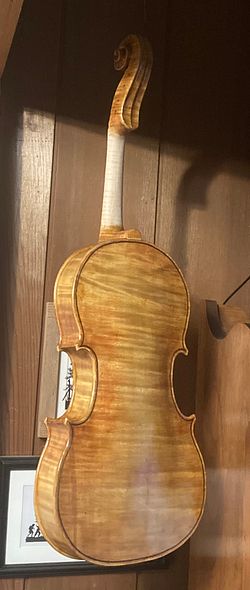
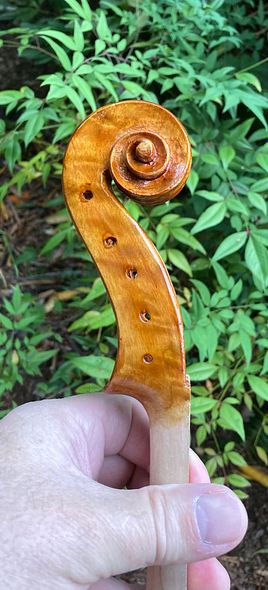
Final Color FrontFinal Color Back Scroll in its Final color
Then, I french-polished the instrument, to flatten any brush-marks. Now I will allow it to dry and harden for a couple of weeks before I set it up for playing. Otherwise, it will acquire deep fingerprints as I work on it.
Originally, I laid out the “kits” for six new five-string fiddles, two years ago. However, I had taken on other responsibilities, so I was pretty busy. But I did manage to complete two of the fiddles a year ago. As a result of numerous interruptions, I had barely begun this particular instrument.
We had lots of interruptions: some good, (a commissioned five-string fiddle) some bad (Health issues for family members.) But, now I’m almost “on the homestretch” to complete my #17 Five-string fiddle.
Where it began
Initially, I bought some very pretty quilted Big Leaf Maple, and some Englemann Spruce, from Bruce Harvie, of Orcas Island Tonewoods. Fortunately, I got the ribs, back and neck out of the same billet of maple. It was nice that the Quilted Maple billet was large enough for that. I cut the top plate and bass bar out of the Englemann Spruce. However, I obtained the willow for the blocks and linings elsewhere.
But then, I laid the instrument aside for a year, partialy completed, while, as I said, other things (commissioned intstruments, family needs, etc,) took precedence.
Eventually, I “drifted back” to complete this instrument in June, and still there were a lot of sidetracks. (“Life is what actually occurs while we are planning something else.“) But this is the final work:
Wild quilted maple back inside carving
Carving the back plate
First, I completed the carving, of the back plate, inside and out. Then I installed the purfling on the back plate. (I had already completed the front plate, a year ago.)
Outside of quilted maple back with purfling complete
Carving the Neck
Meanwhile, I began carving the scroll and neck.
Beginning the scroll, using a saw
Scroll and neck ready for Fingerboard
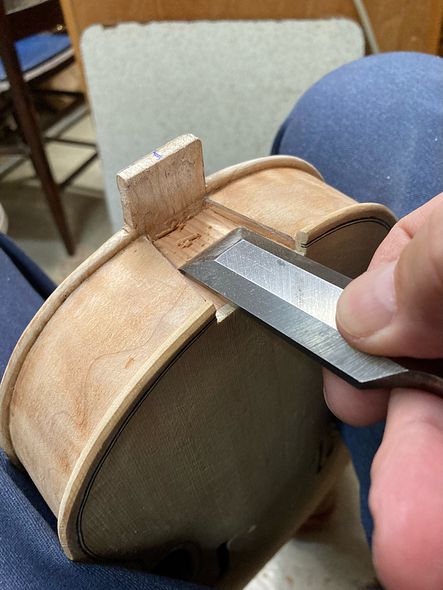
After I installed the back plate on the corpus, it was time to install the neck.
The Neck-Set
Carving the neck mortise
First I laid out the mortise with a straightedge and pencil. Then I carved the mortise out, using chisels and scrapers. Afterward, once the neck joint was perfectly fitted, I glued and clamped the neck into the mortise and allowed it to dry.
However, I still needed to finish carving the neck heel and back button, together, as one piece. In that way, all the dimensions and curves will be correct. In addition, I continued to work on the final smoothing and details on the scroll itself.
Final Shaping of Neck, Heel and Scroll
Final carving of the neck and heelBack nearly completeCarving is complete, and it is time to remove the fingerboard!
Finally, I removed the fingerboard. As a result, I could easily access all of the bare wood for the final varnish preparation and varnishing. (Originally, I had only temporarily attached the fingerboard, by means of three dots of hide glue.)
Front view, Ready for varnishBack view, Ready for VarnishScroll, ready for varnish
Varnish Process
In reality, the varnishing process is fairly involved.
First, I apply a mineral ground. Next, I apply a coat of sealer. Then, I begin varnishing. Furthermore, the varnish must be built up, coat by coat. To begin with, I apply two base coats of yellow. Afterward, I work through whatever colors I have chosen to achieve the final result. (Usually, it requires about eight coats of varnish.)
But, here are some pictures taken after the first two coats of yellow varnish:
Two coats yellow varnish, front viewSide view.: two coats yellow varnishTwo coats yellow varnish, back view.Scroll, with two coats yellow varnish
Next time, I will describe the finishing process in more detail. And, as I near completion, I will post again, showing the set-up procedure.
Last time I posted, I had just completed the commissioned five-string fiddle, up to and including the sealer.
Sealed instrument, Front ViewSealed instrument, Back View.
Varnish:
The “magic” of the sealer was that it caused the mineral ground to disappear forever. The instrument instantly went from stark chalk-white to a natural wood color. As a result, the mineral will never be visible again. I always enjoy that transformation.
The varnish, on the other hand, is a series of relatively small changes, wherein the violin achieves the color we want. Furthermore, the increasing clarity and depth of the varnish gives the impression of being able to “see into the wood.”
I always begin with a couple of coats of deepyellow or amber varnish, as an undercoat which will shine through the later color coats.
Yellow First
Here is the violin after the two coats of yellow varnish:
Front View, with Yellow base coat.Yellow base coat, Treble Side View.Back View with Yellow base coat.
Color Coats
Next, I bagan layering the color coats, building to the look I planned. (Each “coat,” in reality, is usually two coats, applied in quick succession. There were about eighttotal color coats, but I will call them “first through fourth.”)
First Color Coat, FrontTreble Side, with First Color Coat.First Color Coat, BackBass Side, with First Color Coat.
This maple is really beautiful wood. I wish I had a lot more of it, but, sadly, I only was able to salvage a little of the tree from which it originated. The “donor tree” was removed from the property where my wife and her siblings grew up. It had finally rotted and was becoming dangerous, so they removed it. But the wood is gorgeous. You can see the stump in this article….
Continuing color coats
As you can see, the yellow base coat is still showing through pretty strongly. That is good, but I still wanted to move the color toward a deep reddish brown, with the golden yellow shining through. Therefore… I needed more color coats!
Second Color Coat, FrontBack, with Second Color Coat.
The color is headed in the right direction, but still needs to be deeper. I will add extra color in any areas that should be darker.
Third Color Coat, Front.Oregon Big Leaf Maple Back, withThird Color Coat.
I was getting pretty close to correct, so I began taking the instrument out into natural light, to check the color there.
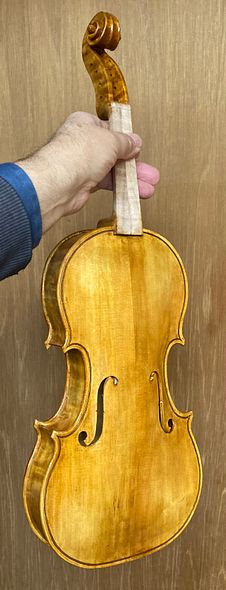
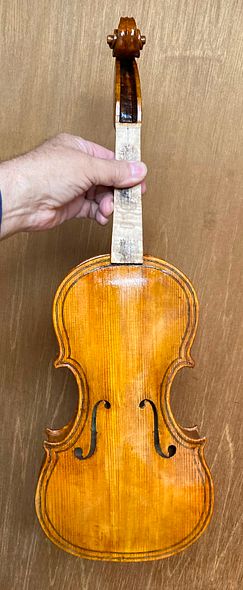
Fourth Color Coat, Front.Treble Side with Fourth Color Coat.Back, with Fourth Color Coat.Bass side, Fourth Color Coat.
The color was pretty close to what I had hoped to produce. Therefore, I felt that I was ready to reinstall the fingerboard, Afterward, I would hand-rub the varnish to a good polish. Finally, I allowed it to hang in my dining room and cure a little more fully. The varnish was still quite soft, though dry to the touch.
Fingerboard
First I carved the underside of the fingerboard to remove extra mass. This affects the sound, as well as the feel of the instrument. (Extra, unnecessary mass tends to absorb vibration rather than resonate.)
Underside of fingerboard beginning. It was fully carved and smoothed before installation.
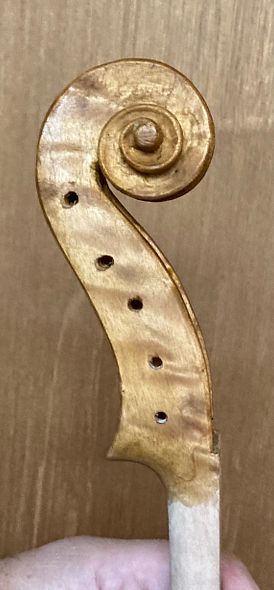
Then I carved a tiny notch, dead center on the upper end of the backside of the fingerboard, where it would contact the neck. After carving the notch in the fingerboard, I drilled a shallow 1/16″ hole in the neck, to accomodate a tiny nail.
That nail is temporarily installed, at an angle, to serve as a guide and an anchor while installing the fingerboard. (The hide glue is very slippery while it is still hot, and liquid. There is a tendency for the fingerboard to “drift” under the clamps, before the glue can gel.)
The notch in the fingerboard fits on the nail. The nail, then, serves as a temporary stop, so the fingerboard stays put. (I remove the nail after the glue has set.)
Fingerboard installed. Notice the tiny nail used to temporarily position the fingerboard.
Beginning Set-up
After a few more days, I began set-up. First, I installed the soundpost, saddle, nut, and end button. Next, I fit the pegs, and was ready for the bridge and the strings.
Nut installed: it will be filed lower before installing strings.Saddle installed, still requiring final smoothing and retouch.
You can see in the above photo that the varnish was still very soft. Everywhere I touched it, it also resulted in my leaving fingerprints. I had to “French-polish” the whole instrument afterward, and let it hang until the varnish was harder. Then it would be easier to handle. (But it was good to have the set-up nearing completion, too.)
Completed five-string fiddle ready for varnish retouch.
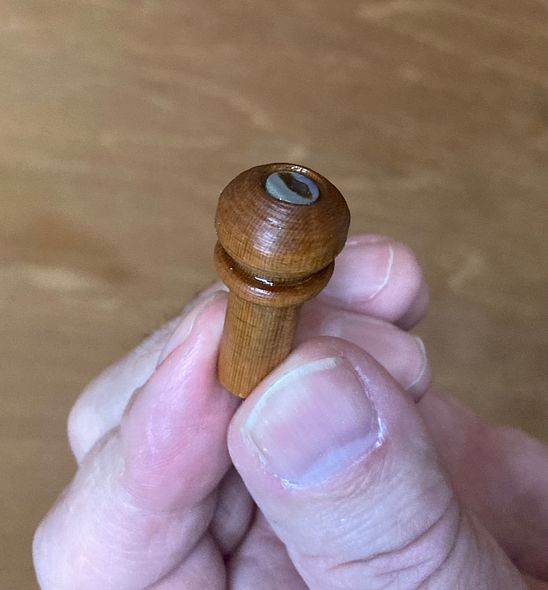
Pegs
After the varnish had hardened a little more, I then installed the pegs.
Pegs installed, Front view.Bass side view with Pegs.Back Side View with Pegs.
Final Set-up
I installed the Bridge and Strings and Tailpiece, and then the fiddle was complete. I still let it hang in my dining room for a week or so, too, so that the varnish would continue to harden without damage.
Hanging up to cure.
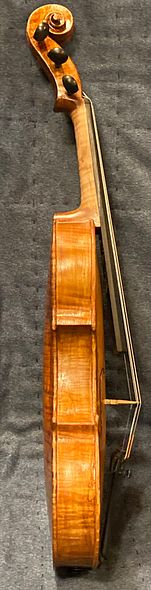
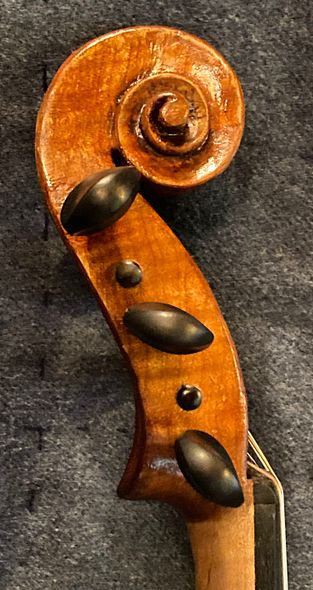
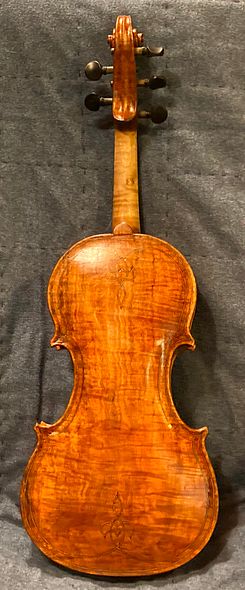
Final photos
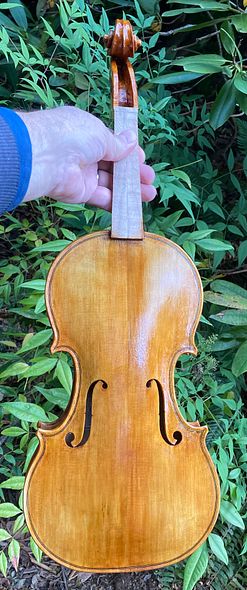
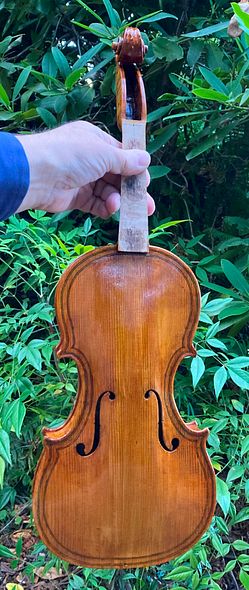
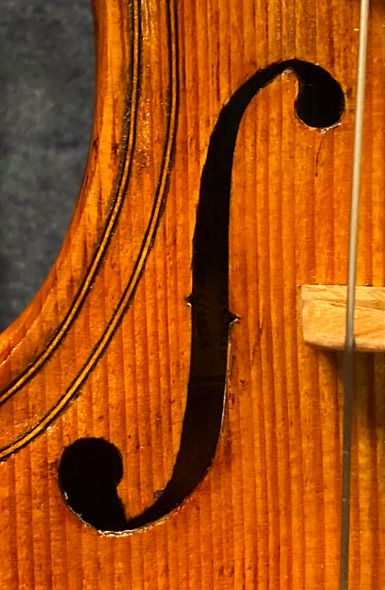
Final look at the Front before delivery.Close-up of the f-hole on the Oregon Douglas Fir Front.Bass side: final look before delivery.Close up of the Scroll.Final look at the back of the fiddle before delivery.
I prepared the instrument’s documents (Bill of Sale and Provenance Document) and afterward, when the varnish had cured for another two weeks, the customer took delivery at the end of July, 2023.
He was delighted, and played the instrument for a long time at my house. Further (which is a joy to me,) he has contacted me since then, expressing his continued joy in the new fiddle. That is the kind of thing that makes this work a great pleasure.
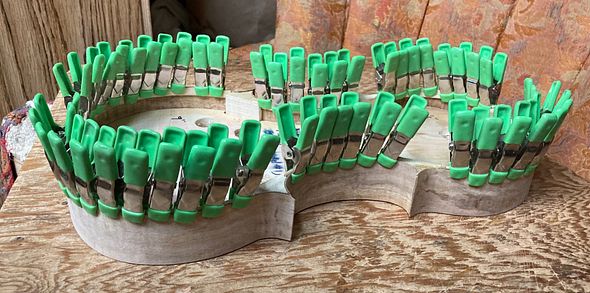
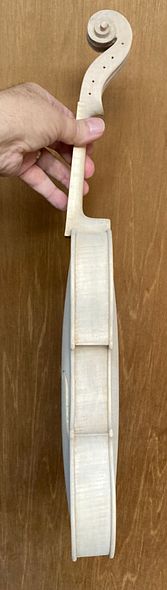
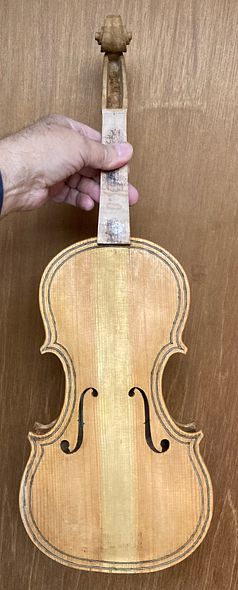
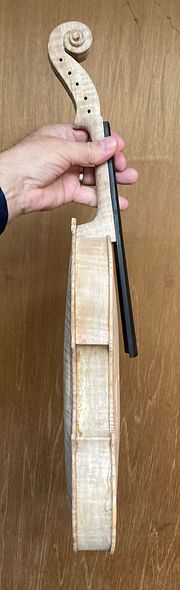
Front, with rib garland, back, neck and fingerboard, nearly ready for assembly.
I failed to take photos of the actual neck-setting procedure on this violin. (Sorry.) I will link to a series of photos from a previous instrument. That one had a major “flesh-wound” mishap. (I accidentally thrust a gouge through my left thumb…but it does include the neck-setting process. And the wound healed!)
This one went very smoothly: I think it took less than an hour to achieve a perfect fit. Then I removed the interior mold, and installed the back linings, so that the corpus was complete and ready to receive the back plate.
Back linings, installed on an earlier instrument. Once again, I forgot to take pictures.
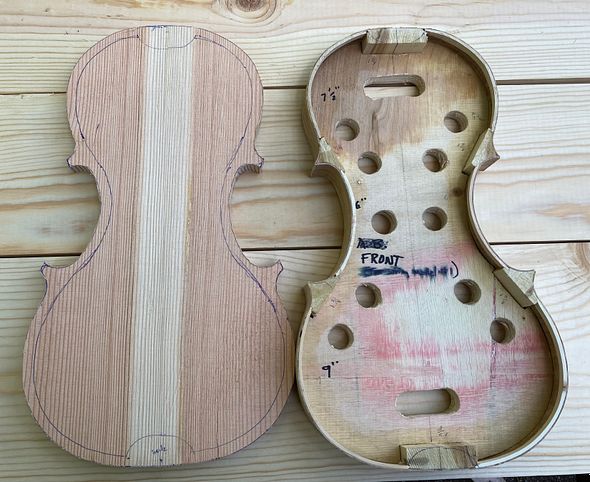
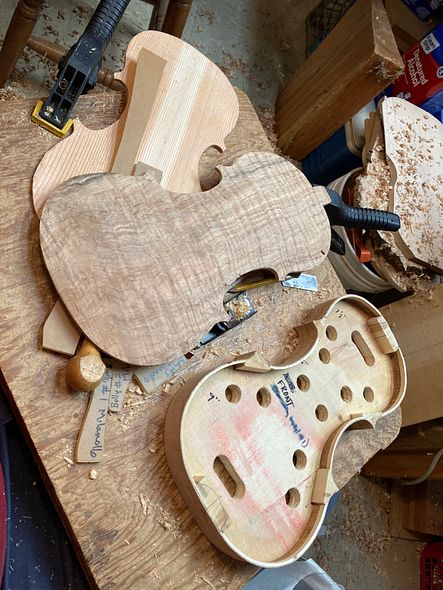
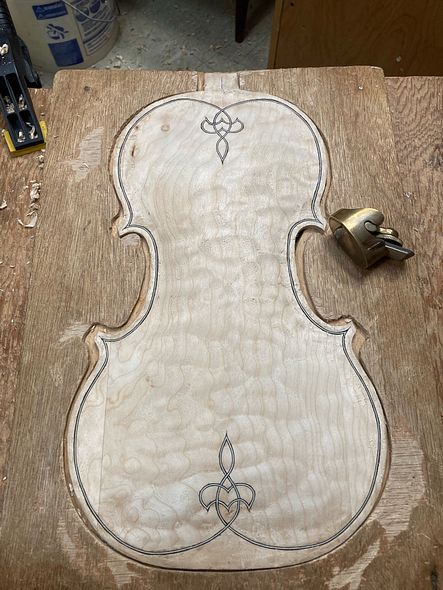
Completing the Back Plate
I also had to complete the back plate. I had already completed the outside arching, and most of the interior carving, as well. Still had to finish scraping the interior dead-smooth, then install the purfling, and the label.
Completing the interior of the back plate.
Beginning the purfling weave on the back plate.
Partway done with back plate purfling.
Completing the purfling weave inlay.
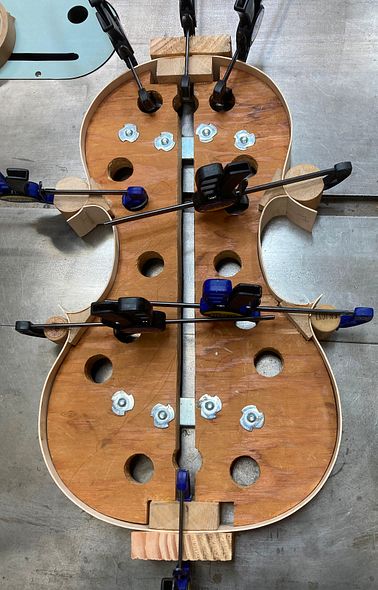
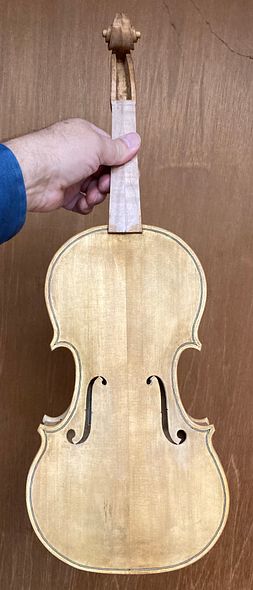
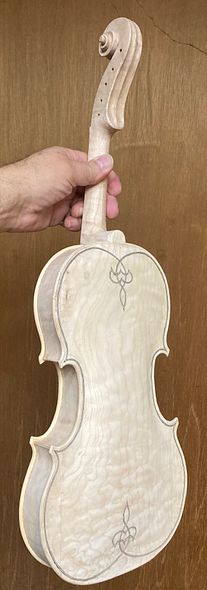
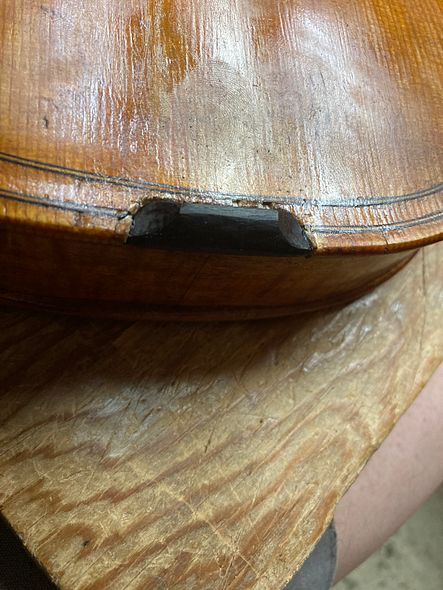
Once the plate was truly complete, I added the label, and installed the back plate on the corpus.
The spool clamps hold the entire perimeter while the glue sets. the spring clamp holds the neck heel and button tightly in place.Back plate installed: notice that the button is far oversized. (See next photo.)The back button is deliberately left oversize, to be carved to final shape as a unit with the neck heel.Neck heel and button carved to match.
Preparing for the Varnish
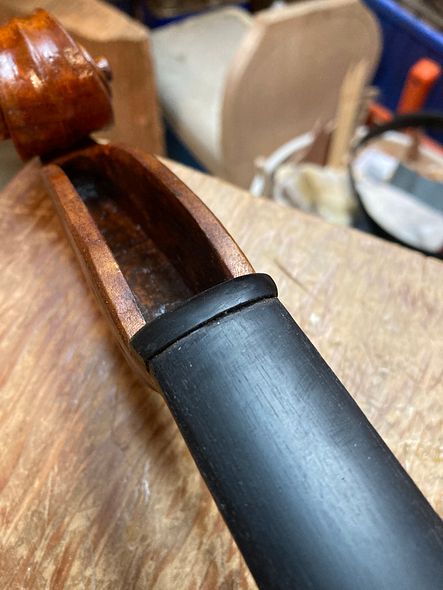
I removed the fingerboard, to give me easy access to all parts of the front of the fiddle. Notice that the fingerboard had only been held by three “dots” of hide glue. even so, the glue took off a microscopically thin layer of ebony when I removed the fingerboard. (That is what the “black stuff” is.)
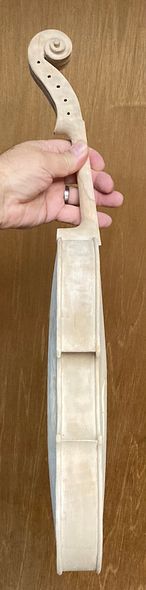
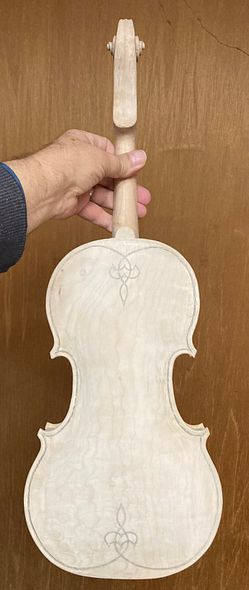
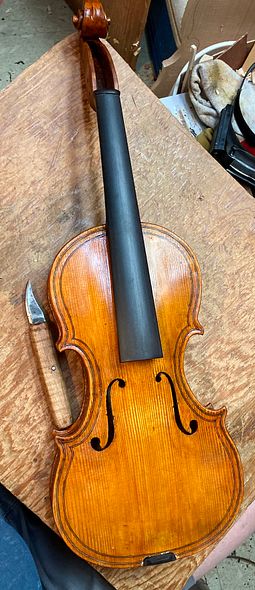
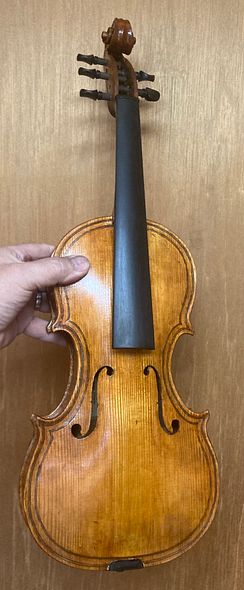
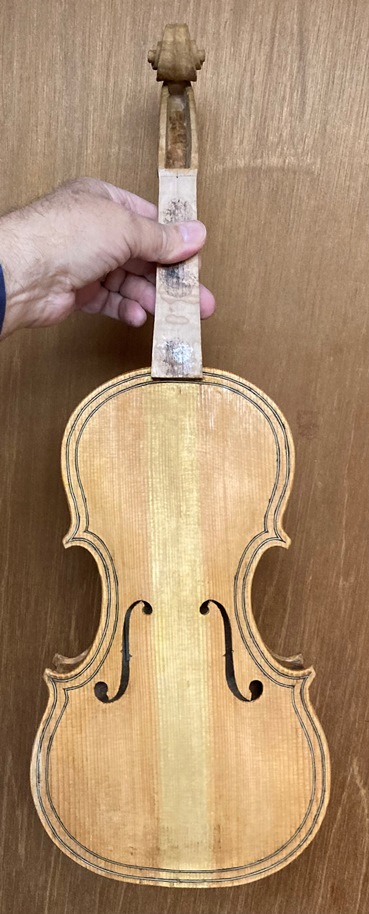
Fiddle “completed in the white.” Ready for all varnish-prep work.
All final shaping has to be completed at this point: any bumps, humps and hollows have to be carefully addressed, using a sharp scraper, before the mineral ground is applied. The mineral ground is a suspension of extremely fine particles that “plug” the pores in the wood, so that the varnish does not penetrate deeply and deaden the sound.
I apply it wet, with a brush, and vigorously rub it into the wood with my bare fingers, then rub off as much of the excess material left on the surface as I can. It is not supposed to be “on” the surface, so much as “in” the surface of the wood.
Front side, with wet mineral ground.
The wet mineral ground temporarily darkens the wood, but, as it dries, it turns stark white.
Dry mineral ground.
The next step is always pretty amazing: when I brush on the sealer, it surrounds all the “white” particles in the wood, and they become transparent. Look at the “before and after” photos of the back plate, as the sealer is applied:
Back plate with dry mineral ground.Same plate with sealer applied.
From this point forward, it is just a matter of applying numerous coats of varnish, and adjusting the color as the process progresses. Furthermore, I want all the parts to “fit together” in terms of color. (You can see that there is a difference between the front and back color, for example.)
Next time, we will talk about color varnish coats.
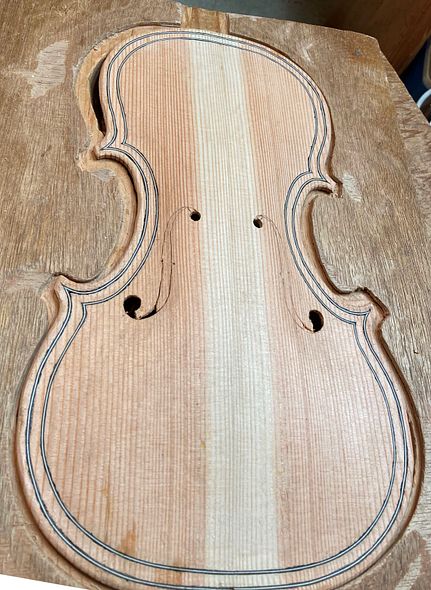
So, moving forward, the next thing was to complete the front plate,
Douglas Fir Front plate outer arching nearly completed
Once the arching was nearing correct values, I carved most of the interior and then began laying out f-holes and purfling lines. The Douglas Fir is extremely difficult to work with, because the winter reeds are incredibly hard, while the summer reeds are nearly as soft as spruce… so the knife tends to follow the winter reed, instead of your intended path, making it very difficult to cut a smooth line.
Beginning to carve the interior of the Front Plate. This part was not too hard.Checking the depth of the hollow. There is still work to do on the outside, so I have to be careful.
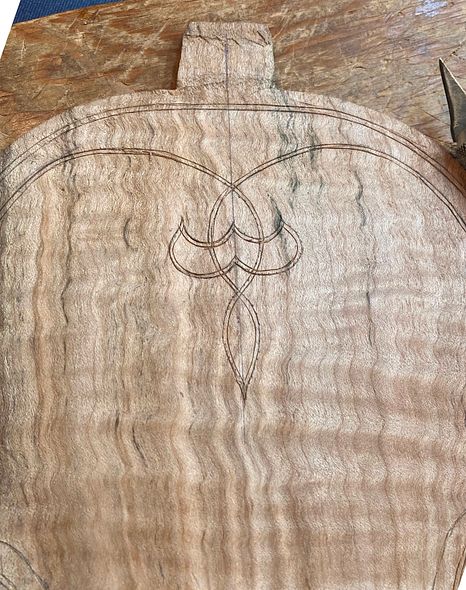
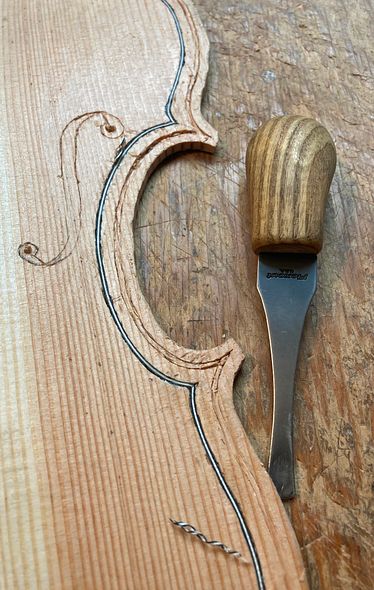
Purfling Procedure
Rough beginning for purfling and sound-holes.
It was discouraging seeing how rough my beginning looked. But, as things progressed, I was able to clean up my lines a little and they began to look more acceptable:
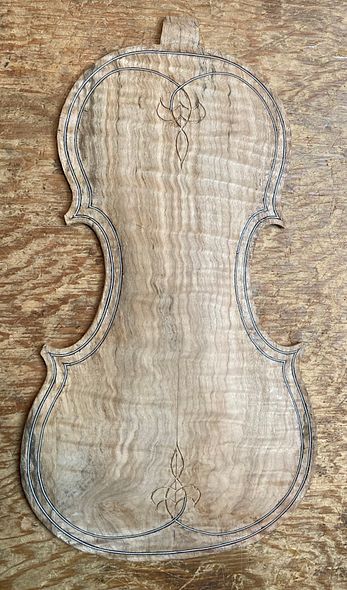
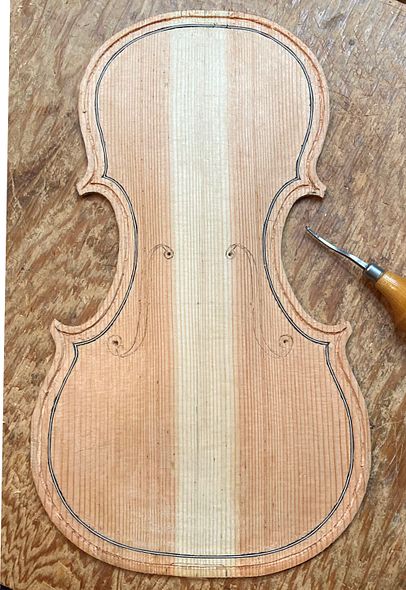
Inner line of purfling completed.
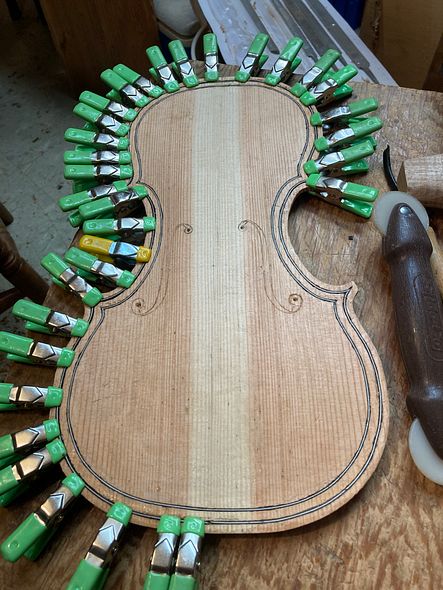
And then, The outer purfling. I was being careful to not inlay the purfling too deeply, for fear of causing problems, but that meant the purfling did not want to stay in the slots by itself, while the glue set. So I had to clamp it down until the hot hide glue gelled and set up.
Clamping purfling while glue sets.
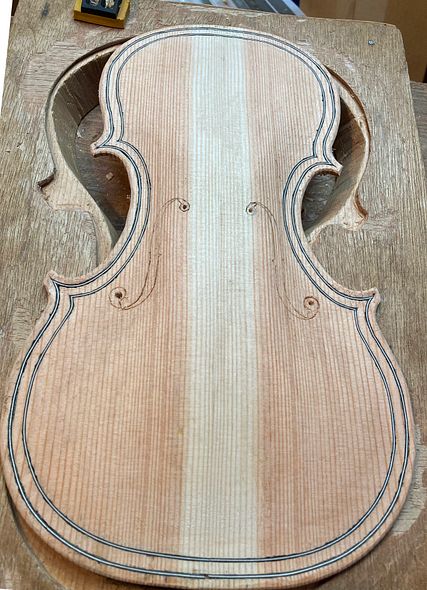
But it looked pretty good after I planed it all flush with the Douglas Fir.
Outer line of purfling copmpleted. Notice the pilot holes for the f-holes have been drilled.
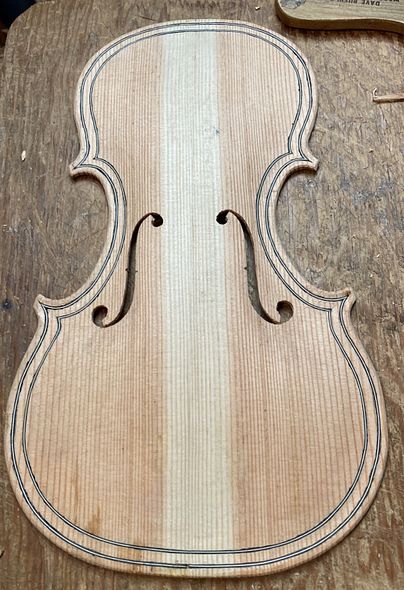
When the interior and exterior were correct, I could finish cutting out the f-holes.
Beginning to cut out f-holes.F-holes completed but rough. as the next few days went by, I kept returning to the f-holes with small files and perfecting the shapes.
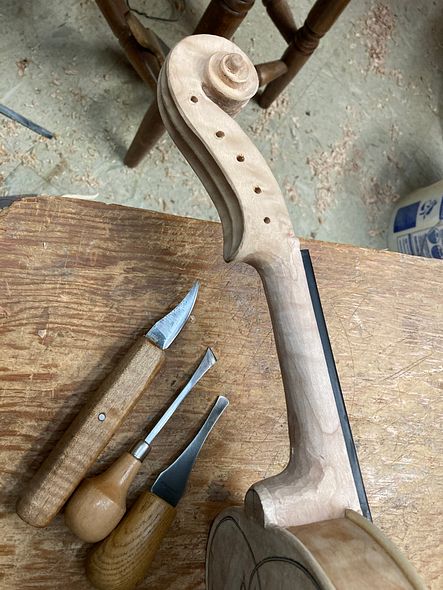
Originally, when I first began making instruments, I laid out the scrolls with a pencil and simply started carving. However, that was extremely labor intensive and not very accurate, either. As a result, it was very easy for me to lose track of where I was going, and ruin a scroll by carving away wood I really needed. (Obviously, that is a “bitter pill to swallow,” having to scrap a scroll and start over.)
Learning from a Better Maker
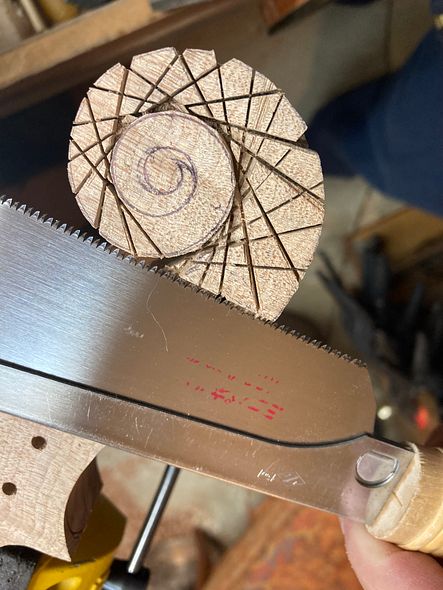
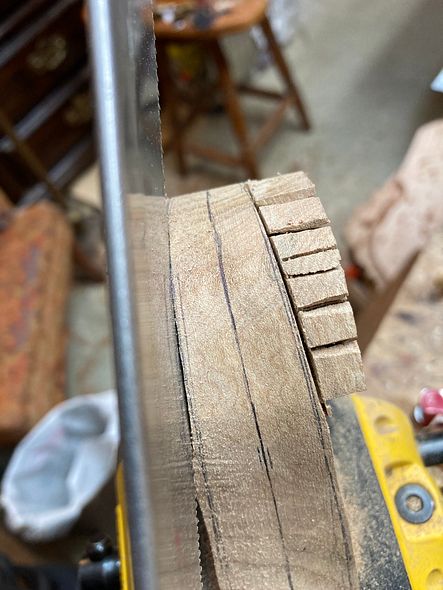
So, then, what has changed? Fortunately, I watched how a viola maker in Brazil (Luis Manfio, of Sao Paulo) carves his scrolls, on a photo-essay he once posted. To begin with, he used a fine-toothed saw to cut “tangents” to the scroll pattern. Then, he used the same saw to follow the side surfaces of the scroll and remove the scrap wood. Understandably, this was a much better way than I had been attempting, so, ever since then, I have followed that path.
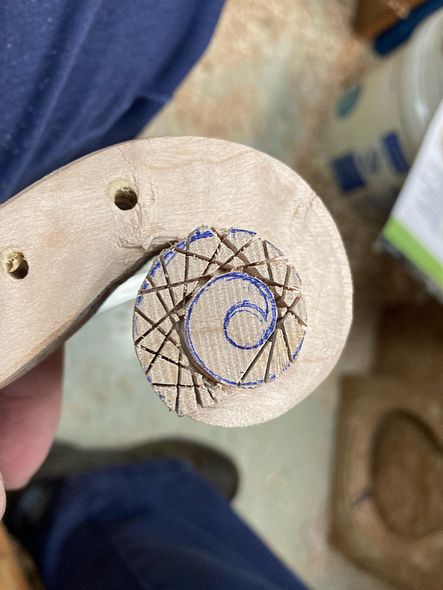
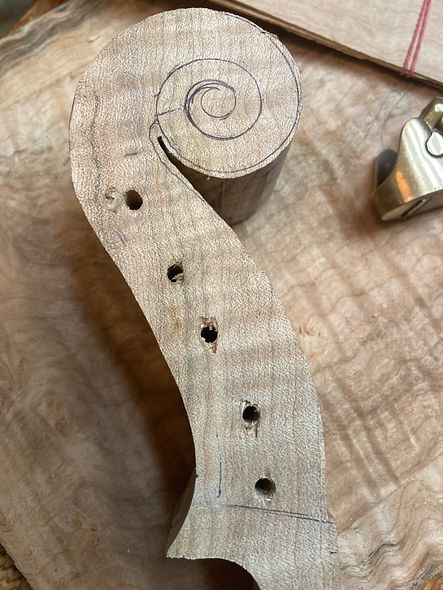
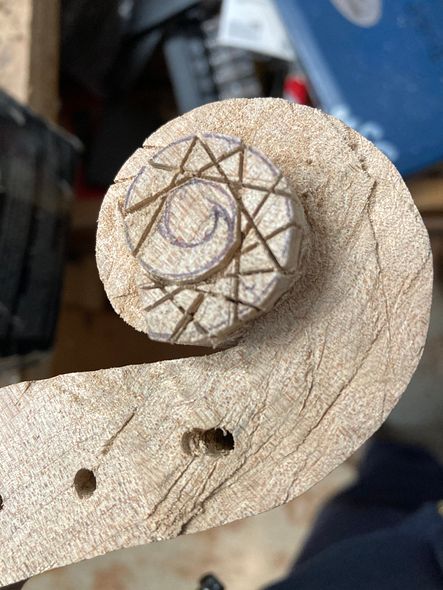
Step one: Five String Scroll blank, laid out for carving.Also, the Volute and pegbox layout.Step two: Cutting tangents to the scroll curves.Step three: Cutting the volute lines, to remove the scrap wood.The resulting scroll blank still needs more tangents cutThis is how the final tangents look. (Notice, too, an “error” pilot hole. It will be plugged befor the real peg holes are drilled.)
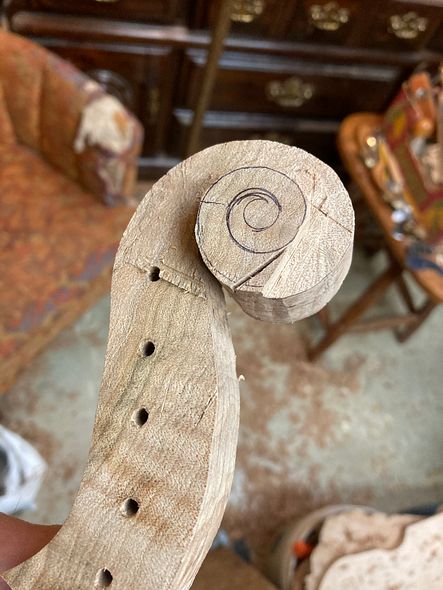
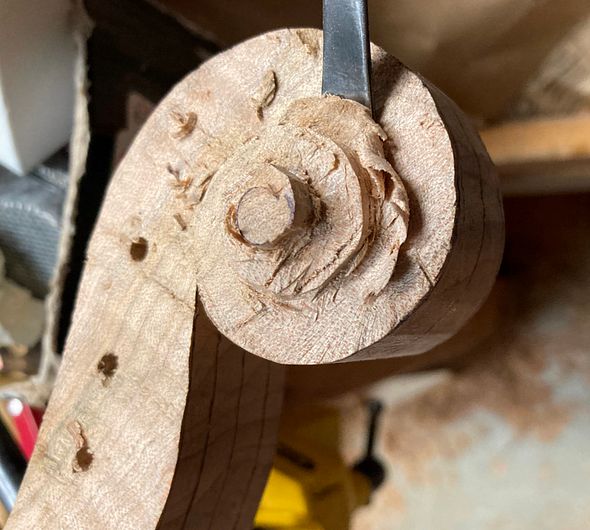
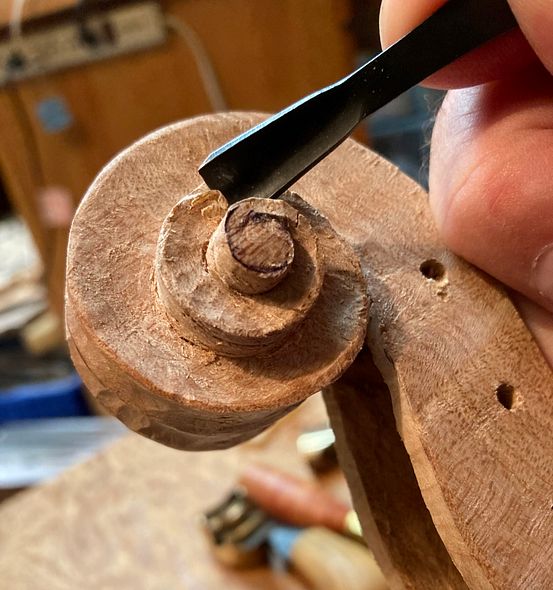
Then I carefully cut away the waste wood from the center area of the scroll, using small gouges.
Using a small gouige to remove the rough wood from around the scroll “eye”Undercutting the turns of the scroll, using a small curved gougeRough carved pegbox and scroll, front viewRough-carved scroll and pegbox from side and backCloser view of rough-carved back of scrollTreble-side view of rough-carved scroll. (Additionally, notice that the “error” hole has been plugged.)Bass side of rough-carved scroll.
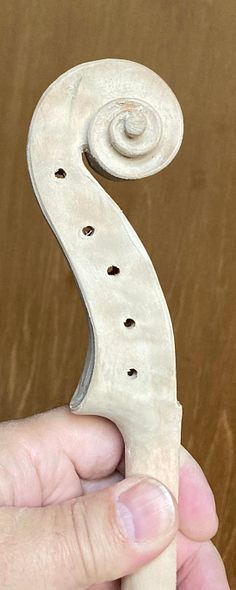
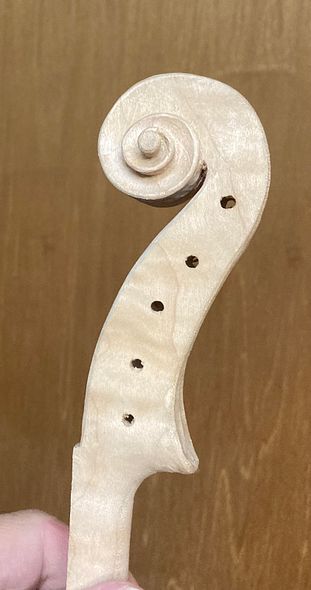
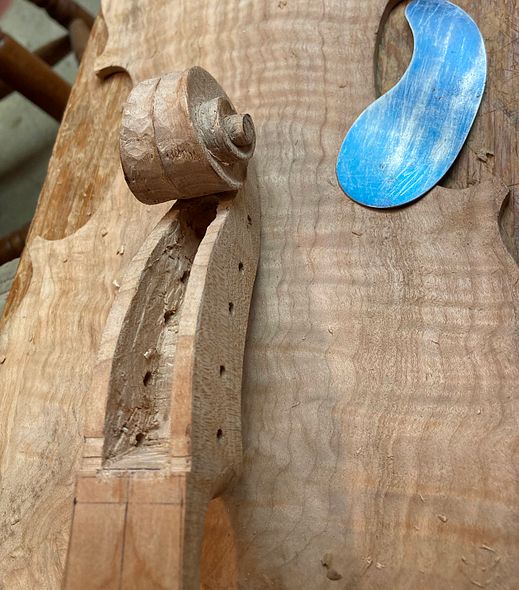
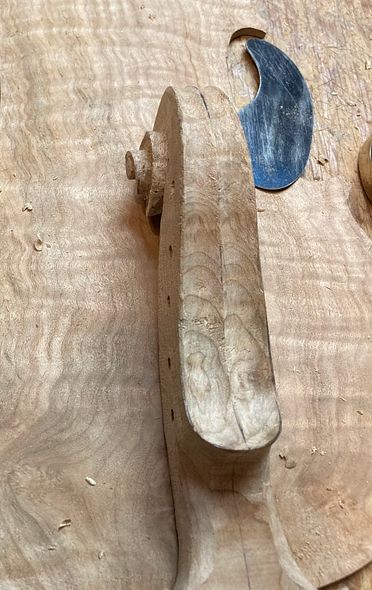
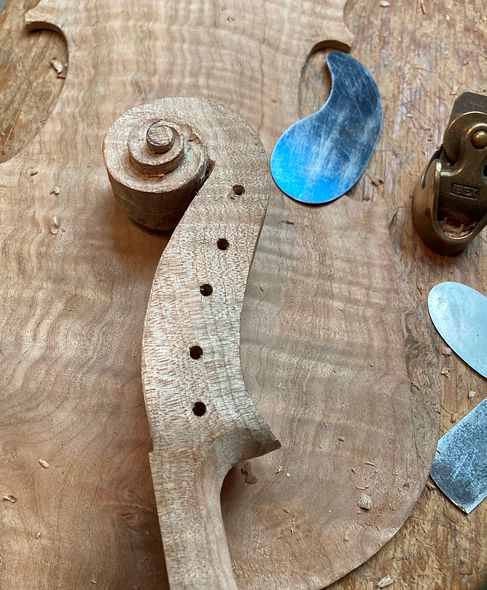
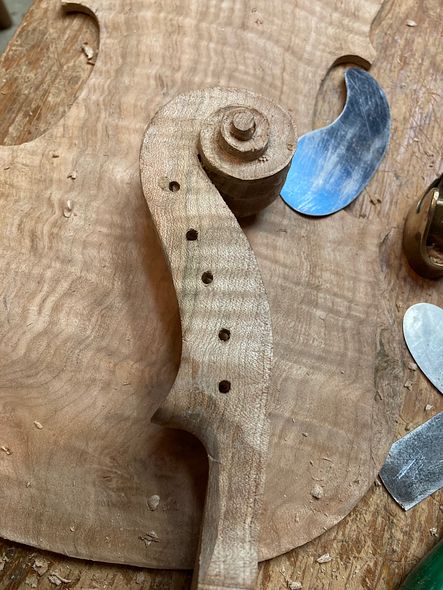
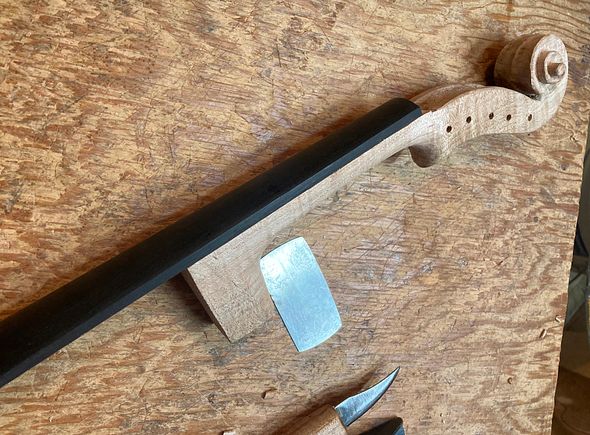
Installing the Fingerboard
After the scroll is close enough to correct that it will not be changing much, I will trim off the excess wood from the sides of the “handle-portion” of the neck. Then, I will temporarily install the fingerboard, using three “dots” of hot hide glue.
Fingerboard temporarily installed and being shaped along with the neckShaping the fingerboard and neck, and perfecting the scroll
Subsequently, the next step is to install the neck into the neck-block on the instrument.
A customer ordered a new, custom-made Five String Fiddle, and it is on the way! He chose heavily spalted, heavily-flamed, Oregon Big Leaf Maple for the back plate, the sides, the neck and scroll. My wife’s parents gave me the wood from this maple tree.
Ann used to play under and climb on this tree as a child, and we hated to see the tree cut down. Her parents still live there, less than four miles from our house. However, they had to remove the tree because it was dying. I have salvaged wood for a few instruments from that tree and they all look and sound wonderful!
Given a choice between Spruce and Douglas Fir, the customer chose the Douglas Fir, for his front plate. This tree also grew just a few miles from my home. (A famous violin and viola maker, Otto Erdescz (1917-2000) used to make violins and violas with Douglas Fir soundboards. Professional musicians still play some of them, today. But very few luthiers use Douglas Fir. I didn’t either, until a few years ago!)
Not my usuaI Choice in times past
For many years, I refused to try such a thing. But a friend gave me a load of very straight grained Douglas Fir firewood, a few years ago. I was splitting some of the firewood, and the split-off piece hit the ground: it rang like a bell! I had never seen such straight-grained, clear Douglas Fir, with zero runout!
Unfortunately, that particular piece was too short for a fiddle. I had to search through the pile for a piece that was long enouigh for a violin plate.
Since then, I have made several such instruments, and they all sound great. (I find that the Spruce is definitely easier to work with, though, and, for classical, orchestral instruments, I still use only European maple and spruce.)
Customer Preferences:
This man showed up at my shop and he played all the five string instruments I had. (He really had not played 5-string instruments before. He laughed for joy, hearing the rich deep C-string on each one. After a short while, he declared, “OK, I’m addicted!”)
He played the full range of all of them. He finally settled on my earliest unsold 5-string (#3 on the “Chronology” page) as being exactly what he wanted.
But not to buy that instrument. No! He wanted a commissioned instrument “just like that one!” (He wanted one especially built for him! Sure! We can do that!)
And, as it turned out, that was a good thing. A week later, thenext customer who came to try out all my instruments also loved that fiddle, but she bought it that day, and drove away! So, it is gone, now!
Which Mold?
I knew which of my molds was the source of that fiddle: I have made at least four off of that specific mold. All of them have sold, now, so, for the moment, there are none available. (This instrument will “solve that problem,” for a moment, but it will disappear immediately after completion.)
The commissioning customer also wanted localwood. so that he could say, “My violin came from a tree on that hill!” So…choosing the wood was the first step.
Choosing the Wood
The model I would use had already been chosen, so that was not an issue. I also knew what the wood source would be: I still have a little of the maple my wife’s parents had given me. And, with the customer’s approval, I chose a clear piece of Douglas Fir, salvaged from the firtewood I mentioned earlier. He loved both pieces.
“Fiddle in the rough!”
Here is a closer picture of the maple:
Heavily Spalted and Heavily Flamed Maple
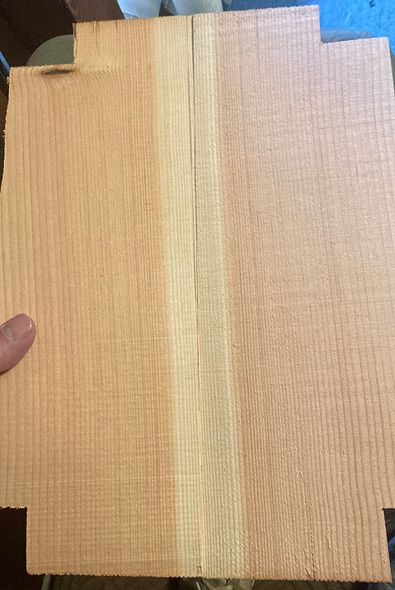
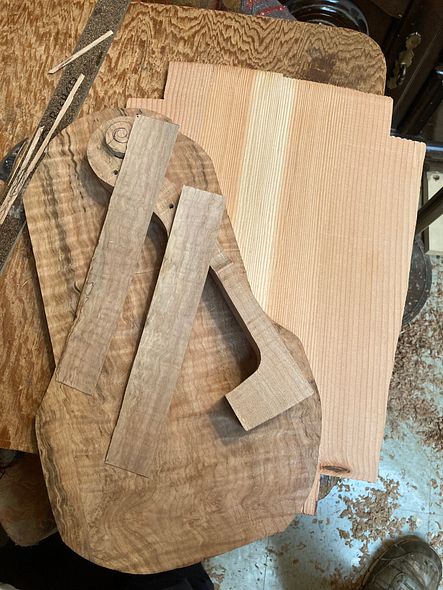
I book-matched the spruce, by cutting a single billet in two equal halves and gluing them together to make the front plate.
Douglas Fir, cut and ready to joint and glue the Center seam
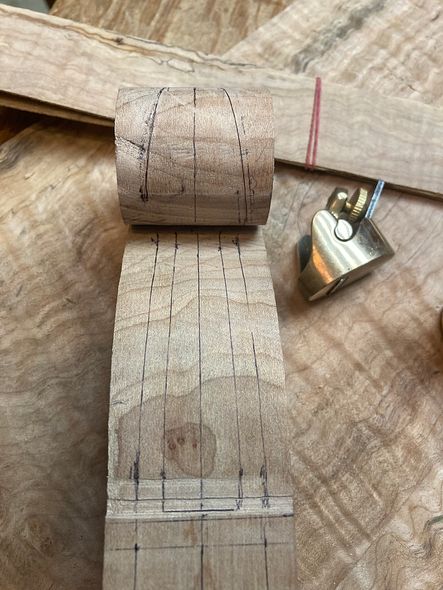
I laid out the neck outline on the billet I had chosen for the neck, and I drilled the pilot holes for the tuning pegs. Then I cut out the side profile on a bandsaw.
Scroll profile cut out, and pilot holes drilled.
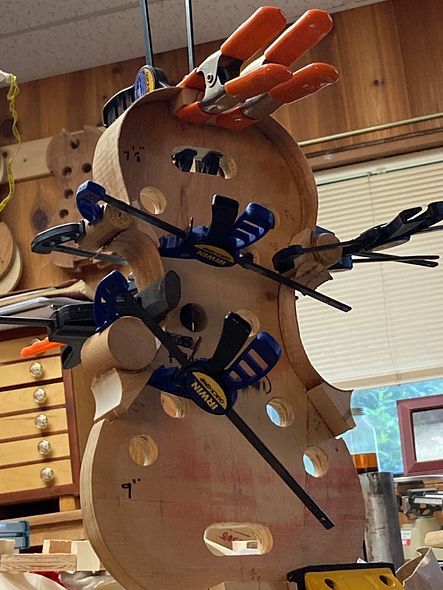
Mold Preparation
Meanwhile, I got the blocks glued into the mold. Then I traced their shapes from my template, so the whole job could begin. I also planed away the rough surfaces of the maple to ascertain that it actually would serve well as the back plate of a new five-string fiddle. And, I found that it was just a little too narrow in the lower bouts.
So, I “transplanted” a small piece of wood from the area above the upper bout on each side and grafted them in on the lower bouts. (This practice is not at all uncommon: It will be every bit as strong as the center seams on two-piece backs. And, once the double purfling is installed, the joints will be nearly invisible, under the varnish.)
Back plate in progress, blocks in the mold, and the shapes traced from the template.
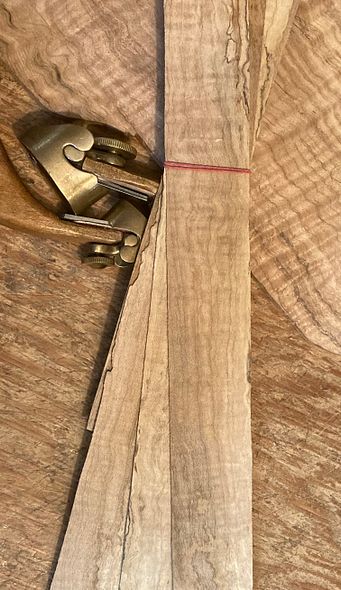
Preparing the Ribs
I had chosen wood for the ribs, as well, and I sawed them to a thickness of a little over 2 mm. I thinned them, using a wooden fixture I made, clamped to my oscillating spindle-sander. The fixture allows me to gradually reduce the thickness to 1 mm.
Here are the ribs:
Rib-stock, sawn and thinned: ready to be cut to size and bent.
Installing the Ribs
Next, I cut the ribs to the correct length and width. I carefully considered which grain from one side would “mirror” which grain on the otherside. I had already been tinkering on the neck, as you can see in this photo, but I will explain that process later. (It isn’t always possible to do everything in a precise order. While I am waiting for glue to dry on one section, for example, I may jump ahead on another piece.) You can see the bookmatched front plate, too.
Bookmatched top plate, neck and back billets in progress, and rib samples, cut to size.
I cut all six ribs, and marked them as to inside, outside, upper and lower ends, etc, as well as which side of the fiddle they would call their home…treble or bass side.
Then I bent the ribs using a hot “bending iron” (actually made of aluminum, but, in the old days, they wereiron.)
(I forgot to take photos of the shaped blocks: Sorry.)
I had cut and shaped the corner and end blocks, already, so I applied a generous coat of hot hide glue to one block at a time. then, I clamped the rib into the block surfaces, making certain that everything fit correctly before tightening the clamps.
First, I installed the center bout ribs, and when the glue had dried, I used the spindle-sander to trim the ends of those ribs to match the curvature of the outer faces of the corner block, so I could install the upper and lower ribs. Here are the upper ribs, glued and clamped:
Center and Upper bout ribs installed, using hot hide glue and clamps.
The lower end of the bass-side center bout rib was not fully tight, so I reglued it and reclamped it. (left lower side of photo.)
Then, when that glue was dry, I installed the lower ribs, by turning the mold upside down in the vise, so I could see clearly. It also meant that both hands were free to adjust the rib position, and apply clamps.
All the ribs are installed, but still need to be trimmed, before installing the linings.
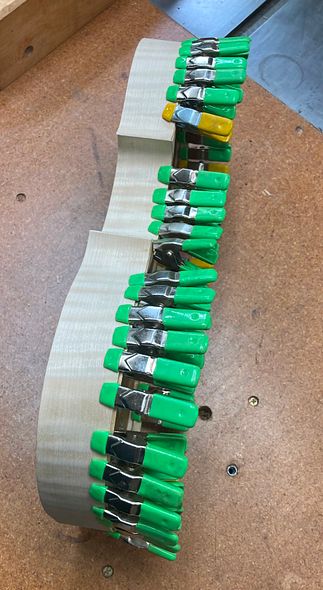
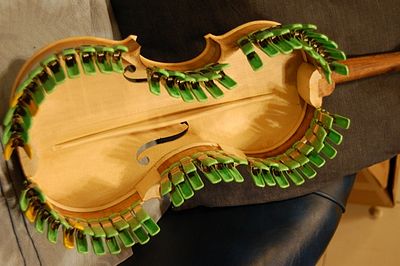
Linings bent and installed
I also did not take photos of bending and installing the linings. (Sorry.) Here are two photos of the result, still in clamps.
Front view of linings clamped in place.Side view of lining clamps and rib garland.
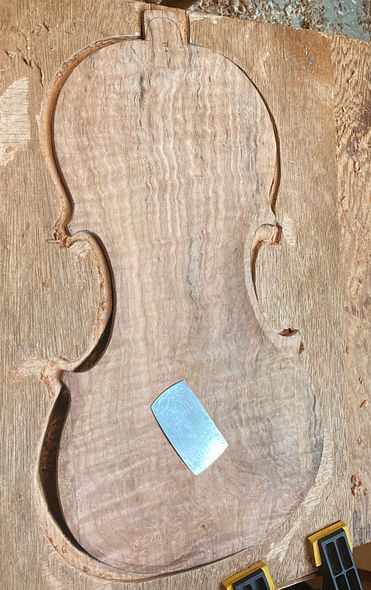
Tracing the plates
Once the linings were installed and the ribs thus strengthened, I could trace the shape of the plates, and begin cutting things out.
Garland and Front plate billet cut to shape.And, that is the progress, so far!
Thanks for looking! I will try to keep everyone posted as to progress.


_rib_installed.jpg?width=590&height=590&fit=bounds)