
“New” Five-String Bluegrass Fiddle, Begun Two Years Ago
I Began in Good Faith, Years Ago!
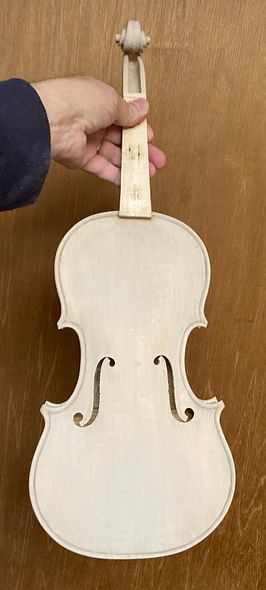
Originally, I began this fiddle in 2023, thinking I would “press on” and get it done soon. I had already closed up the corpus, with the dated label inside! But, due to unforeseen circumstances, I had to postpone its completion.
A commissioned instrument interrupted the flow of my “built-on-speculation” instruments. I always move any commissioned work (whether repairs or a new build) to higher-priority. I move them ahead of my usual “build it and they will come” work.
The man commissioned a five-string fiddle on one of my early models. So, I completed his instrument (#16 on the Chronology page) before completing Instruments #17, #18, and #19. I had planned otherwise, but it happened.
Slight Chaos!
I had begun all three of those instruments, simultaneously. But I did not realize that, in my array of personal labels, I had somehow skipped #16. When that came to my attention (as I worked on the commissioned fiddle) I felt I had to correct the mix-up. I had no option but to print a new sheet of labels, with a #16 in the mix. Then, I labeled his new fiddle, as though I had built it before the other three. I completed it before the others, though, but instruments #17-19 were still hanging on my workspace wall, waiting for their turn. (Sigh…)
Meanwhile, I had surgeries on my right eye (cataract surgery and corneal transplant) and had to wait for it to heal before I could do much work.
Later, my beloved wife, Ann, fell and broke her wrist, requiring surgery to repair it. At the same time, I had contracted Covid (finally…my first time!) and could not even go to the hospital with her. Fortunately, our daughter was in town, with her husband, and they took her to the ER.
By the time all that was over, I had the same surgeries in the other eye. (Yeah, it was a really productive year!)
BUT: Between all the “setbacks,” I did manage to complete instruments #17 and #18 on the Chronology page. (#18 sold almost immediately…that was nice!)
But then…
Another client called with a commission: This customer wanted a 15-3/4″ five-string viola. She lived in Switzerland., and will fly here to take delivery, so I again shunted #19 to “last in line.”
Resuming Work on Five-String #19
I have nearly completed the new commissioned viola. (It will be five-string #20…but it is not yet on the Chronology page.) So I went back and resumed work on #19.
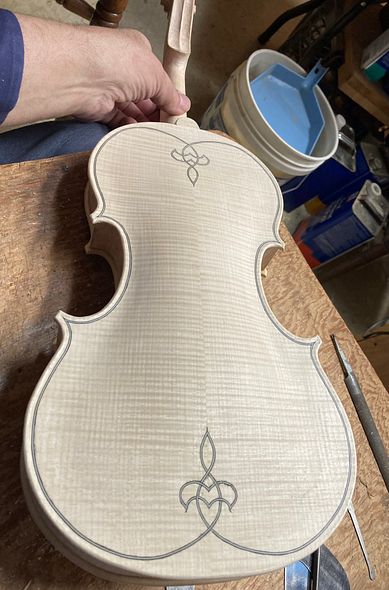
The work had already been done up to (but not including) the purfling on the back plate. So that is where I had to begin. Unfortunately, I was still “sneaking in a few minutes, ” here and there, while completing the newest viola, so I neglected to photograph the purfling process. However, if you would like to see that process, here is a link to the purfling procedure for a large five-string viola from five years ago.
Preparing for Varnish
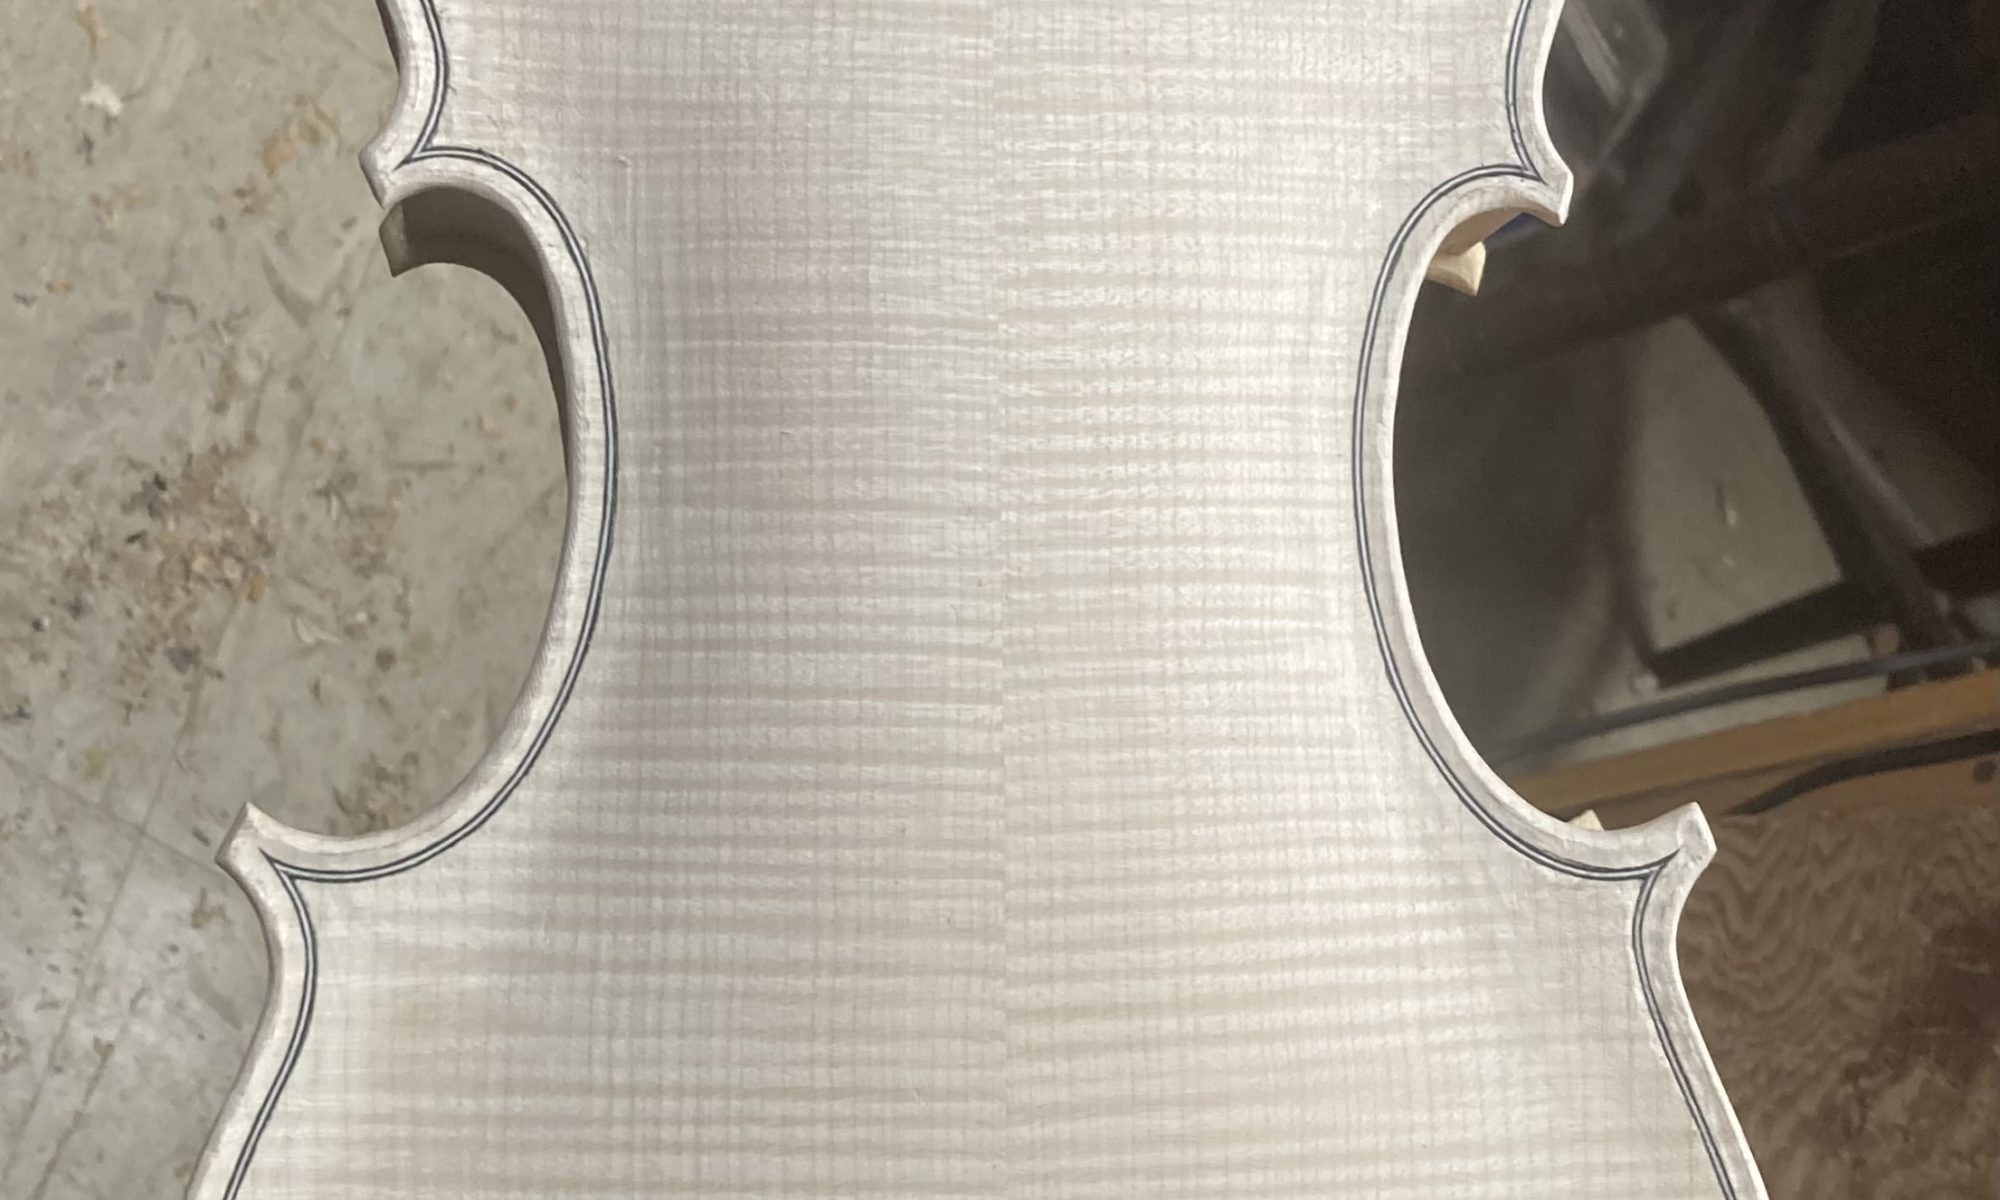
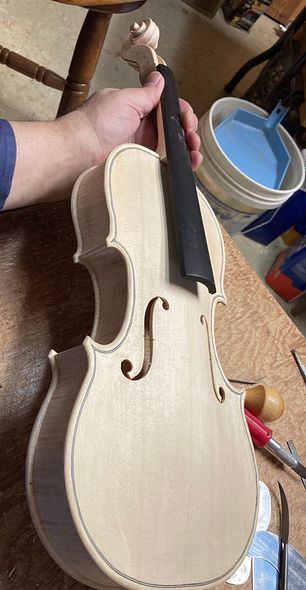
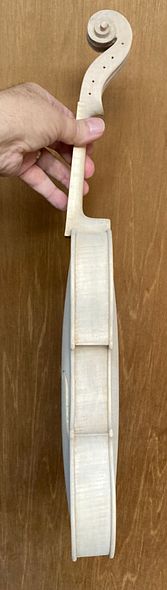
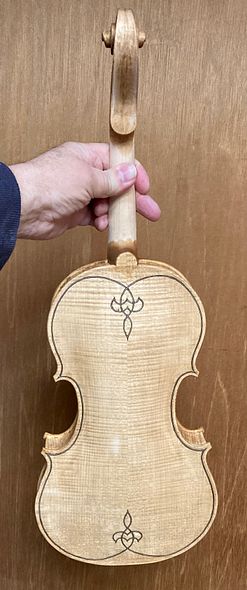
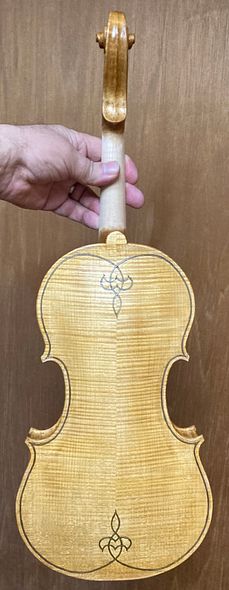
I scraped the entire instrument as smooth as I could get it, then brushed coffee all over the instrument, to raise the grain, and allow me to see areas that still needed work. I repeated this cycle until the grain would no longer swell with moisture, then I sanded it lightly all over, to remove any tiny, unnoticed fibers that might still be protruding. The instrument looked like this at that point.
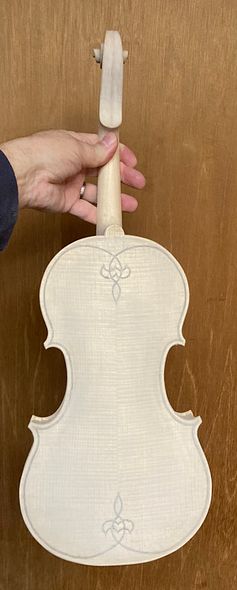
Mineral Ground
I learned for Roger Hargraves that filling the natural wood-pores with a mineral will help the sound, and it prevents excessive varnish penetration. So, nowadays, I rub Gypsum powder into the raw wood surface, to fill those pores. I mix the gypsum with coffee, which adds a tiny bit of color to the wood, but when the mixture dries, it turns chalk-white, mostly obscuring the grain;
Sealer
After the mineral Ground is fully dry, I gently sand off any excess gypsum, that is sitting on the surface, so that it will not obscure anything once the varnish is in place. It still looks stark white, but does not have piles in the corners, or elsewhere.
The Sealer application always seems like magic, because, as the sealer surrounds all the perticles of mineral, the gypsum turns transparent. It literally disappears, and will never be seen again!
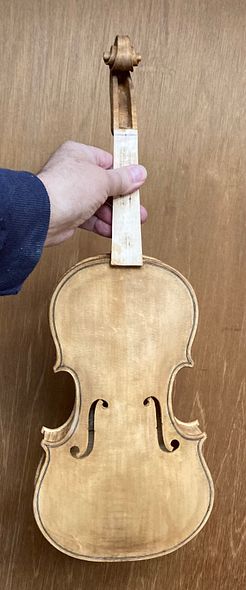
The Sealer I use is made of rosin, dissolved in a mixture of denatured alcohol and Spirits of turpentine (the one that strongly smells of pine.) It takes a few days to dry as a rule, and the fragrance of pine remains for a long time.
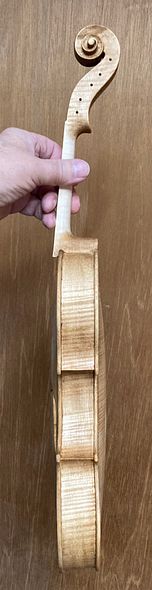
After the sealer has completely dried, I go over the instrument to remove any excess sealer. I can do that with a thin, flexible scraper, or stearated abrasive paper (which does not easily clog up) or by using a rag, wetted with denatured alcohol. (I think the rag with alcohol probably does the best job.)
Then it is time to begin varnishing.
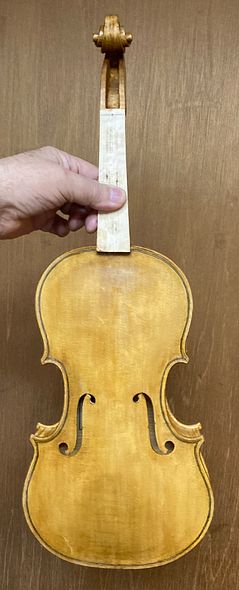
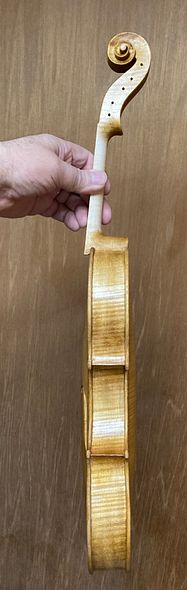
Varnish Beginning
I usually begin with three coats of yellow varnish, to provide a deep “golden glow” to shine from within the subsequent darker coats of varnish:
Color Coats to Come
Next, I will begin to add the colors of varnish I need, to produce the finished look I want. It requires anywhere from eight to twelve coats to achieve that look, usually, but each coat is microscopically thin, so the entire finish is still extremely thin. It will not reduce the sound quality at all, and it will protec the wood from dirt, skin-oil and other substances that might otherwise penetrate the bare wood.
If you would like to immediately see how I finish an instrument, see this link.
I have often had people ask whether I would be willing to leave a violin unvarnished. For the above reasons (plus the fact that I would not put my name in such an instrument:) The answer has always been “No.”
Next time, we will walk through the varnishing process.
Thanks for looking!