Simultaneously, I had purchased the European Maple one-piece back, as a solid wood billet, with sides, and neck billet. Additionally, I ordered the European Spruce front plate blank from International Violin Company in Baltimore Maryland.
At the time when I last posted, I had just begun varnishing the viola and had only applied the yellow base coats of varnish. Obviously, the intent is that this yellow base will provide the “golden glow” shining from within the subsequent darker-color coats of varnish.
However, as I added increasingly dark varnish layers, the changes were increasingly slight. As noted earlier, the change from raw wood to sealer was obvious. Furthermore, the change from sealed wood to yellow varnish was amazing. But the subsequent steps move more gently into the final iteration.
Front with the first color coatBack view with the first color coat
Second Color Coat
Front with a second color coat.Back with two cor coats.
Third Color-Coat
Front view with three color coats.Back with three color coats.Three color coats from an angle showing off the figured Spruce.
And Assembly!
To begin with the varnish procedure, I had removed the fingerboard and nut, to allow full access to the front plate for varnish-prep, varnishing and polishing. However, now it is time to replace those parts and begin final assembly.
I installed the soundpost, too, so that the instrument corpus could begin “getting used to” that pressure from within.
Then I re-installed the fingerboard and nut, and scraped the joint to make it completely smooth. Obviously, I will have to retouch the varnish on some of those areas.
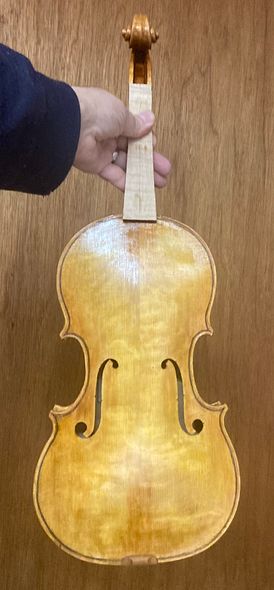
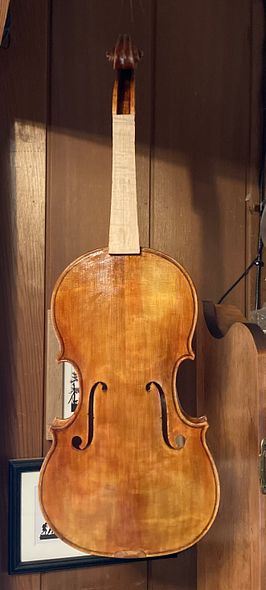
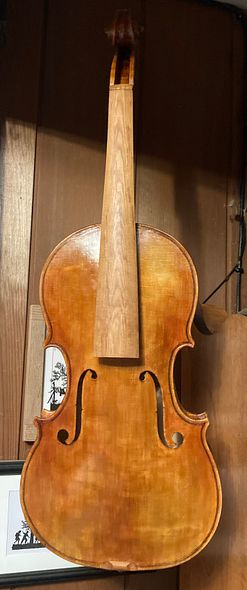
Front at final color, with Fingerboard.
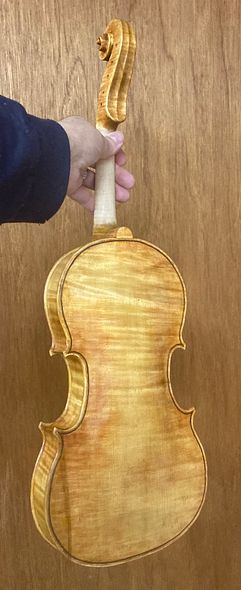
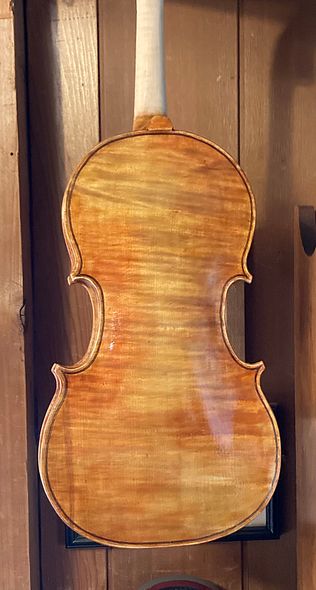
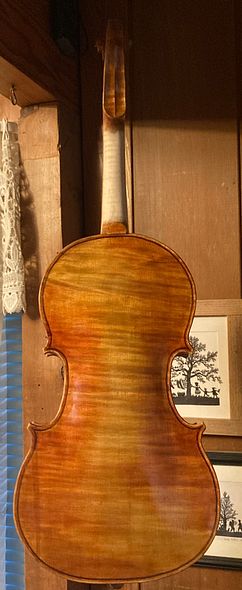
Back view at final varnish color.
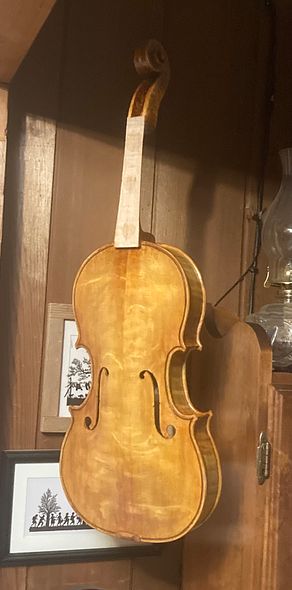
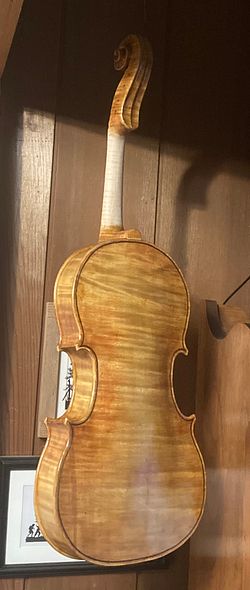
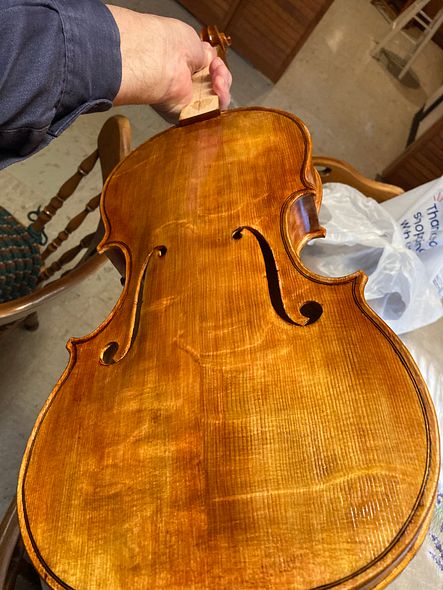
Three-quarter view, showing varnish contrasts.
What’s Next?
Following this, the next thing will be to install the “Knilling Perfection” (internally geared) tuning pegs.; Afterward, I will continue with final set-up. I can install the pegs now, but the final set-up will have to wait for the varnish to harden a little more.
“New” Five-String Bluegrass Fiddle, Begun Two Years Ago
I Began in Good Faith, Years Ago!
Originally, I began this fiddle in 2023, thinking I would “press on” and get it done soon. I had already closed up the corpus, with the dated label inside! But, due to unforeseen circumstances, I had to postpone its completion.
A commissioned instrument interrupted the flow of my “built-on-speculation” instruments. I always move any commissioned work (whether repairs or a new build) to higher-priority. I move them ahead of my usual “build it and they will come” work.
The man commissioned a five-string fiddle on one of my early models. So, I completed his instrument (#16 on the Chronology page) before completing Instruments #17, #18, and #19. I had planned otherwise, but it happened.
Slight Chaos!
I had begun all three of those instruments, simultaneously. But I did not realize that, in my array of personal labels, I had somehow skipped #16. When that came to my attention (as I worked on the commissioned fiddle) I felt I had to correct the mix-up. I had no option but to print a new sheet of labels, with a #16 in the mix. Then, I labeled his new fiddle, as though I had built it before the other three. I completed it before the others, though, but instruments #17-19 were still hanging on my workspace wall, waiting for their turn. (Sigh…)
Meanwhile, I had surgeries on my right eye (cataract surgery and corneal transplant) and had to wait for it to heal before I could do much work.
Later, my beloved wife, Ann, fell and broke her wrist, requiring surgery to repair it. At the same time, I had contracted Covid (finally…my first time!) and could not even go to the hospital with her. Fortunately, our daughter was in town, with her husband, and they took her to the ER.
By the time all that was over, I had the same surgeries in the other eye. (Yeah, it was a really productive year!)
BUT: Between all the “setbacks,” I did manage to complete instruments #17 and #18 on the Chronology page. (#18 sold almost immediately…that was nice!)
But then…
Another client called with a commission: This customer wanted a 15-3/4″ five-string viola. She lived in Switzerland., and will fly here to take delivery, so I again shunted #19 to “last in line.”
Resuming Work on Five-String #19
I have nearly completed the new commissioned viola. (It will be five-string #20…but it is not yet on the Chronology page.) So I went back and resumed work on #19.
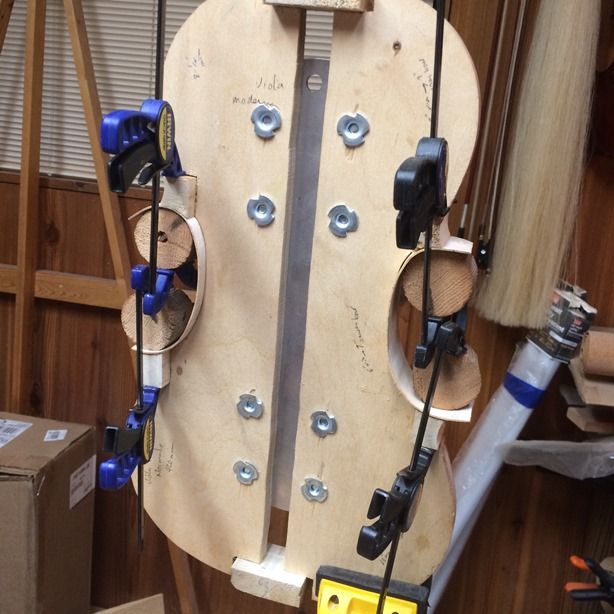
The work had already been done up to (but not including) the purfling on the back plate. So that is where I had to begin. Unfortunately, I was still “sneaking in a few minutes, ” here and there, while completing the newest viola, so I neglected to photograph the purfling process. However, if you would like to see that process, here is a link to the purfling procedure for a large five-string viola from five years ago.
Preparing for Varnish
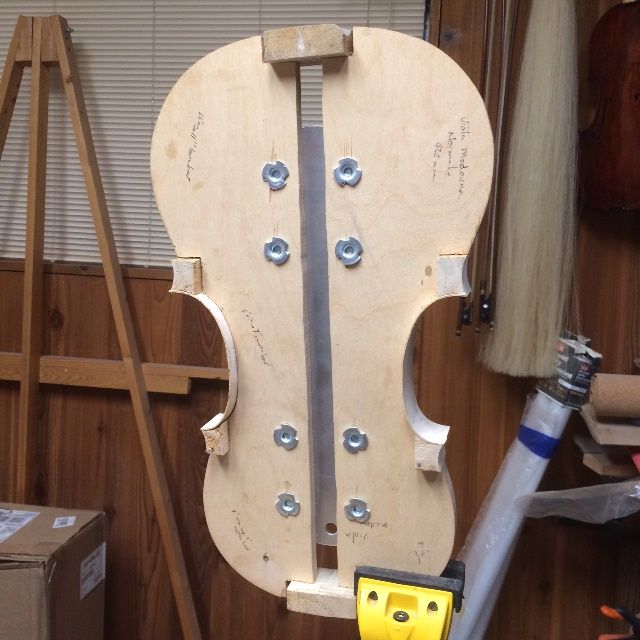
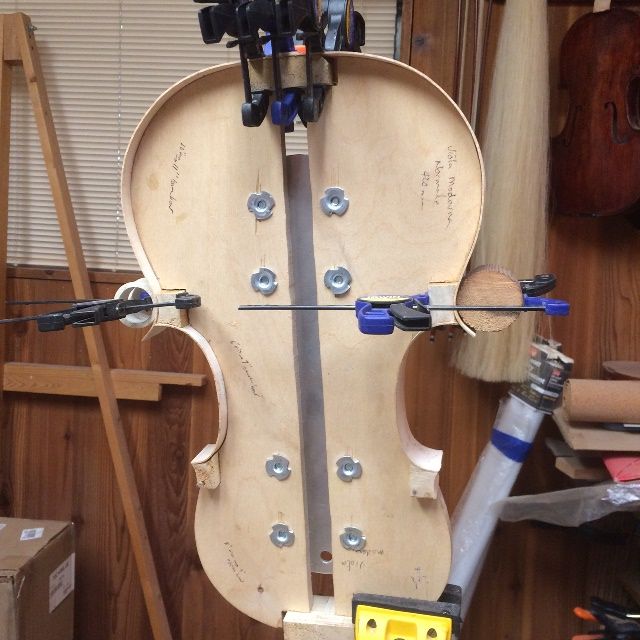
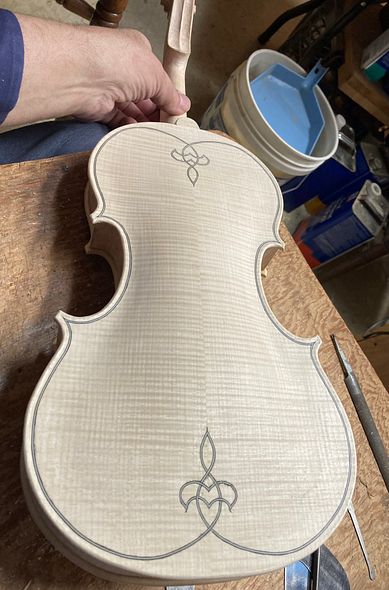
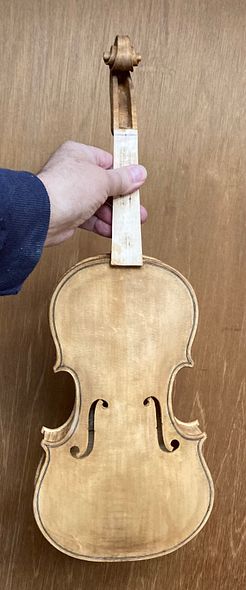
I scraped the entire instrument as smooth as I could get it, then brushed coffee all over the instrument, to raise the grain, and allow me to see areas that still needed work. I repeated this cycle until the grain would no longer swell with moisture, then I sanded it lightly all over, to remove any tiny, unnoticed fibers that might still be protruding. The instrument looked like this at that point.
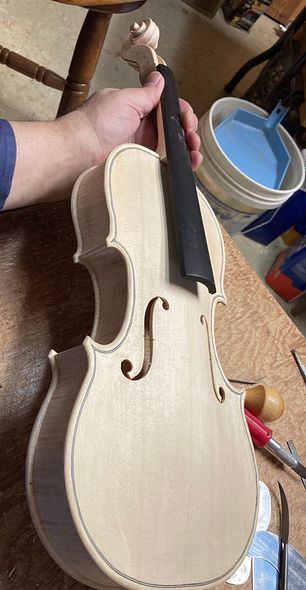
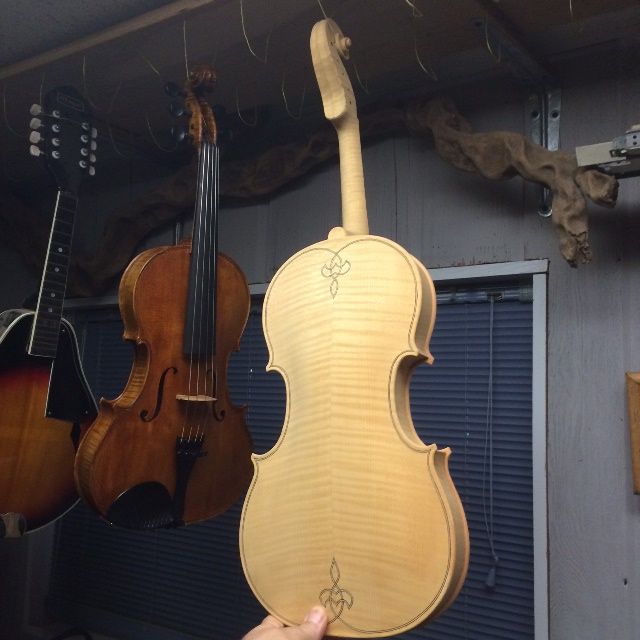
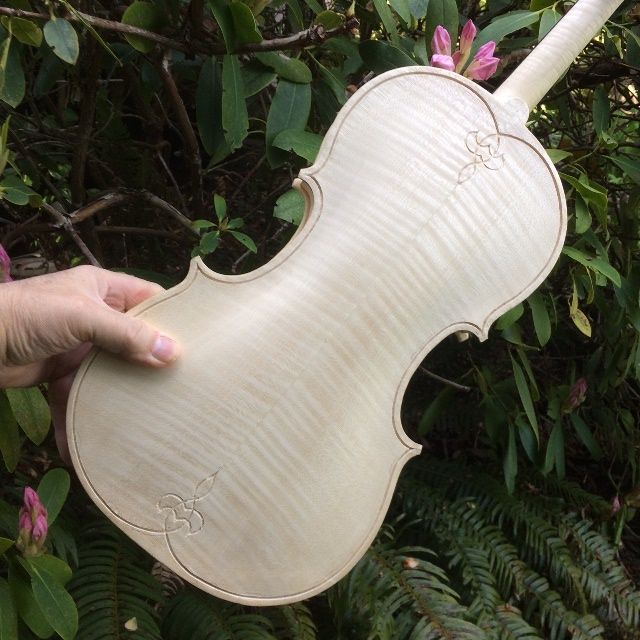
Front view, in-the-white
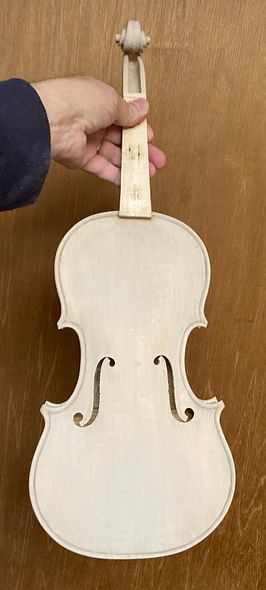
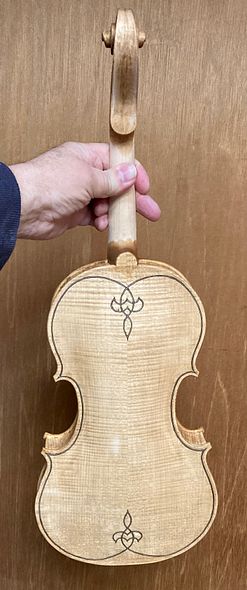
Back View, in-the-white.
Mineral Ground
I learned for Roger Hargraves that filling the natural wood-pores with a mineral will help the sound, and it prevents excessive varnish penetration. So, nowadays, I rub Gypsum powder into the raw wood surface, to fill those pores. I mix the gypsum with coffee, which adds a tiny bit of color to the wood, but when the mixture dries, it turns chalk-white, mostly obscuring the grain;
Front View with Mineral Ground.
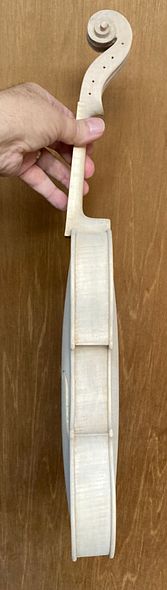
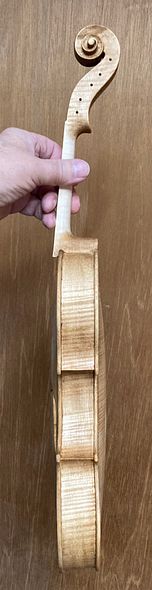
Side with Mineral Ground.
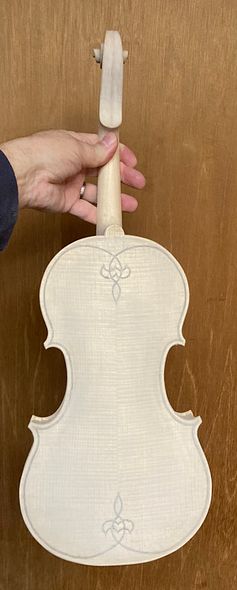
Back view with Mineral Ground
Sealer
After the mineral Ground is fully dry, I gently sand off any excess gypsum, that is sitting on the surface, so that it will not obscure anything once the varnish is in place. It still looks stark white, but does not have piles in the corners, or elsewhere.
The Sealer application always seems like magic, because, as the sealer surrounds all the perticles of mineral, the gypsum turns transparent. It literally disappears, and will never be seen again!
Front view with Sealer.
Side with Sealer.
Back View , with Sealer.
The Sealer I use is made of rosin, dissolved in a mixture of denatured alcohol and Spirits of turpentine (the one that strongly smells of pine.) It takes a few days to dry as a rule, and the fragrance of pine remains for a long time.
After the sealer has completely dried, I go over the instrument to remove any excess sealer. I can do that with a thin, flexible scraper, or stearated abrasive paper (which does not easily clog up) or by using a rag, wetted with denatured alcohol. (I think the rag with alcohol probably does the best job.)
Then it is time to begin varnishing.
Varnish Beginning
I usually begin with three coats of yellow varnish, to provide a deep “golden glow” to shine from within the subsequent darker coats of varnish:
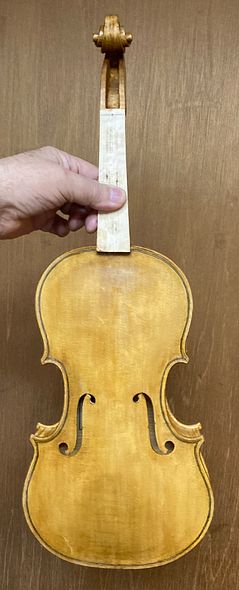
Front view with Yellow varnish.
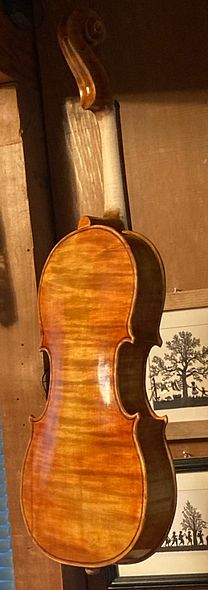
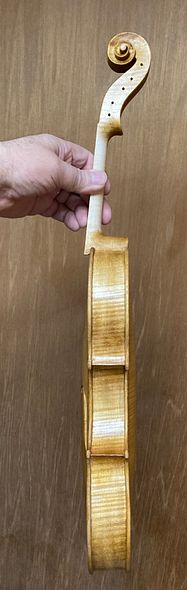
Side with Yellow base coat.
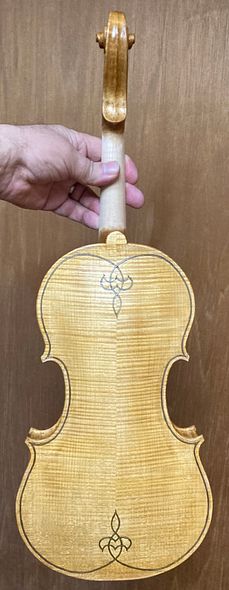
Back view with Yellow Varnish .
Color Coats to Come
Next, I will begin to add the colors of varnish I need, to produce the finished look I want. It requires anywhere from eight to twelve coats to achieve that look, usually, but each coat is microscopically thin, so the entire finish is still extremely thin. It will not reduce the sound quality at all, and it will protec the wood from dirt, skin-oil and other substances that might otherwise penetrate the bare wood.
I have often had people ask whether I would be willing to leave a violin unvarnished. For the above reasons (plus the fact that I would not put my name in such an instrument:) The answer has always been “No.”
Next time, we will walk through the varnishing process.
To begin with, last year, a professional violist in Switzerland contacted me, asking about commissioning a 15-3/4″ 5-string viola. With this in mind, we discussed the project at length. We ascertained her specific requirements. Obviously, that is her privilege, since she was ordering a commissioned instrument.
Meanwhile, I had undergone surgery on both eyes. As a result, I could not do anydetailed work until my eyes healed. The client was very patient: I chose the wood for her instrument, to her approval (European Spruce and Maple,) and ordered the special material for her fittings.
Choosing Materials
European Spruce front plate materialOne-Piece European Maple Back PlateSonowood for fittings, as the billets arrived
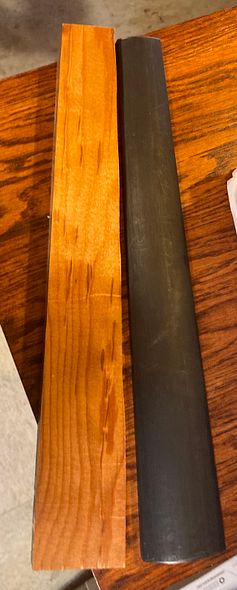
Out of concern for endangered tropical woods, the request specified that I use a Swiss product, “Sonowood” for the fingerboard and other fittings. In this case, the Sonowood is Spruce. They heated it enough to liquefy the internal lignin. Next, they compressed it to three times its natural density. The resulting product is as hard and wear-resistant as ebony. But Sonowood is not endangered: it is Spruce!
Carving The Fittings
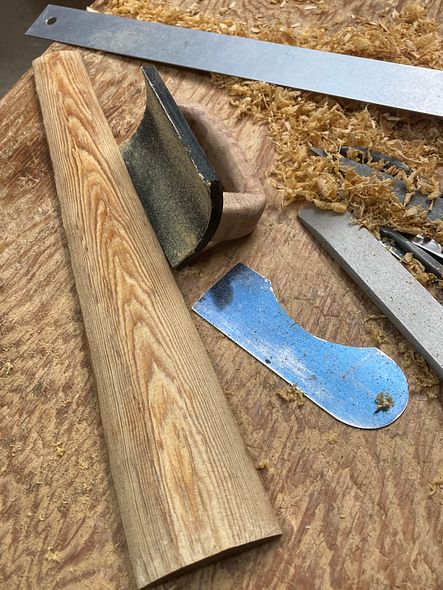
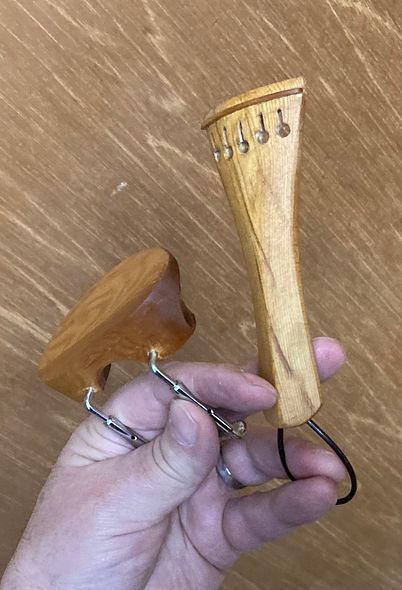
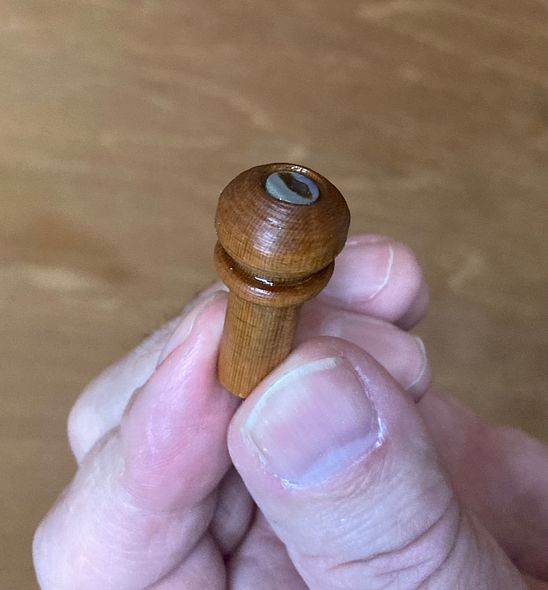
On the other hand, Sonowood is expensive and difficult to work with. It was good that I ordered it early. It took a long time to arrive, and I learned its working properties by carving the fingerboard. Then I made the chinrest, the tailpiece, and the end button. I saved the nut and saddle for last, as I had to fit them to the fingerboard and front plate.
Fingerboard footprint copied from Ebony fingerboard billet.Carving the fingerboardHandmade Chinrest and TailpieceEnd Button, with Paua Shell dot
Beginning the Rib Garland
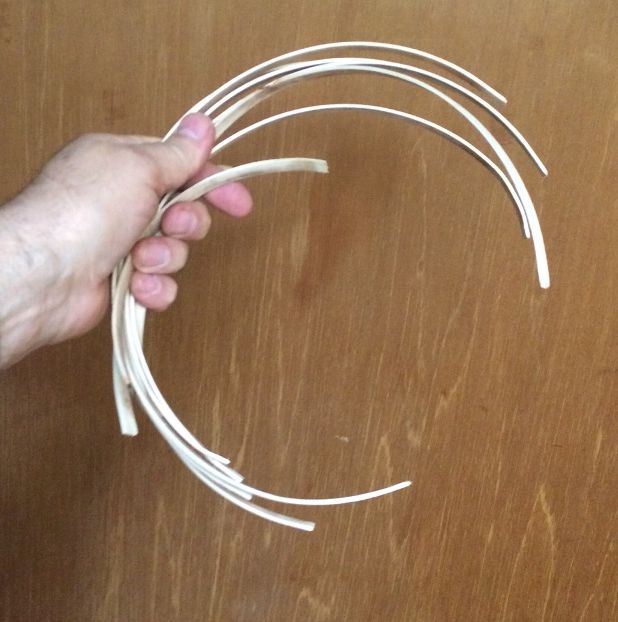
While I was waiting to receive the Sonowood billets, I had prepared the ribstock, bent the ribs, and installed them into the mold.
Ribs installed in GarlandRib Garland with linings installed
Beginning the Plates
Next, I installed the linings, traced the plates and began carving.
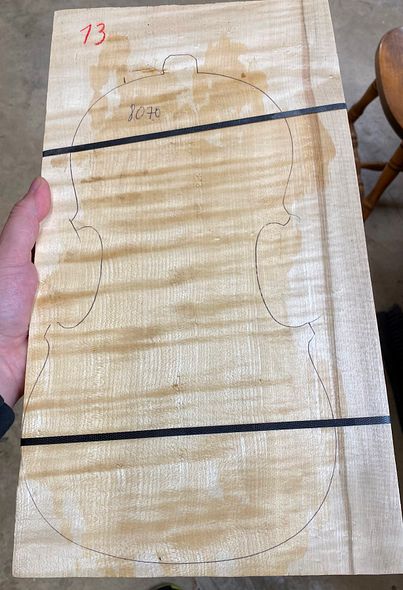
Footprint of front and back plates, ready to carve. Dark streak on back plate is heartwood.
Neck and Scroll
Simultaneously, I also laid out and began carving the neck and scroll.
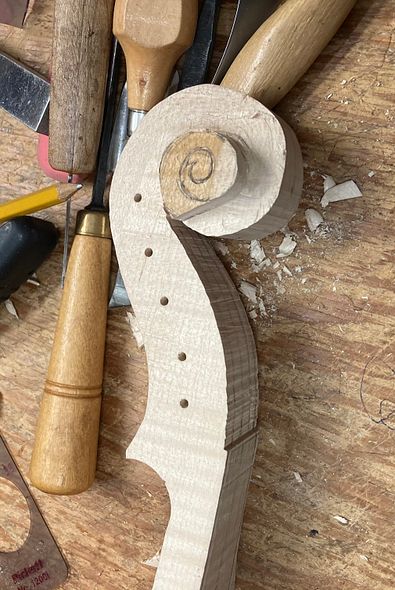
Beginning the Scroll
Once I had completed all the parts, I assembled them and began finishing.
Beginning Varnishing
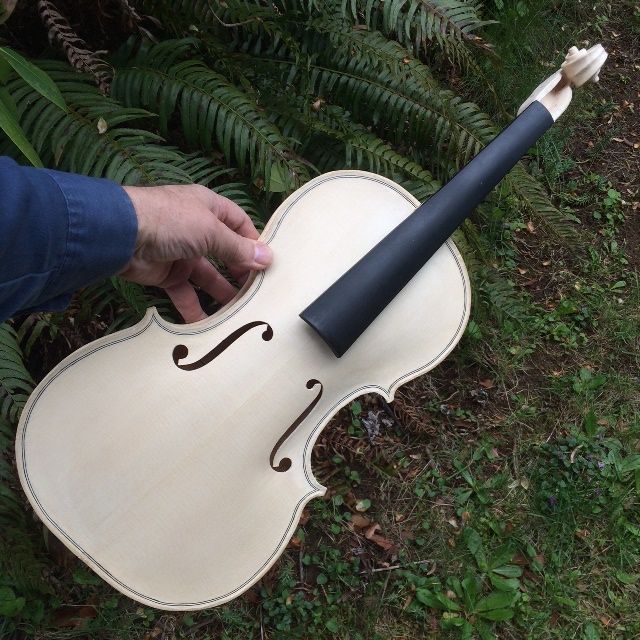
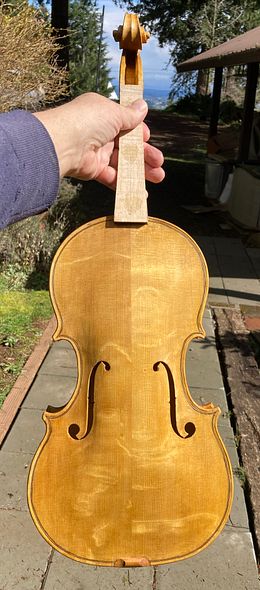
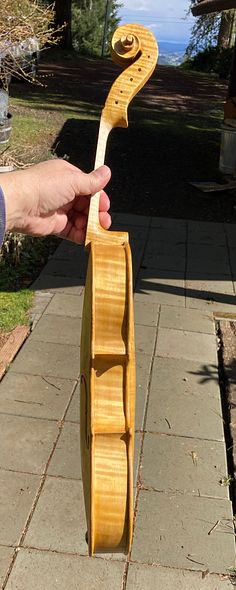
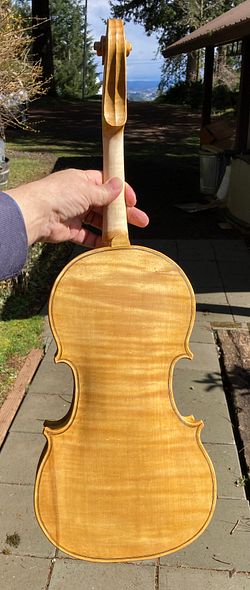
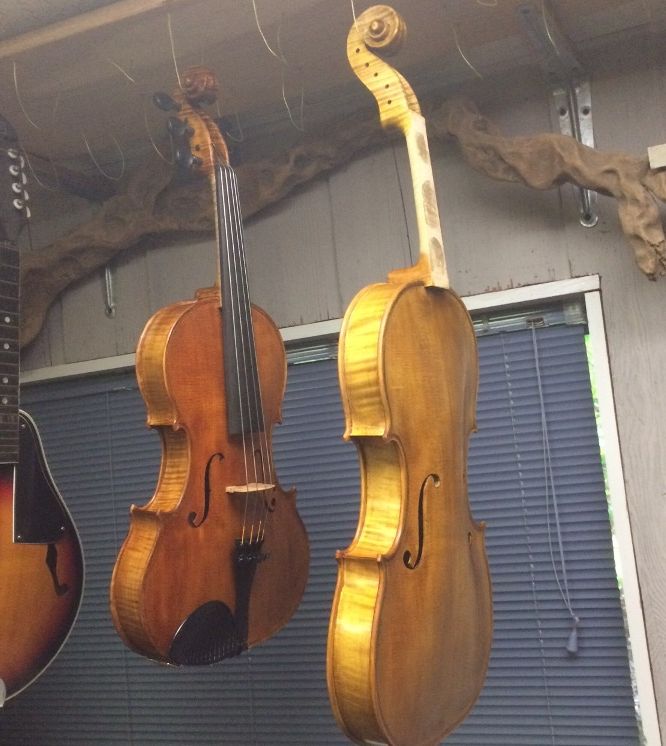
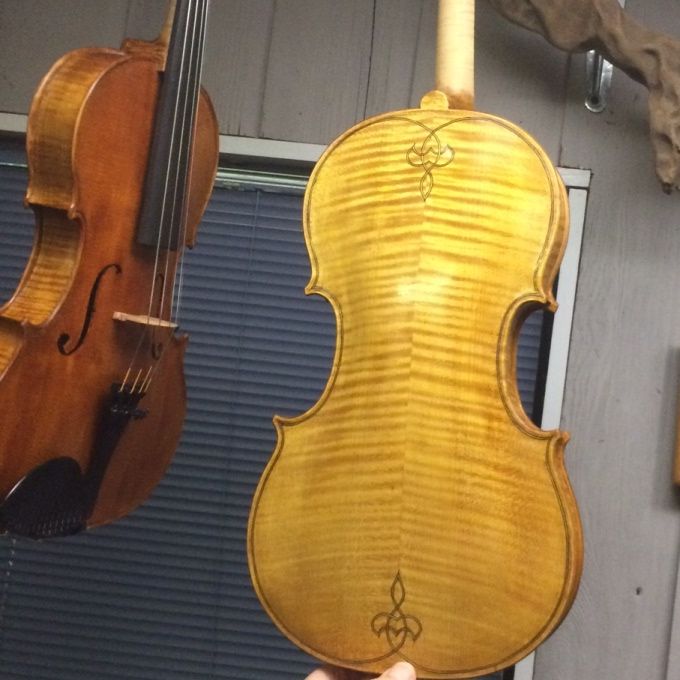
To “Cut to the Chase,” as people often say, here is how viola looks, today. I have applied the base coats of yellow varnish , and I will soon begin applying the darker layers of varnish.
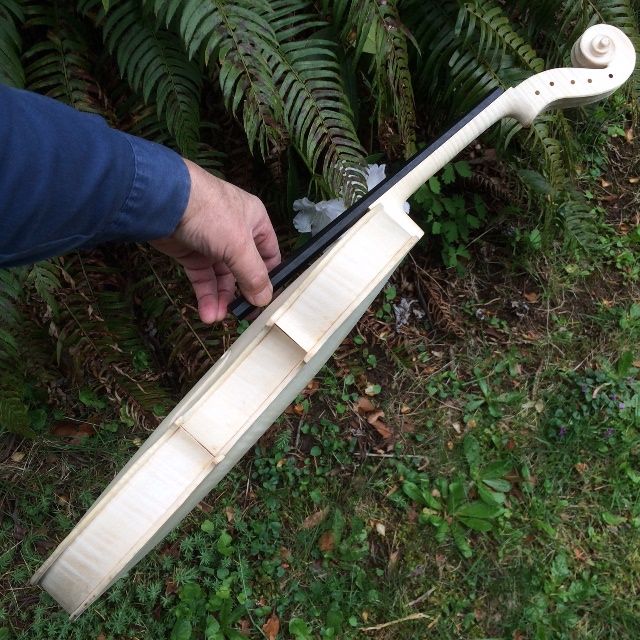
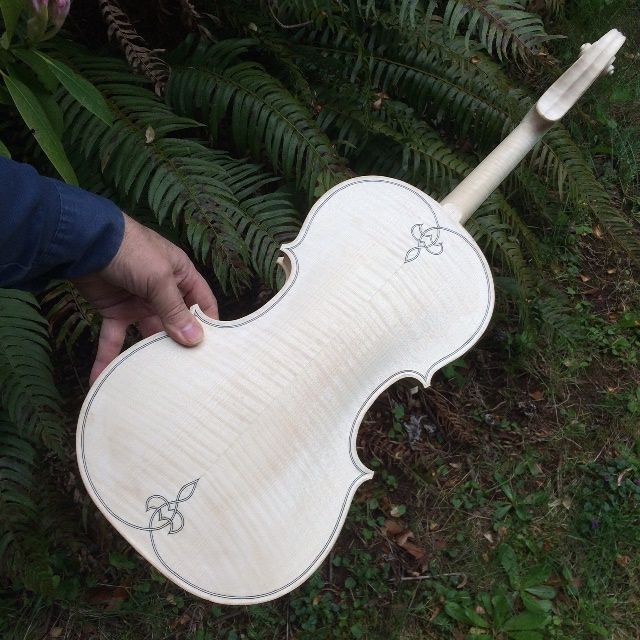
Front side with Yellow Base CoatsSide View with Yellow Base CoatsBack View with Yellow Base Coats
I will post more, as things progress toward completion.
Varnishing Process for the 16-1/2″ five-string Viola:
All Smoothing and Varnish-prep is done:
When I last posted, the final woodwork had been completed. I had twice wetted down the wood, to raise the grain, and scraped and sanded away the rough raised grain. The wood was stable enough to commence the tanning process.
After the wood is smooth, there will be:
a tanning treatment,
a mineral ground treatment,
a sealer, to lock the mineral ground in place, and
finally, the varnish itself in a series of 6-12 coats, depending on color.
Tanning the Wood
People who live in very sunny regions (New Mexico, for instance) need no light booth: they simply hang their instrument out in the sun for a few hours and it takes on a deep yellow-tan color. I live in Oregon. Western Oregon, between Portland and the coast. We are more likely to achieve a patina of bird-droppings than a sun-tan, if we hang instruments outdoors. (Sigh…)
So, a number of years ago, I bought an old cabinet, about seven feet tall, lined it with aluminum foil as a reflector, wired it with a strong UV source (two 48″ fluorescent UV tubes in a shop-light fixture), and I hang my instruments in it overnight. To heighten the effect, I brush on a coat of very diluted Sodium nitrite and let it dry before I expose it to the UV. This works pretty well, and I have pretty much adopted it as a normal pre-varnish treatment.
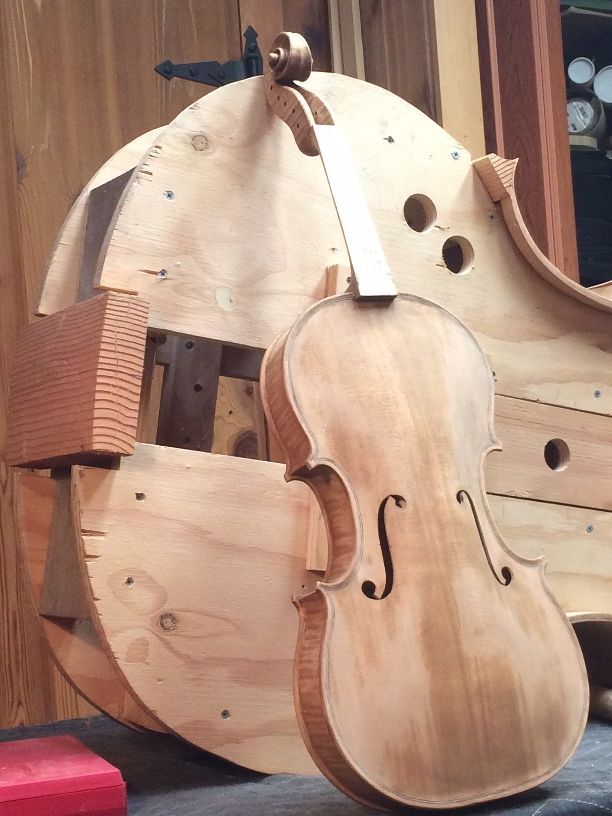
Tanned front side of the 16-1/2″ five-string Viola.
Tanned back side of the same instrument.
Mineral Ground:
Years ago, an excellent luthier in Europe posted a detailed explanation of why and how he employs a mineral ground in his instruments, to improve projection. I tried it (because, “if it is good enough for Roger Hargraves…”) and immediately started getting better reviews on the sound of my instruments.
So…obviously, that became part of my process, as well. I use gypsum powder, suspended in coffee (gotta wake up the tone!) so as to achieve a little deeper color in the same move. I rub it in vigorously, trying to get the particles of gypsum to actually penetrate the pores of the wood, then rub off the excess with a rag, before it is fully dry. When it is dry, it obscures the grain, and turns a chalky white color.
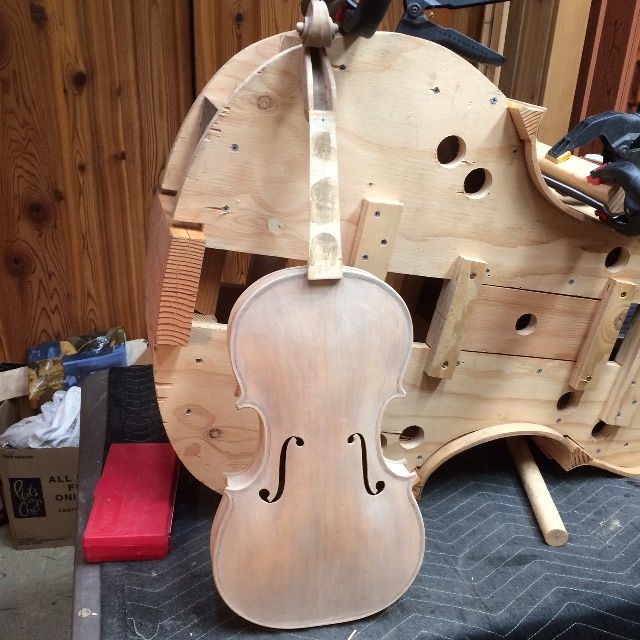
Mineral ground drying on 16-1/2″ 5-string Viola. (5-string bass beginning in background.)
Mineral Ground is dry. I will sand off any excess mineral, and then apply the sealer.
Sealer
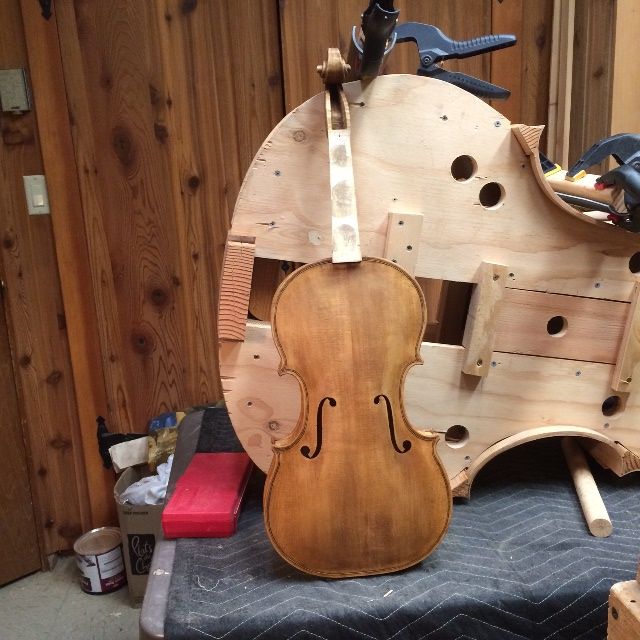
Sealer coat, front view.
Sealer coat, back view.
The sealer, in this case, is simply rosin, dissolved in turpentine and alcohol. The mixture soaks into the wood, causing the mineral ground to become transparent, then the solvents evaporate, leaving the rosin in the wood. The mineral ground will never again be visible.
Varnish Beginning
When the sealer is dry, I sand lightly, using 320 grit, to remove any lumps I may not have seen, and then I am ready to begin varnishing. I always begin with two base-coats of very yellow/gold varnish, so that the gold color will shine through the darker color coats.
Two coats of yellow varnish, side and front view.
Two coats of yellow varnish, back view.
I like the way the European Maple and Spruce are shining through the varnish. I think they will sound great, too. Tapping on the corpus, it sounds as though it will have a big, deep voice.
I will follow the completion of the varnish process in a later post.
Last “woodwork” tasks on the 16-1/2″ five-string Viola:
Last time, we finished up with the neck set, and the corpus closed, but all the edgework (and final shaping of the neck heel, etc.) left to be done.
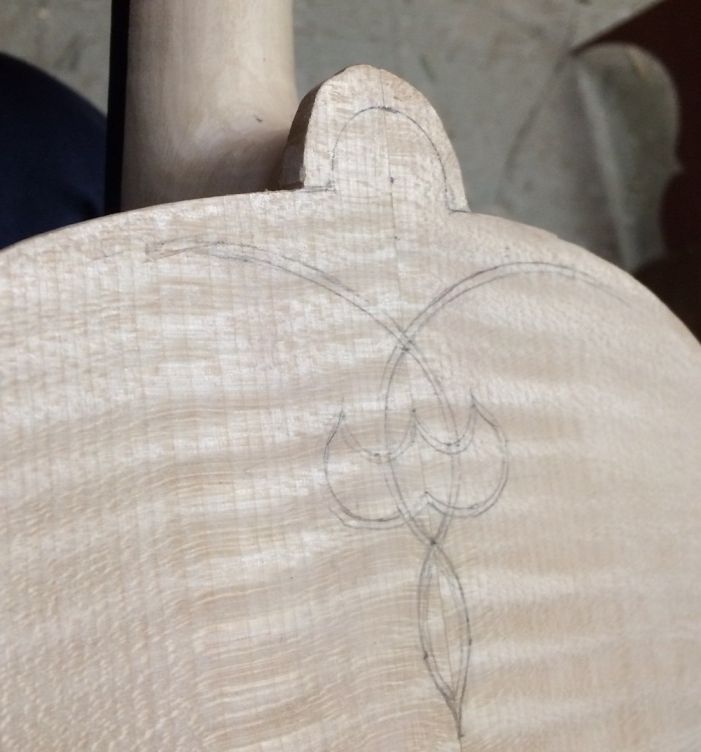
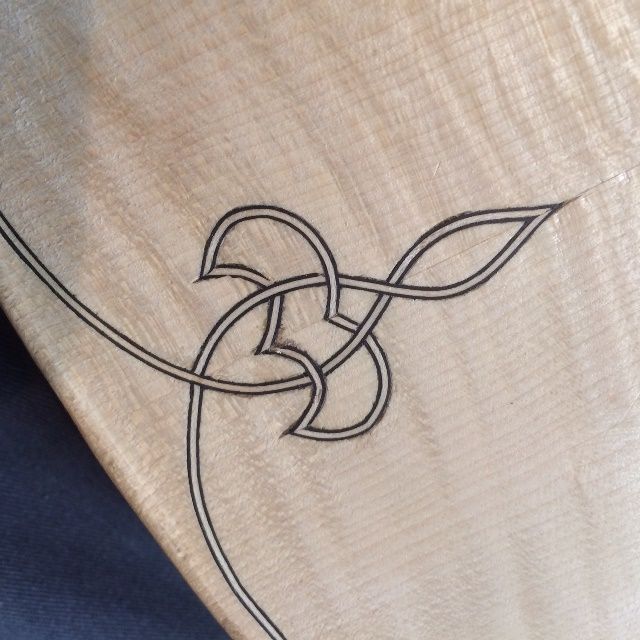
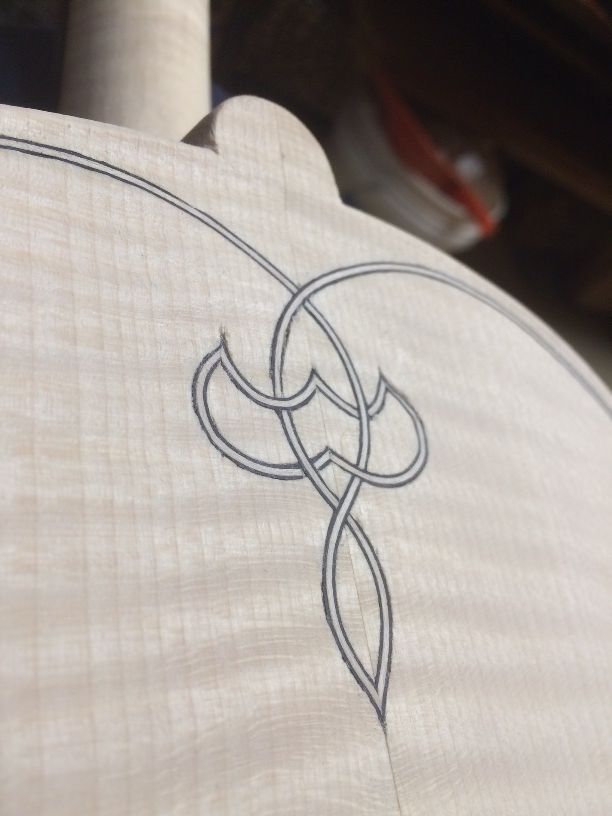
Closed corpus, purfling weave sketched, heel/button need carving.
Carving the heel/button combination
The neck heel and the back button, together, make up the majority of the strength of the neck-joint. I once had a cello come in for repair, fully up to tension, but “something was loose.” Yeah, the ONLY glue still holding in the neck-joint was the glue between the neck heel and back button! I removed the neck, cleaned out the old glue, and re-glued the entire joint: but I never forgot that the heel/button connection alone had held the entire load of the string tension! So I make certain that this joint is perfect, and the two are carved as one piece after gluing.
There is also a specific measurement from the center of the neck-heel curve to the top edge of each side of the front plate where it joins the back: in violas, I shoot for exactly 27mm.
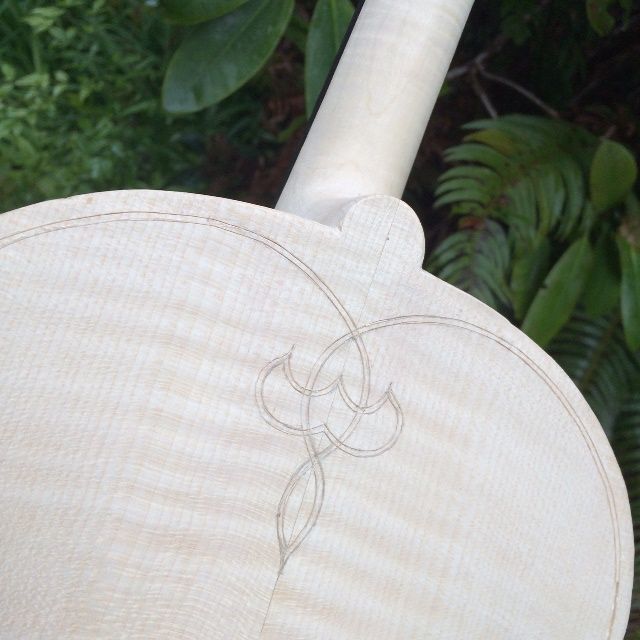
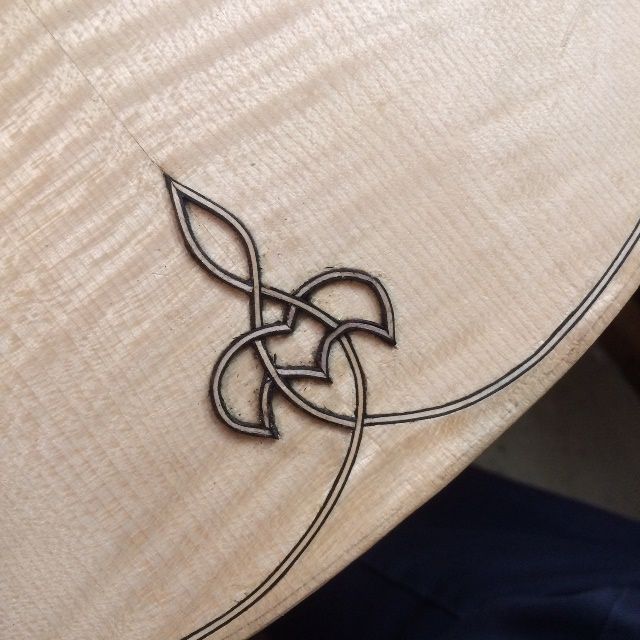
Heel and button carved: ready to begin purfling. I have laid out the purfling and incised it.
Purfling
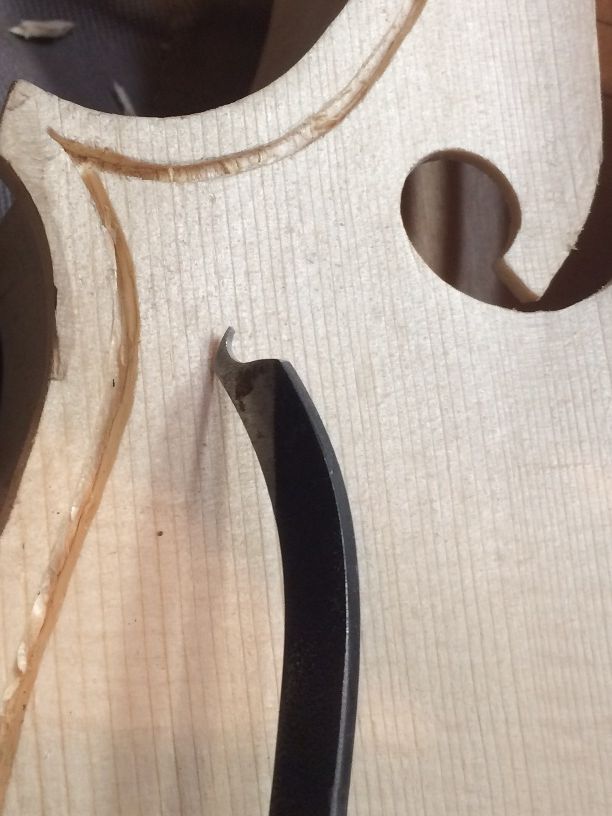
I used to struggle with cutting the purfling slot (I still do, but for different reasons) because I was trying to cut the full depth in a single pass, or maybe two. One of my teachers corrected me, saying that the first pass around, with the knife, is just to “darken the lines” left by the marker. Then it is relatively easy for the blade to follow the groove for subsequent fast passes, each making the slice a little deeper. Finally, I use a special tool to pick out the waste wood from between the lines.
Purfling-pick with front plate.
One problem I faced with the back plate that I had not noticed so much, on the front plate, even though it had the same issue: This purfling is a little wider than what I usually use, so, in spite of the fact that I marked out the correct width, my pick tools (all of them) are made for the narrower purfling, and they do not readily make the slot the correct width. That meant a lot of going back and widening things just a little bit (0.5 mm, usually.) The European spruce of the front plate is soft, and quite forgiving. The harder European maple back plate does not give at all, so if the slot is too narrow, the strip is not going in, at all.
Another issue is that the purfling weave is on top of a fairly thin portion of the back plate, so I could not cut my slots as deeply as I wanted to. Thus, there was very little wood-support for the purfling, and the pieces were difficult to fit, whereas, around the perimeter, I could cut a slot for the full depth of the purfling strips and achieve full support. Ah, well…that’s life. But there were some joints I am not so happy with.
Anyway, this is how the purfling went:
I cut the center bout slots, first, along with the corners.
The goal is to complete the whole slot before inserting any purfling. (Notice the shallow purfling-weave slots.)
Installing the purfling
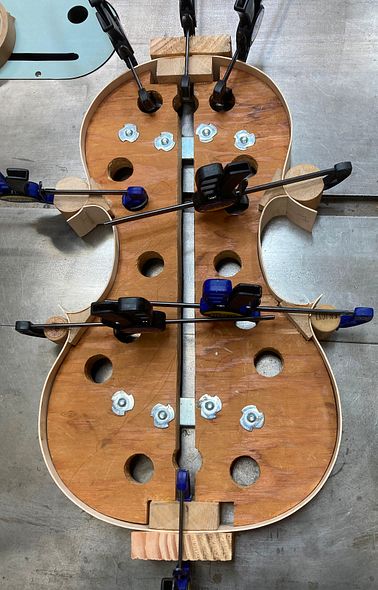
As I did on the front plate, I installed the center-bout strips first, dry, and then the rest of the perimeter. I glued the perimeter in completely, before beginning the purfling weaves, themselves.
In the case of the purfling weaves, since the slots were so shallow, I glued each piece as I installed it, then worked on the other end of the instrument while the glue from that piece set up and began to hold.
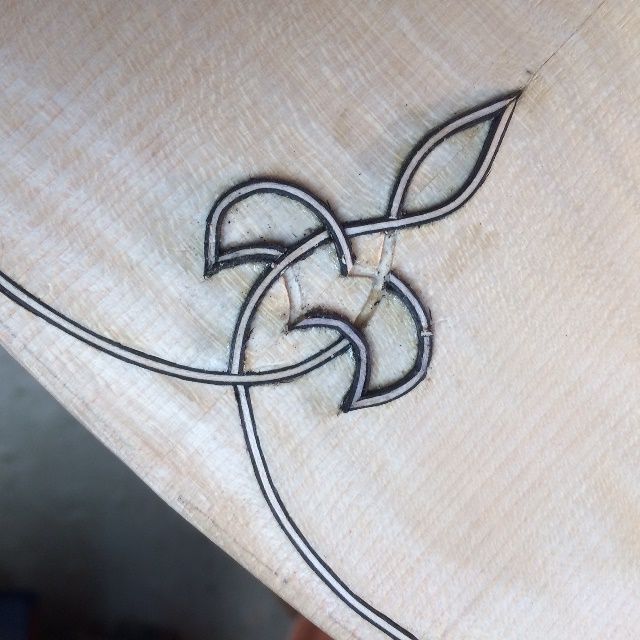
Outer perimeter complete…working on the weaves.
Purfling weave is nearly complete. Notice that some joints are not as clean as others.
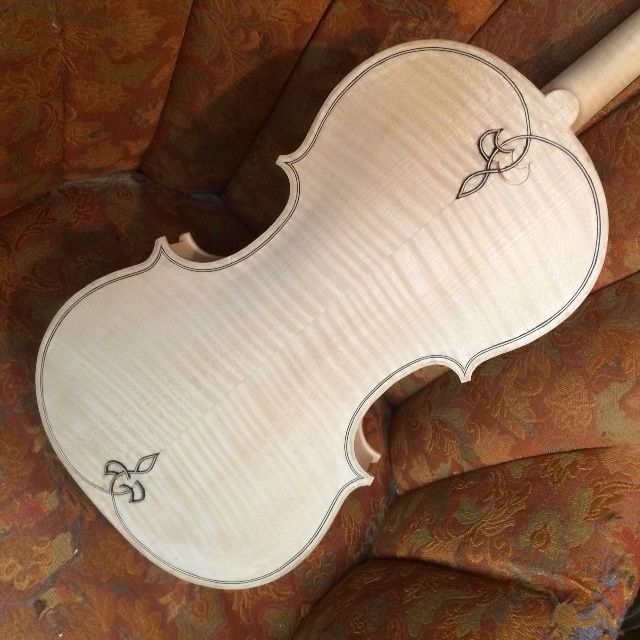
Completed purfling weave: still needs to be planed flush.
Completed purfling weave…”warts and all.” I may elect to go back and improve things a little. (Probably not.)The other weave turned out a little better.
The Channel
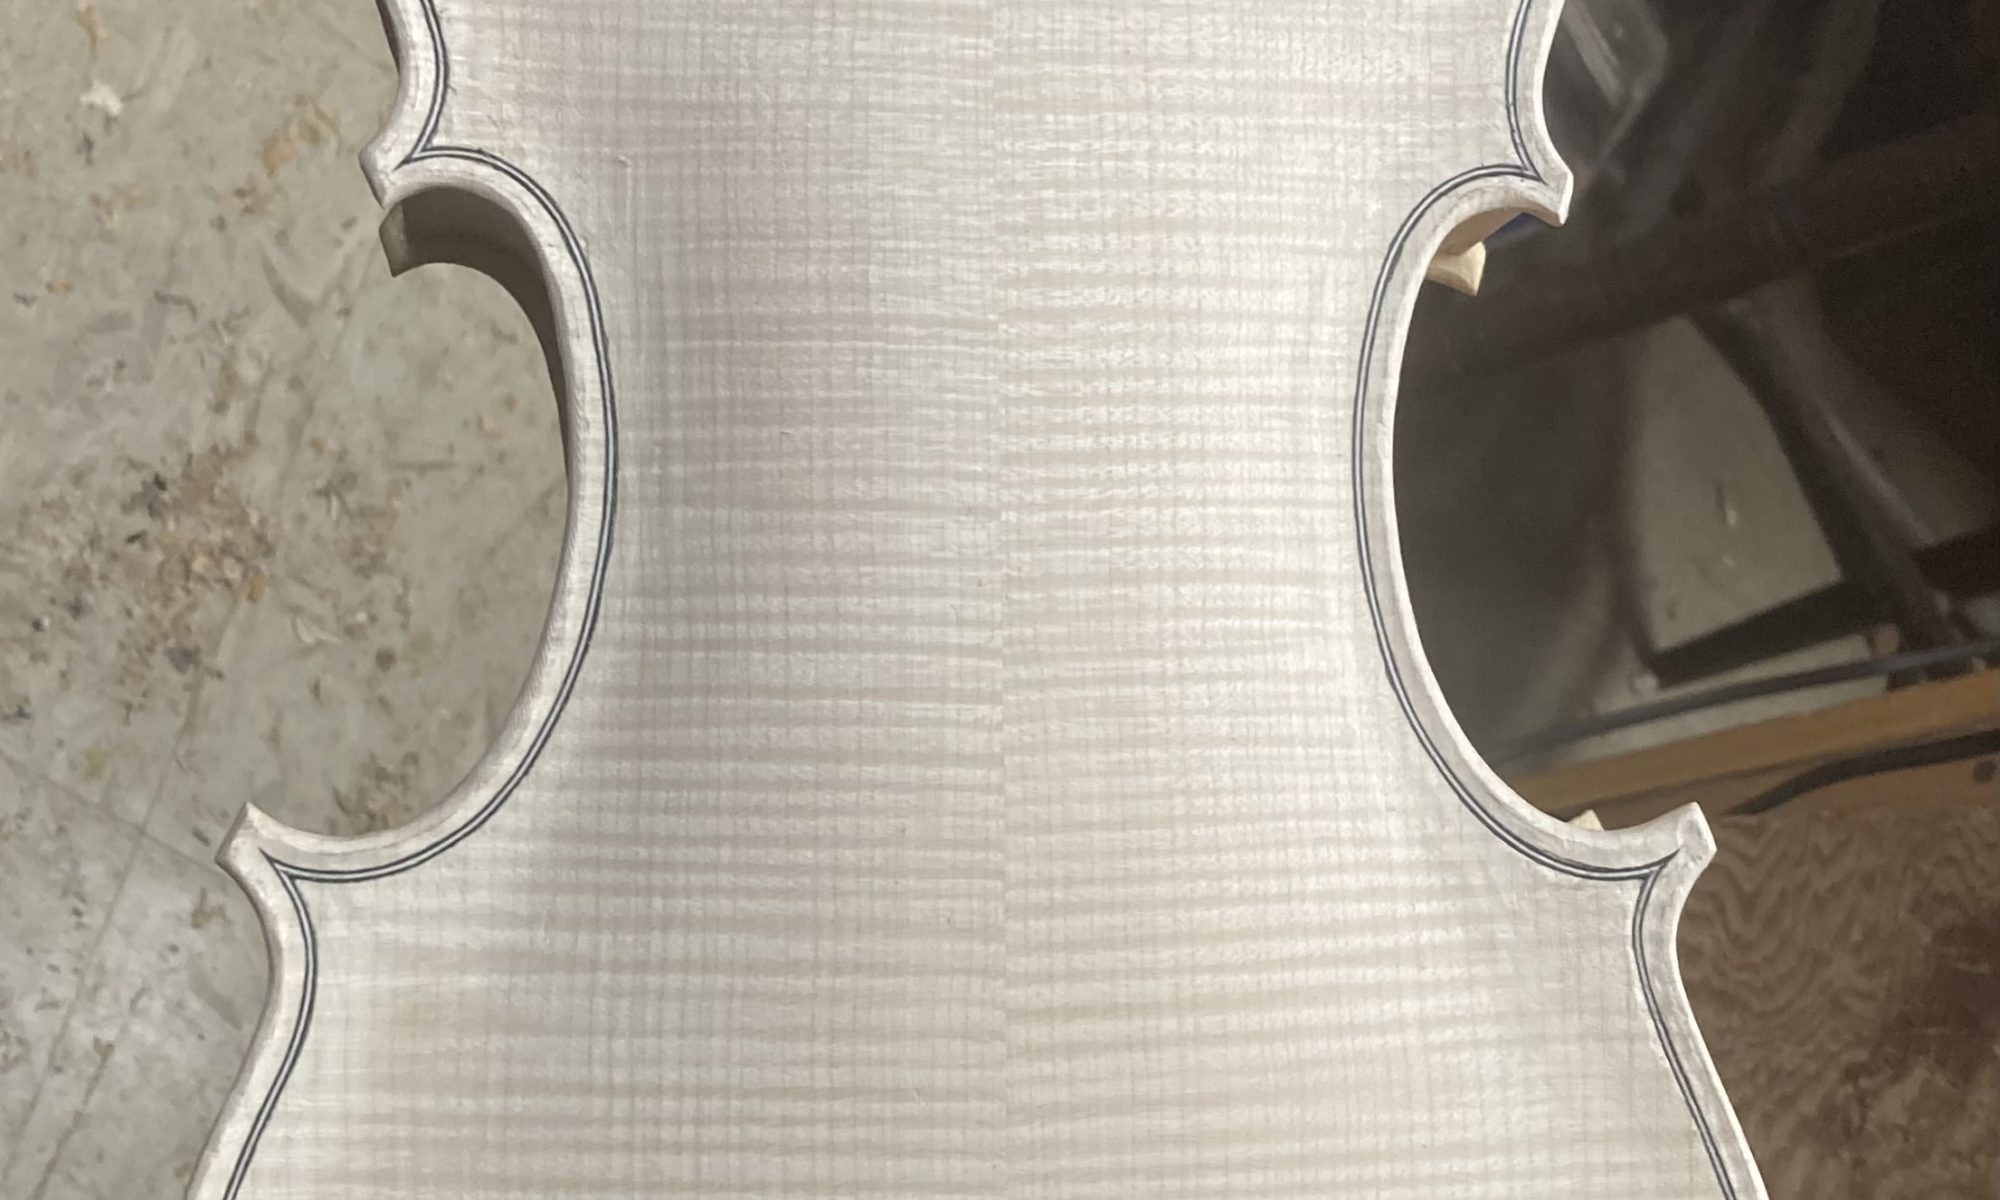
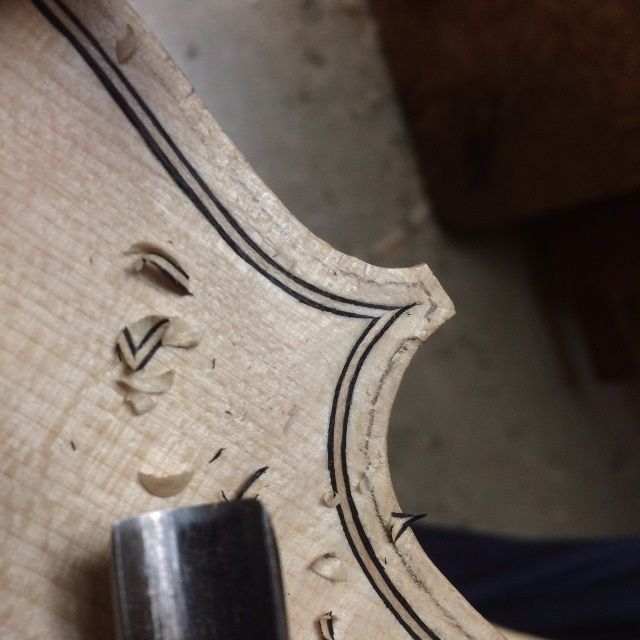
Once the purfling is all in place, and planed flush, it is time to carve the “channel.” This is a slight “ditch” that runs all the way around the perimeter: the bottom of the “ditch” is usually at the purfling, while the outer edge of the ditch ends exactly at a line called the “crest,” which is about 40% of the distance in, from the outer edge of the plate to the outer edge of the purfling. The inner edge of the “ditch” will be planed and scraped back to “fair” into the surface of the arching, without any lumps or hollows.
Notice the pencil-line “crest”, between the purfling and the plate-edge.
Edgework
Finally, after all the surface of the plate is correct, I plane, scrape and sand the edges themselves, so that the outer curve of the plate edge perfectly meets the inner curve of the channel, all the way around the plate.
In this case, I did not take the picture until after I had completed the next step, which was to wet the whole structure down with water, in order to deliberately raise the grain, so that any imperfections, or compressed areas, will rise up and be seen…and subsequently, be scraped and sanded flush again. All this to say, please understand the “rough” surface of all the wood.
Edgework complete, but still rough with raised grain.
So…that means the whole instrument is now complete, minus the varnish prep-work, and the actual varnish and set-up!
Front ready for varnish.
Side ready for varnish.
Back ready for varnish.
Varnish Sequence
I will post the varnish sequence as it occurs, but, for now, know that the sequence will include at least two “wet-it-down, let-it-dry, and scrape/sand-it-smooth” iterations. The idea is to produce a surface that will no longer respond to moisture by raising the grain. This is particularly important on the handle portion of the neck, where the moisture from players’ hands will certainly be in contact with the wood, every time the instrument is played. But, under the varnish, the slightest discontinuity will become glaringly obvious, so that is important as well.
After the wood is smooth, there will be:
a tanning treatment,
a mineral ground treatment,
a sealer, to lock the mineral ground in place, and
finally, the varnish itself in a series of 6-12 coats, depending on color.
This is the first large 5-string viola I have made. So far, most players have been quite firm about wanting the same scale length as a violin…and an instrument that will fit in their fiddle case. So that is what I have mostly made. But lately, there seems to have been an increased interest in five-string violas. Some were interested specifically in a smaller viola (hence the current, nearly completed 5-string 15″ Viola,) but more recently, there were two players who were really interested in a large 5-string viola. A 16-1/2″ Viola with a high E string.
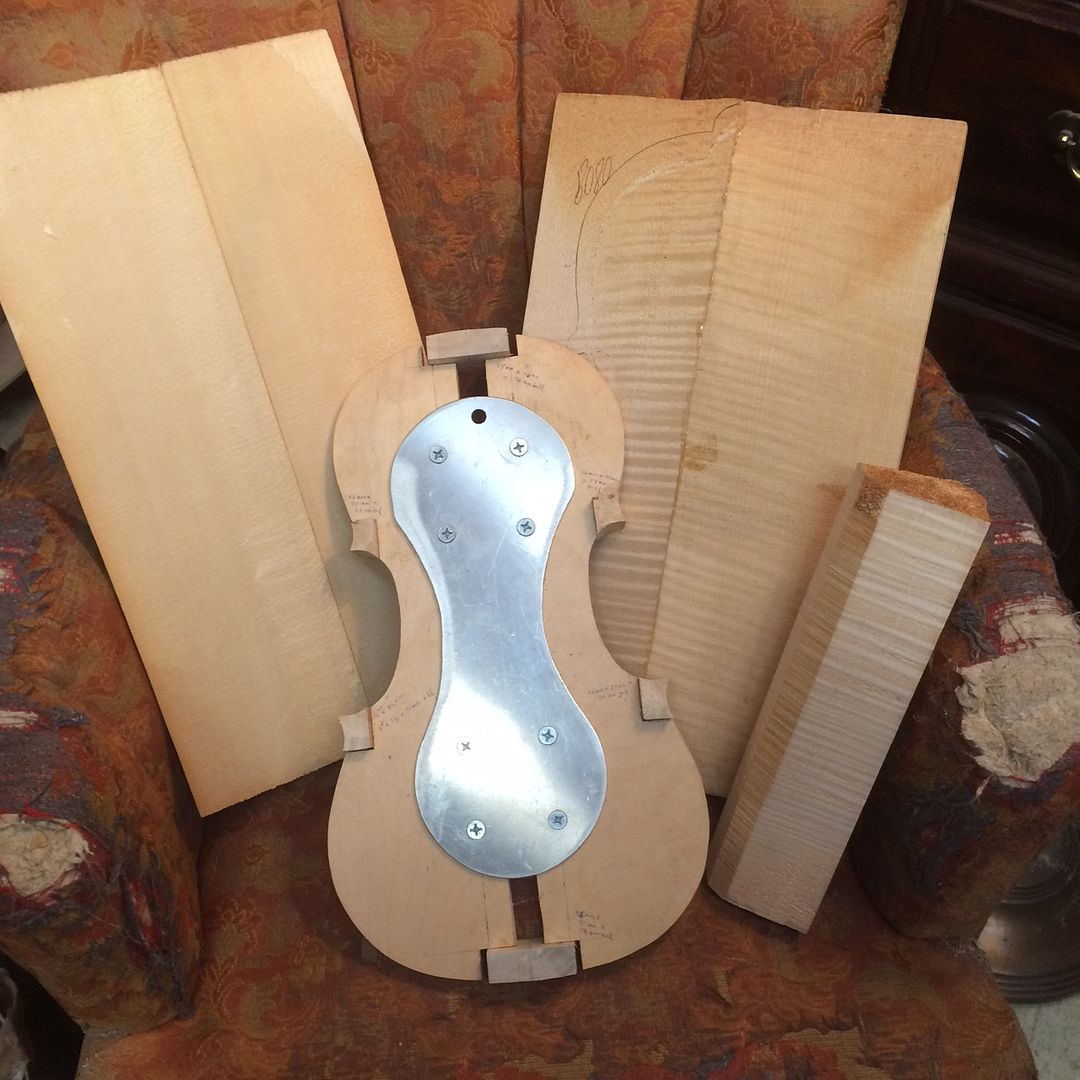
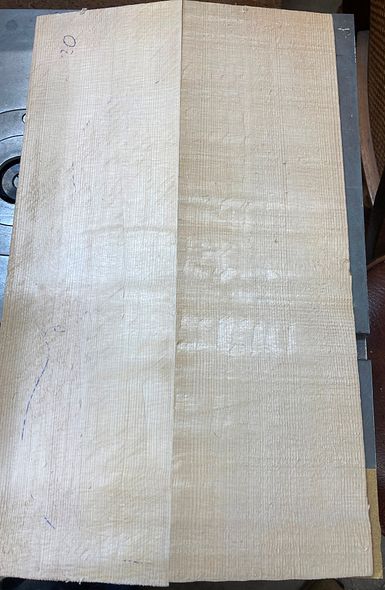
So… here we go! I already had European Maple and Spruce billets set aside from earlier “shopping trips,” and everything else that I needed to build a big viola. All I had to do was to finish the instruments already on the bench! They are now out of the way, except for completing the varnish and final set-up of the 15″ 5-string viola… so I am good to go. Here are most of the materials, with the plates already bookmatched.
Materials for new 5-string Viola.
Making, Bending and Installing Ribs
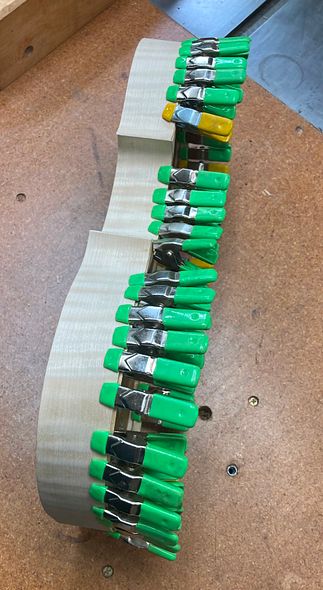
The blocks were already in the mold, and shaped. It was time to start working on ribs. I thinned the ribs to the proper thickness, using a fixture I made for my oscillating spindle sander (one of my few power-tools.) Then I bent each of them to the proper shape, using a hot bending iron.
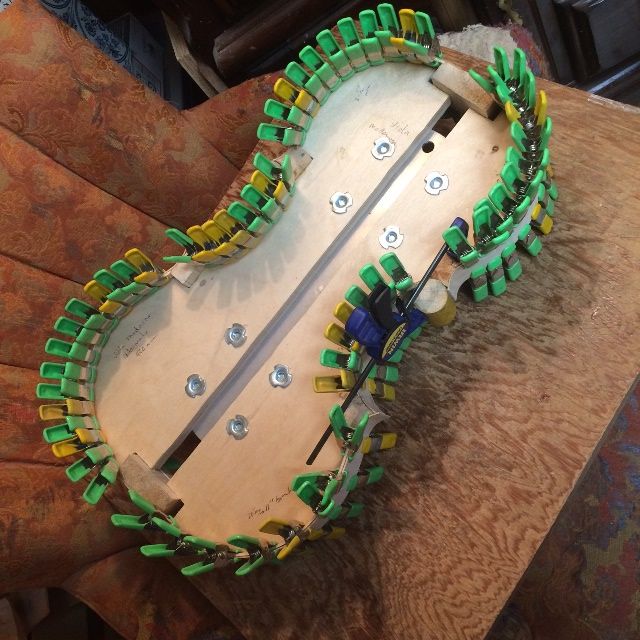
When I had all six ribs shaped, I installed the two center-bout (often called “C-bout”) ribs, and secured them with hot hide glue and clamps. You can see that clamping to a curved surface is not easy. I held the mold in a small vise, then secured each joint using hot hide glue, cylindrical wooden cauls, and f-style clamps.
Center ribs installed on 16-1/2″ five-string Viola.
When the glue holding the center-bout ribs was dry, I trimmed the ends of the ribs, using the spindle sander again, and installed the lower bout ribs. The joint at the center of the instrument, between the lower ribs, has to be pretty close to perfect, as it will always be visible and any discrepancies will be glaringly obvious under the varnish.
Center ribs trimmed to match the curvature of the blocks.
Lower ribs installed.
Finally, I installed the upper ribs. There is no joint between the upper ribs: in fact, they don’t even have to touch. The neck mortise will remove the middle section regardless of how good my joinery is, so I leave a gap there to allow for easy installation of the ribs. (Meaning, I only have to concern myself with how the ribs fit the corner blocks and that they cleanly follow the mold up to the neck block.)
Upper ribs installed.
Making, Bending and Installing Linings
While I was bending ribs, and still had the iron hot, I went ahead and cut and bent a supply of linings. The linings, like the blocks, are made of willow, because I like the way it works. The linings serve to triple the gluing surface of the edges of the ribs, where they contact the plates, as well as strengthening the rib garland.
Linings bent and ready to install.
I made a small mortise at the juncture between each rib and each block (24 of them,) and then installed the linings dry, to make certain they fit correctly. Then, one-by-one, I removed each lining, applied hot hide glue to both the rib and the lining, and quickly reinstalled the lining and secured it with a series of small spring-clamps.
Linings with hot hide glue and spring clamps.
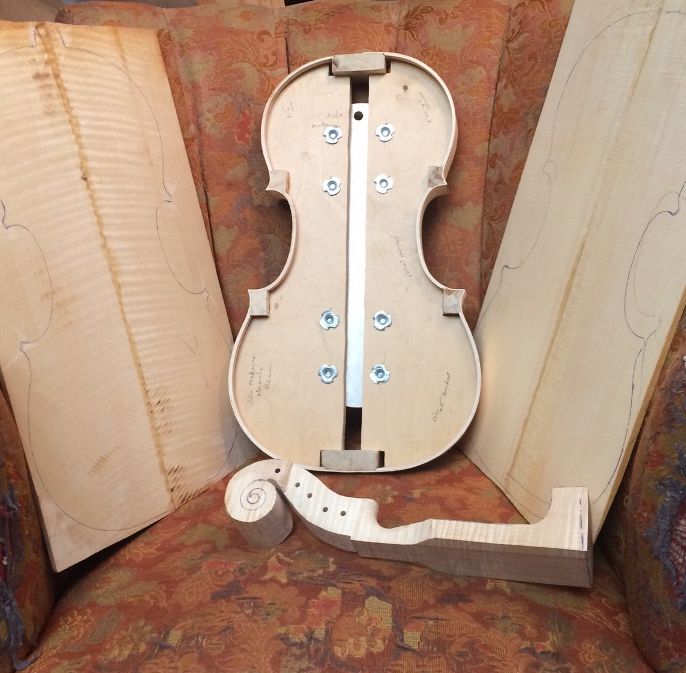
Tracing the Shape of the Plates
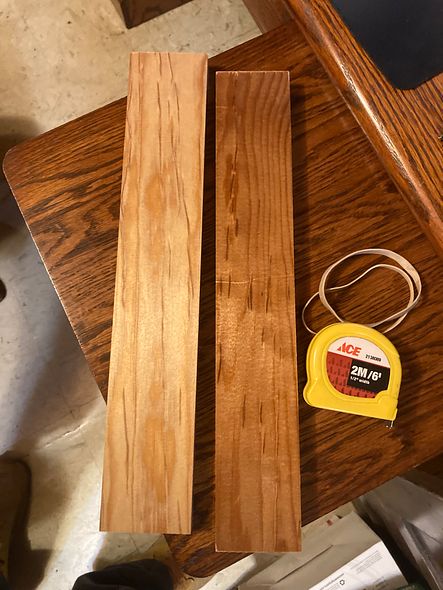
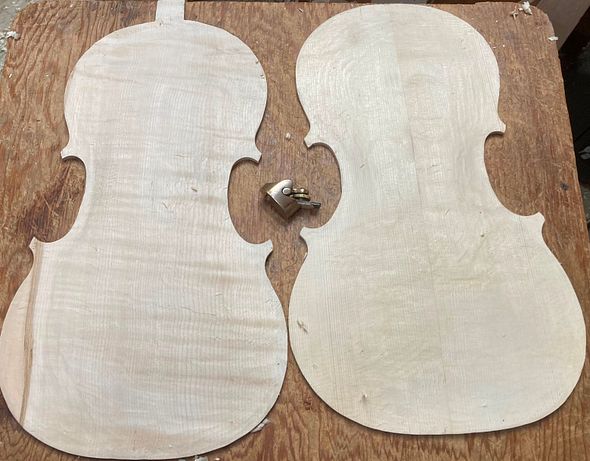
When the glue holding the linings was dry, I removed the clamps and used the spindle sander to trim the ends of the rib corners. I also leveled the front and back of the garland, so that I would be able to trace the shape of the plates. The European Maple back plate is on the left, and the European Spruce front plate is on the right. I used a small washer as a spacer, to establish the edge overhang, and a ball-point pen to trace the shapes. You can see that I have begun work on the neck, as well, which is also made of European Maple.
Completed garland, traced plate-shapes, and partially carved neck.
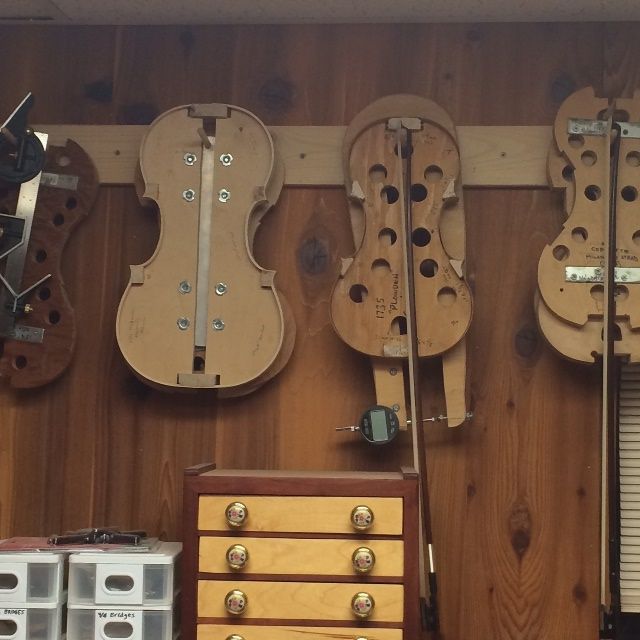
The garland is temporarily out of the focus of the work, now, so I hung it up, out of harm’s way, until I am ready to begin installing plates.
Rib garland completed and set aside for safe-keeping.
The next step is to actually cut out the plates and begin shaping them into the voice of a Viola. I will let that wait until a later post.


.JPG)
.JPG)