Final woodwork on 5-string 16-1/2″ Viola

Last “woodwork” tasks on the 16-1/2″ five-string Viola:

Last time, we finished up with the neck set, and the corpus closed, but all the edgework (and final shaping of the neck heel, etc.) left to be done.
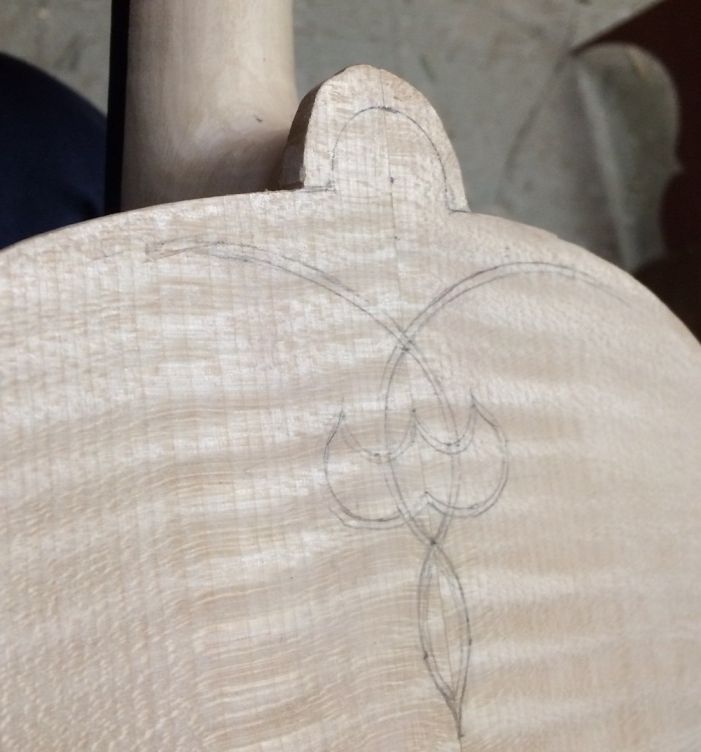
Closed corpus of the 16-1/2" five-string Viola: purfling weave sketched, heel/button need carving.
Closed corpus, purfling weave sketched, heel/button need carving.


Carving the heel/button combination

The neck heel and the back button, together, make up the majority of the strength of the neck-joint. I once had a cello come in for repair, fully up to tension, but “something was loose.” Yeah, the ONLY glue still holding in the neck-joint was the glue between the neck heel and back button! I removed the neck, cleaned out the old glue, and re-glued the entire joint: but I never forgot that the heel/button connection alone had held the entire load of the string tension! So I make certain that this joint is perfect, and the two are carved as one piece after gluing.

There is also a specific measurement from the center of the neck-heel curve to the top edge of each side of the front plate where it joins the back: in violas, I shoot for exactly 27mm.
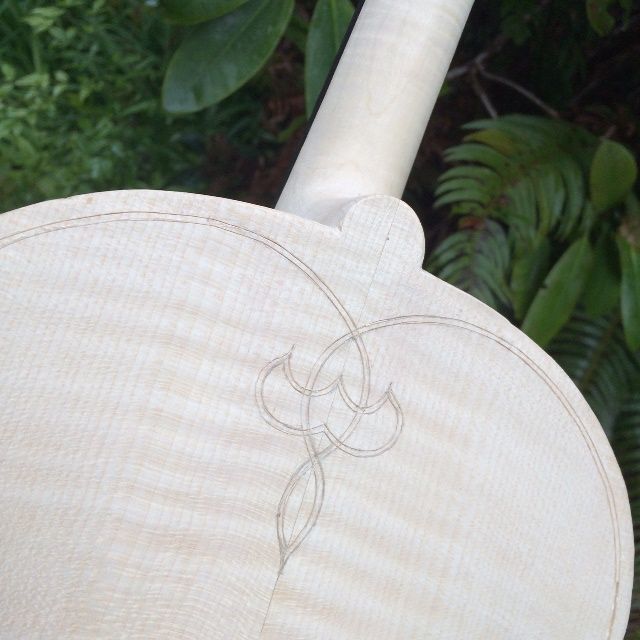
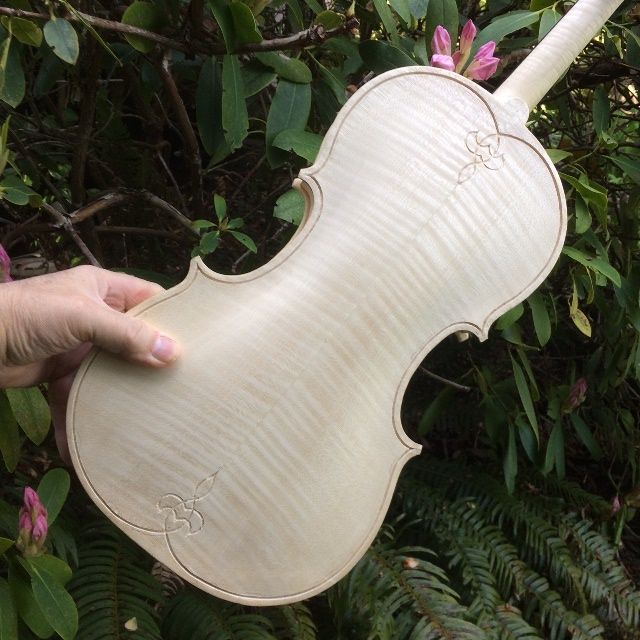
Heel and button carved on the 16-1/2" five-string Viola: ready to begin purfling.
Heel and button carved: ready to begin purfling. I have laid out the purfling and incised it.


Purfling

I used to struggle with cutting the purfling slot (I still do, but for different reasons) because I was trying to cut the full depth in a single pass, or maybe two. One of my teachers corrected me, saying that the first pass around, with the knife, is just to “darken the lines” left by the marker. Then it is relatively easy for the blade to follow the groove for subsequent fast passes, each making the slice a little deeper. Finally, I use a special tool to pick out the waste wood from between the lines.
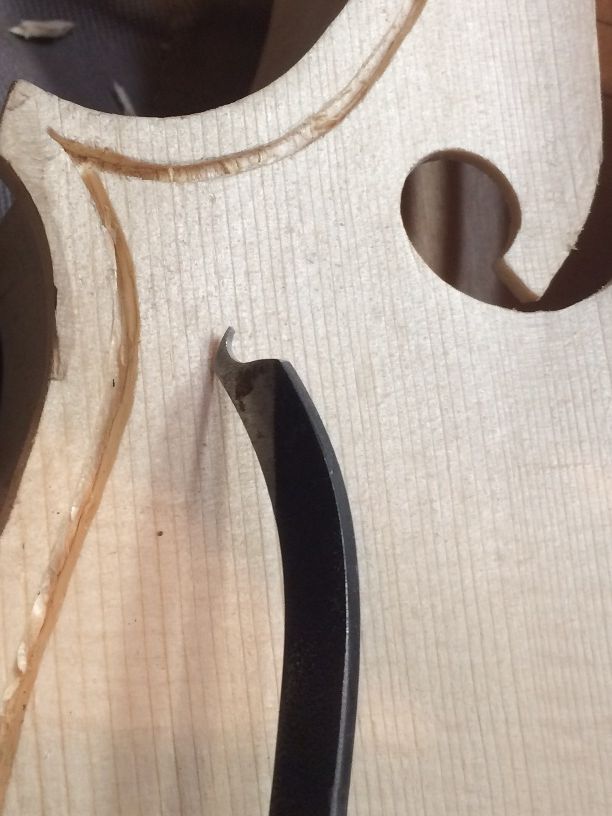
Purfling pick with front plate of 16-1/2" five-string Viola.
Purfling-pick with front plate.

One problem I faced with the back plate that I had not noticed so much, on the front plate, even though it had the same issue: This purfling is a little wider than what I usually use, so, in spite of the fact that I marked out the correct width, my pick tools (all of them) are made for the narrower purfling, and they do not readily make the slot the correct width. That meant a lot of going back and widening things just a little bit (0.5 mm, usually.) The European spruce of the front plate is soft, and quite forgiving. The harder European maple back plate does not give at all, so if the slot is too narrow, the strip is not going in, at all.

Another issue is that the purfling weave is on top of a fairly thin portion of the back plate, so I could not cut my slots as deeply as I wanted to. Thus, there was very little wood-support for the purfling, and the pieces were difficult to fit, whereas, around the perimeter, I could cut a slot for the full depth of the purfling strips and achieve full support. Ah, well…that’s life. But there were some joints I am not so happy with.

Anyway, this is how the purfling went:

I cut the center bout slots, first, along with the corners of the 16-1/2" five-string Viola.
I cut the center bout slots, first, along with the corners.


The goal is to complete the whole slot before inserting any purfling on the 16-1/2" five-string Viola.
The goal is to complete the whole slot before inserting any purfling. (Notice the shallow purfling-weave slots.)


Installing the purfling

As I did on the front plate, I installed the center-bout strips first, dry, and then the rest of the perimeter. I glued the perimeter in completely, before beginning the purfling weaves, themselves.

In the case of the purfling weaves, since the slots were so shallow, I glued each piece as I installed it, then worked on the other end of the instrument while the glue from that piece set up and began to hold.
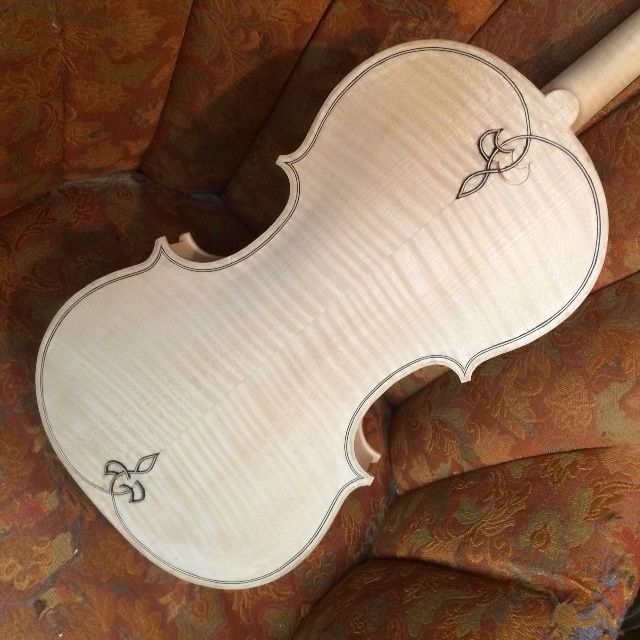
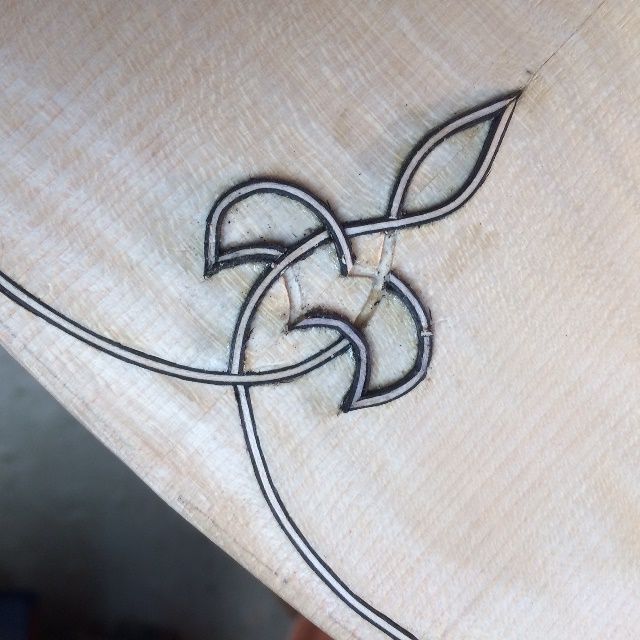
Outer perimeter complete...working on the purfling weaves for the 16-1/2" five-string Viola.
Outer perimeter complete…working on the weaves.


Purfling weave nearly done on the 16-1/2" five-string Viola. Notice that some joints are not as clean as others.
Purfling weave is nearly complete. Notice that some joints are not as clean as others.


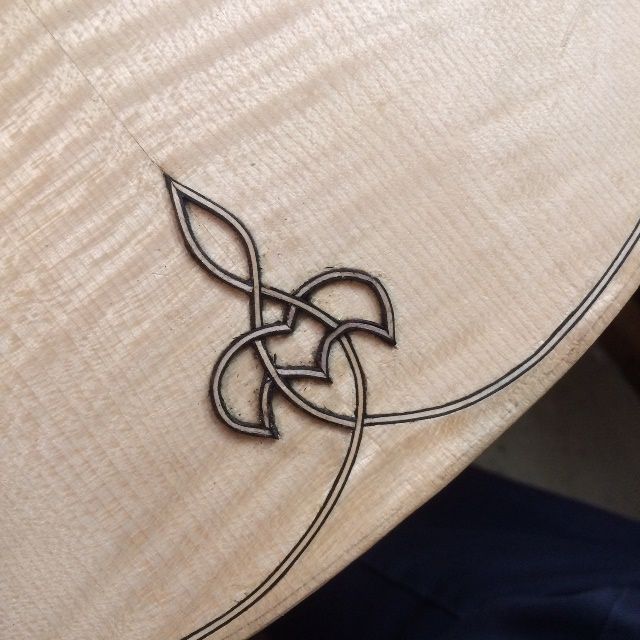
Completed purfling weave on the 16-1/2" five-string Viola: still needs to be planed flush.
Completed purfling weave: still needs to be planed flush.


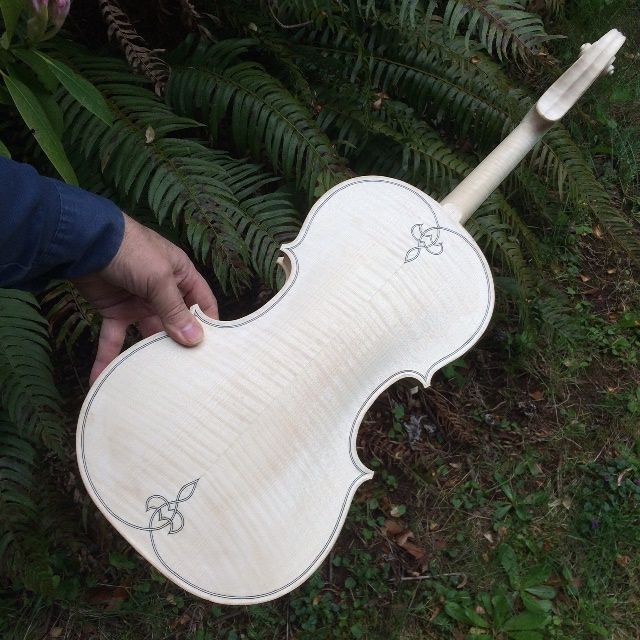
Completed purfling weave on the 16-1/2" five-string Viola...warts and all.
Completed purfling weave…”warts and all.” I may elect to go back and improve things a little. (Probably not.)
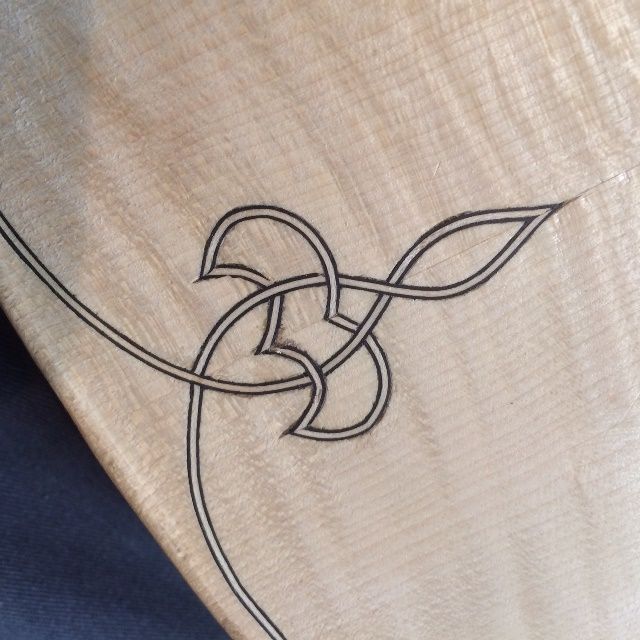
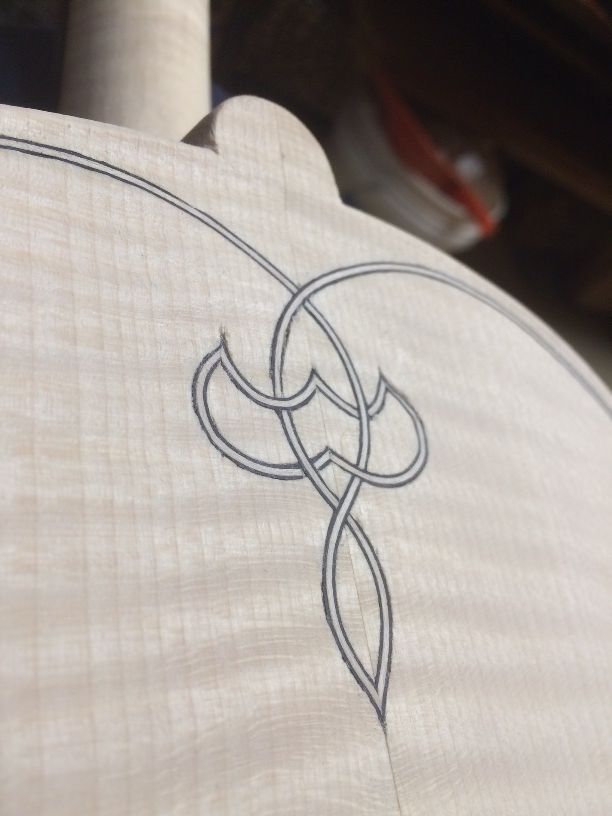
The other weave on the 16-1/2" five-string Viola turned out a little better.
The other weave turned out a little better.

The Channel

Once the purfling is all in place, and planed flush, it is time to carve the “channel.” This is a slight “ditch” that runs all the way around the perimeter: the bottom of the “ditch” is usually at the purfling, while the outer edge of the ditch ends exactly at a line called the “crest,” which is about 40% of the distance in, from the outer edge of the plate to the outer edge of the purfling. The inner edge of the “ditch”  will be planed and scraped back to “fair” into the surface of the arching, without any lumps or hollows.
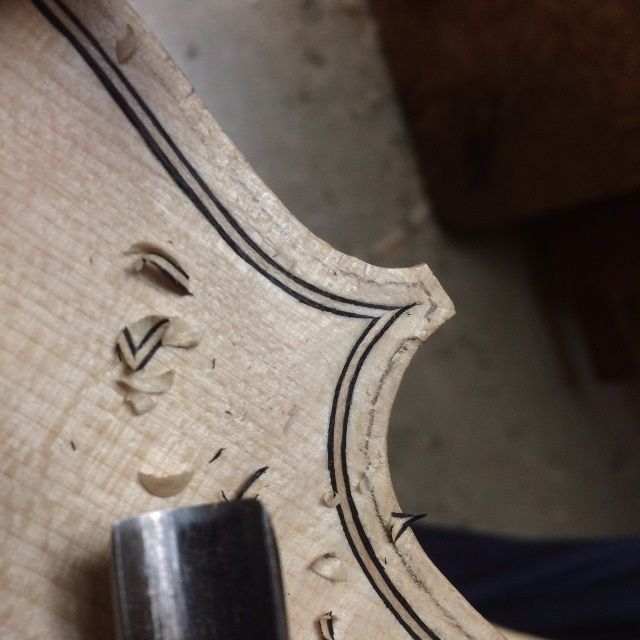
Notice the pencil-line marking the crest of the edge on the 16-1/2" five-string Viola.
Notice the pencil-line “crest”, between the purfling and the plate-edge.


Edgework

Finally, after all the surface of the plate is correct, I plane, scrape and sand the edges themselves, so that the outer curve of the plate edge perfectly meets the inner curve of the channel, all the way around the plate.

In this case, I did not take the picture until after I had completed the next step, which was to wet the whole structure down with water, in order to deliberately raise the grain, so that any imperfections, or compressed areas, will rise up and be seen…and subsequently, be scraped and sanded flush again. All this to say, please understand the “rough” surface of all the wood.

Edgework of the 16-1/2" five-string Viola complete, but still rough with raised grain.
Edgework complete, but still rough with raised grain.


So…that means the whole instrument is now complete, minus the varnish prep-work, and the actual varnish and set-up!
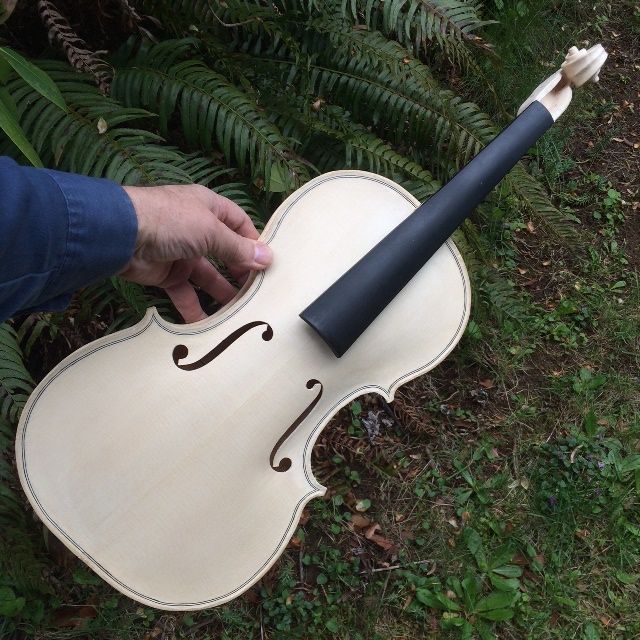
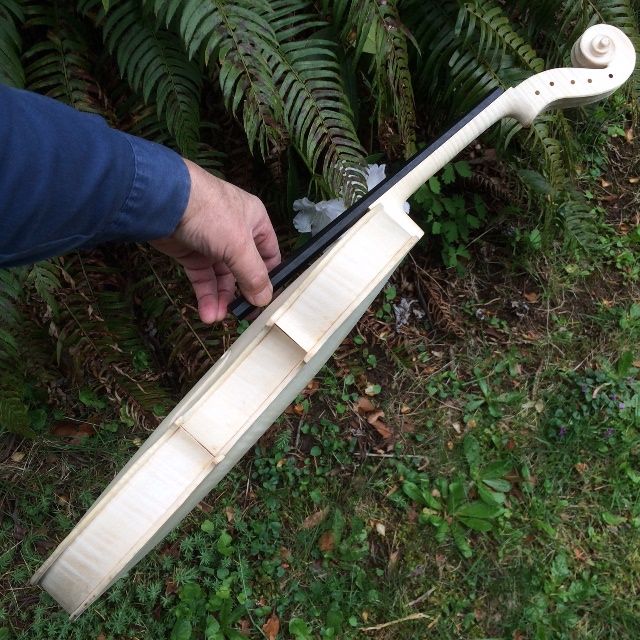
16-1/2" five-string Viola Front ready for varnish.
Front ready for varnish.


16-1/2" five-string Viola Side ready for varnish.
Side ready for varnish.


16-1/2" five-string Viola Back ready for varnish.
Back ready for varnish.


Varnish Sequence

I will post the varnish sequence as it occurs, but, for now, know that the sequence will include at least two “wet-it-down, let-it-dry, and scrape/sand-it-smooth” iterations. The idea is to produce a surface that will no longer respond to moisture by raising the grain. This is particularly important on the handle portion of the neck, where the moisture from players’ hands will certainly be in contact with the wood, every time the instrument is played. But, under the varnish, the slightest discontinuity will become glaringly obvious, so that is important as well.

After the wood is smooth, there will be:

    1. a tanning treatment,
    2. a mineral ground treatment,
    3. a sealer, to lock the mineral ground in place, and
    4. finally, the varnish itself in a series of 6-12 coats, depending on color.


Enough for today.


Thanks for looking.


More Progress on the 16-1/2″ Five-String Viola

Progress on the 16-1/2″ five-string Viola

Beginning the plates

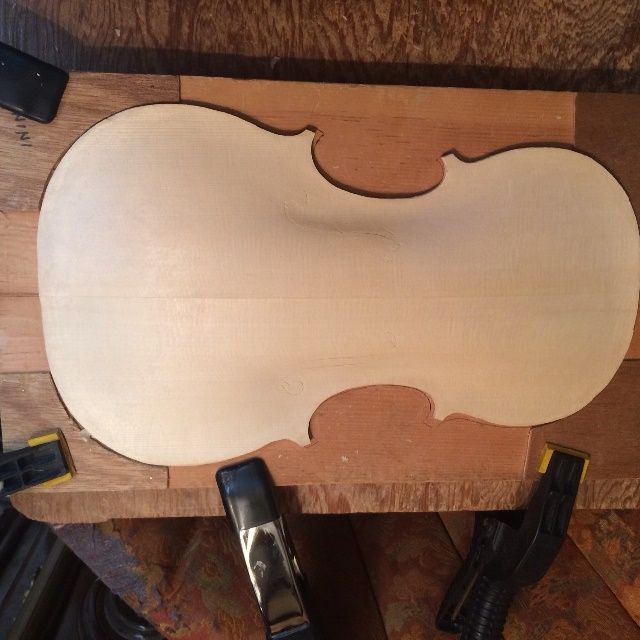
When I last posted, I had traced the shape of the garland onto the plates and was ready to cut out the plates. I decided to wait on the back plate, but the front plate was ready to go,  so I cut it out, using my band saw, and smoothed the edges, using the spindle sander and files. (I have built precisely one instrument without power tools of any sort: One of my early teachers required it, so I complied, but it convinced me that, at my age, I need to save my joints for the things that I have to do by hand, rather than beating them to death just on principle. Besides, I am convinced that if the old masters had possessed power tools, they would have used them without question. They were very practical people.)

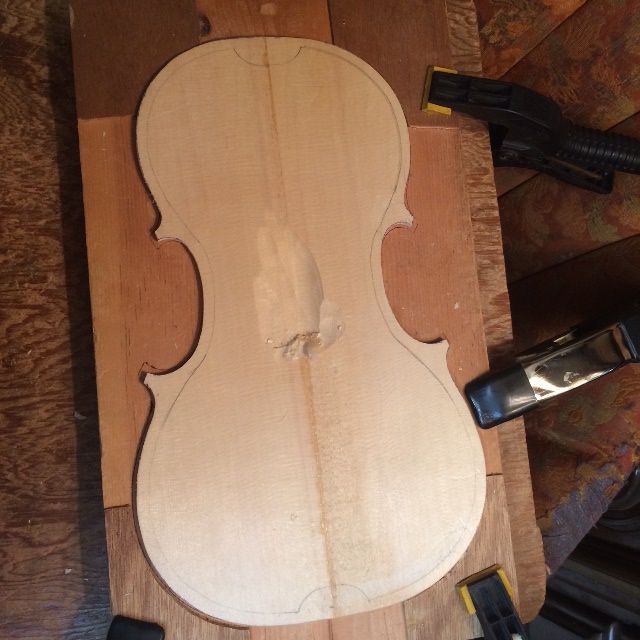
So, with the front plate cut to shape, I first marked the edge at a thickness of 4.5 mm. I used a wheel-style marking gauge, with a sharp disc, to mark the thickness and scribe it into the edge of the plate, all the way around. Then I began cutting away waste wood to achieve the desired arching shape. I checked a poster (Published by The Strad) of the “Conte Vitale” 1676 viola by Andrea Guarneri . It is one of the most frequently copied violas in the world, as it is a large viola that works very well, and copies of it frequently work very well, too. I am modifying the pattern a little for superior playability, but I have made this model before, so it is not “guesswork.”

I forgot to take pictures, initially, but here are a couple, belatedly:

Remaining scribe-line for edge-thickness on the 16-1/2" five-string Viola.
Remaining scribe-line for edge-thickness. I plane down to the line all around, eventually.


Line beginning to disappear on the edge of the 16-1/2" five-string Viola.
Line beginning to disappear.


Arching complete on the front plate of the 16-1/2" five-string Viola.
Arching complete.


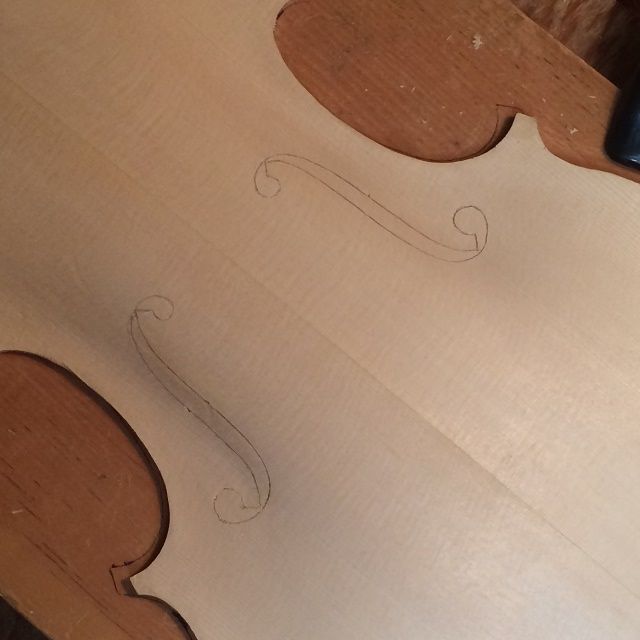
Arching complete and f-holes laid out for the 16-1/2" five-string Viola.
Arching complete and f-holes laid out.

F-hole Layout and Incision

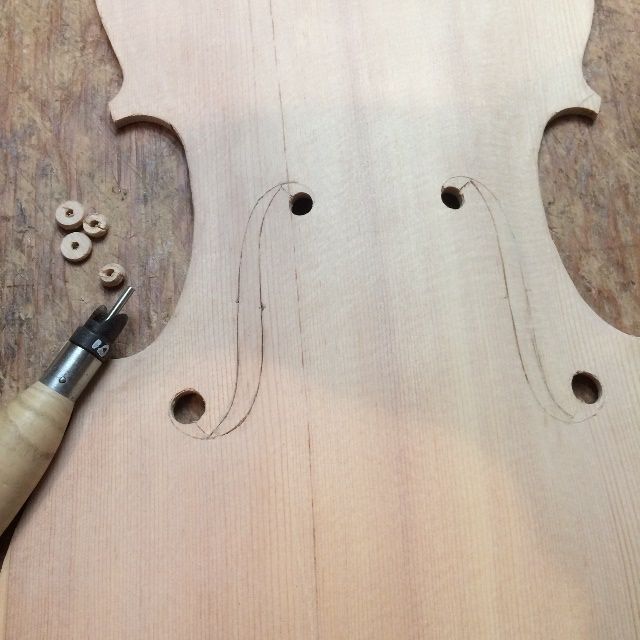
Once the arching was complete, right down to scraping, I laid out the f-holes, and incised them deeply into the European Spruce of the front plate. Incising the f-hole outline allows me to turn the plate and sight over the edge of the plate at the profile. I want the main stem of the f-hole to be essentially parallel with the plane of the ribs, when seen from the side. I use this as a final correction for the arching, and without exception, it has required me to correct the shape of the arching before moving on.

F-holes laid out and incised deeply on the front plate of the 16-1/2" five-string Viola.
F-holes laid out and incised deeply.

Graduation

Once the arching is truly completed, and I am satisfied with the f-holes, I begin graduating the inside of the plate. This means that I am carving the inside of the plate to “match the outside,” in that it will be an appropriate thickness all over. I usually want the center area between the f-holes one thickness, the band running up the center to each end slightly thinner, and the wing areas outside that area quite a bit thinner. There is no “set” thickness, and each luthier has to make choices in order to achieve what he or she wants from an instrument. Getting what you hope for depends on those choices you make, and the choices were (hopefully) made intelligently,  based on the type and density of the chosen wood, the shape of the arching, and so forth. Getting the arching and graduations right is a lot of carving on a large instrument, but it pays off in quality of sound.

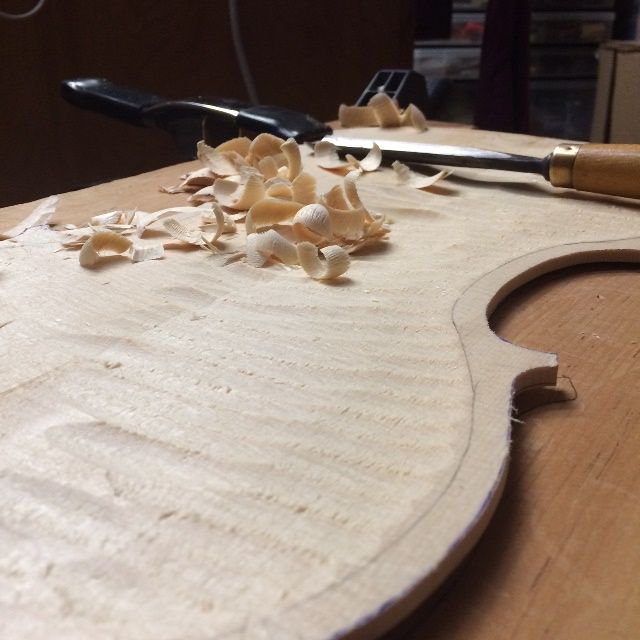
beginning to carve the interior of the front plate of the 16-1/2" five-string Viola.
Beginning to carve the interior for thickness graduation.


Carving away the waste wood from the interior of the 16-1/2" five-string Viola.
Carving away all this waste wood produces a lot of shavings. Fortunately, we heat our home with wood, and the shavings are great for starting the morning fire. 🙂


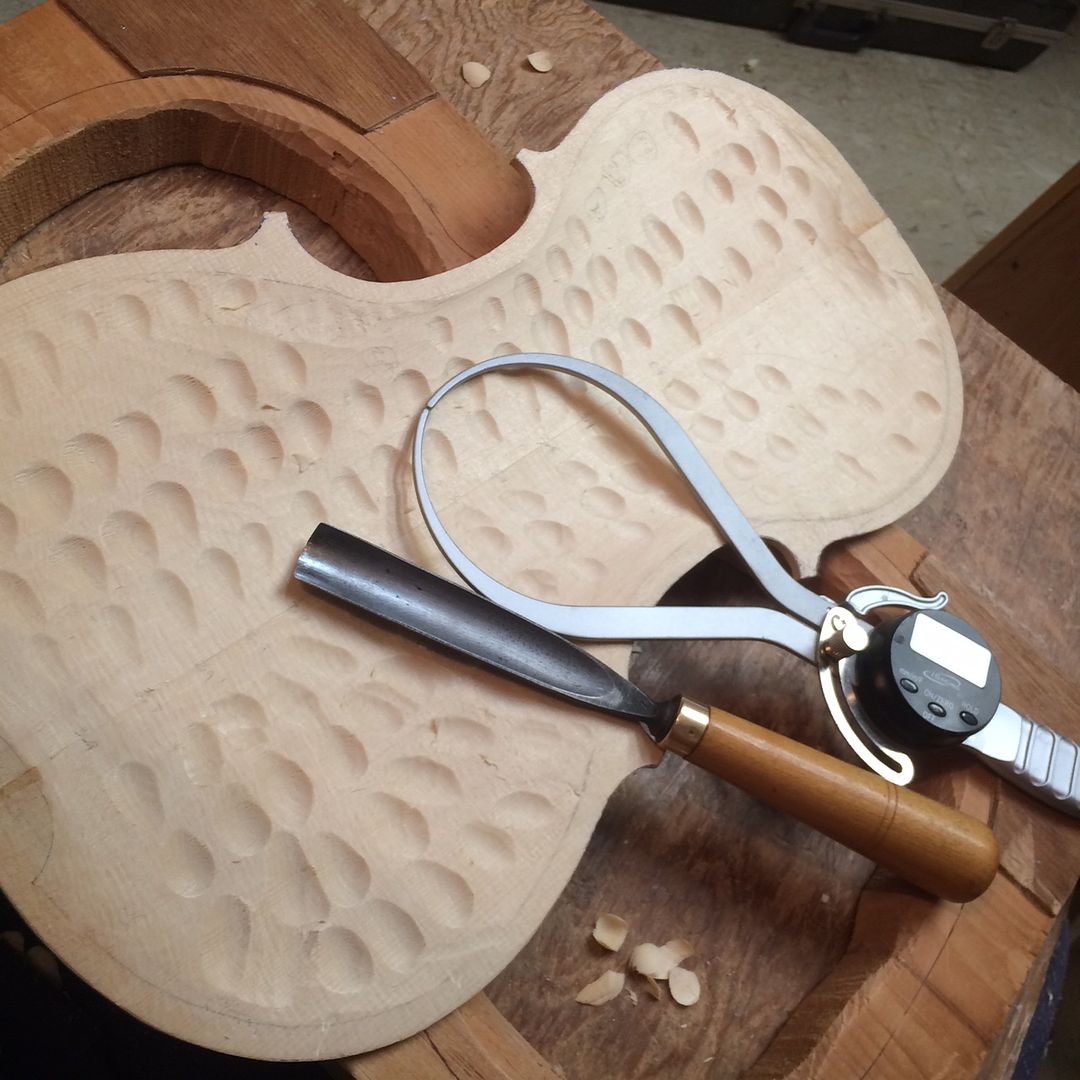
Carving thickness "dots" for the front plate of the 16-1/2" five-string Viola.
Once I am getting close, I carve “dots,” calibrated to specified thicknesses.


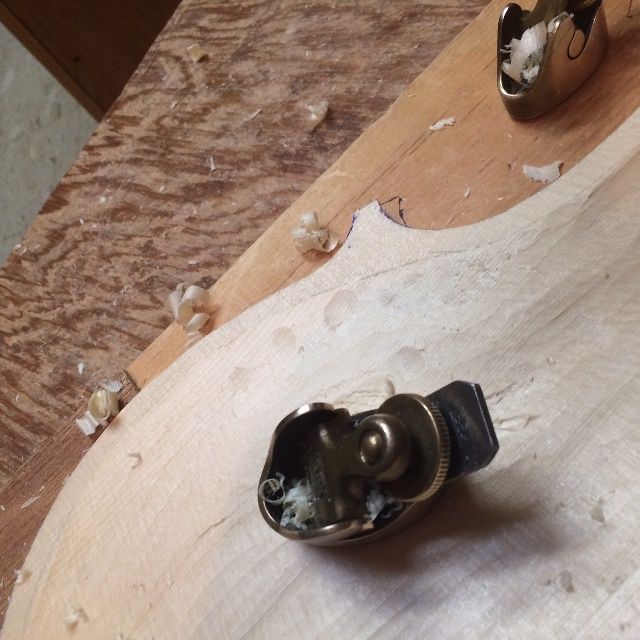
Connecting the thickness "dots" on the front plate of the 16-1/2" five-string Viola, by planing.
“Connecting the dots,” using a finger plane.


Frequently I can see the traces of the incised f-holes from the inside by the time I am finished with the graduation of the front plate. And, believe it or not, I  always can easily see light through the spruce plate, in the thinner areas, if I hold it up to a lamp.

Cutting out the F-holes

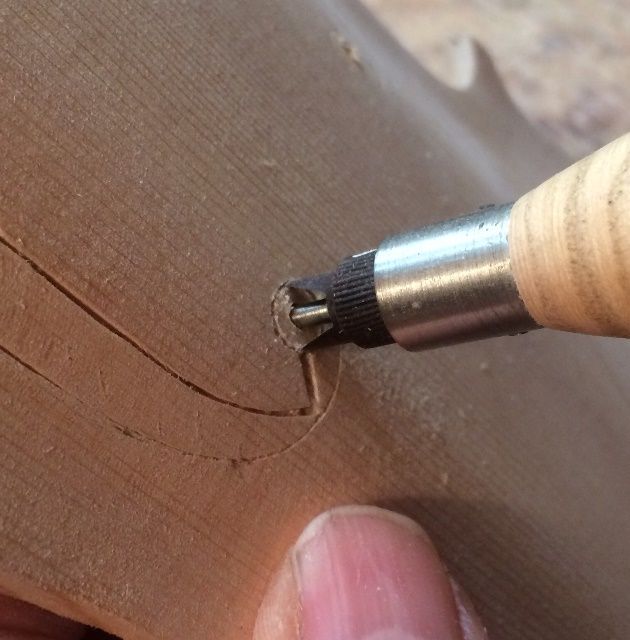
I use a special tool to cut the upper and lower eyes of the two f-holes, then use a small knife to finish cutting them out.

f-hole cutter, boring the "eyes" of the f-holes on the 16-1/2" five-string Viola.
I use an f-hole cutter to open the upper and lower “eyes” of the f-holes.


Ready to cut out the stems of the f-holes on the 16-1/2" five-string Viola.
Ready to cut out the stems of the f-holes. (Earlier instrument…I forgot to take pictures…)


Bass Bar

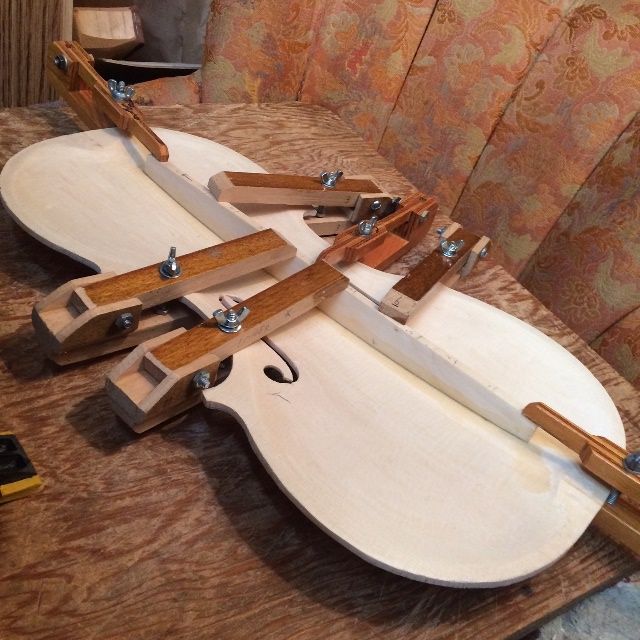
Once the f-holes are cut out and refined, the next thing is the bass bar. This is the only brace attached to the inside of a violin, viola or cello: it supports the bass foot of the bridge, and provides for clarity and strength to the bass notes. An instrument with a weak bass bar will not sound good.

Bass bar fitted, glued and clamped, in the 16-1/2" five-string Viola front plate.
Bass bar fitted, glued and clamped.


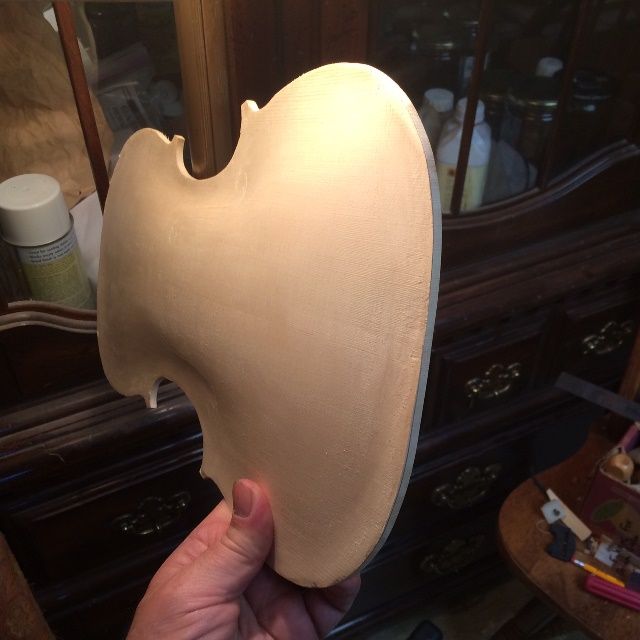
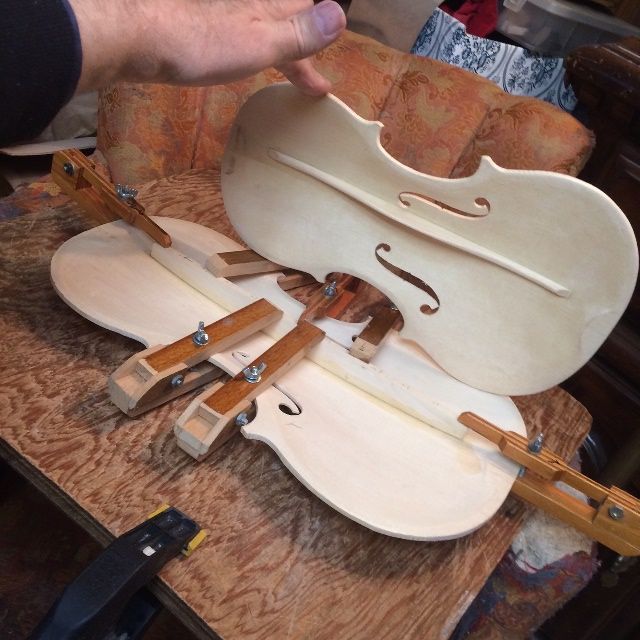
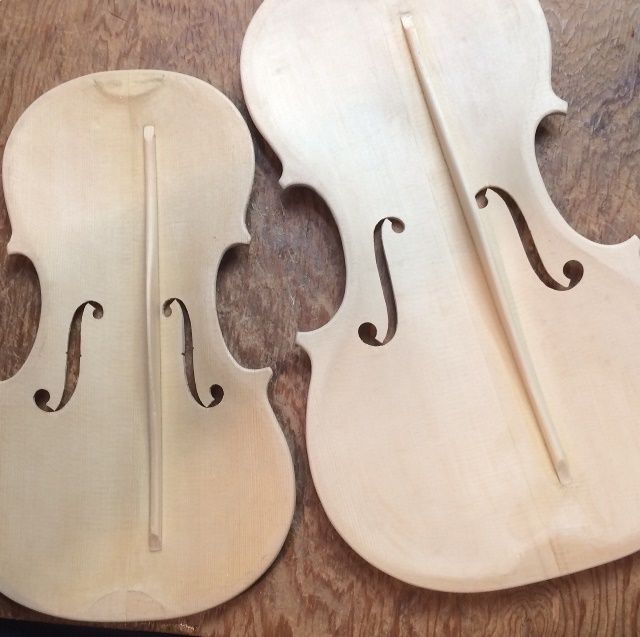
With no point of reference, it is hard to realize the size of that plate: so here is a standard violin-sized plate for comparison: A 16-1/2″ viola is pretty big.

Size comparison with violin plate and bassbar: 16-1/2" five-string Viola compared to a violin.
Size comparison with violin plate and bass bar.


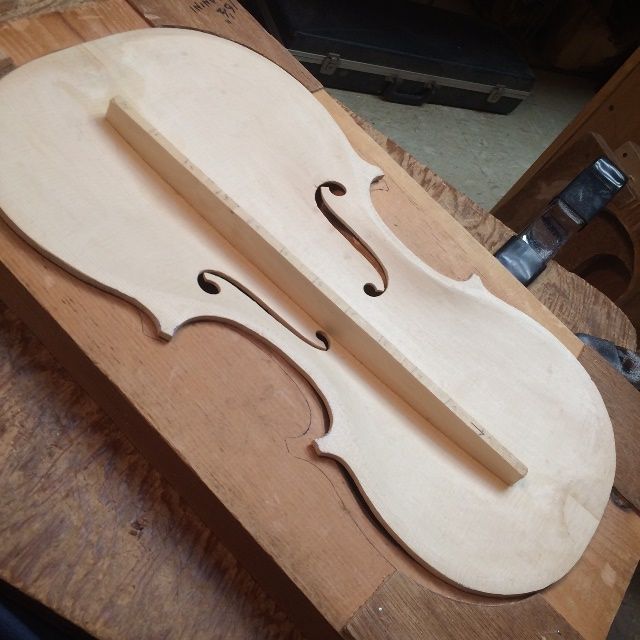
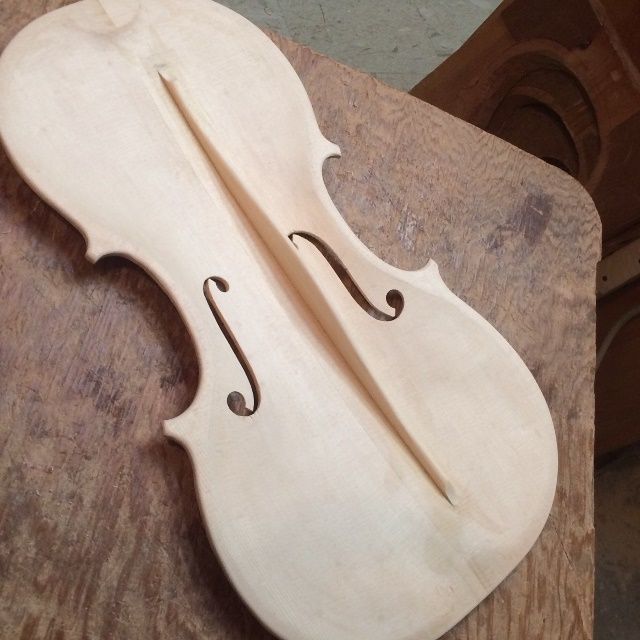
Bass bar glued into the 16-1/2" five-string Viola, and ready for trimming to shape.
Bass bar glued, and ready for trimming to shape.


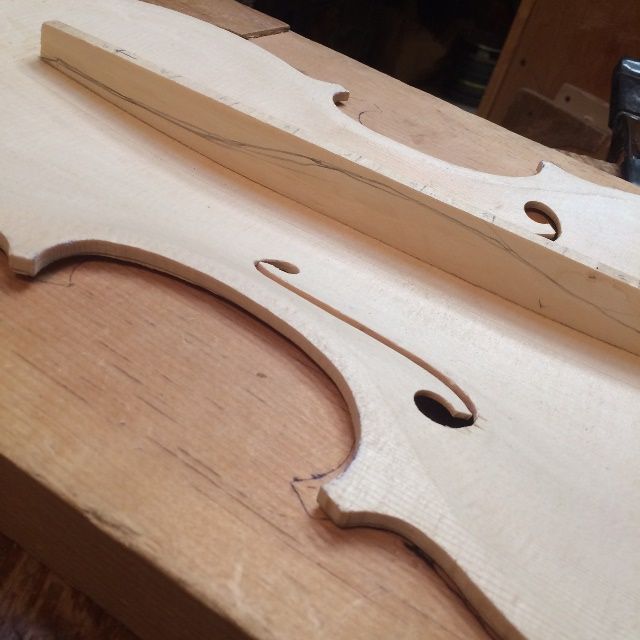
Proposed shape of completed bass bar in the 16-1/2" five-string Viola.
Proposed shape of the completed bass bar.


I cut the bass bar to the desired shape, using gouges, planes and scrapers.

Completed bass bar in the 16-1/2" five-string Viola.
Completed bass bar.


Another size comparison between the 16-1/2" five-string Viola and a violin.
Another size comparison. Same violin plate.


Inner Edgework

I know it will be difficult to accomplish the inner edgework after the plate is installed, so I always do that first. I also trim and shape the linings, so that they taper smoothly into the ribs.

Installing the Front Plate

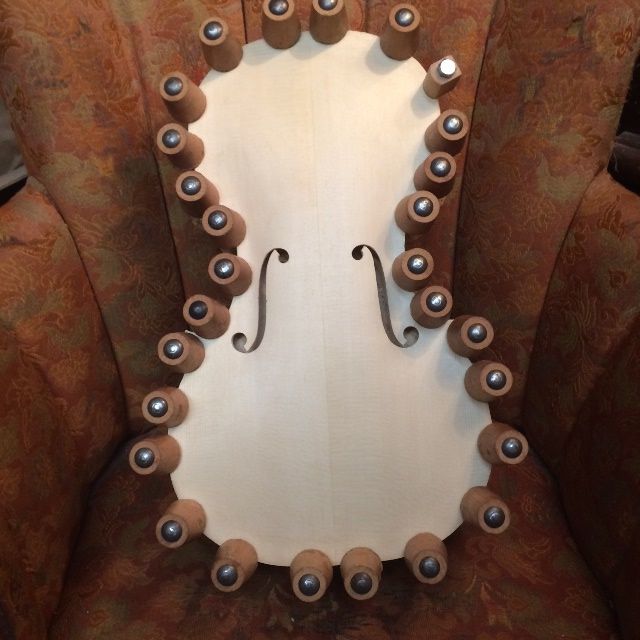
I dry-clamped the plate to the Garland, and then, using a thin palette knife, slipped hot hide glue (on the thin side, for easy removal if needed) into the unclamped areas and immediately applied padded spool clamps to tightly hold the plate until the glue could dry. Then I removed the first few clamps and inserted glue there, and reclamped. My wife thinks the instrument looks as though it is wearing hair-curlers at this point. 🙂

Front plate of the 16-1/2" five-string Viola installed, glued and clamped to the garland.
Front plate installed, glued and clamped.


And that is where the instrument rests for tonight.


Thanks for looking.
More 5-string Fiddle Progress

Five-String Fiddle Progress

(Further progress on building a custom-made 5-string bluegrass fiddle.)

Neck Set

The neck was ready to set into the neck-block, late last night, but I had reached my physical limit. So, today, I prepared both the neck and the garland, by ascertaining that all angles and dimensions were correct, and then laying out the shape of the neck mortise on the neck block of the garland.  This is a critical step in violin-making and always raises my blood pressure a little, as I know that, if I make a mistake, it will require serious rework to get back to a usable status.

However, this time, the job went pretty smoothly, and I was able to set the neck in a fairly short time. One thing I do a little differently than I was originally taught, is that I set the neck before installing the maple back plate. This allows me to achieve a good fit with the rib garland and neck block, and not have to worry about the fit against the back plate button. Then I saw off the stub of the neck heel, and plane and file it flush with the rib garland. After I remove the mold and add the back linings, I will level the back of the garland, and be ready to trace the back plate shape.


Five-string fiddle neck Set Complete.
Neck Set Complete: still have to remove the neck-heel stub.


Here is the completed corpus (Sitka Spruce top plate and Big Leaf maple ribs still on the mold) with the wild-grain Big-leaf maple back plate billet.

Completed Corpus of Five-string fiddle with Back Plate Billet.
Completed Corpus with Back Plate Billet.


Mold Removal

So, the next step was to remove the plywood mold. This is another stressful step because it involves literally using a hammer and chisel, to break the glue-bond between the blocks and the mold, so as to release the garland from the mold.  I used to have a difficult time doing this, because occasionally a drop of hide glue had seeped between the rib and the mold, and anchored the fragile rib material to the very solid mold. The likelihood of breaking a rib at that point became nearly 100%. Eventually, however, I learned to liberally coat all the non-gluing surfaces of the mold with candle-wax (paraffin,) by vigorously rubbing a candle over all the areas I felt were likely to get a drop of glue on them.

The result today was that, when I removed the mold, it went smoothly, and I could see a place where glue had definitely intruded but it had dried with zero adhesion to the waxy mold. (What a relief!)

Five-string fiddle mold removed, ready for back linings.
Mold removed, ready for back linings.

Installing the Back Linings

The linings are important for two reasons: they strengthen the fragile rib-edges, and they triple the gluing surfaces between the rib-garland and the front and back plates.

So, I cut the mortices in both sides of each of the six blocks to receive the lining strips, and then inserted the linings dry, to get a perfect fit.

Afterward, I removed each lining, one by one, coated them liberally with hot hide-glue, and re-inserted them, clamping immediately with small spring-clamps.

Five-string fiddle back linings installed, glued and clamped.
Back linings installed, glued and clamped.

Shaping Blocks and Linings

If you look closely you can also see, in the above photos, that I had trimmed the blocks on the front side, before removing the mold. After the glue is dry on the back linings, I will also trim the back side of the blocks, to achieve a smooth, curved surface on the interior of all the blocks. At that same time, I will taper the linings so that they are very thin on the edge toward the middle of each rib, but still 2 mm thick at the edge where they will contact the back and front plates.

After that, it will be time to level the back surface of the entire corpus (garland and neck-heel) so as to fit tightly against the back plate billet. Then I can trace the final shape of the back plate, cut it to shape, and get going on completing the back plate.

For now, I am satisfied to allow the glue to dry, and take the rest of the evening off.


Thanks for looking.
Commissioned Handmade Five-string Fiddle Beginning

Starting a new 5-String Fiddle

The Materials:

A few weeks ago I announced that a new fiddle would be beginning. Now I have a few photos to show:

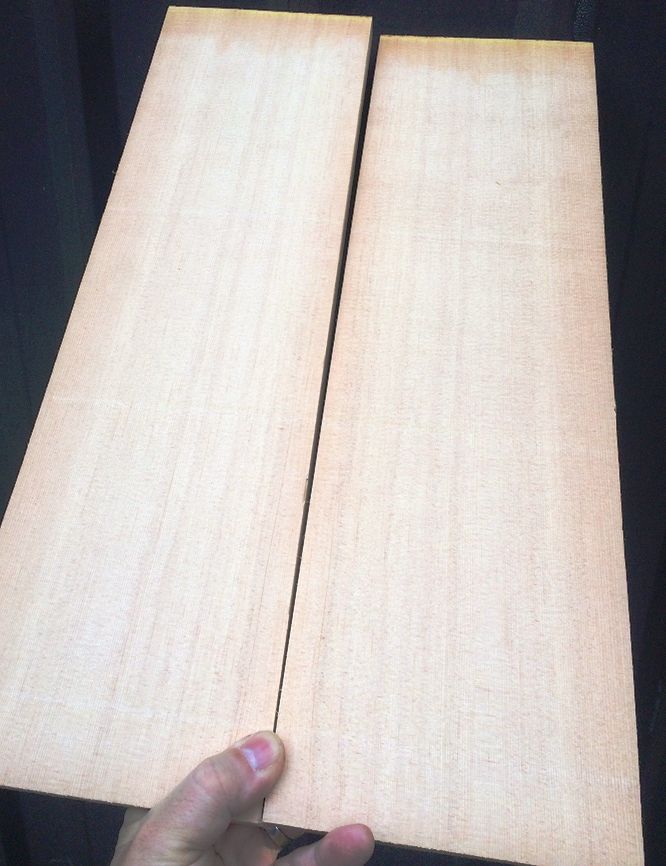
The top plate is Sitka Spruce, from Bruce Harvie. The customer wanted “Oregon wood,” and the Big Leaf Maple is definitely from in my neighborhood, here in Oregon (I helped harvest it;) but the Sitka is just a species that grows here…I don’t know where it was harvested.

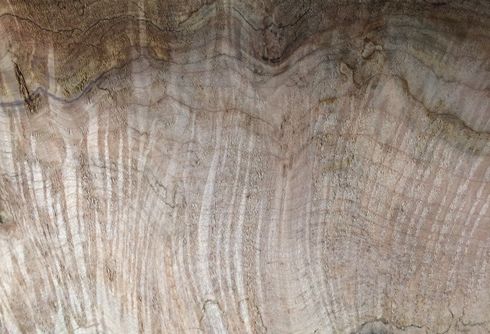
Wild-grain Big Leaf Maple for Five-string fiddle back and ribs!
Wild-grain Maple for back and ribs!


Fine-grained Sitka Spruce for Five-string fiddle top plate.
Fine-grained Sitka Spruce for the top plate.


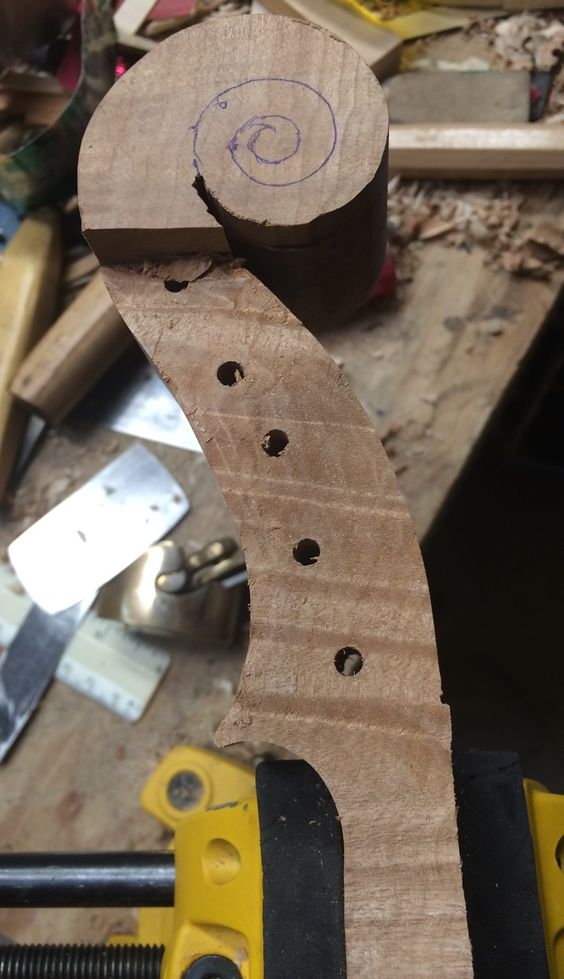
Preview of the grain in the Five-string fiddle neck billet.
Preview of the grain in the neck billet.


Beginning the work of building a 5-string fiddle:

I book-matched the spruce, to form the basis for the front plate: a solid plate with a tight glue-line down the center.

I used the mold (or form, as many people prefer to call it) that matched the fiddle the customer liked best. Then I added willow blocks to become the corners and end-blocks, and I traced the intended shape of the blocks from the mold template onto the back-side of the blocks, where they are flush with the mold.

Blocks and mold with Five-string fiddle template.
Blocks and mold with template.


Five-string fiddle Preliminary block-shaping complete.
Preliminary block-shaping complete.


Added the ribs, of the spalted maple the customer liked, and glued them to the willow blocks. Afterward, I added linings, also of willow, and let them into the blocks and glued them to the ribs and the blocks.

Spalted Maple ribs and willow linings on beginning of Five-string fiddle.
Spalted Maple ribs and willow linings.


Five-string fiddle Rib garland nearly complete.
Rib garland nearly complete.


Then I traced the shape of the garland onto the top plate material, using a small washer as a spacer, and a ball-point pen as a scribe. I completed the corners using a straightedge and a series of circle templates. Finally, I marked the edge at exactly 4 mm thick, and carved the arching, using gouges and planes and scrapers.

Sitka top-plate arching complete for Five-string fiddle.
Sitka top-plate arching complete.


Then I marked the layout of the double purfling and the f-holes, and began incising them into the Sitka Spruce.

F-holes and purfling traced and cutting begun for Five-string fiddle.
F-holes and purfling traced and cutting begun.


Sometime in the midst of all the above work, I laid out and began carving the scroll and pegbox. That wild grain is very tricky to carve, as it changes direction constantly.

Rough-carved scroll and pegbox of Five-string fiddle.
Rough-carved scroll and pegbox.


I went ahead and completed the purfling and the f-holes, so that I could prepare the plate to be glued to the garland.

Completed top plate and neck work with garland for Five-string fiddle.
Completed top plate and neck work with garland.


I also added the bass-bar, chalk-fitting it to perfection, and gluing it in place, with hot hide glue. The bass-bar will be carved, planed and scraped to the proper shape after the glue dries.

Five-string fiddle Bass-bar glued and clamped.
Bass-bar glued and clamped.


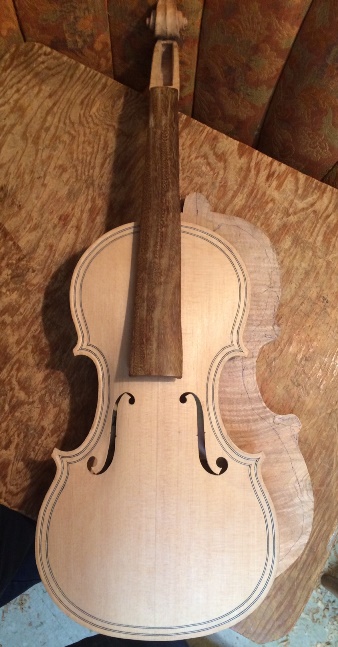
Five-string fiddle Top plate glued and clamped to the garland, fingerboard glued to the neck.
Top plate glued and clamped to the garland, fingerboard glued to the neck.


The fingerboard is Ipé, as requested by the customer. It is an extremely dense hardwood, but not threatened as Ebony is beginning to be. It finishes to a dark brown and looks good, as well as wearing well. It is extremely difficult to work, though, so it may take time to become popular with makers. The saddle and the nut will also be Ipé, but the pegs will be ebony, simply because I have never mastered the lathe-turning of tuning pegs.

Working on the fingerboard for the Five-string fiddle.
Working on the fingerboard.


And that is pretty much where things stand, for now. I will try to post pictures as they become available.


Thanks for looking.