Completed Five-String Fiddle

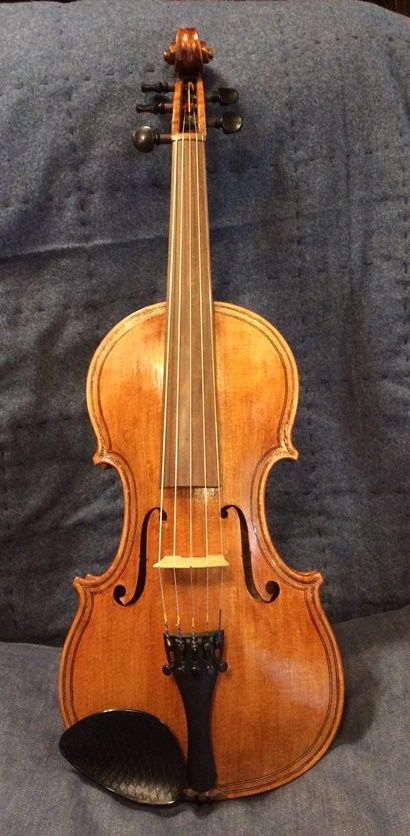
Commissioned Five-string fiddle complete.

Five String Fiddle is headed for the Bluegrass Festival!

The customer gave her enthusiastic blessing to my taking her precious new fiddle to the Wintergrass festival; hopefully to be played by some real professionals. Last night I completed most of the set-up, and I had it playing this morning.

So, here is most of the set-up process:

  1. Re-install the fingerboard.
  2. Carve and install the nut (final shaping later.)
  3. Ream peg-holes
  4. Carve and install the saddle.
  5. Install the end button.
  6. Install the soundpost
  7. Install the pegs.
  8. Cut the bridge to proper fit,  shape, and height.
  9. Install tailpiece and strings.
  10. Play it for final adjustment of soundpost, bridge, nut height, etc.

As you may recall, the customer chose Ipe wood for fingerboard, nut, and saddle. It is an extremely hard and dense wood, but not a threatened species, so it is still easy to obtain. In fact, the board I purchased was being sold for decking. I actually have some Apitong wood, too, salvaged from a railroad boxcar floor. Also very dense and hard, but not as pretty as Ipe.

The color of the Ipe wood looks good with the Oregon Big Leaf Maple and the Sitka spruce under their varnish. The only finish on the Ipe is a very light rub of linseed oil.
Shaping the nut of the Five-String Fiddle
Shaping the nut of Ipe wood, to match the fingerboard.


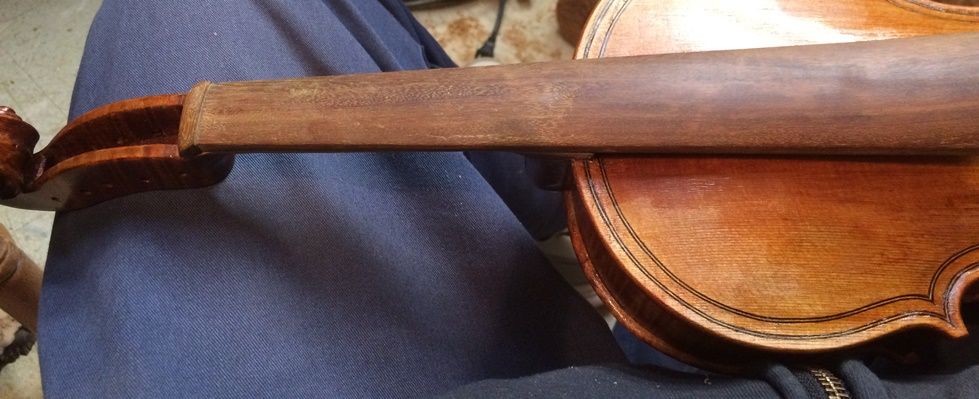
Ipe nut and fingerboard of the Five-String Fiddle
Nut and fingerboard installed and cut to preliminary shape.


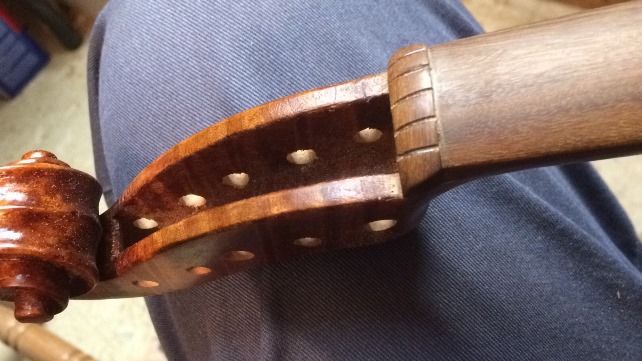
Peg holes and nut grooves of the Five-String Fiddle
Peg holes reamed and nut grooves located, but not finished.


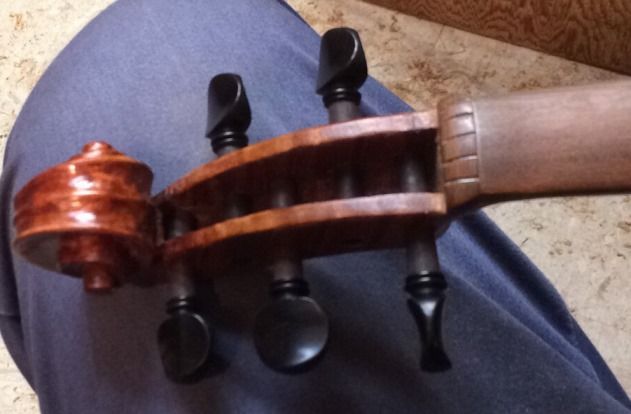
Pegs installed on the Five-String Fiddle
Pegs shaped, cut and installed.


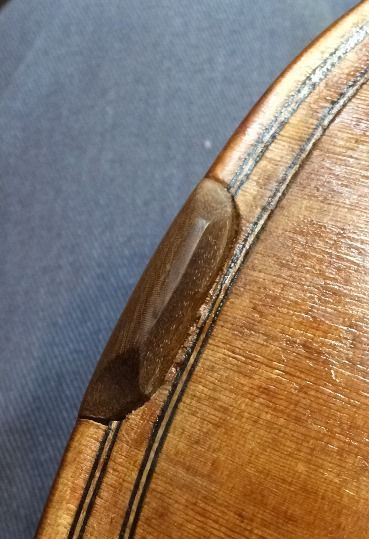
Ipe saddle installed on the Five-String Fiddle
Saddle, of Ipe wood, installed with radiused corners to prevent cracks.


Bottom view of the Ipe wood saddle on the Five-String Fiddle
Bottom view of the Ipe wood saddle.


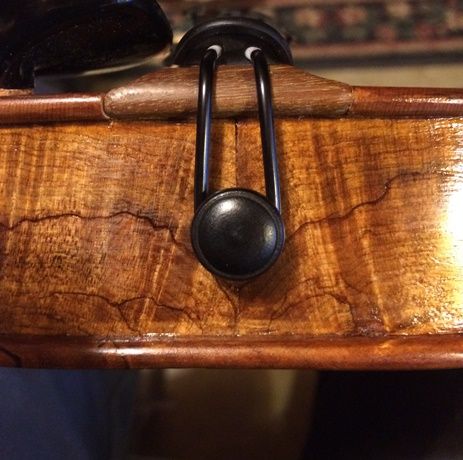
Completed end button with tailpiece of the Five-String Fiddle.
Completed end button with tailpiece.
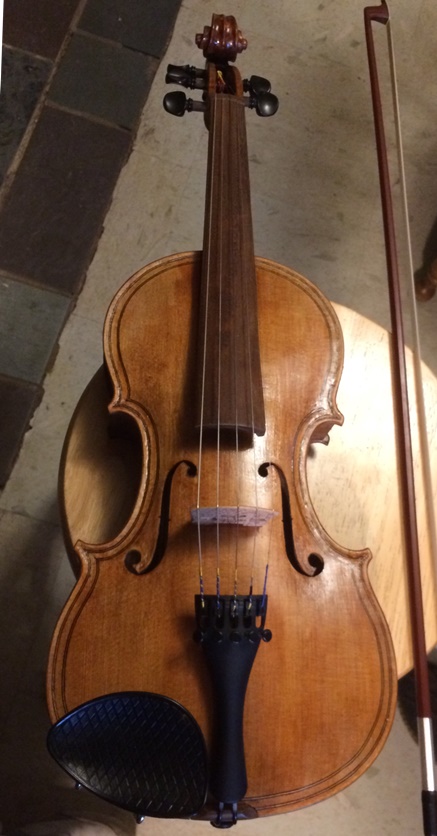
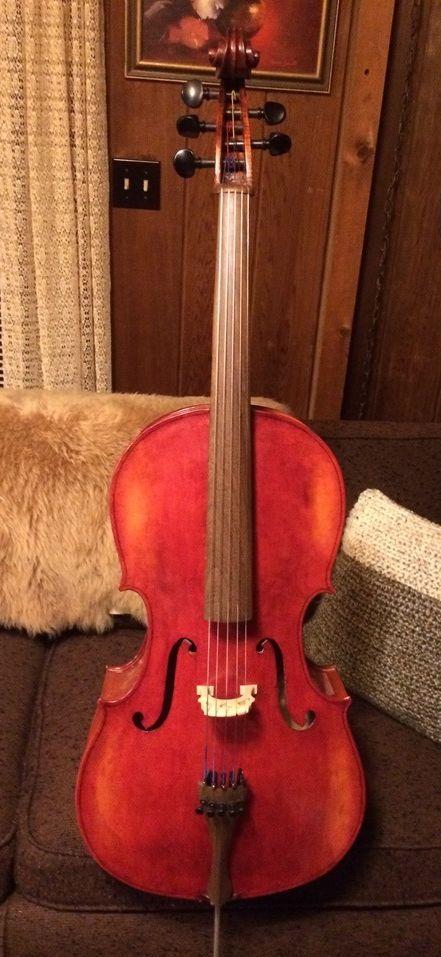
Finished front view of the Commissioned Five-String Fiddle.
Finished instrument front view. End button and pegs are ebony: I can’t obtain Ipe pegs and fittings.


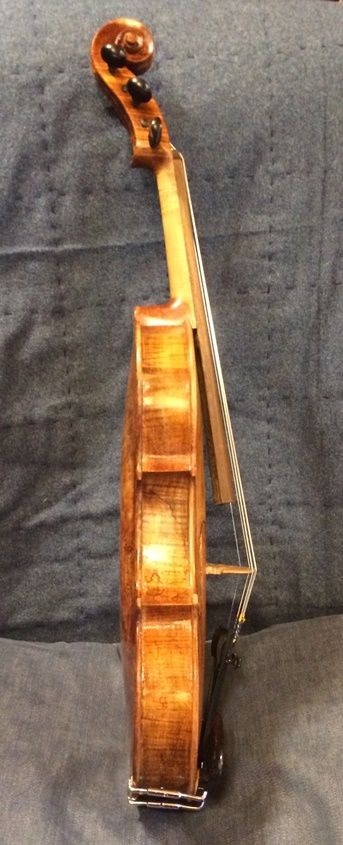
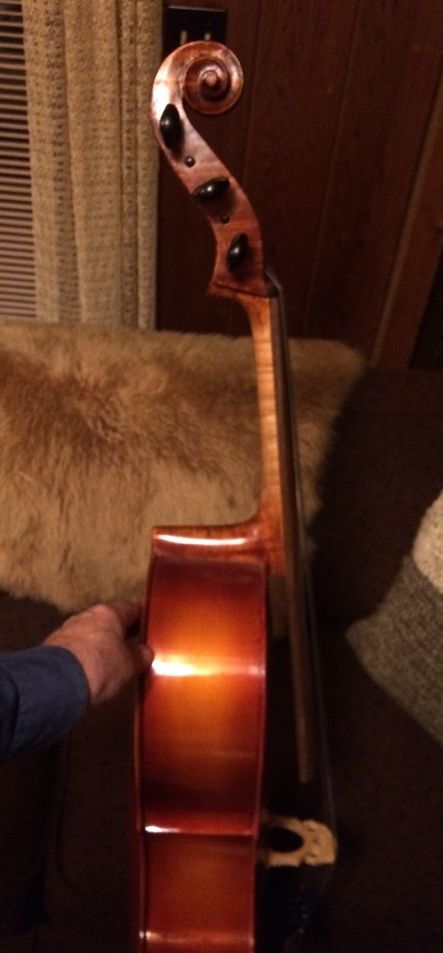
Bass side viw of the finished Five-String Fiddle
Finished bass side view.


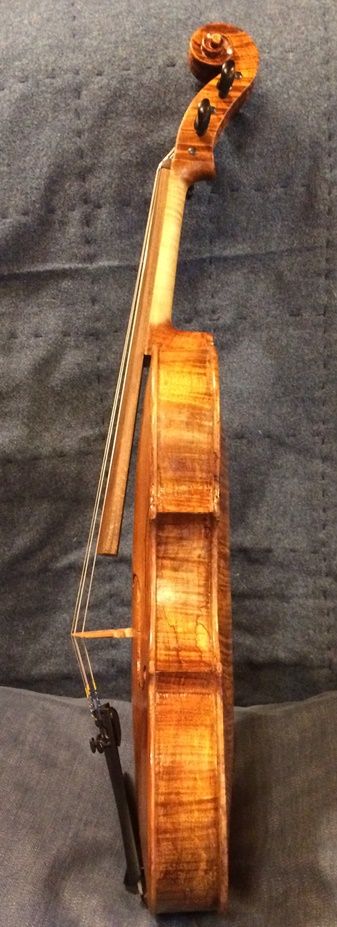
Treble side view of the finished Five-String Fiddle.
Finished treble side view.


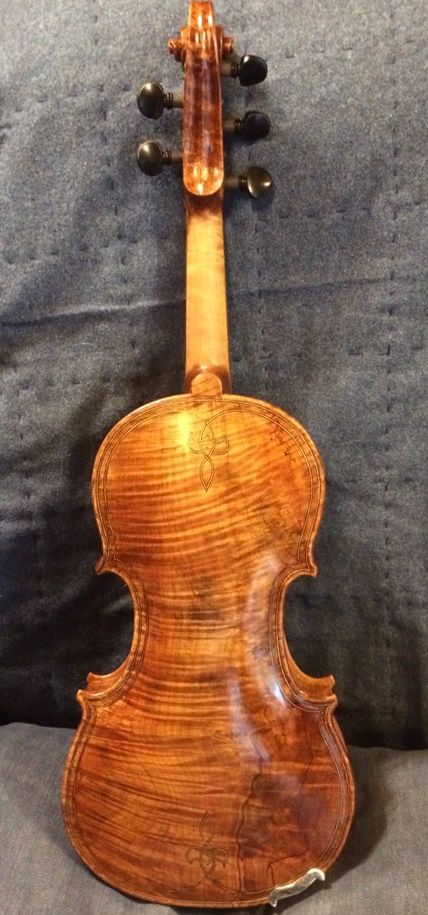
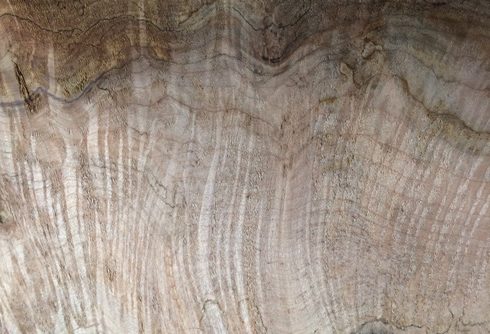
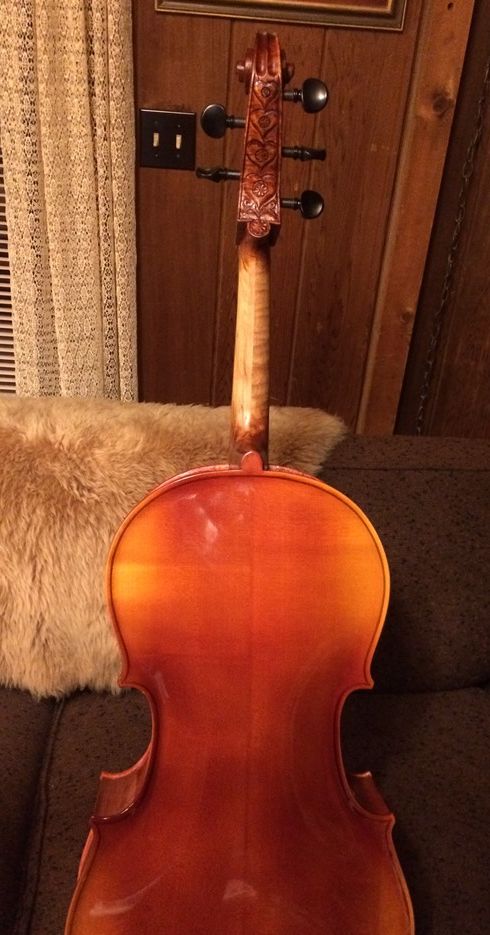
Finished back view of the Five-String Fiddle.
Finished back view.


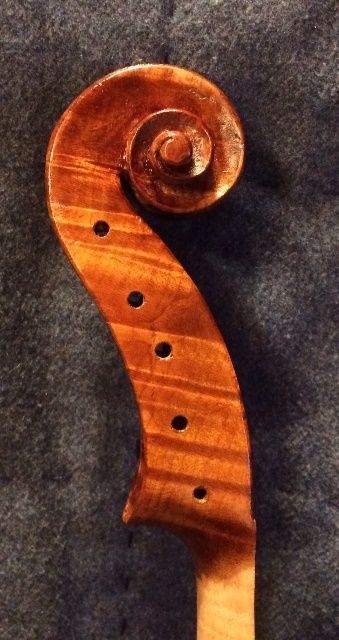
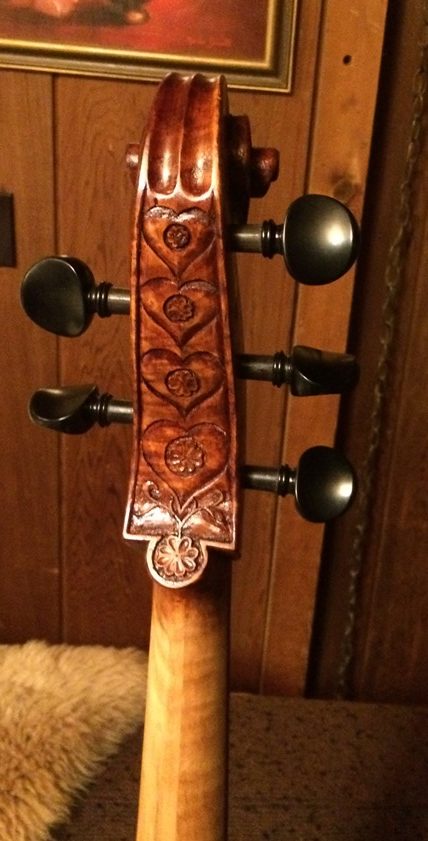
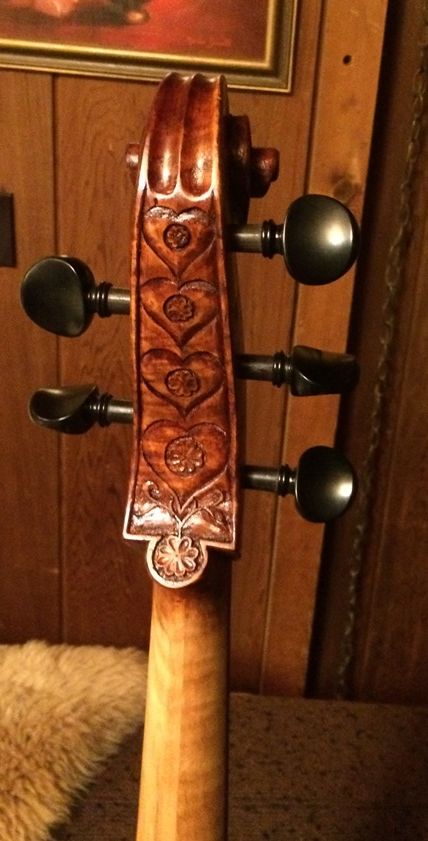
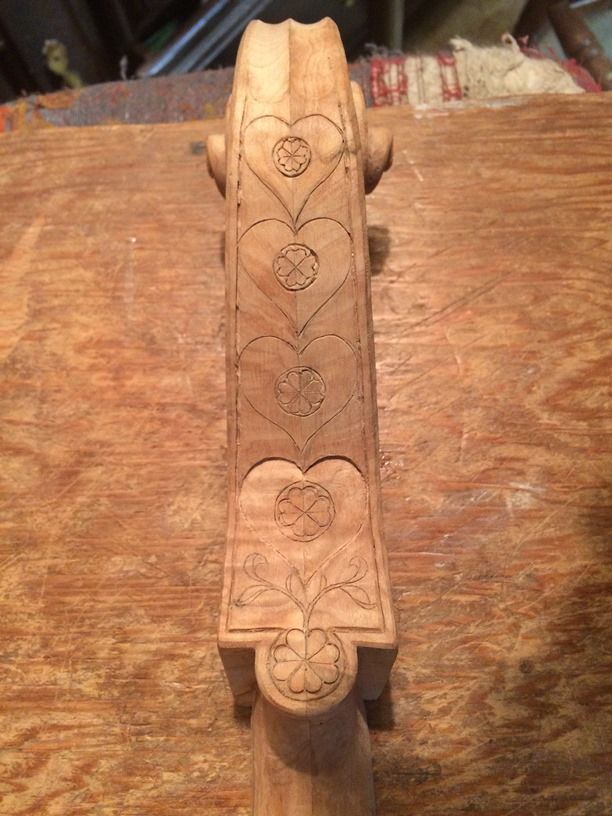
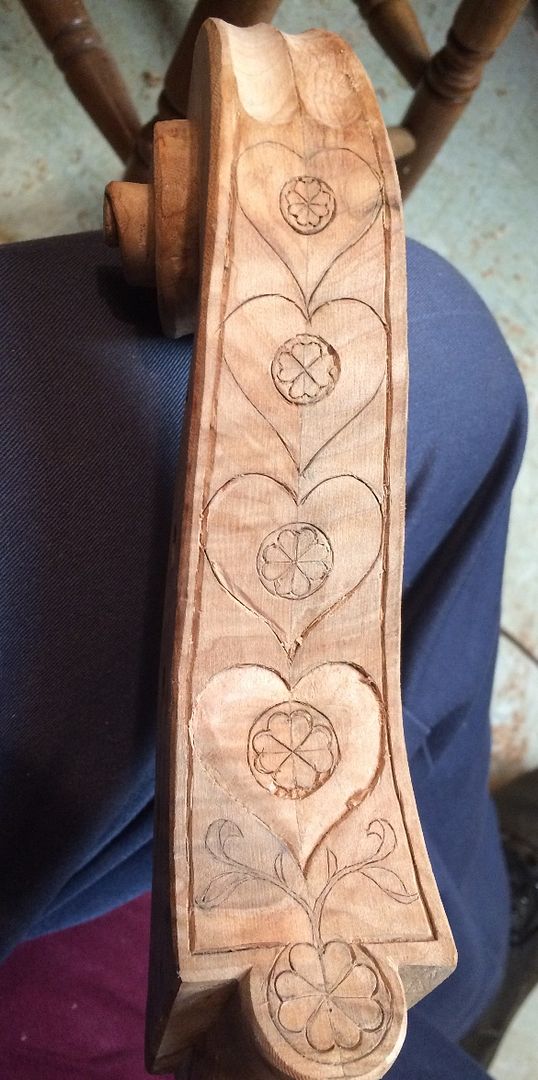
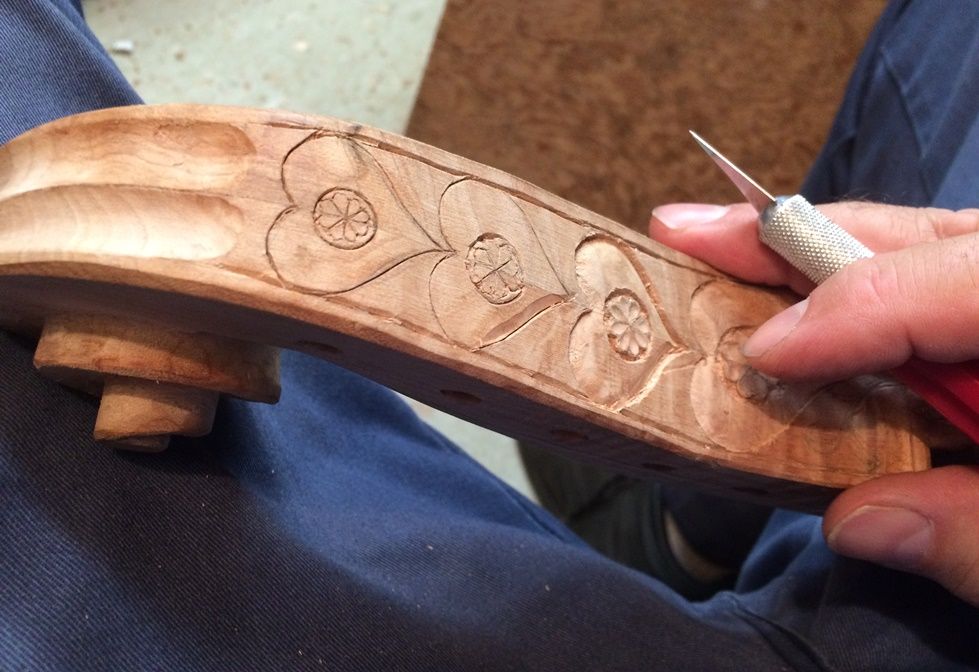
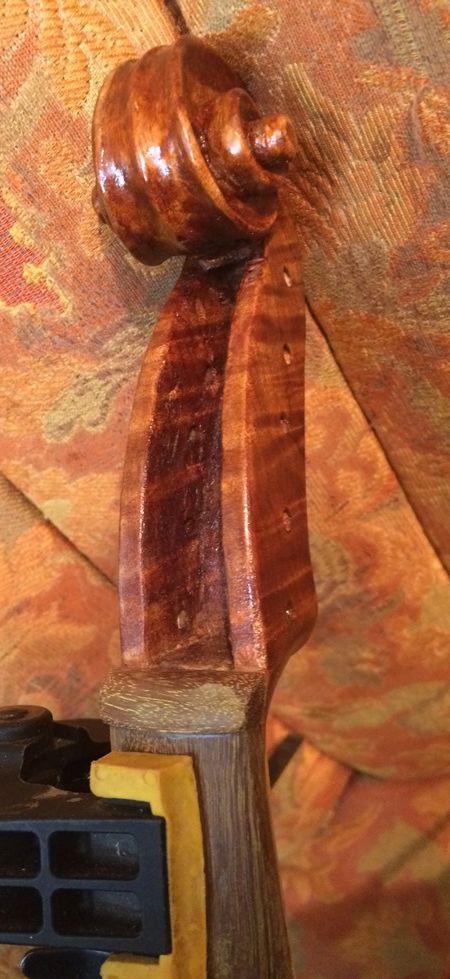
Bass side scroll of the Five-String Fiddle.
Bass side scroll.


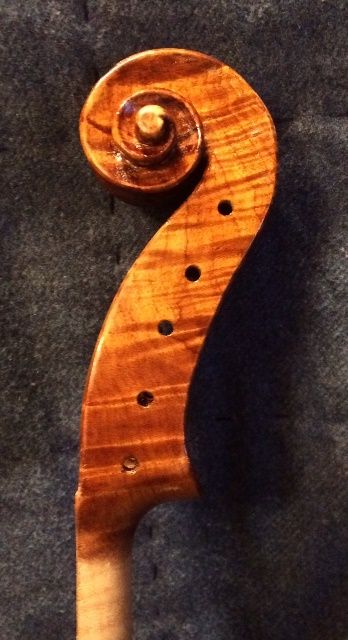
Treble side scroll of the Five-String Fiddle.
Treble side scroll.

“Playing it in.”

So, at this point, the main thing is to play the instrument as much as possible, so that it settles into its new life as a fiddle, instead of a bunch of pieces of wood! This period is called “play-in”, and there is much controversy as to what is really happening. But my observation is that there are definite positive changes that come about through vigorous playing of a new (or newly restored) instrument. I’m not going to try to “prove it:” it is just my observation and one I feel comfortable acting upon.
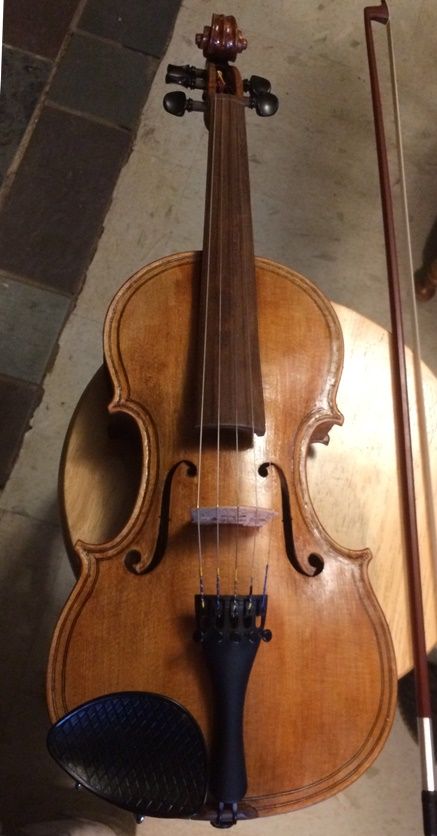
Five-String Fiddle Ready to play!
Ready to play!

How does she sound?

So far, so good! Very good, deep C-string tone, and well-balanced across all the strings. I would like a little more volume, and I may do some tinkering with the soundpost to that end, but I have to say, “Not bad for a brand-new fiddle!”

I think it is a winner! (Very pretty, too, but I didn’t do that…the tree did.)

Thanks for looking.

Carving the Five-string fiddle Back Plate

Five-string fiddle Inside Complete

Before I could prepare the back plate of this five-string fiddle, I had to complete the rest of the corpus (body of the violin:) First, the inside willow blocks and willow linings had to be tapered and shaped so they are completely smooth. Then, the back of the entire corpus (including the heel of the neck) has to be leveled, so that it will lie flat on the back plate. So, here is the main part of the 5-string violin, with the interior clean and smooth, and the back leveled and flat:

Five-string fiddle Inside complete, and back leveled.
Inside complete, and back leveled.


Beginning the Back Plate

I clamped the corpus flat on the back plate billet, then traced around the ribs, using a small washer to establish the correct rib overhang. Then I corrected the corners, using a straightedge and a series of circle patterns. Finally, I cut out the plate “footprint”, and began the arching process. Oregon Big Leaf Maple is a relatively soft maple, but it is still a good deal harder and tougher than Sitka spruce, so the back plate is a lot more work to carve. Here is the beginning:

Beginning Five-string fiddle Back Plate arching.
Beginning Back Plate arching.

In the above photo, the back plate is sitting in a work cradle, so that it will stay in place while I carve it. The Ibex plane in the photo has been slightly modified, to add the palm-fitting handle. This reduces the stress on my fingers and transfers the force to the palm of my hand as opposed to my thumb and forefinger. (To Ibex plane-owners: you will observe that I have removed the adjusting screw and reinstalled it upside down to allow insertion of the maple handle.)

I have been on vacation for two weeks, which has allowed me to accomplish more work than usual, in a shorter period of time. I go back to my regular job, on Monday, though, so things are about to slow to a crawl. (Sorry…that’s life. :-))


Thanks for looking.

Commissioned Handmade Five-string Fiddle Beginning

Starting a new 5-String Fiddle

The Materials:

A few weeks ago I announced that a new fiddle would be beginning. Now I have a few photos to show:

The top plate is Sitka Spruce, from Bruce Harvie. The customer wanted “Oregon wood,” and the Big Leaf Maple is definitely from in my neighborhood, here in Oregon (I helped harvest it;) but the Sitka is just a species that grows here…I don’t know where it was harvested.

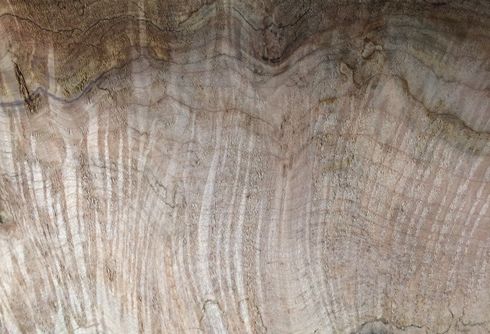
Wild-grain Big Leaf Maple for Five-string fiddle back and ribs!
Wild-grain Maple for back and ribs!


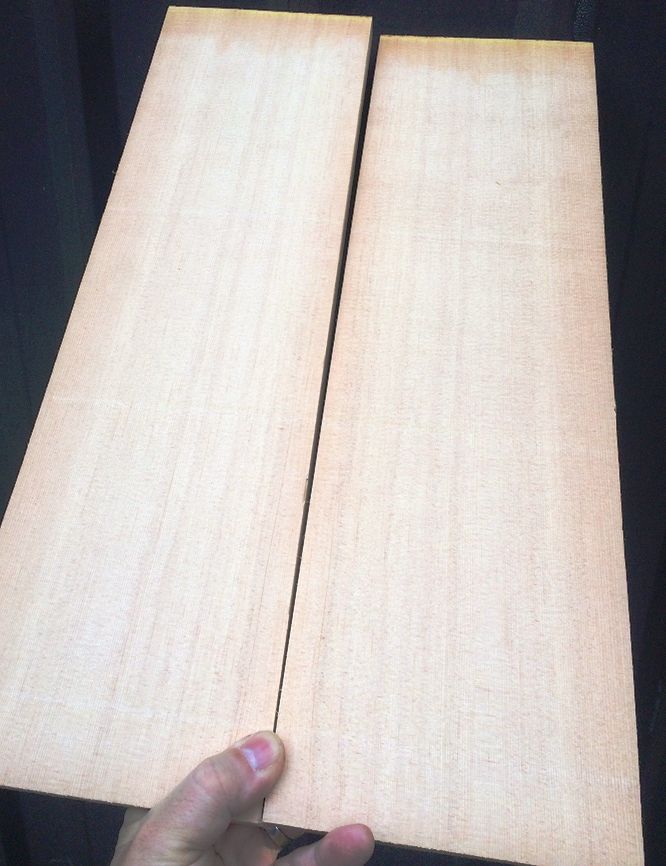
Fine-grained Sitka Spruce for Five-string fiddle top plate.
Fine-grained Sitka Spruce for the top plate.


Preview of the grain in the Five-string fiddle neck billet.
Preview of the grain in the neck billet.


Beginning the work of building a 5-string fiddle:

I book-matched the spruce, to form the basis for the front plate: a solid plate with a tight glue-line down the center.

I used the mold (or form, as many people prefer to call it) that matched the fiddle the customer liked best. Then I added willow blocks to become the corners and end-blocks, and I traced the intended shape of the blocks from the mold template onto the back-side of the blocks, where they are flush with the mold.

Blocks and mold with Five-string fiddle template.
Blocks and mold with template.


Five-string fiddle Preliminary block-shaping complete.
Preliminary block-shaping complete.


Added the ribs, of the spalted maple the customer liked, and glued them to the willow blocks. Afterward, I added linings, also of willow, and let them into the blocks and glued them to the ribs and the blocks.

Spalted Maple ribs and willow linings on beginning of Five-string fiddle.
Spalted Maple ribs and willow linings.


Five-string fiddle Rib garland nearly complete.
Rib garland nearly complete.


Then I traced the shape of the garland onto the top plate material, using a small washer as a spacer, and a ball-point pen as a scribe. I completed the corners using a straightedge and a series of circle templates. Finally, I marked the edge at exactly 4 mm thick, and carved the arching, using gouges and planes and scrapers.

Sitka top-plate arching complete for Five-string fiddle.
Sitka top-plate arching complete.


Then I marked the layout of the double purfling and the f-holes, and began incising them into the Sitka Spruce.

F-holes and purfling traced and cutting begun for Five-string fiddle.
F-holes and purfling traced and cutting begun.


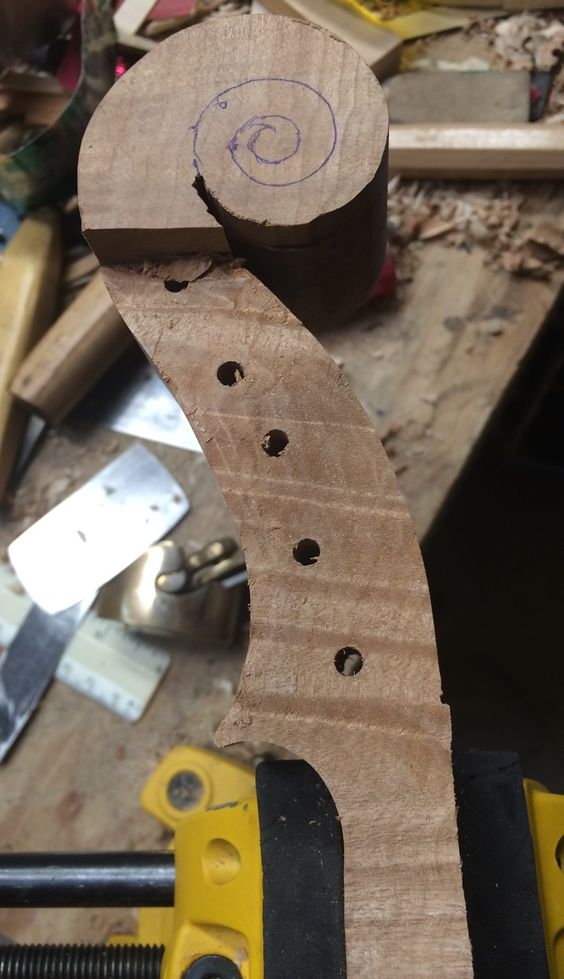
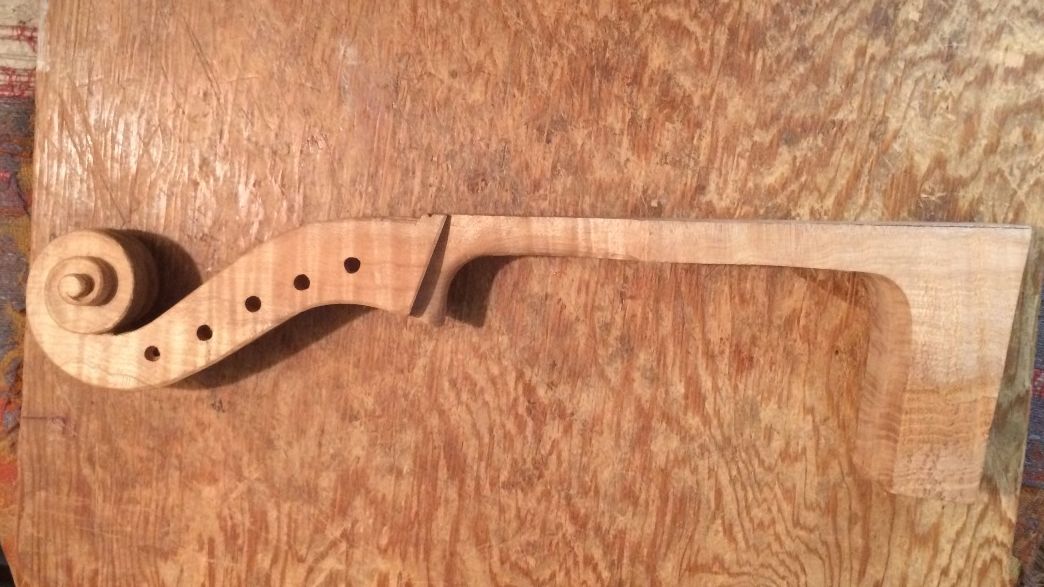
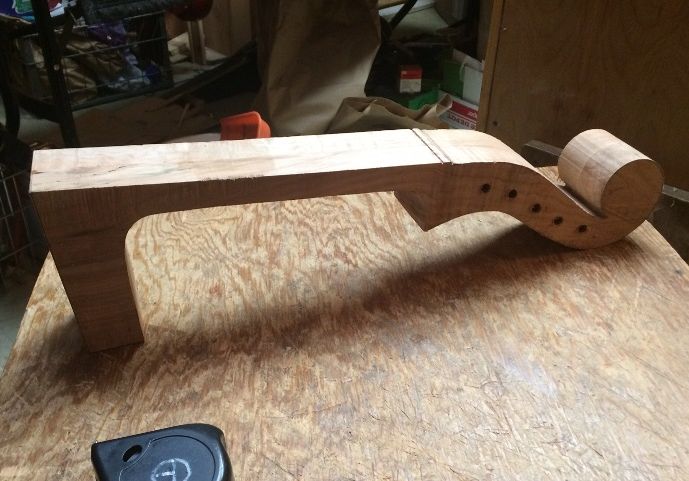
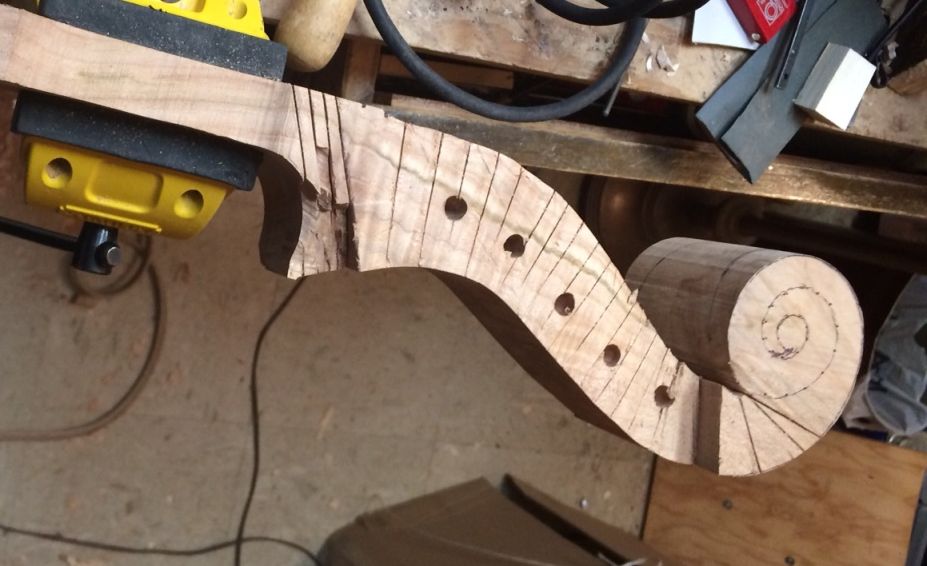
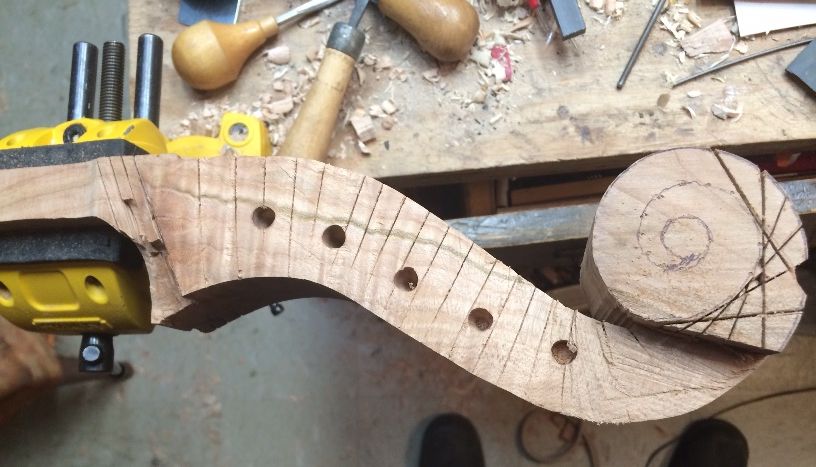
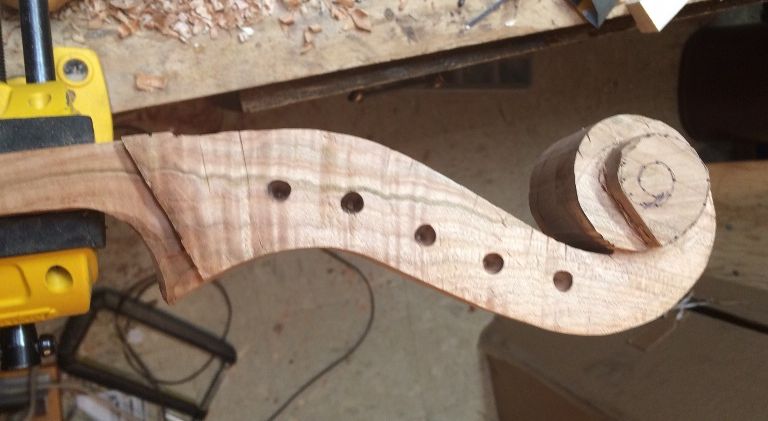
Sometime in the midst of all the above work, I laid out and began carving the scroll and pegbox. That wild grain is very tricky to carve, as it changes direction constantly.

Rough-carved scroll and pegbox of Five-string fiddle.
Rough-carved scroll and pegbox.


I went ahead and completed the purfling and the f-holes, so that I could prepare the plate to be glued to the garland.

Completed top plate and neck work with garland for Five-string fiddle.
Completed top plate and neck work with garland.


I also added the bass-bar, chalk-fitting it to perfection, and gluing it in place, with hot hide glue. The bass-bar will be carved, planed and scraped to the proper shape after the glue dries.

Five-string fiddle Bass-bar glued and clamped.
Bass-bar glued and clamped.


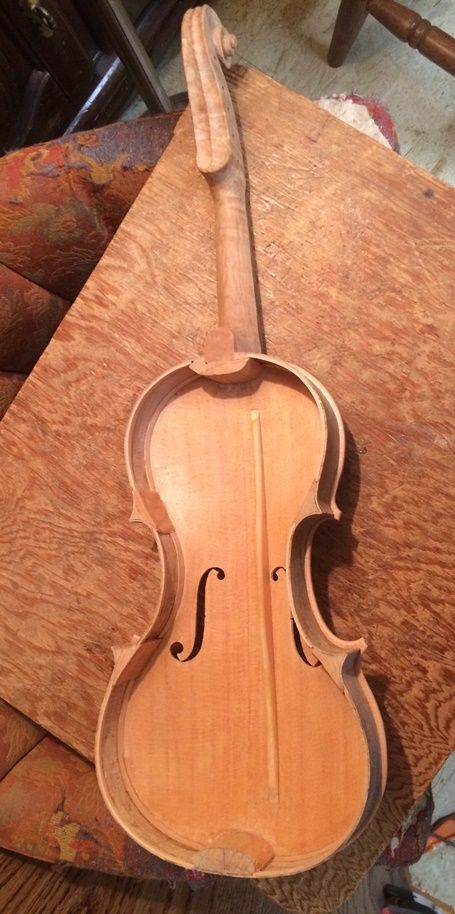
Five-string fiddle Top plate glued and clamped to the garland, fingerboard glued to the neck.
Top plate glued and clamped to the garland, fingerboard glued to the neck.


The fingerboard is Ipé, as requested by the customer. It is an extremely dense hardwood, but not threatened as Ebony is beginning to be. It finishes to a dark brown and looks good, as well as wearing well. It is extremely difficult to work, though, so it may take time to become popular with makers. The saddle and the nut will also be Ipé, but the pegs will be ebony, simply because I have never mastered the lathe-turning of tuning pegs.

Working on the fingerboard for the Five-string fiddle.
Working on the fingerboard.


And that is pretty much where things stand, for now. I will try to post pictures as they become available.


Thanks for looking.

New 5-string Commission on the Way!

New Five-String Fiddle Request!

A client contacted me through this website and asked whether I could build a 5-string fiddle of primarily Oregon woods. (Sure!)

Test-Drive of existing fiddles

We made an appointment and she came for a visit. She played eight of my hand-made instruments (all good fiddles), finally declaring a particular one to be exactly what she wanted, except that she did not care for the look of the one-piece Sitka Spruce top plate. It had very wide grain on the bass side and narrower on the treble side. (It sounds great, but the looks were bothering her.) Soooo…

Custom-made Five-string!

I went into my storage and retrieved a really wild-grained piece of Big Leaf Maple, and two billets of very straight, even-grained Spruce: one of Englemann, and another of Sitka: she chose the Englemann and loved the maple. She wanted an instrument essentially the same as that first one, but without the odd-looking belly grain. (The same model; made on the same mold (form), and sounding just like it, as well.) It will be tough to do, because the one she really likes is already five years old; it has had time to settle, be re-adjusted, and settle again. (Yes, it sounds good!)

Select Woods and a Good Start

So, we went out to one of my other buildings and hand-picked some likely-looking wood for the neck and ribs, and we were ready to do business. She presented a deposit, and I suggested that she take home the one she loved, for the time being, to keep her interest up while waiting for me to complete her personal treasure. She went home happy, and I began sorting willow for blocks, finding my proper templates, and enjoying the prospect of a new five-string fiddle build. I will post follow-ups as they occur.

Thanks for looking.

I will post this over on the Bluefiddles page, as well.

Violoncello Piccolo Project

Piccolo Cello Essentially Complete

Remembering it is a “Mock-up”

This is not a cello I have built from raw wood. It was an inexpensive, small Romanian Cello I salvaged years ago (I had forgotten that it was Romanian… I thought it was Chinese) and for which I had never found a buyer. Currently, there is someone interested in a handmade five-string cello, and leaning toward the piccolo model, as that is the traditional size from the time of J.S. Bach. But there is no standard size of which I am aware, so I removed the neck of the little old cheap cello and made a 5-string neck and scroll with which to replace the old neck.

Here is the result:


Piccolo Front
Piccolo Front


Piccolo Bass Side
Piccolo Bass Side


Piccolo Back
Piccolo Back


Back of Scroll
Back of Scroll


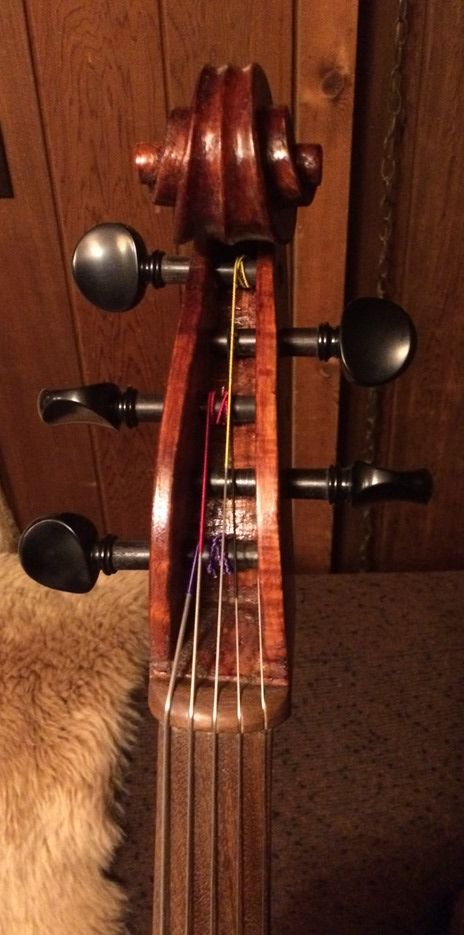
Front of Scroll
Front of Scroll


It plays fairly well, for what it is. I have a difficult time becoming accustomed to the sound of the High E string in a cello, but I can see the value for certain applications, as it would effectively eliminate “thumb-position” in a lot of pieces.

If a person wanted a full-size five-string cello, or a 3/4- size, a 7/8-size, or what have you, I can make those, too.

I see that Helicore is now providing a five-string set for a full-size cello, so I may have to try one, just to see how the new strings sound.  🙂

Thanks for looking.

Five String Cello Progress

Five String Cello Project in Progress

Upgrade to my brain (memory) needed, it turns out:

It turns out that the “Hybrid” cello I chose for the donor corpus, was actually solid wood on back and sides, as well as the top. So, that’s a good thing!  It is still a rather cheap instrument, and so, this is still just a “mock-up” for R&D, so to speak. I will begin the “real thing,” (all handmade by me,) when the customer is satisfied that this is what he wants. (One thing he wanted is all Oregon woods, as far as possible. So this doesn’t qualify.)

Five-string neck is on the way:

The scroll is nearly complete, and I decided to go with the carved back on the scroll, as some of the early instruments had, just for fun.

Treble side five-string cello scroll
Treble side scroll


Five-String Cello Scroll in progress, front view.
Scroll front in progress.


Bass side view of five-string cello scroll.
Bass side scroll.


Five string cello scroll back carving begun.
Scroll back carving begun.


I had never tried this type of scroll back, before; Turns out it is a lot of meticulous work! I’m still not done, but I am moving along on it.

Five-string Cello scroll back progress.
Scroll back progress.


Five-string cello scroll carving process.
Pressing onward! Hands are getting tired!


There will still be a lot of scraping and polishing to do before it is done. Also, I have to make a fingerboard to fit the neck; but then I can install the neck.

Pushing forward to the finish!


Thanks for looking!

Lots of Delays and New Project

Lots of Delays and New Project

Delays:

Home repairs and equipment repairs.

We had a few break-downs this summer. The lawn tractor, a faithful beast of thirty years, suddenly quit working. Turned out to be a bad PTO clutch. I was eventually able to order new parts online, and do the work myself, but it was a discouraging project, as I am really not a mechanic, by inclination. But it works again.

Meanwhile, it also turned out that one of our toilets had been leaking under the floor, and had ruined the floor, so the whole underlayment had to come out. I replaced it with something called “wonderboard”…a concrete product, reinforced with fiberglass… nasty stuff to work with, but relatively impervious, so I was glad to go ahead with it.  mudded all the screws so they were flush, and all the seams, etc., then sanded the whole mess flat. Then linoleum, and sealer, and wallpaper. Finally got everything back in place, working, no leaking pipes, etc.,  just Wednesday of this week. Glad to be done with that.

New Project:

5-String Violoncello Piccolo

A fellow called me a while back, having seen my 5-string fiddles, and asking for a custom-made five-string cello, using all Oregon woods, if possible. (No problem…but most of the historic 5-string cellos I am aware of were piccolos…considerably smaller instruments, and quite rare. Only a few surviving models.) Nope, he wanted a full-size. Okeedoke, no problem. They even sell Cello-string sets for full-size 5-string cellos.

But he thought it over, and now is leaning toward a piccolo, just because. (They really are a special instrument!) But, now I do have a problem: I don’t have one to show him.

So, since I am short on time, I am making an experimental mock-up of the correct size, using a fractional-size hybrid cello (laminated sides and back; carved top), and replacing the normal neck with a neck and scroll specifically designed for a five-string instrument. It will not be the quality instrument he will expect in a custom-made cello, but it will give him the opportunity to experiment with the smaller size and the five strings.

I had plenty of maple on hand, but not thick enough for the neck, so I laminated two 1-1/2″ slabs, side by side, to make a thick billet, and then sawed out the blank.

Piccolo Neck Blank
Piccolo Neck Blank


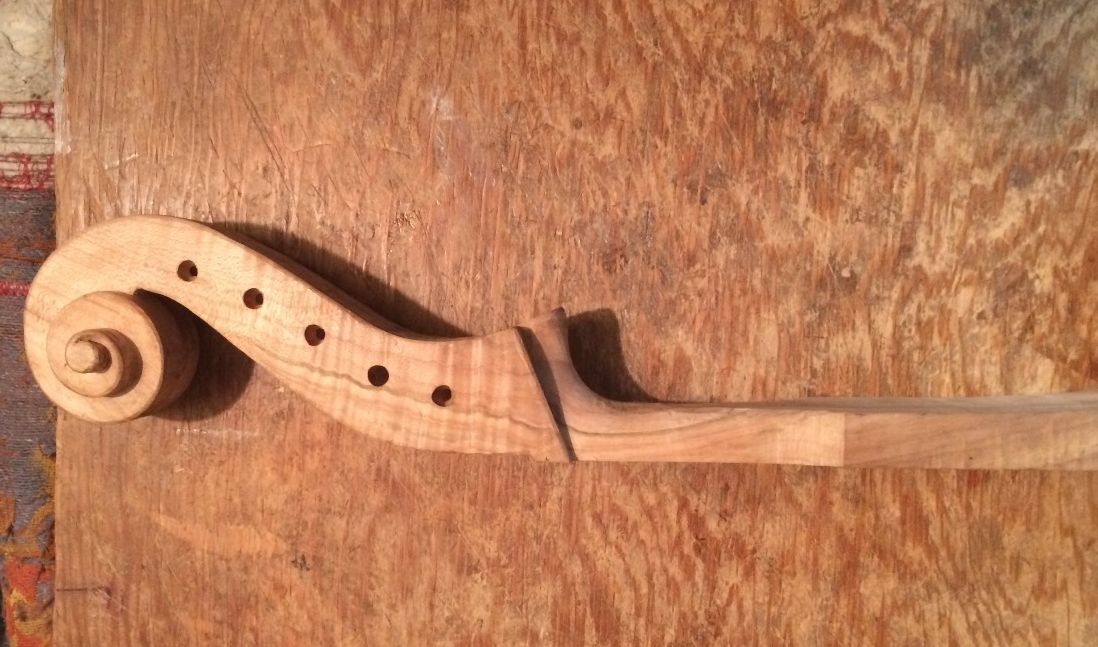
I laid out the details of the scroll and neck; then used a saw to begin removing excess material. It is hot and humid, today, and I tired pretty rapidly, so I only got partway done:

Piccolo neck and scroll in progress
Piccolo neck and scroll in progress.


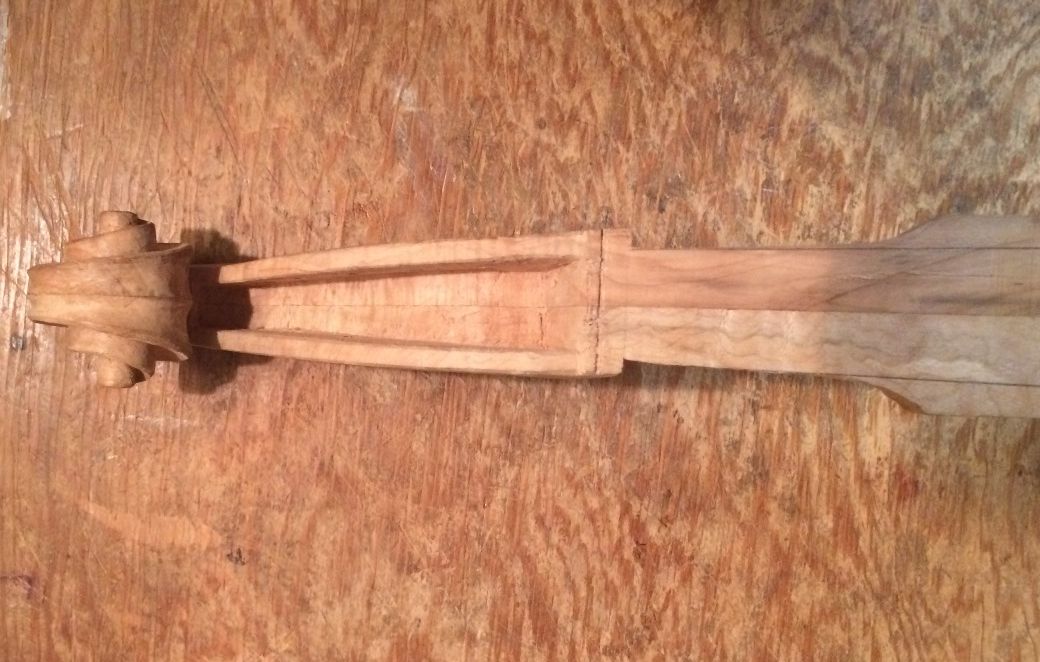
Piccolo Scroll with more cuts

Piccolo Scroll with more cuts.


Starting to smooth up a bit, but still a long way to go.
Starting to smooth up a bit, but there is still a long way to go.

Plan:

I hope to have the scroll and neck complete in a day or two. I then intend to make a fingerboard and nut of Ipe, a non-threatened hardwood, and install the assembly on the hybrid corpus, immediately thereafter.

At that point, it should be down to the final finish of the neck and fingerboard, and set-up of the instrument in its new life as a  five-string cello piccolo. The corpus is already in good shape, so it should not require additional attention.

I will post photos, as they become relevant.

Thanks for looking.

Five String Fiddles in the White

“Shop-made” 5-strings

Not my preference, but…

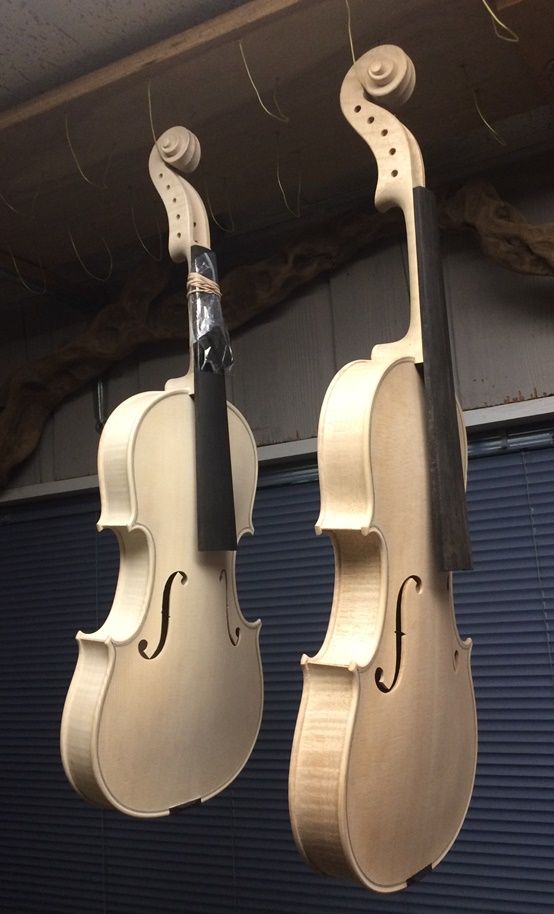
There are folks who want a five-string fiddle, and who can’t justify the expense of a hand-made instrument, made by an American luthier. I completely understand that, so I am going to try an experiment of sorts: I bought two instruments in the white …unvarnished, incomplete, etc.  One is a five-string violin (standard size), with a one-piece back, and the other is a 15″  5-string viola.

five string fiddles in the White
A 5-string violin and a 15″ 5-string viola.

The viola looks much larger than the violin in this photo, but, in reality, the body is 1-1/16″ longer than that of the violin, with a proportionately larger neck and scroll.

Possible Glitches

I can see some potential problems, and I will see whether I can correct them before completing the instruments. There are certain details necessary to a good instrument that have been overlooked in these two. Specifically, it is needful to arrange the locations of the pegs in such a way that the higher strings do not rub on the pegs that are lower in the box. Both of these instruments fail that test pretty badly, but other than that, they seem to be very well-made, if possibly a little heavy.

Up until now, I have only bought standard, four-string instruments-in-the-white, and they have all turned out quite well. I hope I can make these two turn out to be great instruments, too, but… as I said, this is an experiment, of sorts.

At any rate, I will go over them carefully to try and bring them up to my standards as far as those things go. The workmanship is very good, though: I hope they sound great. I guess we will have to wait and see.

Shop Instruments, as a Principle

The advantage of using an imported, unfinished instrument like this, is that it drastically reduces my labor investment, and I can pass the savings on to customers who want a good instrument, but may not want to spend so much.

I label my shop instruments as “Atelier Chez les Eveques“, (the Shop at the Bishops’ Place.) Unlike my handmade personal instruments, they are not signed or numbered. But they are good instruments, and all who have bought them have been well-satisfied.

I will show progress on these two instruments as time permits. (We have had a host of home-repairs to worry us, lately….)

Thanks for looking.

5-String Fiddle Linings

Why Linings in a 5-string Fiddle?

What is the use of linings?

In most of the members of the violin family, including the five-string variants) there are narrow strips of wood glued to the inside of the ribs, all around the edges, called linings. On some double basses the linings are actually on the outside of the ribs,  as well as the inside, following the edge of each rib. The purpose is the same in either case: it is to strengthen the very fragile rib material as well as tripling or quadrupling the thickness of the gluing surface at the edge of the rib. This is so that the rib garland can be securely attached to the front and back plates, also making it possible to remove those plates without breaking the ribs, when repairs are needed.

Wood for linings

I like to use willow for my linings when it is available, because it is easy to bend and fit to the ribs, as well as being very easy to carve, when it is time to taper those linings, and make them fair into the inside surface of the rib structure. Many makers use spruce, and I have done so as well, but have decided that I prefer willow. In fact, when I can get it, I specifically prefer Weeping Willow above anything else I have tried.

Installing linings

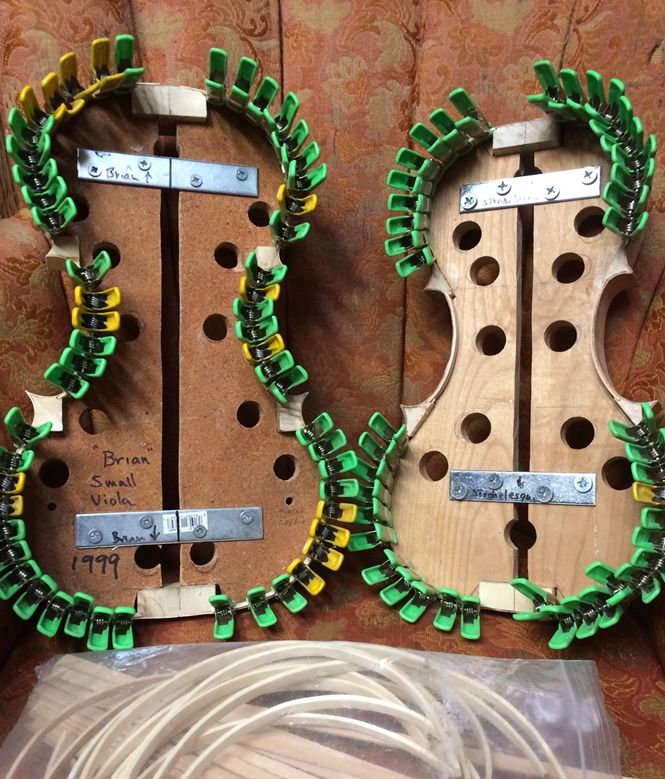
So…I arrived home fairly tired this evening, but I fired up the glue-pot, and prepared to install some linings: You can see the center bouts on the right-hand instrument’s ribs are already in place, making the edge 3 mm thick, instead of barely 1 mm.

When I pre-form the linings, I begin by using my bandsaw to cut a “plank” of willow, 3 mm thick, then thinning it to a very consistent 2 mm thickness. I use a “wheel-style” marking gauge, set to 7 mm width, to deeply score the “plank” along one edge, then flip it over and score the opposing face, effectively cutting the rib free from the “plank.”  Then all I have to do is bend those linings blanks around my bending iron, and produce a pile of “ready-to-use” linings for my violin ribs (see below.)

linings in five-string viola and 5-string fiddle
Rib linings in the 14-7/8″ 5-string viola and one of the 5-string violins. In the foreground you can see the linings I have pre-formed to approximately the required curvature .

I use a small sharp knife and a tiny gouge to make a small mortise in the junction between blocks and ribs (12 places on each face of the garland.) I only use hot hide glue on instruments, but the hot hide glue cools and gels rather quickly, so I cut the pre-formed linings to the proper length, and fit all of them into the garland, dry.  One by one, I then remove each lining, coat it liberally with hot hide glue, and quickly re-insert it into the tight-fitting place prepared for it.  I pinch hard, with my left forefinger and thumb, to squeeze the joint tight, and then use my right hand to apply a spring clamp. I move over a half-inch, and repeat, until the whole lining is tightly secured with glue and clamps. The little spring-clamps will hold the freshly glued linings in place until the glue hardens.

The same principle works for larger instruments, but the ribs are bigger, and I use bigger clamps.

Anyway, that is all I accomplished this evening. Possibly tomorrow I will get the rest of the linings into the other instruments.
Once the linings are in place, the ribs are a good deal less fragile, and less prone to breakage. That is a relief, as they are really easy to break, without the linings.

Follow along and see the whole build!

Thanks for looking!

Aha! Blog posts are now visible!

I am grateful to the patient staff at NameCheap, who walked me through to a satisfactory conclusion to the problem I have been having with this website.

I had inadvertently set upwhat amounted to a continuous loop, whereby the posts went to the page to which they were originally assigned, but then were redirected to another page, and back again…at least, that is how I now understand the error.

At any rate, now, when a visitor opens the site, they see the home page, and then can see at the top of the page an item called “Blog Posts.” And, there they are!

So…you can expect to see more progress reports and photos, as the days go by.

I should have a 14″ five-string viola nearly finished in the next week, or so, as well as good progress on a 14-7/8″ five-string viola and two five-string violins (fiddles).

On the other hand, we have company coming next week, so there is much to do in preparation for that visit, so perhaps it will take a little longer. Either way, the whole website is now functional, so I am happy.

🙂


Thanks for looking.