Another Five String Fiddle in the Works!

I Began this 5-String Fiddle  Sometime Last Year…

Life Happens! Projects get put on hold...

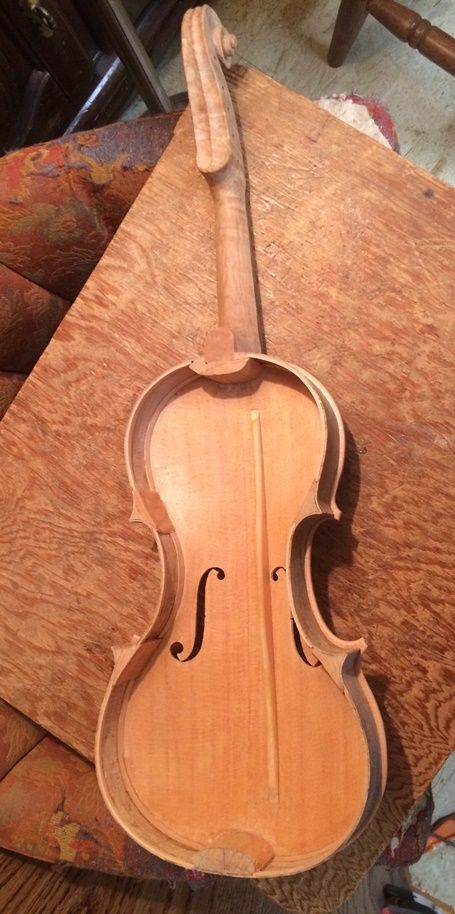
Originally, I laid out the “kits” for six new five-string fiddles, two years ago. However, I had taken on other responsibilities, so I was pretty busy. But I did manage to complete two of the fiddles a year ago. As a result of numerous interruptions, I had barely begun this particular instrument.

We had  lots of interruptions: some good, (a commissioned five-string fiddle) some bad (Health issues for family members.) But, now I’m almost “on the homestretch” to complete my #17 Five-string fiddle.

Where it began

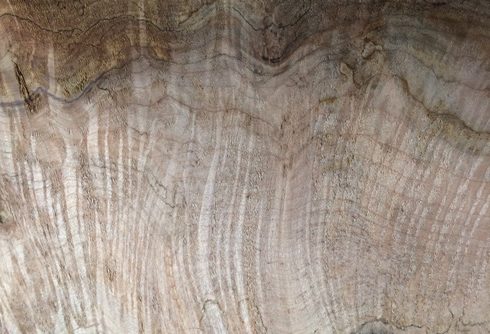
Initially, I bought some very pretty quilted Big Leaf Maple, and some Englemann Spruce, from Bruce Harvie, of Orcas Island Tonewoods. Fortunately, I got the ribs, back and neck out of the same billet of maple. It was nice that the Quilted Maple billet was large enough for that. I cut the top plate and bass bar out of the Englemann Spruce. However, I obtained the willow for the blocks and linings elsewhere.

But then, I laid the instrument aside for a year, partialy completed, while, as I said, other things (commissioned intstruments, family needs, etc,) took precedence.

Eventually, I “drifted back” to complete this instrument in June, and still there were a lot of sidetracks. (“Life is what actually occurs while we are planning something else.“) But this is the final work:
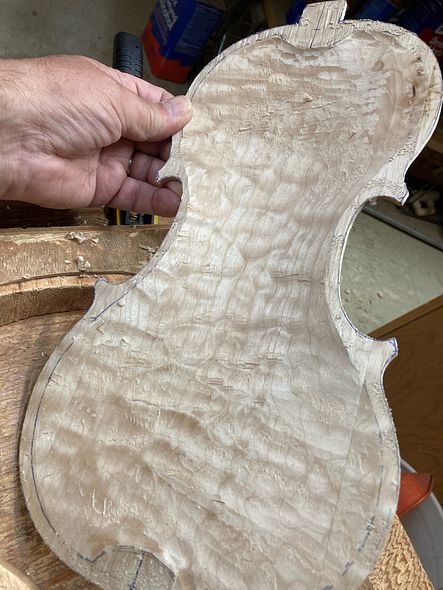
quilted maple for five string bluegrass fiddle handcrafted in Oregon by artisanal luthier Chet Bishop
Wild quilted maple back inside carving

Carving the back plate

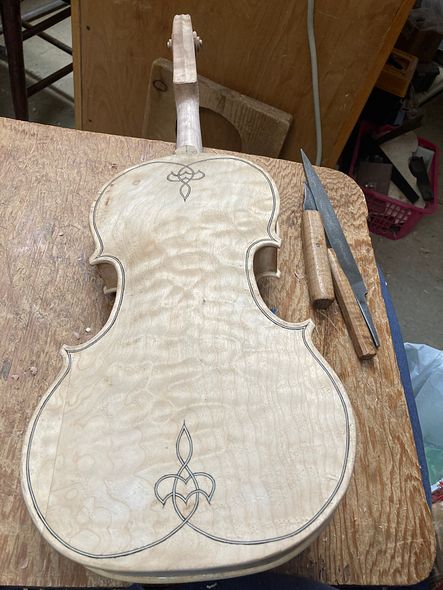
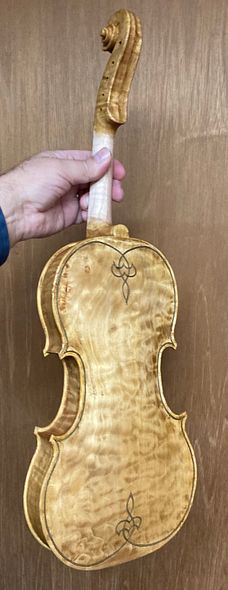
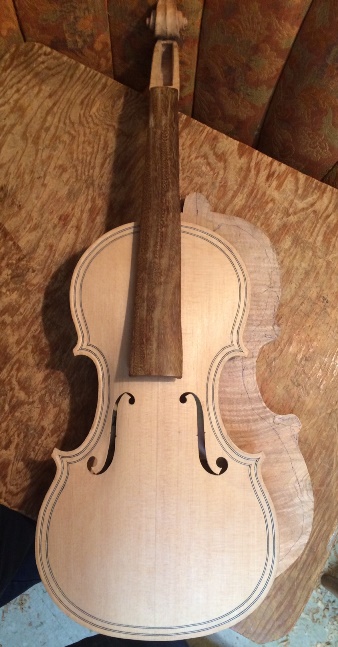
First, I completed the carving, of the back plate, inside and out. Then I installed the purfling on the back plate. (I had already completed the front plate, a year ago.)
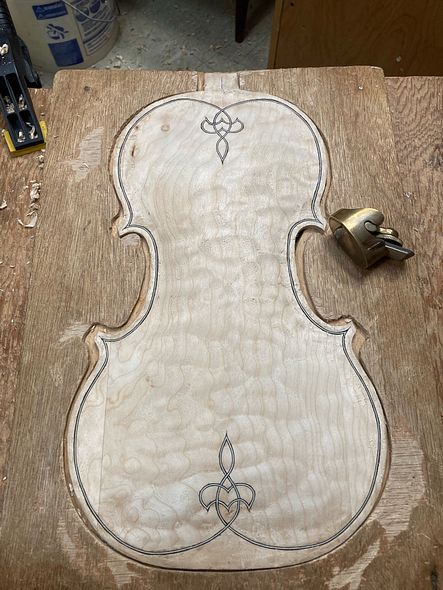
back plate of five string bluegrass fiddle handcrafted in Oregon by artisanal luthier Chet Bishop
Outside of quilted maple back with purfling complete

Carving the Neck

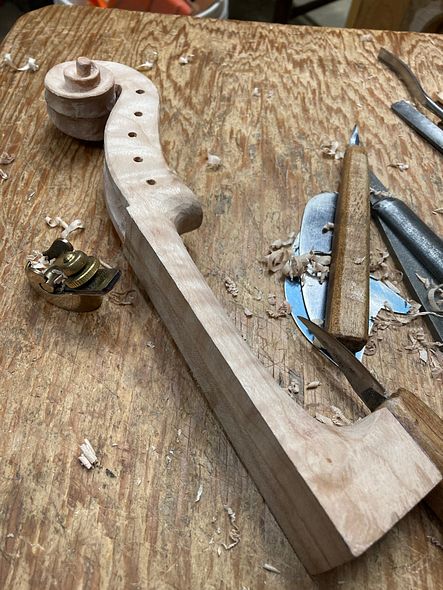
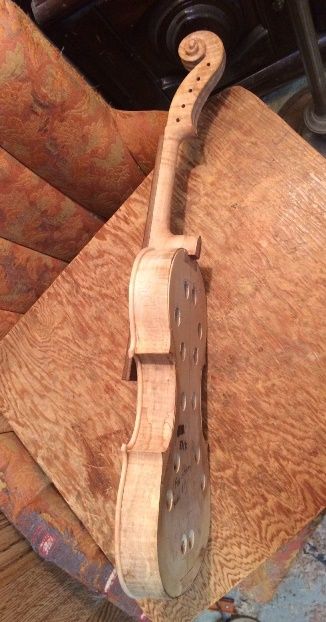
Meanwhile, I began carving the scroll and neck.
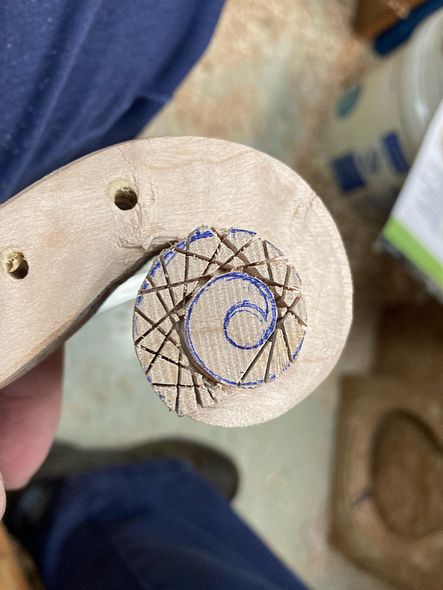
early carving on a scroll
Beginning the scroll, using a saw


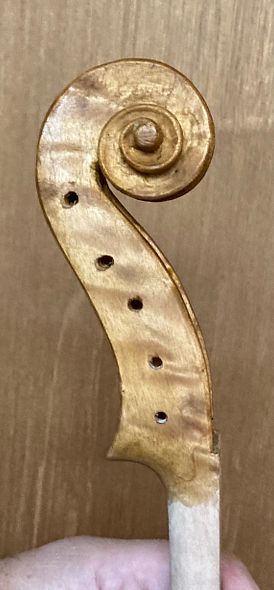
scroll and neck for a 5-string bluegrass fiddle handcrafted in Oregon by artisanal luthier Chet Bishop.
Scroll and neck ready for Fingerboard

After I installed the back plate on the corpus, it was time to install the neck.

The Neck-Set
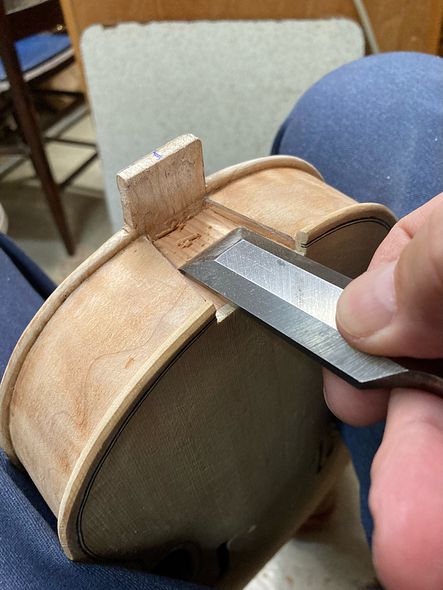
Neck Mortise in a 5-string bluegrass fiddle handcrafted in Oregon by artisanal luthier Chet Bishop.
Carving the neck mortise

First I laid out the mortise with a straightedge and pencil. Then I carved the mortise out, using chisels and scrapers. Afterward, once the neck joint was perfectly fitted, I glued and clamped the neck into the mortise and allowed it to dry.

However, I still needed to finish carving the neck heel and back button, together, as one piece. In that way, all the dimensions and curves will be correct. In addition, I continued to work on the final smoothing and details on the scroll itself.

Final Shaping of Neck, Heel and Scroll
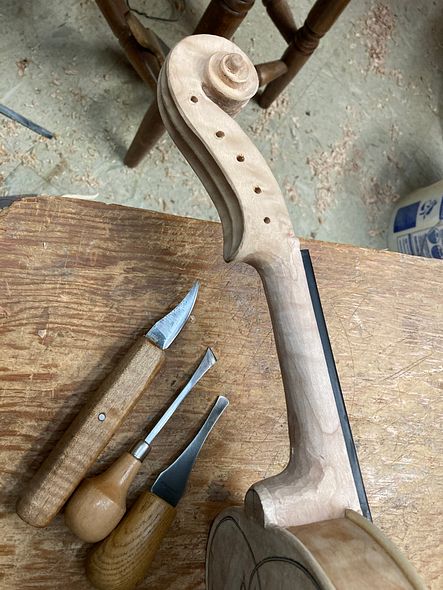
final carving of the neck and heel of a 5-string bluegrass fiddle handcrafted in Oregon by artisanal luthier Chet Bishop
Final carving of the neck and heel
Back nearly complete on five string fiddle by Chet Bishop
Back nearly complete
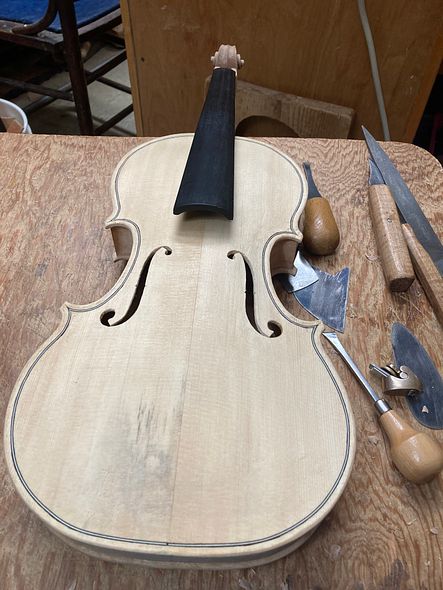
Completed front view of five string fiddle by Chet Bishop.
Carving is complete, and it is time to remove the fingerboard!

Finally, I removed the fingerboard. As a result,  I could easily access all of the bare wood for the final varnish preparation and varnishing. (Originally, I had only temporarily attached the fingerboard, by means of three dots of hide glue.)
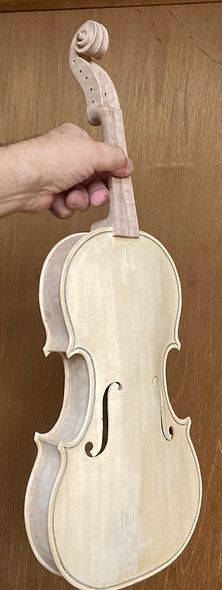
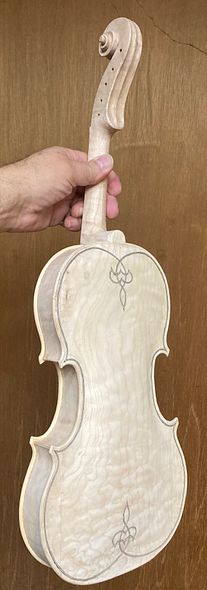
Five String Fiddle ready for varnish, handcrafted in Oregon by artisanal luthier Chet Bishop.
Front view, Ready for varnish
Back view of 5-string fiddle by Chet Bishop, ready for varnish.
Back view, Ready for Varnish
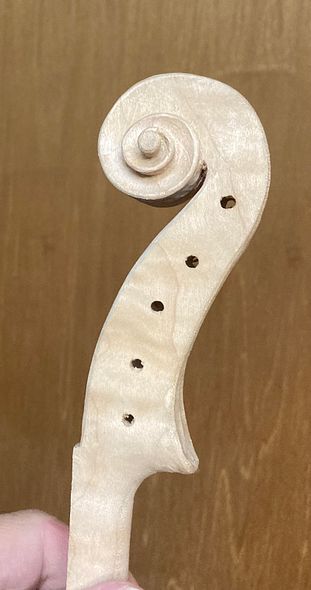
Scroll ready for varnish
Scroll, ready for varnish

Varnish Process

In reality, the varnishing process is fairly involved.

First, I apply a mineral ground. Next, I apply a coat of sealer. Then, I begin varnishing. Furthermore, the varnish must be built up, coat by coat. To begin with, I apply two base coats of yellow. Afterward, I work through whatever colors I have chosen to achieve the final result. (Usually, it requires about eight coats of varnish.)

But, here are some pictures taken after the first two coats of yellow varnish:
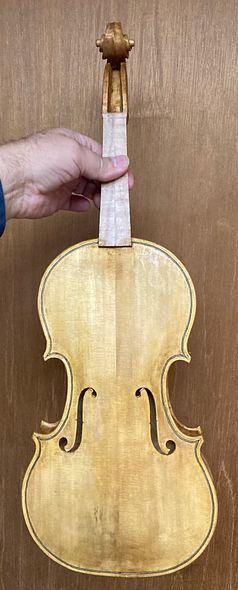
Yellow base coats of varnish on five string fiddle handcrafted in Oregon by artisanal luthier Chet Bishop
Two coats yellow varnish, front view
two coats yellow varnish side view
Side view.: two coats yellow varnish
Two coats yellow varnish, back view of five string bluegrass fiddle handcrafted in Oregon by artisanal luthier Chet Bishop
Two coats yellow varnish, back view.
two coats yellow varnish on a five-string scroll by Chet Bishop
Scroll, with two coats yellow varnish

Next time, I will describe the finishing process in more detail. And, as I near completion, I will post again, showing the set-up procedure.

Thanks for looking.

Progress report: fiddles for Fall of 2021

Progress Report 8/3/21

Foundational Work For 5-string Fiddles

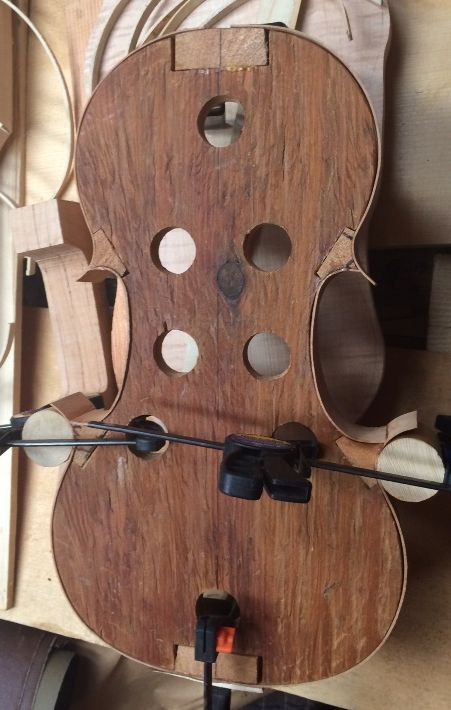
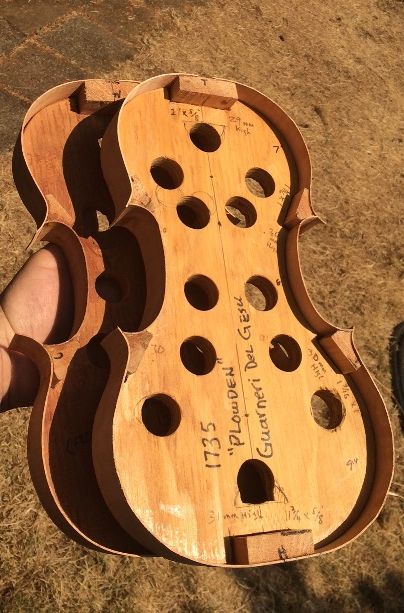
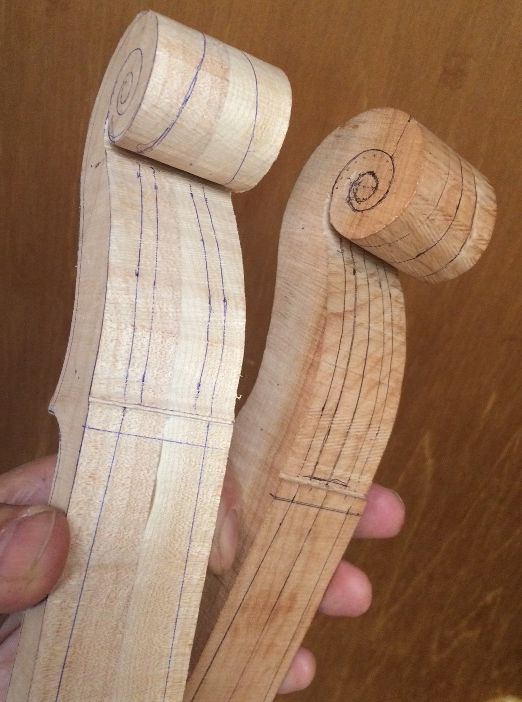
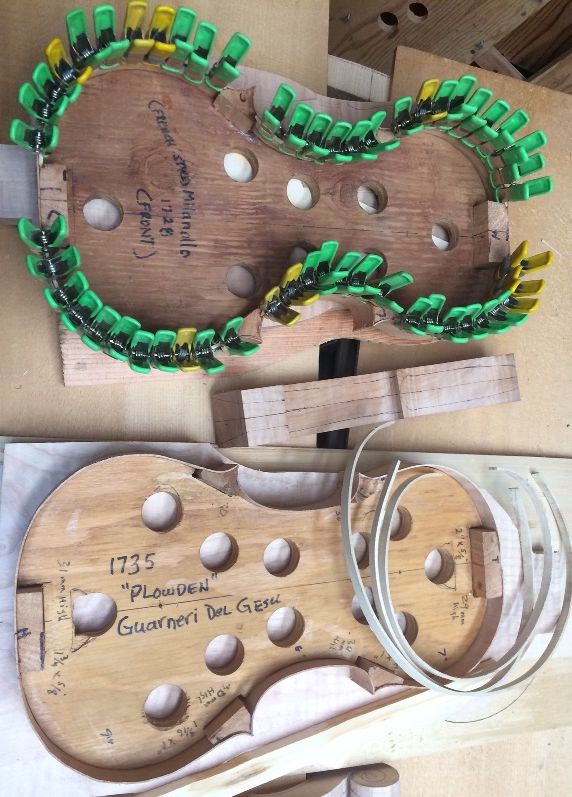
My last post showed the six “kits” I had built. The post included bookmatching the five-string fiddle plates, cutting the profiles of the Big Leaf Maple necks and scrolls, and cutting appropriate ribs to size. As a result, I ended up with six kits, including bass bar blanks all cut from the same billet of Englemann Spruce, and a big pile of linings ready to bend. ( I thought the linings were willow, but I now suspect may be poplar, instead.)

Five of these front plates ar Englemann Spruce, but one is Douglas Fir. I rarely find Douglas Fir that will work for tonewood, but a friend brought me a pickup-load of firewood,  and I found some that sounds great. (As you can see, I am not a “snob” about where I get my wood. If I need special wood, I buy it, but I frequently use Oregon woods.)

(In case anyone reading this is not aware, I build all my instruments (except the fittings, as a rule) entirely from the raw materials. I make all my molds by hand, and all my templates by hand. I have even made many of my tools. So every instrument is genuinely “handmade in Oregon by Chet Bishop.”) 🙂

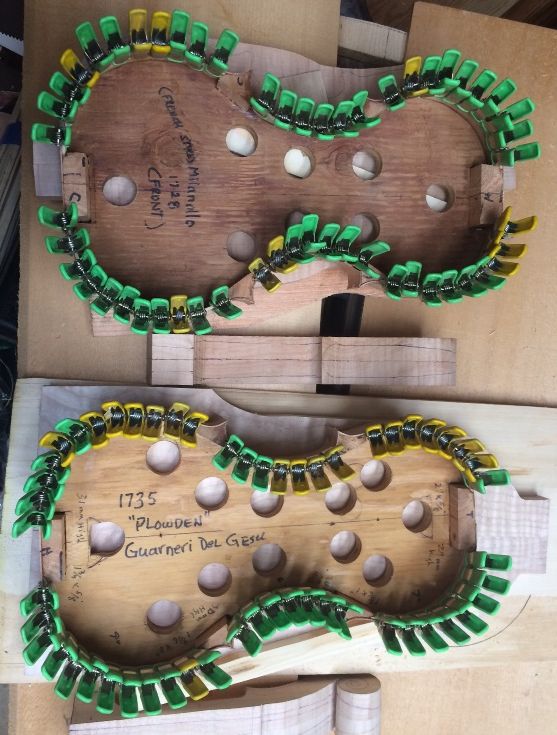
materials laid out for 5-string fiddles to be made in Oregon by Chet Bishop
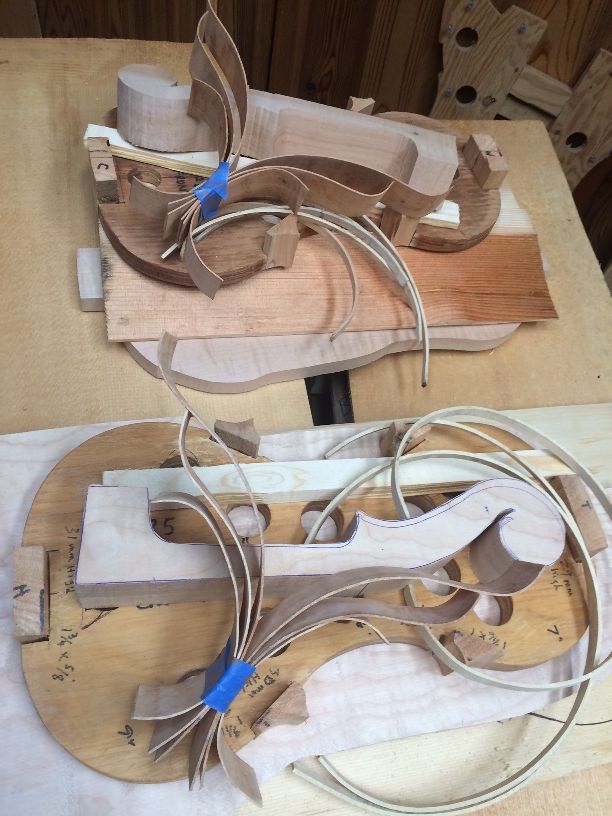
Four of the six assembled “kits.”


I set aside four of the six “kits,” just to get them out of the work area. Then I began work on the remaining two kits.

Fiddles in pieces, waiting to become 5-string fiddles handmade in Oregon by Chet Bishop
Two of the four kits in storage.


Beginning the Builds

The first step after shaping the blocks (last post) is to bend the ribs and linings. Then I can glue the ribs to the prepared blocks, using hot hide glue, and finally glue the linings to the ribs.

I rub a heavy coat of candle-wax (“paraffin” in the US) on the outer rims of my molds. This will prevent a “sneaky” drop of hide-glue from accidentally bonding the ribs to the molds instead of just to the blocks.

(A rib accidentally glued to the mold can be a disaster if I don’t realize my mistake in time. The glue is definitely stronger than the rib. It will destroy the rib, if I don’t catch it early enough to use hot water or steam to release it. But the wax coating pretty much eliminates that problem.)

I used a bending iron and a thin aluminum bending strap, to hand-shape the ribs, and then put them aside in paired sets, with the respective molds for which they are intended.

ribs and linings bent for handmade 5-string fiddle by Chet Bishop in Oregon
Ribs and linings bent and ready to install.

Installing the Ribs

I installed the center-bout ribs first: they can be difficult, so I’m glad they are first. But the real reason they are first, is that the upper and lower ribs will overlap the ends of the center ribs: they do not have a mitered corner, but a lapped corner, which if done correctly, is essentially invisible.

installing ribs on 5-string bluegrass fiddle handmade in Oregon by Chet Bishopribs
A pair of center-bout ribs installed.

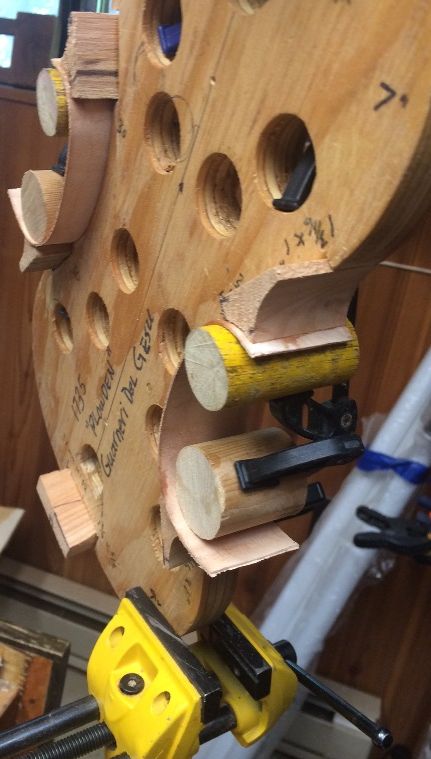
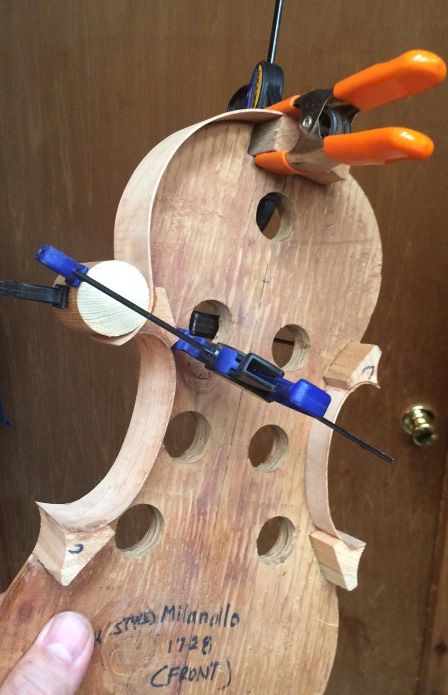
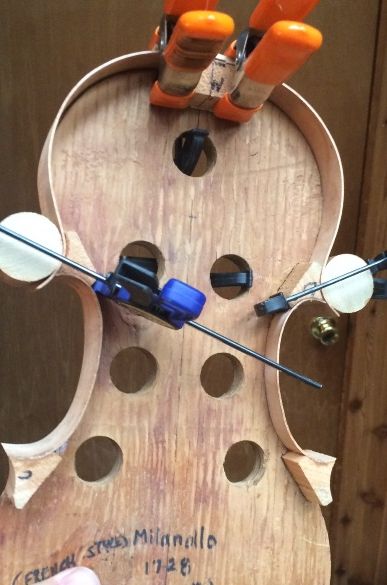
I frequently use these “French-style” molds, (flush on the back) which allow me to install the front linings and still easily remove the mold. (Italian-style molds are centered on the ribs…I use that kind, too.)

I used cylindrical clamping cauls of appropriate sizes (dowels, broom-handles…whatever) and f-clamps to quickly secure the rib ends before the hot hide glue gels. If I make a mistake, I can steam the joint loose with a teapot, and do it over, correctly.

After the center-bout ribs dry, I shape the ends of the ribs to match the curvature of the blocks.  Then the upper and lower ribs can be glued to the perfectly-shaped block and rib. Finally, I begin installing the upper and lower ribs.

installing ribs on 5-string fiddle handmade by Chet Bishop in Oregon
First upper rib installed: notice the shaped endes of the center-bout ribs.


Installing ribs in 5-string fiddle handmade in Oregon by Chet Bishop
A pair of matching upper ribs installed.


installed ribs on five-string fiddle handmade in Oregon by Chet Bishop
All the upper and lower ribs installed. (Looking from the back side of the mold.)


ribs installed on two five-string fiddles, handmade in Oregon by Chet Bishop, Luthier.
Two completed rib-sets, ready to be trimmed before adding linings. (Lots of smoke blowing in from the fires this season, making the light kind of red.)

Necks!

While waiting for glue to dry on the ribs, I laid out the necks so that I will be ready to begin carving them.

Necks for five-string fiddles handmade in Oregon by Chet Bishop, Luthier.
Necks laid out for carving.

Linings!

After trimming all the corners, so that they look as though the ribs come together as one, I begin installing the linings. I cut a small mortise on each side of each block, flush with the rib, so that the lining will be glued tightly to the rib, and into the block mortise. I secure them all using hot hide glue.

Next, I cut the linings to length, shaping the ends to closely fit the prepared mortises. Then, I coat about 7mm of the edge of the rib, and the entire mating surface of the lining with hot hide-glue and insert the lining into the mortises and push it to the correct level, corresponding to the ribs. Finally, moving rapidly, I secure it with small spring-clamps.

installing linings in five-string fiddles being handmade in Oregon by Chet Bishop
One set of linings fully installed: one to go!


Linings installed in five-string fiddles handmade in Oregon by Chet Bishop
All the front linings installed in both molds.


I made a good deal of progress yesterday, and had hoped to make more progress today, but there were some household repairs that needed to be addressed first; so I didn’t begin working on violins until mid-afternoon.

Tomorrow I will level the fronts of the garlands and trace the front plates… I hope.  🙂


Thanks for looking!

Back to the Bass!

New Project? Nope! Not really!

Picking up where I left off:

This is not really a new project, but rather one that was “tabled,” for lack of better term…work was suspended until a better set of circumstances emerged.

I built the mold for this bass in 2015, began bending ribs in 2017, with a woefully inadequate bending iron, and a great deal of frustration.

A commission came in, so I set aside the bass, to work on the cello, and never came back to it…so it sat in the corner of my workshop silently sneering at me every time I looked that way.

But! Since I was laid off from my job, where I had worked for 33-1/3 years, in January, I am catching up with some projects and able to face others with new eyes.

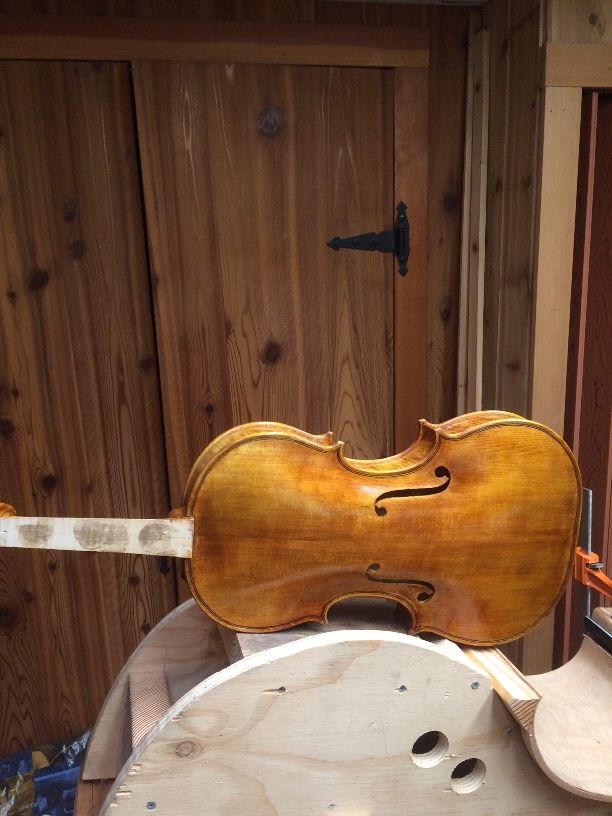
Here is the five-string 16-1/2″ viola I am just finishing up, balanced on top of the bass mold:

Large viola with five-string double bass mold.
Large viola with double bass mold.

Once I had the bass mold up on my bench again, it was easier to confront the problems, rather than avoiding them.


The New Bending Iron

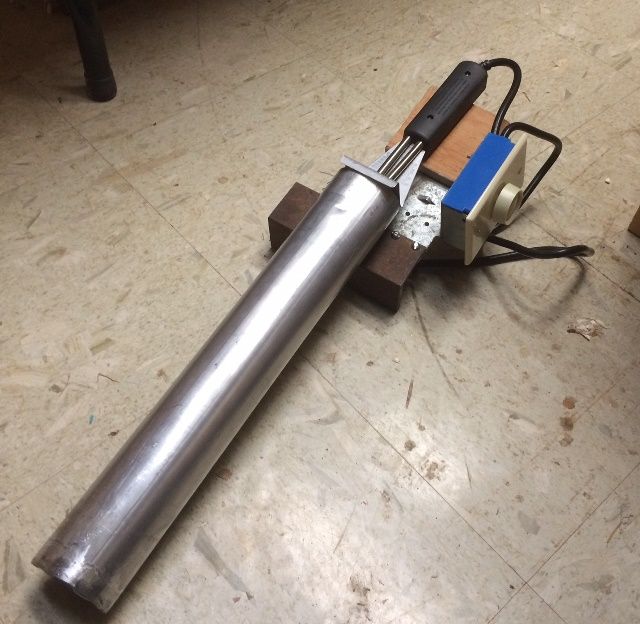
The first thing I needed was a new bending iron. A fellow I met online, John Koehler, a fellow bass maker, told me how he built his bending iron. So I followed his lead, and built a new bending iron:

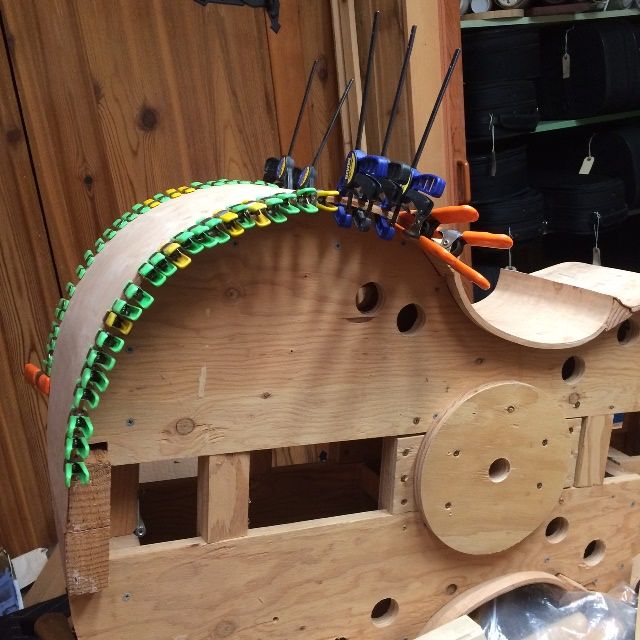
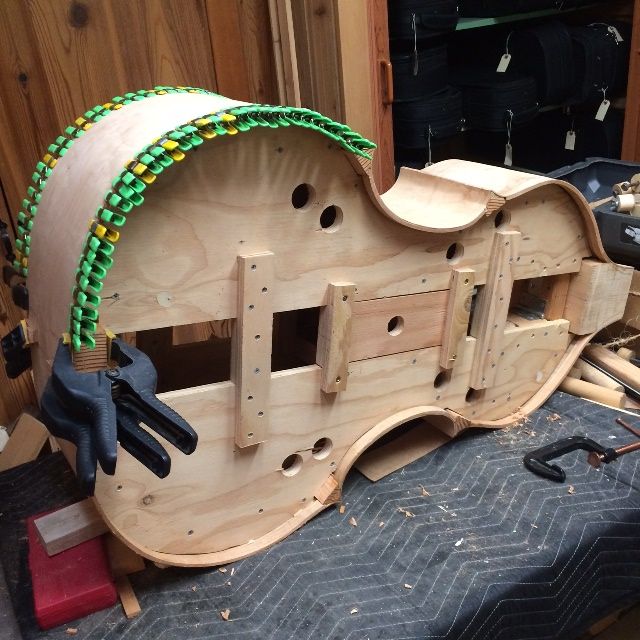
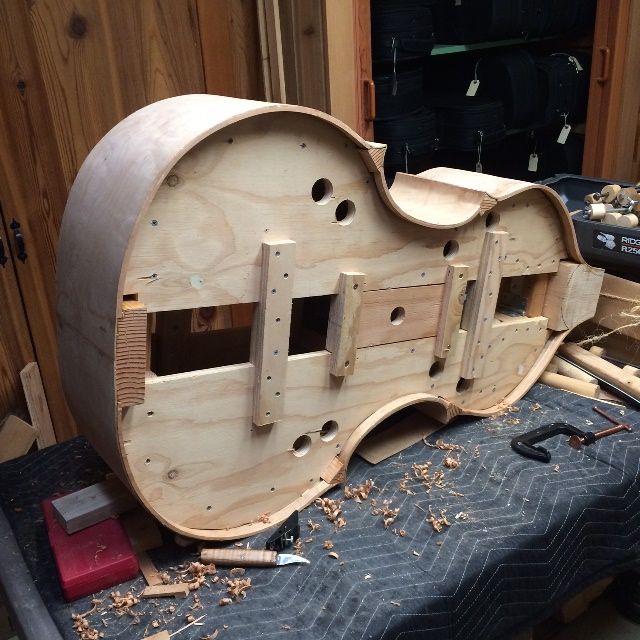
Homemade bending iron, enabling me to bend the ribs for the 5-string double bass.
My homemade bending iron.


It is a section of exhaust tube, welded to a piece of angle iron, so that I could clamp the apparatus in a vise. Heat is supplied by a 550-W electric charcoal briquette lighter, controlled by a 600-W dimmer switch. It took a little trial and error to get it set up correctly and to calibrate it, but it turned out to work very well! (What a relief!)

Bending the ribs

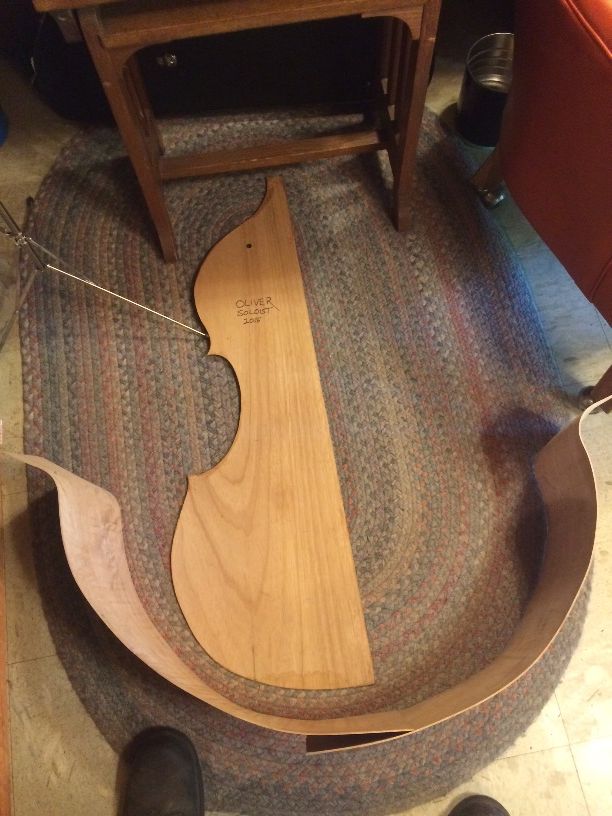
Bending the remaining two Big Leaf Maple ribs was nearly effortless, and took about ten minutes, tops, not counting waiting for the tube to heat up.

Lower ribs bent to approximate the mold shape of the 5-string double bass.
Lower ribs bent to approximate the mold shape.


Installing the ribs and linings

Then I glued the ribs into the fir blocks on the mold with hot hide glue, one at a time, and affixed the willow linings in the same manner before moving to the next rib.

Treble rib with linings installed on the 5-string double bass.
Treble rib with linings installed.


Once one rib was completely secure, trimmed and lined, I rolled the bass mold over and repeated the operation on the other side.

Bass side rib with linings installed on the 5-string double bass.
Bass side rib with linings installed.


I planed the linings flush with the ribs and blocks, and the garland was essentially complete. It will require careful leveling before fitting the plates, but not much other than that.

Completed rib garland for the 5-string double bass.
Completed rib garland.

In the coming weeks, I will complete the center-joins of front and back plates,  then complete the carving of the plates and the neck and scroll, and start putting this bass together!

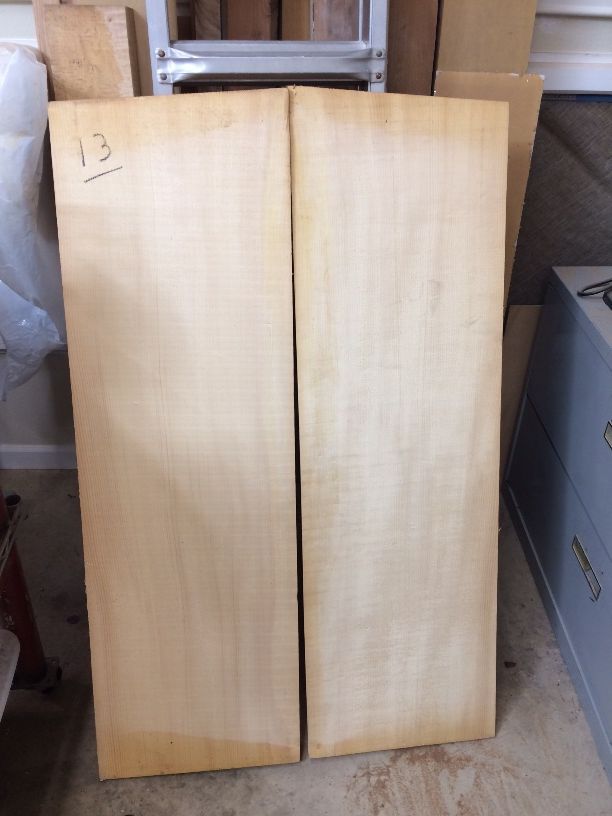
Just as a teaser, this is the wood for the front, back and neck:

Sitka Spruce billet for the front plate of the 5-string double bass.
Sitka Spruce billet for the front plate.


Big Leaf Maple for back plate and neck of the 5-string double bass.
Big Leaf Maple for the back plate and neck.

(Notice that there is a fair chunk left over where the neck pattern does not use all the wood it is on: watch that space! )

Thanks for looking!

Carving the Five-string fiddle Back Plate

Five-string fiddle Inside Complete

Before I could prepare the back plate of this five-string fiddle, I had to complete the rest of the corpus (body of the violin:) First, the inside willow blocks and willow linings had to be tapered and shaped so they are completely smooth. Then, the back of the entire corpus (including the heel of the neck) has to be leveled, so that it will lie flat on the back plate. So, here is the main part of the 5-string violin, with the interior clean and smooth, and the back leveled and flat:

Five-string fiddle Inside complete, and back leveled.
Inside complete, and back leveled.


Beginning the Back Plate

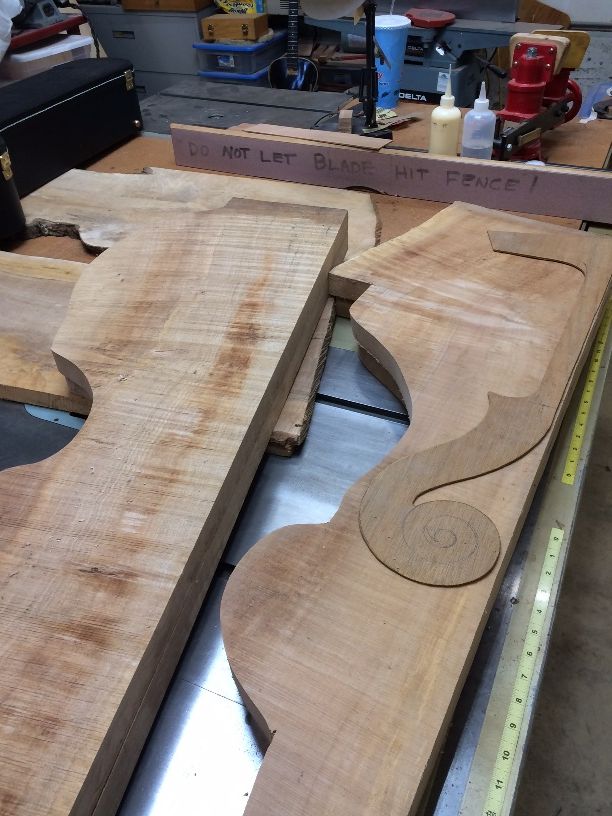
I clamped the corpus flat on the back plate billet, then traced around the ribs, using a small washer to establish the correct rib overhang. Then I corrected the corners, using a straightedge and a series of circle patterns. Finally, I cut out the plate “footprint”, and began the arching process. Oregon Big Leaf Maple is a relatively soft maple, but it is still a good deal harder and tougher than Sitka spruce, so the back plate is a lot more work to carve. Here is the beginning:

Beginning Five-string fiddle Back Plate arching.
Beginning Back Plate arching.

In the above photo, the back plate is sitting in a work cradle, so that it will stay in place while I carve it. The Ibex plane in the photo has been slightly modified, to add the palm-fitting handle. This reduces the stress on my fingers and transfers the force to the palm of my hand as opposed to my thumb and forefinger. (To Ibex plane-owners: you will observe that I have removed the adjusting screw and reinstalled it upside down to allow insertion of the maple handle.)

I have been on vacation for two weeks, which has allowed me to accomplish more work than usual, in a shorter period of time. I go back to my regular job, on Monday, though, so things are about to slow to a crawl. (Sorry…that’s life. :-))


Thanks for looking.
More 5-string Fiddle Progress

Five-String Fiddle Progress

(Further progress on building a custom-made 5-string bluegrass fiddle.)

Neck Set

The neck was ready to set into the neck-block, late last night, but I had reached my physical limit. So, today, I prepared both the neck and the garland, by ascertaining that all angles and dimensions were correct, and then laying out the shape of the neck mortise on the neck block of the garland.  This is a critical step in violin-making and always raises my blood pressure a little, as I know that, if I make a mistake, it will require serious rework to get back to a usable status.

However, this time, the job went pretty smoothly, and I was able to set the neck in a fairly short time. One thing I do a little differently than I was originally taught, is that I set the neck before installing the maple back plate. This allows me to achieve a good fit with the rib garland and neck block, and not have to worry about the fit against the back plate button. Then I saw off the stub of the neck heel, and plane and file it flush with the rib garland. After I remove the mold and add the back linings, I will level the back of the garland, and be ready to trace the back plate shape.


Five-string fiddle neck Set Complete.
Neck Set Complete: still have to remove the neck-heel stub.


Here is the completed corpus (Sitka Spruce top plate and Big Leaf maple ribs still on the mold) with the wild-grain Big-leaf maple back plate billet.

Completed Corpus of Five-string fiddle with Back Plate Billet.
Completed Corpus with Back Plate Billet.


Mold Removal

So, the next step was to remove the plywood mold. This is another stressful step because it involves literally using a hammer and chisel, to break the glue-bond between the blocks and the mold, so as to release the garland from the mold.  I used to have a difficult time doing this, because occasionally a drop of hide glue had seeped between the rib and the mold, and anchored the fragile rib material to the very solid mold. The likelihood of breaking a rib at that point became nearly 100%. Eventually, however, I learned to liberally coat all the non-gluing surfaces of the mold with candle-wax (paraffin,) by vigorously rubbing a candle over all the areas I felt were likely to get a drop of glue on them.

The result today was that, when I removed the mold, it went smoothly, and I could see a place where glue had definitely intruded but it had dried with zero adhesion to the waxy mold. (What a relief!)

Five-string fiddle mold removed, ready for back linings.
Mold removed, ready for back linings.

Installing the Back Linings

The linings are important for two reasons: they strengthen the fragile rib-edges, and they triple the gluing surfaces between the rib-garland and the front and back plates.

So, I cut the mortices in both sides of each of the six blocks to receive the lining strips, and then inserted the linings dry, to get a perfect fit.

Afterward, I removed each lining, one by one, coated them liberally with hot hide-glue, and re-inserted them, clamping immediately with small spring-clamps.

Five-string fiddle back linings installed, glued and clamped.
Back linings installed, glued and clamped.

Shaping Blocks and Linings

If you look closely you can also see, in the above photos, that I had trimmed the blocks on the front side, before removing the mold. After the glue is dry on the back linings, I will also trim the back side of the blocks, to achieve a smooth, curved surface on the interior of all the blocks. At that same time, I will taper the linings so that they are very thin on the edge toward the middle of each rib, but still 2 mm thick at the edge where they will contact the back and front plates.

After that, it will be time to level the back surface of the entire corpus (garland and neck-heel) so as to fit tightly against the back plate billet. Then I can trace the final shape of the back plate, cut it to shape, and get going on completing the back plate.

For now, I am satisfied to allow the glue to dry, and take the rest of the evening off.


Thanks for looking.