Back to the Bass!

New Project? Nope! Not really!

Picking up where I left off:

This is not really a new project, but rather one that was “tabled,” for lack of better term…work was suspended until a better set of circumstances emerged.

I built the mold for this bass in 2015, began bending ribs in 2017, with a woefully inadequate bending iron, and a great deal of frustration.

A commission came in, so I set aside the bass, to work on the cello, and never came back to it…so it sat in the corner of my workshop silently sneering at me every time I looked that way.

But! Since I was laid off from my job, where I had worked for 33-1/3 years, in January, I am catching up with some projects and able to face others with new eyes.

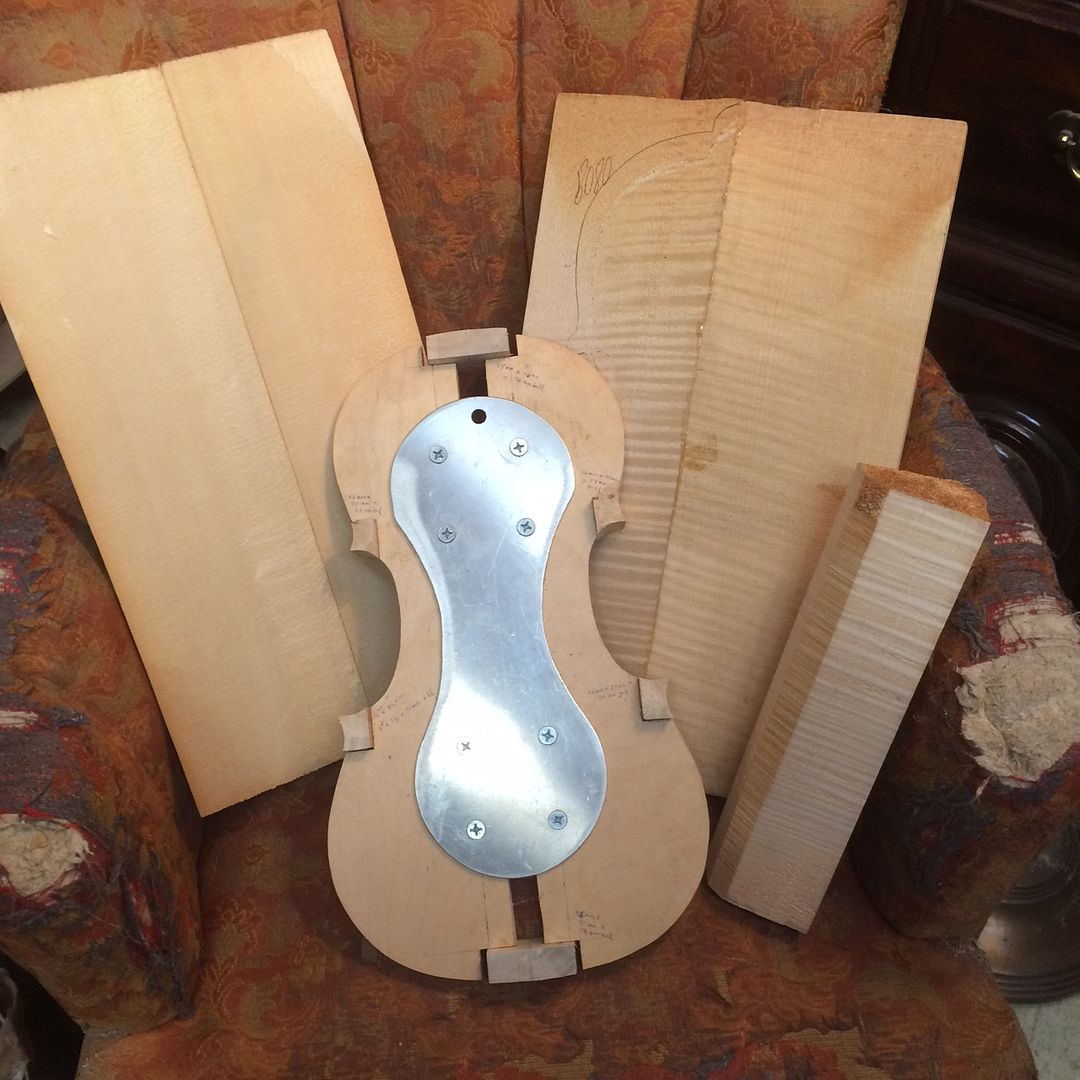
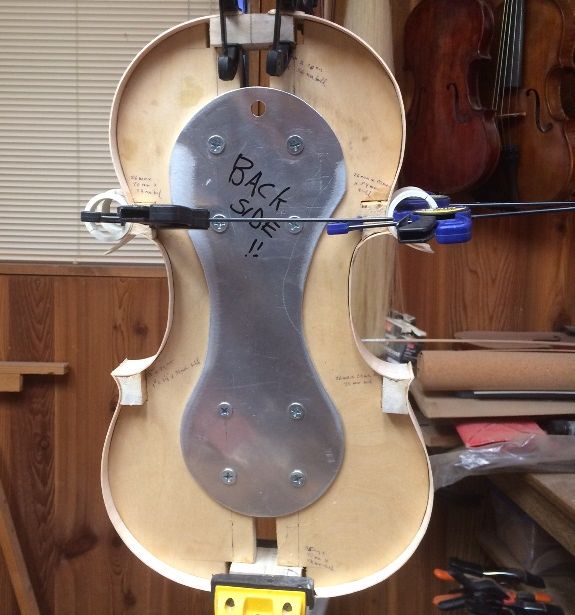
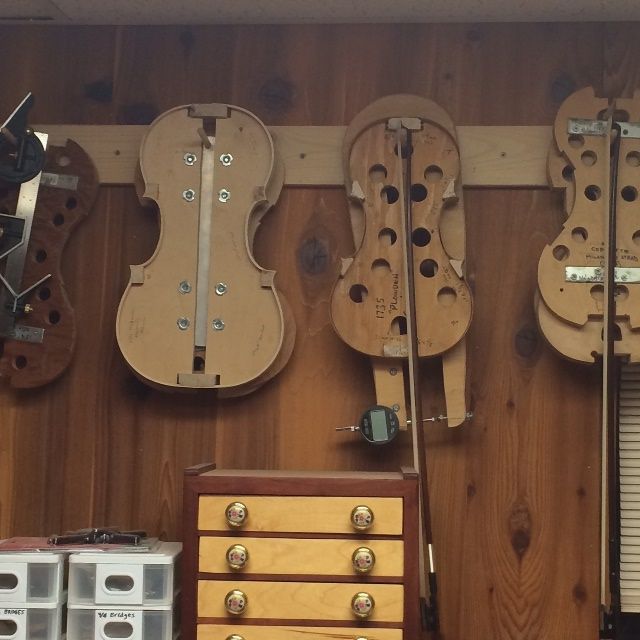
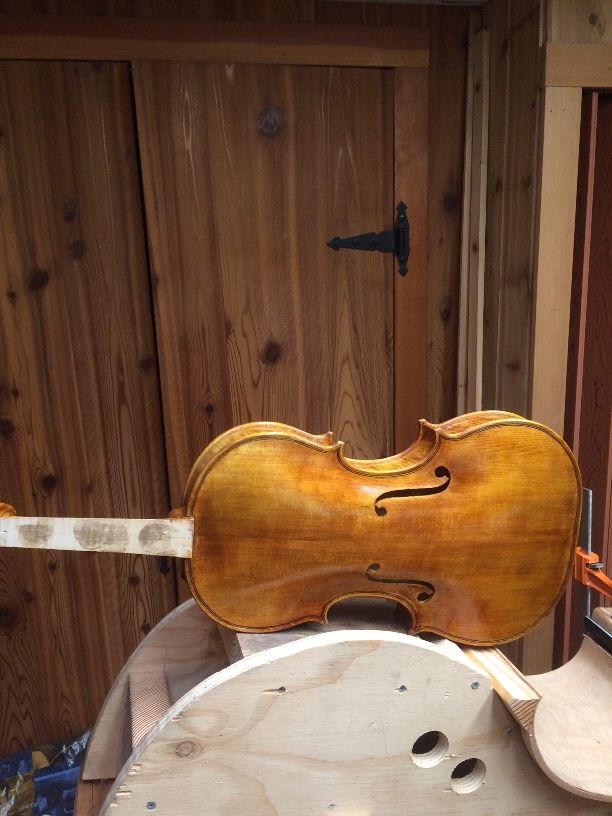
Here is the five-string 16-1/2″ viola I am just finishing up, balanced on top of the bass mold:

Large viola with five-string double bass mold.
Large viola with double bass mold.

Once I had the bass mold up on my bench again, it was easier to confront the problems, rather than avoiding them.


The New Bending Iron

The first thing I needed was a new bending iron. A fellow I met online, John Koehler, a fellow bass maker, told me how he built his bending iron. So I followed his lead, and built a new bending iron:

Homemade bending iron, enabling me to bend the ribs for the 5-string double bass.
My homemade bending iron.


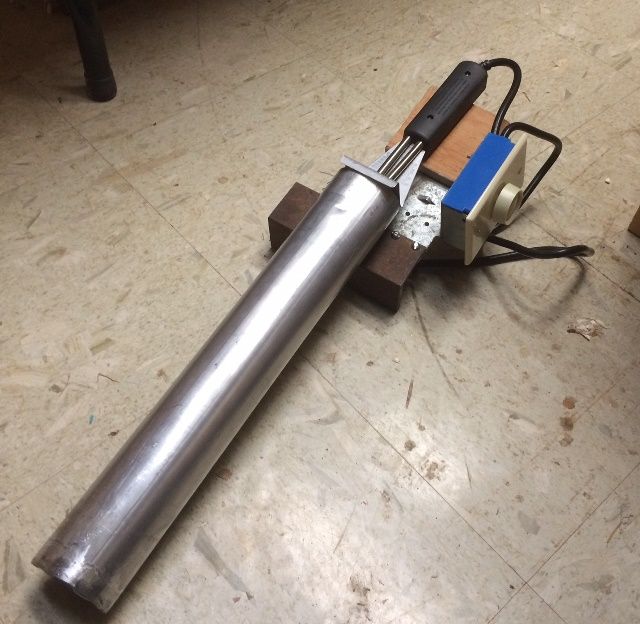
It is a section of exhaust tube, welded to a piece of angle iron, so that I could clamp the apparatus in a vise. Heat is supplied by a 550-W electric charcoal briquette lighter, controlled by a 600-W dimmer switch. It took a little trial and error to get it set up correctly and to calibrate it, but it turned out to work very well! (What a relief!)
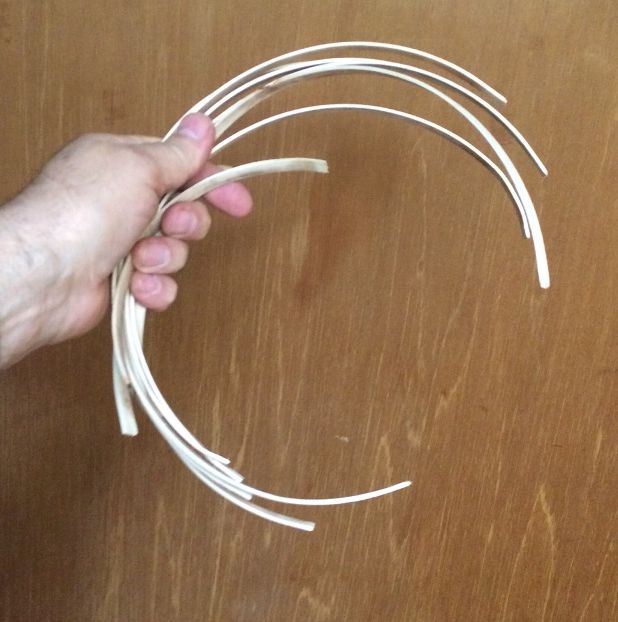
Bending the ribs

Bending the remaining two Big Leaf Maple ribs was nearly effortless, and took about ten minutes, tops, not counting waiting for the tube to heat up.

Lower ribs bent to approximate the mold shape of the 5-string double bass.
Lower ribs bent to approximate the mold shape.


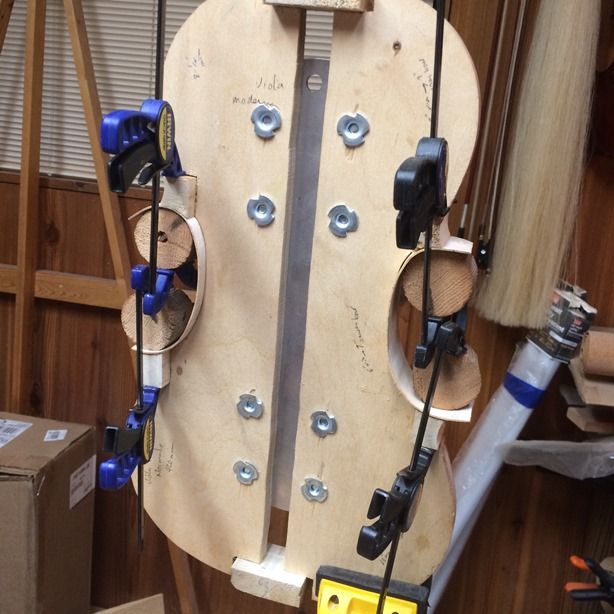
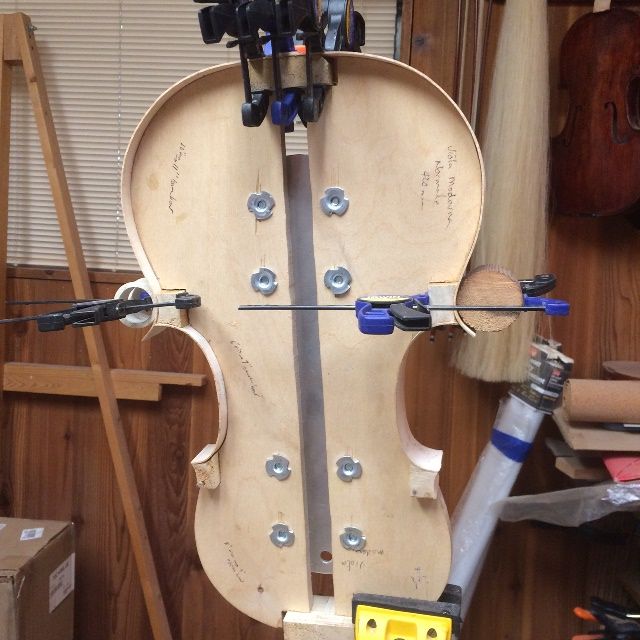
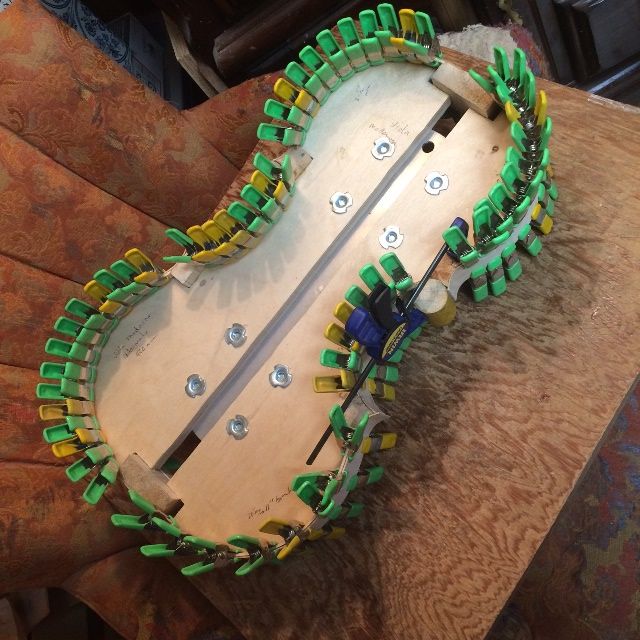
Installing the ribs and linings

Then I glued the ribs into the fir blocks on the mold with hot hide glue, one at a time, and affixed the willow linings in the same manner before moving to the next rib.

Treble rib with linings installed on the 5-string double bass.
Treble rib with linings installed.


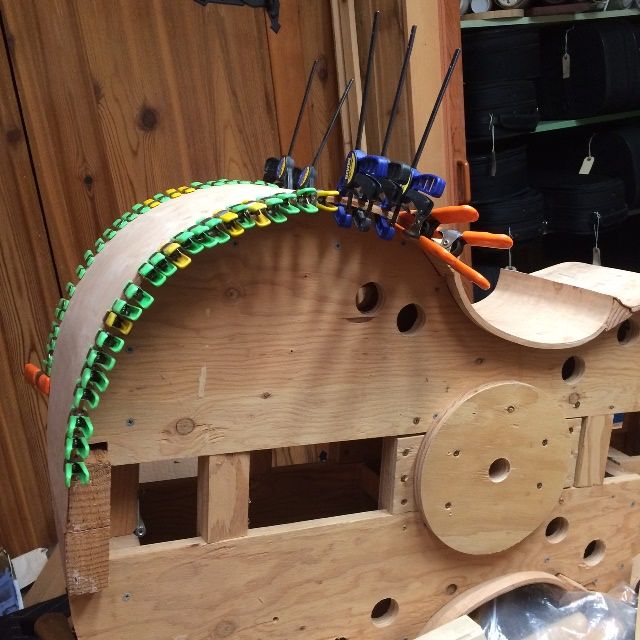
Once one rib was completely secure, trimmed and lined, I rolled the bass mold over and repeated the operation on the other side.

Bass side rib with linings installed on the 5-string double bass.
Bass side rib with linings installed.


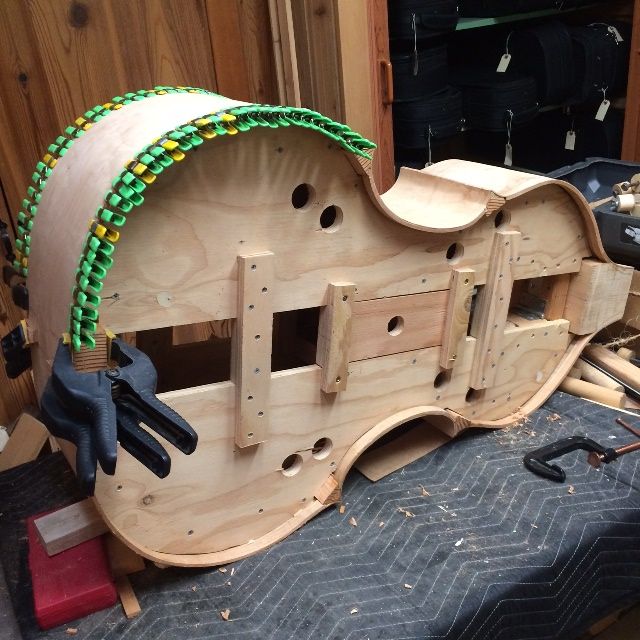
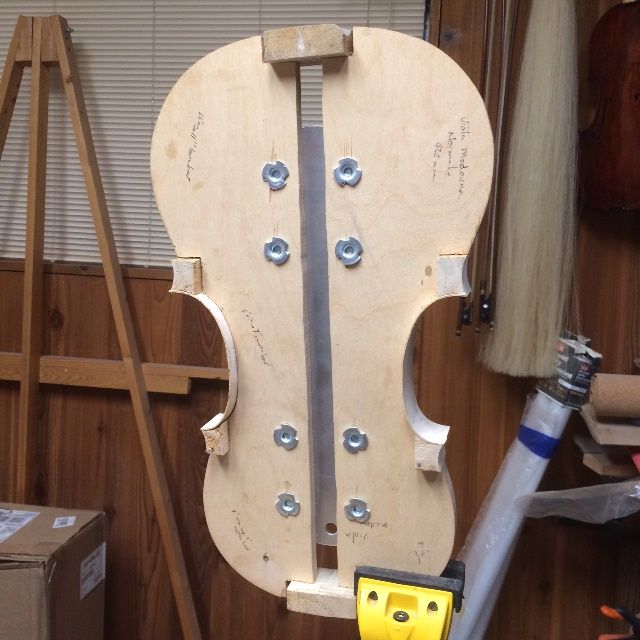
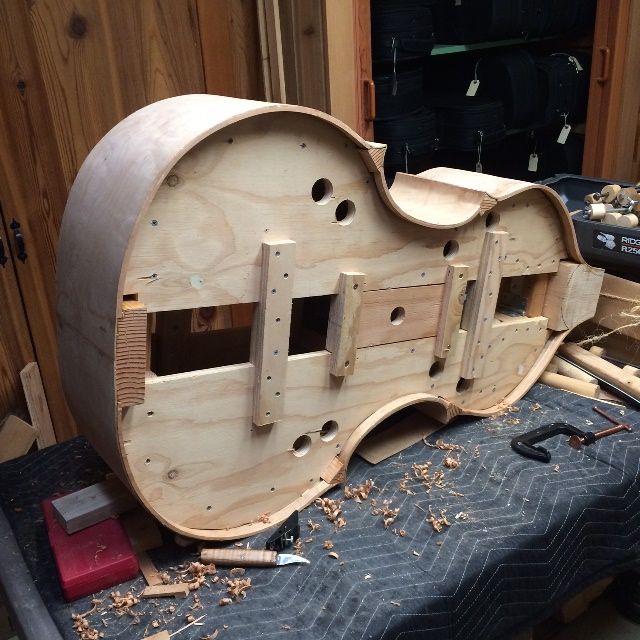
I planed the linings flush with the ribs and blocks, and the garland was essentially complete. It will require careful leveling before fitting the plates, but not much other than that.

Completed rib garland for the 5-string double bass.
Completed rib garland.

In the coming weeks, I will complete the center-joins of front and back plates,  then complete the carving of the plates and the neck and scroll, and start putting this bass together!

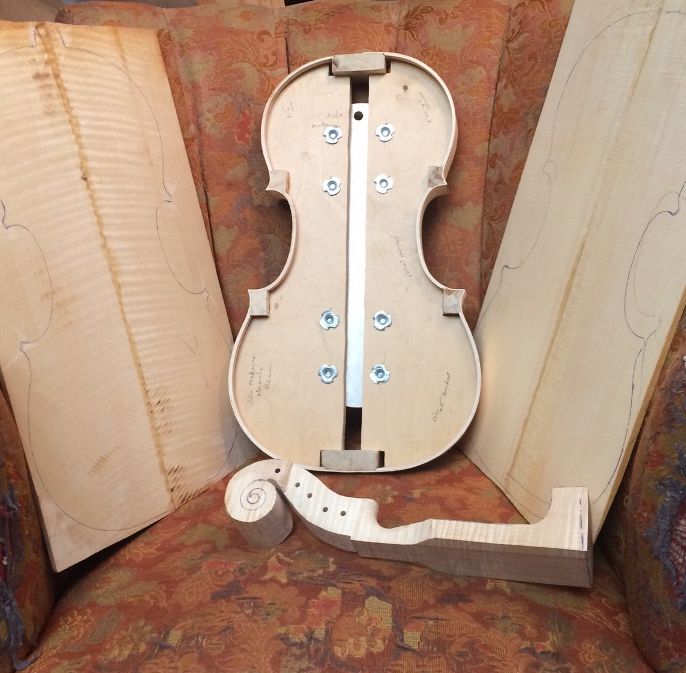
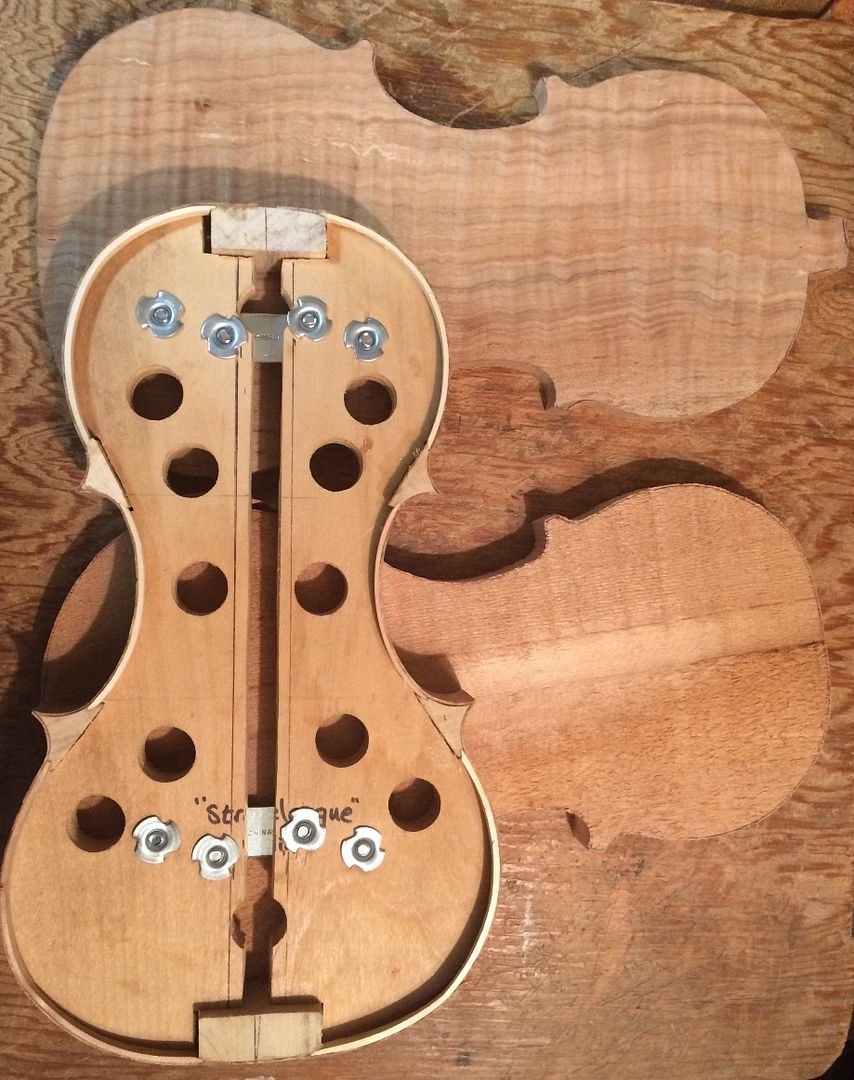
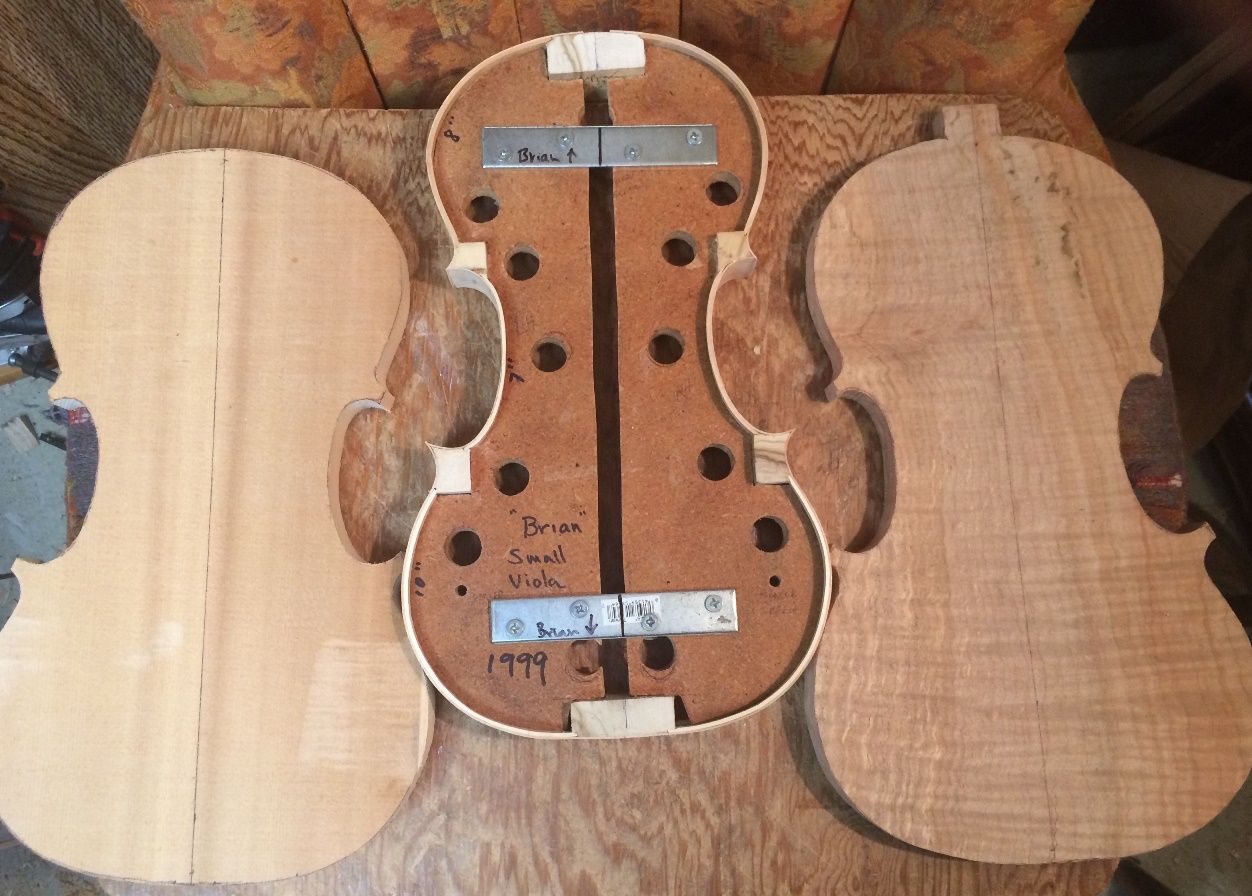
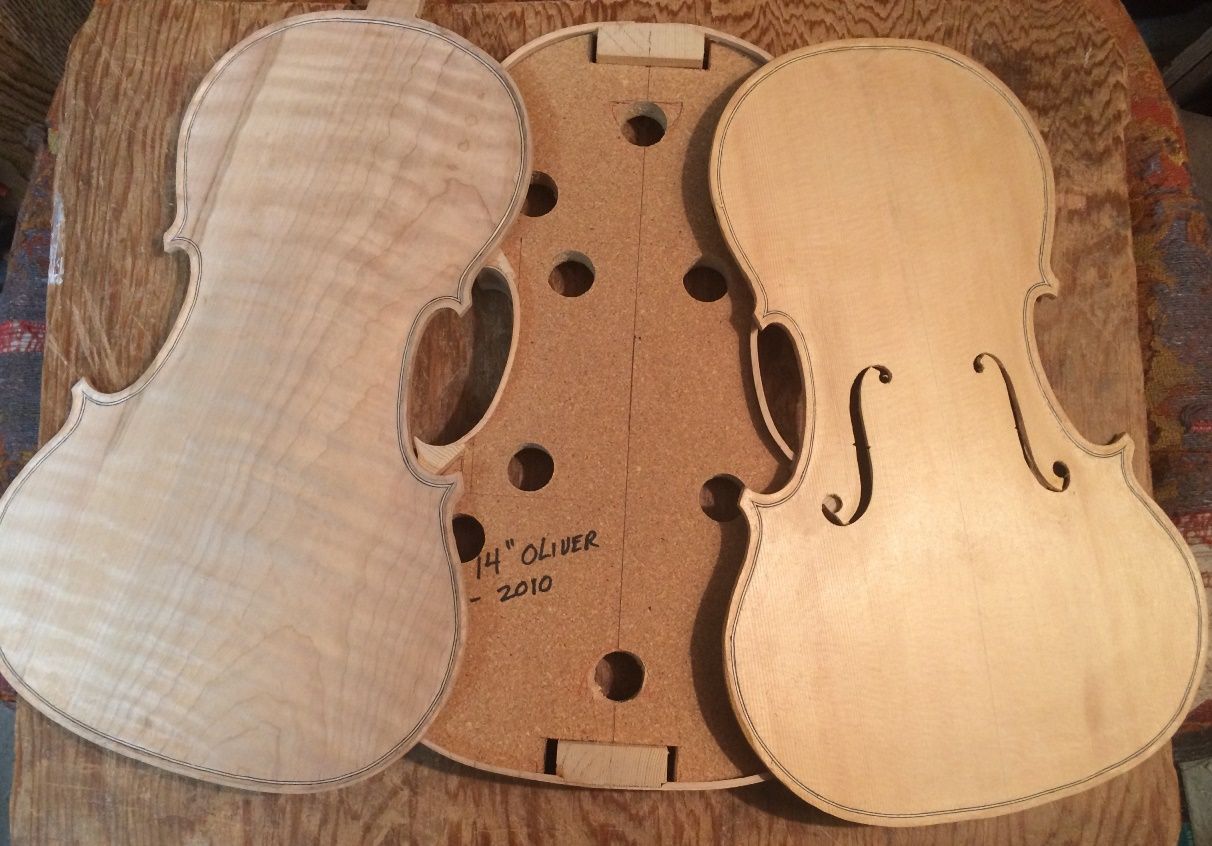
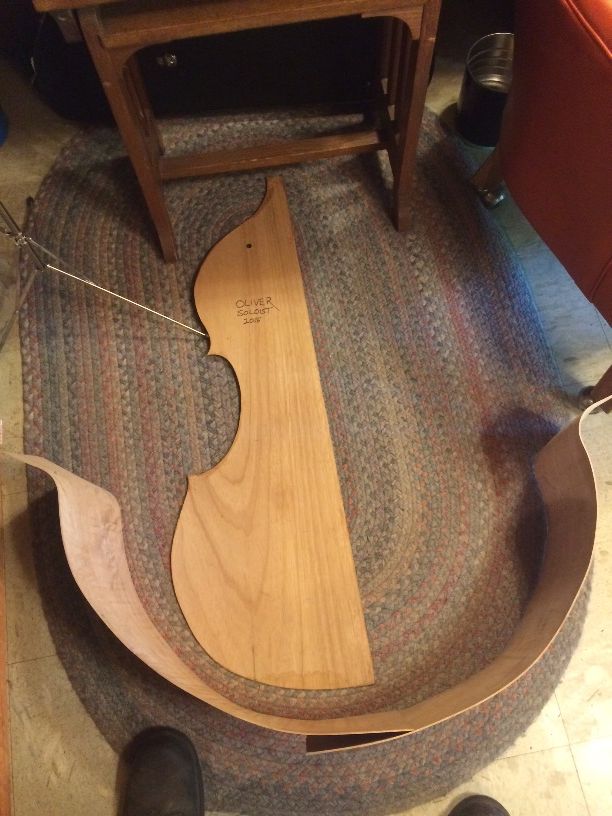
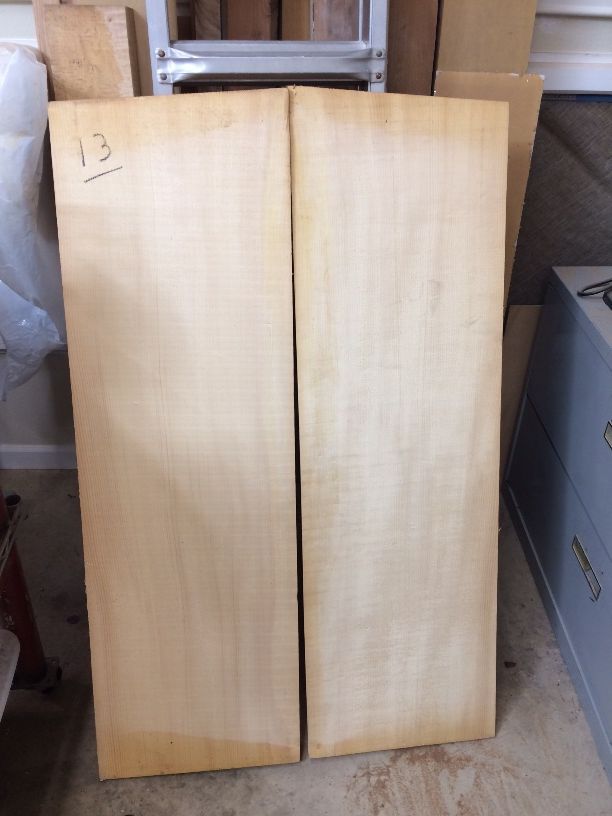
Just as a teaser, this is the wood for the front, back and neck:

Sitka Spruce billet for the front plate of the 5-string double bass.
Sitka Spruce billet for the front plate.


Big Leaf Maple for back plate and neck of the 5-string double bass.
Big Leaf Maple for the back plate and neck.

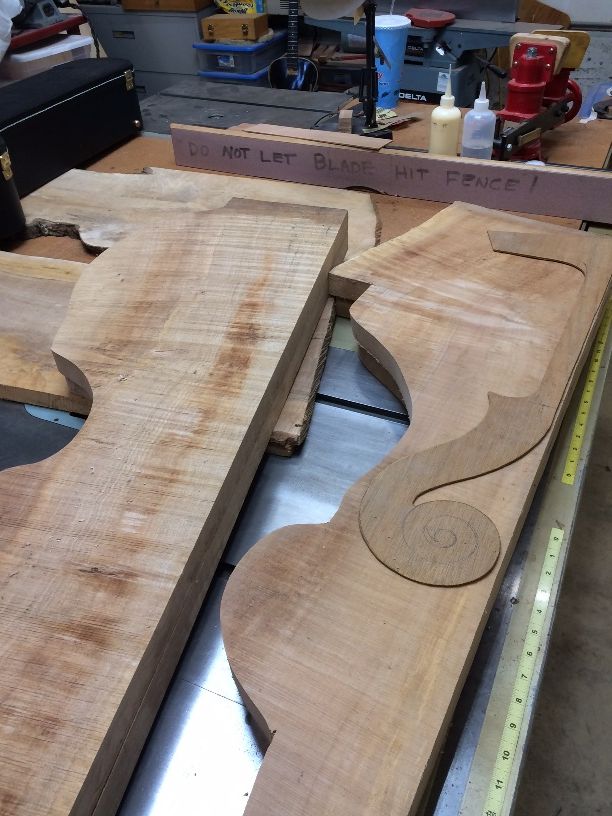
(Notice that there is a fair chunk left over where the neck pattern does not use all the wood it is on: watch that space! )

Thanks for looking!

16-1/2″ Five-String Viola Beginning

16-1/2″ 5-string Viola on the way!

New Project!

This is the first large 5-string viola I have made. So far, most players have been quite firm about wanting the same scale length as a violin…and an instrument that will fit in their fiddle case. So that is what I have mostly made. But lately, there seems to have been an increased interest in five-string violas. Some were interested specifically in a smaller viola (hence the current, nearly completed 5-string 15″ Viola,) but more recently, there were two players who were really interested in a large 5-string viola. A 16-1/2″ Viola with a high E string.

So… here we go! I already had European Maple and Spruce billets set aside from earlier “shopping trips,” and everything else that I needed to build a big viola. All I had to do was to finish the instruments already on the bench! They are now out of the way, except for completing the varnish and final set-up of the 15″ 5-string viola… so I am good to go. Here are most of the materials, with the plates already bookmatched.


Materials for new 5-string Viola.

Making, Bending and Installing Ribs

The blocks were already in the mold, and shaped. It was time to start working on ribs. I thinned the ribs to the proper thickness, using a fixture I made for my oscillating spindle sander (one of my few power-tools.) Then I bent each of them to the proper shape, using a hot bending iron.

When I had all six ribs shaped, I installed the two center-bout (often called “C-bout”) ribs, and secured them with hot hide glue and clamps. You can see that clamping to a curved surface is not easy. I held the mold in a small vise, then secured each joint using hot hide glue, cylindrical wooden cauls, and f-style clamps.

Center ribs installed on 16-1/2" five-string Viola.
Center ribs installed on 16-1/2″ five-string Viola.


When the glue holding the center-bout ribs was dry,  I trimmed the ends of the ribs, using the spindle sander again, and installed the lower bout ribs. The joint at the center of the instrument, between the lower ribs, has to be pretty close to perfect, as it will always be visible and any discrepancies will be glaringly obvious under the varnish.

Center ribs trimmed to match the curvature of the blocks of the 16-1/2" five-string Viola.
Center ribs trimmed to match the curvature of the blocks.


Lower ribs installed on the 16-1/2" five-string Viola.
Lower ribs installed.


Finally, I installed the upper ribs. There is no joint between the upper ribs: in fact, they don’t even have to touch. The neck mortise will remove the middle section regardless of how good my joinery is, so I leave a gap there to allow for easy installation of the ribs. (Meaning, I only have to concern myself with how the ribs fit the corner blocks and that they cleanly follow the mold up to the neck block.)

Upper ribs installed on the 16-1/2" five-string Viola.
Upper ribs installed.


Making, Bending and Installing Linings

While I was bending ribs, and still had the iron hot, I went ahead and cut and bent a supply of linings. The linings, like the blocks, are made of willow, because I like the way it works. The linings serve to triple the gluing surface of the edges of the ribs, where they contact the plates, as well as strengthening the rib garland.

Linings bent and ready to install on the 16-1/2" five-string Viola.
Linings bent and ready to install.


I made a small mortise at the juncture between each rib and each block (24 of them,) and then installed the linings dry, to make certain they fit correctly. Then, one-by-one, I removed each lining, applied hot hide glue to both the rib and the lining, and quickly reinstalled the lining and secured it with a series of small spring-clamps.

Linings installed in the 16-1/2" five-string Viola, with hot hide glue and spring clamps.
Linings with hot hide glue and spring clamps.


Tracing the Shape of the Plates

When the glue holding the linings was dry, I removed the clamps and used the spindle sander to trim the ends of the rib corners. I also leveled the front and back of the garland, so that I would be able to trace the shape of the plates.  The European Maple back plate is on the left, and the European Spruce front plate is on the right.  I used a small washer as a spacer, to establish the edge overhang, and a ball-point pen to trace the shapes. You can see that I have begun work on the neck, as well, which is also made of European Maple.

Completed garland, traced plate-shapes, and partially carved neck for the 16-1/2" five-string Viola.
Completed garland, traced plate-shapes, and partially carved neck.


The garland is temporarily out of the focus of the work, now, so I hung it up, out of harm’s way, until I am ready to begin installing plates.

Rib garland of the 16-1/2" five-string Viola, completed and set aside for safe-keeping.
Rib garland completed and set aside for safe-keeping.


The next step is to actually cut out the plates and begin shaping them into the voice of a Viola. I will let that wait until a later post.


Thanks for looking.


June 22nd Progress Report

Some Progress is better than none!

It has been a frustrating series of weeks: all the usual responsibilities, house guests, etc., plus a few unexpected items. The lawn tractor suddenly quit mowing, though it ran fine. We narrowed it down to being a bad PTO clutch, so that is just another thing to take apart and replace.  Guess that’s what happens when you use 30-year-old equipment. 🙂

Then, two days ago, my beloved better half, Ann, discovered that the side porch steps are in advanced stages of rot…so, today, we went and bought all the pressure-treated lumber to replace them. They, too, have been in place for over 30 years, so, I guess, they have served well.

Progress on the 5-String Fiddles

I did manage to make a little progress on some of the acoustic five-string fiddles I had begun, however:

  • All the linings are in place for two of the instruments (violin and the 14-7/8″ viola.)
  • The front and back plates are traced and cut out for both of those instruments.
  • The front plate graduations are complete for the 14″ viola, and
  • The f-holes are cut out on the 14″ viola, but not refined.

So, this is where things stand, at the moment:

Here is the “Strobelesque” garland with its front and back plates:

garland and plates
Rib Garland and rough-cut plates for the “Strobelesque” fiddle.

No carving at all has been done on the plates, and the Sitka Spruce front plate is still nearly an inch thick. I will plane it down before I begin arching, of course. I do like the look of the spalted maple back and ribs. This maple was from an old Big Leaf Maple tree on the property where Ann grew up. It had begun to show signs of decay, and was removed for safety’s sake. Too bad for the loss of the tree, but it is nice wood.

Here is the 14-7/8″ Viola garland with its front and back plates.

garland with plates
Rib garland with front and back plates for a 14-7/8″ 5-string viola.

This one is my own design. In fact, it was the very first form I ever made, thinking I was just going to make a viola for my youngest son (whose name is on the form, along with the date: 1999.) As it happened, I discovered that lutherie is addictive, and I have been building instruments ever since. 🙂

The center-lines on both plates are ink, not a glue-line: this instrument boasts both a one-piece Spalted (Big-Leaf) Maple back plate (also from the tree at Ann’s childhood home) and a one-piece Sitka Spruce front plate.

Here is the progress on the 14″ Viola:

garland and plates
Rib garland and nearly completed plates for a 14″ five-string viola.

This one is my own design, too: it is the same length as a standard violin, but much wider in the lower bouts, and deeper in the ribs. It will be interesting to see how it works as a five-string fiddle. (This is a first.) This one has an Englemann Spruce front plate and a one-piece Big Leaf Maple back from a log I was given by Terry Howell, years ago.


I will post more reports as the work takes place. Feel free to contact me if you have questions.

Thanks for looking.