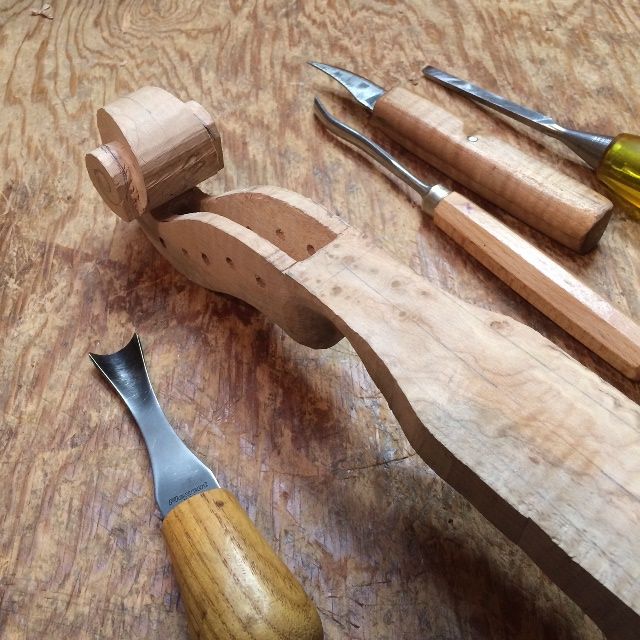
Getting “Closure!” What goes into the final assembly?

Setting the Neck

Front plate installed on five string fiddle handcrafted in Oregon by Artisanal Luthier, Chet Bishop.
Front, with rib garland, back, neck and fingerboard, nearly ready for assembly.

I failed to take photos of the actual neck-setting procedure on this violin. (Sorry.)  I will link to a series of photos from a previous instrument.  That one had a major “flesh-wound” mishap. (I accidentally thrust a gouge through my left thumb…but it does include the neck-setting process. And the wound healed!)

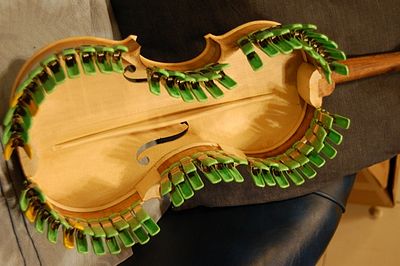
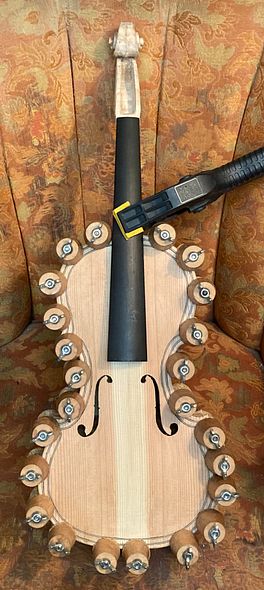
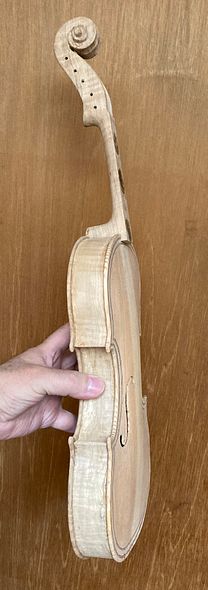
This one went very smoothly: I think it took less than an hour to achieve a perfect fit. Then I removed the interior mold, and installed the back linings, so that the corpus was complete and ready to receive the back plate.

Installing the back linings on a 5-string fiddle handcrafted in Oregon by Chet Bishop, artisanal Luthier.
Back linings, installed on an earlier instrument. Once again, I forgot to take pictures.

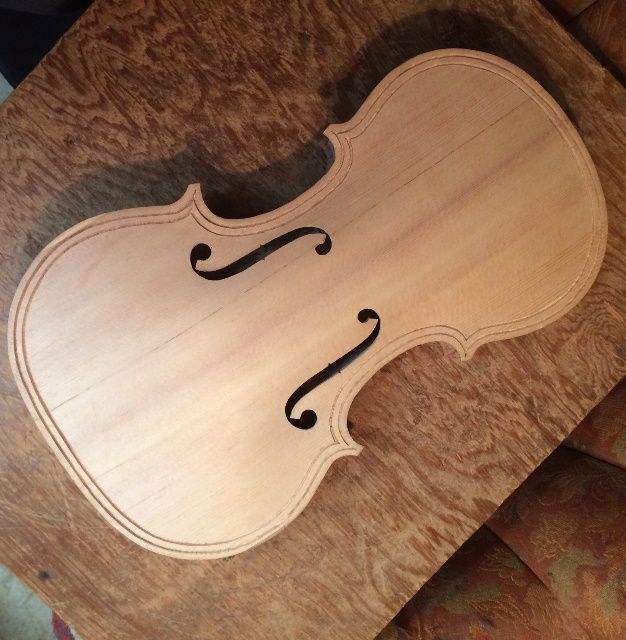
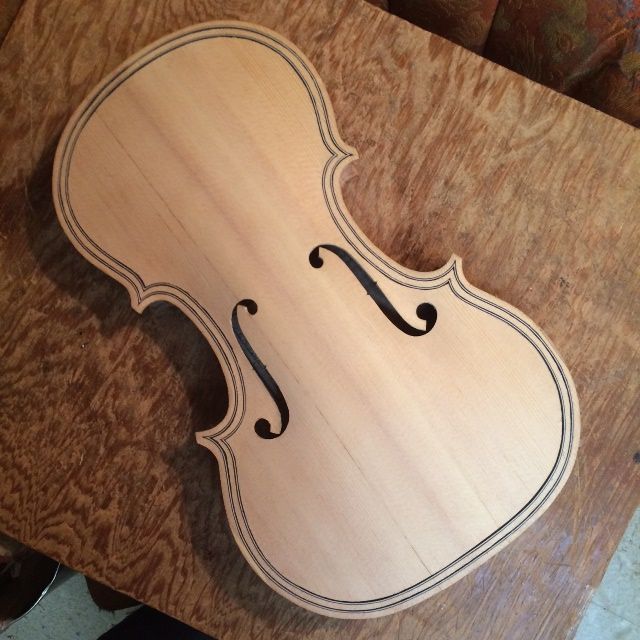
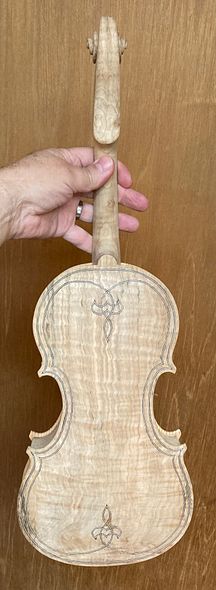
Completing the Back Plate

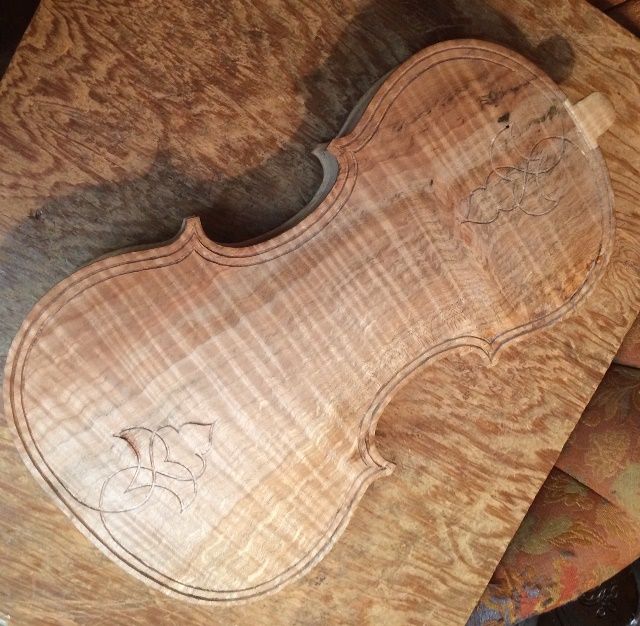
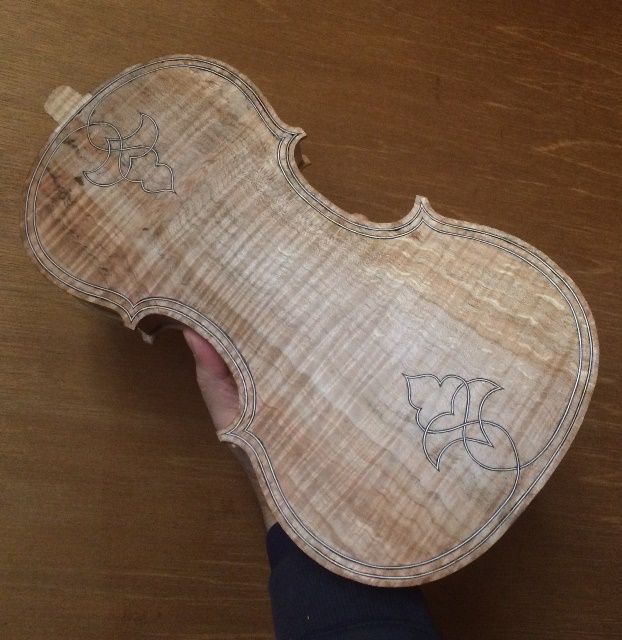
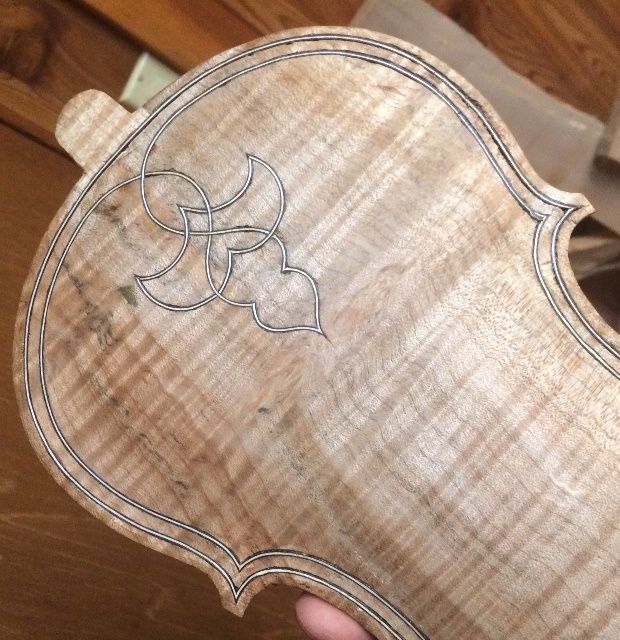
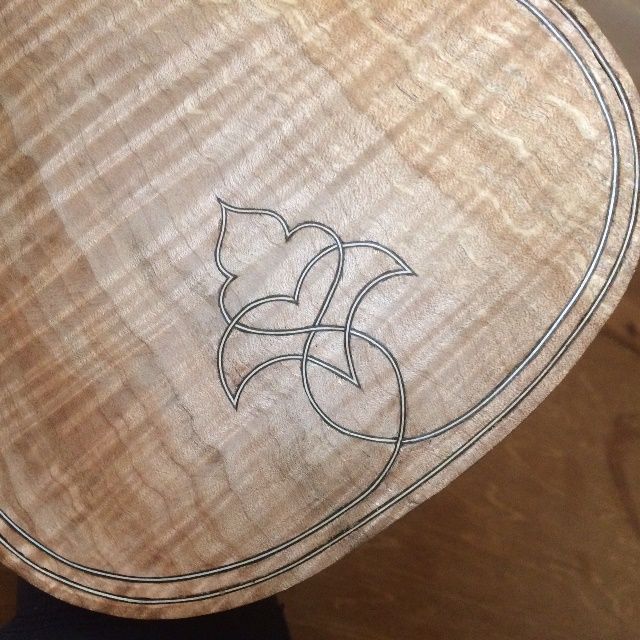
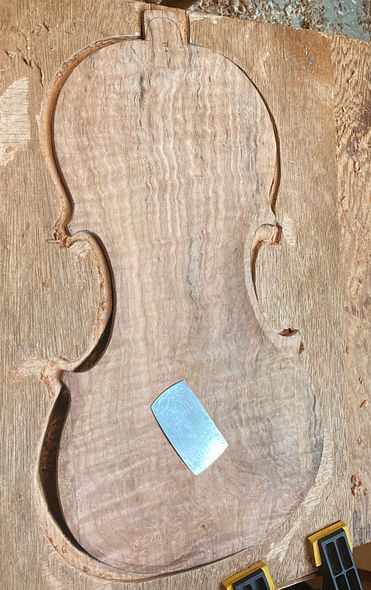
I also had to complete the back plate. I had already completed the outside arching, and most of the interior carving, as well. Still had to finish scraping the interior dead-smooth, then install the purfling, and the label.

Imterior of back plate of five string fiddle handcrafted in Oregon by Chet Bishop, artisanal Luthier.
Completing the interior of the back plate.


Beginning the purfling weave on the back plate of a 5-string fiddle handcrafted in Oregon by Chet Bishop, artisanal Luthier.
Beginning the purfling weave on the back plate.


Partway done with back plate purfling on 5-string fiddle handcrafted in Oregon by Chet Bishop, artisanal Luthier.
Partway done with back plate purfling.


Completing the purfling weave on a 5-string fiddle handcrafted in Oregon by Chet Bishop, artisanal luthier.
Completing the purfling weave inlay.

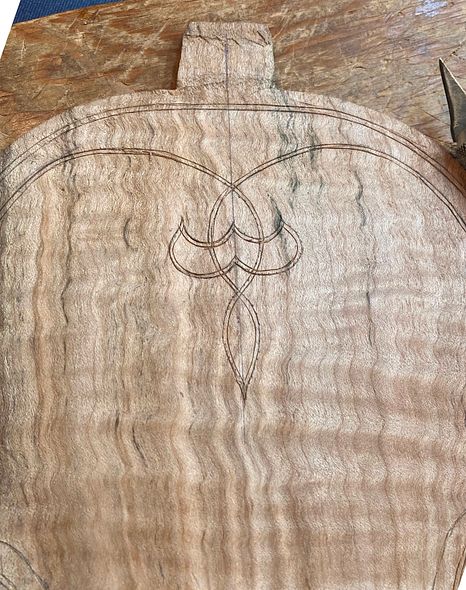
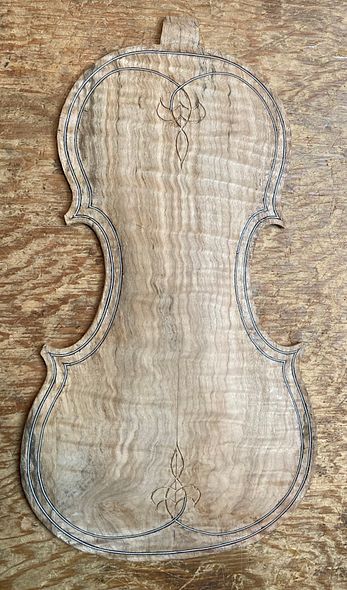
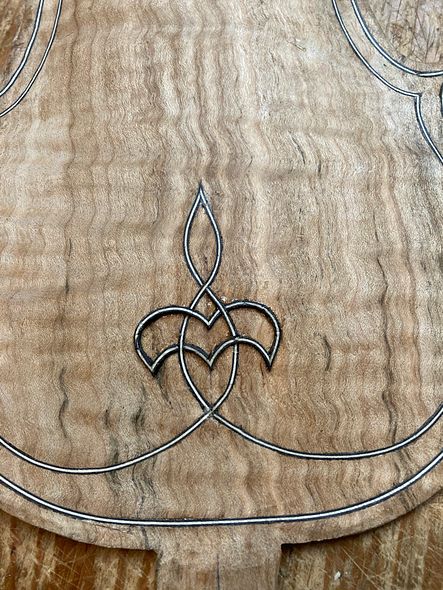
Once the plate was truly complete, I added the label, and installed the back plate on the corpus.

Installing the back plate on a 5-string fiddle handcrafted in Oregon by Chet Bishop, artisanal luthier.
The spool clamps hold the entire perimeter while the glue sets. the spring clamp holds the neck heel and button tightly in place.
Back plate installed, on a 5-string fiddle handcrafted in Oregon by artisanal luthier, Chet Bishop.
Back plate installed: notice that the button is far oversized. (See next photo.)
Side view of oversized button on a 5-string fiddle handcrafted in Oregon by artisanal Luthier, Chet Bishop.
The back button is deliberately left oversize, to be carved to final shape as a unit with the neck heel.
Button and heel carved to match, on 5-string fiddle handcrafted in Oregon by artisanal luthier, Chet Bishop.
Neck heel and button carved to match.

Preparing for the Varnish

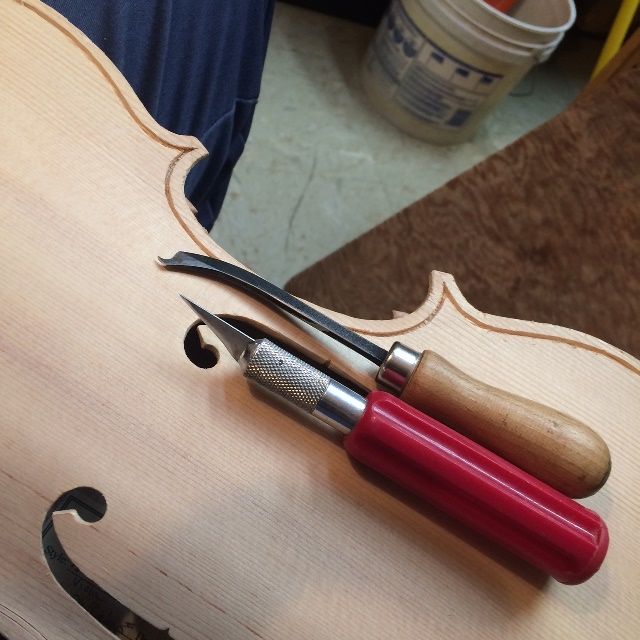
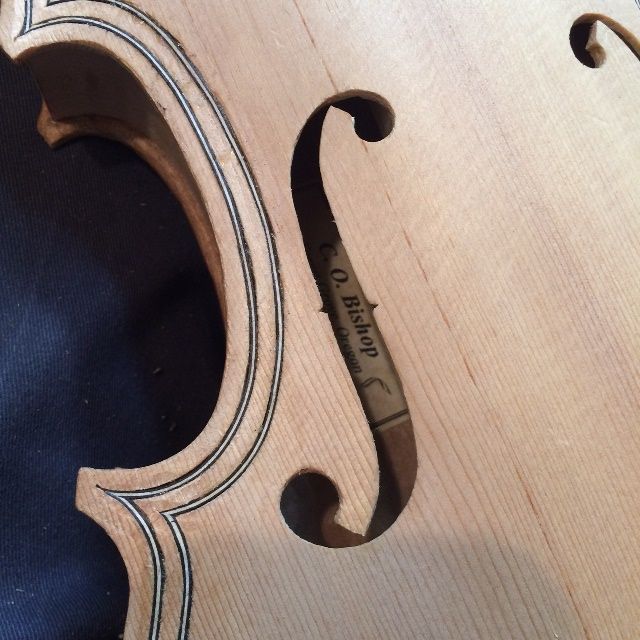
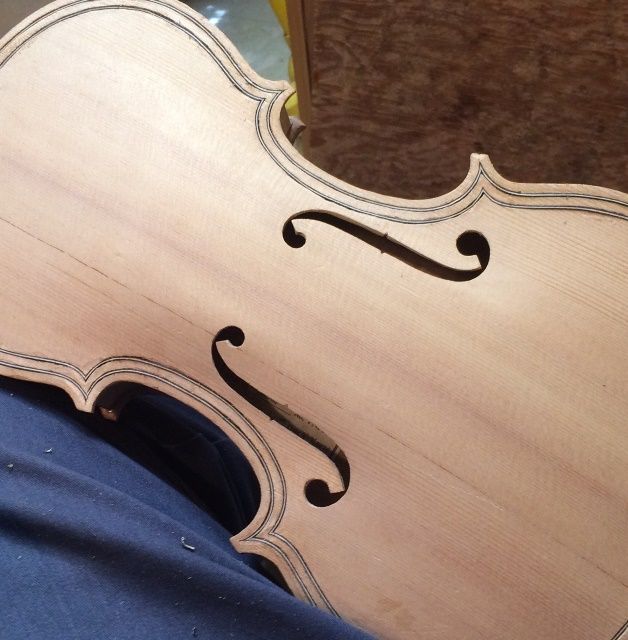
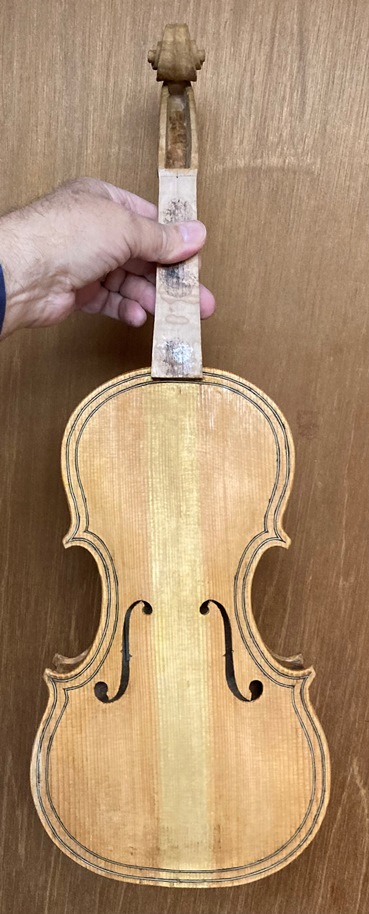
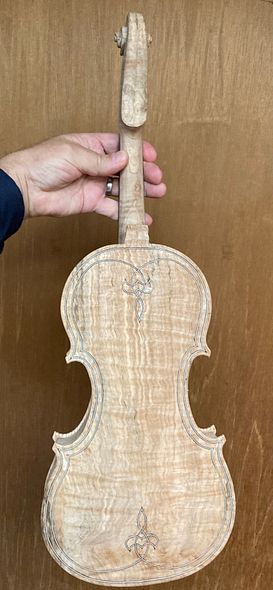
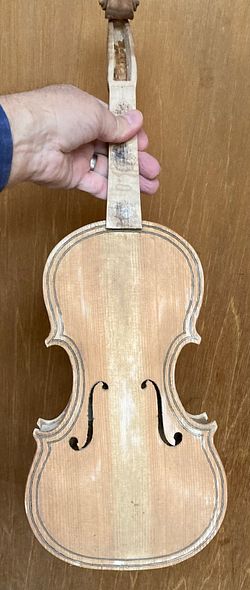
I removed the fingerboard, to give me easy access to all parts of the front of the fiddle. Notice that the fingerboard had only been held by three “dots” of hide glue. even so, the glue took off a microscopically thin layer of ebony when I removed the fingerboard. (That is what the “black stuff” is.)

5-string fiddle in the white, handcrafted in Oregon by Chet Bishop, artisanal Luthier.
Fiddle “completed in the white.” Ready for all varnish-prep work.

Edgework and Varnish Prep

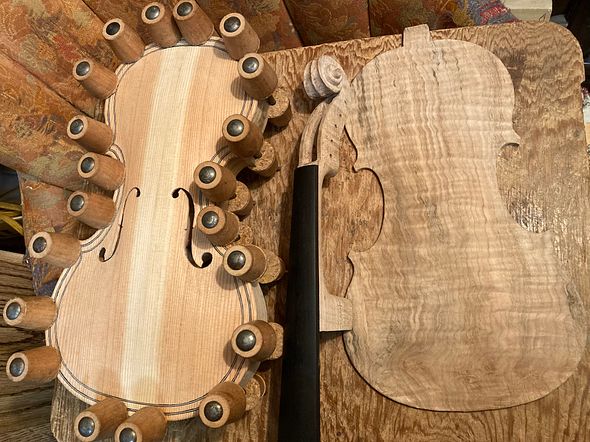
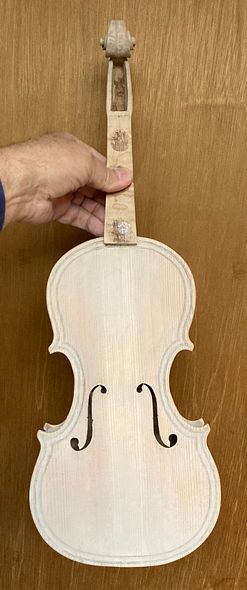
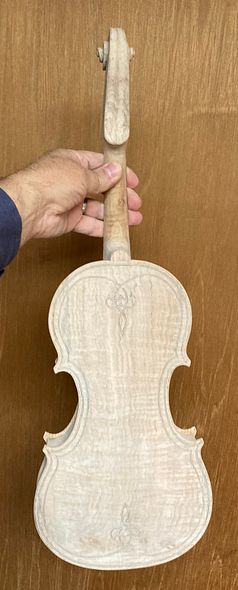
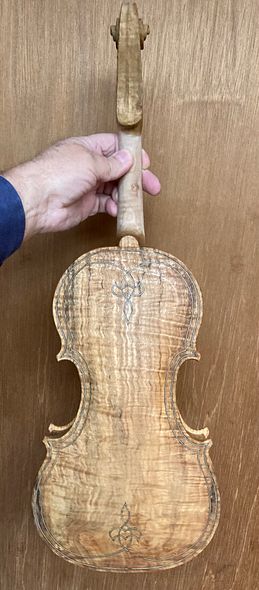
All final shaping has to be completed at this point: any bumps, humps and hollows have to be carefully addressed, using a sharp scraper, before the mineral ground is applied. The mineral ground is a suspension of extremely fine particles that “plug” the pores in the wood, so that the varnish does not penetrate deeply and deaden the sound.

I apply it wet, with a brush, and vigorously rub it into the wood with my bare fingers, then rub off as much of the excess material left on the surface as I can. It is not supposed to be “on” the surface, so much as “in” the surface of the wood.

Wet mineral ground on 5-string fiddle handcrafted in Oregon by artisanal Luthier, Chet Bishop.
Front side, with wet mineral ground.

The wet mineral ground temporarily darkens the wood, but, as it dries, it turns stark white.

Dry mineral ground on 5-string fiddle handcrafted in Oregon by Chet Bishop, artisanal luthier.
Dry mineral ground.

The next step is always pretty amazing: when I brush on the sealer, it surrounds all the “white” particles in the wood, and they become transparent. Look at the “before and after” photos of the back plate, as the sealer is applied:

Back plate of five string fiddle with dry mineral ground. Handcrafted in Oregon, by Chet Bishop, artisanal luthier.
Back plate with dry mineral ground.
Back plate with sealer on 5-string fiddle handcrafted in Oregon by Chet Bishop, artisanal luthier.
Same plate with sealer applied.

From this point forward, it is just a matter of applying numerous coats of varnish, and adjusting the color as the process progresses. Furthermore, I want all the parts to “fit together” in terms of color. (You can see that there is a difference between the front and back color, for example.)

Next time, we will talk about color varnish coats.

Thanks for looking.


Purfling, Edgework and Scroll on a 15″ Five-string viola

Purfling the 15″ 5-string Viola

Complete the slots

When I last posted, I had only begun cutting the outer purfling slots (I planned double purfling plus a weave for the back), so the next thing was to complete those slots.

Tools I used to cut the slots for the purfling in the Five-string viola.
Tools I used to cut the slots.


Front Purfling slots complete on the 15" Five-string viola.
Front Purfling slots complete.


Back purfling slots complete on the 15" Five-string viola.
Back purfling slots complete, including the upper and lower weaves.


Inserting and Gluing the purfling

The next step is to insert and glue the purfling in place, using hot hide glue. First I bend the purfling, using a hot iron, then I cut the ends to match the joints where the various sections meet. I insert the pieces dry, to ascertain that they fit, then, one-by-one, I pick the pieces back out and insert hot hide glue into the underlying slot, and quickly re-insert the purfling, forcing it to the bottom of the slot.

Front purfling dry installed on the 15" Five-string viola.
Front purfling dry installed in the Sitka Spruce top plate.


Close-up of glued purfling for the 15" Five-string viola, partially trimmed.
Close-up of glued purfling, partially trimmed.


Front Purfling glued on the 15" Five-string viola...no edgework done.
Front Purfling glued…no edgework done.


Back Purfling glued in place in the 15" Five-string viola.
Back Purfling glued in place.


Upper Weave complete on the 15" Five-string viola.
Upper Weave, in heavily spalted Big Leaf Maple back.


Lower Weave completed on the 15" Five-string viola back.
Lower Weave. No edgework, yet.


So that was the completion of the purfling. Edgework was next, shaping the channel through which both purfling slots will travel, as well as the outer edge and how the channel fairs into the front and back plate curvature. I used gouges, small planes and files, to get the edges to the required shape of a finished instrument.

While all this was happening, I was also getting going on the scroll, pegbox, and neck, but I will save that story for another post.

Beginning the scroll-carving for the 15" Five-string viola.
Beginning the scroll-carving.


Thanks for looking.