Sadly, these have been a difficult couple of years. For one thing, Health issues within the extended family and increasing responsibilities in other areas of life have made it difficult to actively work on new builds. Consequently, I hardly get started, and something else is needed
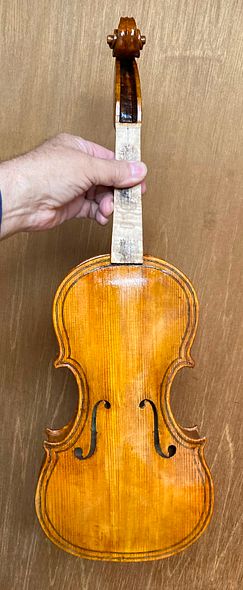
However, currently, I have one new Five-string Fiddle that should be done in the near future.
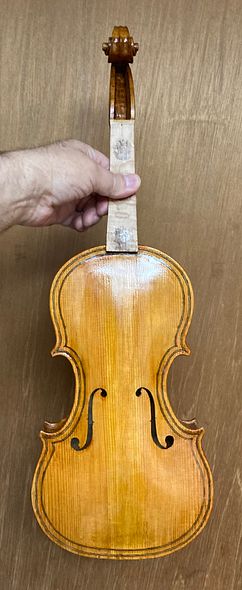
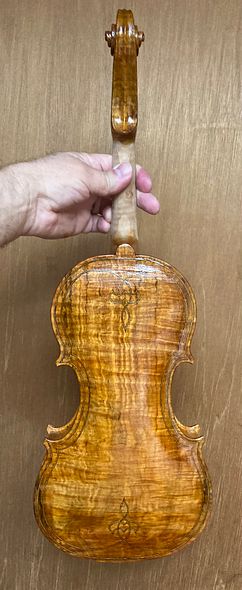
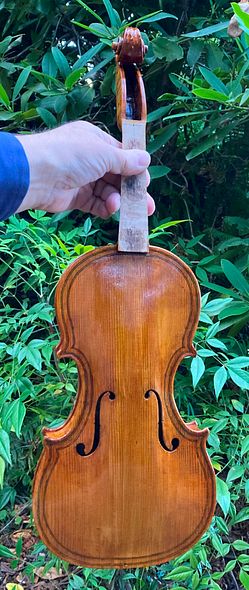
Originally, I bought the figured maple for this instrument as a billet, years ago, from Bruce Harvie of “Orcas Island Tonewoods.” However, the European Spruce, the purfling, and the fittings are from “International Violin Company” in Baltimore. Serendipitously, I secured the linings and blocks from a local source. They are weeping willow, (And it came from a large downed limb in someone’s yard after a windstorm).
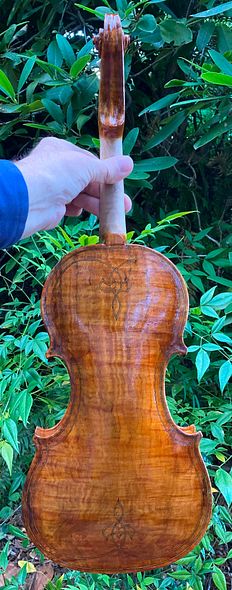
This is my original design from the first five-string fiddle I built. For some reason, it has proved my most popular build, both for tone and playability.
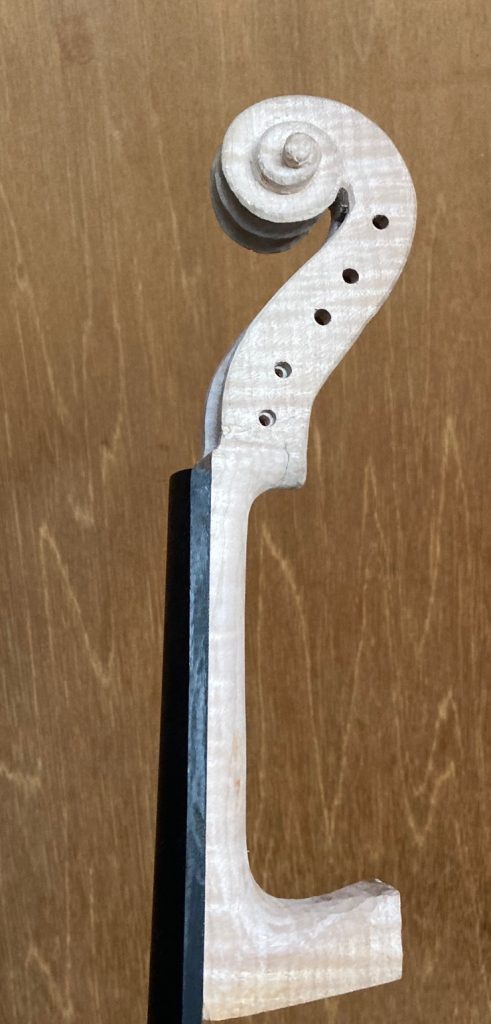
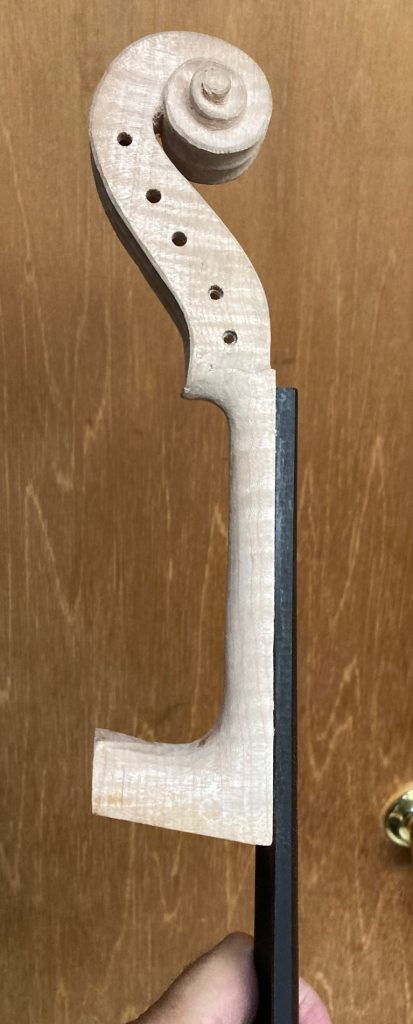
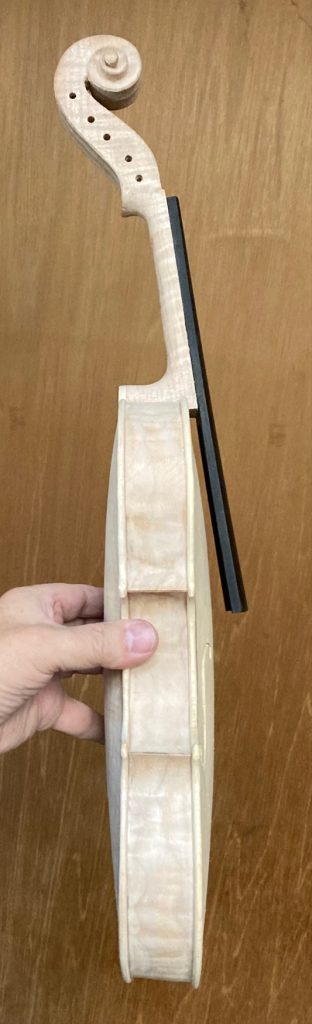
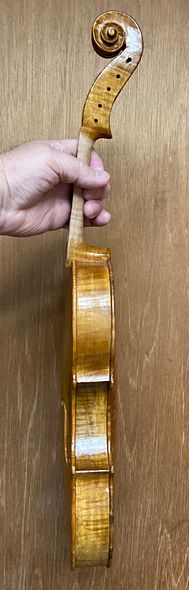
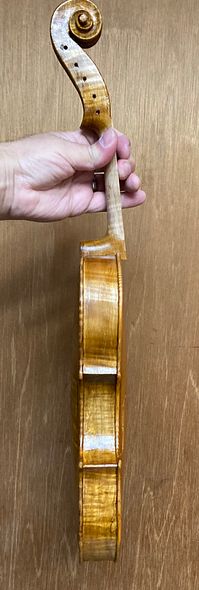
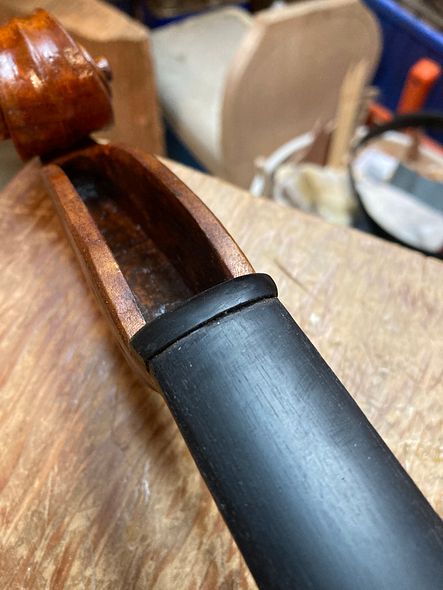
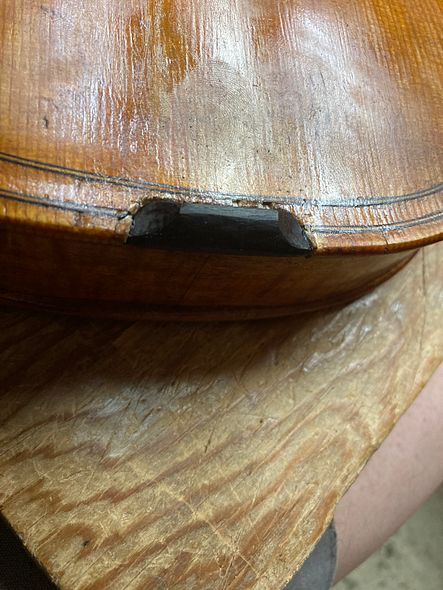
Scroll Graft
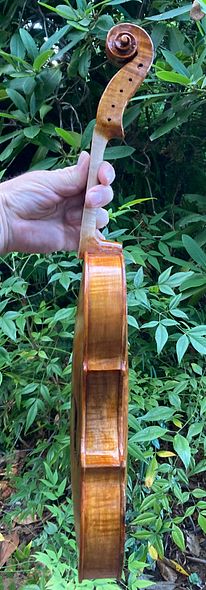
Obviously, (If you look closely, you can see it) I was forced to perform a scroll graft on this instrument. The cause was that there was a series of small knots that penetrated all the way through the neck, right at the nut line. As a result, they would have produced a fatal weakness in the neck. I had already carved most of the scroll when I realized it wasn’t going to work.
Also, obviously, (fortunately,) I had a block of curly maple at hand that could be shaped into a new neck-block and grafted into the scroll.
Progress Photos:
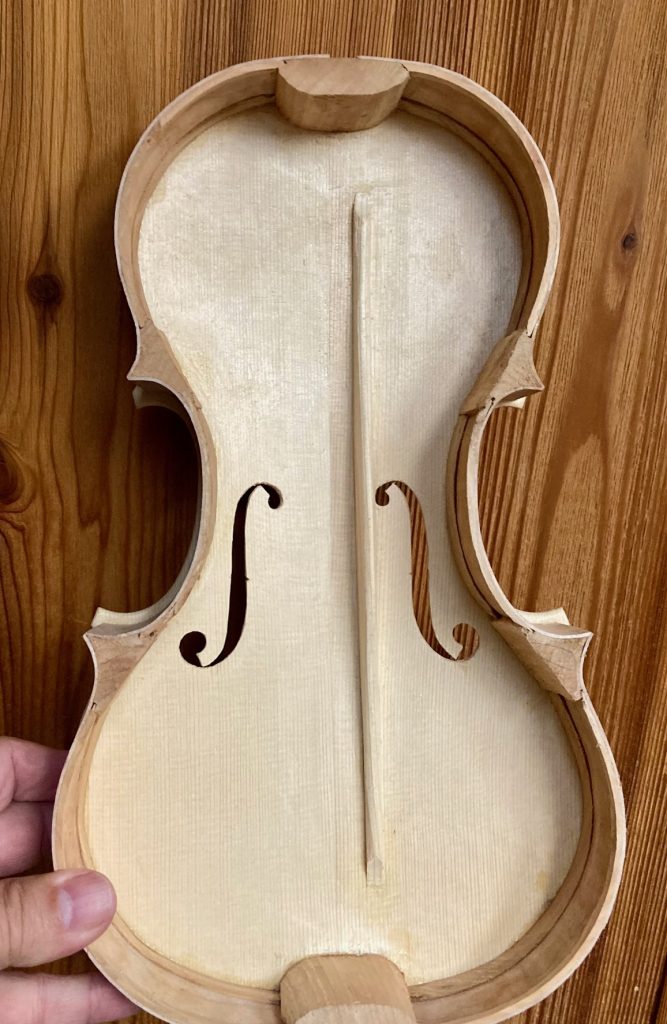
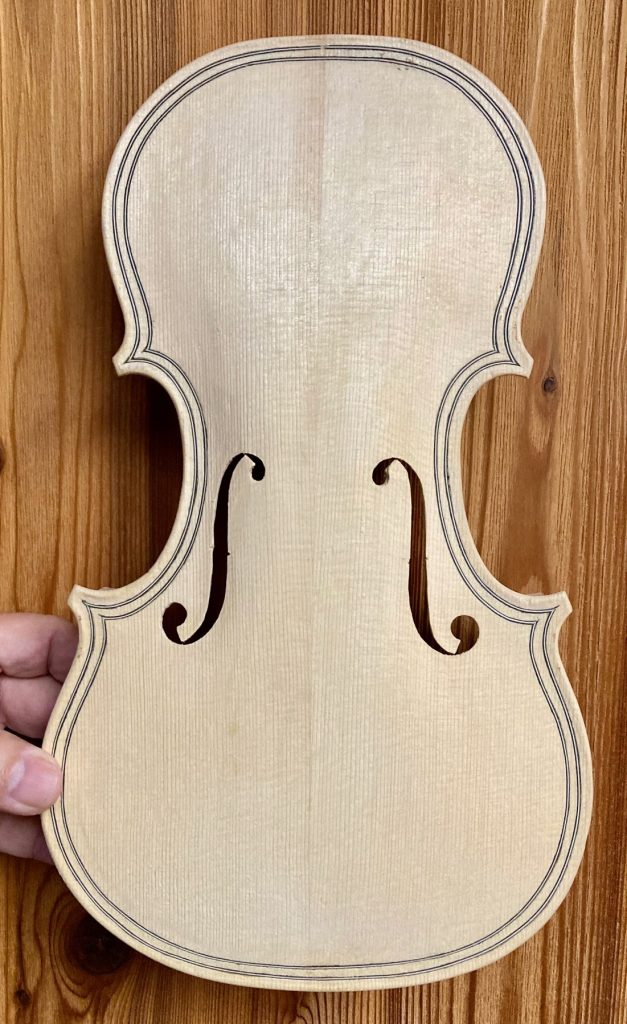
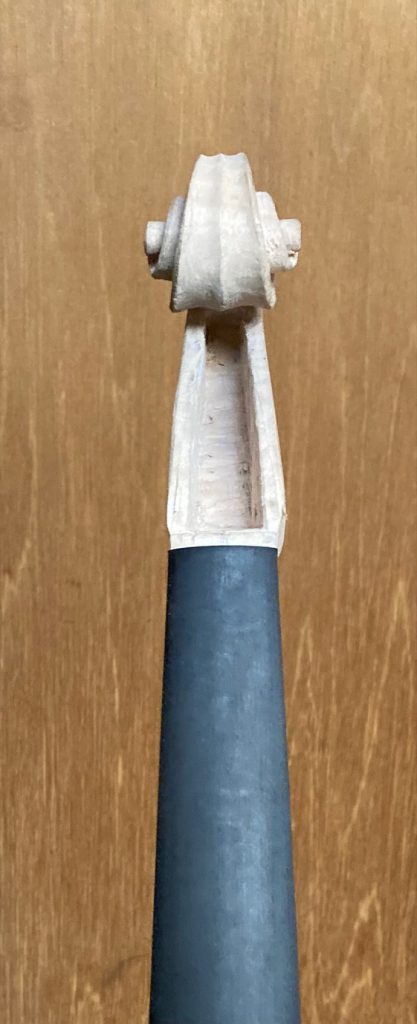
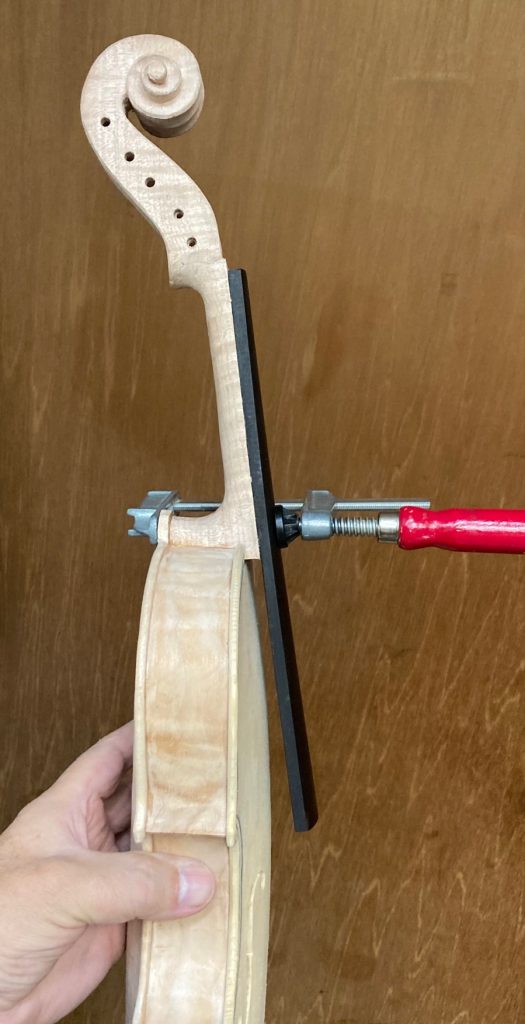
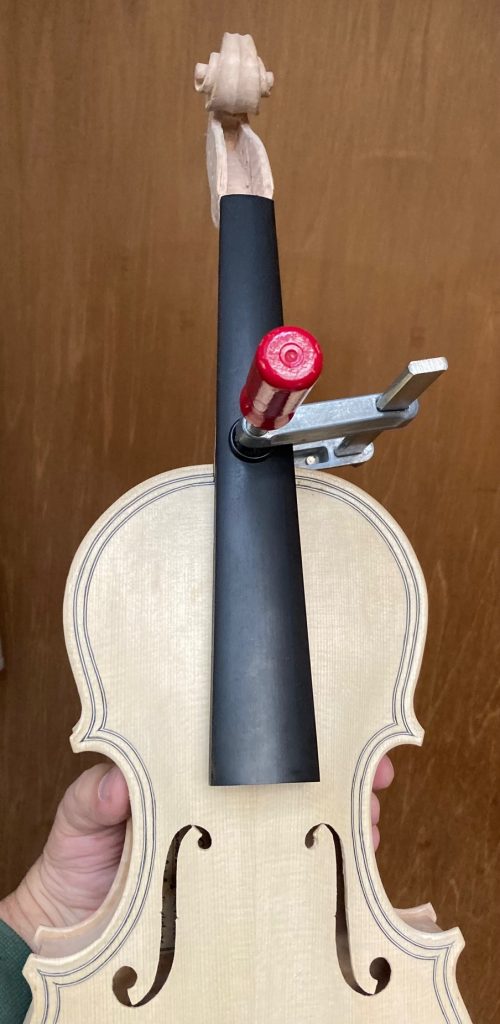
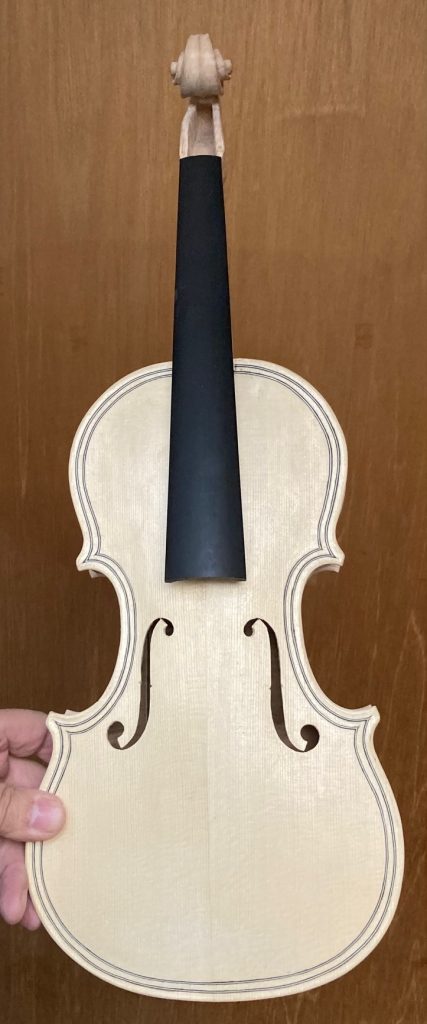
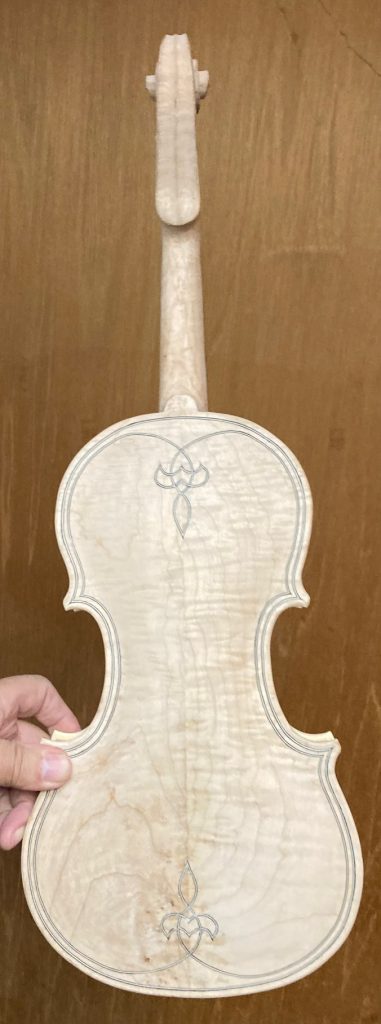
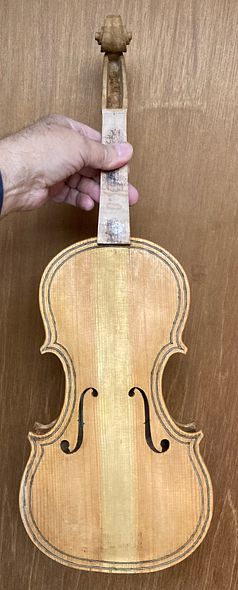
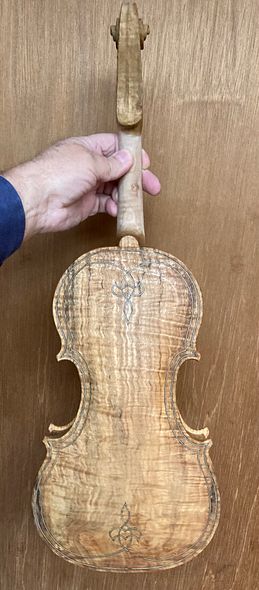
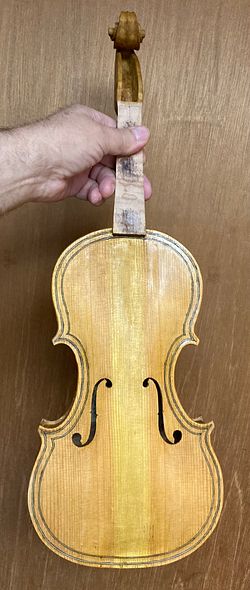
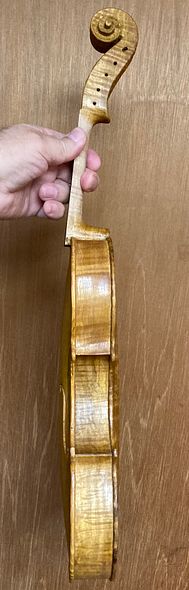
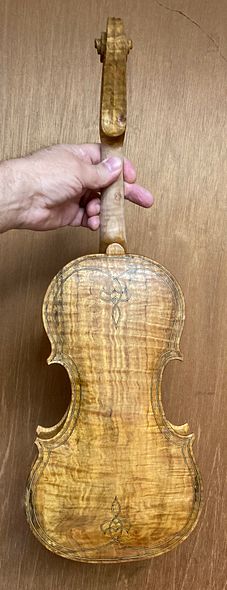
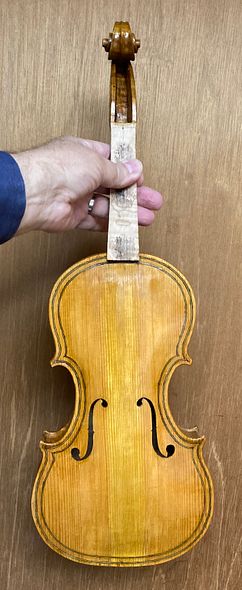
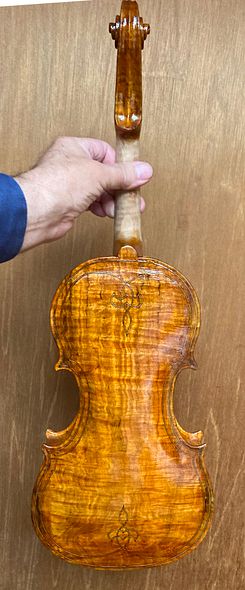
Completed Back PlateInside Front Plate with GarlandFront view Front plate with GarlandTreble Side View of NeckNeck FrontBass Side NeckBass Side Neck SetFront View Neck SetFront View Completed Fiddle in the WhiteBass Side Completed Fiddle in the WhiteBack Side Completed Fiddle in the White
The next step will be to complete final smoothing and varnish preparation, then I will apply a mineral ground. Finally, after the ground is fully dry, I will apply a coat of a sealing compound. Then I can begin varnishing.
Last time I posted, I had just completed the commissioned five-string fiddle, up to and including the sealer.
Sealed instrument, Front View
Sealed instrument, Back View.
Varnish:
The “magic” of the sealer was that it caused the mineral ground to disappear forever. The instrument instantly went from stark chalk-white to a natural wood color. As a result, the mineral will never be visible again. I always enjoy that transformation.
The varnish, on the other hand, is a series of relatively small changes, wherein the violin achieves the color we want. Furthermore, the increasing clarity and depth of the varnish gives the impression of being able to “see into the wood.”
I always begin with a couple of coats of deepyellow or amber varnish, as an undercoat which will shine through the later color coats.
Yellow First
Here is the violin after the two coats of yellow varnish:
Front View, with Yellow base coat.
Yellow base coat, Treble Side View.
Back View with Yellow base coat.
Color Coats
Next, I bagan layering the color coats, building to the look I planned. (Each “coat,” in reality, is usually two coats, applied in quick succession. There were about eighttotal color coats, but I will call them “first through fourth.”)
First Color Coat, Front
Treble Side, with First Color Coat.
First Color Coat, Back
Bass Side, with First Color Coat.
This maple is really beautiful wood. I wish I had a lot more of it, but, sadly, I only was able to salvage a little of the tree from which it originated. The “donor tree” was removed from the property where my wife and her siblings grew up. It had finally rotted and was becoming dangerous, so they removed it. But the wood is gorgeous. You can see the stump in this article….
Continuing color coats
As you can see, the yellow base coat is still showing through pretty strongly. That is good, but I still wanted to move the color toward a deep reddish brown, with the golden yellow shining through. Therefore… I needed more color coats!
Second Color Coat, Front
Back, with Second Color Coat.
The color is headed in the right direction, but still needs to be deeper. I will add extra color in any areas that should be darker.
Third Color Coat, Front.
Oregon Big Leaf Maple Back, withThird Color Coat.
I was getting pretty close to correct, so I began taking the instrument out into natural light, to check the color there.
Fourth Color Coat, Front.
Treble Side with Fourth Color Coat.
Back, with Fourth Color Coat.
Bass side, Fourth Color Coat.
The color was pretty close to what I had hoped to produce. Therefore, I felt that I was ready to reinstall the fingerboard, Afterward, I would hand-rub the varnish to a good polish. Finally, I allowed it to hang in my dining room and cure a little more fully. The varnish was still quite soft, though dry to the touch.
Fingerboard
First I carved the underside of the fingerboard to remove extra mass. This affects the sound, as well as the feel of the instrument. (Extra, unnecessary mass tends to absorb vibration rather than resonate.)
Underside of fingerboard beginning. It was fully carved and smoothed before installation.
Then I carved a tiny notch, dead center on the upper end of the backside of the fingerboard, where it would contact the neck. After carving the notch in the fingerboard, I drilled a shallow 1/16″ hole in the neck, to accomodate a tiny nail.
That nail is temporarily installed, at an angle, to serve as a guide and an anchor while installing the fingerboard. (The hide glue is very slippery while it is still hot, and liquid. There is a tendency for the fingerboard to “drift” under the clamps, before the glue can gel.)
The notch in the fingerboard fits on the nail. The nail, then, serves as a temporary stop, so the fingerboard stays put. (I remove the nail after the glue has set.)
Fingerboard installed. Notice the tiny nail used to temporarily position the fingerboard.
Beginning Set-up
After a few more days, I began set-up. First, I installed the soundpost, saddle, nut, and end button. Next, I fit the pegs, and was ready for the bridge and the strings.
Nut installed: it will be filed lower before installing strings.
Saddle installed, still requiring final smoothing and retouch.
You can see in the above photo that the varnish was still very soft. Everywhere I touched it, it also resulted in my leaving fingerprints. I had to “French-polish” the whole instrument afterward, and let it hang until the varnish was harder. Then it would be easier to handle. (But it was good to have the set-up nearing completion, too.)
Completed five-string fiddle ready for varnish retouch.
Pegs
After the varnish had hardened a little more, I then installed the pegs.
Pegs installed, Front view.
Bass side view with Pegs.
Back Side View with Pegs.
Final Set-up
I installed the Bridge and Strings and Tailpiece, and then the fiddle was complete. I still let it hang in my dining room for a week or so, too, so that the varnish would continue to harden without damage.
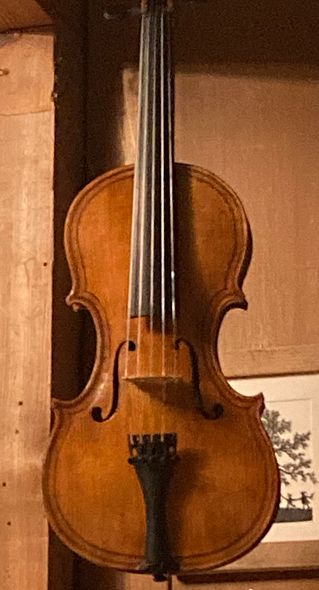
Hanging up to cure.
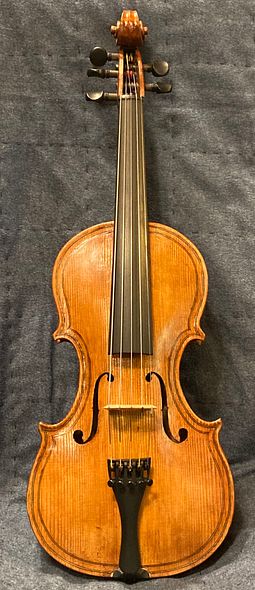
Final photos
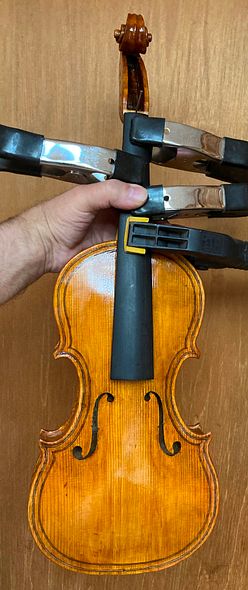
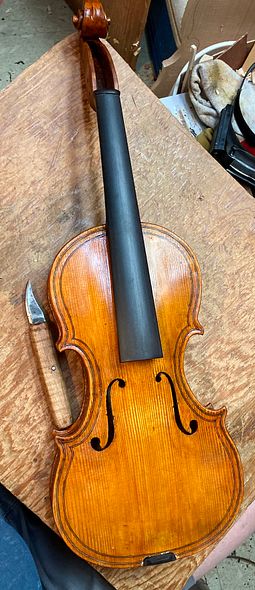
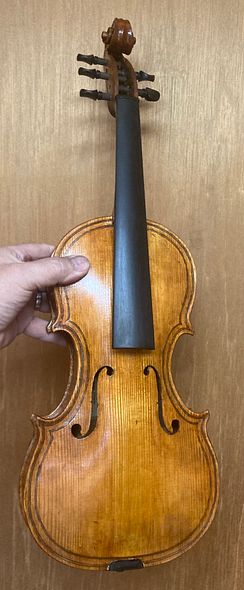
Final look at the Front before delivery.
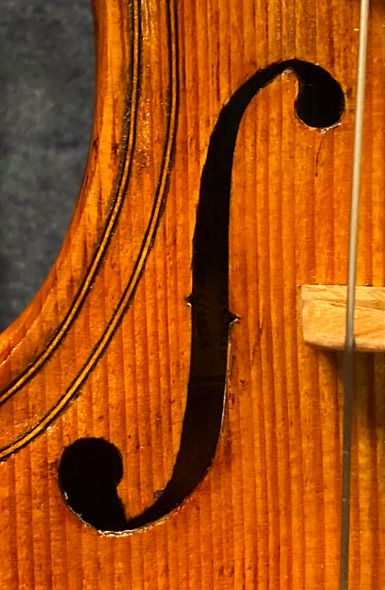
Close-up of the f-hole on the Oregon Douglas Fir Front.
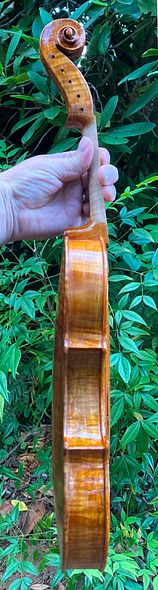
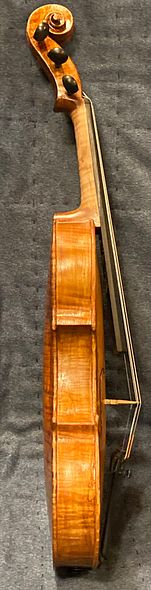
Bass side: final look before delivery.
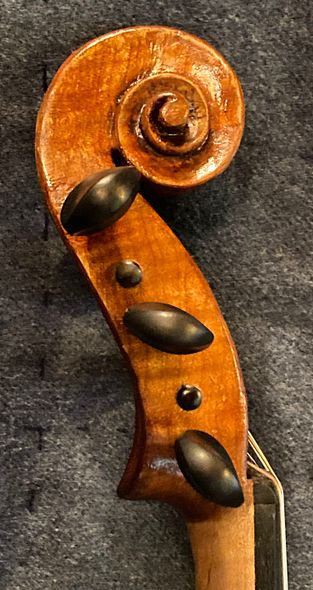
Close up of the Scroll.
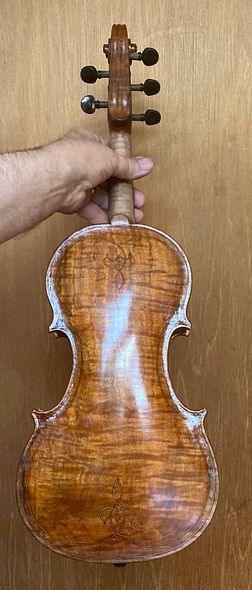
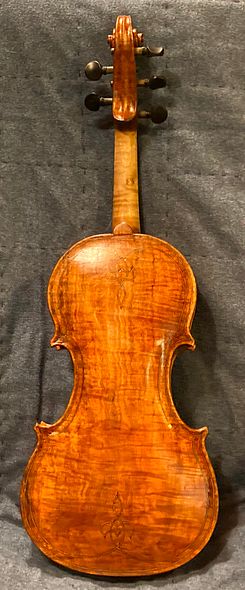
Final look at the back of the fiddle before delivery.
I prepared the instrument’s documents (Bill of Sale and Provenance Document) and afterward, when the varnish had cured for another two weeks, the customer took delivery at the end of July, 2023.
He was delighted, and played the instrument for a long time at my house. Further (which is a joy to me,) he has contacted me since then, expressing his continued joy in the new fiddle. That is the kind of thing that makes this work a great pleasure.
So, when I saw that there were two sections of “scrap” left over, near where the neck end of the five-string double bass back was cut out, I realized that a 5-string fiddle back could fit into each of those two pieces.
So, I salvaged the wood, and not only got two backs, but also the neck blanks for two 5-string fiddles.
Five-string fiddle back cut from the scrap left from a 5-string double bass back.
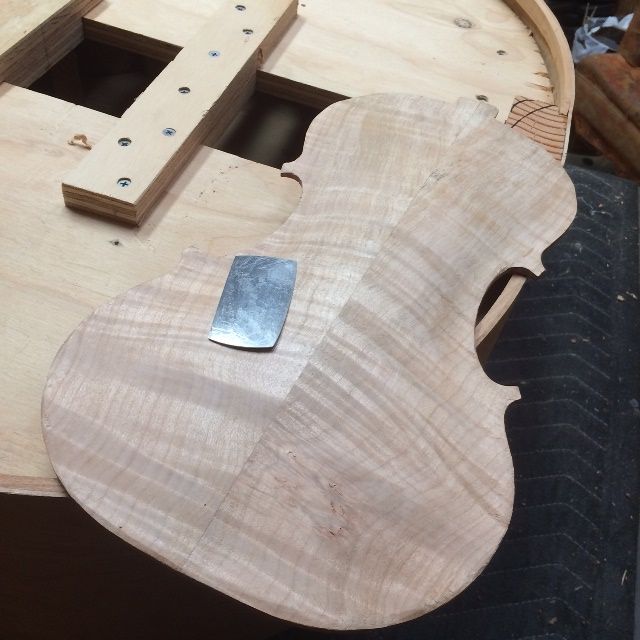
Arching the Plate
Five string fiddle begun, with back and neck from scrap from a 5-string double bass back.
I really like the look of the Oregon Big Leaf Maple back wood. I enjoyed arching the plate.
Five-string fiddle back arching nearly complete. It is sitting on the five-string double bass garland whose back provided the scrap for the fiddle-back.
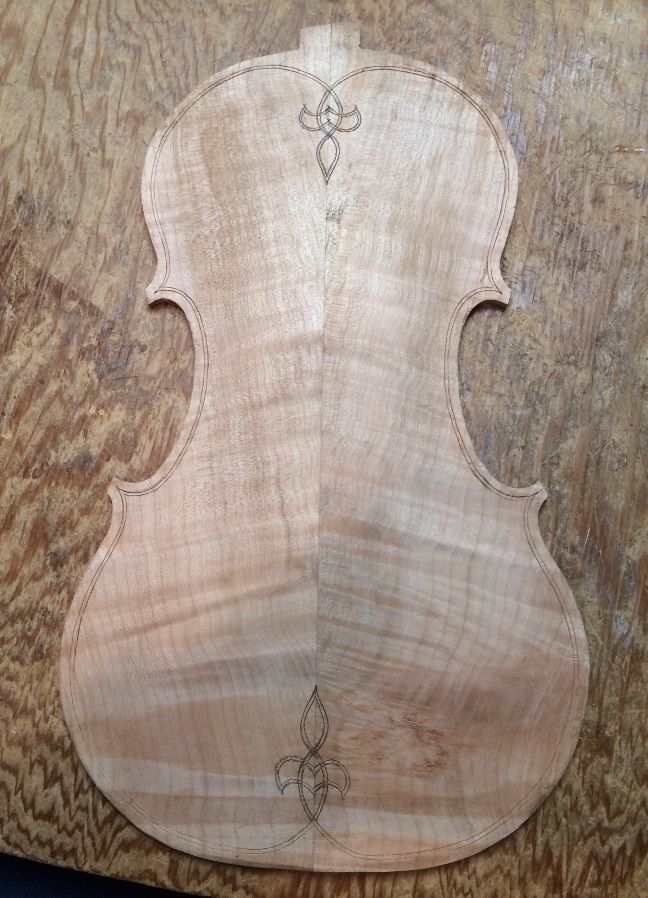
Purfling the Plate
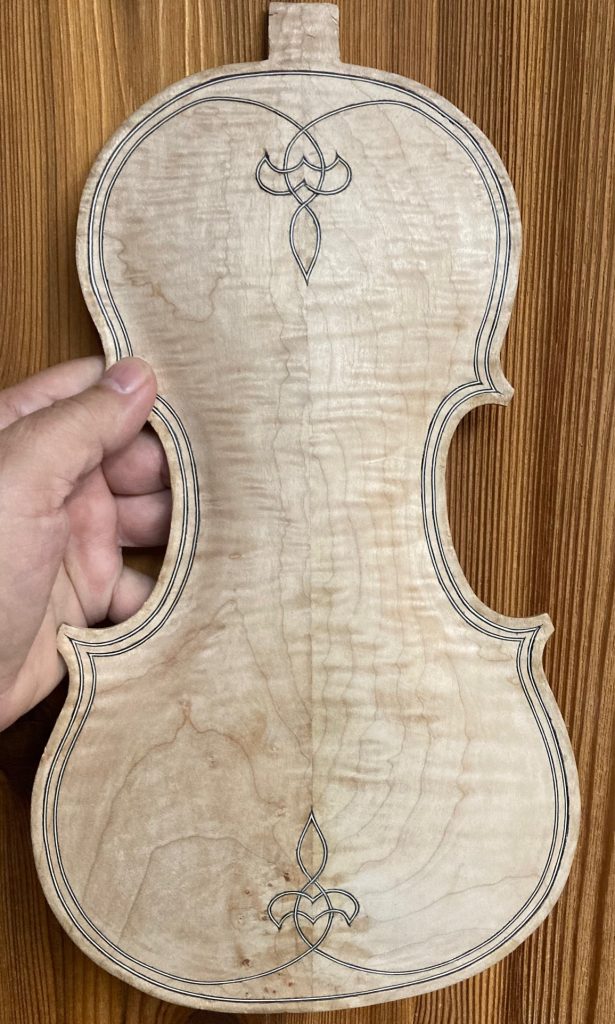
On all my five-string instruments I usually include a purfling weave. It is a modified fleur-de-lis I designed for my first five-string fiddle and have continued to use on subsequent work.
Five-string fiddle back with purfling slots incised and ready to complete.
In this photo, the slots for the purfling have been incised, but not cut deeply, so the next step is to slice deeply enough that the waste wood can be removed from between the cuts, and the purfling strips inlaid in the resulting slot.
I will include the purfling process in subsequent posts.
It has been a frustrating series of weeks: all the usual responsibilities, house guests, etc., plus a few unexpected items. The lawn tractor suddenly quit mowing, though it ran fine. We narrowed it down to being a bad PTO clutch, so that is just another thing to take apart and replace. Guess that’s what happens when you use 30-year-old equipment. 🙂
Then, two days ago, my beloved better half, Ann, discovered that the side porch steps are in advanced stages of rot…so, today, we went and bought all the pressure-treated lumber to replace them. They, too, have been in place for over 30 years, so, I guess, they have served well.
Progress on the 5-String Fiddles
I did manage to make a little progress on some of the acoustic five-string fiddles I had begun, however:
All the linings are in place for two of the instruments (violin and the 14-7/8″ viola.)
The front and back plates are traced and cut out for both of those instruments.
The front plate graduations are complete for the 14″ viola, and
The f-holes are cut out on the 14″ viola, but not refined.
So, this is where things stand, at the moment:
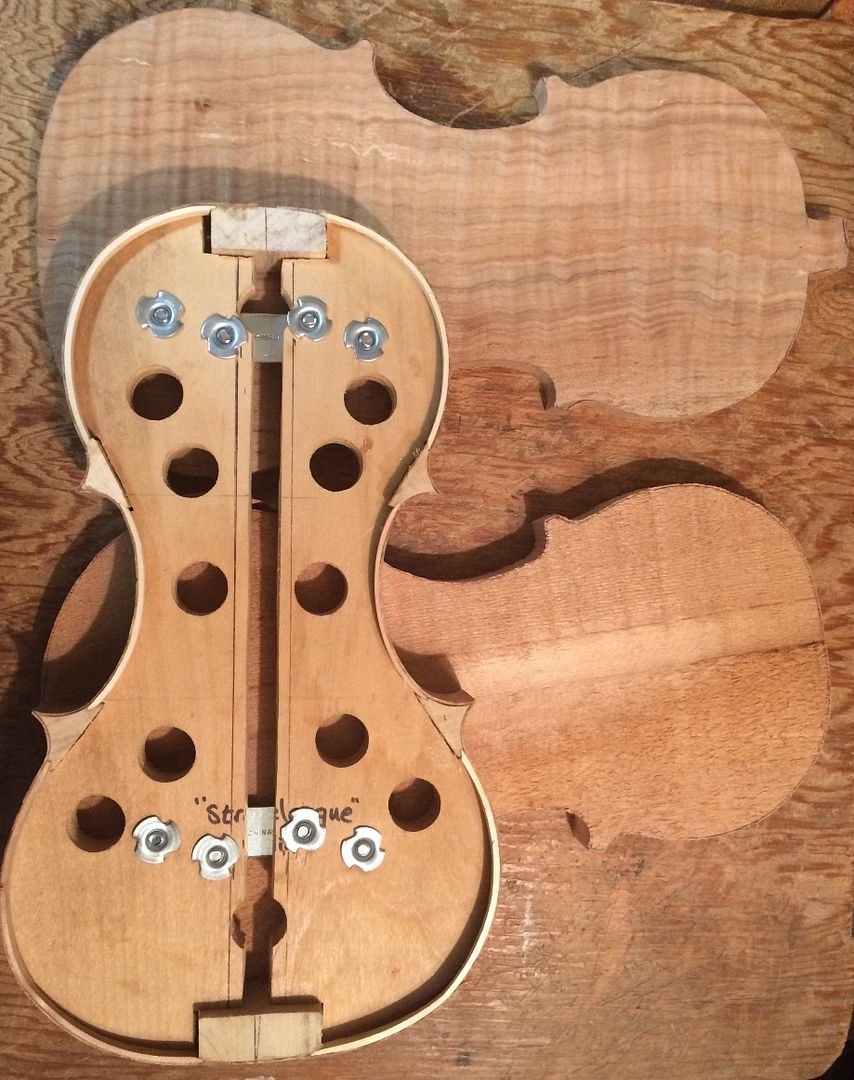
Here is the “Strobelesque” garland with its front and back plates:
Rib Garland and rough-cut plates for the “Strobelesque” fiddle.
No carving at all has been done on the plates, and the Sitka Spruce front plate is still nearly an inch thick. I will plane it down before I begin arching, of course. I do like the look of the spalted maple back and ribs. This maple was from an old Big Leaf Maple tree on the property where Ann grew up. It had begun to show signs of decay, and was removed for safety’s sake. Too bad for the loss of the tree, but it is nice wood.
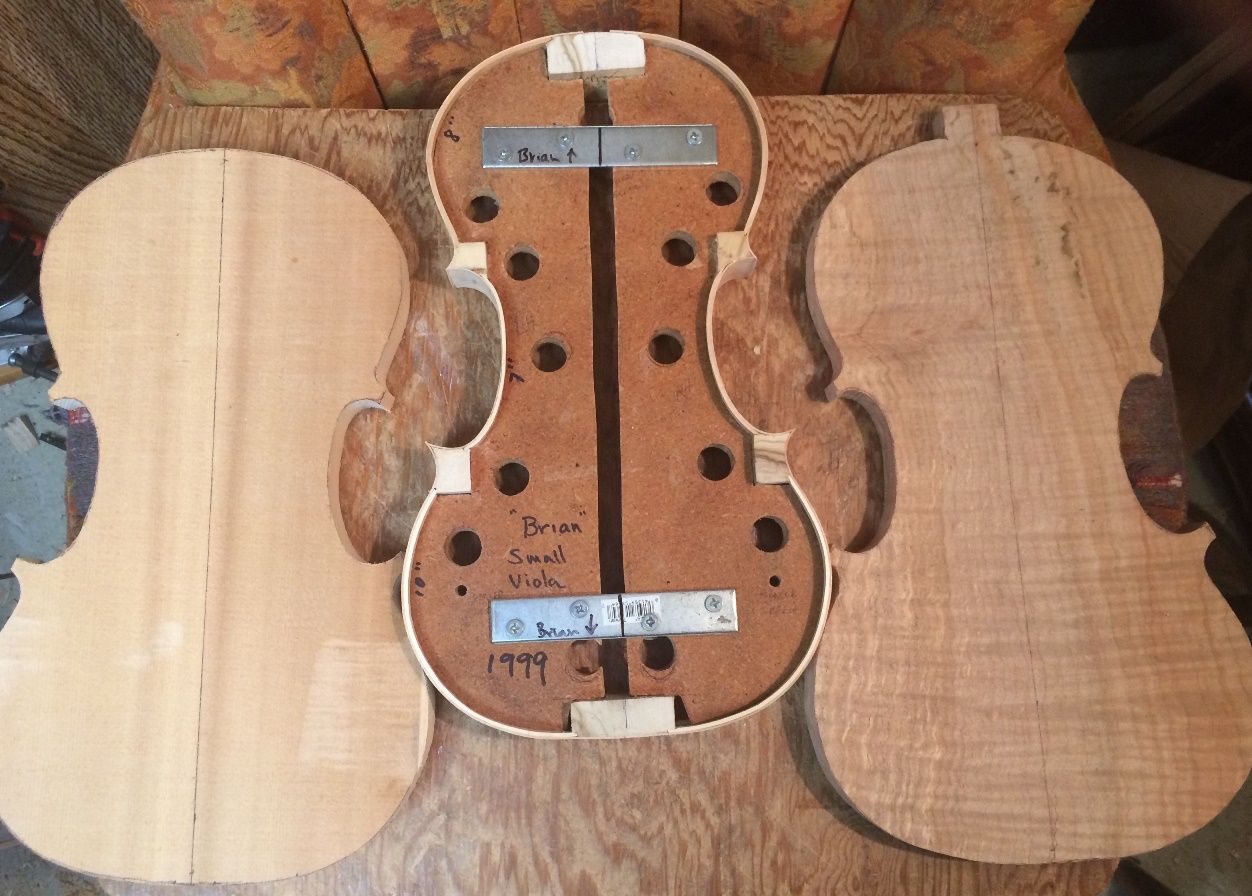
Here is the 14-7/8″ Viola garland with its front and back plates.
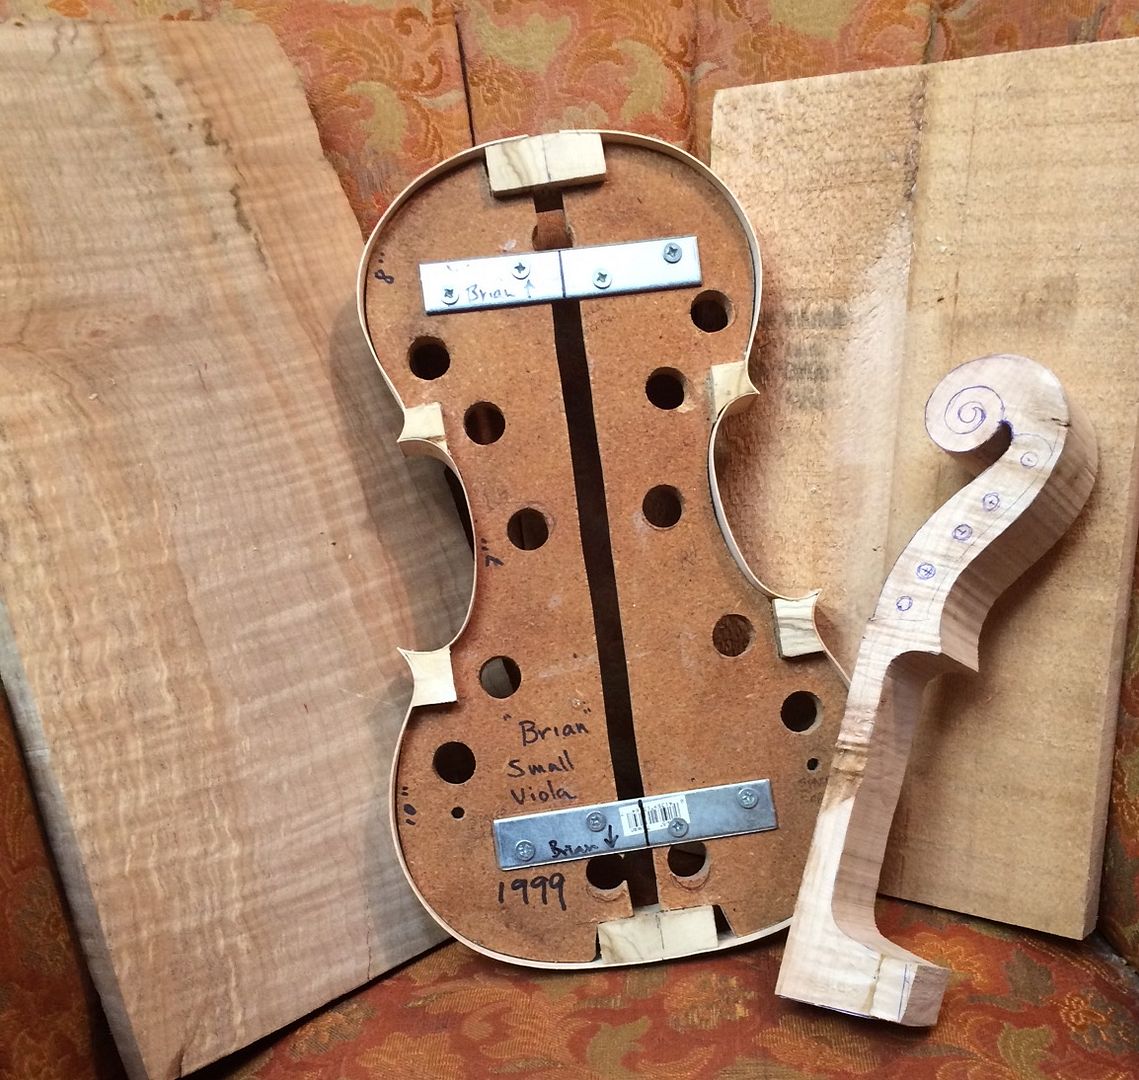
Rib garland with front and back plates for a 14-7/8″ 5-string viola.
This one is my own design. In fact, it was the very first form I ever made, thinking I was just going to make a viola for my youngest son (whose name is on the form, along with the date: 1999.) As it happened, I discovered that lutherie is addictive, and I have been building instruments ever since. 🙂
The center-lines on both plates are ink, not a glue-line: this instrument boasts both a one-piece Spalted (Big-Leaf) Maple back plate (also from the tree at Ann’s childhood home) and a one-piece Sitka Spruce front plate.
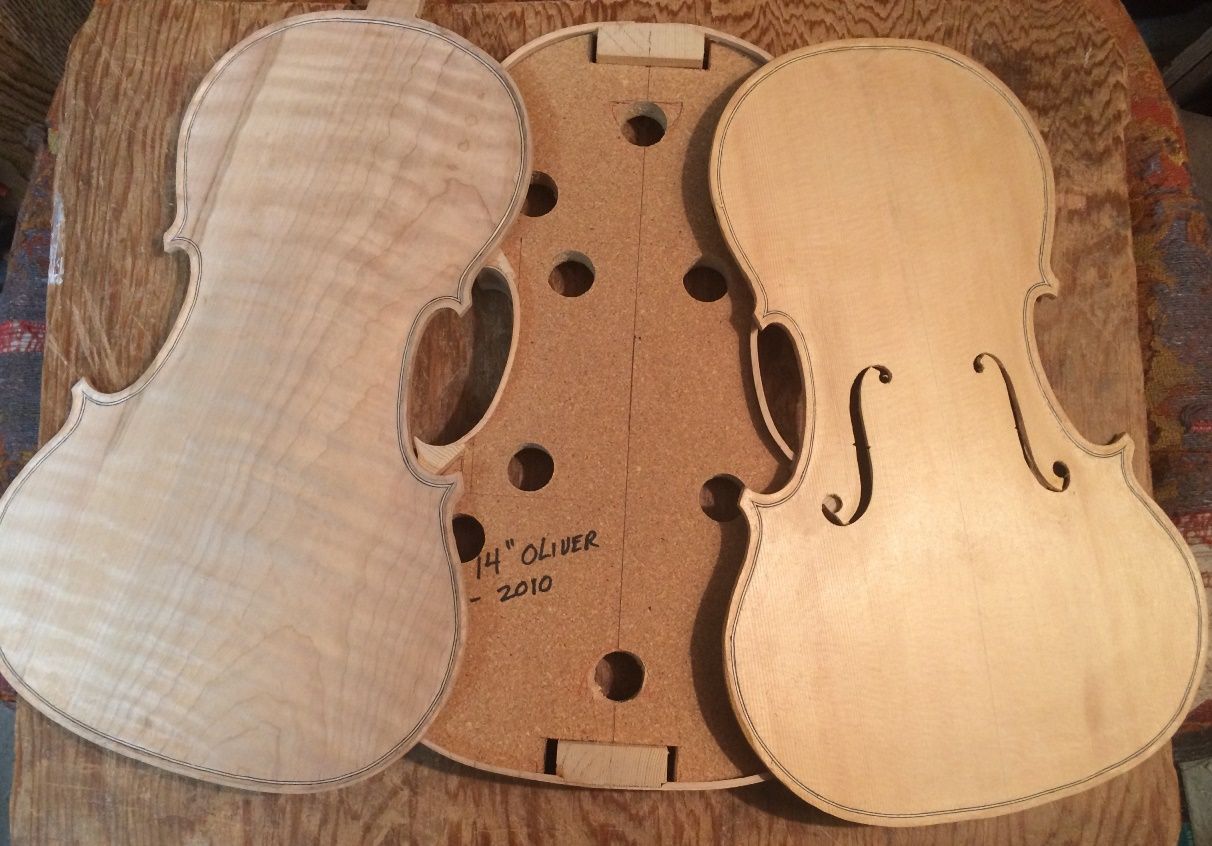
Here is the progress on the 14″ Viola:
Rib garland and nearly completed plates for a 14″ five-string viola.
This one is my own design, too: it is the same length as a standard violin, but much wider in the lower bouts, and deeper in the ribs. It will be interesting to see how it works as a five-string fiddle. (This is a first.) This one has an Englemann Spruce front plate and a one-piece Big Leaf Maple back from a log I was given by Terry Howell, years ago.
I will post more reports as the work takes place. Feel free to contact me if you have questions.
The last time I presented anything about these instruments, I think it was on another site, so– here is how they looked at that time (earlier this week, perhaps.)
Blocks installed, and necks cut out.
In the above photo, all you can see is three violin forms, with blocks installed, and some of the wood that will go into each, including the necks. I already had a fourth instrument (a small viola) begun, which was not in the picture.
So, here is that 14″ 5-string viola, well on the way to completion, but still with a long way to go…as of today.
14″ viola 5-string in progress.
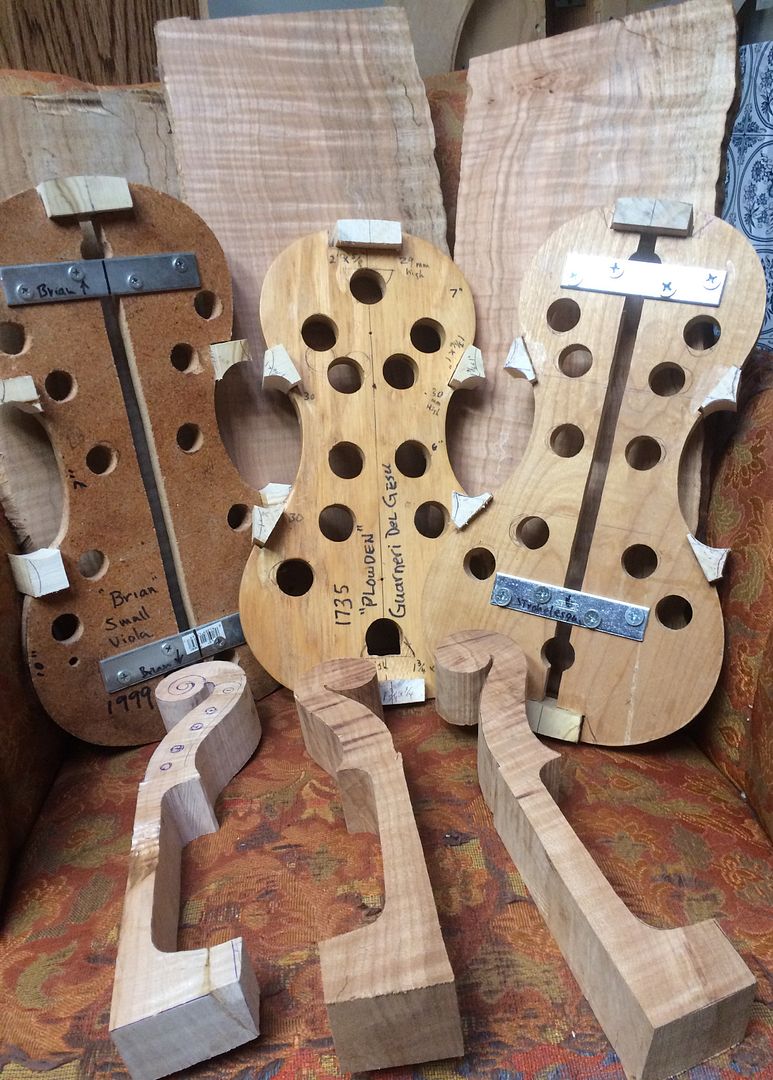
And, as promised, here is a progress report on the other three:
5-string 14-7/8″ viola in progress.
On this instrument, the ribs are installed, but no linings as yet, and, while the Maple and Spruce have been selected for the front and back plates, they are essentially untouched. The neck has been traced out and the outline cut, but it, too, has far to go.
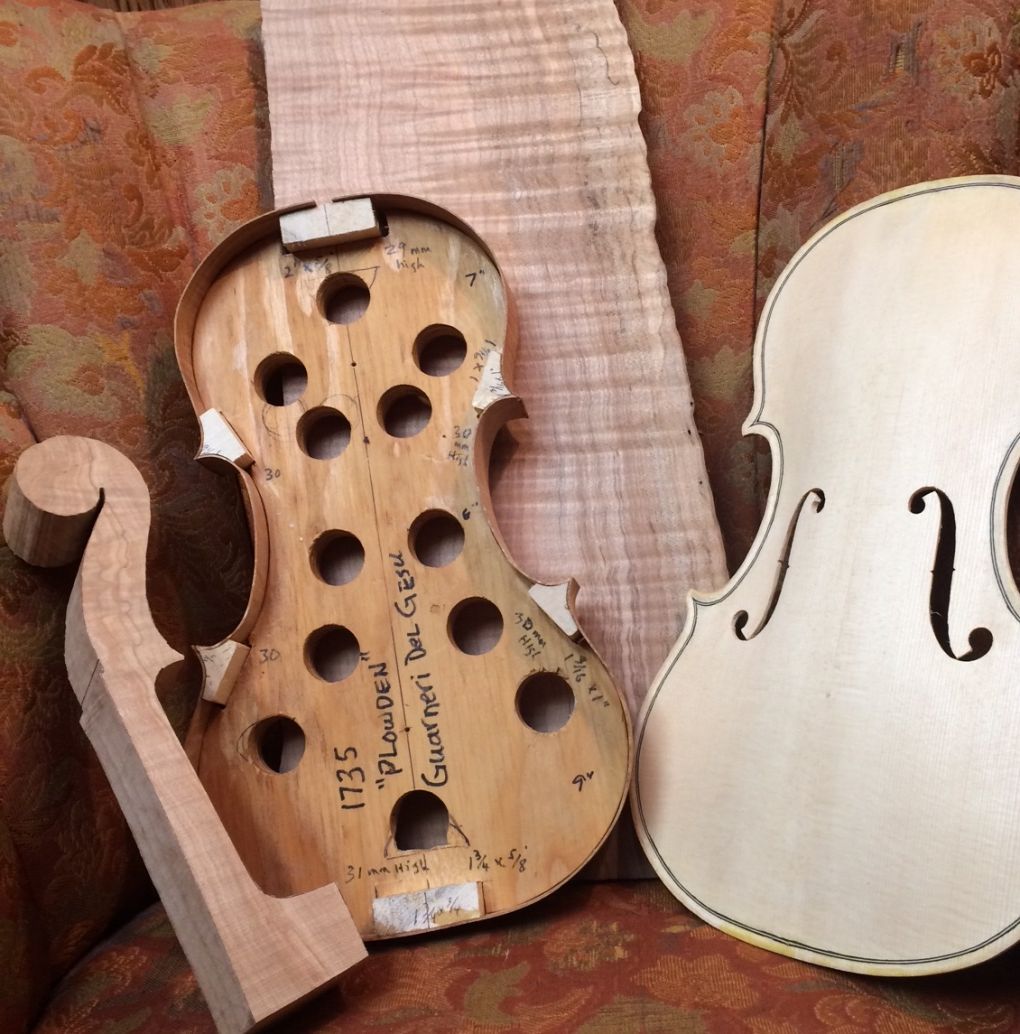
Guarneri-form 5-string fiddle in progress.
For this instrument, a five-string fiddle being built on the form of the 1735 “Plowden” Guarneri del Gesu, I had a top plate left from a previous project on the same form, so I opted to use it, with the spalted Big Leaf Maple back and ribs. No linings, yet, but they have been bent and are ready to install. The neck is from a different Big Leaf Maple, which came from the yard of the property where my wife grew up.
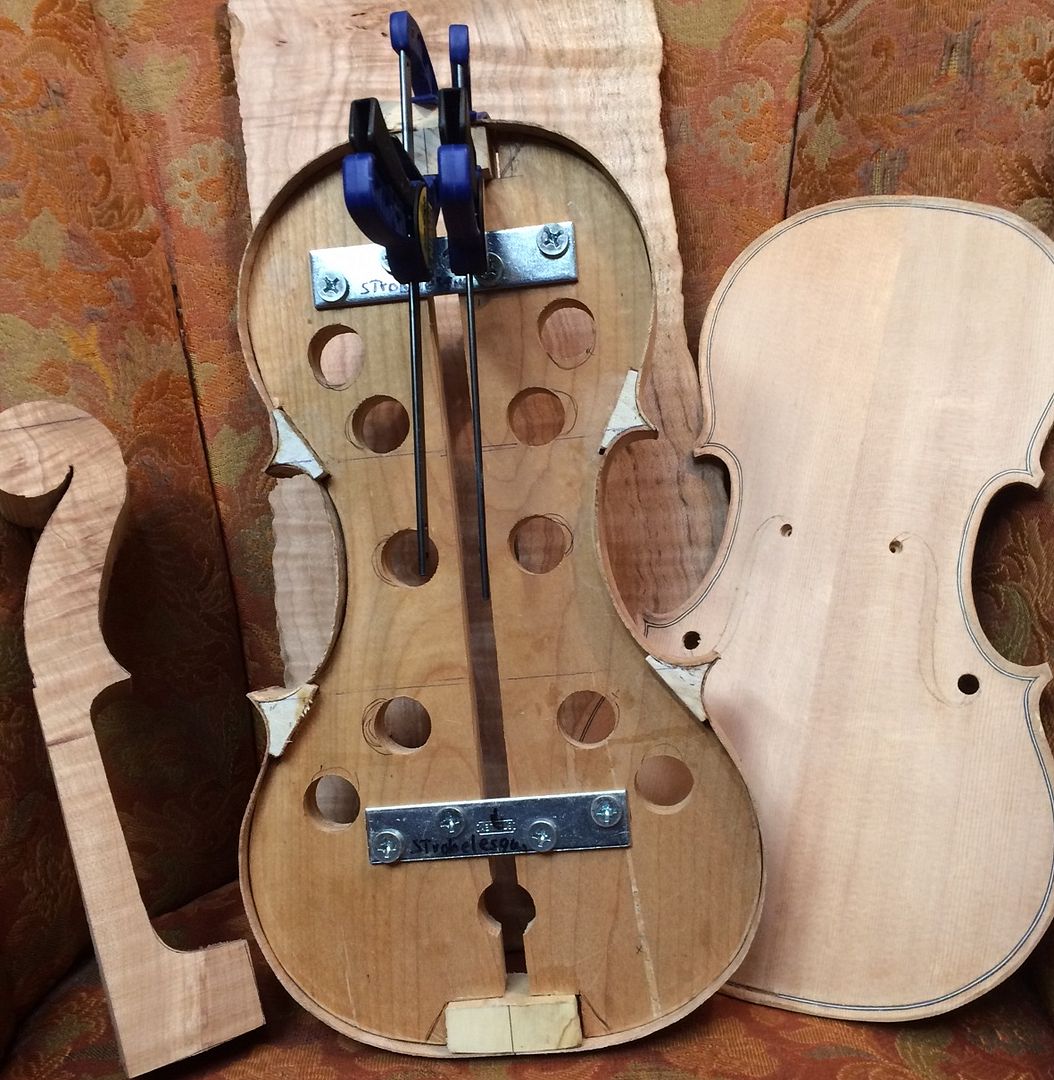
5-string fiddle on “Strobelesque” form, in progress.
Henry (Senior) would not have recognized this form, but it was loosely derived from the form in Henry Strobel’s book, “Violin-making, Step-by-Step”…so it is called “Strobelesque.” In this photo, the glue was not dry on the treble-side upper rib, but I didn’t want to wait, so I took the photo with the clamps still in place. Again, no linings, yet, but they are bent and ready to install. Here, too, I had a partially completed top plate, and elected to use it. The back and sides are heavily spalted Big Leaf Maple, and the neck is also Big Leaf Maple, though from a different tree…the one in my Father-in-Law’s yard. A few years ago, they decided that tree had enough rot to be dangerous, so they took it out, but it provided wood for a number of instruments.
My son Brian Bishop builds high-quality guitars, and managed to salvage several guitar sets beside the various violin and viola sets I saved. I got one cello set out of it, too…it will become a cello for my beloved wife.


.JPG)
.JPG)
 Blocks installed, and necks cut out.