I would love to just say, “There! All Done!” but the fact is, I will always be able to see little things I wish I could change, and perhaps could not see until it was pretty much too late. That’s OK…it’s part of being a maker. I just have to know when it is time to say, “That’s as far as I am going!” and call it good.
Varnish
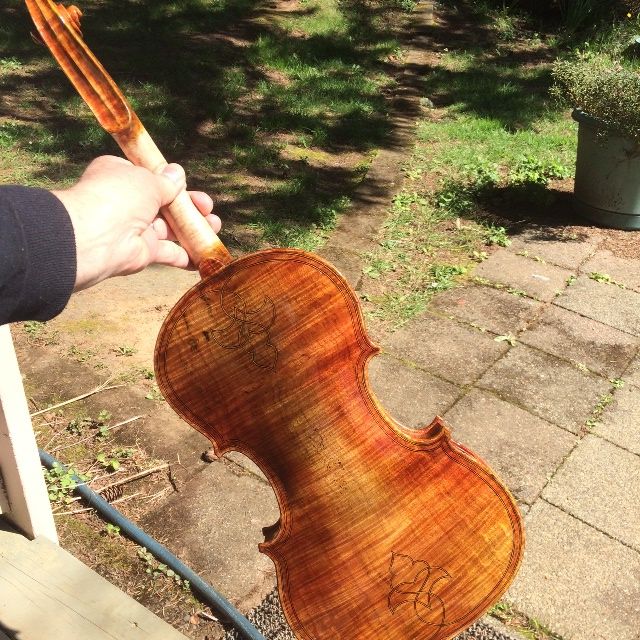
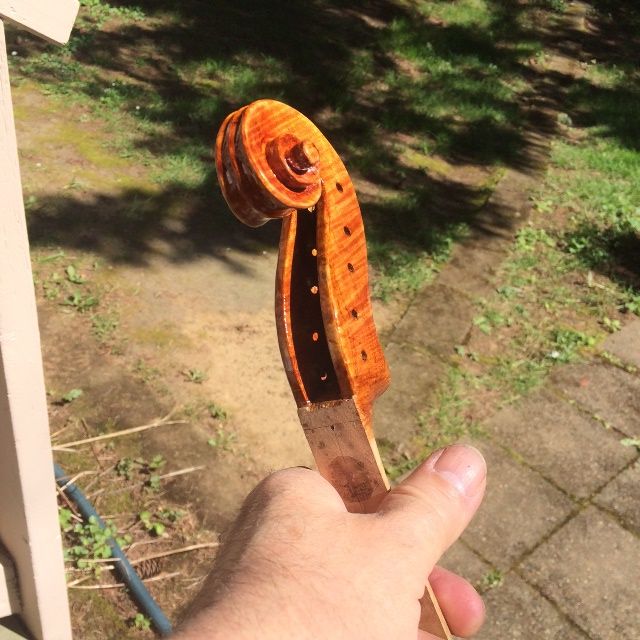
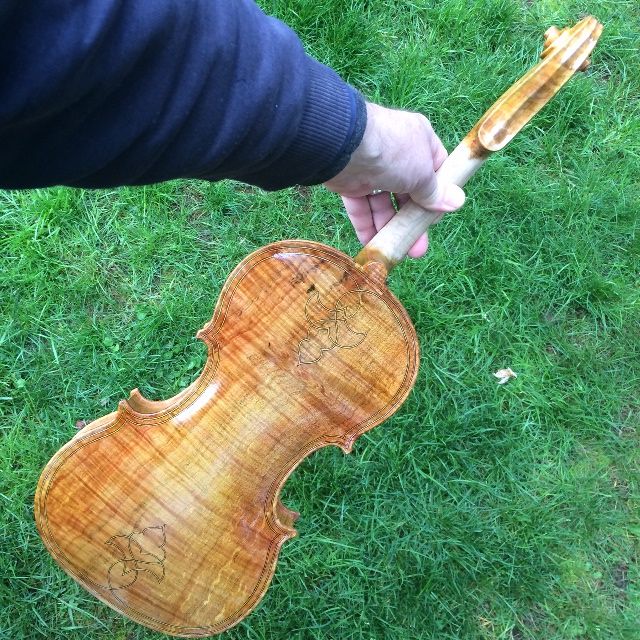
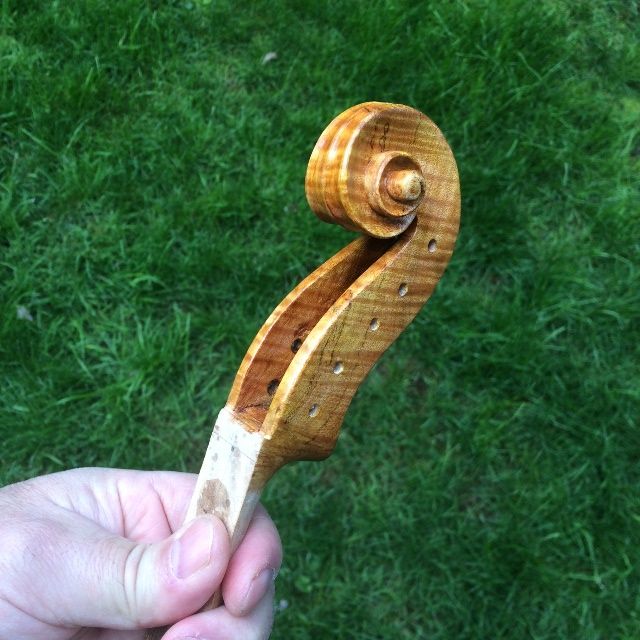
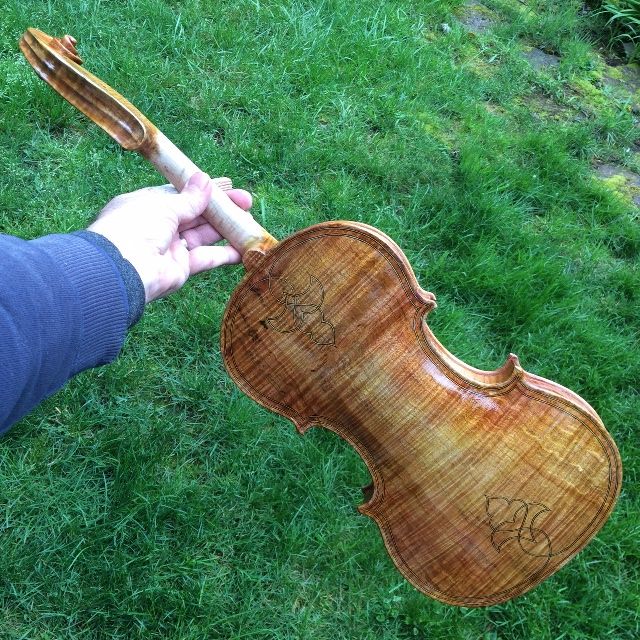
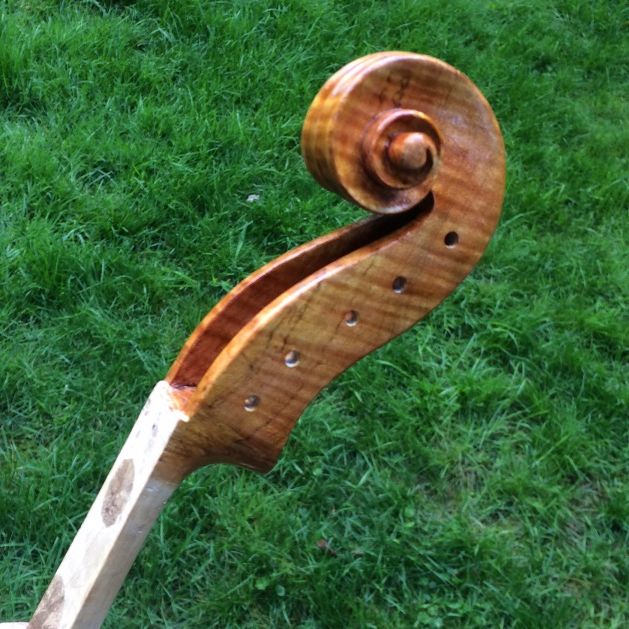
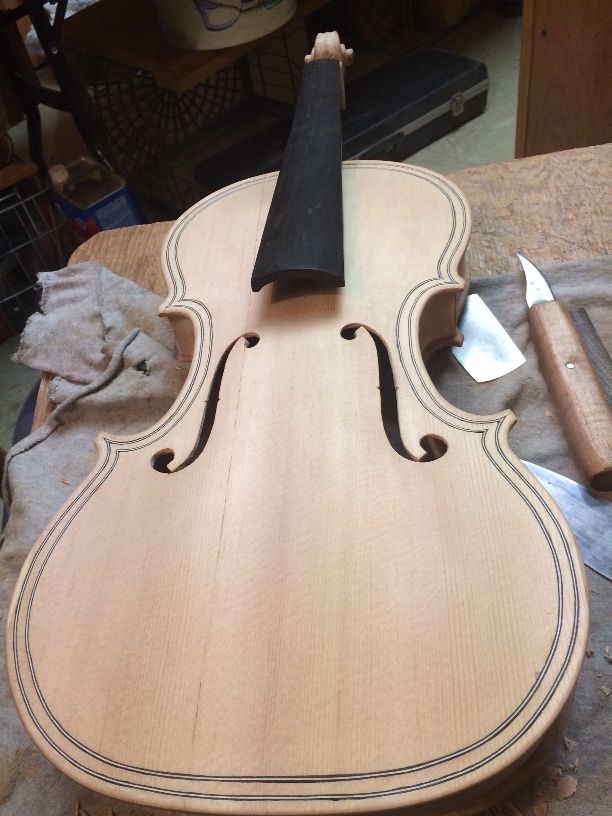
Last time, I shared how one of those decisions was how dark to make the varnish. I came to that decision about two coats past the last time I posted, so I allowed the varnish to harden for about a week, and then gave it a final once-over, and began the set-up procedures. Here is how it looked before I began set-up:
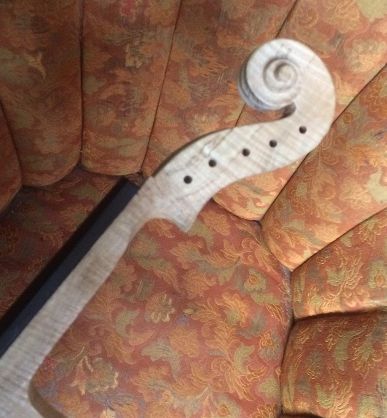
Final varnish front view.
Final Varnish, Back View.
Final varnish, Scroll.
The varnish took several days to harden enough to work on set-up, and even when I thought it was ready, it still easily took fingerprints. 🙁 I guess I should have known. Anyhow, it means there will be some rubbing out to be done after set-up is complete, and the varnish is even harder.
Set-up
I did not take many photos during set-up. Set-up includes:
Re-installing the Fingerboard,
Installing the nut,
Installing the saddle,
Installing pegs,
Fitting the soundpost,
Fitting the bridge,
Installing the end-button,
Installing and adjusting the tailpiece and strings,
Installing the chinrest, and
Playing while adjusting for sound (balance, tone, etc.)
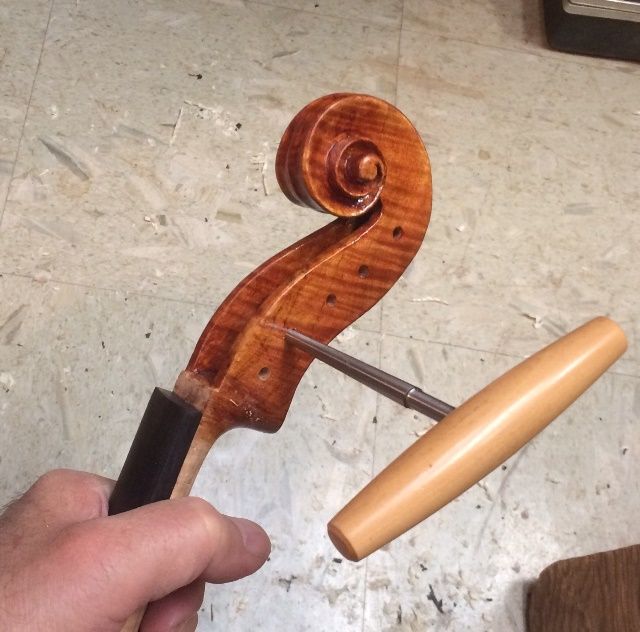
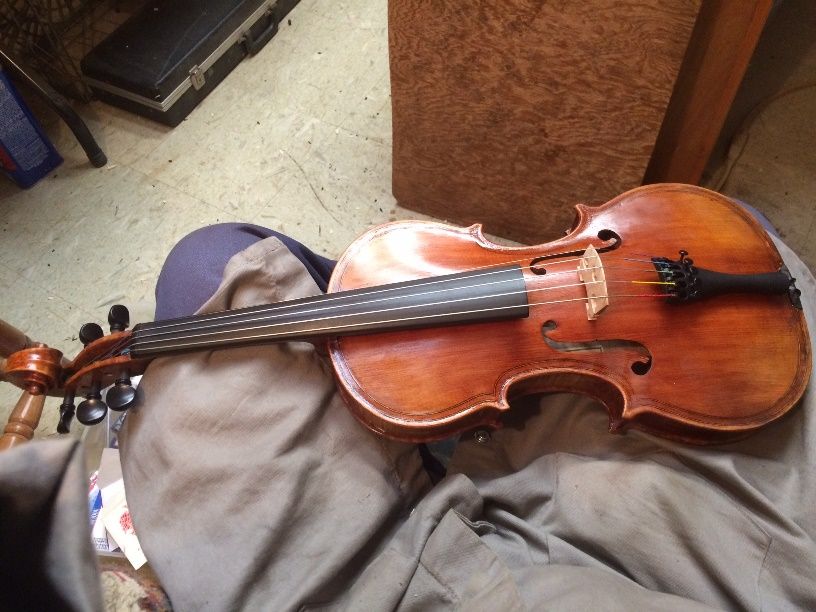
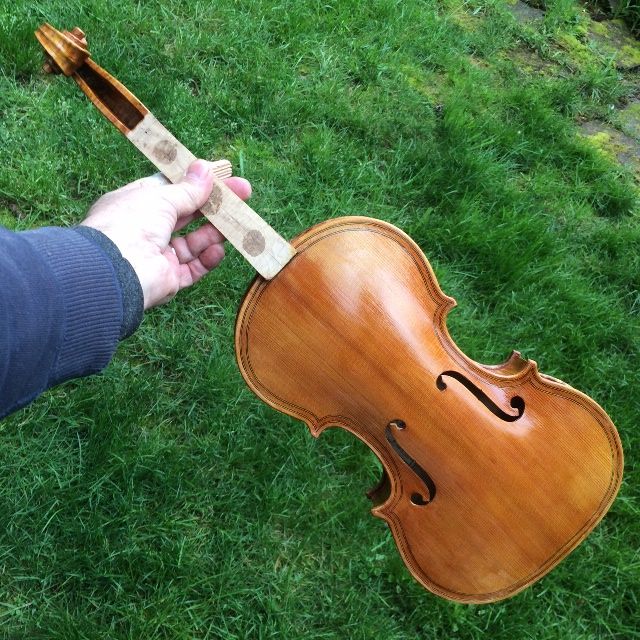
So, I had a fairly frustrating day, wherein it seemed nothing went right on the first try. It took me twice as long as it should have, but I got it done. I only took a few photos:
Fingerboard installed: Beginning to ream peg holes.
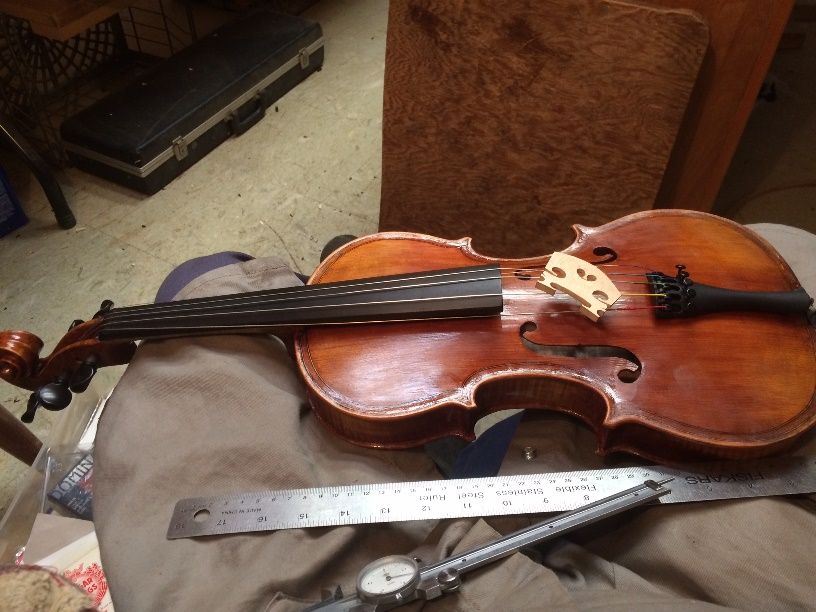
Pegs, nut, saddle, end-button and soundpost installed. Still working on the bridge.
Almost done with set-up: chinrest and final adjustments remaining.
Sound
The 5-string 15″ viola had good sound from the first moment, but, as usual, it required some sound-post adjustment to achieve balance across all five strings. A sharp-eyed viewer also may notice all the mismatched strings; Jargar C, heavy Dominant G, D and A, and a regular Dominant E. I was unable to find the string sets I had bought recently (found them later), so, for the moment I simply used what I had, and adjusted accordingly. And, surprisingly, it sounded quite good.
It has a huge voice compared to my violin-size five-string fiddles, and except for the C, thebalance is very good. I adjusted the soundpost to bring the C-string into line, and it is much better, now. I am anxious to try an actual “set” of strings on it, to see what I can achieve in terms of balance and over-all tone.
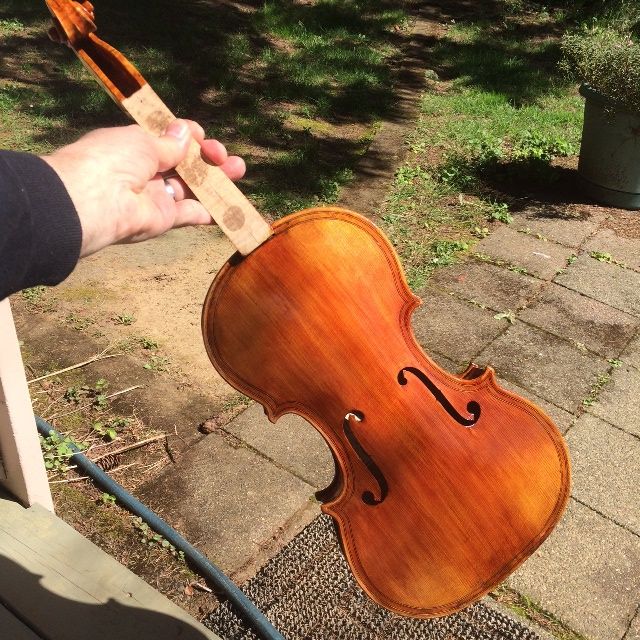
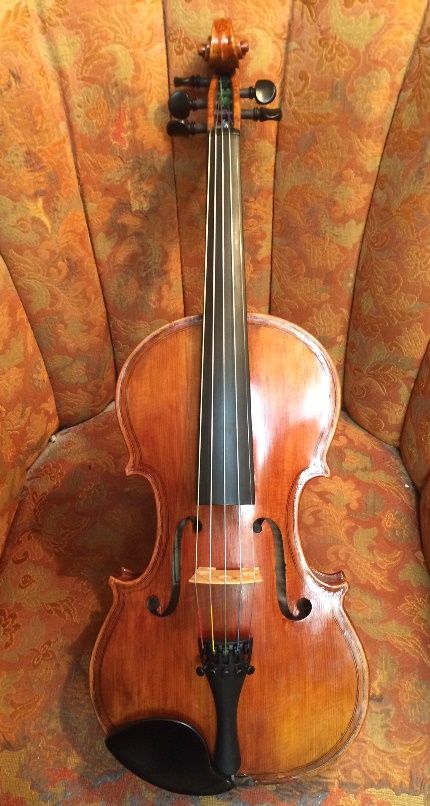
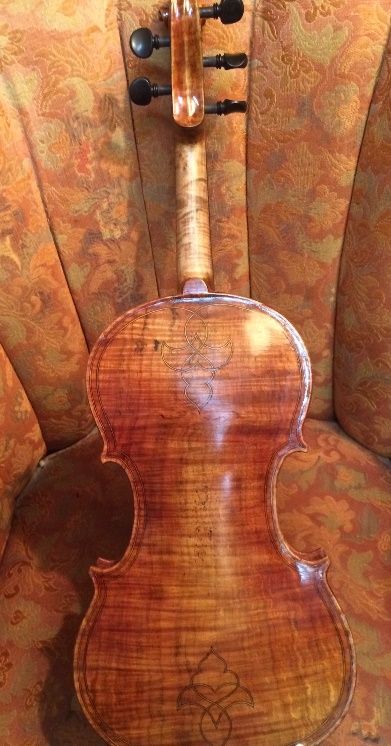
Anyway, here is what it looked like immediately after full set-up:
Front view of completed 15″ 5-string viola.
Back view of completed 15″ 5-string Viola.
It still will need a final rub-down, but for now, I am playing it and just letting it finish hardening.
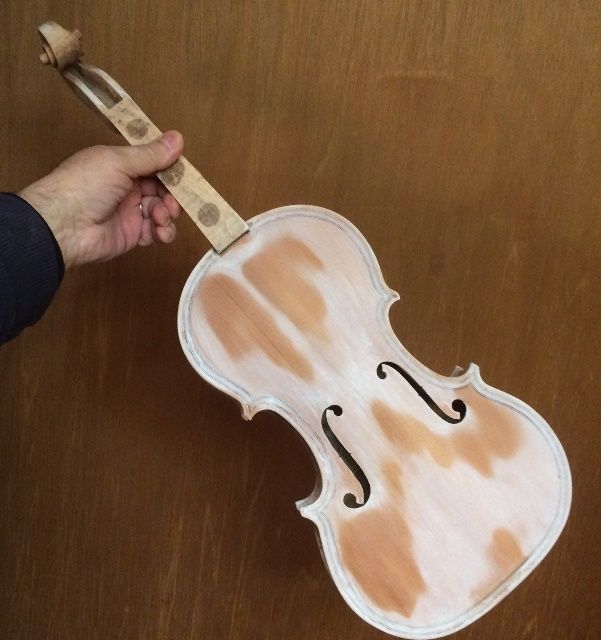
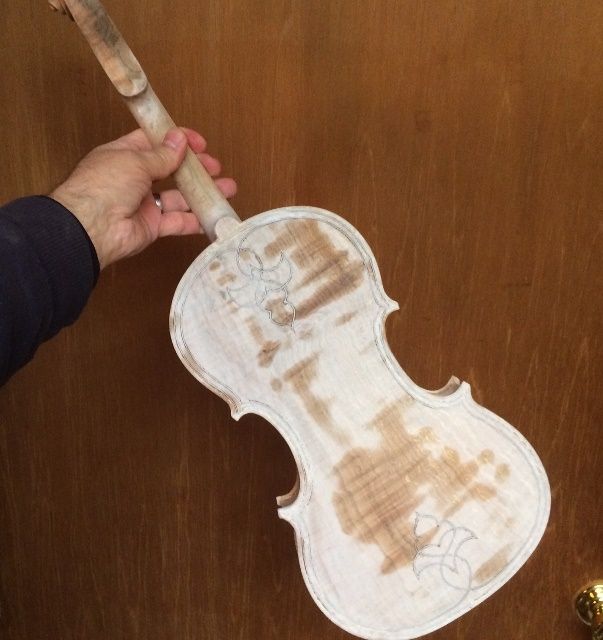
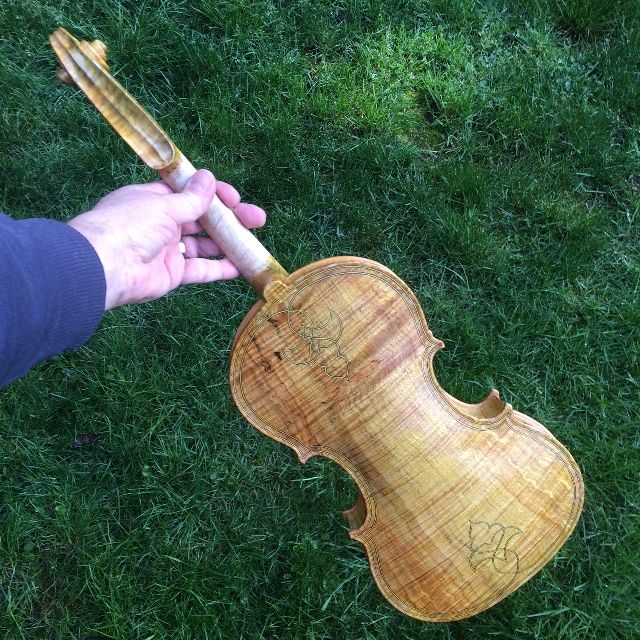
On my last post, I had the base coat of yellow varnish applied and dry, so the next step would be to sand it smooth, removing any sags, runs, “orange-peel,” or other flaws, so that the color coats would lie down smooth and flat.
After sanding, and rubbing the dust away with a rag, I added heavily colored varnish, in very thin coats:
1st color coat, front view.
1st color coat, side view.
1st color coat, back view.
1st color coat, scroll.
I let the varnish dry for a day, then sanded all over with 400-grit, to remove any flaws, and added a second color coat:
2nd color coat, front view.
2nd color coat, side view.
2nd color coat, back view.
2nd color coat, scroll.
Decisions, Decisions!
After this, the challenge becomes “knowing when to stop.” (I like the looks of the instrument right now, but perhaps I would like it better darker. On the other hand, if I don’t like it better darker, I will be stuck with it.) So I have to spend some time looking at it in different lighting, and from different angles.
When I decide that I have enough color applied, I will add a clear coat or two, to anchor all the color, and protect it from wear. Then it will be set-up time!
The raw wood is quite porous, and would soak up varnish like a sponge…which would dampen the viola sound. So we don’t want that to happen! The solution to the problem seems to be to fill the pores of the wood with very fine particles of mineral of some sort. I don’t particularly want something that would form a concretion, as some makers have done, because I think that also changes the sound, but in a different way.
I used Gypsum, ground very fine in a mortar, then suspended in water, and daubed onto the surface; then vigorously rubbed into the pores. After rubbing the mineral into the entire surface (except the “handle” area of the neck) I used a damp cloth to rub all the excess gypsum back off. While it is wet, it just looks like wet wood, but as it dries, it turns chalk-white, assuring me that the surface is truly saturated with the particles.
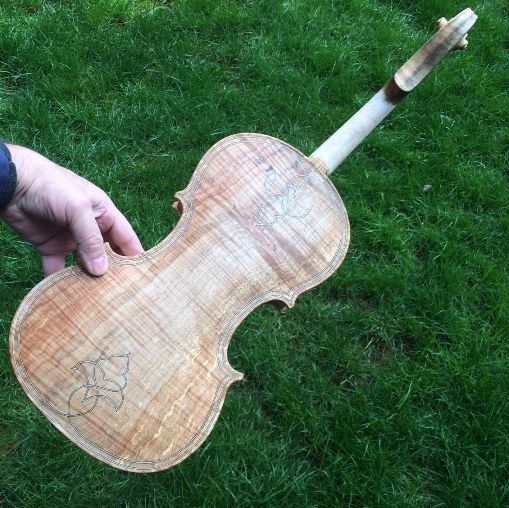
Partially dry mineral ground, front side.
Partially dry mineral ground, back side.
Then, after the gypsum suspension is completely dry, I use fine sandpaper to remove any excess mineral from the surface, so that there are no thick patches of mineral.
Dry Mineral ground, rubbed clean.
Locking the mineral ground in the wood: Sealer
As you can see in the above photograph, the mineral isstill saturating the surface, and obscuring the grain. However, when I apply the sealer (in this case, a mixture of rosin, turpentine, and alcohol) the mineral ground will become completely transparent, and will permanently disappear. The varnish will then be free to show off the grain of the wood.
Front side with sealer.
Side with sealer.
Back with sealer.
Making it Shine: Beginning the varnish
It takes a while for the sealer to dry, because of the turpentine content, but as it dries, the alcohol evaporates first, then the turpentine, leaving the rosin in the wood (which is where rosin comes from in the first place, of course) locking the gypsum particles in place. and further sealing the wood against saturation with varnish.
Before proceeding to the varnish, I carefully sanded all over, to clean up any spots that still felt rough or sticky, then wiped the entire instrument down with alcohol to remove any rosin residue from the surface.
Then I applied a first coat of yellow varnish, as I have noticed that many of the old instruments seem to have something yellow under the darker red or brown varnish. You canespecially see it in the areas where the colored varnish has worn thin, or is completely gone. (Not all of them have this color, but I like it, so that is what I have chosen to do.)
So, here is the base coat of yellow varnish:
Base coat of yellow varnish on front side.
Base coat of yellow varnish on the side.
Base coat of yellow varnish on the back side. The grain of the spalted maple is showing better, again.
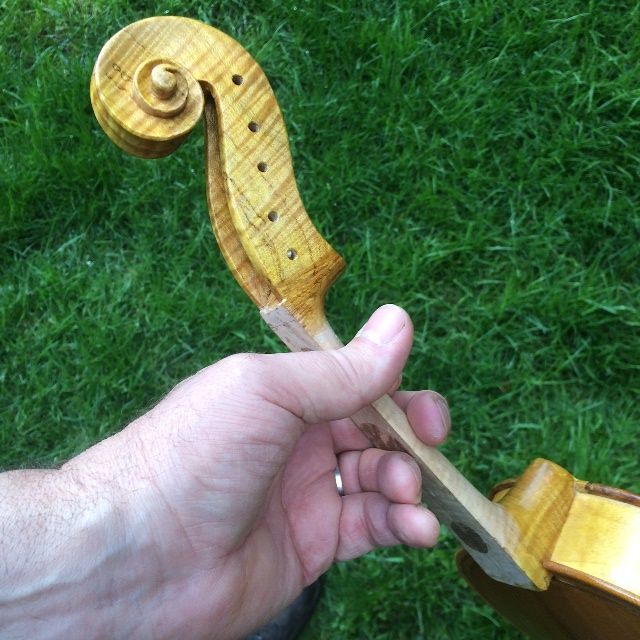
Base coat of yellow varnish on scroll and neck heel.
I do not apply varnish to the “handle” portion of the neck until everything else is completely done. After everything else is done, including set-up, I will rub down the handle area with 400-grit abrasive one last time, and then put about a dime-sized dot of shellac on a rag, on the end of my finger, and vigorously rub it into the wood of the handle area, until it is completely dry. This somewhat seals the wood against sweat and dirt, without leaving a heavy, “slick” coating that would cause drag on a player’s hand.
The rest of the varnish coats will be building color toward the final look of the instrument. I will include them in another post.
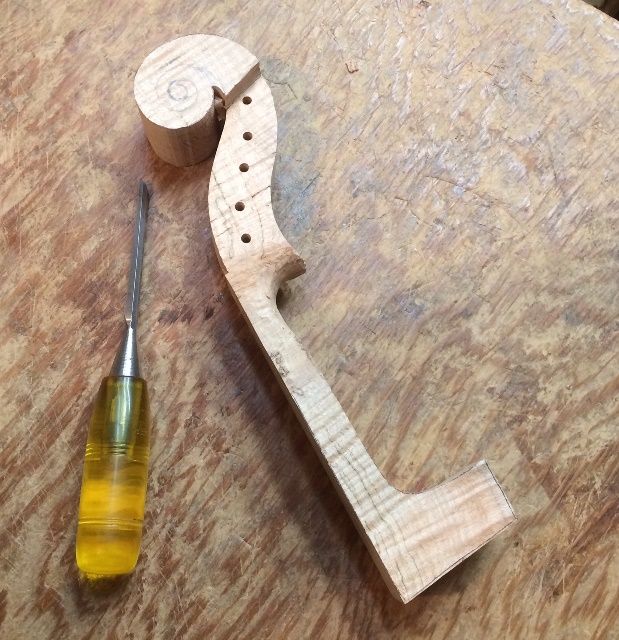
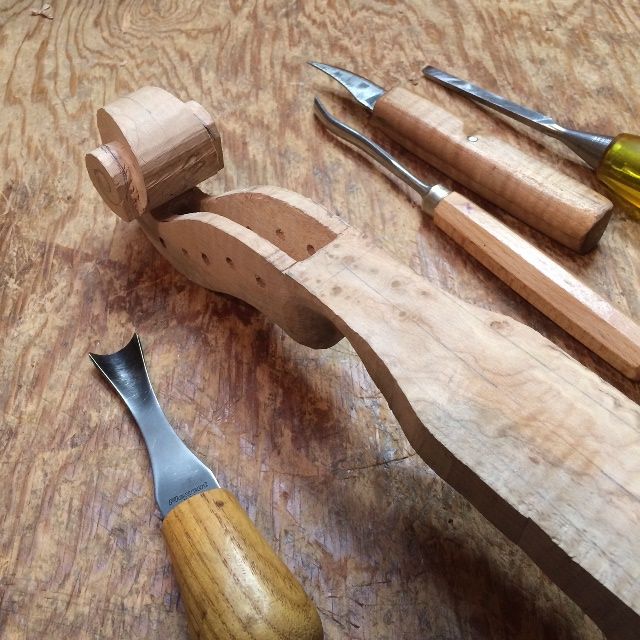
When I first tried making an instrument (a viola) I did not know about using a saw to start, and I carved the entire scroll by hand with a set of small gouges my wife had presented me with a few years earlier. That took a long time, and it was very difficult to keep both sides symmetrical with one another.
Later, I saw a series of photos posted by a maker in Brasil, who showed how he used a thin-bladed saw to outline the scroll, making many small cuts, then removing the waste wood with a combination of saw and gouges. That was a bit of a revelation, and I enthusiastically embraced the change. It did, however, take a bit of practice to master the concept.
So here is the process:
{You can see the dark lines and spots in the wood. This is called “spalting” and is very popular with some people, though it actually is caused by a fungus. This particular Big Leaf Maple billet, along with that of the back, was salvaged from an old tree taken down on my wife’s family’s property, and is quite heavily spalted.)
First, I carefully laid out both sides of the scroll, then I used my bandsaw to cut out the whole “footprint” of the scroll and neck.
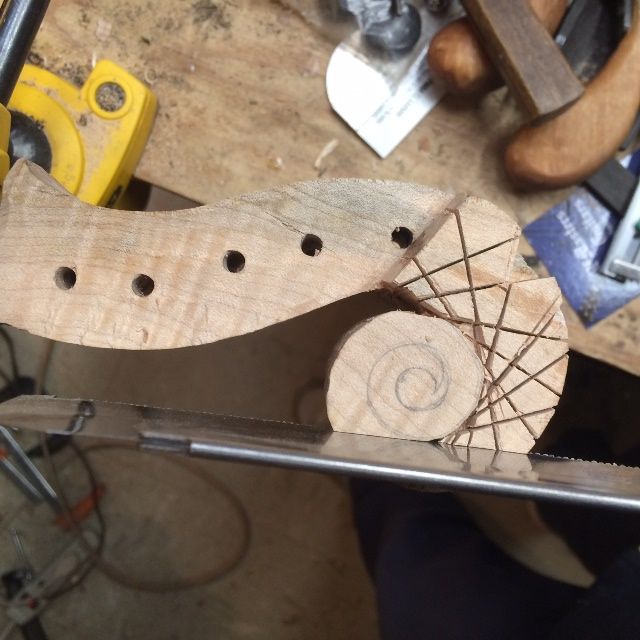
Then I went back and laid out the volute, including the centerline, on the outside of the curve, all the way around, so I know what the scroll should look like from the front and back, as well as both sides. I also used a knife to scribe the centerline deeply enough that I will not lose it as I begin to shape the outside of the scroll.
Then I used the same bandsaw to remove the slabs from the sides of the pegbox, and a little way down into the neck: (You can see I already rounded the heel of the scroll a little, too, with a gouge. That is a personal quirk of mine…I want that heel looking “round” right from the beginning.)
Scroll with outline cut and slabs removed.
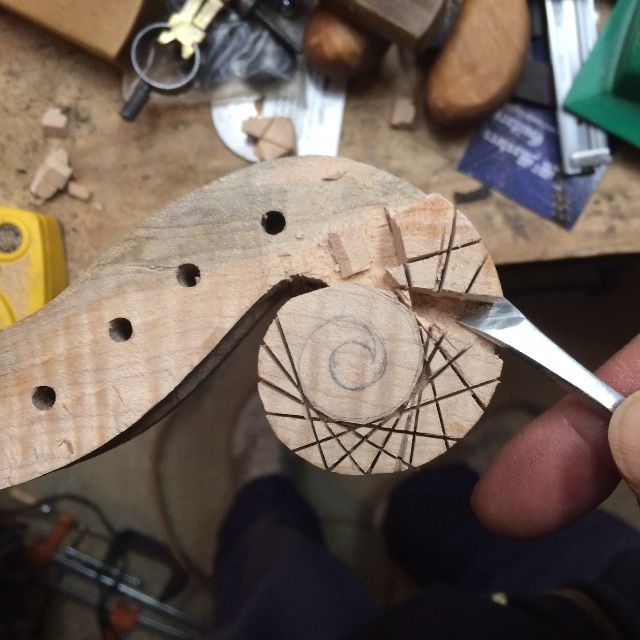
Then I use a small pull-saw (Japanese style, but I don’t know what brand) to cut beside the scroll profile lines just down to where they nearly touch the sides of the volute lines around the outside of the scroll. It is very important to keep these cuts perpendicular to the centerline of the scroll.
Sawing to create the profile of the scroll.
Then I use a combination of a thin saw and various gouges to remove the waste wood created by the saw.
Removing waste wood.
Continuing to remove waste wood.
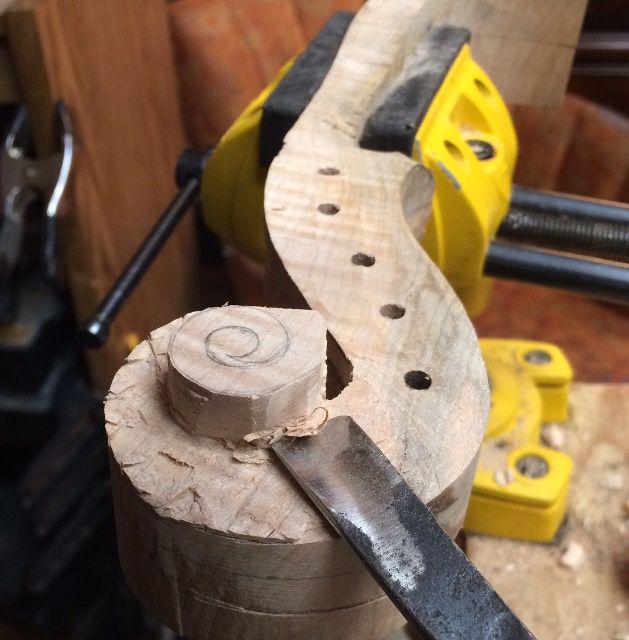
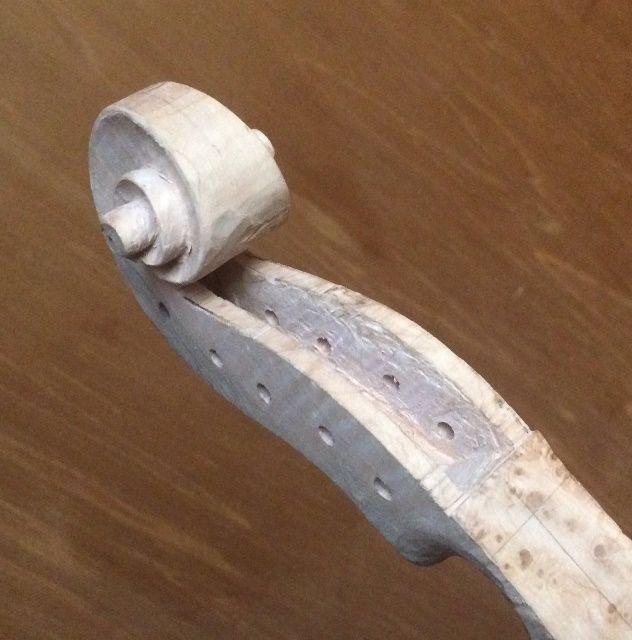
At some point (usually, the earlier the better) I will decide to carve out the interior of the pegbox. I did not take any photos of that process this time, but there are a variety of options. Some makers use a drill to carefully excavate a series of small holes, so that it is easier to remove the waste wood between the holes. That is practical, but you have to be very careful to not go too deep, or too far off to either side. (It is easy to destroy your scroll, in other words… ask me how I know. 🙁 )
I outlined the opening with a small straight chisel, then used that same chisel to begin excavating the waste wood from the interior of the pegbox. You can also see the remaining layout lines for the neck, in this photograph.
Carving the pegbox.
After the pegbox was mostly complete, I began carving the turns of the scroll, as well. This is another place where it is very easy to make serious errors. I continually examine the scroll from all angles to see to it that both sides are progressing equally, and that I am achieving a satisfactory symmetry. If I can keep the two sides looking like mirror images of one another up until the final smoothing, then there is little danger that the final smoothing will change that symmetry.
Beginning to carve the turns of the scroll.
Continuing to carve the pegbox and the turns of the scroll.
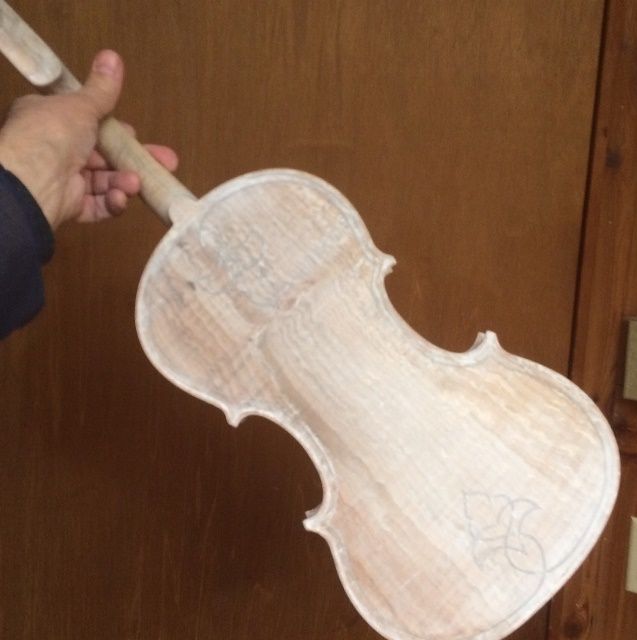
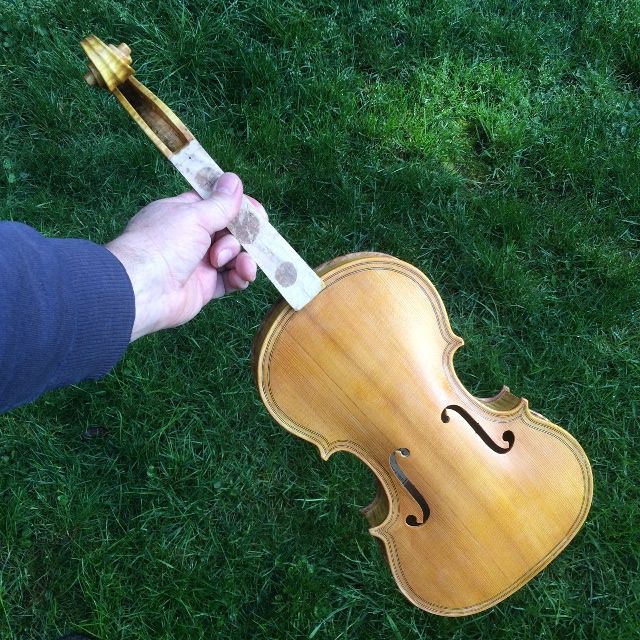
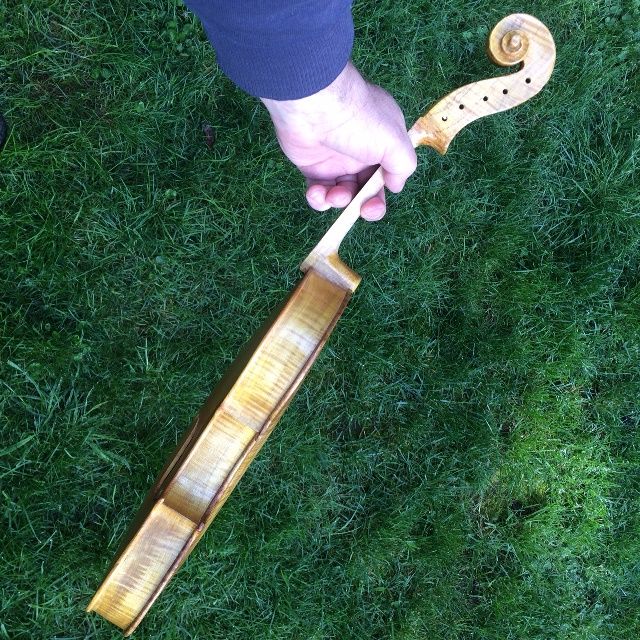
Once the scroll and pegbox were complete, I prepared the fingerboard and glued it in place temporarily. I need the fingerboard installed, in order to correctly set the neck. (I realize that some makers can successfully set the neck without the fingerboard, and I have done so in the past, but it is also easy to make a mistake. I like having the fingerboard correct, and use it to help me set the neck correctly.)
Scroll is complete: Fingerboard is temporarily installed.
Setting the Neck
(I did not take photos of this process, but it goes as follows:)
Lay out the location and footprint of the neck mortise.
Use a thin razor saw to cut the sides of the neck mortise, but not too deeply.
Use very sharp chisels and gouges to remove the waste wood from within the mortise.
Keep checking the fit and adjusting the mortise, until the neck fits perfectly.
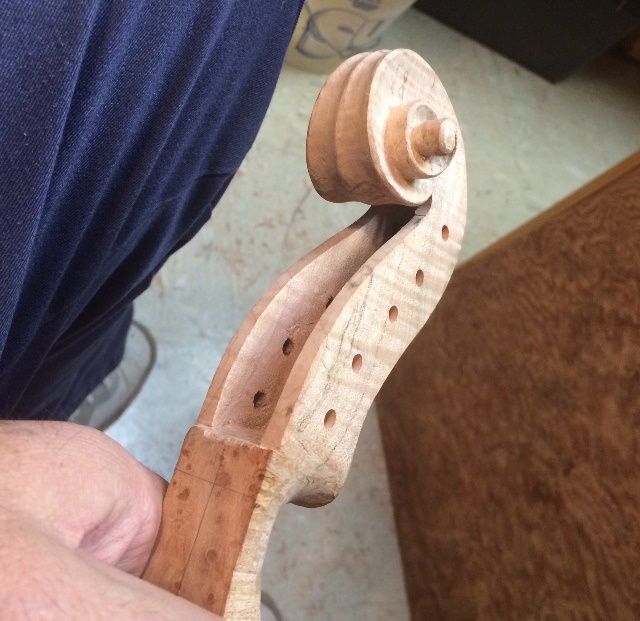
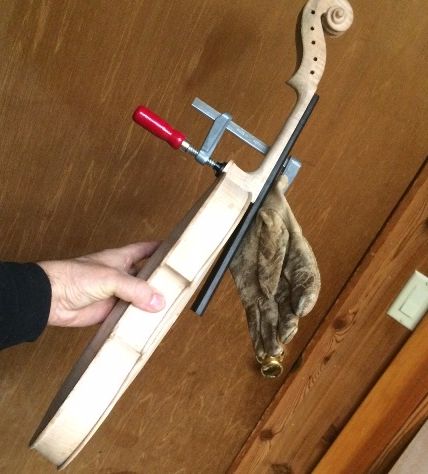
Glue the neck in place, using hot hide glue, and a clamp.
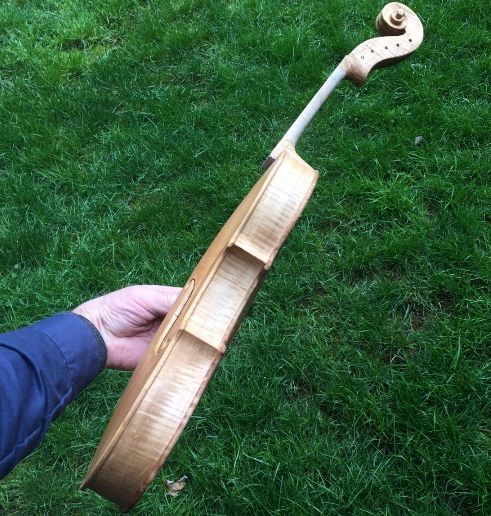
Neck properly set, glued and clamped. Glove is for padding.
You can see in the above photograph that the neck heel has been left to be carved to the correct shape at the same time as the back button. (A lot of people do not realize that, in the violin-family instruments, the joint between the heel of the neck and the back button is critically important to the strength of the neck joint. It is not just to be pretty, as is sometimes the case in guitars.)
Neck-set back view, showing plastic clamp-pad and spalted Big-Leaf Maple back.
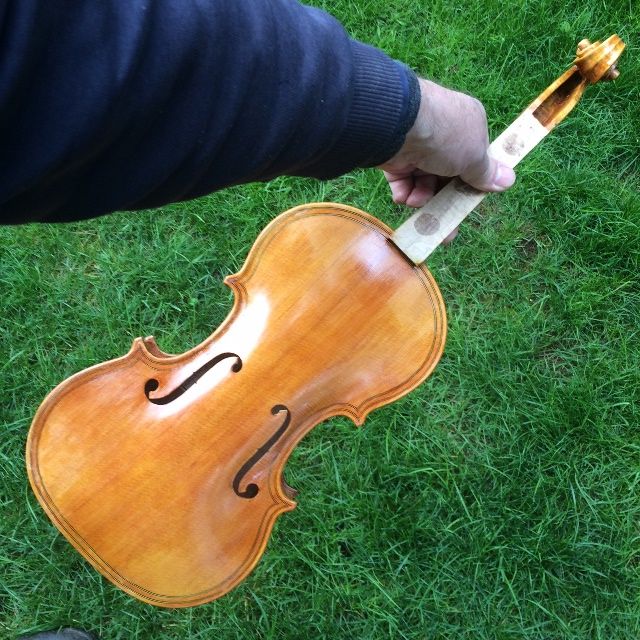
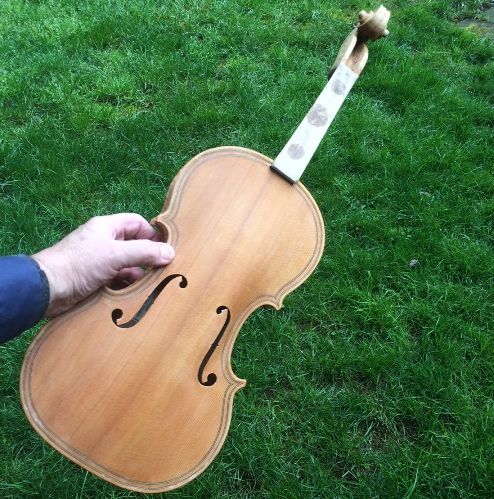
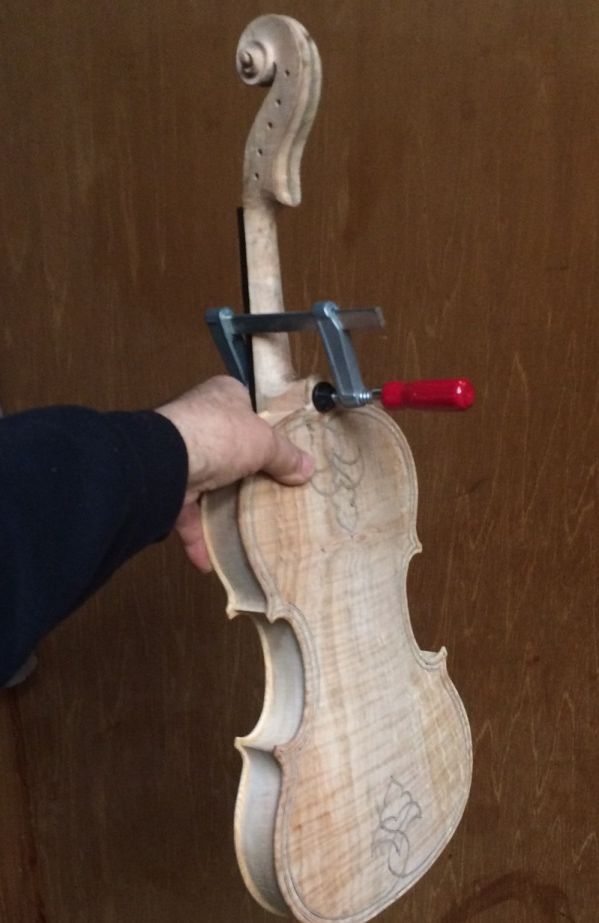
After I carved the heel to the correct shape, The instrument was essentially done, and final shaping and scraping for varnish preparation is the next step.
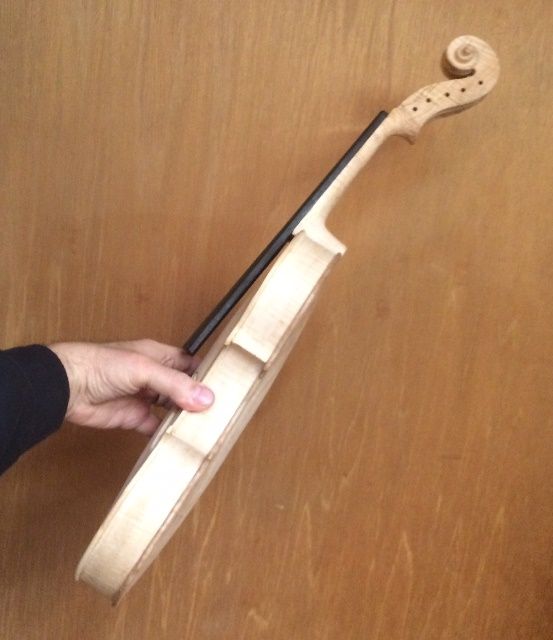
Side view, showing completed neck-heel.
Back view showing back button shape.
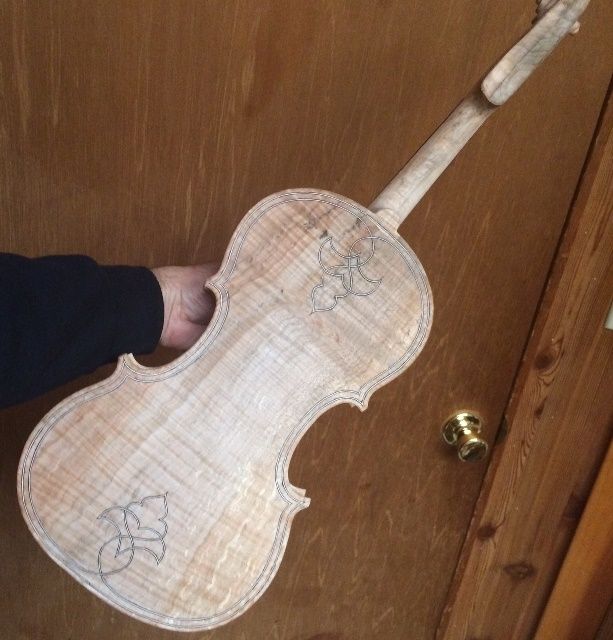
Ready for final Varnish-prep.
I will save the varnishing process for the next post.
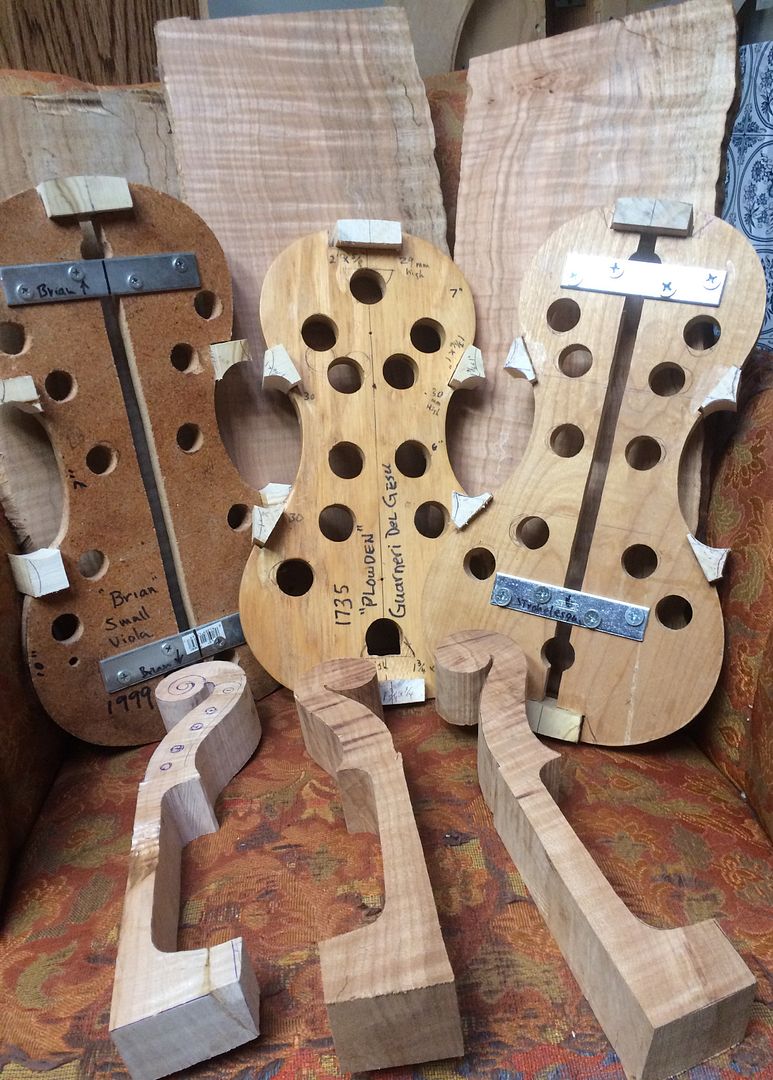
The last time I presented anything about these instruments, I think it was on another site, so– here is how they looked at that time (earlier this week, perhaps.)
Blocks installed, and necks cut out.
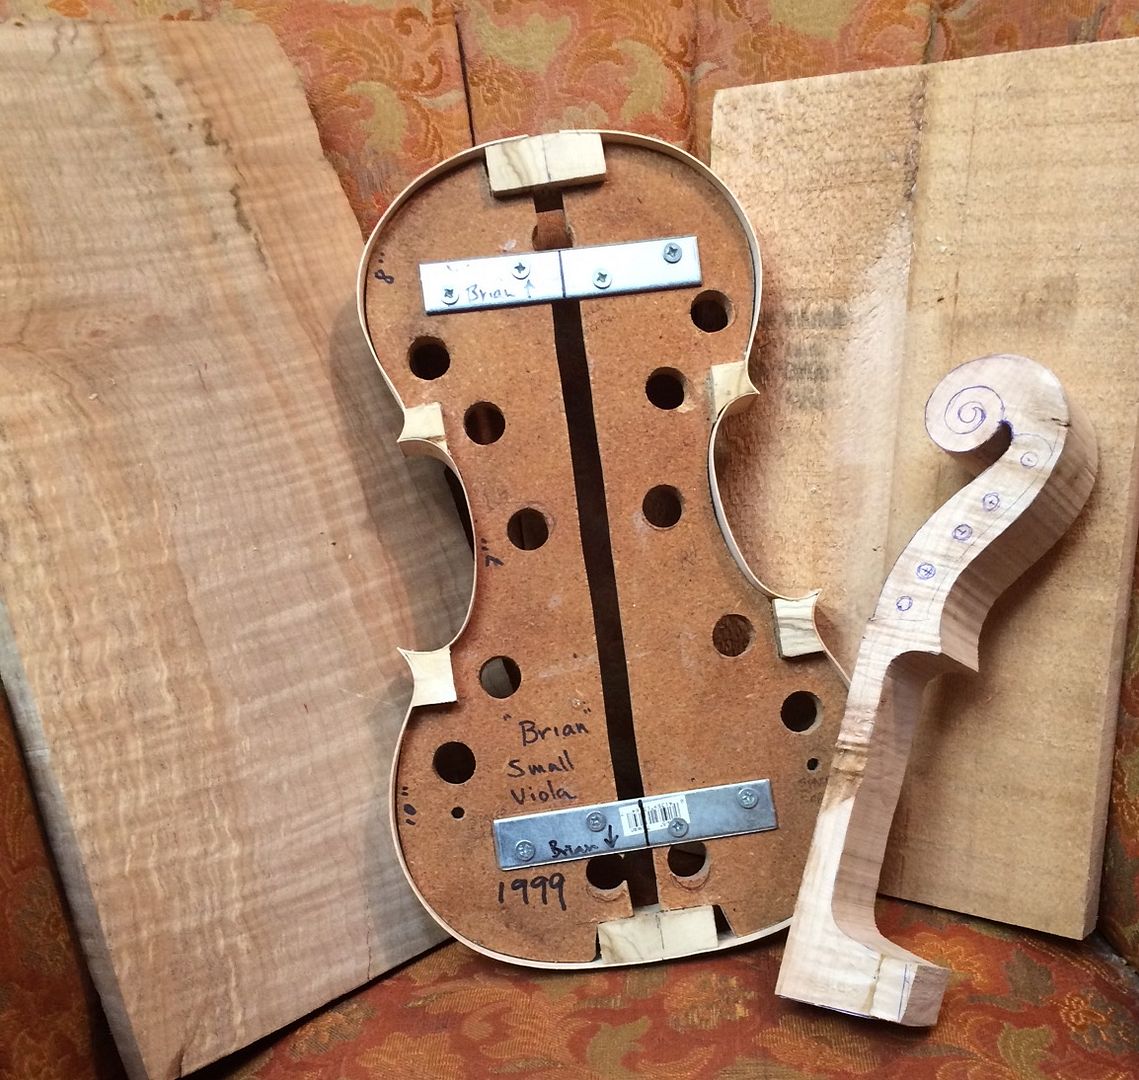
In the above photo, all you can see is three violin forms, with blocks installed, and some of the wood that will go into each, including the necks. I already had a fourth instrument (a small viola) begun, which was not in the picture.
So, here is that 14″ 5-string viola, well on the way to completion, but still with a long way to go…as of today.
14″ viola 5-string in progress.
And, as promised, here is a progress report on the other three:
5-string 14-7/8″ viola in progress.
On this instrument, the ribs are installed, but no linings as yet, and, while the Maple and Spruce have been selected for the front and back plates, they are essentially untouched. The neck has been traced out and the outline cut, but it, too, has far to go.
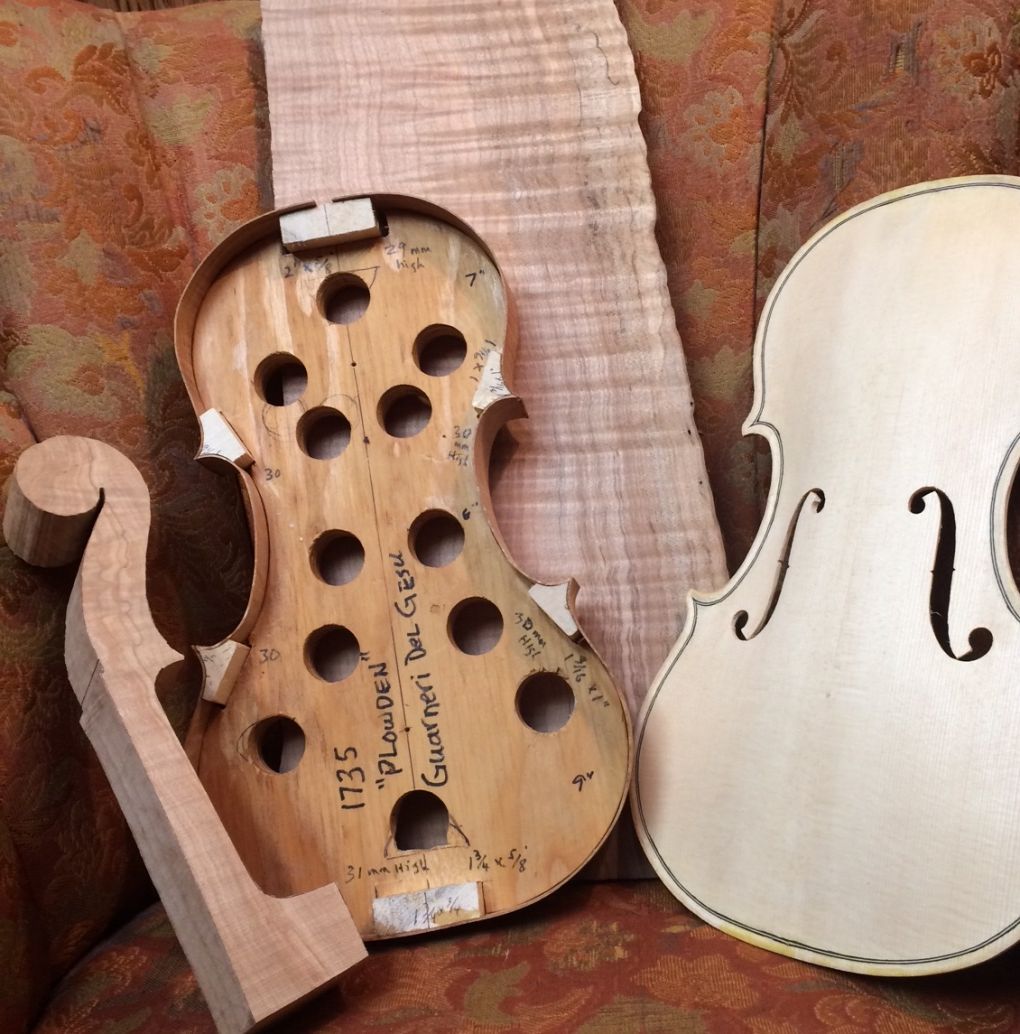
Guarneri-form 5-string fiddle in progress.
For this instrument, a five-string fiddle being built on the form of the 1735 “Plowden” Guarneri del Gesu, I had a top plate left from a previous project on the same form, so I opted to use it, with the spalted Big Leaf Maple back and ribs. No linings, yet, but they have been bent and are ready to install. The neck is from a different Big Leaf Maple, which came from the yard of the property where my wife grew up.
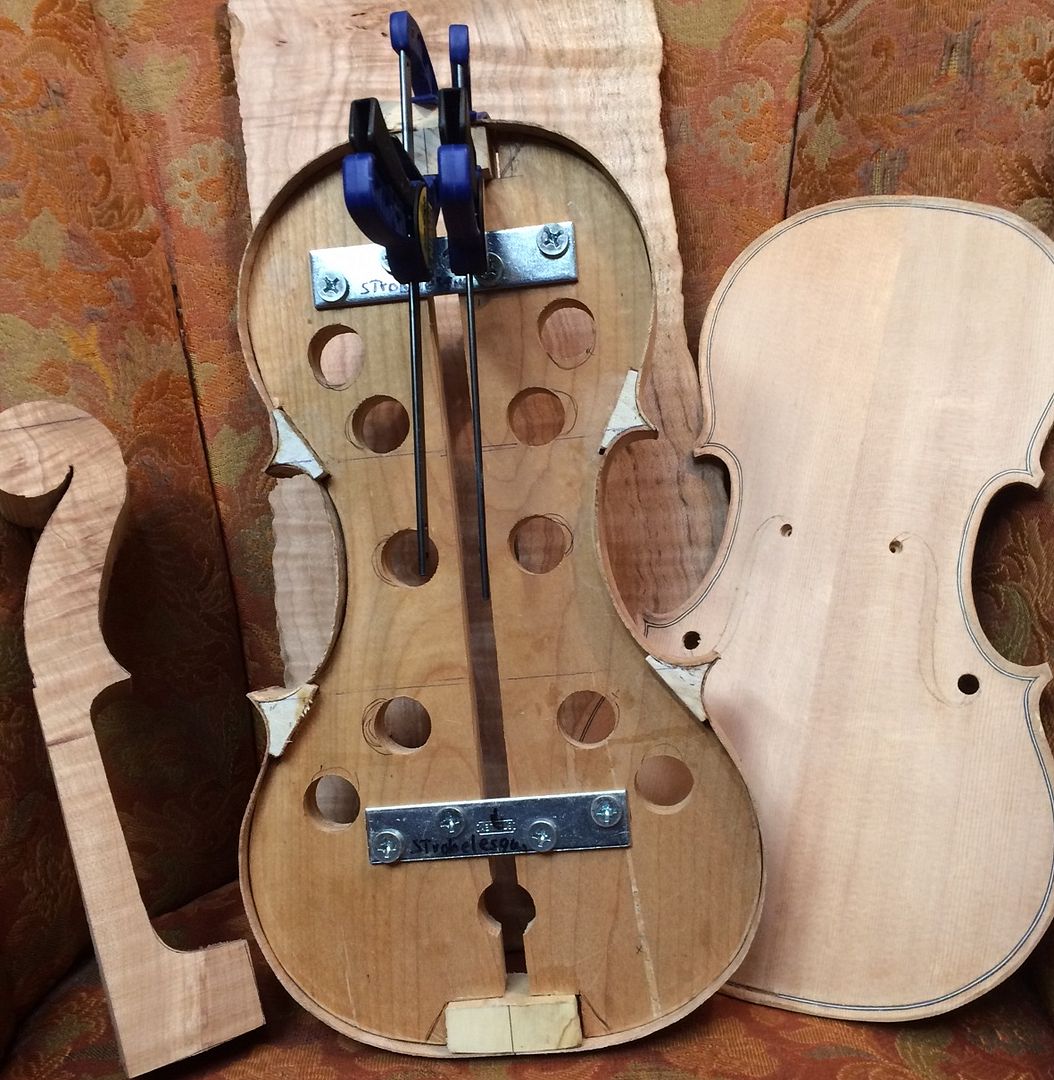
5-string fiddle on “Strobelesque” form, in progress.
Henry (Senior) would not have recognized this form, but it was loosely derived from the form in Henry Strobel’s book, “Violin-making, Step-by-Step”…so it is called “Strobelesque.” In this photo, the glue was not dry on the treble-side upper rib, but I didn’t want to wait, so I took the photo with the clamps still in place. Again, no linings, yet, but they are bent and ready to install. Here, too, I had a partially completed top plate, and elected to use it. The back and sides are heavily spalted Big Leaf Maple, and the neck is also Big Leaf Maple, though from a different tree…the one in my Father-in-Law’s yard. A few years ago, they decided that tree had enough rot to be dangerous, so they took it out, but it provided wood for a number of instruments.
My son Brian Bishop builds high-quality guitars, and managed to salvage several guitar sets beside the various violin and viola sets I saved. I got one cello set out of it, too…it will become a cello for my beloved wife.


 Blocks installed, and necks cut out.