Commissioned Handmade Five-string Fiddle Beginning

Starting a new 5-String Fiddle

The Materials:

A few weeks ago I announced that a new fiddle would be beginning. Now I have a few photos to show:

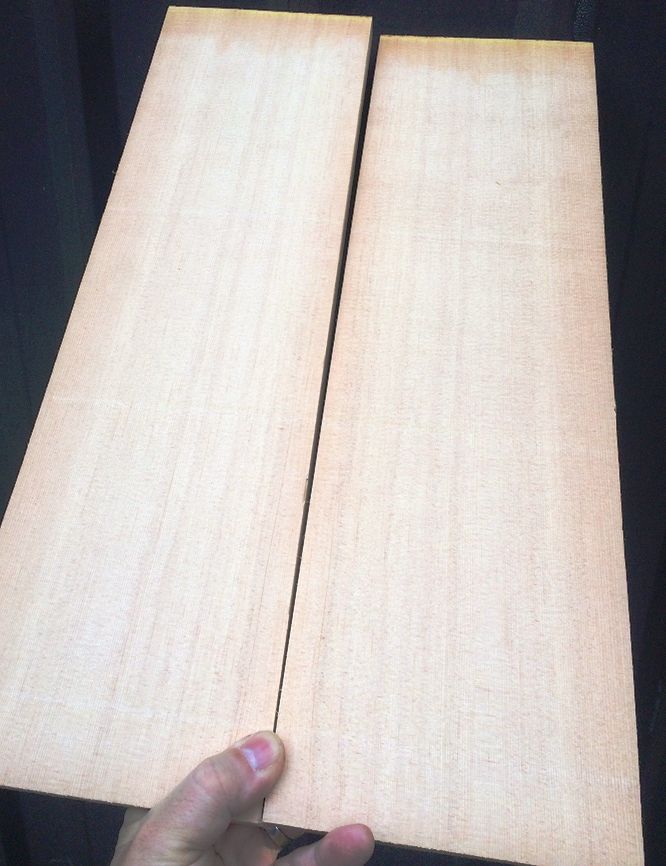
The top plate is Sitka Spruce, from Bruce Harvie. The customer wanted “Oregon wood,” and the Big Leaf Maple is definitely from in my neighborhood, here in Oregon (I helped harvest it;) but the Sitka is just a species that grows here…I don’t know where it was harvested.

Wild-grain Big Leaf Maple for Five-string fiddle back and ribs!
Wild-grain Maple for back and ribs!


Fine-grained Sitka Spruce for Five-string fiddle top plate.
Fine-grained Sitka Spruce for the top plate.


Preview of the grain in the Five-string fiddle neck billet.
Preview of the grain in the neck billet.


Beginning the work of building a 5-string fiddle:

I book-matched the spruce, to form the basis for the front plate: a solid plate with a tight glue-line down the center.

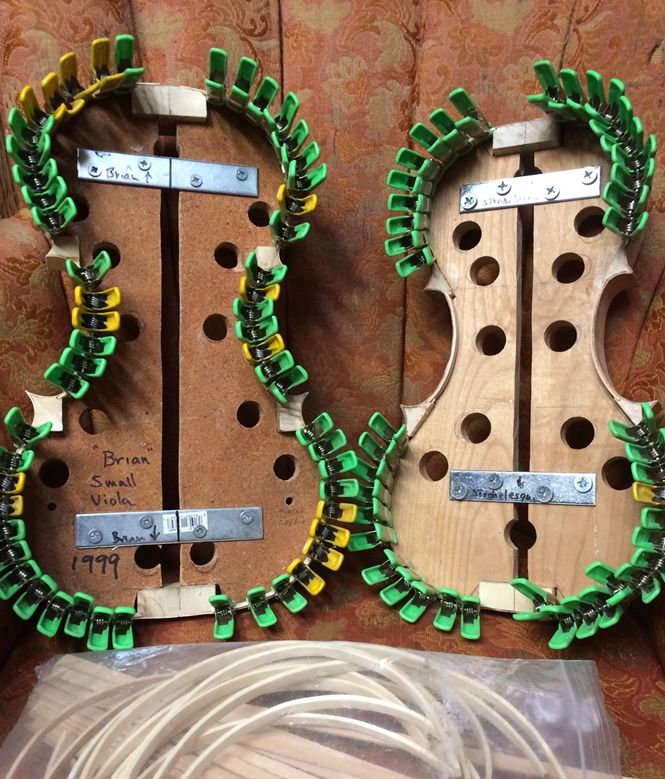
I used the mold (or form, as many people prefer to call it) that matched the fiddle the customer liked best. Then I added willow blocks to become the corners and end-blocks, and I traced the intended shape of the blocks from the mold template onto the back-side of the blocks, where they are flush with the mold.

Blocks and mold with Five-string fiddle template.
Blocks and mold with template.


Five-string fiddle Preliminary block-shaping complete.
Preliminary block-shaping complete.


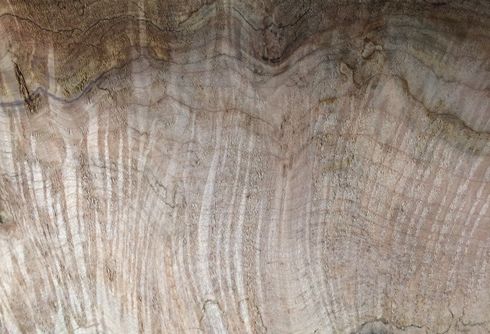
Added the ribs, of the spalted maple the customer liked, and glued them to the willow blocks. Afterward, I added linings, also of willow, and let them into the blocks and glued them to the ribs and the blocks.

Spalted Maple ribs and willow linings on beginning of Five-string fiddle.
Spalted Maple ribs and willow linings.


Five-string fiddle Rib garland nearly complete.
Rib garland nearly complete.


Then I traced the shape of the garland onto the top plate material, using a small washer as a spacer, and a ball-point pen as a scribe. I completed the corners using a straightedge and a series of circle templates. Finally, I marked the edge at exactly 4 mm thick, and carved the arching, using gouges and planes and scrapers.

Sitka top-plate arching complete for Five-string fiddle.
Sitka top-plate arching complete.


Then I marked the layout of the double purfling and the f-holes, and began incising them into the Sitka Spruce.

F-holes and purfling traced and cutting begun for Five-string fiddle.
F-holes and purfling traced and cutting begun.


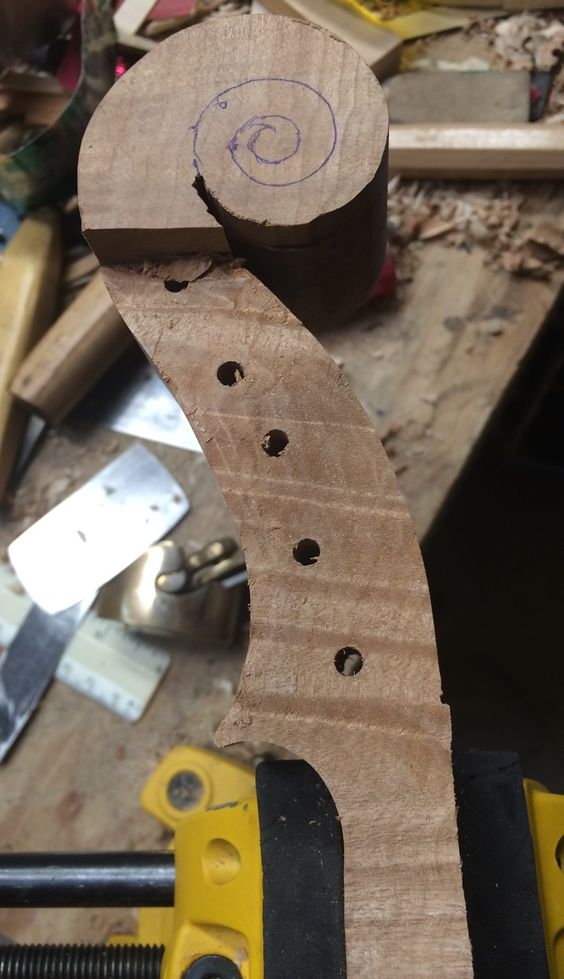
Sometime in the midst of all the above work, I laid out and began carving the scroll and pegbox. That wild grain is very tricky to carve, as it changes direction constantly.

Rough-carved scroll and pegbox of Five-string fiddle.
Rough-carved scroll and pegbox.


I went ahead and completed the purfling and the f-holes, so that I could prepare the plate to be glued to the garland.

Completed top plate and neck work with garland for Five-string fiddle.
Completed top plate and neck work with garland.


I also added the bass-bar, chalk-fitting it to perfection, and gluing it in place, with hot hide glue. The bass-bar will be carved, planed and scraped to the proper shape after the glue dries.

Five-string fiddle Bass-bar glued and clamped.
Bass-bar glued and clamped.


Five-string fiddle Top plate glued and clamped to the garland, fingerboard glued to the neck.
Top plate glued and clamped to the garland, fingerboard glued to the neck.


The fingerboard is Ipé, as requested by the customer. It is an extremely dense hardwood, but not threatened as Ebony is beginning to be. It finishes to a dark brown and looks good, as well as wearing well. It is extremely difficult to work, though, so it may take time to become popular with makers. The saddle and the nut will also be Ipé, but the pegs will be ebony, simply because I have never mastered the lathe-turning of tuning pegs.

Working on the fingerboard for the Five-string fiddle.
Working on the fingerboard.


And that is pretty much where things stand, for now. I will try to post pictures as they become available.


Thanks for looking.

5-String Fiddle Linings

Why Linings in a 5-string Fiddle?

What is the use of linings?

In most of the members of the violin family, including the five-string variants) there are narrow strips of wood glued to the inside of the ribs, all around the edges, called linings. On some double basses the linings are actually on the outside of the ribs,  as well as the inside, following the edge of each rib. The purpose is the same in either case: it is to strengthen the very fragile rib material as well as tripling or quadrupling the thickness of the gluing surface at the edge of the rib. This is so that the rib garland can be securely attached to the front and back plates, also making it possible to remove those plates without breaking the ribs, when repairs are needed.

Wood for linings

I like to use willow for my linings when it is available, because it is easy to bend and fit to the ribs, as well as being very easy to carve, when it is time to taper those linings, and make them fair into the inside surface of the rib structure. Many makers use spruce, and I have done so as well, but have decided that I prefer willow. In fact, when I can get it, I specifically prefer Weeping Willow above anything else I have tried.

Installing linings

So…I arrived home fairly tired this evening, but I fired up the glue-pot, and prepared to install some linings: You can see the center bouts on the right-hand instrument’s ribs are already in place, making the edge 3 mm thick, instead of barely 1 mm.

When I pre-form the linings, I begin by using my bandsaw to cut a “plank” of willow, 3 mm thick, then thinning it to a very consistent 2 mm thickness. I use a “wheel-style” marking gauge, set to 7 mm width, to deeply score the “plank” along one edge, then flip it over and score the opposing face, effectively cutting the rib free from the “plank.”  Then all I have to do is bend those linings blanks around my bending iron, and produce a pile of “ready-to-use” linings for my violin ribs (see below.)

linings in five-string viola and 5-string fiddle
Rib linings in the 14-7/8″ 5-string viola and one of the 5-string violins. In the foreground you can see the linings I have pre-formed to approximately the required curvature .

I use a small sharp knife and a tiny gouge to make a small mortise in the junction between blocks and ribs (12 places on each face of the garland.) I only use hot hide glue on instruments, but the hot hide glue cools and gels rather quickly, so I cut the pre-formed linings to the proper length, and fit all of them into the garland, dry.  One by one, I then remove each lining, coat it liberally with hot hide glue, and quickly re-insert it into the tight-fitting place prepared for it.  I pinch hard, with my left forefinger and thumb, to squeeze the joint tight, and then use my right hand to apply a spring clamp. I move over a half-inch, and repeat, until the whole lining is tightly secured with glue and clamps. The little spring-clamps will hold the freshly glued linings in place until the glue hardens.

The same principle works for larger instruments, but the ribs are bigger, and I use bigger clamps.

Anyway, that is all I accomplished this evening. Possibly tomorrow I will get the rest of the linings into the other instruments.

Once the linings are in place, the ribs are a good deal less fragile, and less prone to breakage. That is a relief, as they are really easy to break, without the linings.

Follow along and see the whole build!

Thanks for looking!