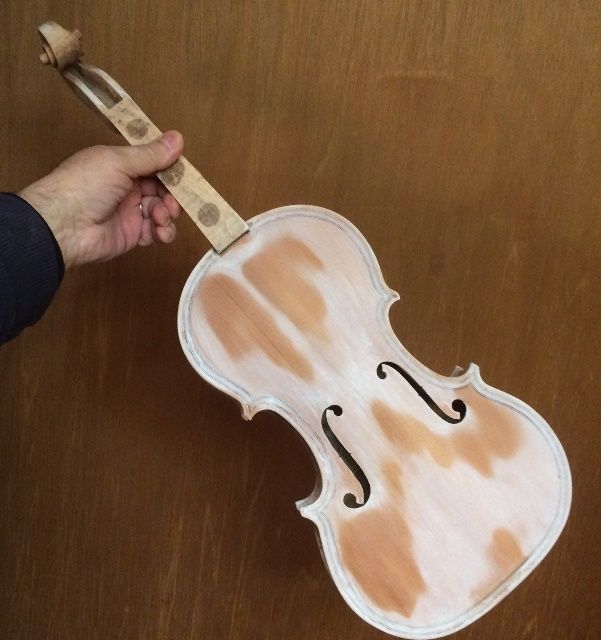
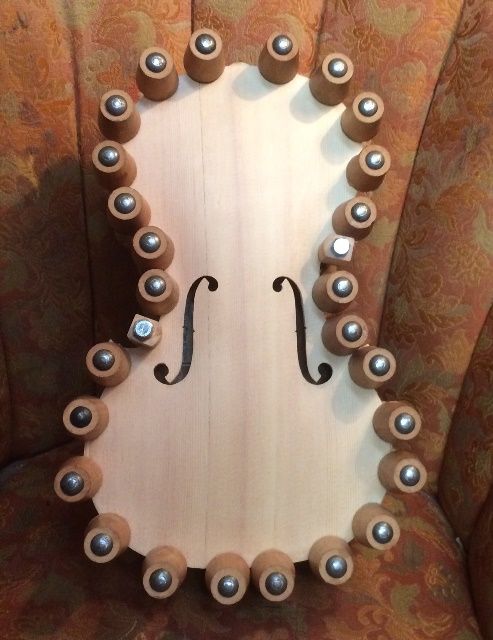
The raw wood is quite porous, and would soak up varnish like a sponge…which would dampen the viola sound. So we don’t want that to happen! The solution to the problem seems to be to fill the pores of the wood with very fine particles of mineral of some sort. I don’t particularly want something that would form a concretion, as some makers have done, because I think that also changes the sound, but in a different way.
I used Gypsum, ground very fine in a mortar, then suspended in water, and daubed onto the surface; then vigorously rubbed into the pores. After rubbing the mineral into the entire surface (except the “handle” area of the neck) I used a damp cloth to rub all the excess gypsum back off. While it is wet, it just looks like wet wood, but as it dries, it turns chalk-white, assuring me that the surface is truly saturated with the particles.
Partially dry mineral ground, front side.
Partially dry mineral ground, back side.
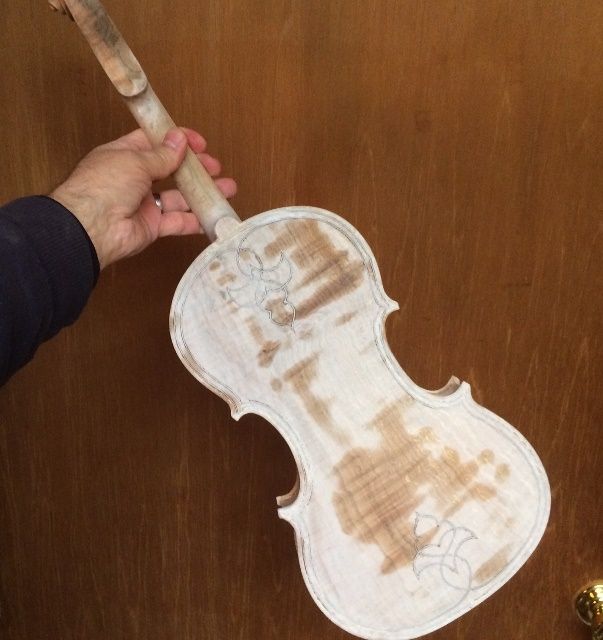
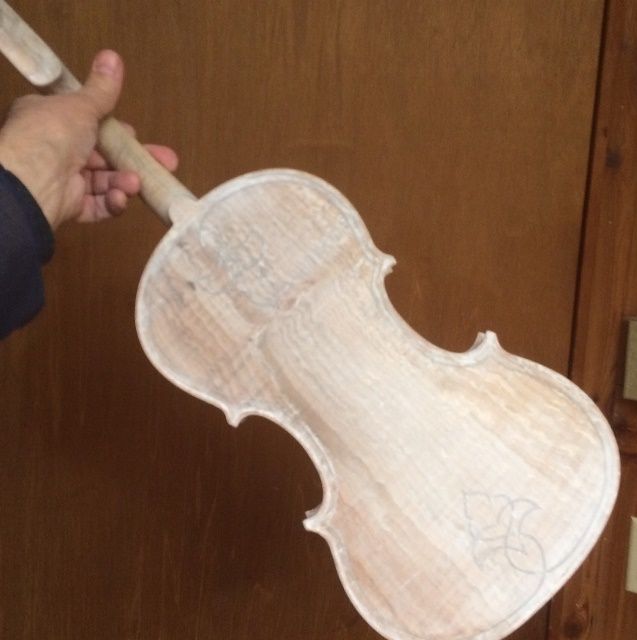
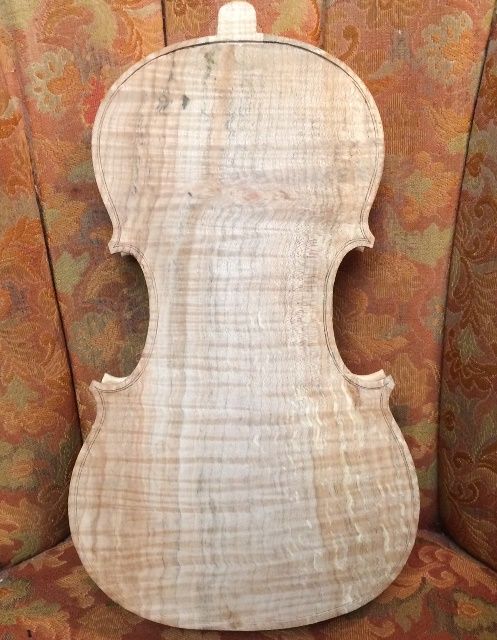
Then, after the gypsum suspension is completely dry, I use fine sandpaper to remove any excess mineral from the surface, so that there are no thick patches of mineral.
Dry Mineral ground, rubbed clean.
Locking the mineral ground in the wood: Sealer
As you can see in the above photograph, the mineral isstill saturating the surface, and obscuring the grain. However, when I apply the sealer (in this case, a mixture of rosin, turpentine, and alcohol) the mineral ground will become completely transparent, and will permanently disappear. The varnish will then be free to show off the grain of the wood.
Front side with sealer.
Side with sealer.
Back with sealer.
Making it Shine: Beginning the varnish
It takes a while for the sealer to dry, because of the turpentine content, but as it dries, the alcohol evaporates first, then the turpentine, leaving the rosin in the wood (which is where rosin comes from in the first place, of course) locking the gypsum particles in place. and further sealing the wood against saturation with varnish.
Before proceeding to the varnish, I carefully sanded all over, to clean up any spots that still felt rough or sticky, then wiped the entire instrument down with alcohol to remove any rosin residue from the surface.
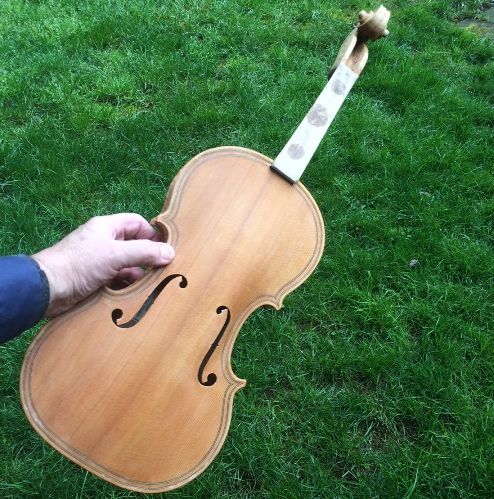
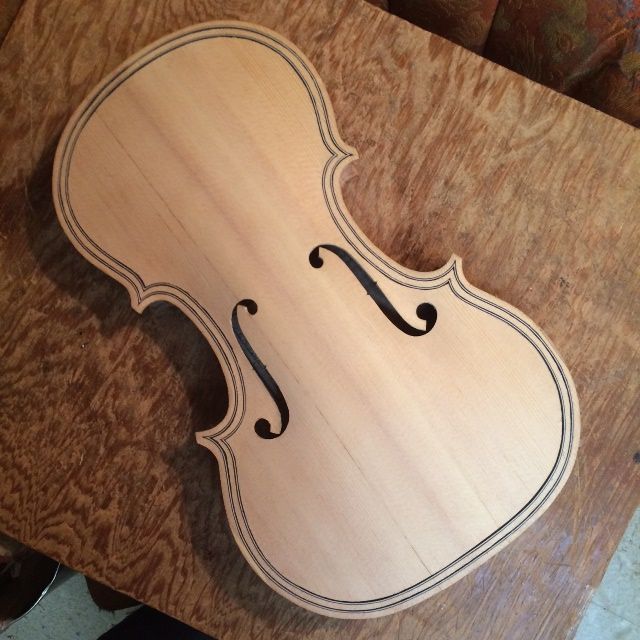
Then I applied a first coat of yellow varnish, as I have noticed that many of the old instruments seem to have something yellow under the darker red or brown varnish. You canespecially see it in the areas where the colored varnish has worn thin, or is completely gone. (Not all of them have this color, but I like it, so that is what I have chosen to do.)
So, here is the base coat of yellow varnish:
Base coat of yellow varnish on front side.
Base coat of yellow varnish on the side.
Base coat of yellow varnish on the back side. The grain of the spalted maple is showing better, again.
Base coat of yellow varnish on scroll and neck heel.
I do not apply varnish to the “handle” portion of the neck until everything else is completely done. After everything else is done, including set-up, I will rub down the handle area with 400-grit abrasive one last time, and then put about a dime-sized dot of shellac on a rag, on the end of my finger, and vigorously rub it into the wood of the handle area, until it is completely dry. This somewhat seals the wood against sweat and dirt, without leaving a heavy, “slick” coating that would cause drag on a player’s hand.
The rest of the varnish coats will be building color toward the final look of the instrument. I will include them in another post.
When I first tried making an instrument (a viola) I did not know about using a saw to start, and I carved the entire scroll by hand with a set of small gouges my wife had presented me with a few years earlier. That took a long time, and it was very difficult to keep both sides symmetrical with one another.
Later, I saw a series of photos posted by a maker in Brasil, who showed how he used a thin-bladed saw to outline the scroll, making many small cuts, then removing the waste wood with a combination of saw and gouges. That was a bit of a revelation, and I enthusiastically embraced the change. It did, however, take a bit of practice to master the concept.
So here is the process:
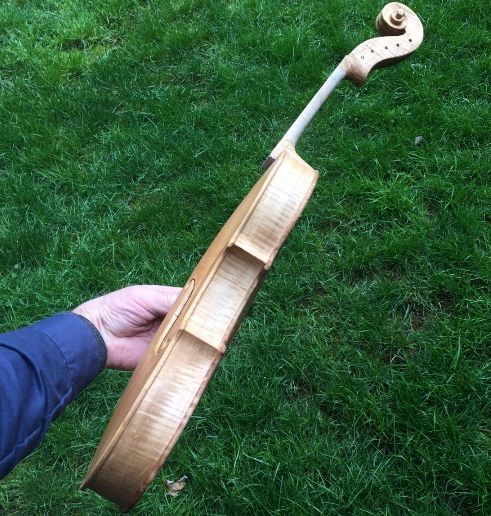
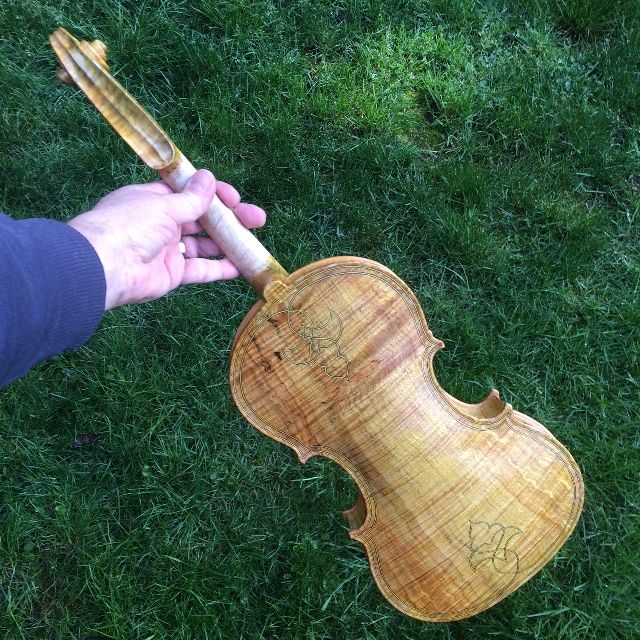
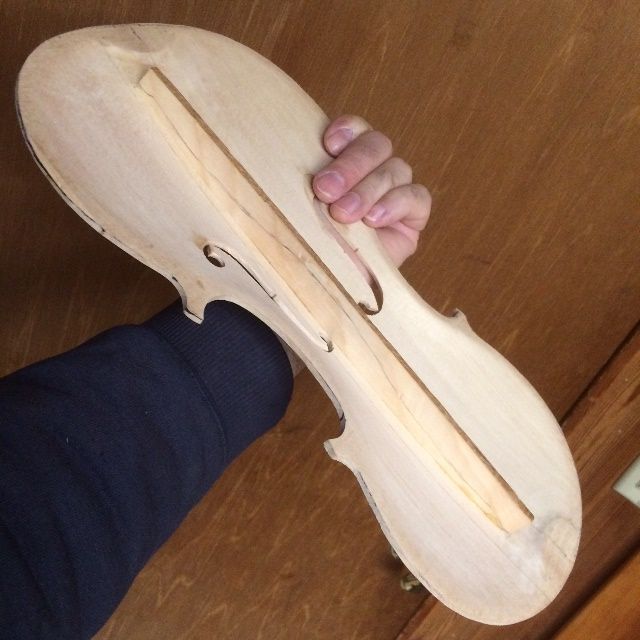
{You can see the dark lines and spots in the wood. This is called “spalting” and is very popular with some people, though it actually is caused by a fungus. This particular Big Leaf Maple billet, along with that of the back, was salvaged from an old tree taken down on my wife’s family’s property, and is quite heavily spalted.)
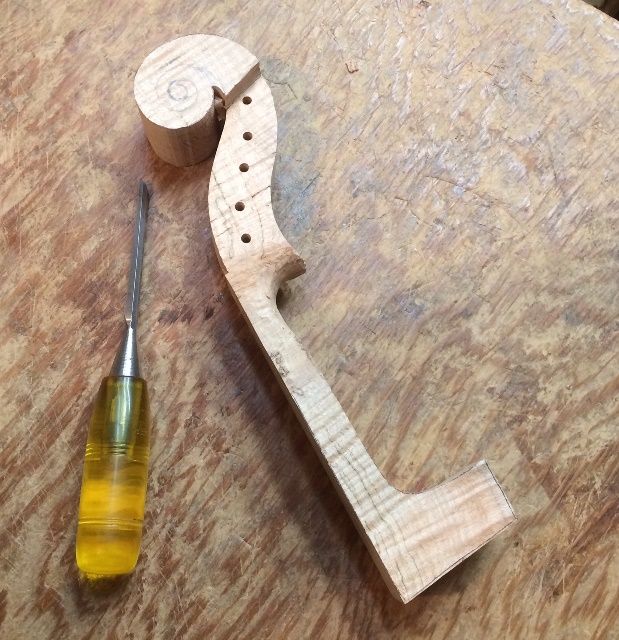
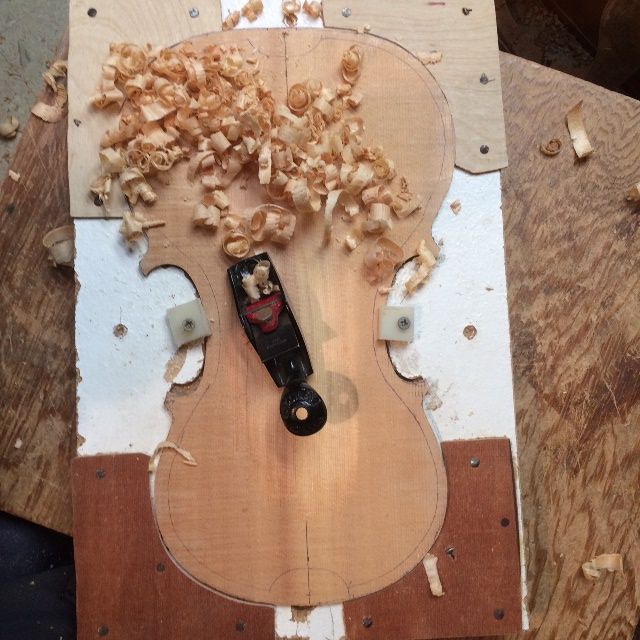
First, I carefully laid out both sides of the scroll, then I used my bandsaw to cut out the whole “footprint” of the scroll and neck.
Then I went back and laid out the volute, including the centerline, on the outside of the curve, all the way around, so I know what the scroll should look like from the front and back, as well as both sides. I also used a knife to scribe the centerline deeply enough that I will not lose it as I begin to shape the outside of the scroll.
Then I used the same bandsaw to remove the slabs from the sides of the pegbox, and a little way down into the neck: (You can see I already rounded the heel of the scroll a little, too, with a gouge. That is a personal quirk of mine…I want that heel looking “round” right from the beginning.)
Scroll with outline cut and slabs removed.
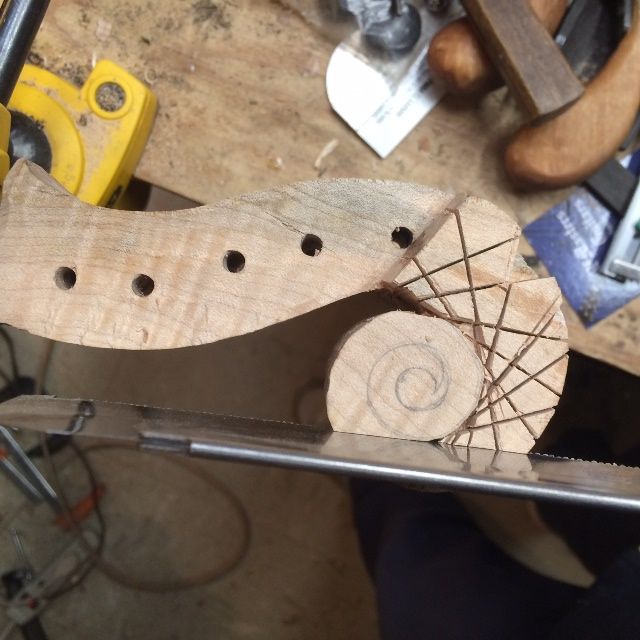
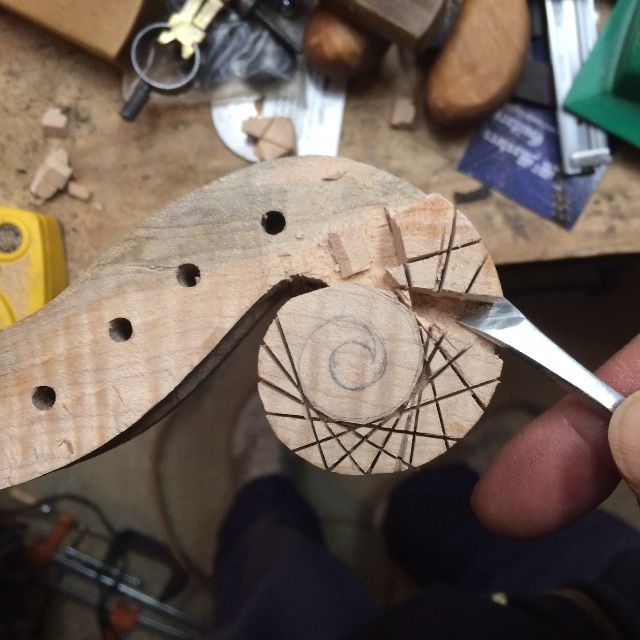
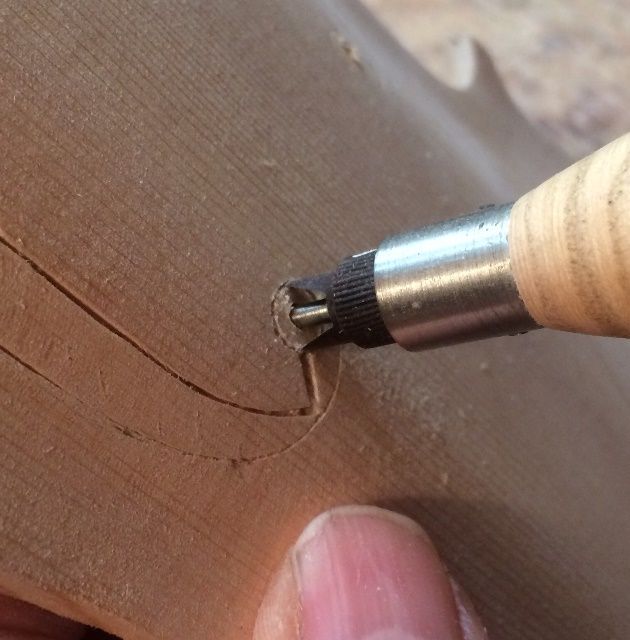
Then I use a small pull-saw (Japanese style, but I don’t know what brand) to cut beside the scroll profile lines just down to where they nearly touch the sides of the volute lines around the outside of the scroll. It is very important to keep these cuts perpendicular to the centerline of the scroll.
Sawing to create the profile of the scroll.
Then I use a combination of a thin saw and various gouges to remove the waste wood created by the saw.
Removing waste wood.
Continuing to remove waste wood.
At some point (usually, the earlier the better) I will decide to carve out the interior of the pegbox. I did not take any photos of that process this time, but there are a variety of options. Some makers use a drill to carefully excavate a series of small holes, so that it is easier to remove the waste wood between the holes. That is practical, but you have to be very careful to not go too deep, or too far off to either side. (It is easy to destroy your scroll, in other words… ask me how I know. 🙁 )
I outlined the opening with a small straight chisel, then used that same chisel to begin excavating the waste wood from the interior of the pegbox. You can also see the remaining layout lines for the neck, in this photograph.
Carving the pegbox.
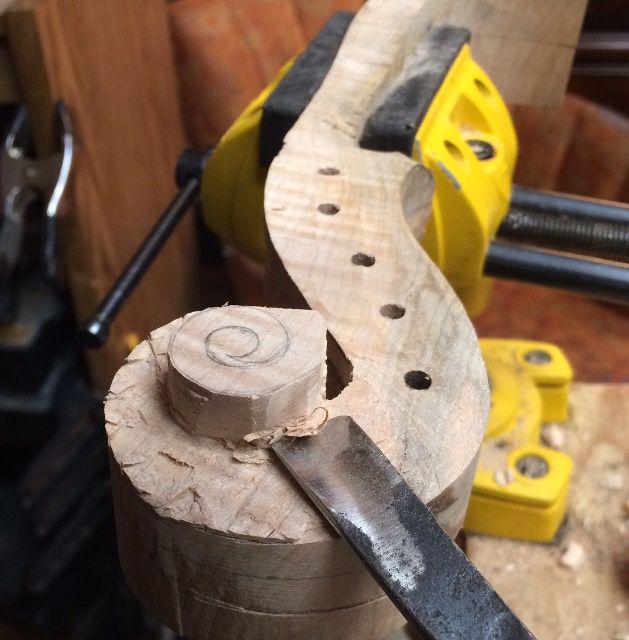
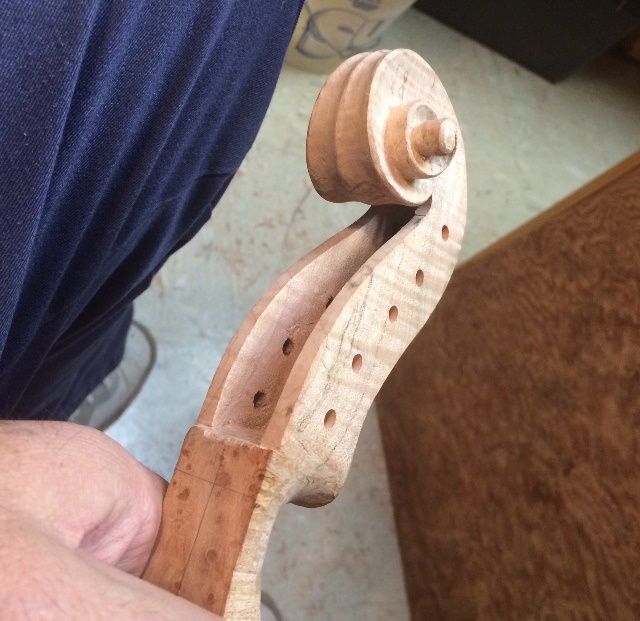
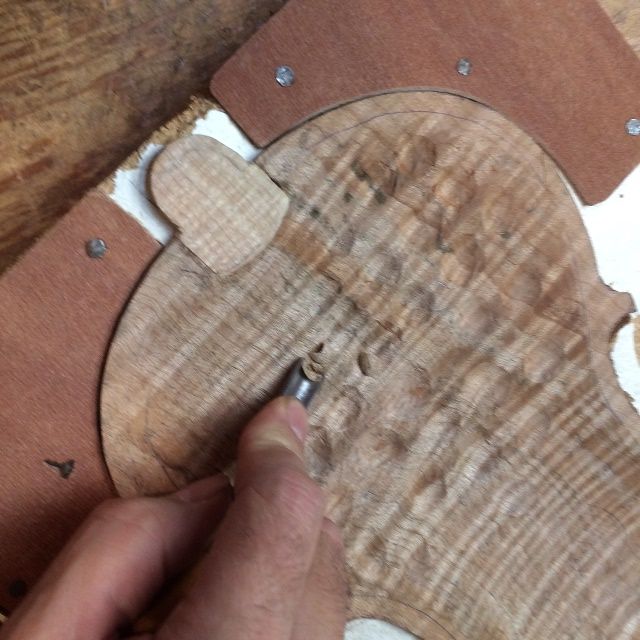
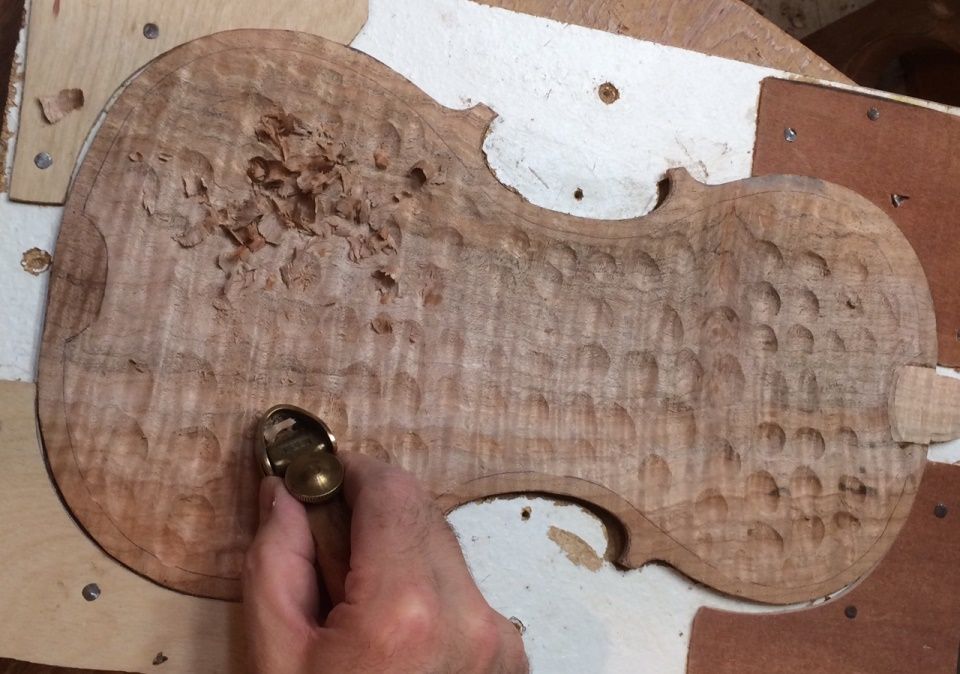
After the pegbox was mostly complete, I began carving the turns of the scroll, as well. This is another place where it is very easy to make serious errors. I continually examine the scroll from all angles to see to it that both sides are progressing equally, and that I am achieving a satisfactory symmetry. If I can keep the two sides looking like mirror images of one another up until the final smoothing, then there is little danger that the final smoothing will change that symmetry.
Beginning to carve the turns of the scroll.
Continuing to carve the pegbox and the turns of the scroll.
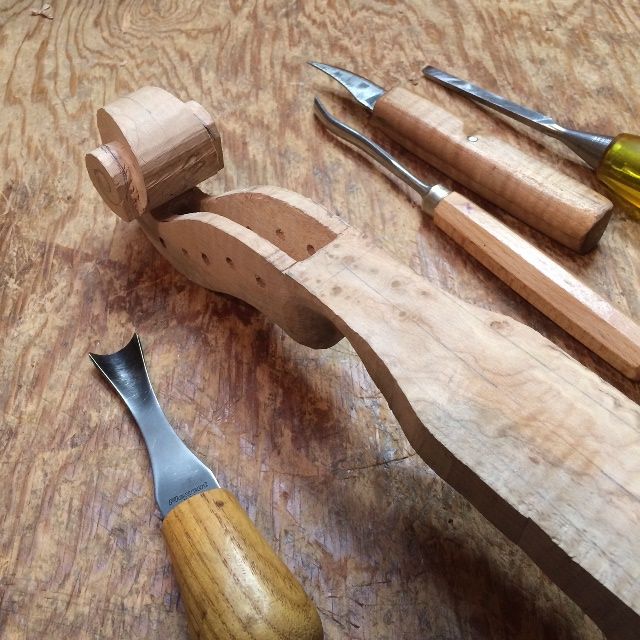
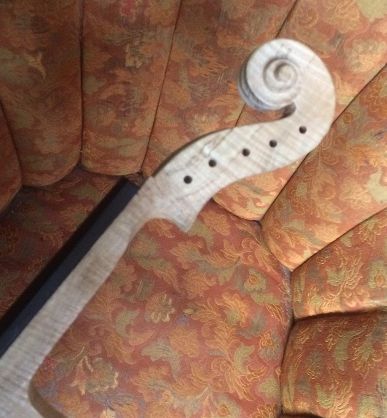
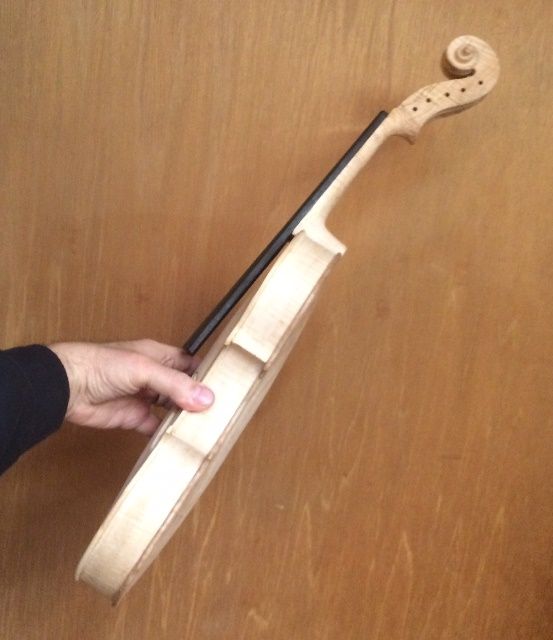
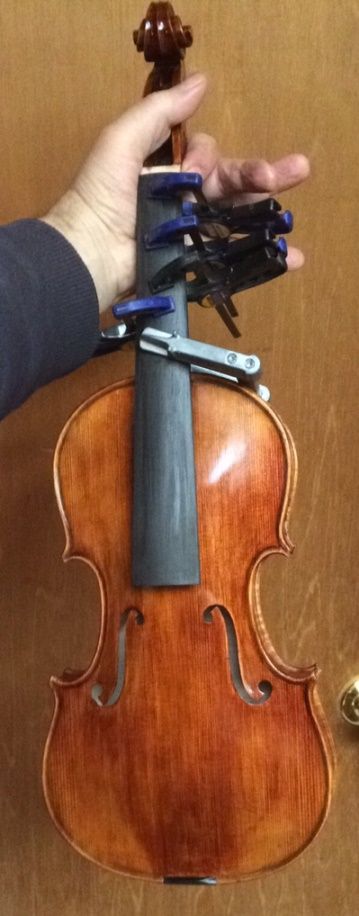
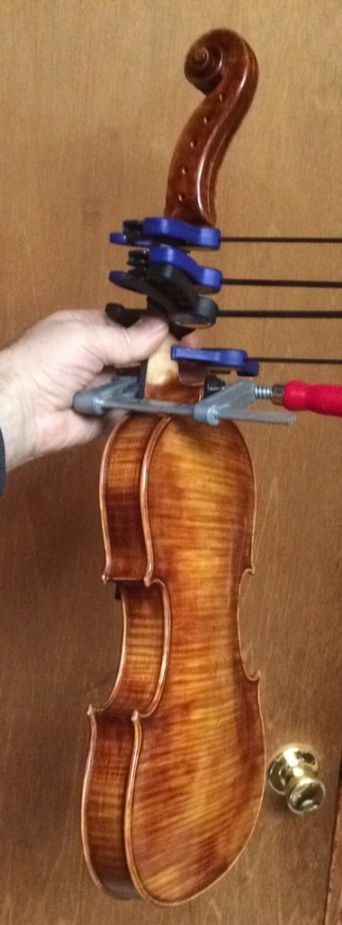
Once the scroll and pegbox were complete, I prepared the fingerboard and glued it in place temporarily. I need the fingerboard installed, in order to correctly set the neck. (I realize that some makers can successfully set the neck without the fingerboard, and I have done so in the past, but it is also easy to make a mistake. I like having the fingerboard correct, and use it to help me set the neck correctly.)
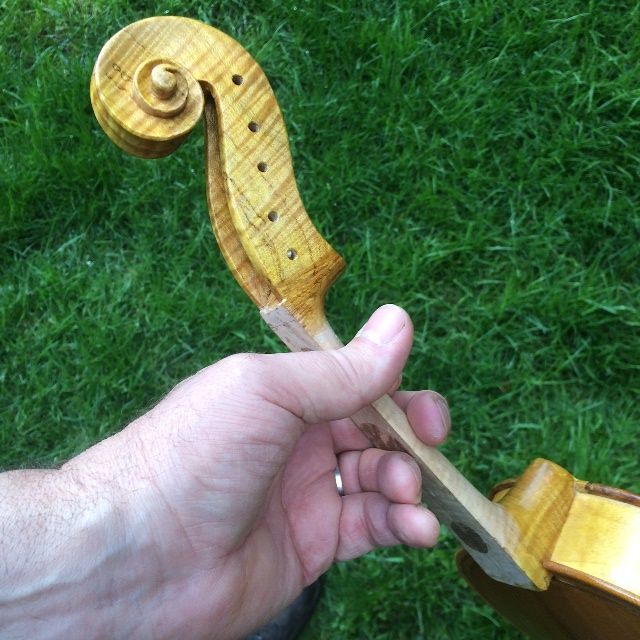
Scroll is complete: Fingerboard is temporarily installed.
Setting the Neck
(I did not take photos of this process, but it goes as follows:)
Lay out the location and footprint of the neck mortise.
Use a thin razor saw to cut the sides of the neck mortise, but not too deeply.
Use very sharp chisels and gouges to remove the waste wood from within the mortise.
Keep checking the fit and adjusting the mortise, until the neck fits perfectly.
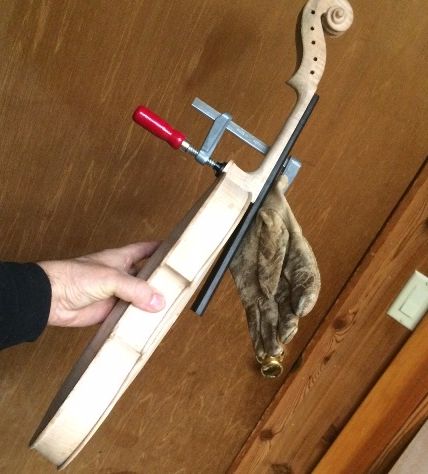
Glue the neck in place, using hot hide glue, and a clamp.
Neck properly set, glued and clamped. Glove is for padding.
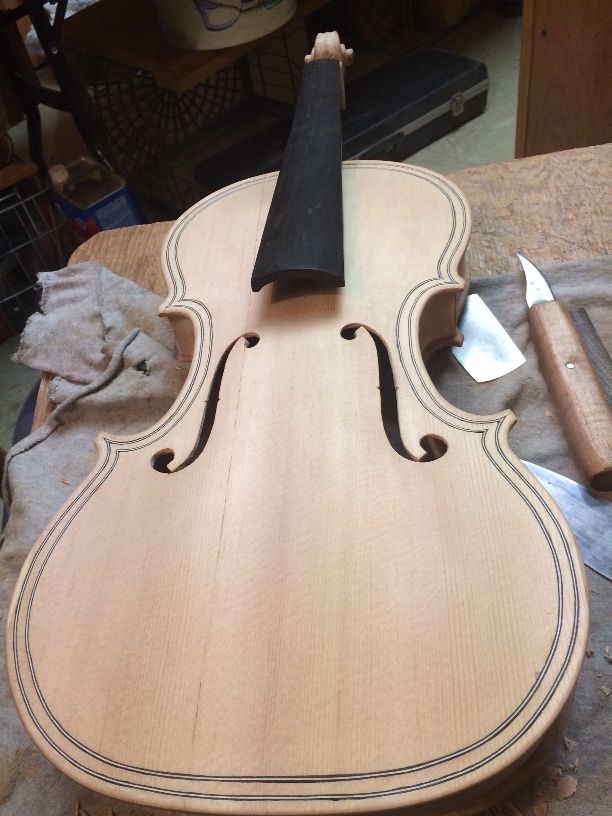
You can see in the above photograph that the neck heel has been left to be carved to the correct shape at the same time as the back button. (A lot of people do not realize that, in the violin-family instruments, the joint between the heel of the neck and the back button is critically important to the strength of the neck joint. It is not just to be pretty, as is sometimes the case in guitars.)
Neck-set back view, showing plastic clamp-pad and spalted Big-Leaf Maple back.
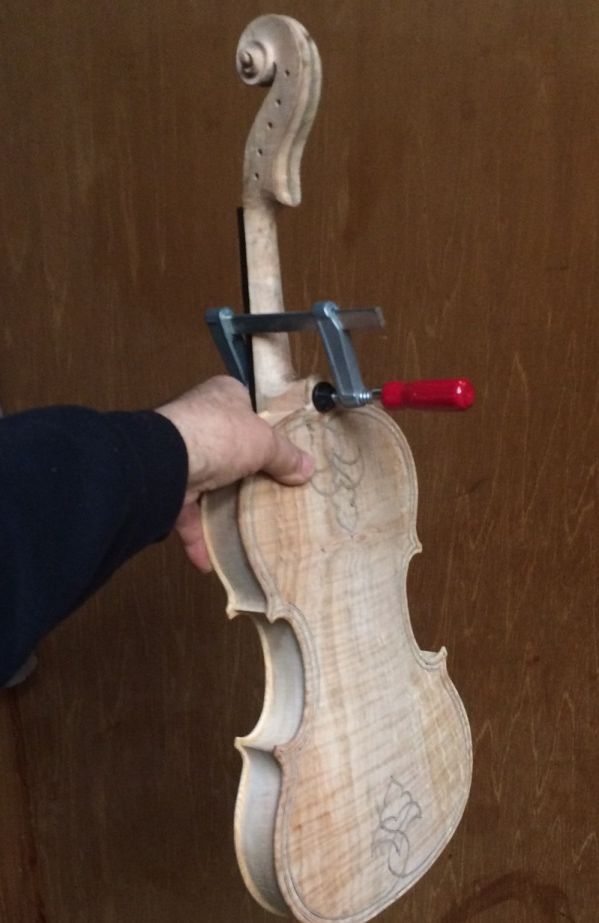
After I carved the heel to the correct shape, The instrument was essentially done, and final shaping and scraping for varnish preparation is the next step.
Side view, showing completed neck-heel.
Back view showing back button shape.
Ready for final Varnish-prep.
I will save the varnishing process for the next post.
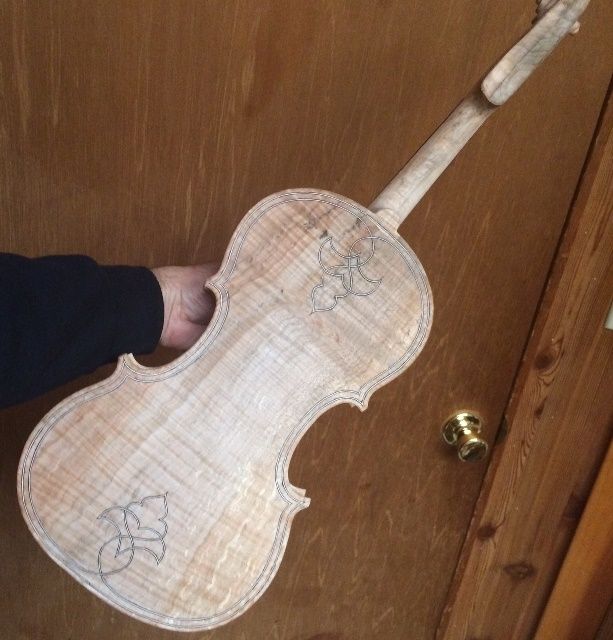
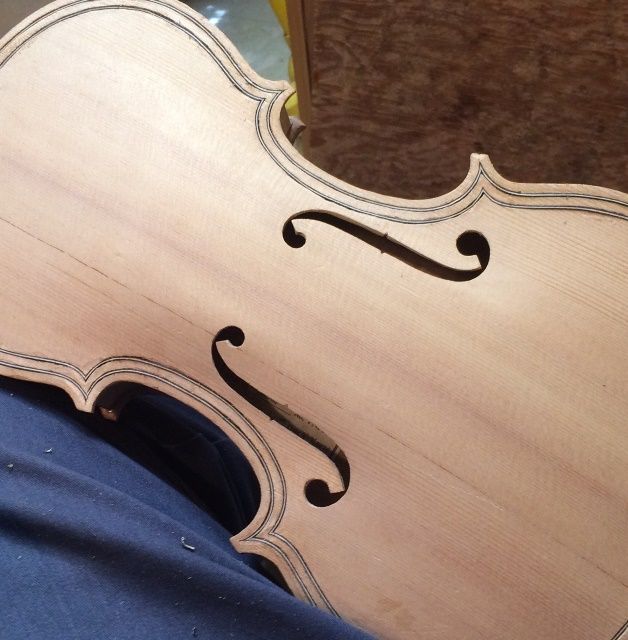
When I last posted, I had only begun cutting the outer purfling slots (I planned double purfling plus a weave for the back), so the next thing was to complete those slots.
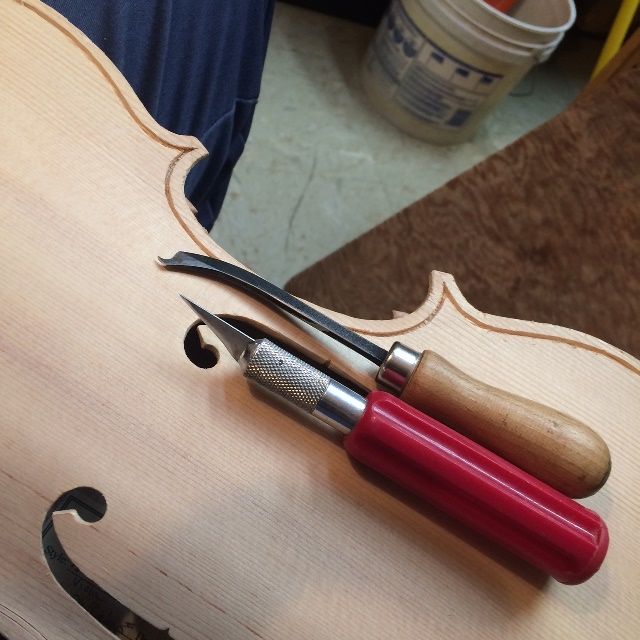
Tools I used to cut the slots.
Front Purfling slots complete.
Back purfling slots complete, including the upper and lower weaves.
Inserting and Gluing the purfling
The next step is to insert and glue the purfling in place, using hot hide glue. First I bend the purfling, using a hot iron, then I cut the ends to match the joints where the various sections meet. I insert the pieces dry, to ascertain that they fit, then, one-by-one, I pick the pieces back out and insert hot hide glue into the underlying slot, and quickly re-insert the purfling, forcing it to the bottom of the slot.
Front purfling dry installed in the Sitka Spruce top plate.
Close-up of glued purfling, partially trimmed.
Front Purfling glued…no edgework done.
Back Purfling glued in place.
Upper Weave, in heavily spalted Big Leaf Maple back.
Lower Weave. No edgework, yet.
So that was the completion of the purfling. Edgework was next, shaping the channel through which both purfling slots will travel, as well as the outer edge and how the channel fairs into the front and back plate curvature. I used gouges, small planes and files, to get the edges to the required shape of a finished instrument.
While all this was happening, I was also getting going on the scroll, pegbox, and neck, but I will save that story for another post.
When I last posted, I had completed the carving of both plates and the garland, but had not begun assembling the corpus.
Bass-Bar
The next step was to install the bass bar. The bass bar is the only fixed, interior brace in violins, violas or cellos. Flatback basses do have some other bracing, but they are a different “branch of the family,” so to speak. All members of the violin family have a bass bar– a spruce brace, which runs “north-south” at a slight angle, nearly parallel to the centerline of the front plate of the instrument, and just inboard of the bass-side f-hole, so that it supports the bass-side foot of the bridge. In a five-string instrument, this becomes an even more critical part as the instrument has a broader range and has to have good support on the bass side, as well as the ability to sing in the higher registers.
I first carve the bass bar bottom to exactly fit the inside curve of the front plate, along the correct location, and at the correct angle, then glue and clamp it in place, using hot hide glue and special clamps, padded with cork, so as not to damage the soft spruce of the front plate.
Fitted, glued and clamped bass-bar. Still needs to be shaped.
Proposed general profile of the bass-bar.
Shaping the bass-bar, using a finger-plane.
Completed shape of finished bass-bar.
Five-string viola corpus assembly:
Now the plates are ready to be installed. Before doing so, I used a small finger plane and half-round files to shape the edge all the way around on the inner face of each plate, hoping to avoid having to shape it after installation. (I am aware that sometimes adjustments have to be made, so I may have to do some tight-clearance work later on, in spite of this precaution. That’s OK.)
The next step was to install the back plate. This is an older-model mold, or “form,” (my first, in fact, as I mentioned in an earlier post) so it has some peculiarities, compared to my newer ones: it is a two-part mold, made to collapse, thus easing removal of the mold after installing the first plate. But in later iterations, I moved toward installing the front plate first, and installing the neck before removing the mold.
In this model, originally, I had planned to install the back plate, then remove the mold, and finally install the front plate, after which I could install the neck whenever I was ready to do so. Nowadays I personally find it easier, however, to install the neck before the back plate is in place, because I don’t have to concern myself with the back side of the heel aligning with the back plate button. (Annnd, it would have been a simple matter of planning, to still do that with this mold, if I had been thinking ahead: just label the front side of the mold as being the side without the screws (which have to be accessible) and you can install the front plate first, then remove the mold after installing the neck; no problem.) However…I wasn’t thinking ahead, and I used the mold exactly as I had originally designed it, so I have no choice, now: I am forced to install the back plate first, remove the mold and then (after shaping the blocks and linings and cleaning the interior of the corpus) install the front plate. So that is what I did. (By the way, in case you are thinking that the shape of the front and back plates are mirror-image of one another, the fact is, they virtually never are exactly mirrored, and are nearly never bilaterally symmetrical even if they were. So the front plate will not fit the back of the mold, and vice-versa.) Ah, well…hindsight, etc.
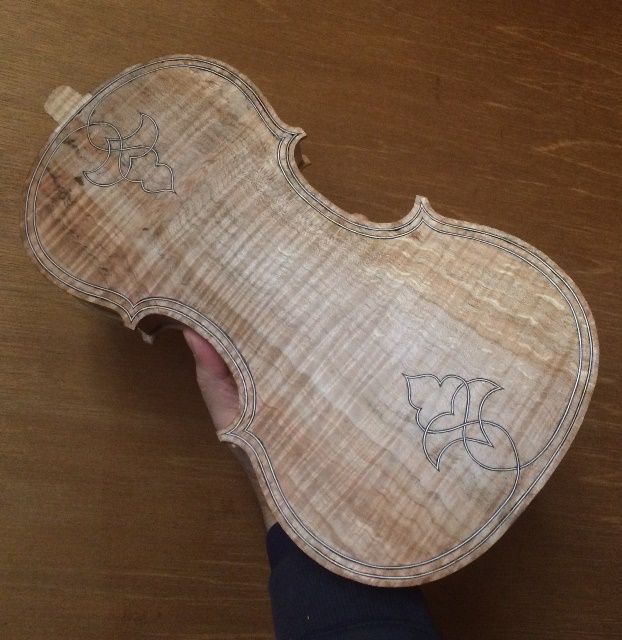
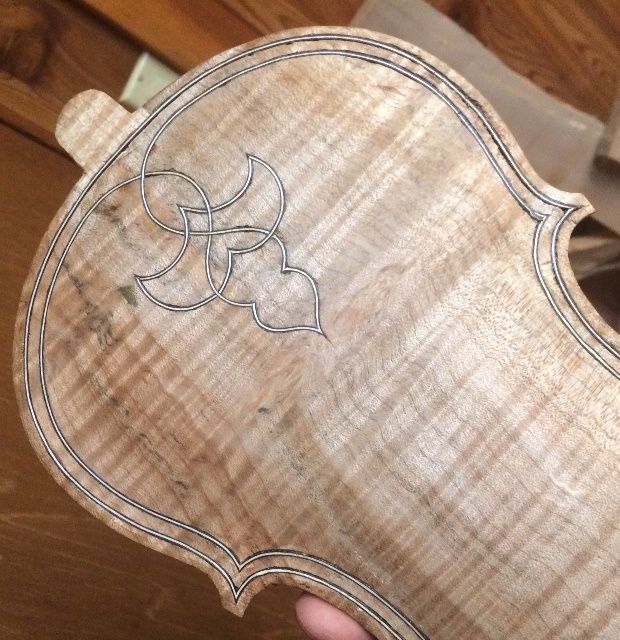
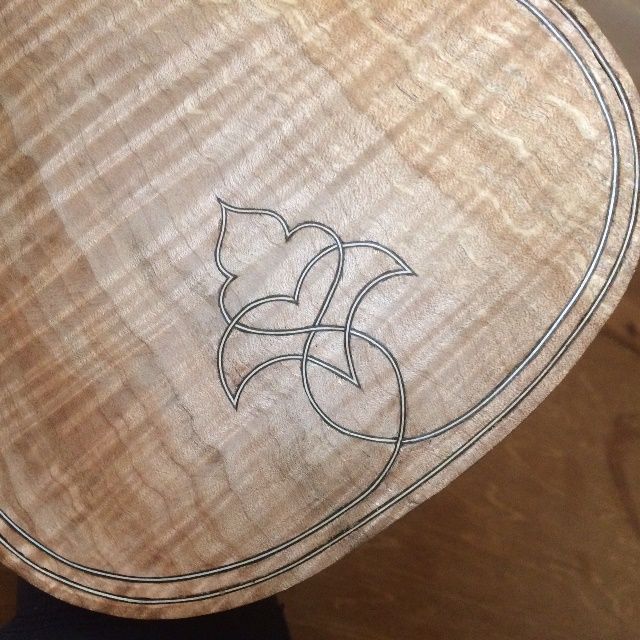
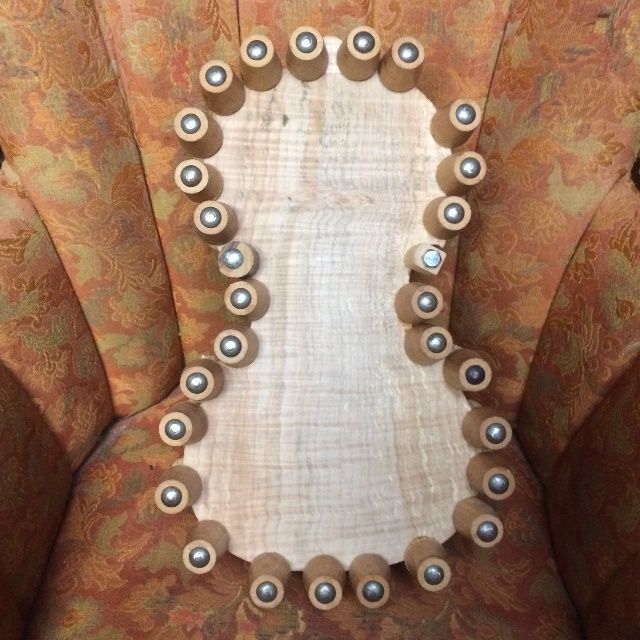
Here is the back plate, glued in place: the mold is still inside, holding everything rigid. Notice the spalting and curl in the maple back. This is a striking look, and some people love it…others do not.
Back plate glued and clamped in place on the garland.
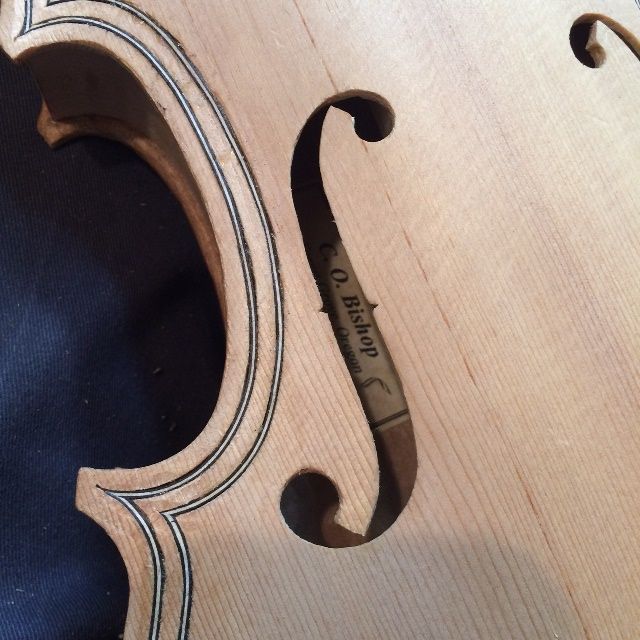
After the back plate glue was dry, I removed the mold, shaped the interior blocks and linings, and cleaned up the interior of the corpus, so that it was ready for the front plate to be installed. I also installed the signed and numbered label, marking this as one of my handmade instruments.
Then I clamped the front plate in place, dry, just as I had done with the back plate, removed a few clamps at a time, and used a thin palette-knife to insert hot hide glue between the plate and the blocks and linings. As soon as I had the glue in place, I quickly replaced whatever clamps I had removed, before the glue could gel.
Once the plate was glued and clamped all the way around, I went back around with a blade, and picked out any gelled, cooled hide-glue that had squeezed out of the joint, so as not to have to deal with it later, in the form of hard, jagged chunks of dry hide glue. Then I tightened the clamps a little, and brushed hot water all around the joint, so as to reconstitute any glue that had gelled too soon, and allow the joint to close even more tightly.
Here is the corpus, all glued together. The next step will be to adjust the overhangs as needed, and lay out the corners so as to begin purfling.
Front plate showing: Corpus assembled, glued and clamped.
Beginning Purfling the Five-string viola:
I used to do my purfling before closing the corpus, but I frequently discovered that the rib garland had moved a little, during the removal of the mold…or in some other way, things had changed, and then my plates no longer fit the garland, and I could not change the plates, because I had already installed the purfling…which locks in the shape of the plates, irrevocably (sigh…). So, I began waiting until after the corpus is closed and whatever needed overhang adjustments have been made, and then begin purfling.
I use a two-blade purfling marker to sketch in the location of the twin, parallel cuts needed to make the purfling slot, but I have to sketch the corners in by hand, with a pencil, because the purfling marker will not correctly lay out the corners.
I went ahead and began both the front and the back plates, but got too tired to complete them last night. (Today was spent getting last-minute things done, as we have heard they are mandating that all Oregonians stay at home, due to the coronavirus scare. Went and bought flour and other groceries, filled the car with gas, and got the snow-tires removed, as that deadline is soon upon us as well.)
One thing about the maple and spruce plates: the spruce is very soft, compared to the maple, but it is tricky to carve, because of that. The winter grains (reeds, they are called) are so much harder than the summer reeds, that the blade has a definite tendency to swerve and follow the grain instead of the line you are trying to follow. The maple is much tougher to cut, because it is hard all over, but it is much easier to follow your lines without digressing.
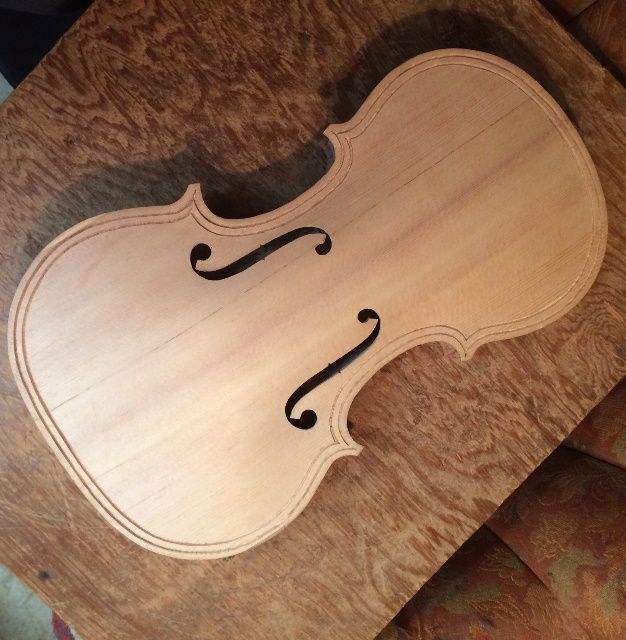
So, here is what the little viola looks like, today:
Back purfling-slot begun: the dark strip at the top is the only area where I already picked out the slot.
Front purfling-slot begun: none of the slot has been picked out.
In both cases, the plan is to cut the two incisions, pick out the wood between them, and then dry-fit the purfling strips, before removing them one-by-one and gluing them in place with hot hide glue.
That will be the next post, unless I take a break and carve the scroll. Either way, it is starting to look like a fiddle!
I had originally begun this little viola ten years ago, wondering what effect it would have to go extra-wide on the lower bouts without changing much else: I was sidetracked with other, more pressing projects, so the little viola sat, partially completed, for ten years. I was somewhat disinclined to complete it, now, because my skills have increased significantly over the intervening years, and I can’t undo some of the “marks of the amateur” which now glare at me accusingly. But, I also felt the need to get some 5-string violas going, and if it didn’t work then I could still toss it out, or whatever…at any rate, it was just an experiment.
I completed the little 5-string viola about the time I completed the recent commission, so I numbered it accordingly, and set it up. It has a great big voice, and is balanced and clear across all five strings! What a surprise!
Accidental Imitation of a famous instrument
I sent pictures to a violist friend, and her immediate response was “A 14” Tertis! Bet that would have made the old boy mad!”
I had heard of Lionel Tertis, and his famous contribution to the viola world…but had never actually seen one of his instruments. So I looked up photos on the internet, and, to my surprise, it really doeslook like my little fiddle! So, I inadvertently retraced the steps of Mr. Tertis, and produced a fairly powerful little “Tertis-style” 14″ five-string viola! He, of course, was on the other end of the spectrum, trying to achieve a very large, but still playable, viola. (My apologies to the Maestro! I wasn’t being deliberately irreverent!)
🙂
Here are some photos:
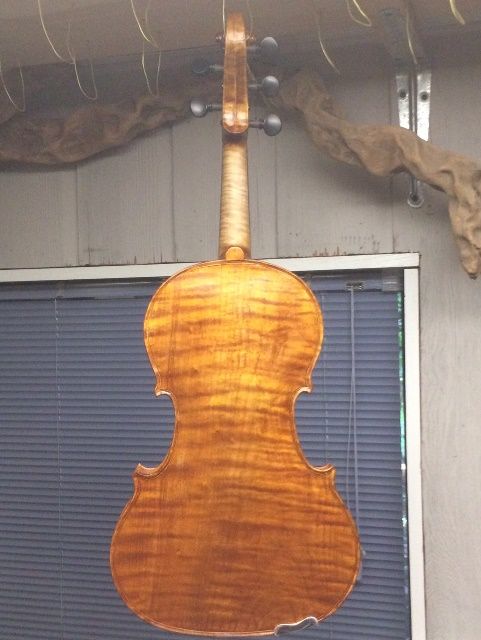
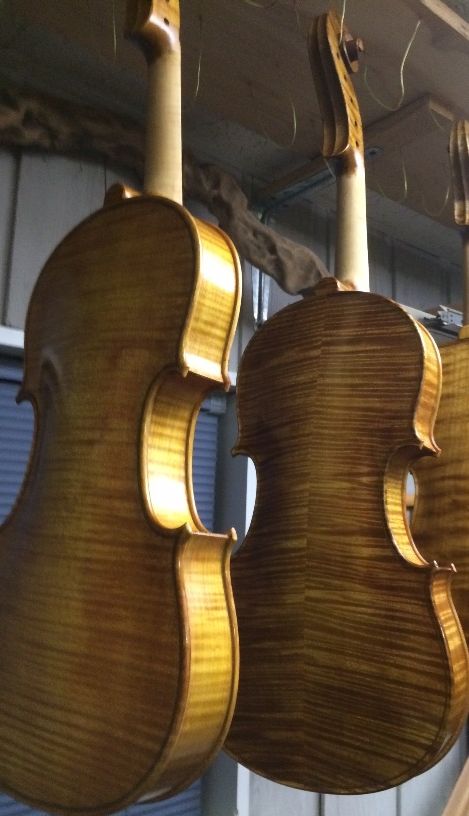
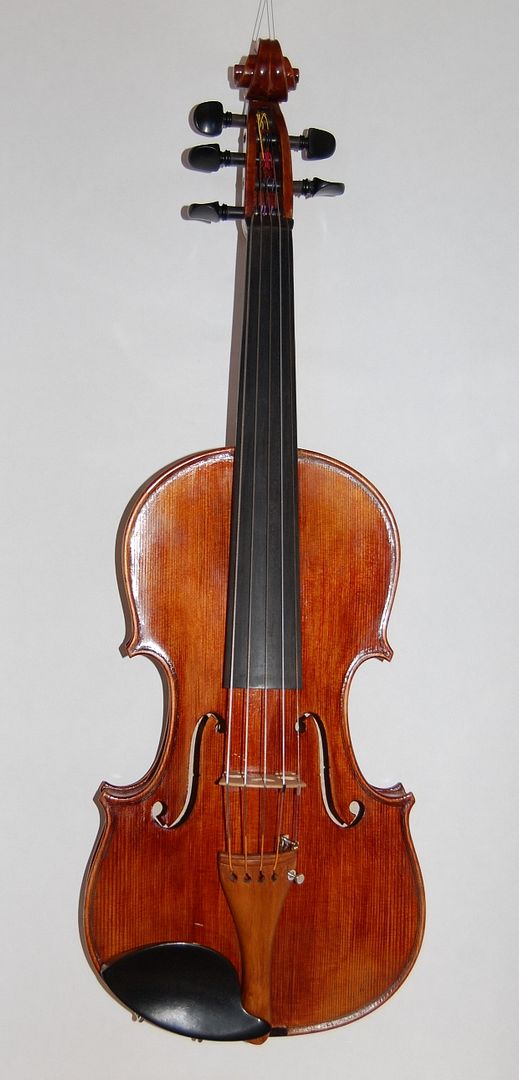
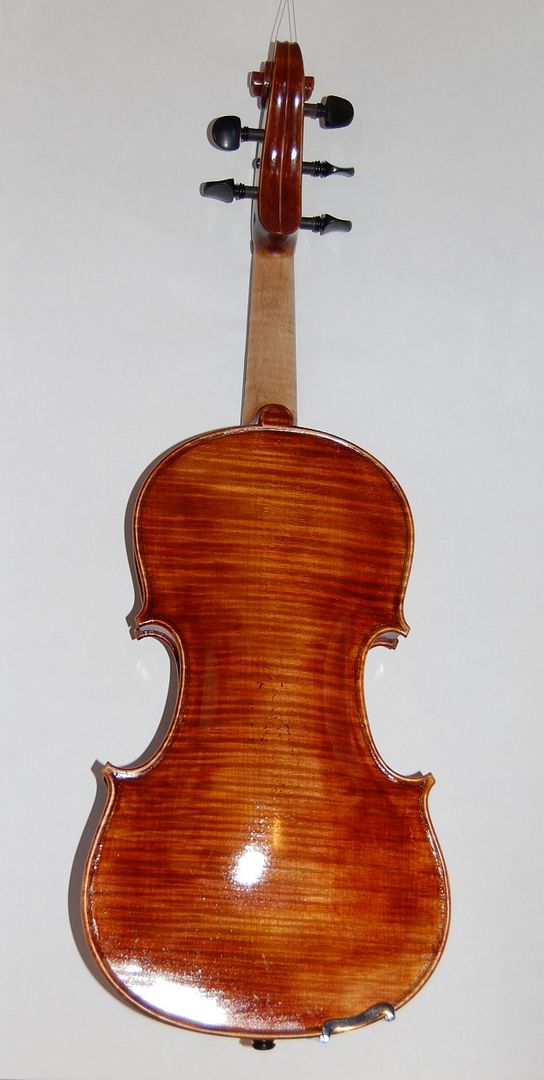
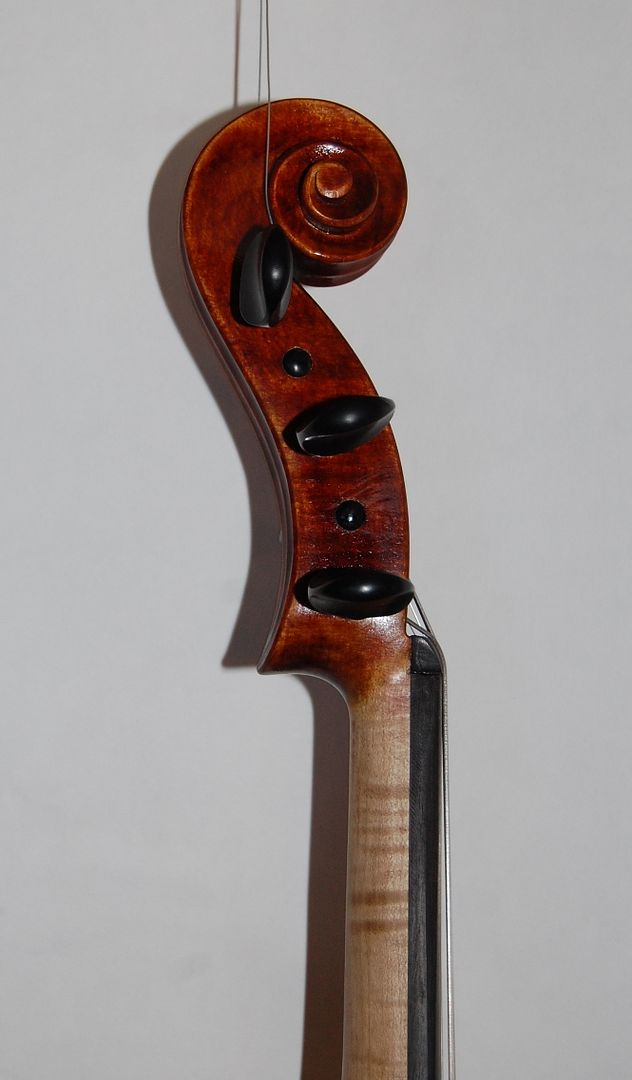
14″ wide-bout 5-string viola front.
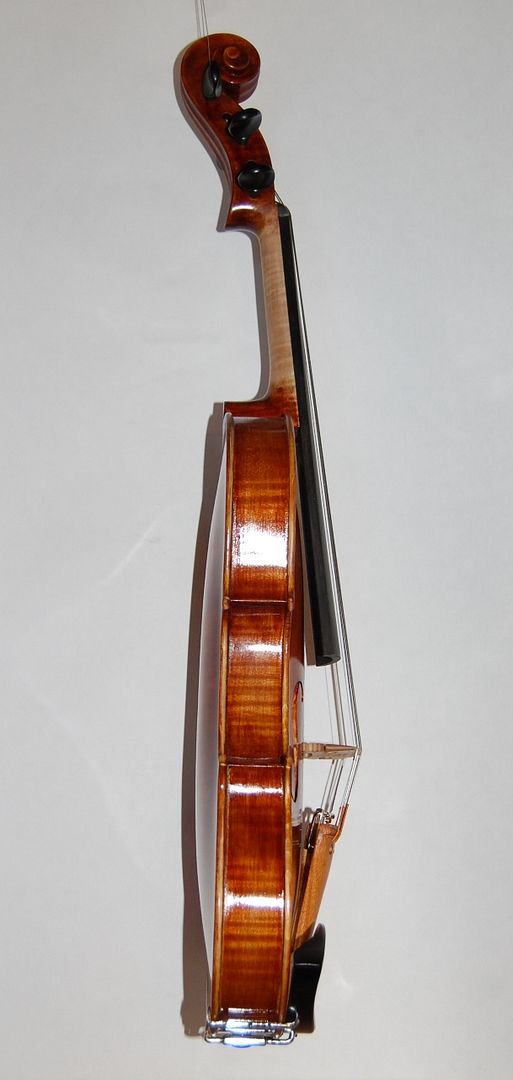
14″ wide-bout 5-string viola side.
14″ wide-bout 5-string viola back.
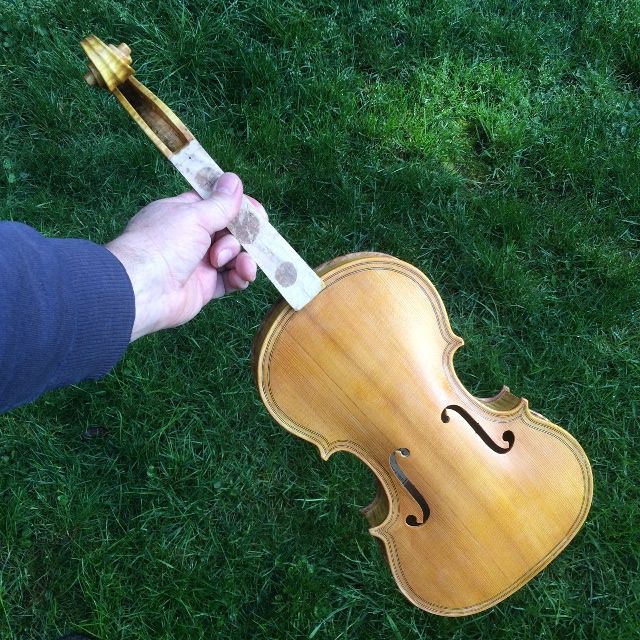
The back, ribs and neck are Big Leaf Maple, harvested near my home, and the belly is Sitka Spruce. I used spirit varnish, as usual.
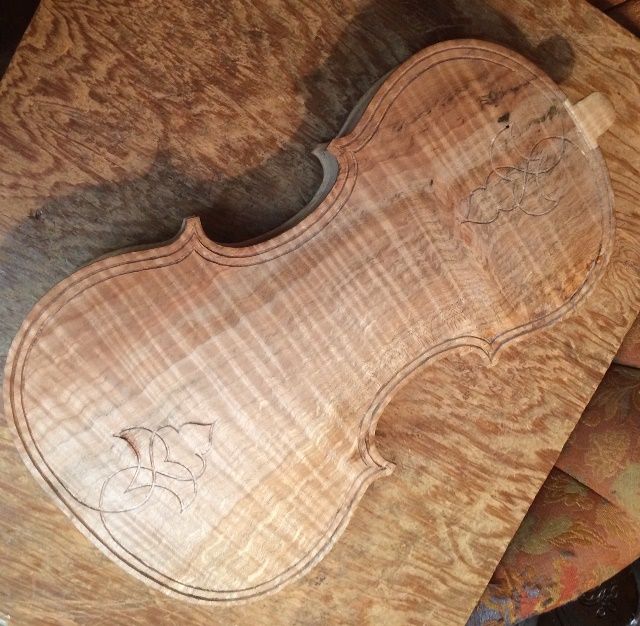
I have been seeing increased interest in 5-string violas, lately, so I am working to “populate” my five-string viola stock. This is the viola design I began with over 20 years ago (The mold says 1999; it was my very first instrument.) and it makes a very nice small viola. So I decided it would probably make a great 5-string viola as well.
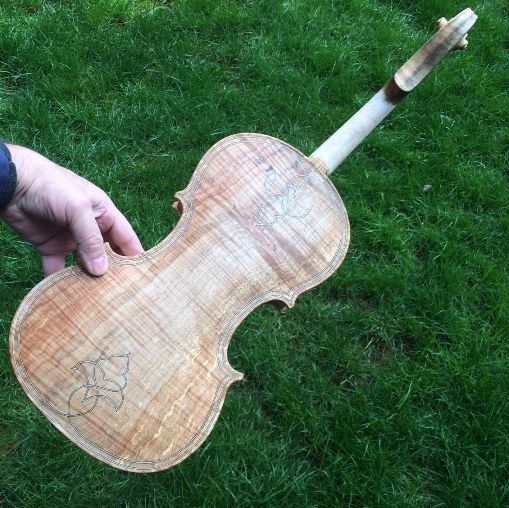
I began the work quite some time ago, but other projects took priority, so the little viola languished on the bench. The back is curly, spalted maple from a tree that had been taken down on my wife’s parents’ place, and the belly is Sitka spruce. Both the front and back plates are one-piece in this case…something I seldom do. (One-piece front plates are uncommon. One-piece backs are quite common, and I prefer them.)
The rib-garland had been completed and the plates traced out months ago; so, after delivering the last commissioned instrument, I finally felt free to get to work again on the viola.
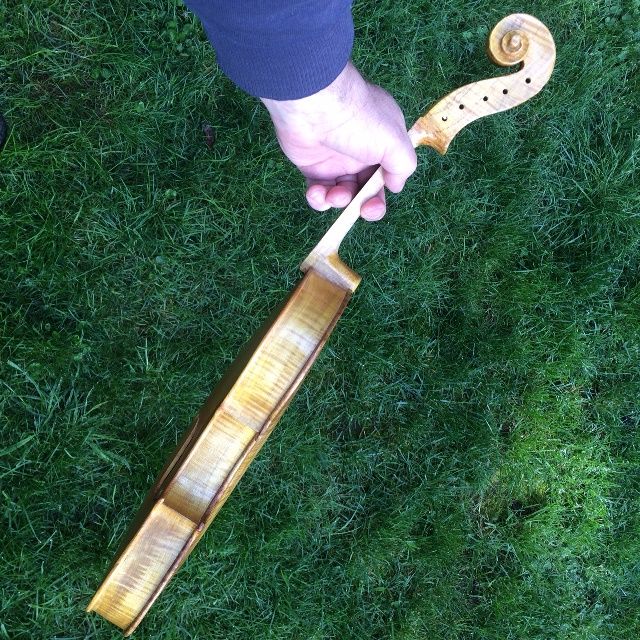
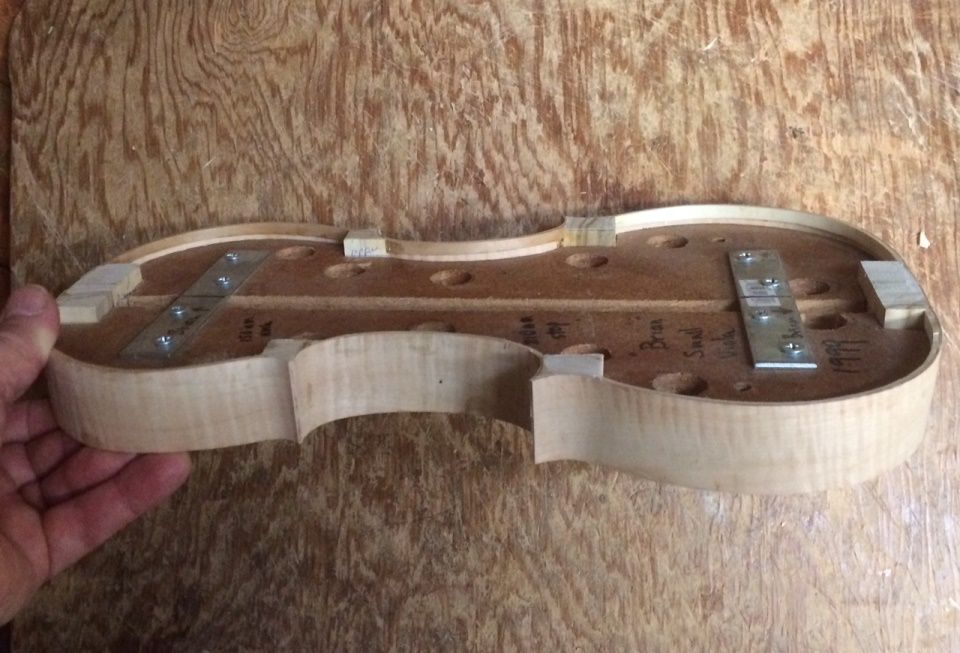
Completed Rib Garland. Linings and blocks still require shaping and scraping.
Five-string viola arching complete: ready to graduate the plates
I failed to take any photos while arching…so we are beginning with that portion complete.
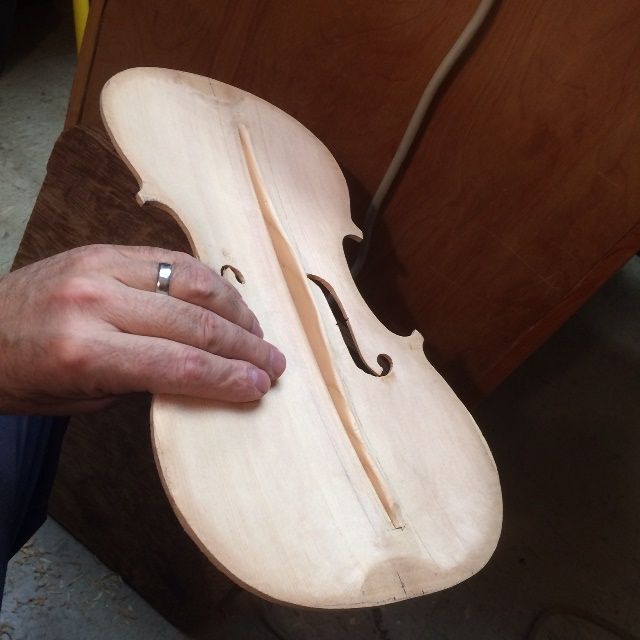
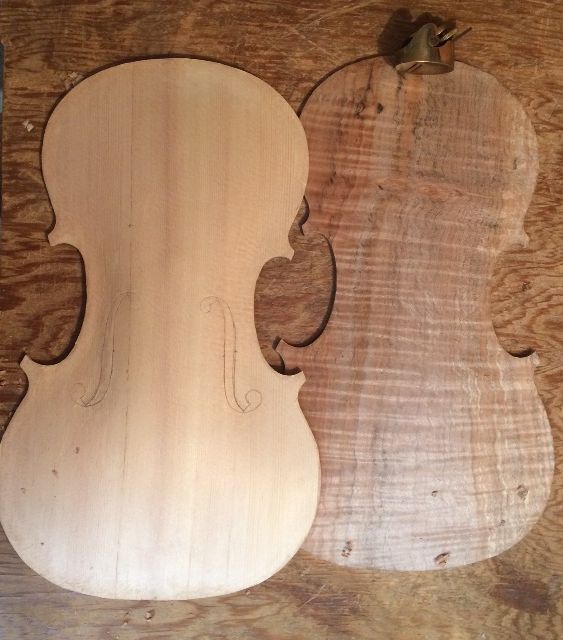
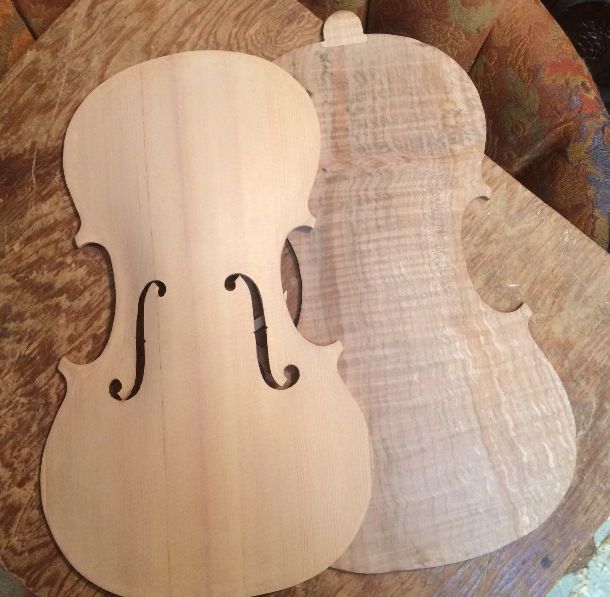
Front and Back Plates, completed except f-holes, bass-bar, purfling, and edgework.
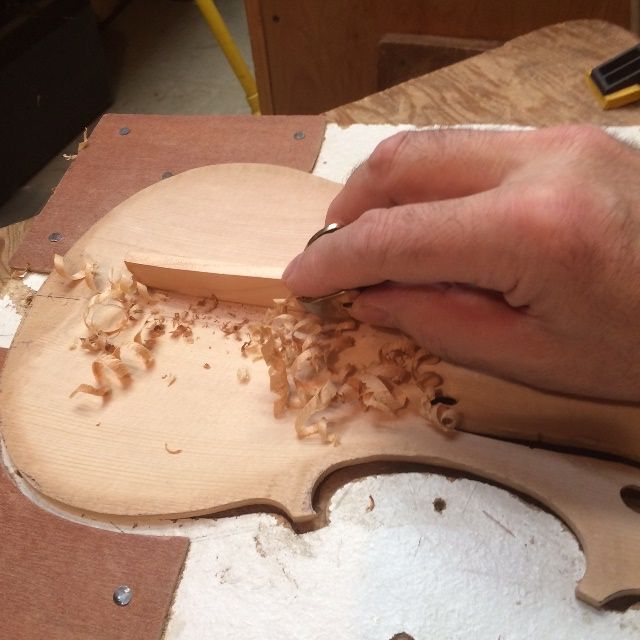
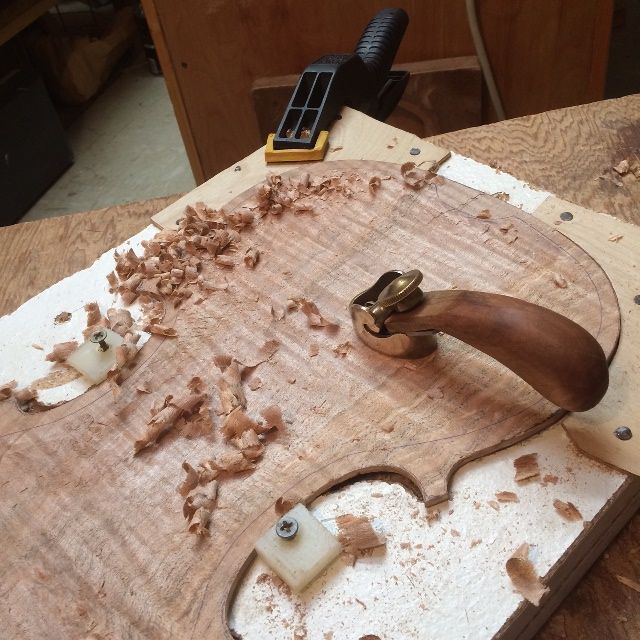
Graduation of back plate.
Carving “dots” with specific thicknesses. Notice the button graft, to replace damaged wood.
On the backs, especially, I make a practice of carving “dots” to specific thicknesses, following a plan in my mind. Once all the dots are correct, I “connect the dots” using small planes, until the entire interior is a smooth continuum, and all the correct thicknesses.
Connecting the Dots.
The Spruce is a lot easier to plane, so I tend to just measure and plane. Most people use gouges for all this work, but I like using the planes.
Graduating Front Plate, using curved-sole plane.
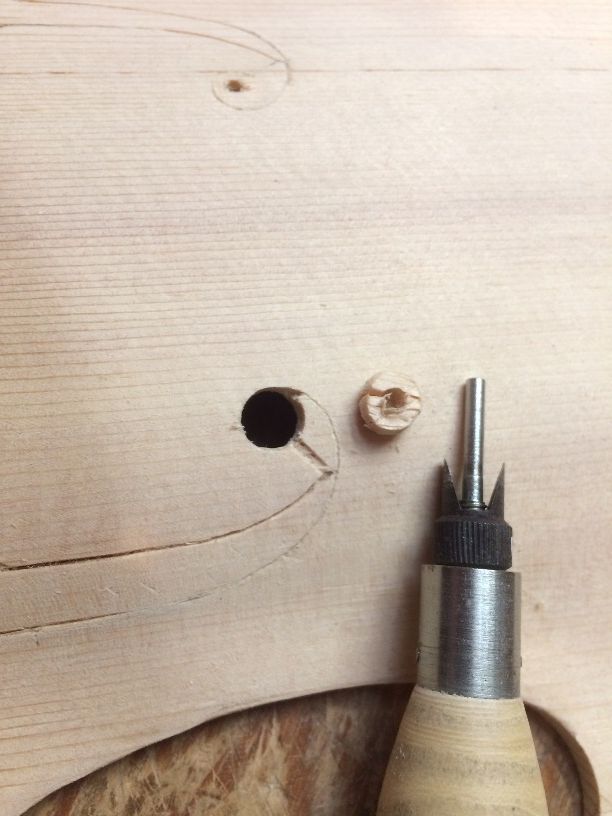
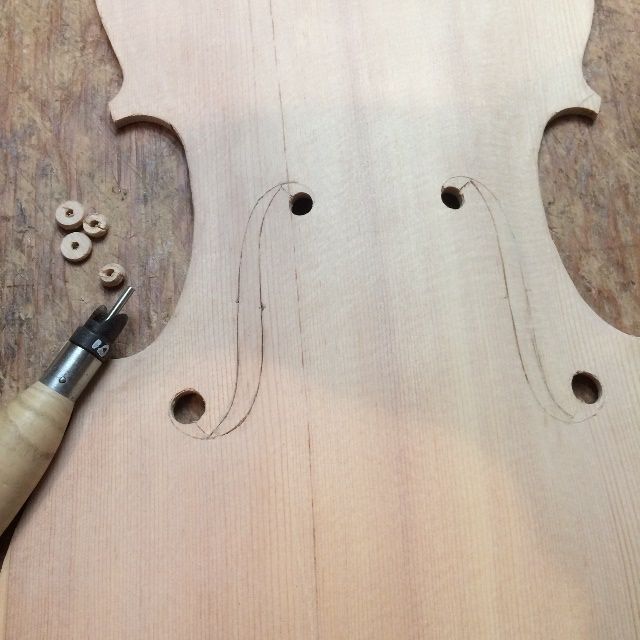
Cutting the f-holes on the Five-String viola
Once the plates are completed (which also involved laying out and incising the f-holes) I still have to actually cut out the f-holes. I used to do this using just a knife, but it was time-consuming, and I found it difficult to get the round parts “round.” My grown children bought this tool for me, a special tool for cutting just the upper and lower eyes of f-holes. It works beautifully!
F-hole cutter in action: this tool cuts a perfectly round hole for the eyes of the f-holes.
F-hole cutter mark.
F-hole cutter with plug removed.
F-hole cutter work complete… Knife work remains.
Plates essentially complete: bass bar, purfling, and edgework remain.
Beginning the Scroll for the Five-String viola
While things were being sorted around, and different tasks became logical, I decided to get a start on the scroll and neck. Didn’t get very far, but here it is:
Beginning the scroll.
There is still a long way to go, but it is feeling more as if I was getting something done, at least.
Advanced Student Instruments, including Five String Fiddles
A less expensive option:
I had originally hoped to only build “new, made from the raw wood” instruments, but, as it turns out, fewer people are willing (or able) to pay for the labor involved in building such an instrument. So, reluctantly, some years ago, I began to offer “advanced student instruments,” which meant I bought an unfinished instrument “in the white”, and completed the building, finishing and set-up as if it were my own creation, but labeling it as having been “from my shop” (meaning, not made by me,) and selling it at about 1/4-1/3 the price of my handmade instruments. For better or worse, these were a popular option, as the buyer gets a very good violin or viola, for a low price, and a 100% trade-in, if they later decide to buy one of my original handmade instruments. I named the new line of instruments “del Atelier Chez les Eveques” (From the workshop at the Bishops’ place.) I like the sound of it, and it sounds a lot more “bien sophistique” in French, for some reason. 🙂
Five String “Chez Les Eveques”
I recently found that there were now also 5-string instruments available in the white, and, as an experiment, I bought two of them: a five-string fiddle (which seems to simply be a regular violin with a 5-string scroll,) and a 15″ 5-string viola (which, again, seems to be a normal 15″ viola body with a 5-string scroll.)
5-string violin and 5-string 15″ viola, in the white.
A good starting place:
As had been my experience in the past, the workmanship is quite good. The rest is up to me, as a rule. I do see some improvements I would make if I were in charge of the factory producing them, but that is OK, too. (Can’t give away all the secrets!)
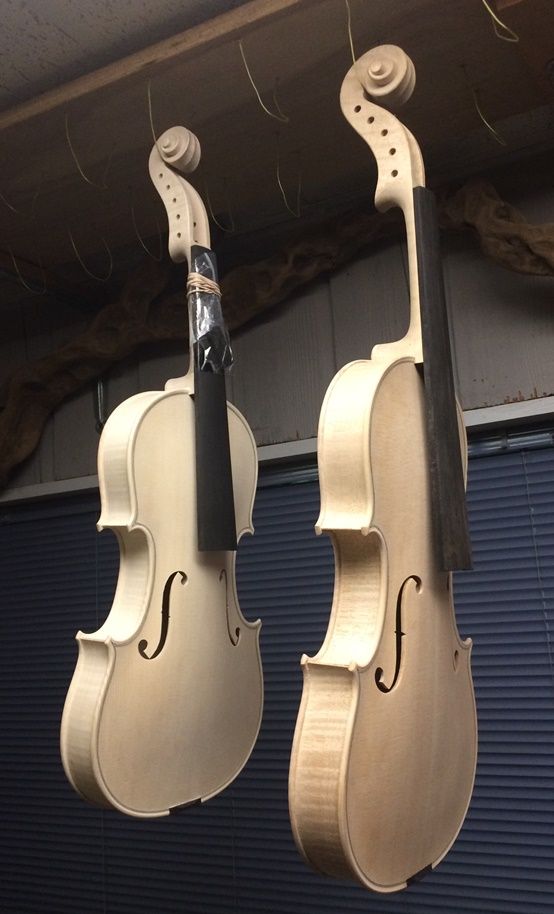
I began the finishing process as if they were my own work; but with no specific plan, as I had no customer in mind, so I could not ask their preference. Just my usual gound, sealer, and first varnish coats.
Early varnish look for both instruments.
Annnd … a Customer!
I was also in the midst of completing a commissioned instrument, so that was taking priority, but sometime along in the middle, there, I received a message from an individual who wanted this level of five-string fiddle. Annnd, she wanted to see what it looked like as it stood now… I actually had the customer on the phone, when I went into the next room and clumsily took two photos with my phone (see below) and sent them to her.
Snapshot of front.
Snapshot of back.
Bingo! She liked it, and said, “Let’s get it done!” So, we were off and running!
I asked questions as to her preferences, saw photos of her current existing instruments, and got a clear idea of where I was going with the look: (fairly deep color, some antiquing, etc.), and I began laying on color to suit, but sending her progress reports with photos, for approval.
Varnish getting close to completion.
Once the varnish was nearing completion, I installed the fingerboard and began set-up:
Front view with fingerboard.
Back view with fingerboard.
Having received assurance that all was well, so far, I continued on into set-up, and completed the instrument.
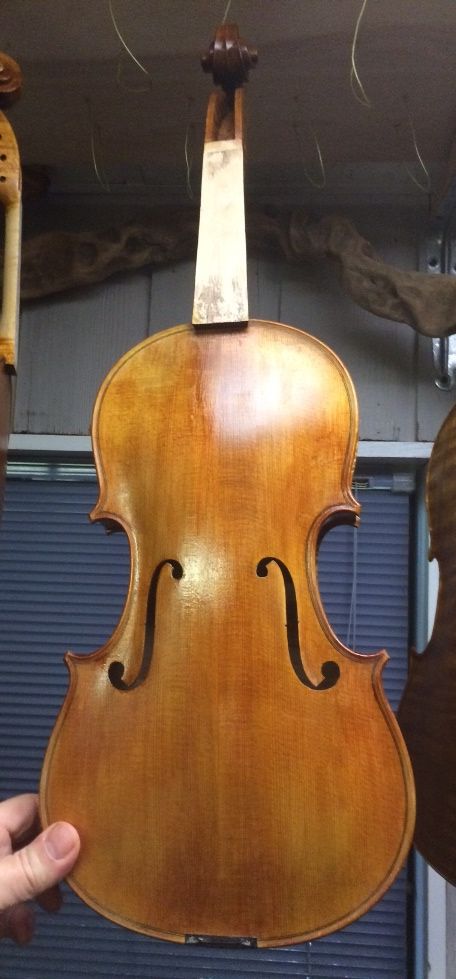
Front view of the completed instrument.
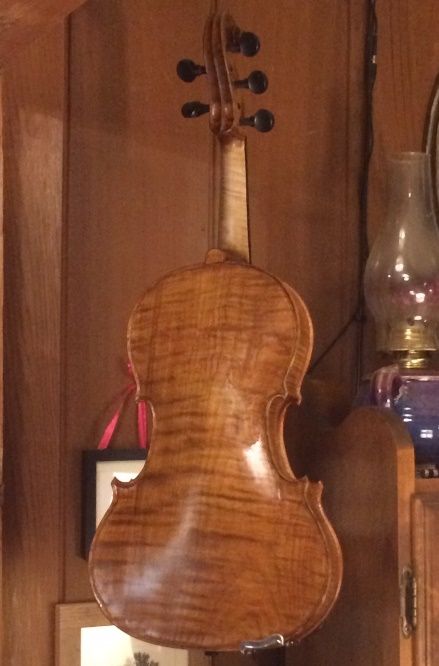
That tailpiece is hand-carved of Osage Orange, per the customer’s request: she was classically trained and does not like the multiple fine-tuners I usually supply.
Side view of the completed instrument.
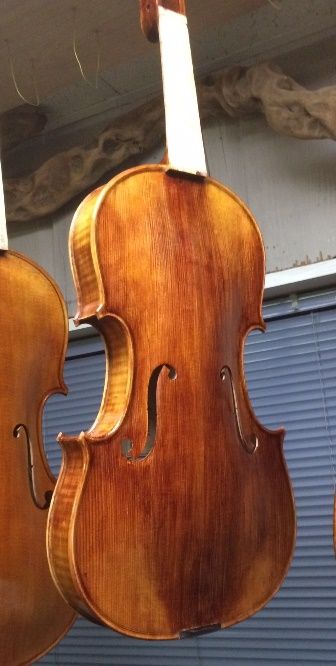
Back view of the completed instrument.
Close-up of the scroll.
So…you may be thinking, “How does it sound?“
Well, actually, disgustingly good! I always hope that my handmade instruments are just “head and shoulders above” the ones I buy in the white, but this is really a good five-string fiddle! The main advantage of the handmade original is that the customer gets to choose what type of (and in some cases what specific pieces of) wood will be used, as well as the overall look, and set-up. I can tailor an instrument to the needs of the specific player, if I start from the beginning with that player in mind. Not so much with the factory-made, in-the-white instruments. But, in this case, I think we have a winner!
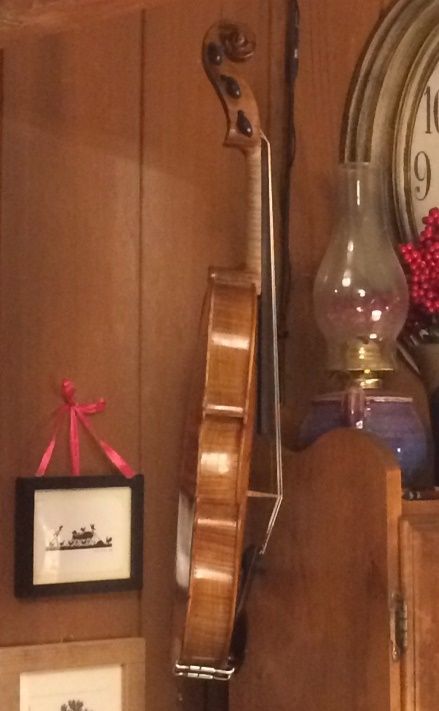
The customer is a violist, so she knows good viola sound, and will undoubtedly mix and match strings until she finds the perfect match for her, but she is starting off with excellent balance across all five strings: nothing flabby or unfocused about that C-string at all! So, she should be able to put her favorite strings on it and get “instant gratification.” I expect so, anyway… There are so many possible combinations that I can’t say for certain that they will all work. I will ship it with a decent set of strings that work very well, and after that, it is the customer’s game, for life! 🙂
Here is her new baby, hanging in my dining room, ready to ship!
I began this instrument as an experiment, in 2010, but did not complete it. In fact, the only reason I know when I began it is that I wrote the date on the mold when I made it. It was intended to be a 14″ Viola with a very wide lower bout.
The wood for the neck, sides and the one-piece back is plain-sawn, Big-leaf maple with a two-piece Sitka spruce top plate. The workmanship is not as good as I try to produce today, so I might have simply discarded it, but, (I reasoned with myself) “it is just an experiment, to see what happens if you add a lot of width in the lower bouts.” If it turns out to work well, I will still have the mold and can simply make better, more professional examples of the same model.
What about a five-string Experiment?
So, back in September of 2019, it occurred to me that really I needed more 5-string fiddles on my website (especially violas), and that, if it worked, this was one I could complete more quickly…so I jumped back on it!
It still needs a good rubdown, a soundpost adjustment, and some play-in time, but today it is playing, and it sounds and looks OK, for what it is.
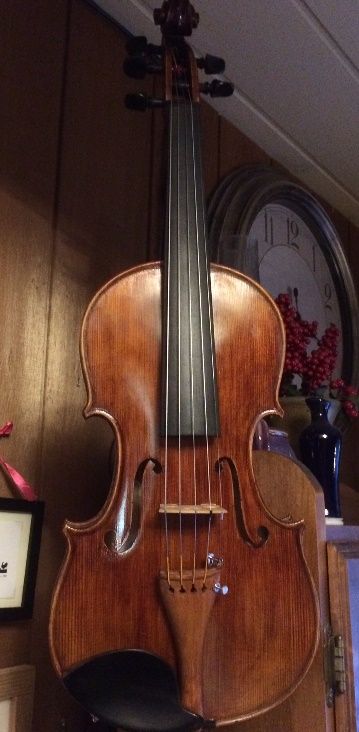
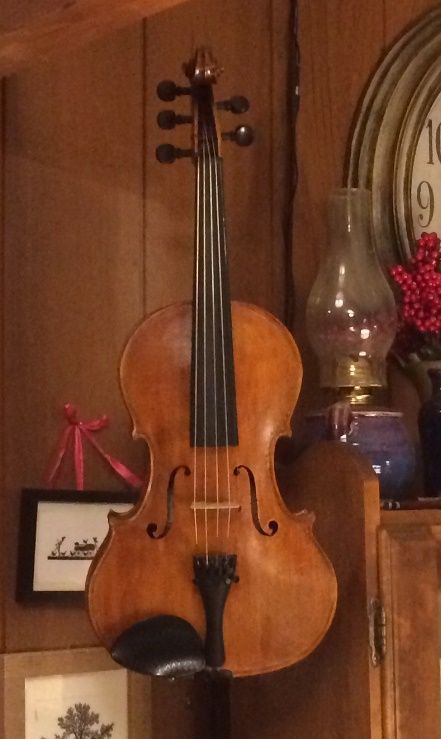
Front view of 14″ Five String Viola with wide lower bouts.
Not a great photo, but here is the side view.
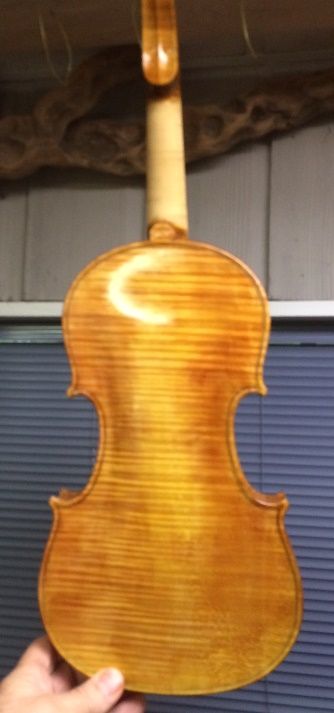
Back view of 14″ five-string viola with wide lower bouts.
The voice is still a little too soft for what I want, but that could be the fact that the varnish is still pretty soft, too; and also, the soundpost is pretty tight (which I know will need to change, but I also recognize that there is a tendency for the arching to relax a little and for the soundpost to be looser, after some time with strings on. Longitudinal compression of the top plate tends to try to shorten the top, resulting in a change in how the soundpost fits.)
All that to say, I am reticent to just jump in and trim the post, when it may actually need the extra length, in a few weeks, and with the varnish hardening off, and the playing-in beginning to take hold, I want to take my time about making changes.
The sound is (mostly) balanced across all five strings, but the C-string could use a little more focus. Probably adjusting the soundpost and giving the varnish more time to harden will take care of all those issues.
Finally, because the repetitive tensioning and relaxing of the tuning is hard on strings, I have deliberately used an older set of strings for the set-up and trial period, so as not to sacrifice a brand-new set in what I know will shorten the life of the strings.
So! There it hangs in the dining room, where it will be warm, and we will see what the next week or so brings.
For most people, the Wintergrass Bluegrass Festival is an opportunity to hear dozens of dynamic players and bands. For a maker, like myself, it was an opportunity to present my instruments to a variety of players. for examination and “test-drives.”
My son (Brian Bishop, of Bishop Guitars) and I, had only heard of Wintergrass a month earlier, from a wood vendor and Mandolin-player, Bruce Harvie of Orcas Island Tonewoods. We attempted to contact Wintergrass, to ask whether any exhibitors’ booths remained available, and ultimately, Bruce Adolph, one of the main organizers, contacted me to say that one exhibitor had backed out at the last minute, so, if we wanted it, that table was available. (Yes, we wanted it!)
As it turned out, we were squeezed between two other outfits, both with huge, prominent signs, so there was occasionally a little confusion, as folks assumed we were part of one or the other of our neighbors’ companies, and never even saw our lovely sign.
One little table fro two makers. But we got a lot of positive attention.
People frequently thought we were either with Thompson Guitars or with Peghead Nation. We had to point out the sign (It got a little crooked in the photo below.) Notice, too, that Brian and I had traded ends of the table. Why?
Because the big outfit two booths over to our right evidently persuaded the maintenance people to change the lighting, during the night, which robbed both Thompson Guitars andus of light. So Brian and I just swapped ends, so that Brian’s guitars would glow in the light, and my violins would be a little more subdued. It was an improvement for both of us, and we were fine, but Thompson was really robbed, with no such remedy. Sad. Not a good way to treat your neighbors.
Our little table. Room for two guitars and three fiddles. Brian (in the red shirt) had a third guitar, which we handed to interested players.
We were the only actual makers in the Dealers’ Hall where our table was located…the rest were big instrument factories, mostly: Taylor, Eastman, Yamaha, etc. Our instruments were each individually handmade by a single luthier. Brian’s parlor guitars and OM guitars were very well received, as were my 5-string bluegrass fiddles and my 4-string fiddle.
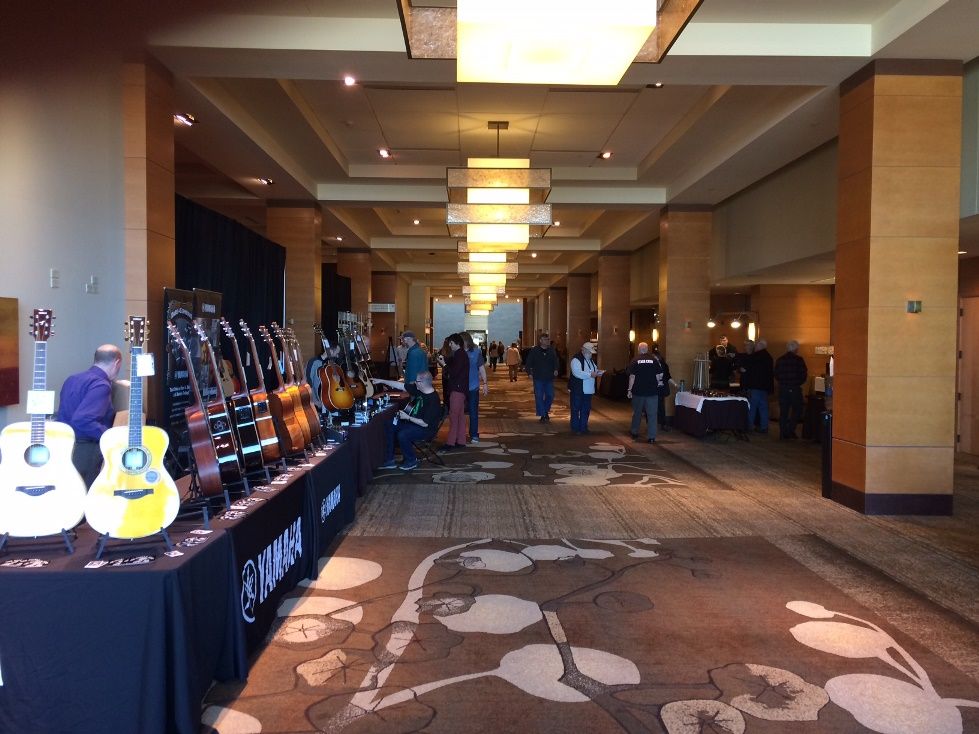
Dealers’ Hall, before the show opened. (We were just past the second post on the left.)
We got a fair amount of attention, though we were small and obscure, as players came by the table. Some had come there to perform in the show, and just decided to check out the makers. Others were there to enjoy the show, but, as players, they wanted to try out the instruments. It was very enjoyable.
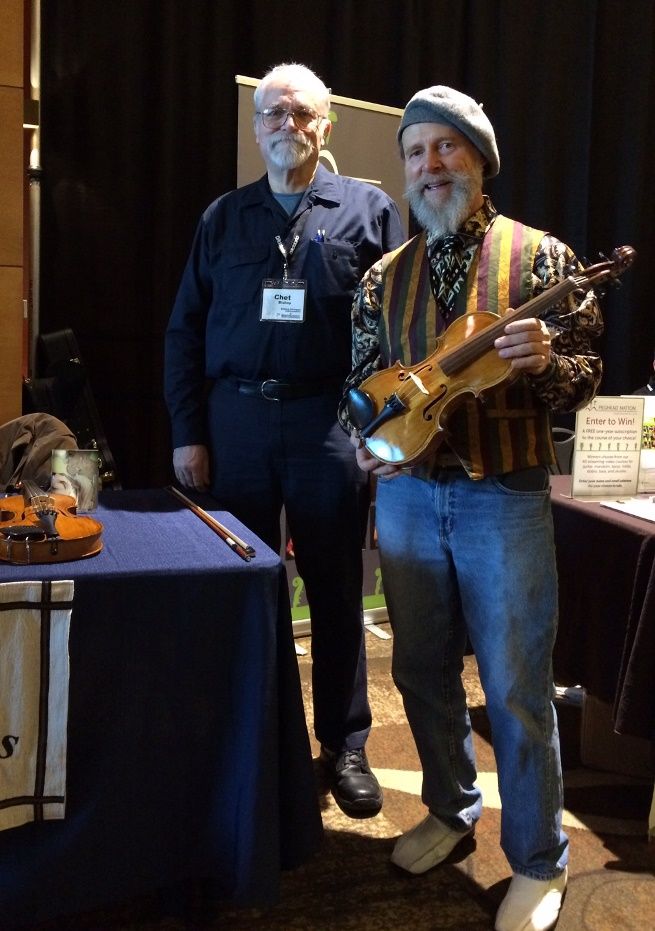
Joe Craven, a well-known entertainer, and a friend of the lady who commissioned this instrument. (I was hoping he would play it, but he was exhausted from his work and chose to not try it out.)
I wish I knew this young player’s name! He was very friendly and a great player.
Everyone loved our handmade instruments (both the guitars and the fiddles) and some sales may eventually result. Either way, we will be back next year!
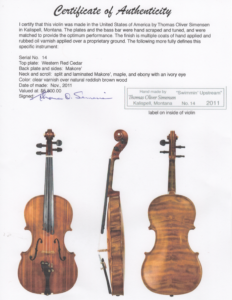
While Brian (my youngest son, the guitar-maker) and I were at the Wintergrass 2020 bluegrass festival in Bellevue last week, a colleague, Tom Simensen, a luthier from Kalispell, Montana, had a beautiful handmade violin stolen from his booth. (Click on the link above, for better photos and detailed views)
It was stolen from the Makers’ room at the Hyatt Regency Hotel in Bellevue, on Saturday, February 22nd, about 6:30 PM.
Here is the provenance document including photographs, a written, detailed description, and a photo of the label inside: